Creating and using Canned Responses to reduce average response time
Updated
How to use Canned Responses in Agent Console and Care Console to deliver on-brand, quick answers to routine customer questions.
Canned responses are templatized replies to frequently asked common questions. Agents can use them to reply quickly with a single click, thereby saving time to focus on complex issues.
For example, if you find yourself repeating the same answers to questions like ‘How can I add a credit card to my account?’ from your contacts, you can document these steps as a canned response and let your agents use it whenever they get that question. You save time and effort, customers get prompt answers to their queries, and your customer service team performance improves drastically.
Refer to the following video to better understand canned responses.
To create Canned Responses
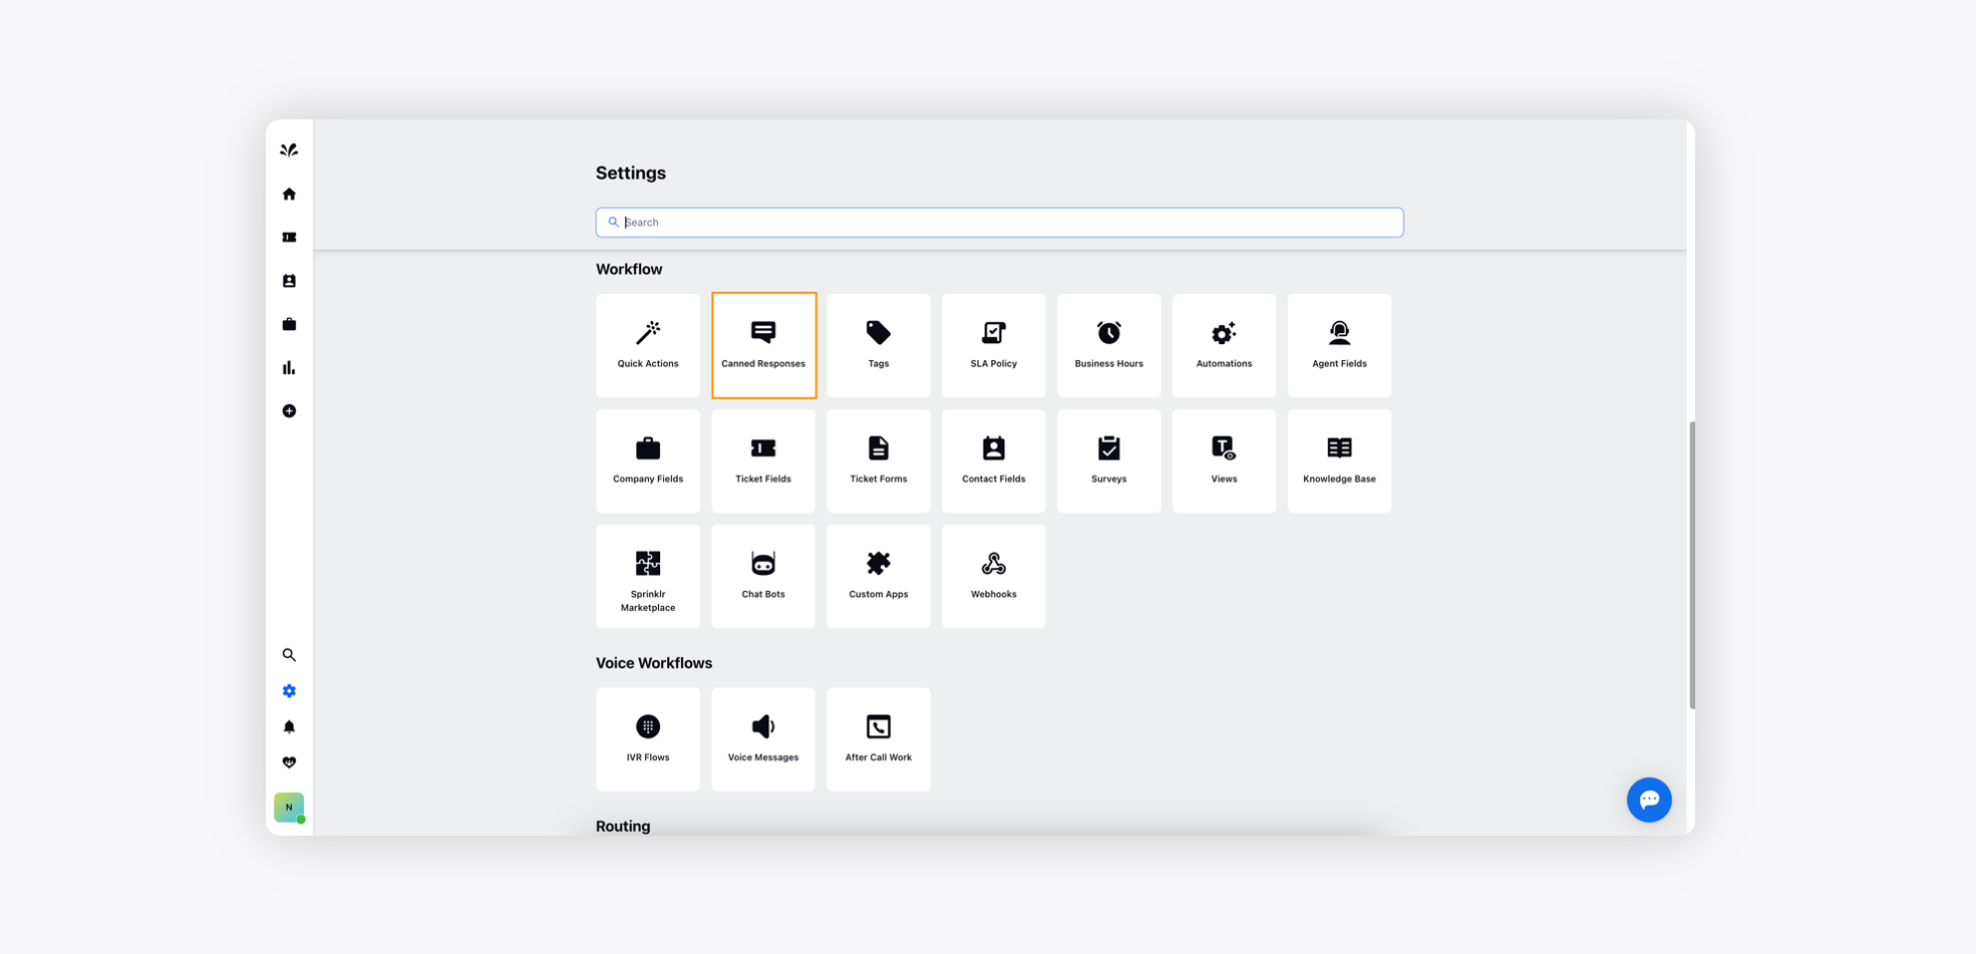
Log in to Care Console. On the Sprinklr Service window, click the Settings icon on the left-hand side. Under Workflow, click Canned Responses.
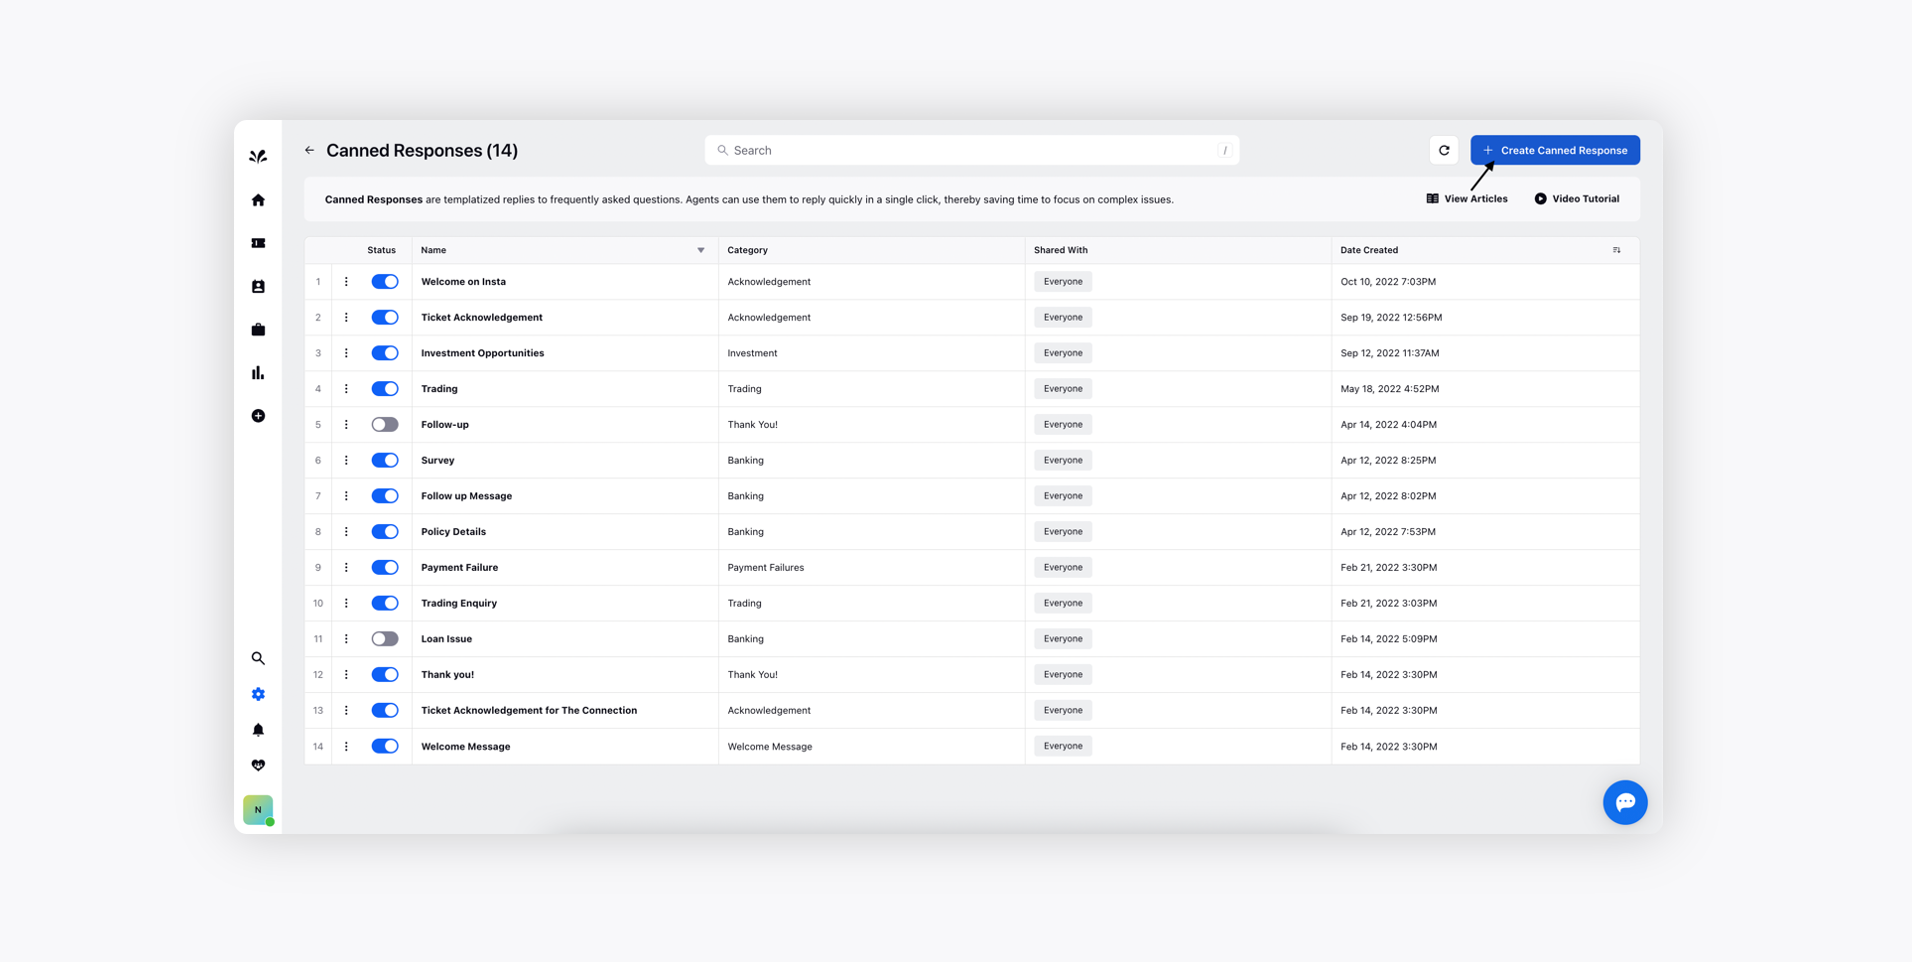
To create a new canned response, click Create Canned Response in the top right corner of the Canned Responses window.
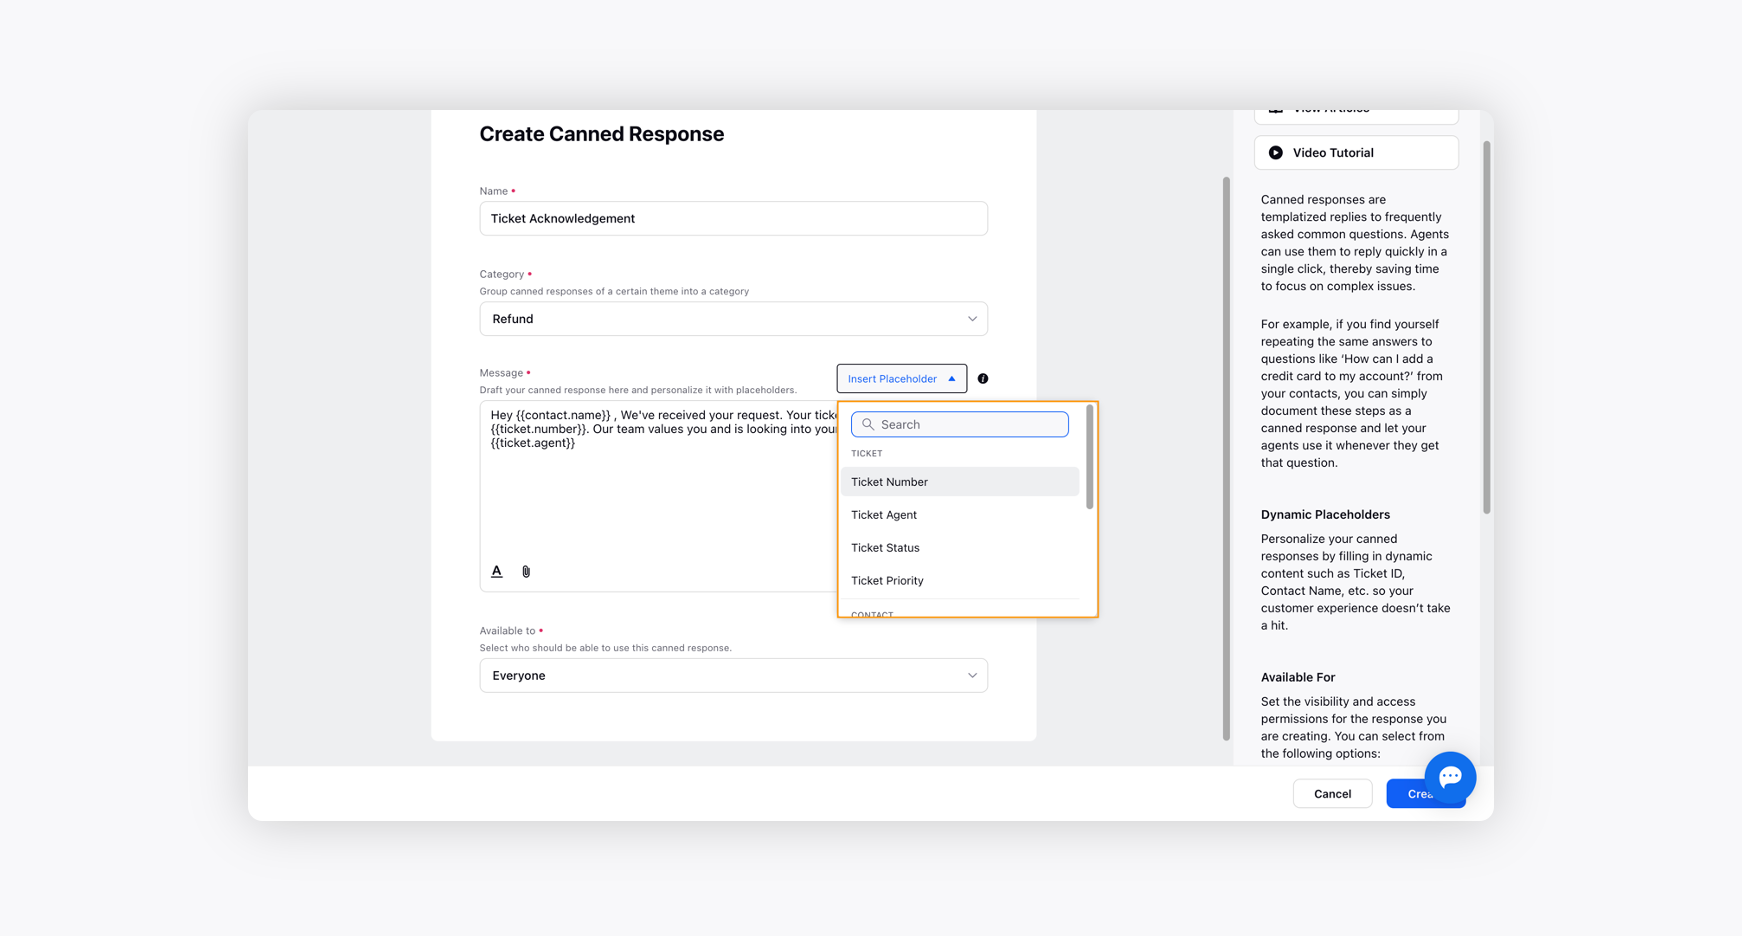
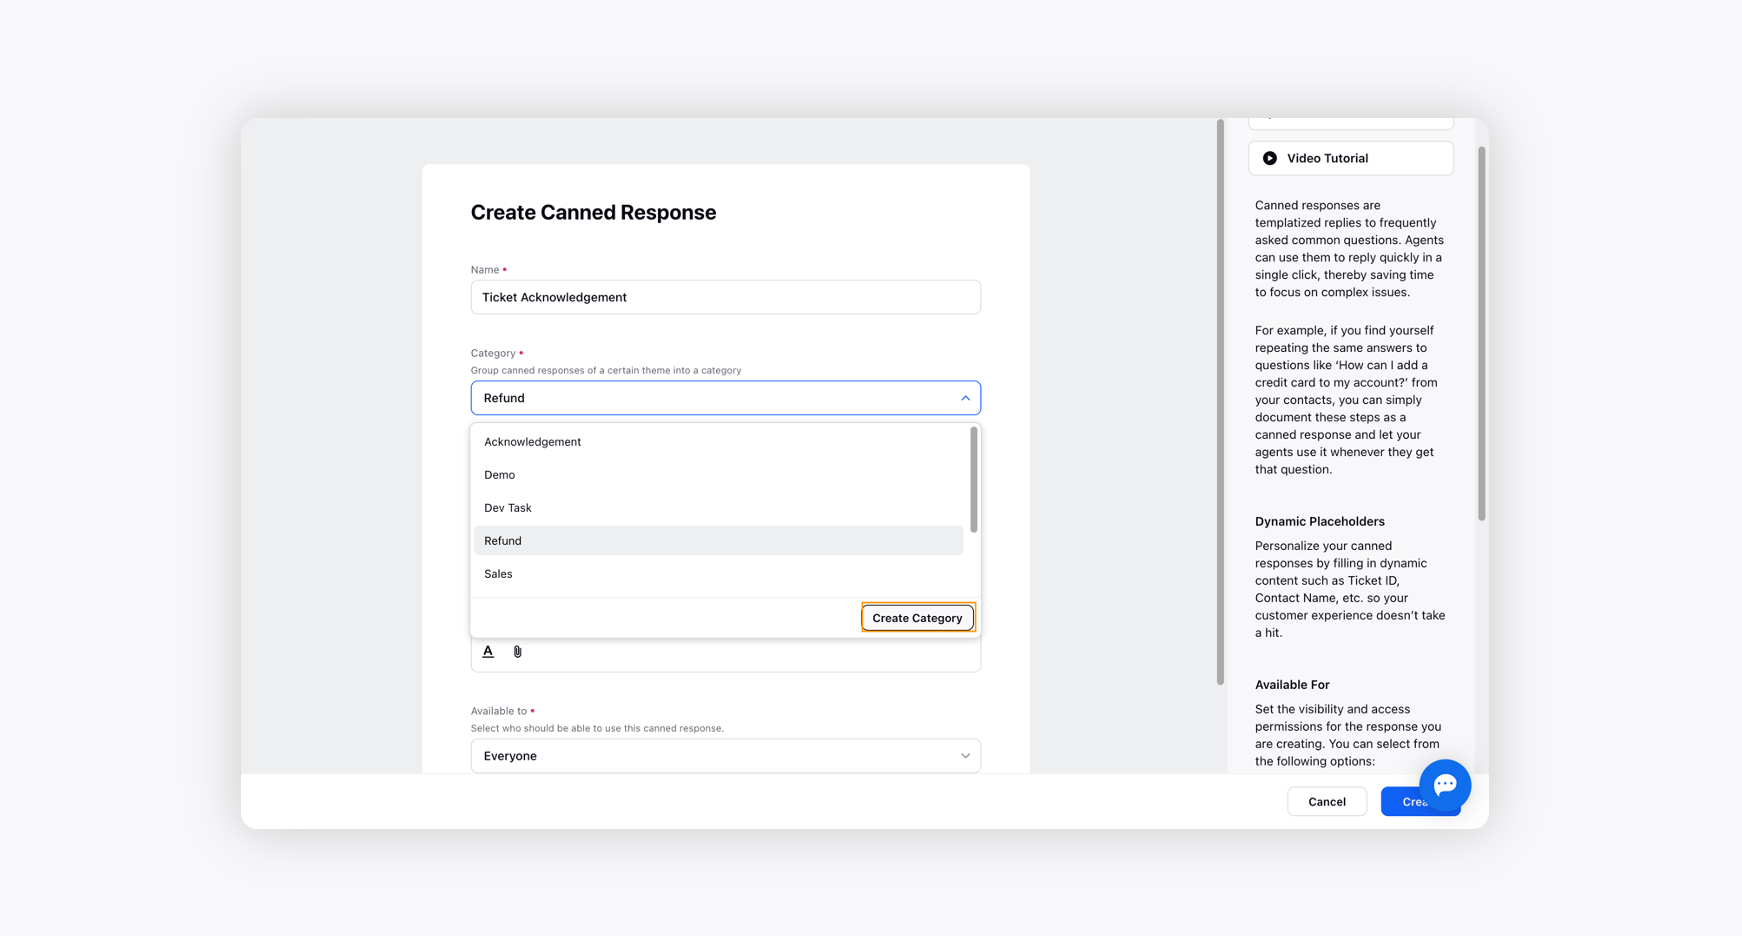
On the Create Canned Response window, enter the Name of your canned response.
Select a Category from the drop-down menu. Categories help you arrange similar responses into one group. For example, if you create a canned response for questions on Refund, you can add your response to the Refund category.
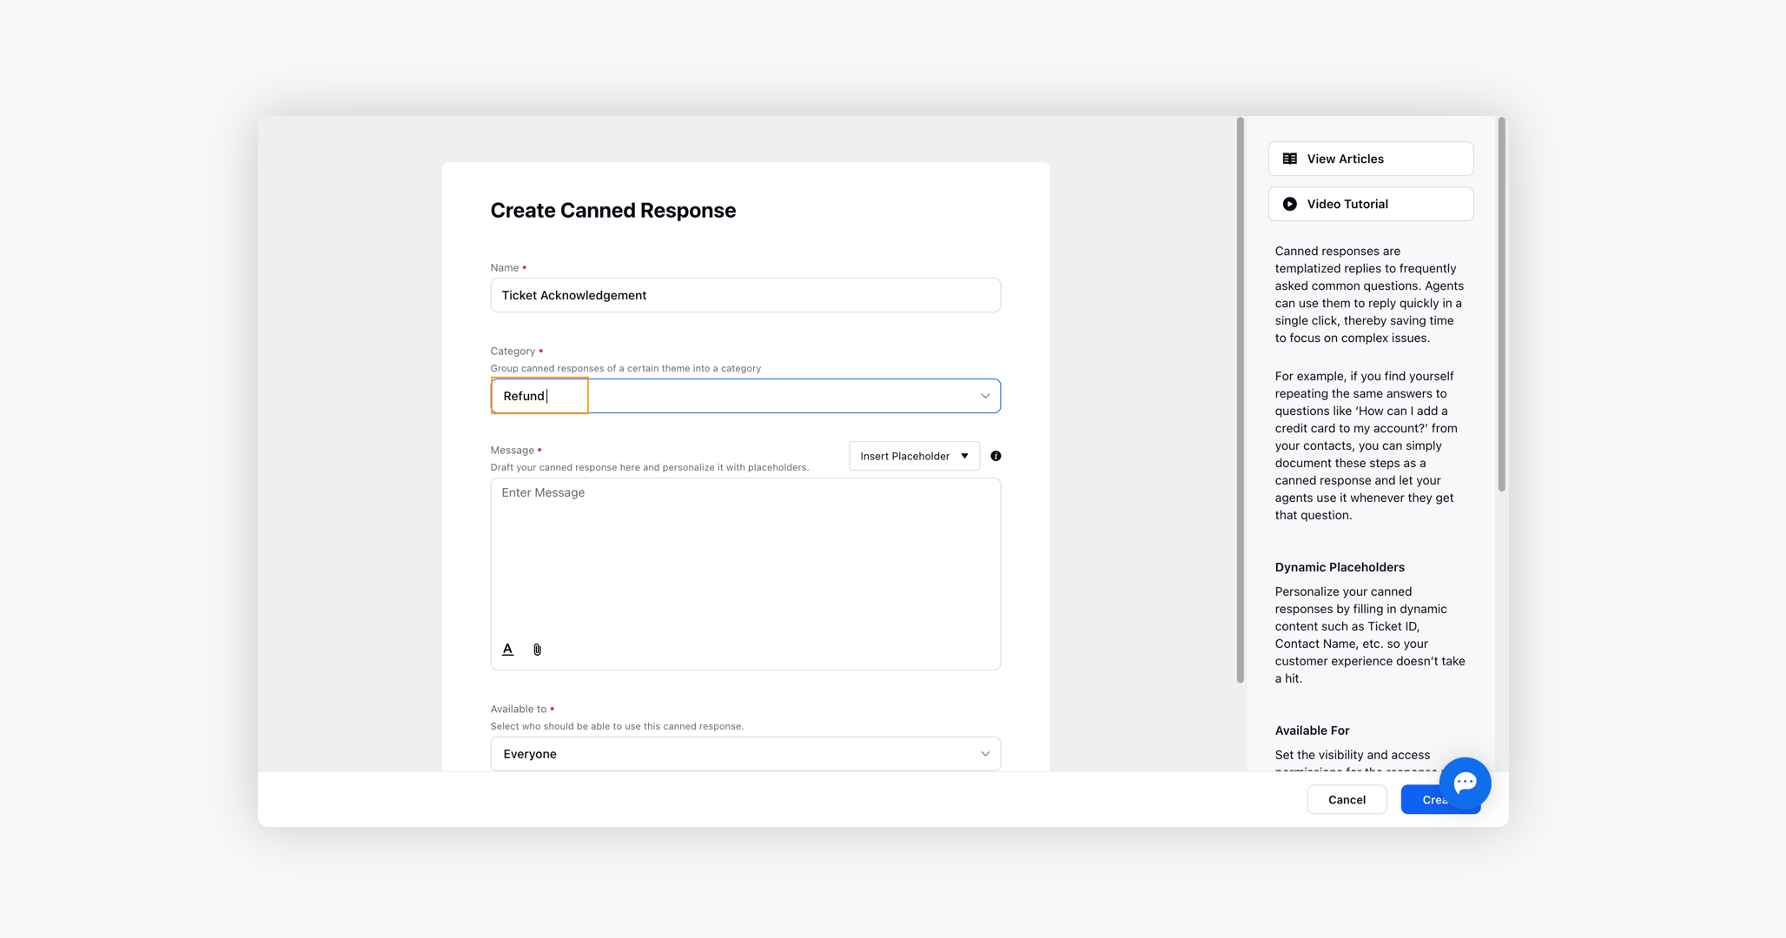
You can also create a Category if you do not have an existing one by clicking Create Category from the Category drop-down menu.
Under the Message field, write the response you want to send to the customers. Click Insert Placeholders in the top right corner of the message box to add variables and personalize your canned responses by filling in dynamic content such as Ticket ID, Contact Name, etc., so your customer experience doesn’t take a hit.
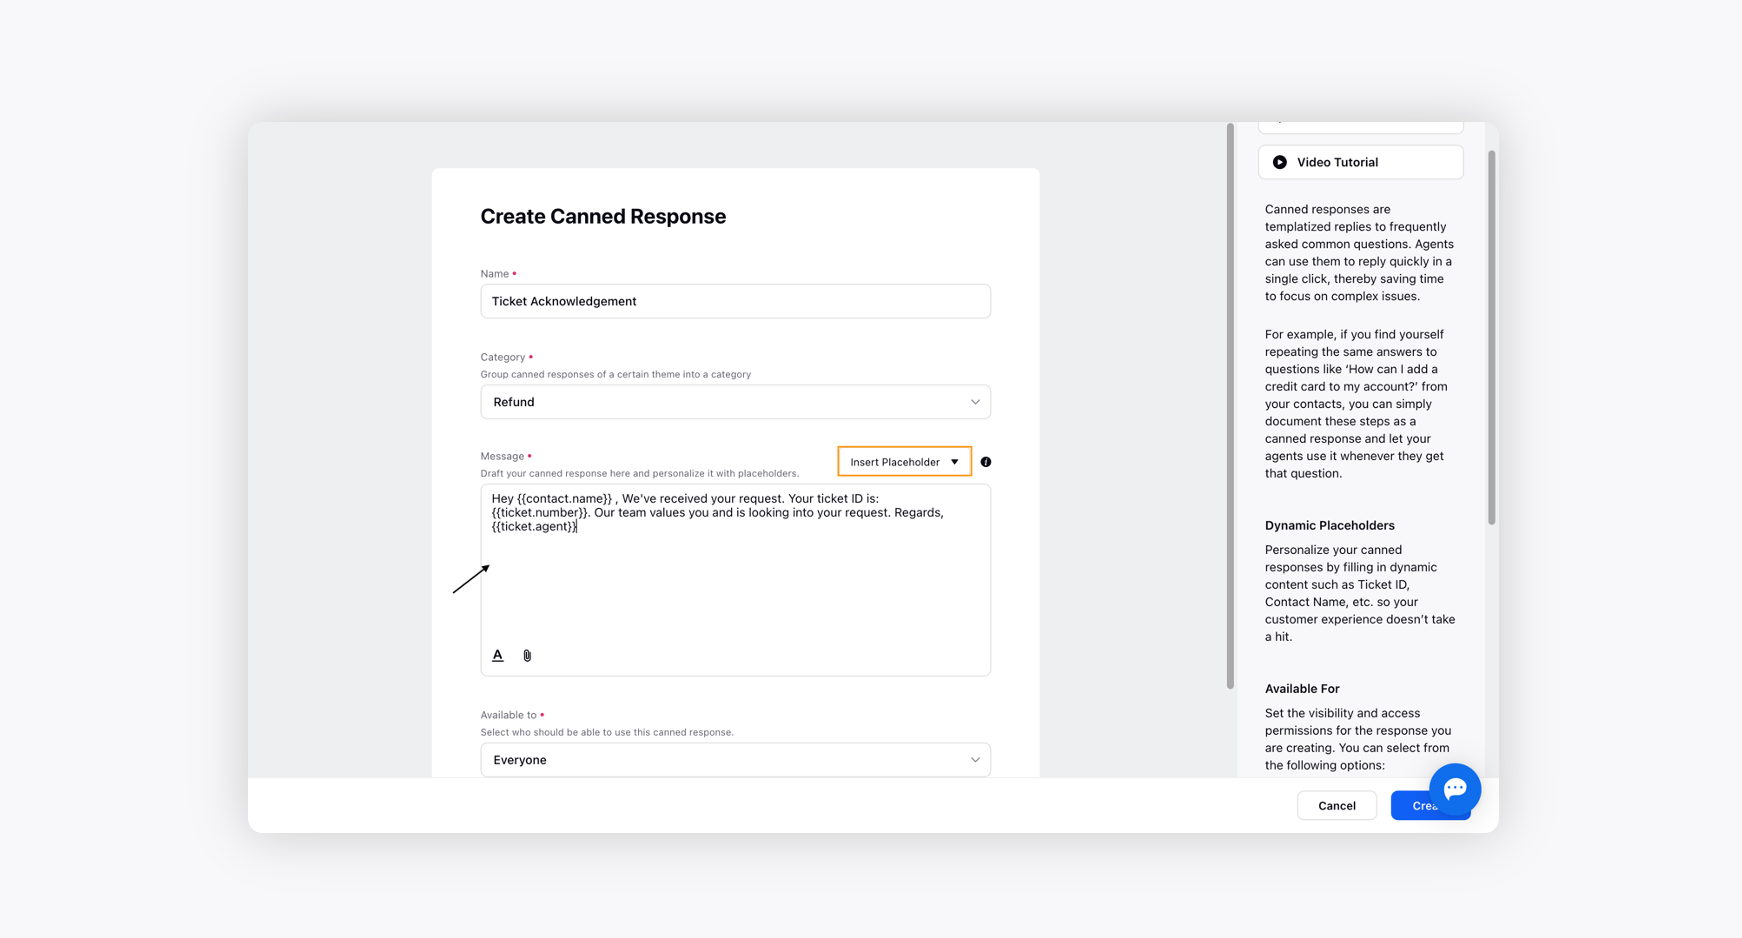
You can format your message or attach any file with the help of the Formatting and Attach File options in the bottom left corner of the Message box.
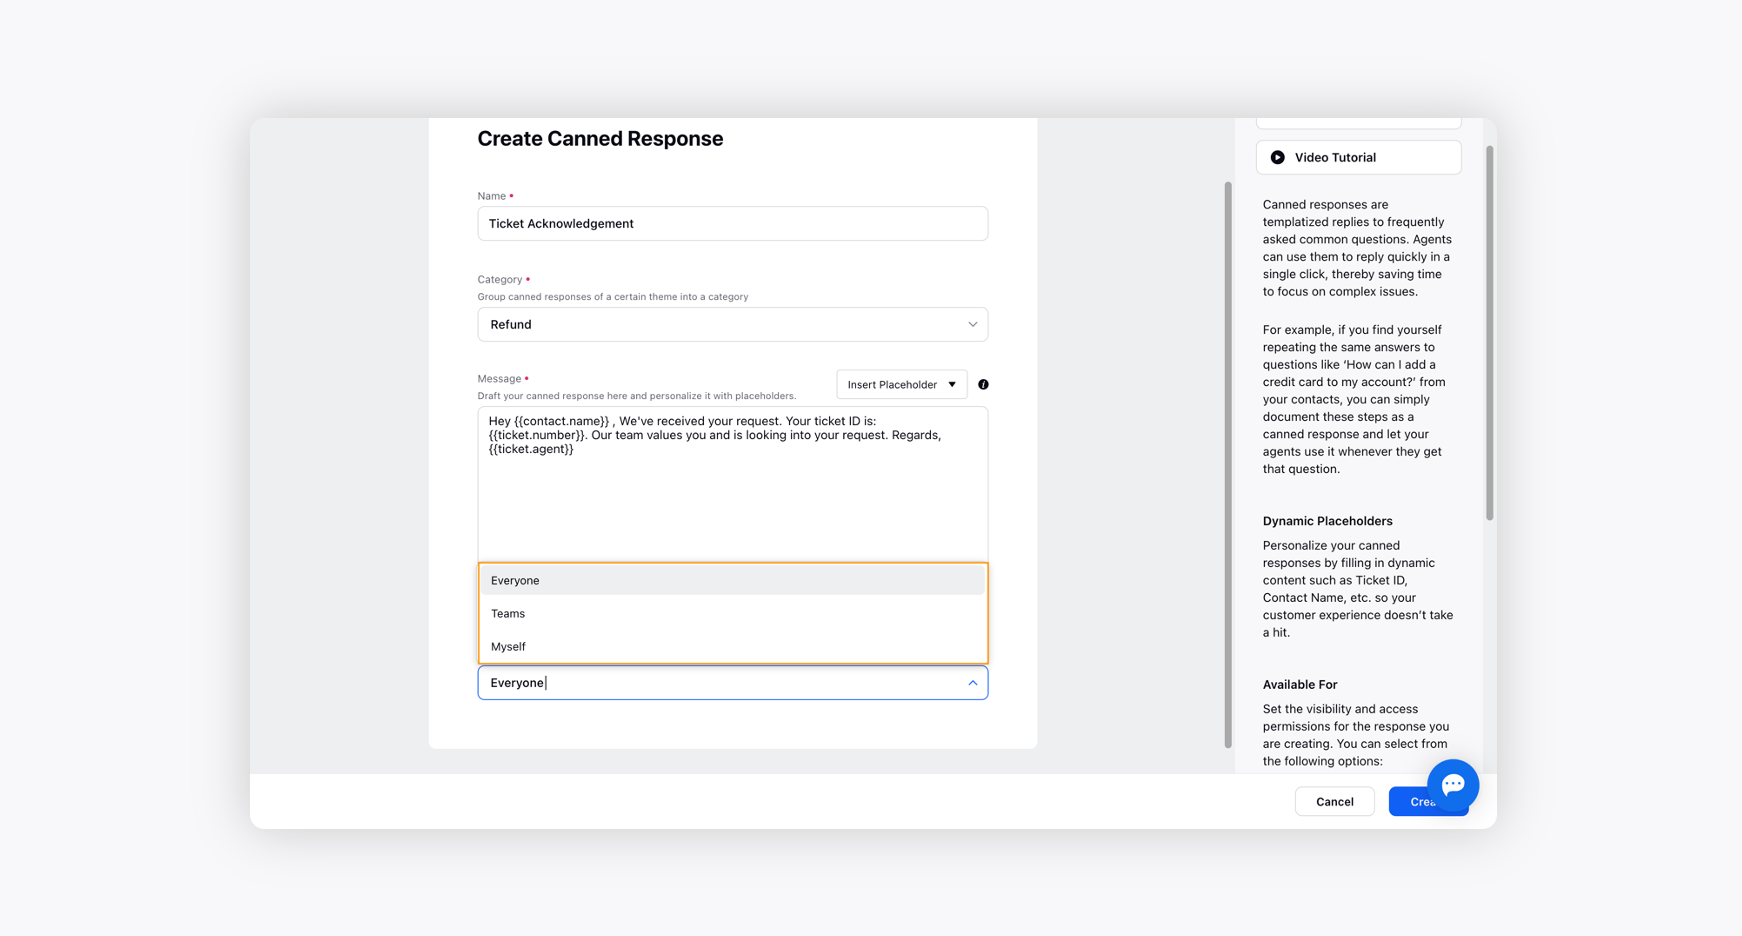
Set the visibility and access permissions for the response you are creating from the Available To drop-down menu. You can select from the following options:
Everyone - Every agent, irrespective of the team they belong to, can use it.
Teams - You can set availability for a particular team by selecting Teams from the drop-down menu. For example, a canned response for 'Refund' can be made visible just to your 'Returns and Refunds' team, as other teams will not use it.
Myself - If you set availability to myself only, the canned response will only be available for you to use it.
Click Create in the bottom right corner to complete the task.
List of placeholders in Canned Responses
Canned responses can have different placeholders, which you can insert while sending a message to the intended user. Here is the list below: