Managing columns in Table View on Sprinklr Service
Updated
Understand how to manage columns and switch the Ticket section to Table View on Sprinklr Service.
Managing the ticket columns enables you to view the specific columns you want to view to analyze the ticket creation requirements, prioritize the relevant tickets or know the status of the ticket.
To switch to Table View on Sprinklr Service
Go to the Tickets section of Sprinklr Service and click the Options icon next to All Tickets and click Switch to Table View from Card View.
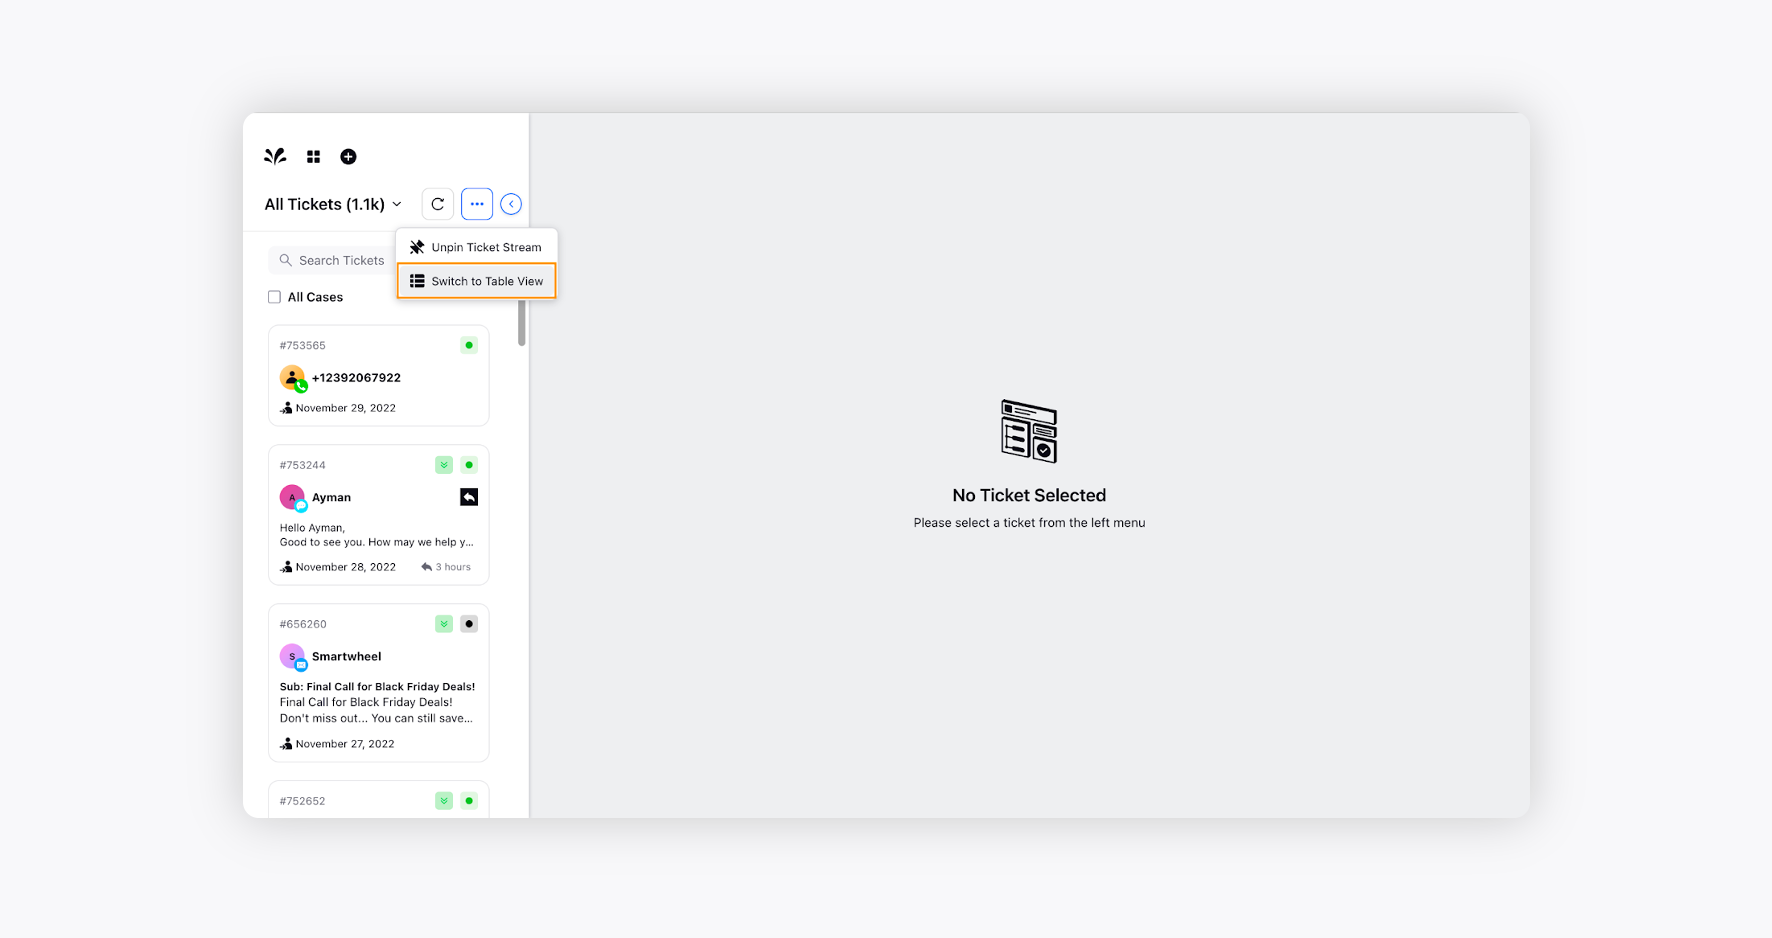
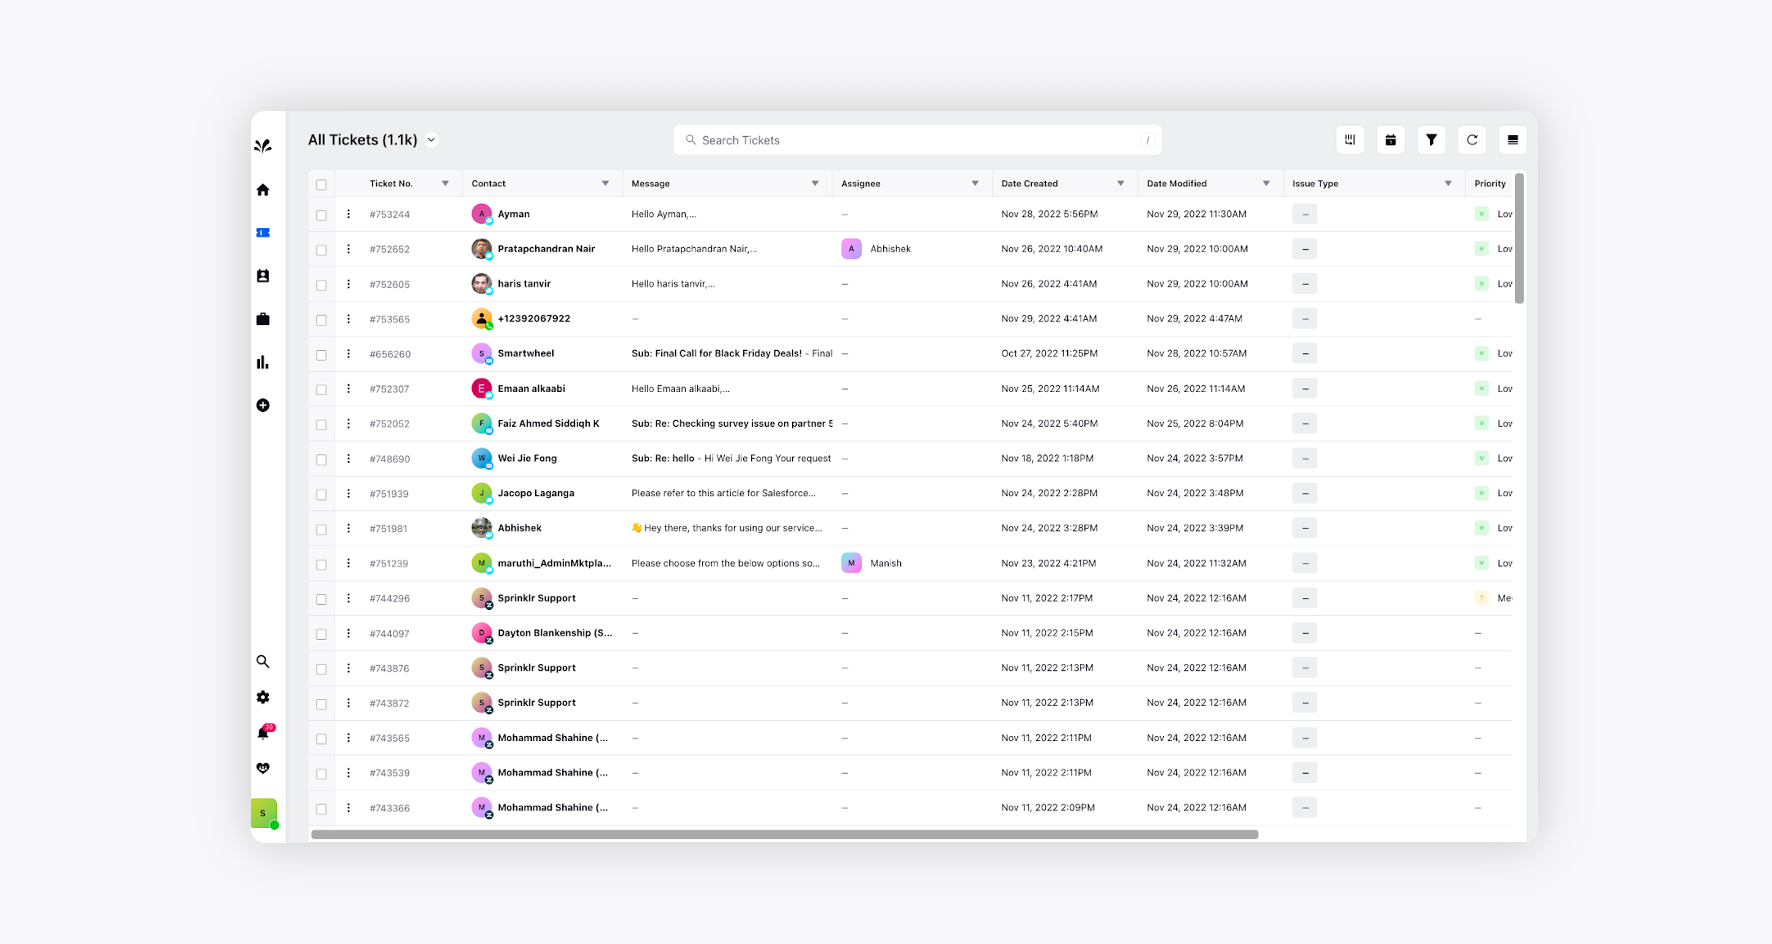
The ticket section will be switched to the Table View.
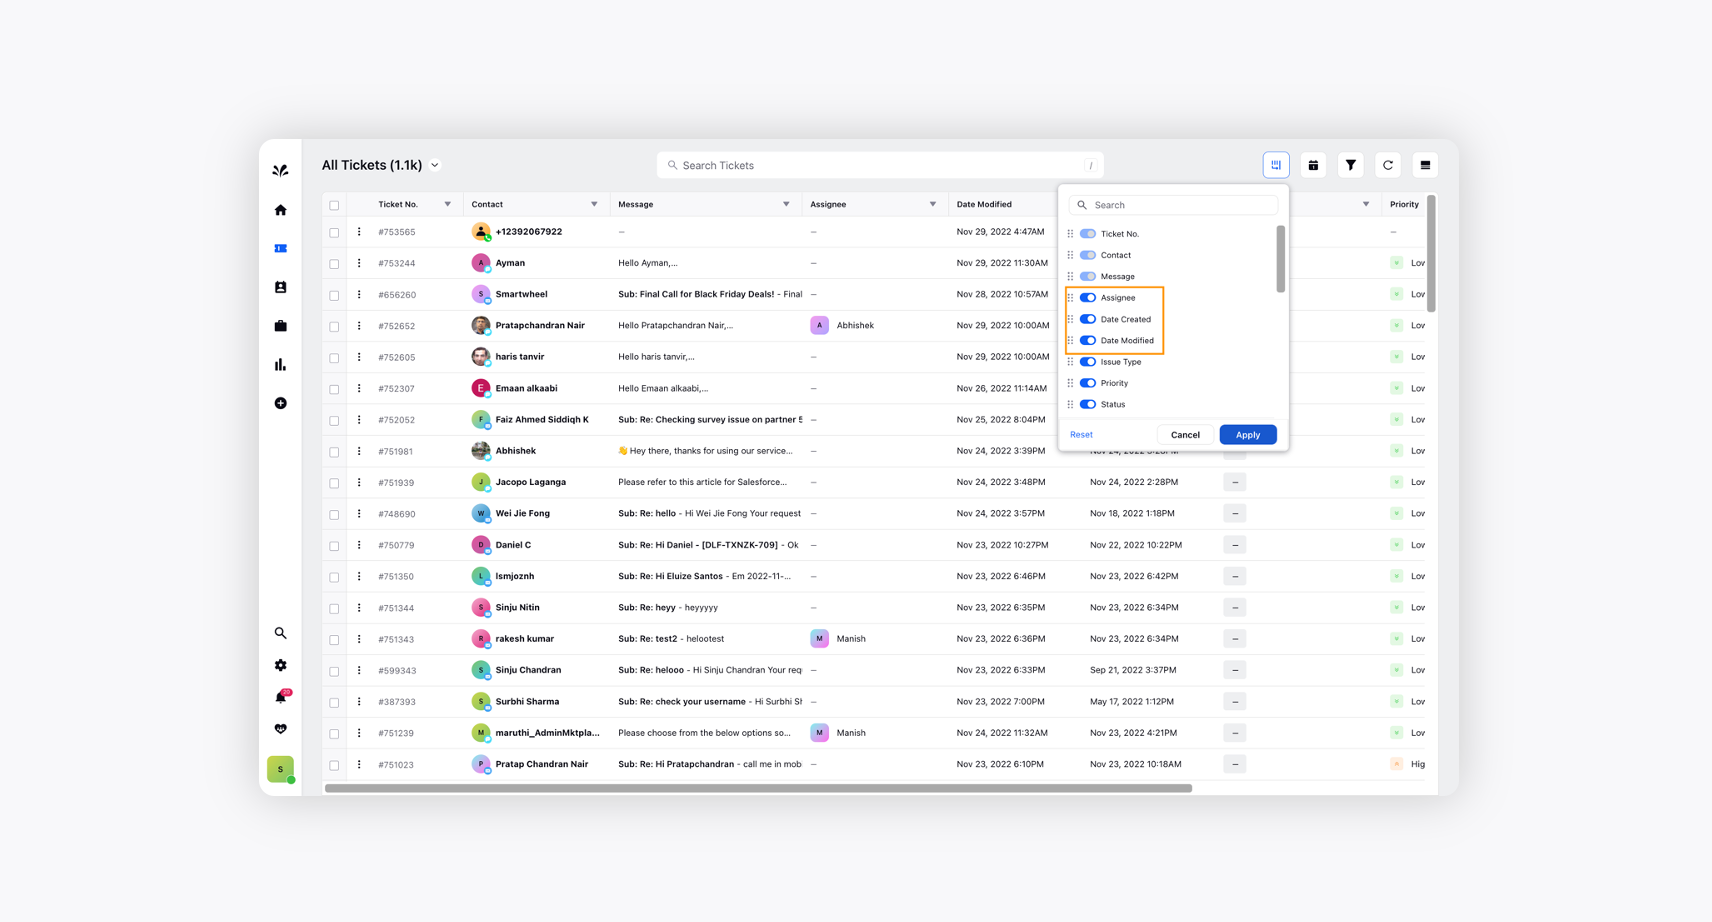
Now, go to the Manage Columns icon at the top and Toggle On the columns you want to view.

The columns selected will be visible in the Table View.
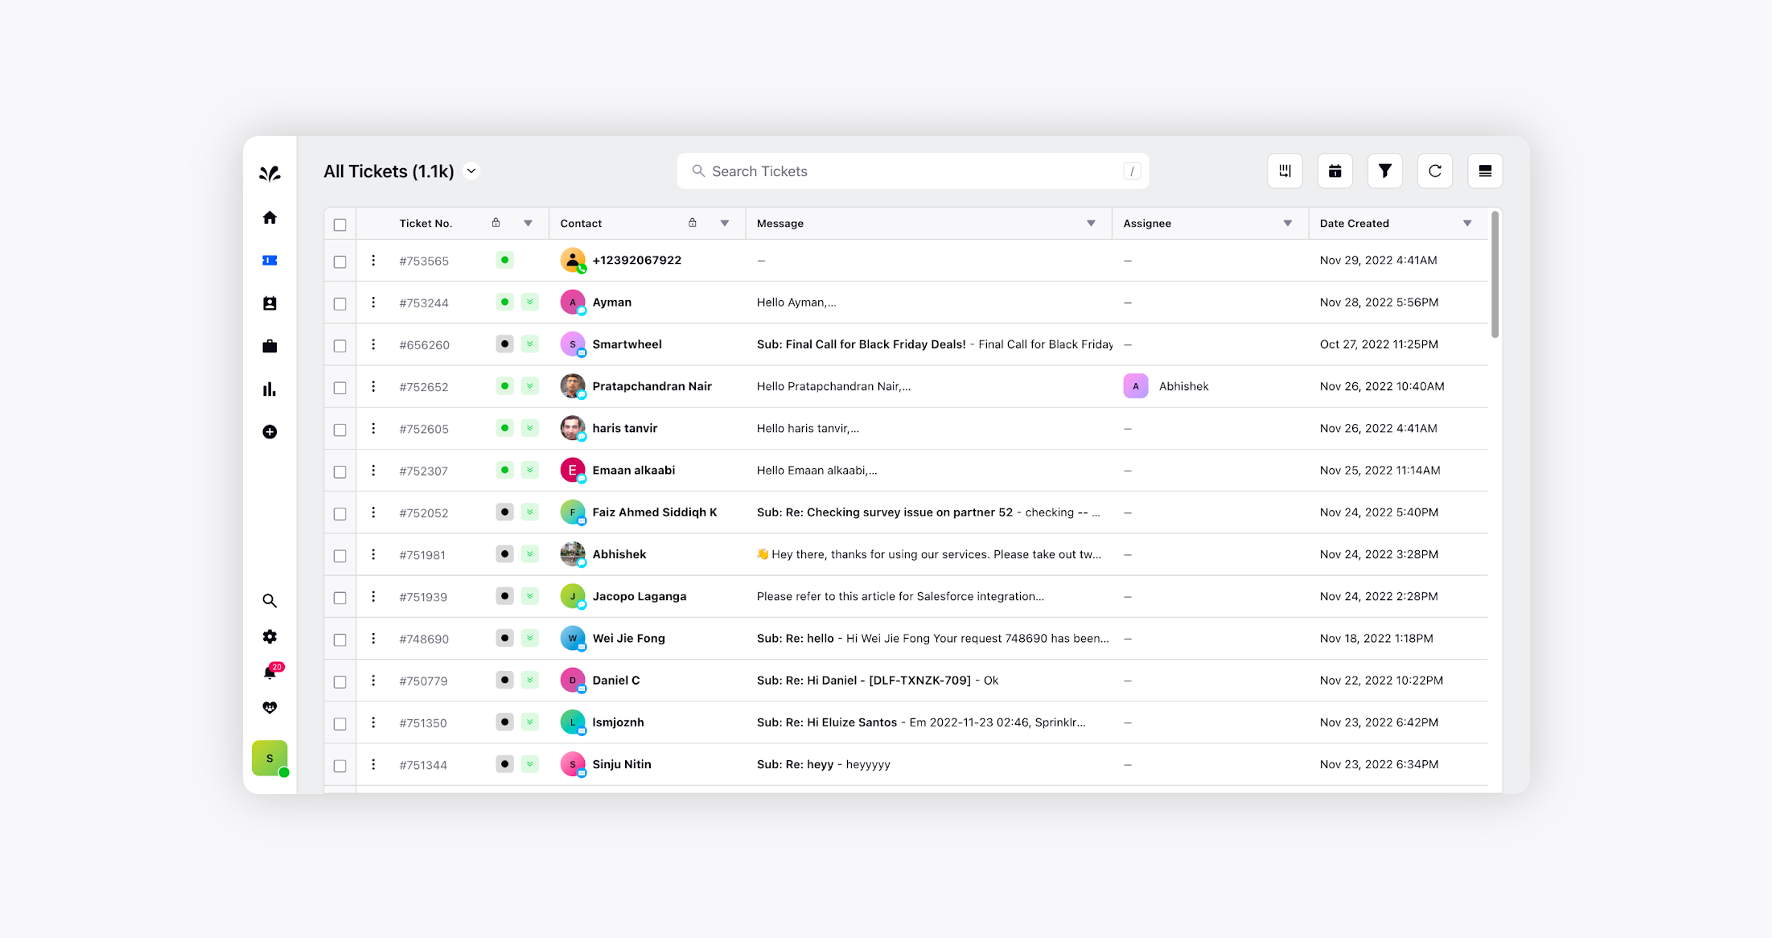
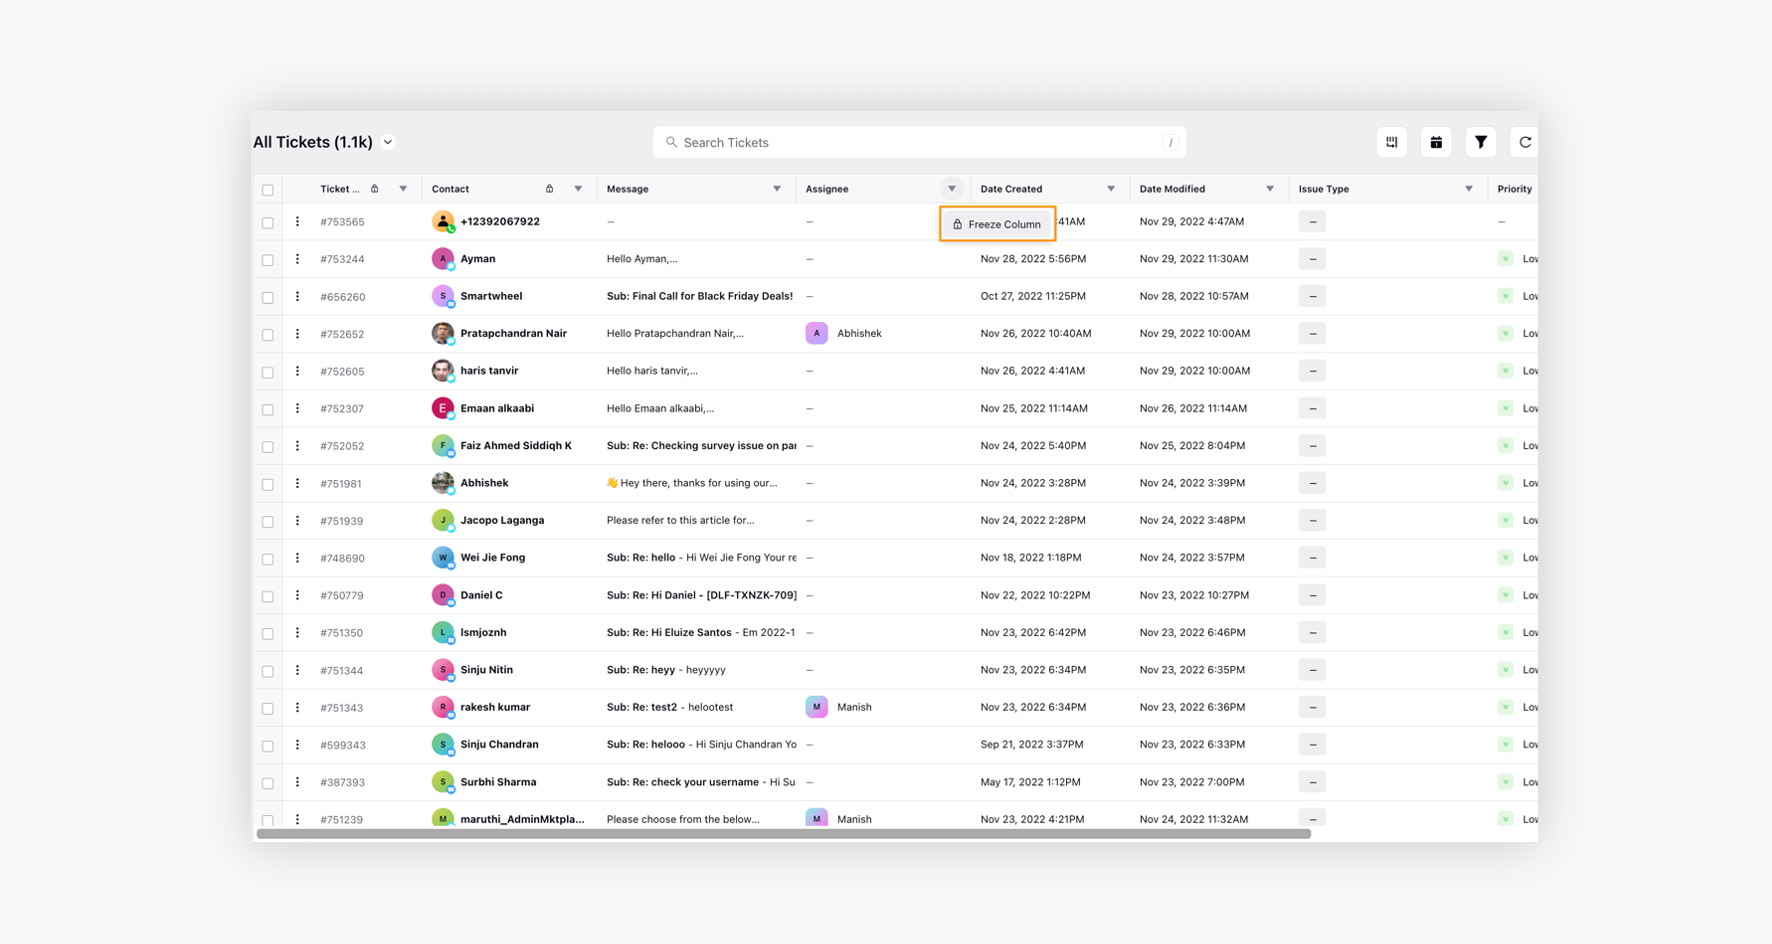
You can also freeze a specific column by clicking the arrow down button against the particular column and clicking Freeze Column. So, the selected columns will be frozen, and you will be able to scroll the remaining columns seamlessly.
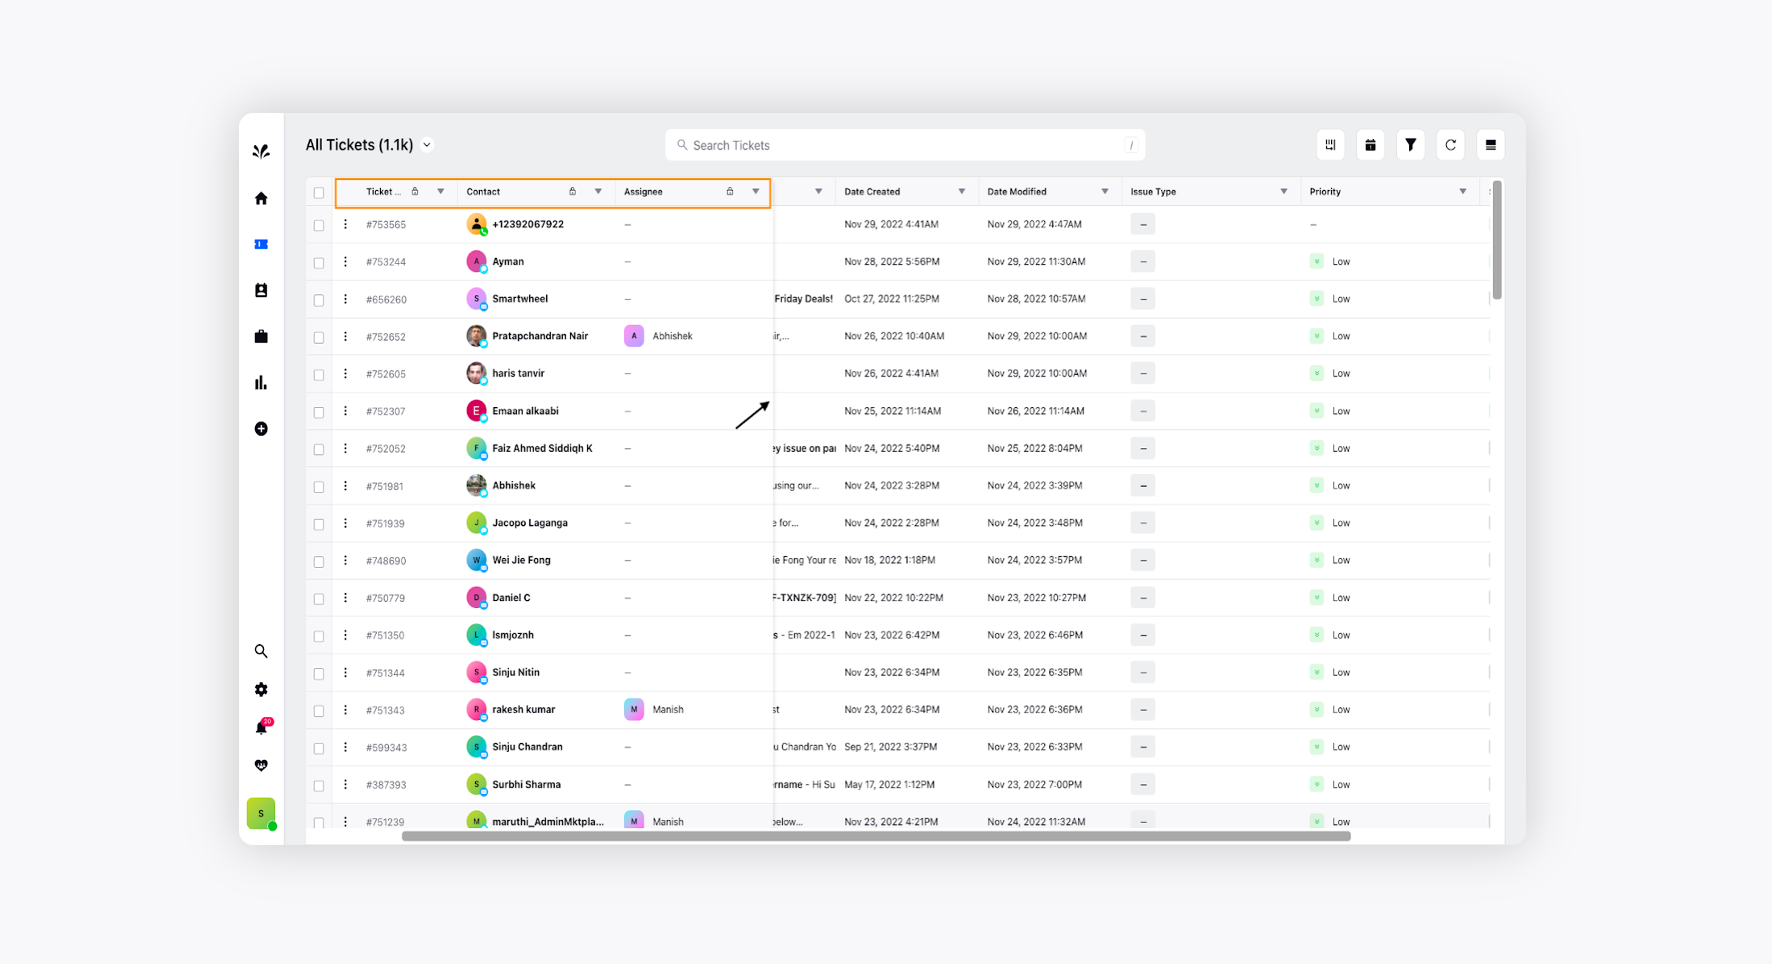
Besides this, you can enlarge the size of the column as well by stretching the column with the cursor. This ensures the details inside the column are more apparent.
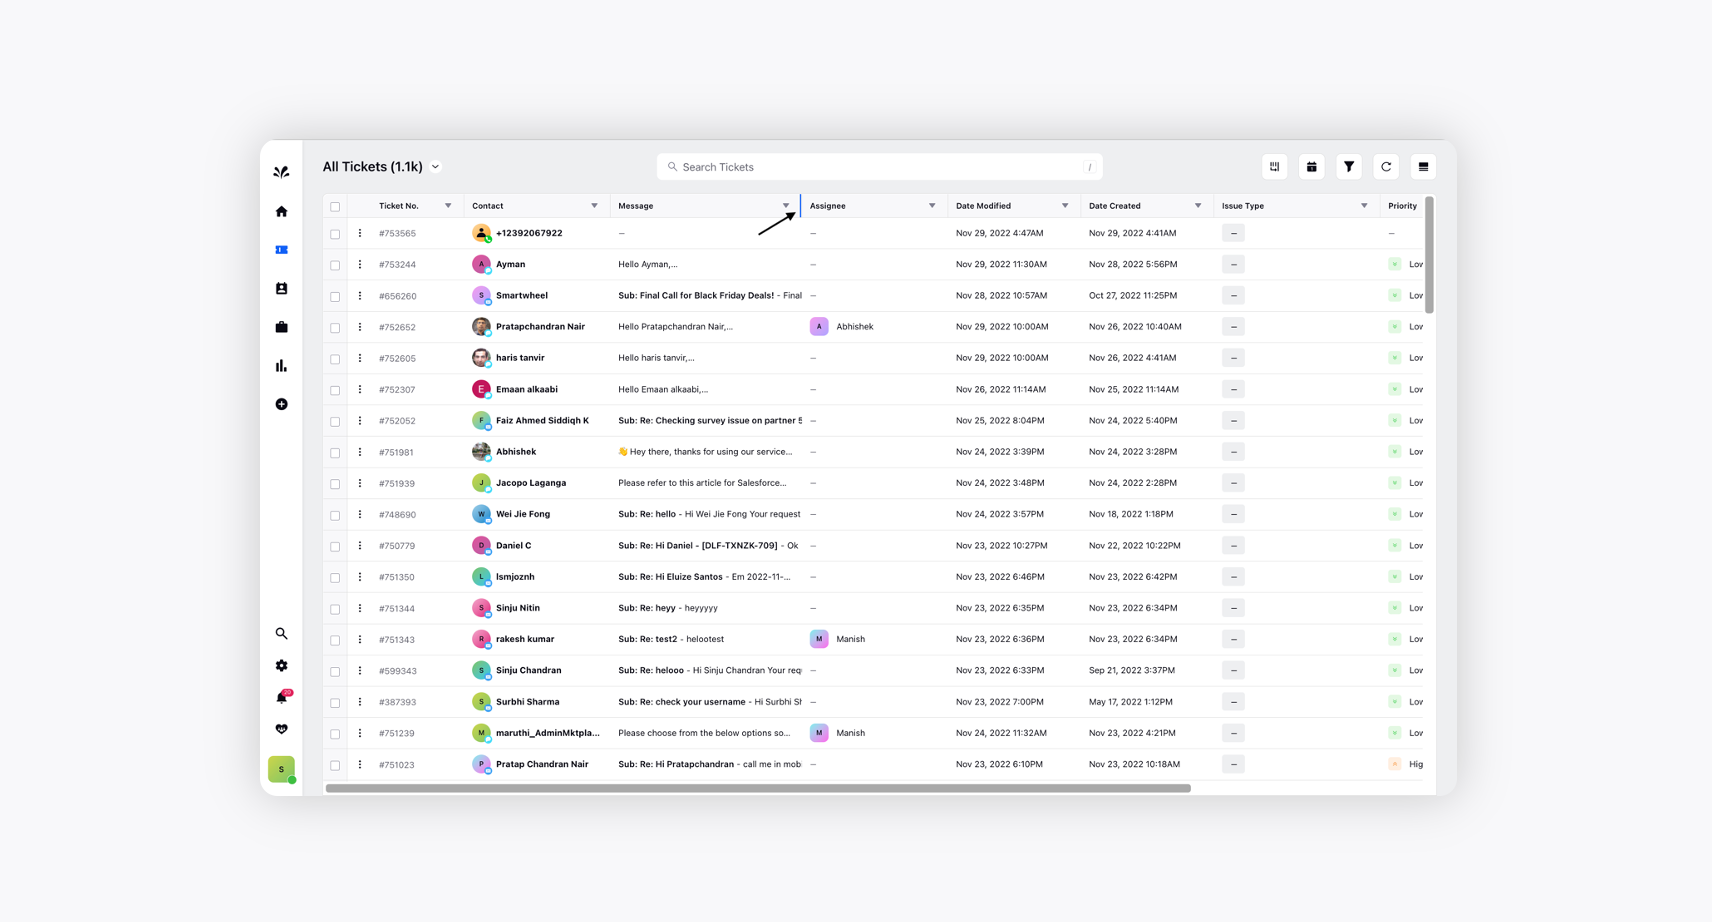
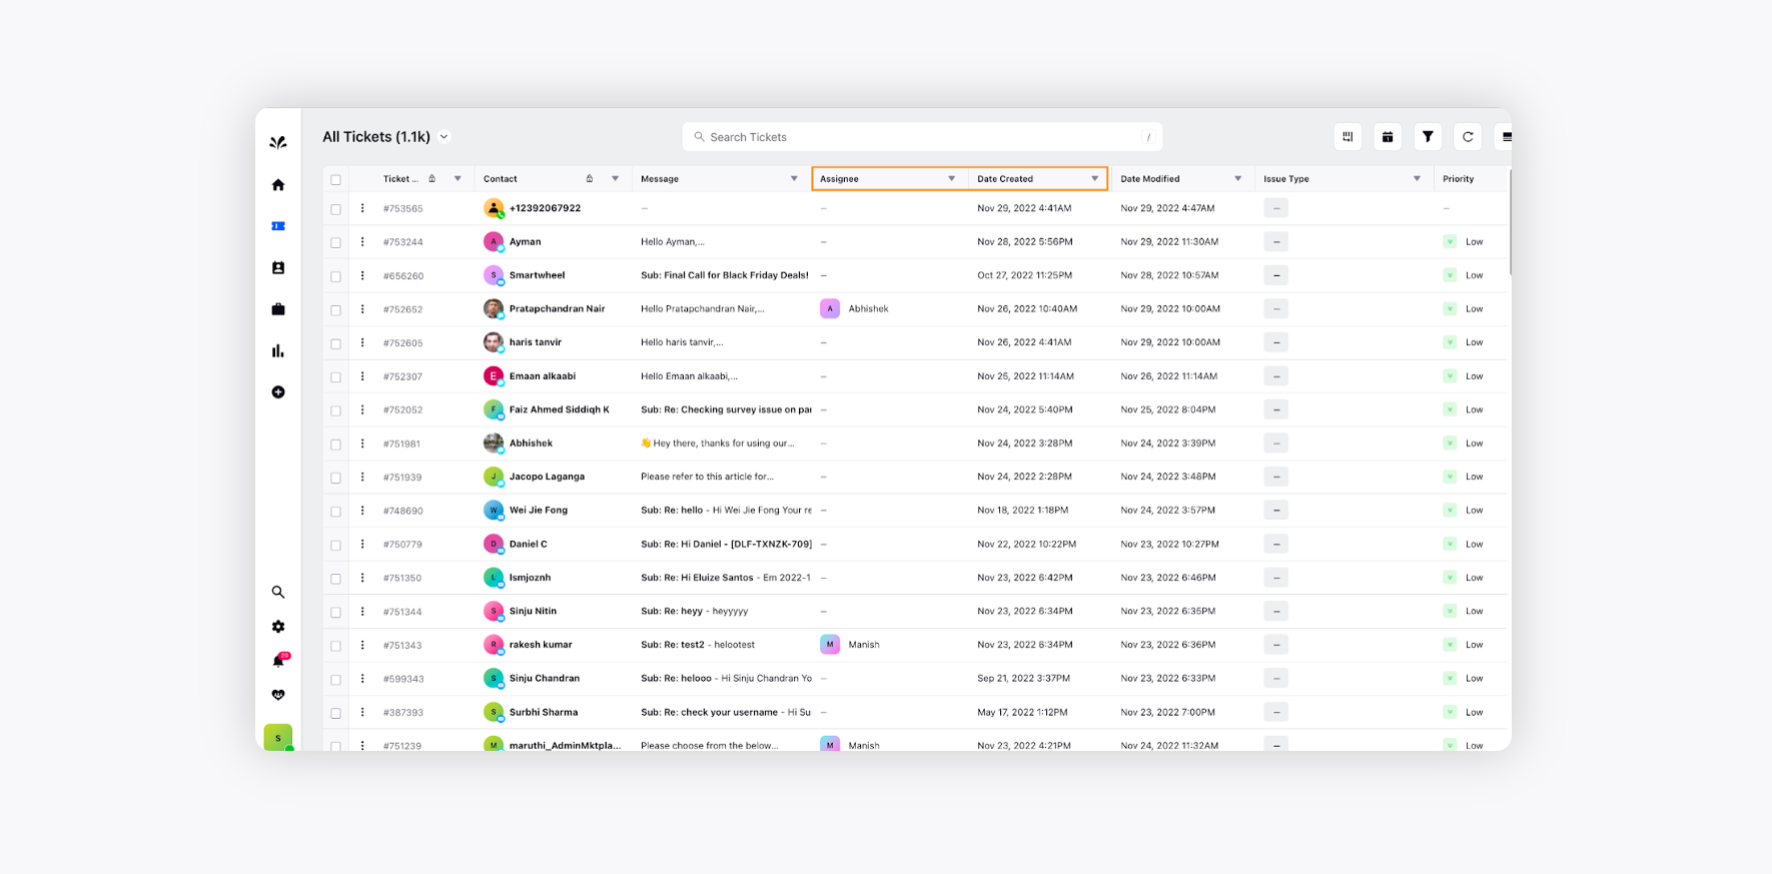
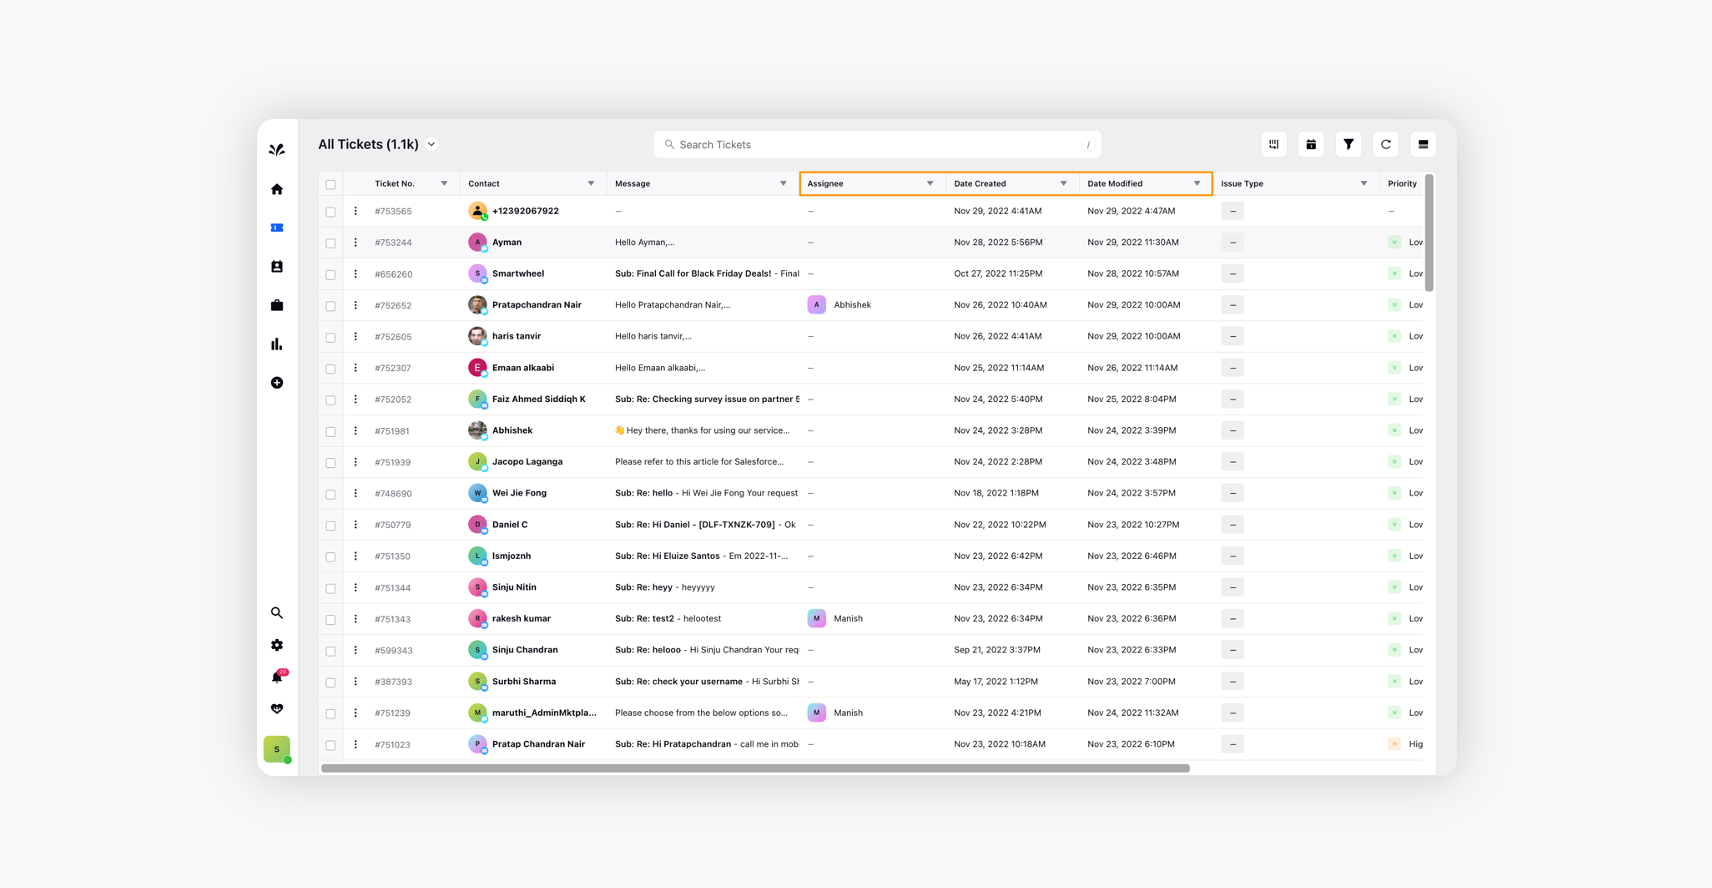
You can reorder the columns as well by clicking the Manage Columns icon and reordering the particular columns as per your business requirement. In the image below, the column Date Created has been reordered after Assignee. Click Apply after that.
The ticket columns have been reordered.
You can apply filters and sort the ticket column as well. The particular column has been sorted as per the Case Modification Time. Click Save after that.
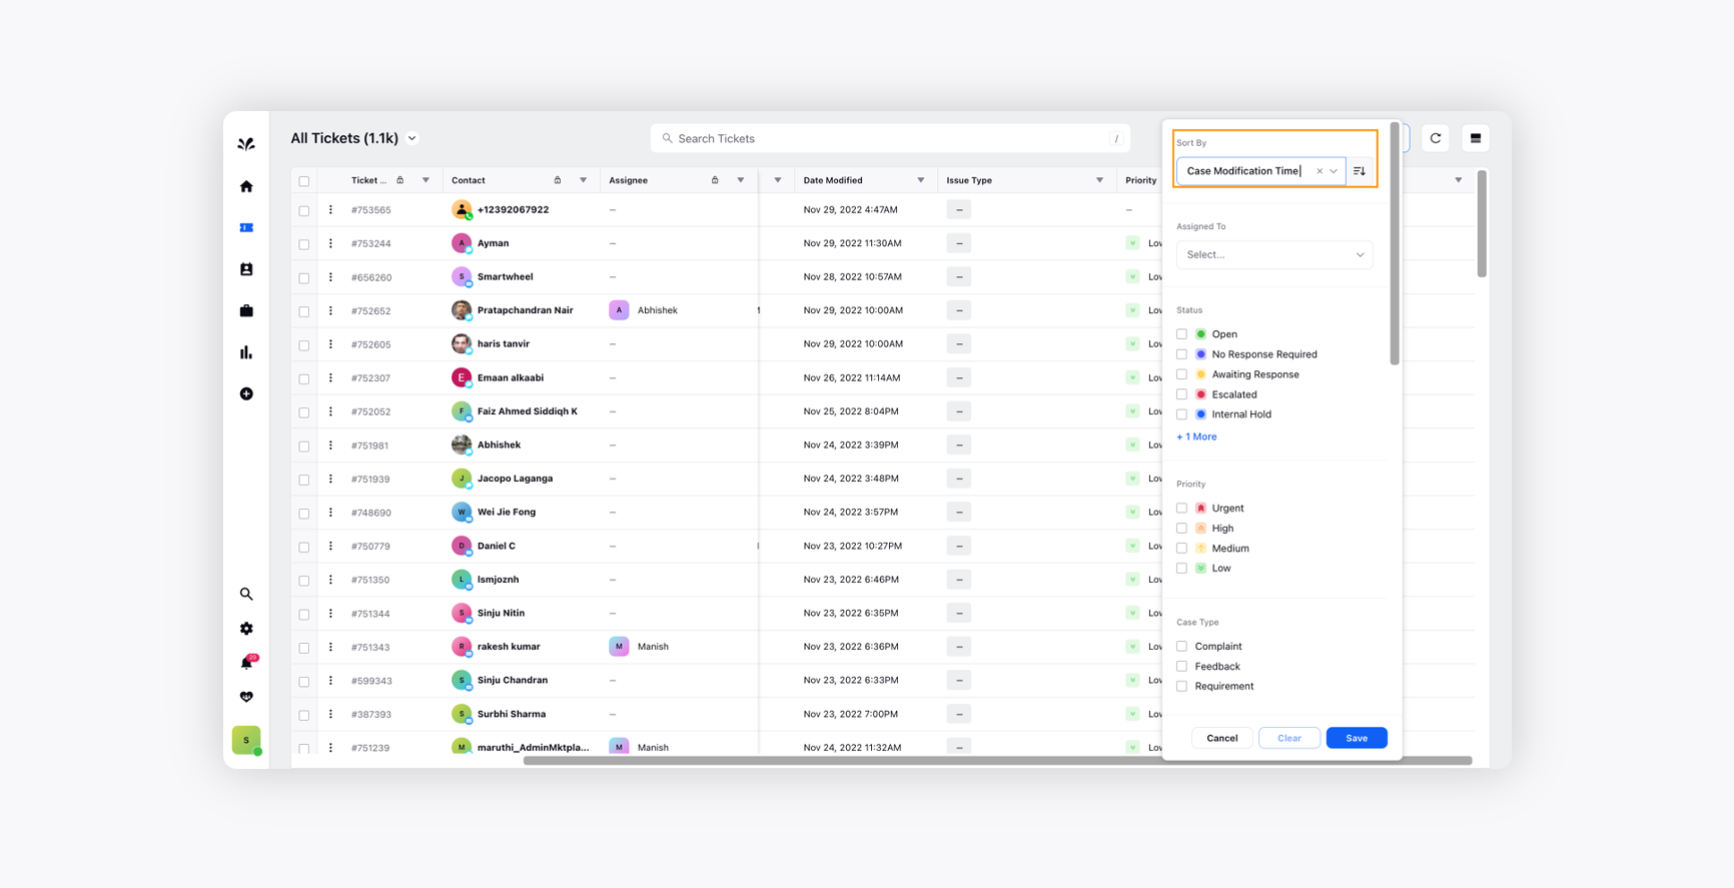
The ticket section will be sorted as per Case Modification Time.