Use Care Console to interact with customers effectively
Updated
How to interact, manage, and provide on-point solutions to every customer query via a single, easy-to-use platform.
Sprinklr’s Omnichannel Care Console provides a platform where agents can interact with customers irrespective of their contact mode, be it any social channel, Live Chat, phone, or email.
In this article, you will learn the different functionalities of Care Console.
Overview of Care Console
Overview Fields — Description
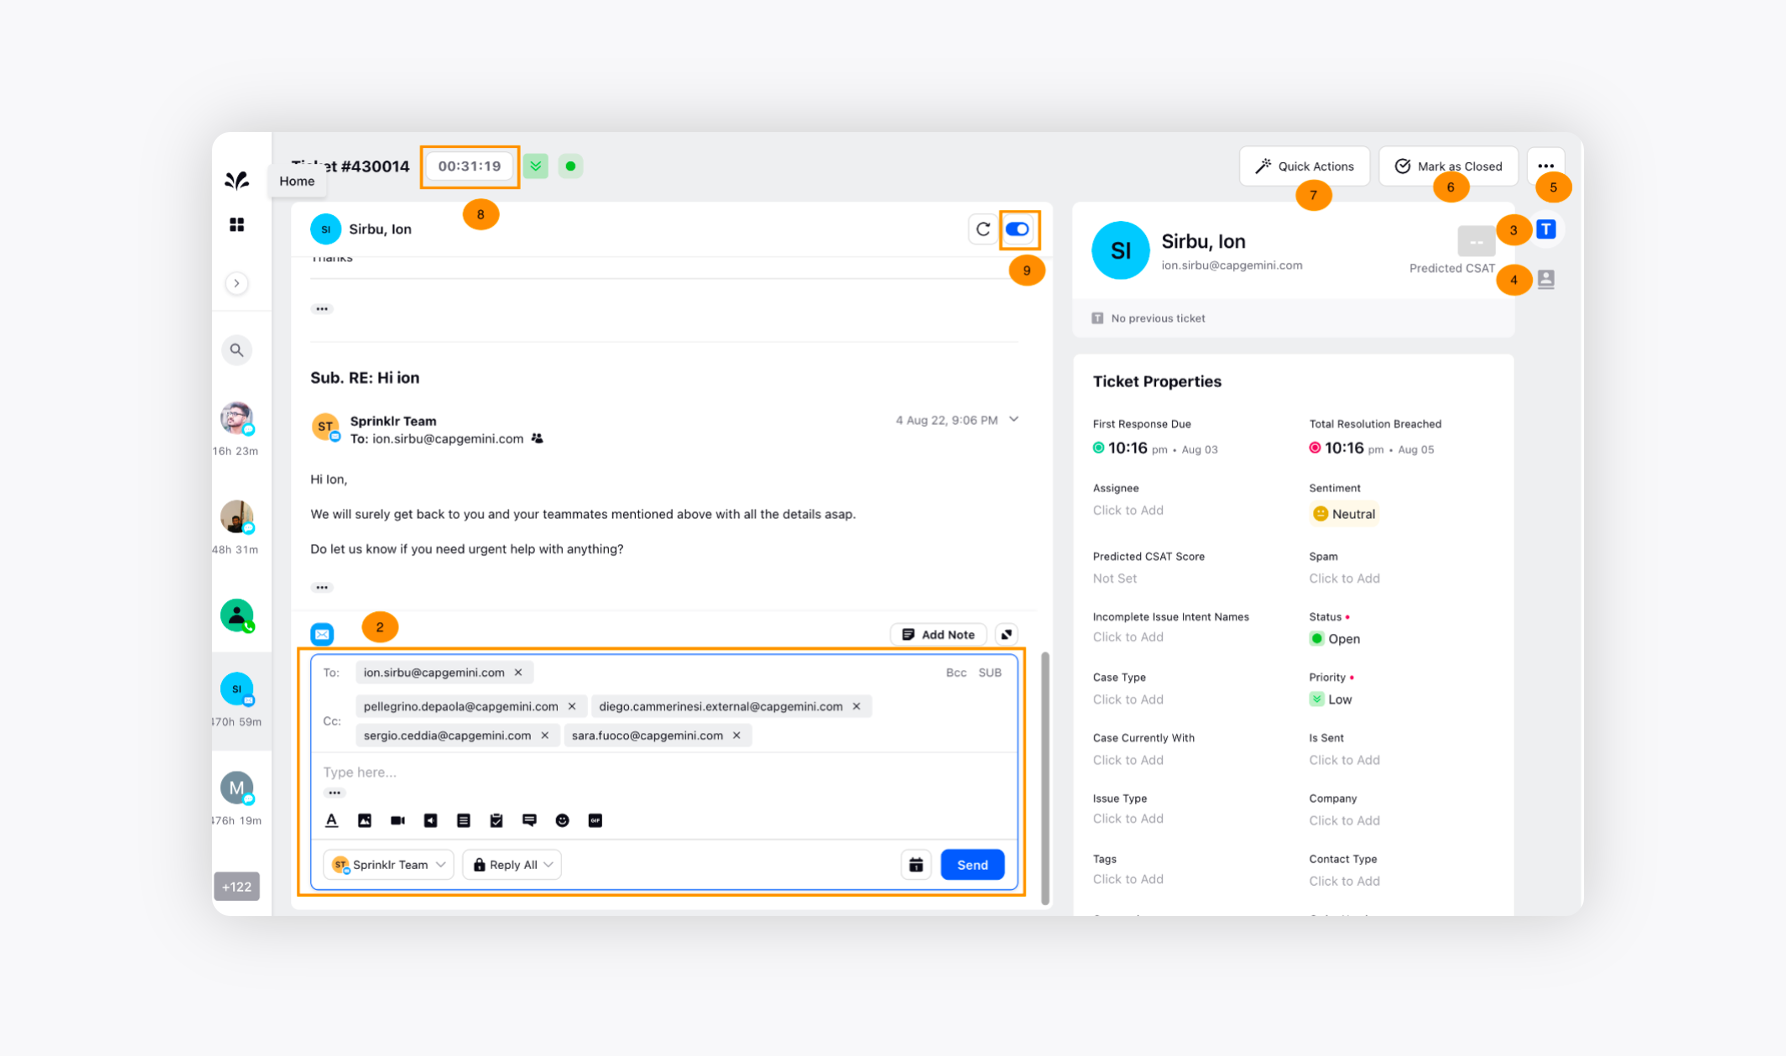
To navigate to Care Console reply editor
On the Sprinklr Service Home window, click the Tickets icon on the left navigation bar.
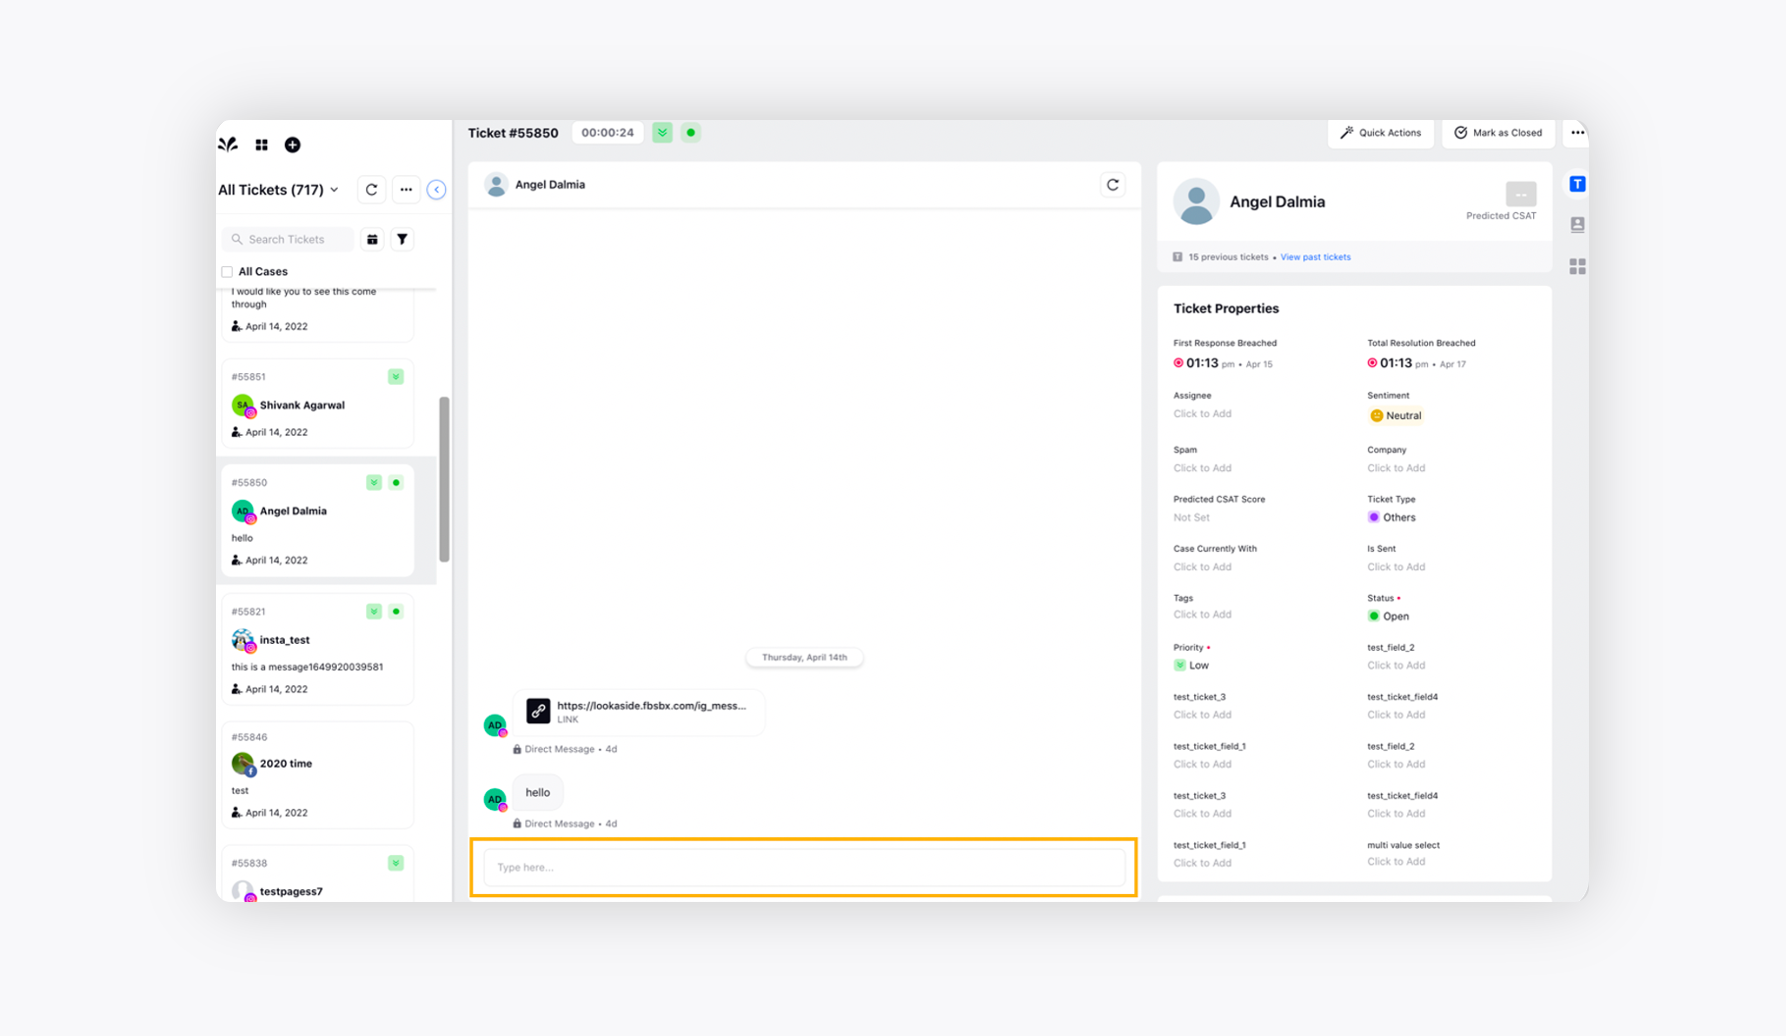
On the Care Console window, select the ticket that you want to respond to from the Ticket Stream on the left.
Navigate to the Reply Editor at the bottom after selecting a ticket to reply.
Click Reply Editor and type your reply. In the reply editor, agents can include Images, Videos, GIFs, and Emojis to make the conversation more interesting.
Agents can click the Canned Responses icon to use a canned response in their conversation. To know more, see Use Canned Responses in Care Console. Additionally, agents can add CSAT Survey by clicking the Survey icon at the end of the conversation to understand how customers feel about their support. To know more about CSAT Survey, see Create and Track CSAT Survey.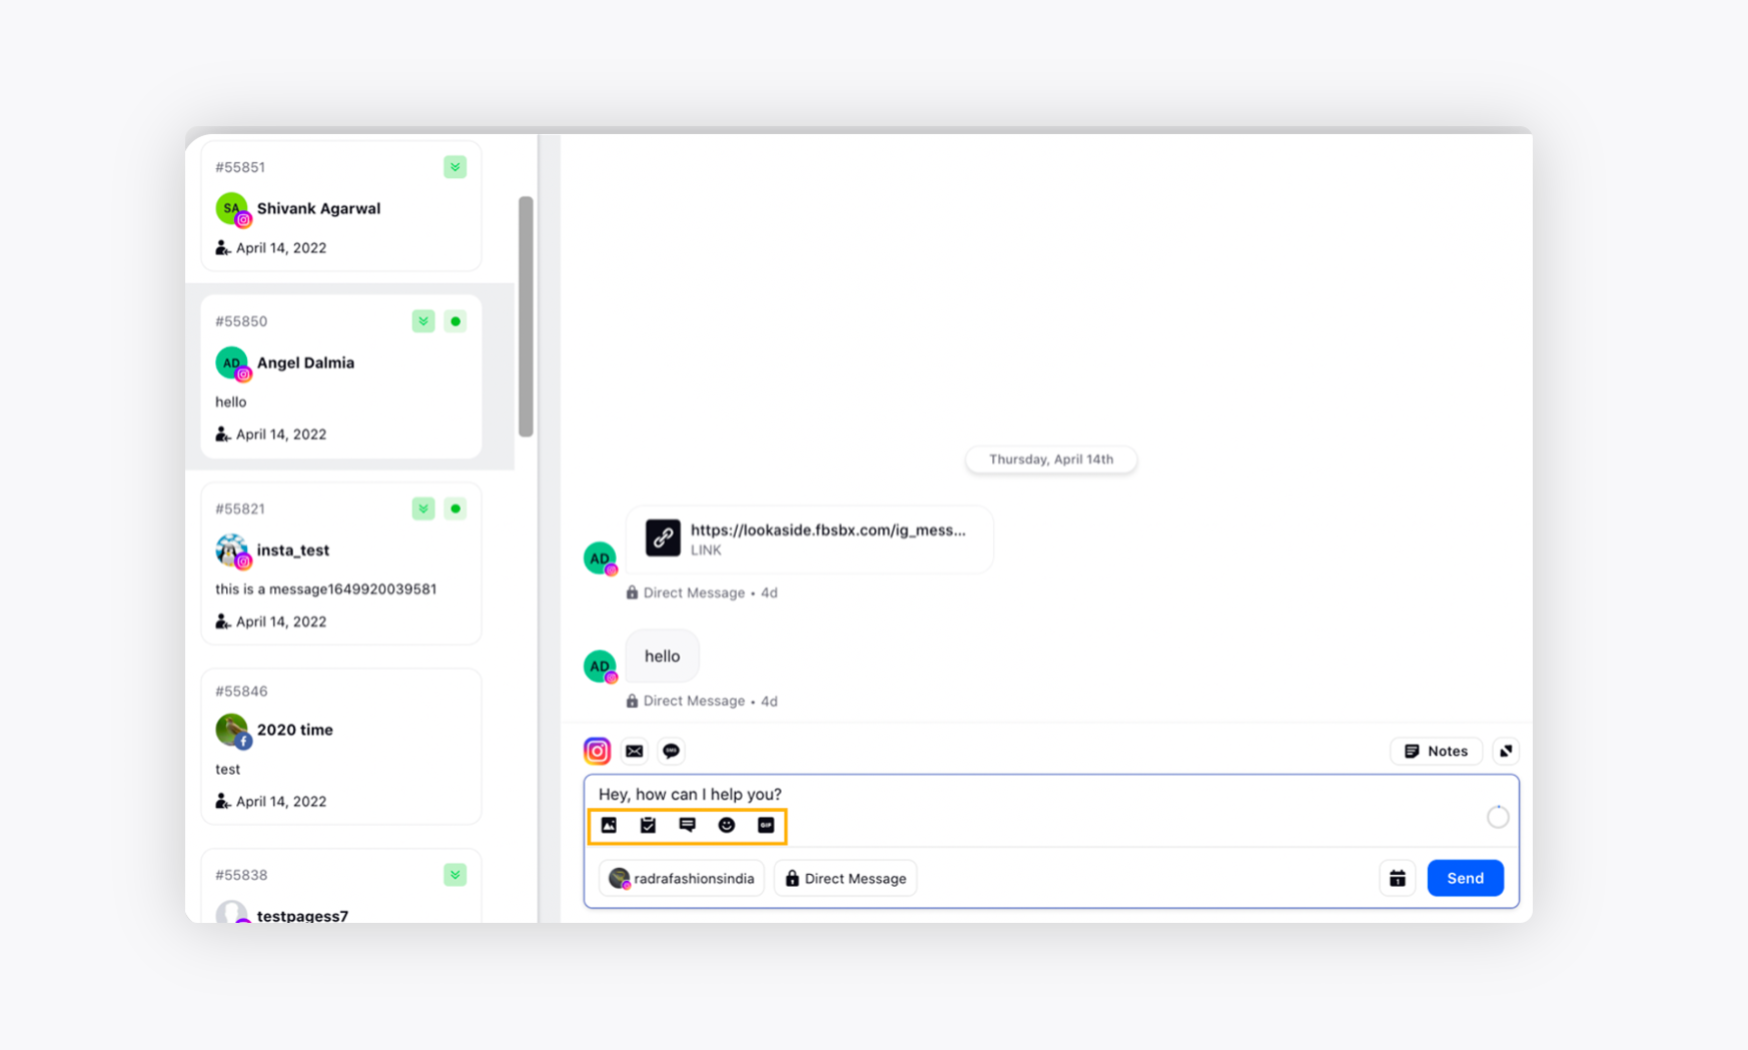
Hover over the received message to perform Message Level actions, such as like, reply to DM, etc.
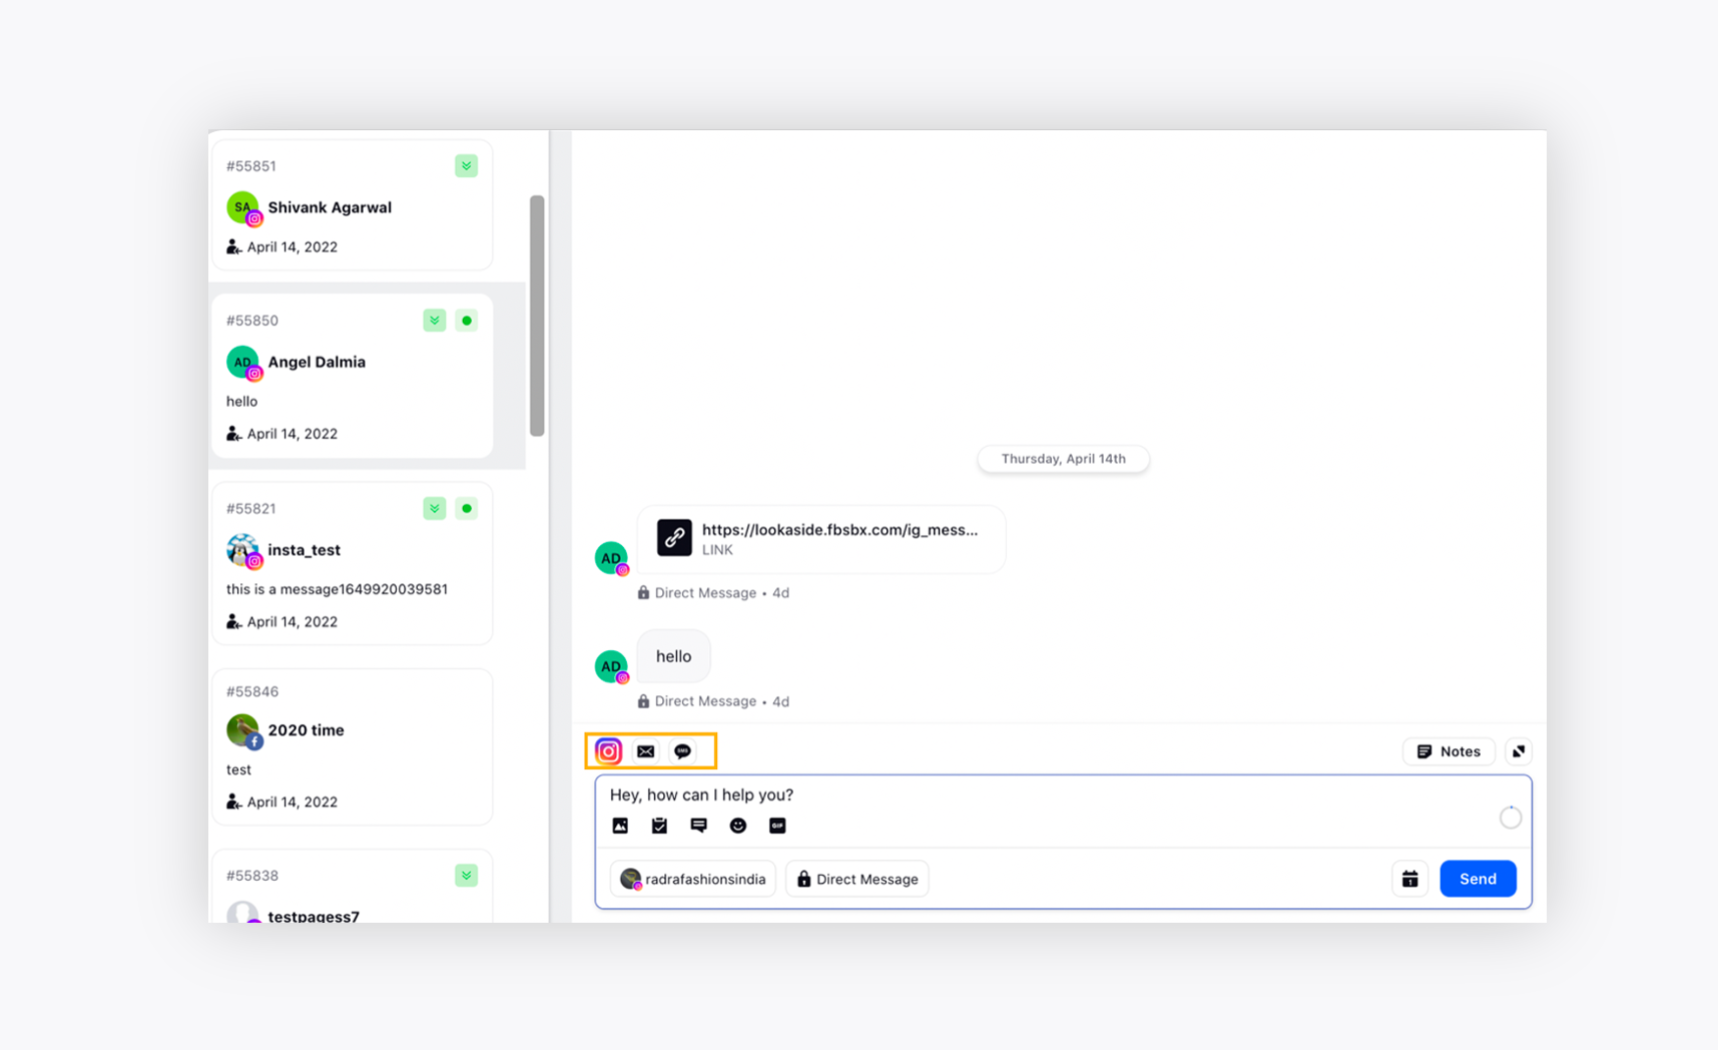
In the top right corner of the Reply Editor, agents can choose the medium where they want to reply to the customer. This option is subject to change based on the available contact details provided by customers.
In the below image, agents can reply to the customer on their Instagram, Email Id, or SMS.
Click the Schedule Message icon to schedule a message for a later date or time if an agent needs to remind customers of different services, offers, or other information. To know more, see Schedule a Message in Care Console.

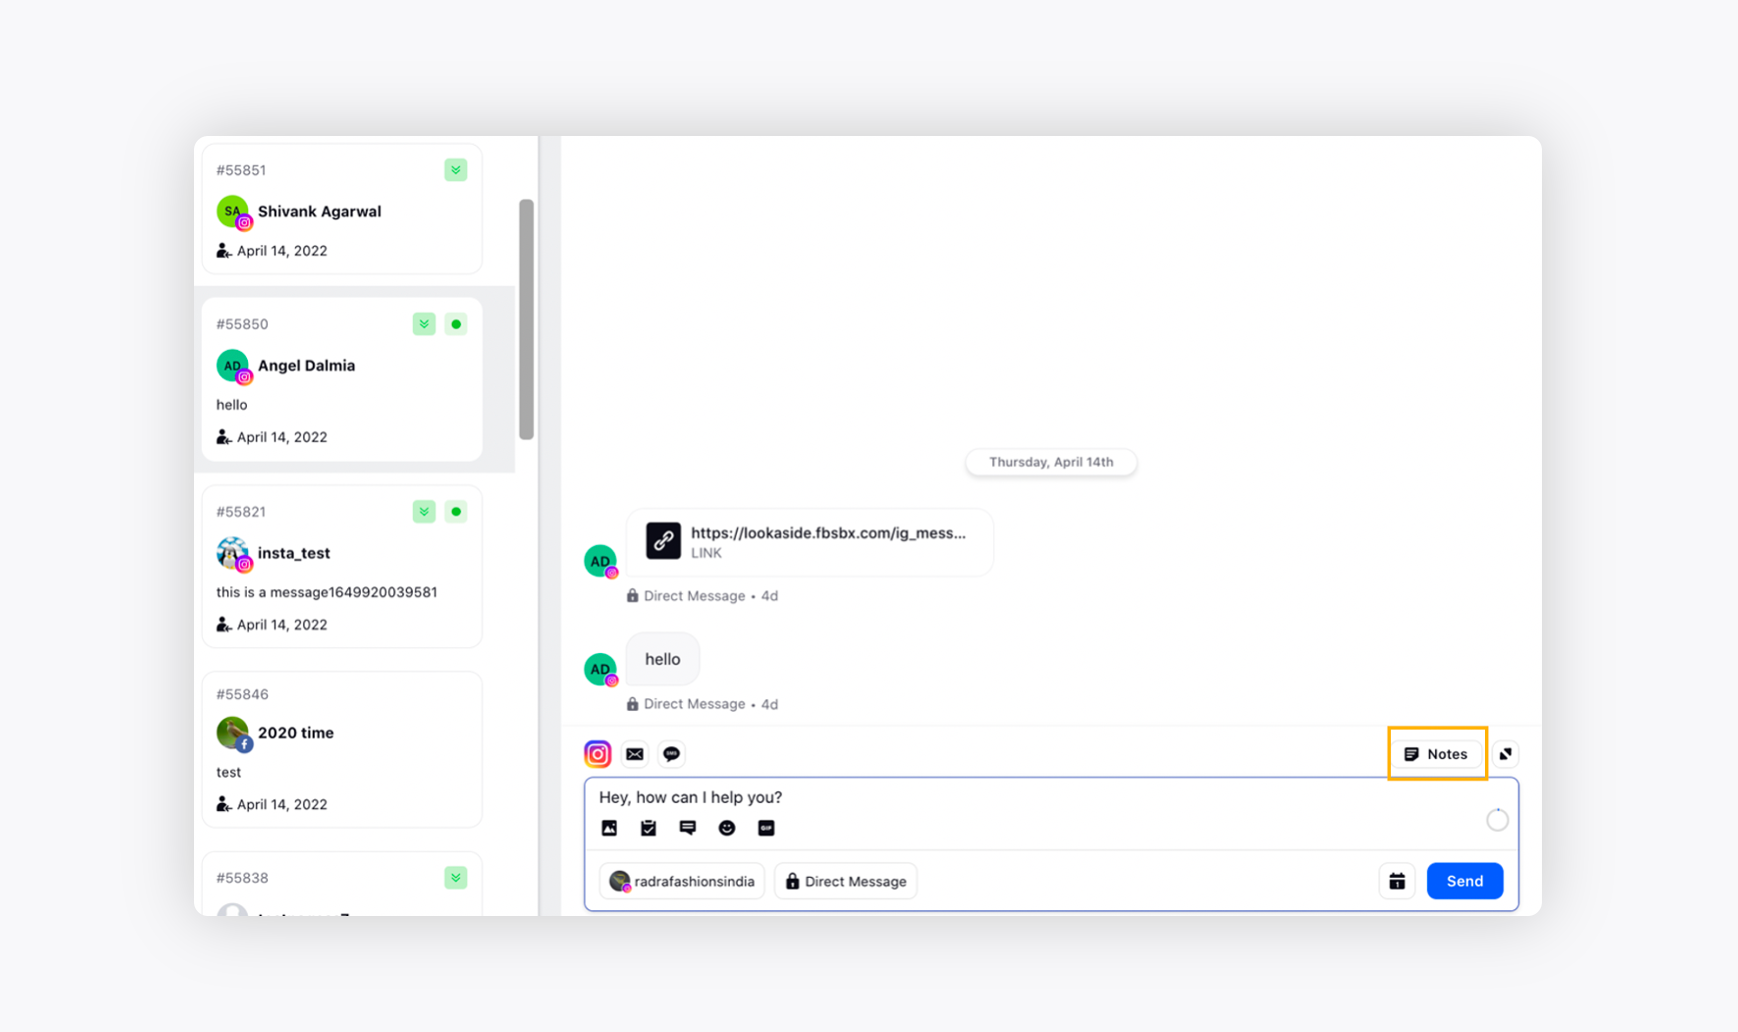
Click Notes in the top right corner of the reply editor to add notes to tickets that are only visible to agents logged in to Sprinklr . If agents have a large note to add, they can click on the Expand icon beside Notes.
Click Send to send a reply to the customer.
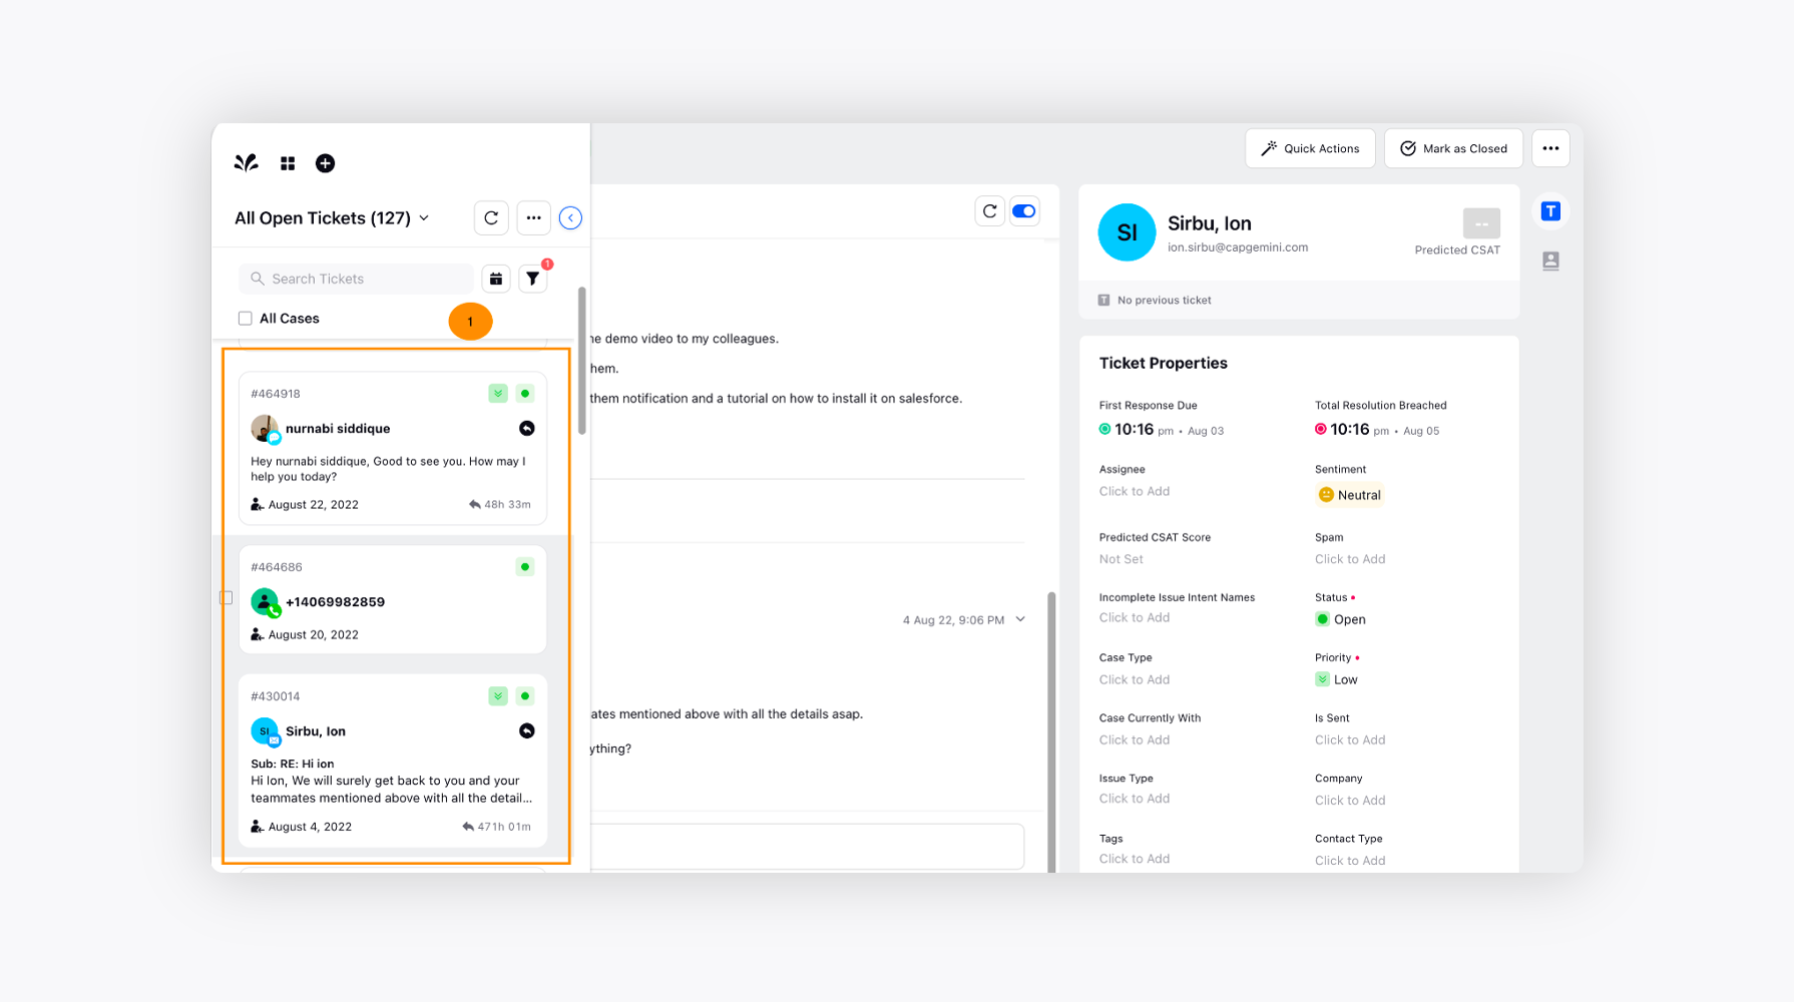
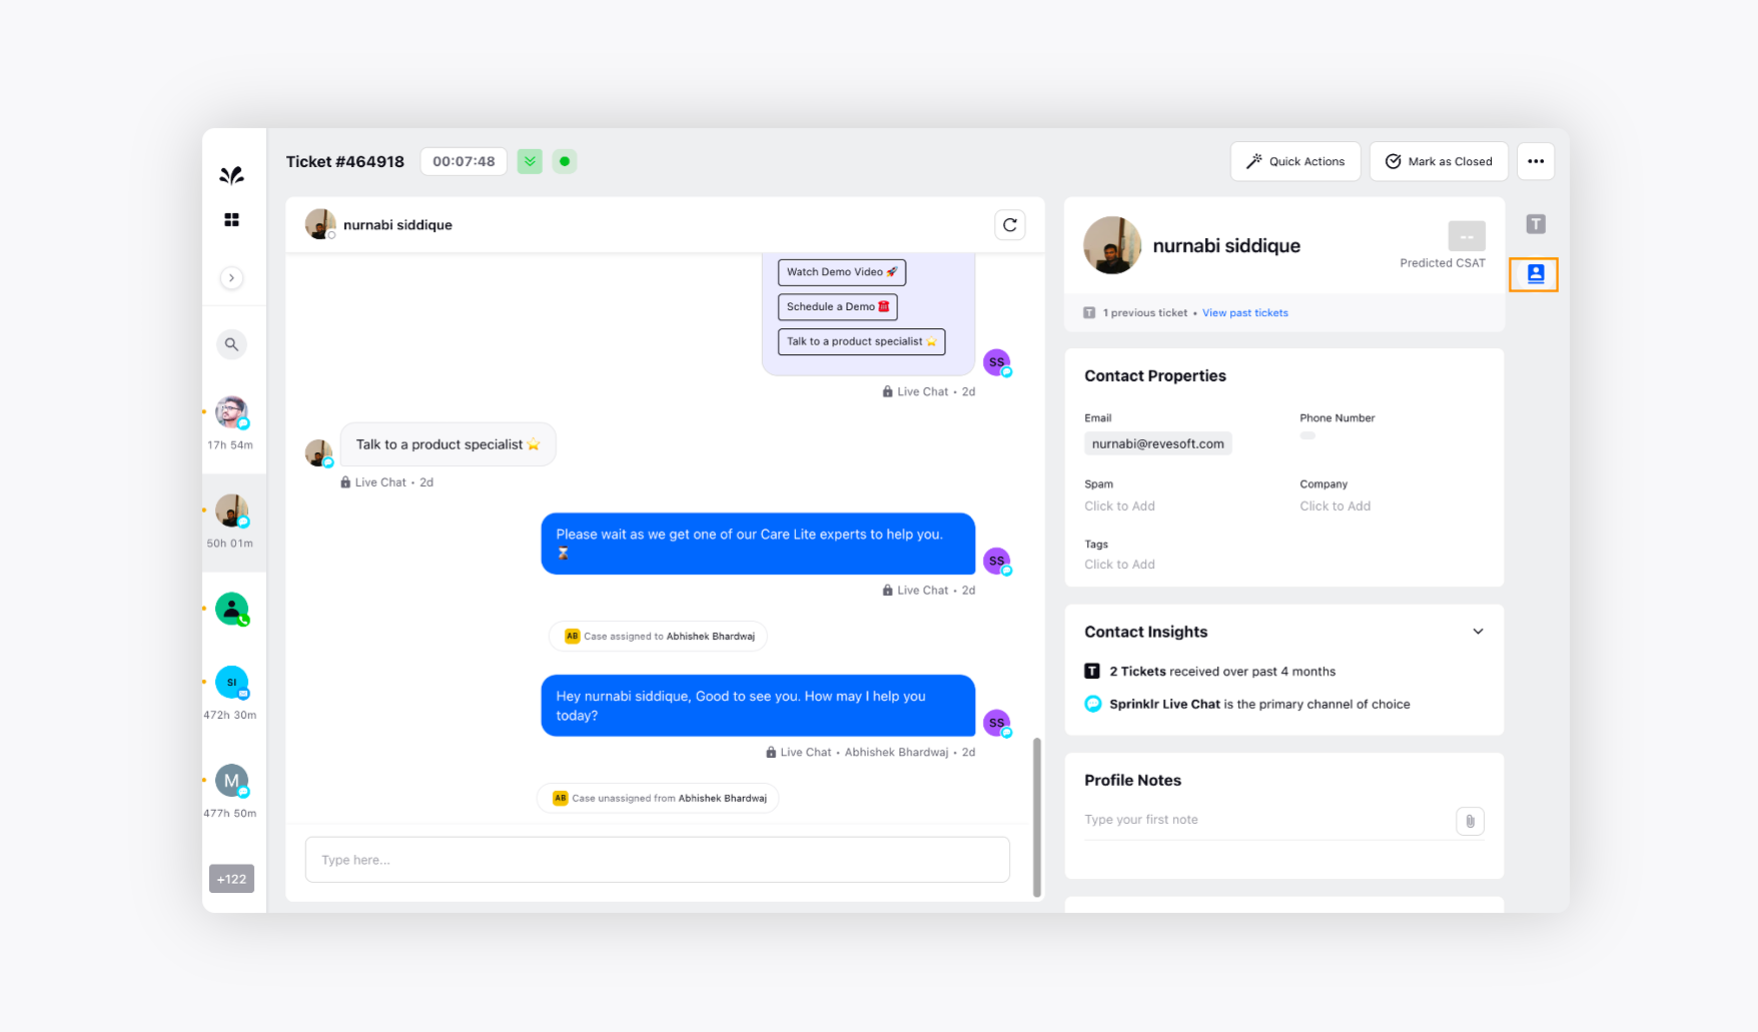
Click the Ticket Details tab on the right of the Care Console window to view widgets consisting of different Ticket Properties, related Knowledge Base articles, To-Dos, Ticket Notes, and Ticket Activity.
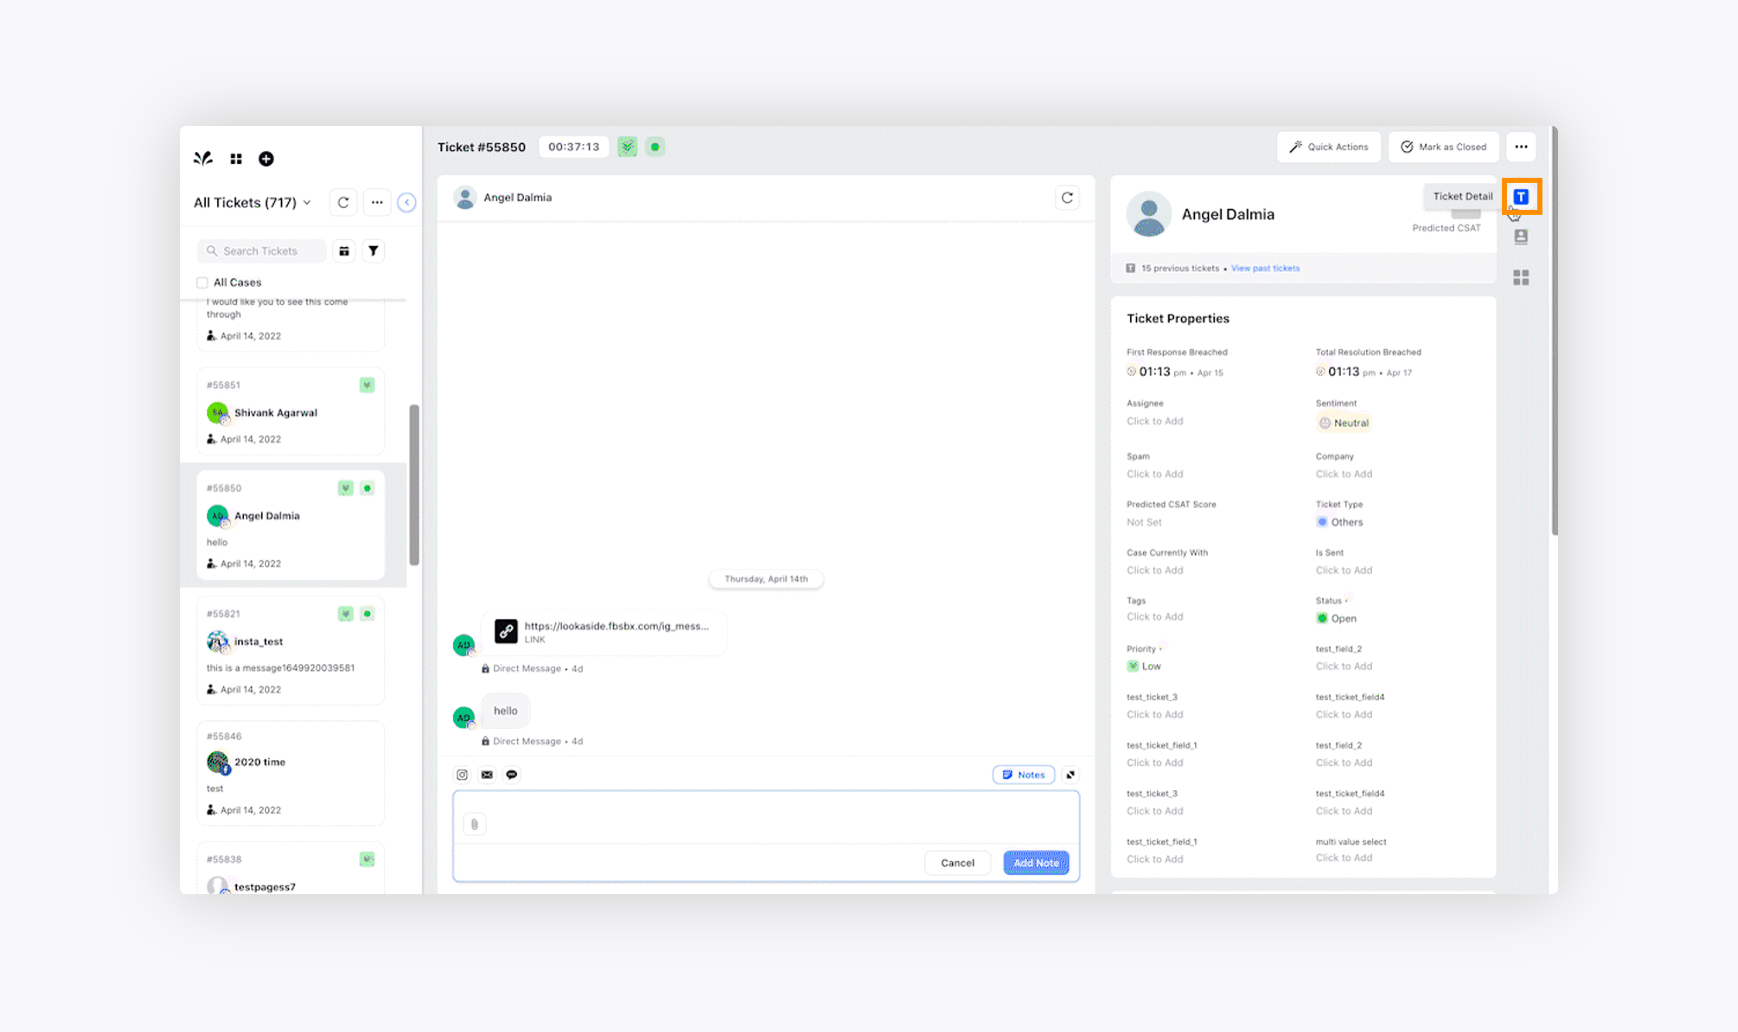
Click the Contact 360 tab to view widgets consisting of different Contact Properties, Contact Insights, Notes, and Past Tickets received by a particular customer.
Additional Care Console actions
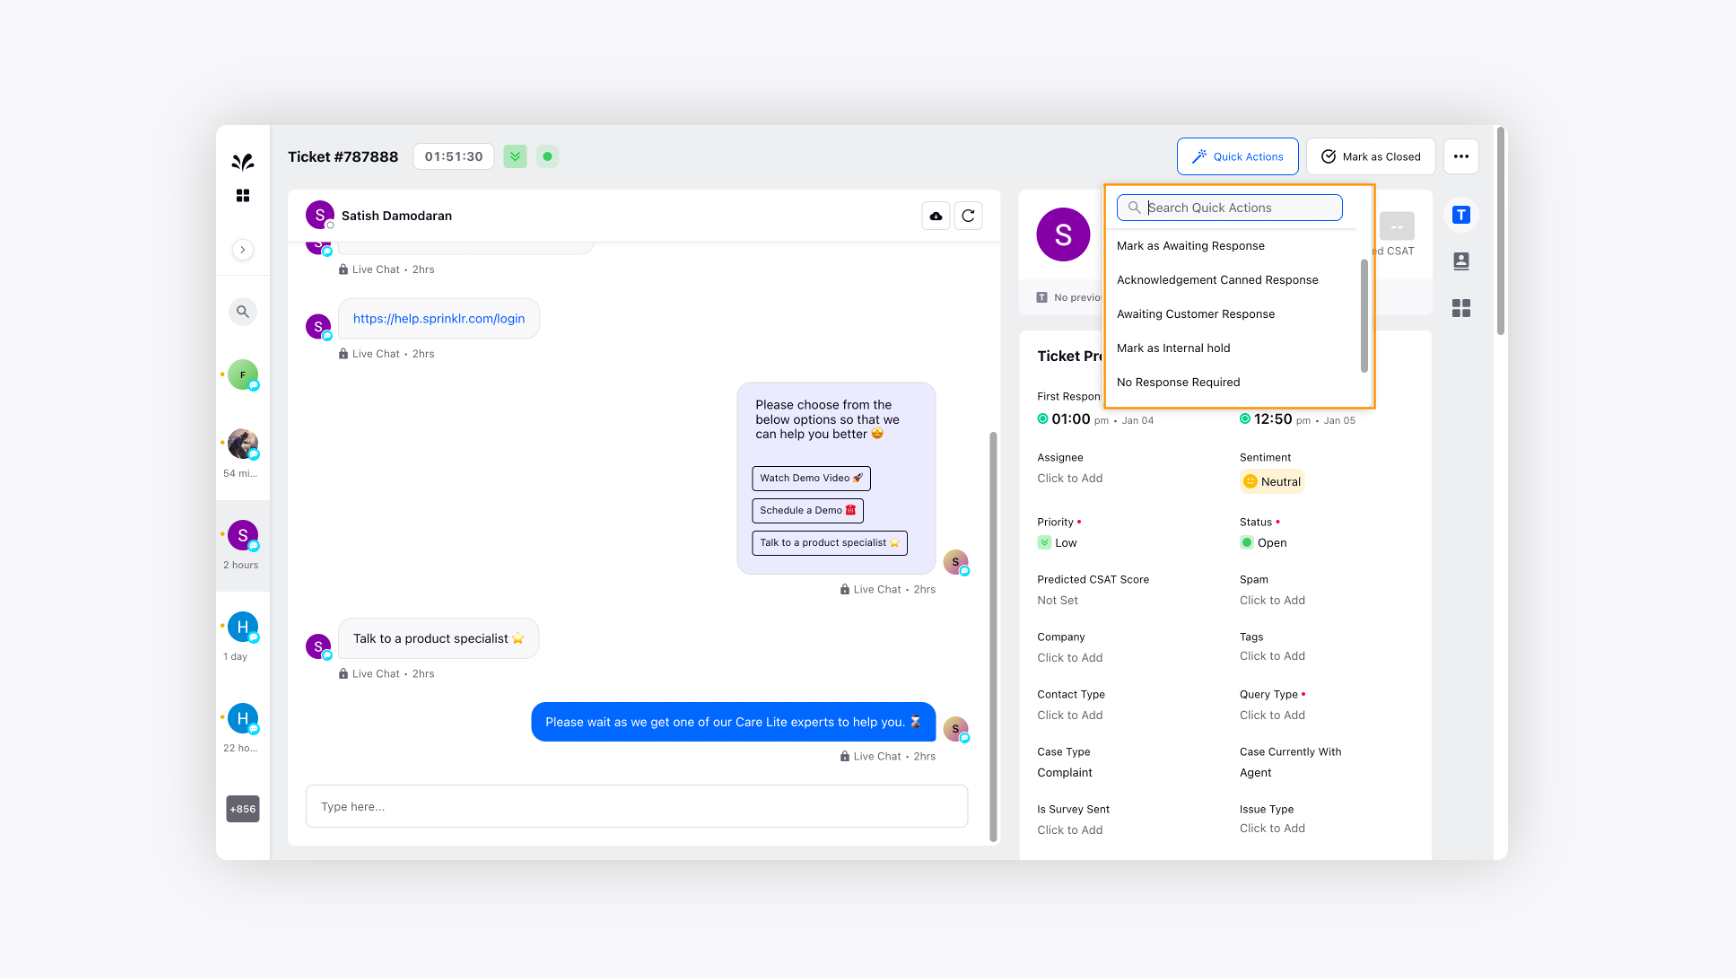
Quick Actions
Agents can apply Quick Actions on the current ticket in a few clicks. These quick actions will help them bring down multiple repetitive actions to a single click, saving time, and increasing work efficiency. For more information, see Use Quick Actions in Care Console.
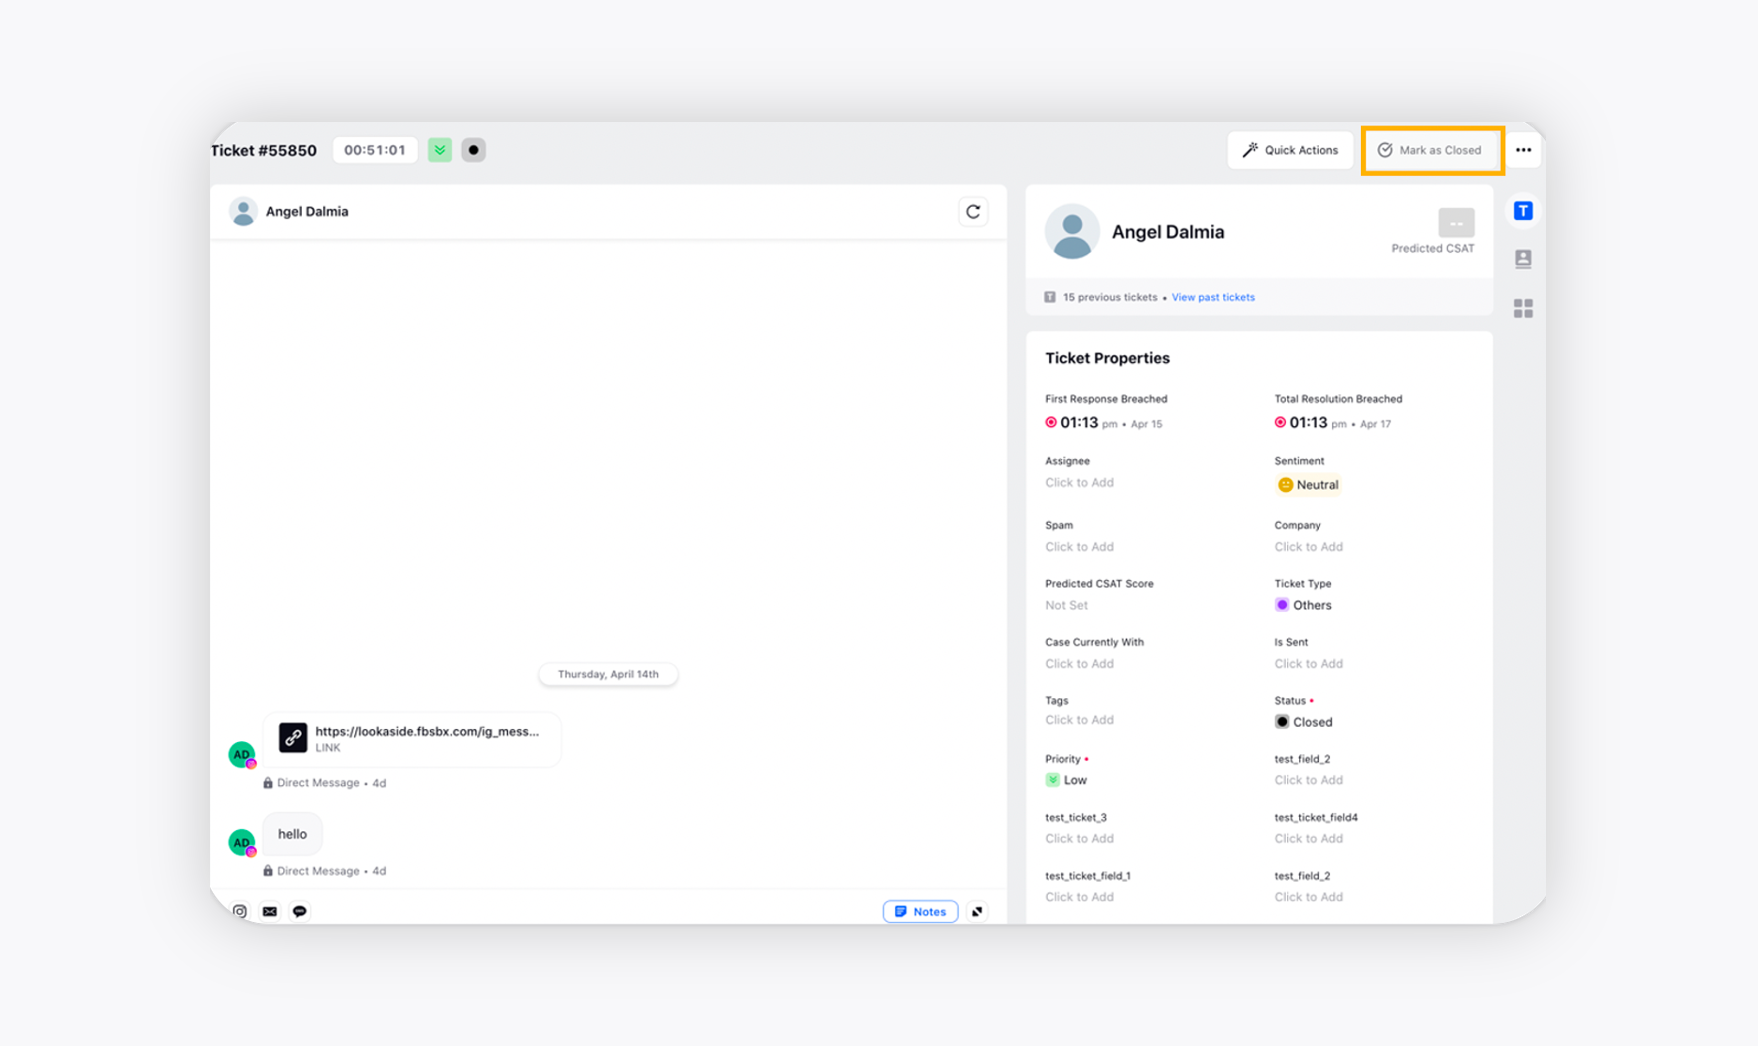
Mark as Closed
After providing a resolution to the customer, agents can close the ticket by clicking the Mark as Closed button in the top right corner and start working on another ticket.
Delete Ticket
If an agent finds a duplicate or spam ticket, they can easily delete that ticket. The deleted ticket will move to the trash, and any new incoming message from that same customer will create a new ticket.
Follow the below step to delete a ticket:
On the Care Console window, hover over the Options icon in the top right corner and select Delete Ticket.
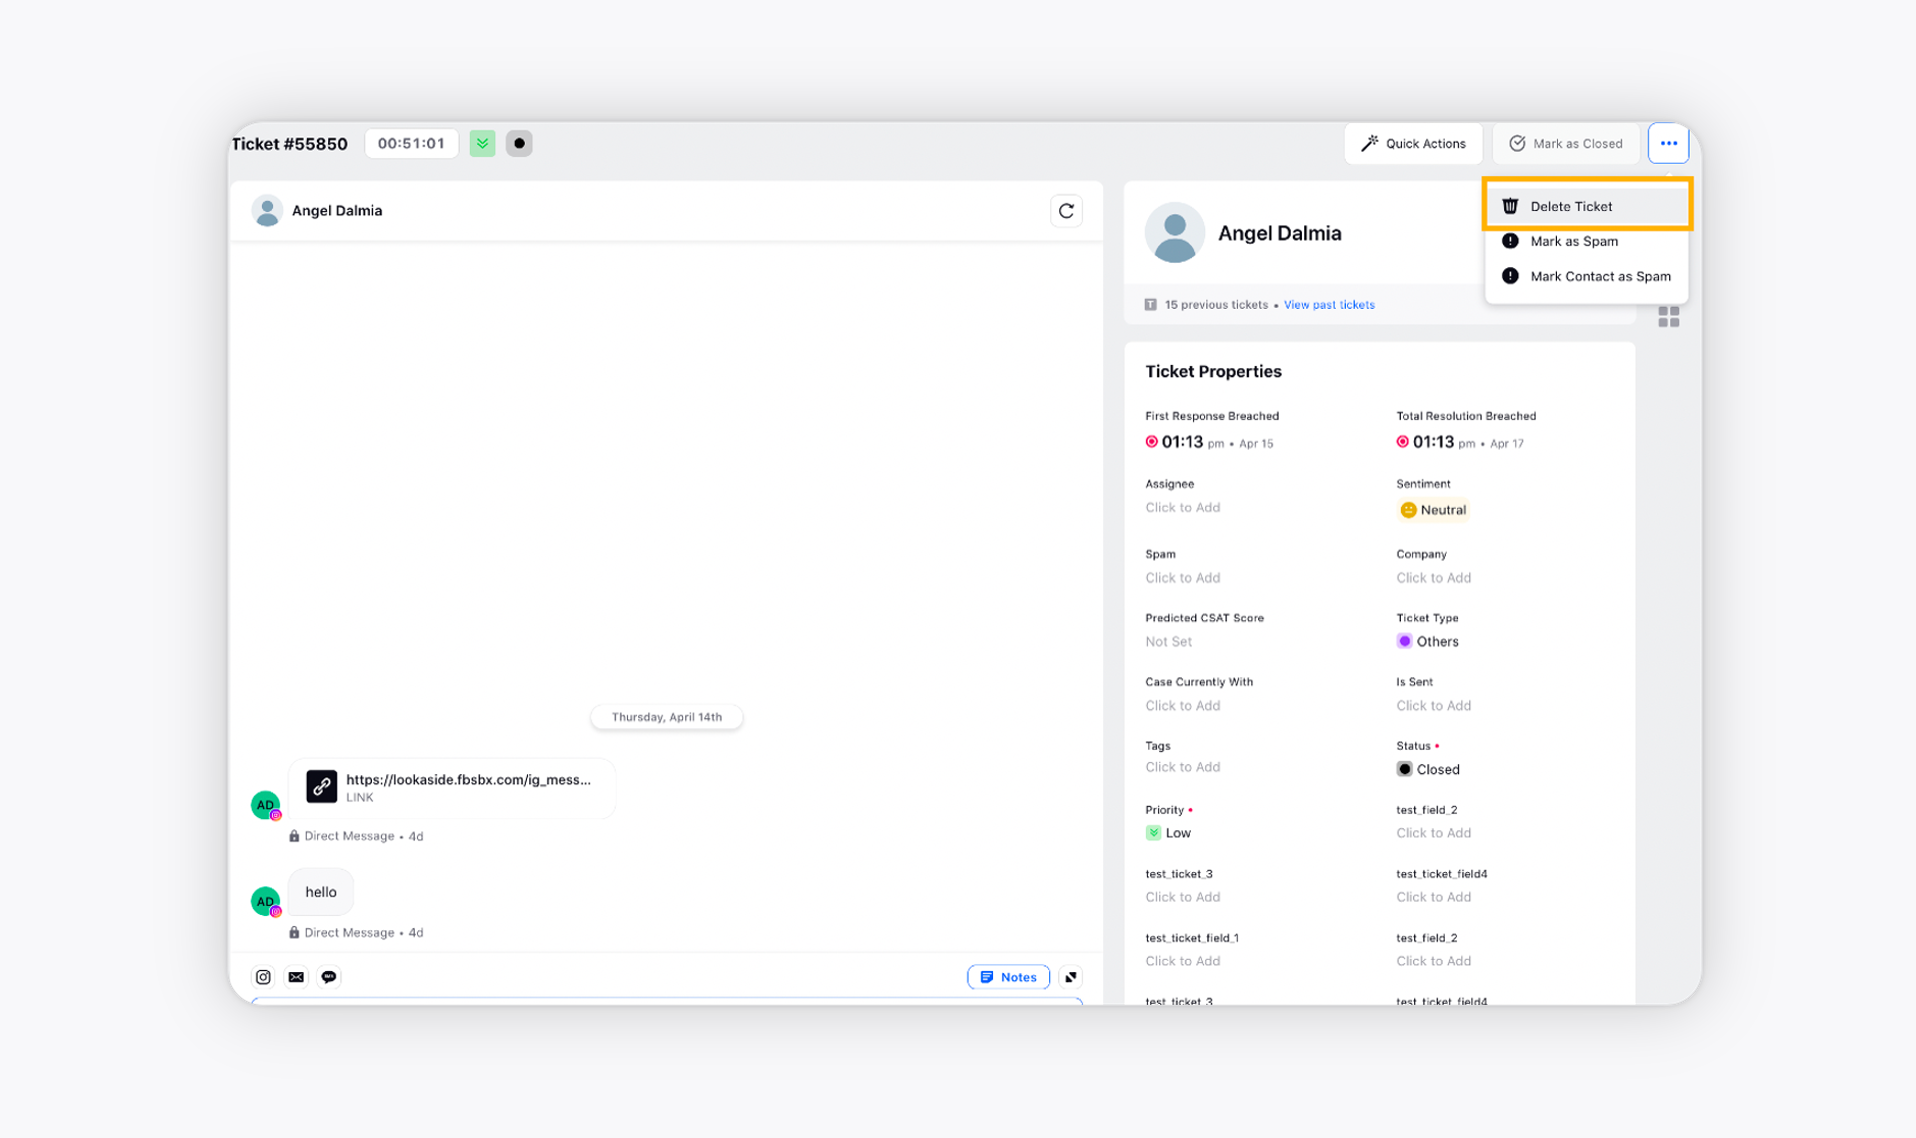
Mark as Spam
Agents can mark Tickets containing malicious attachments or messages that may compromise valuable data and damage the system as Spam. Click here for more details.
Follow the below step to mark a ticket as spam:
On the Care Console window, hover over the Options icon in the top right corner and select Mark as Spam.
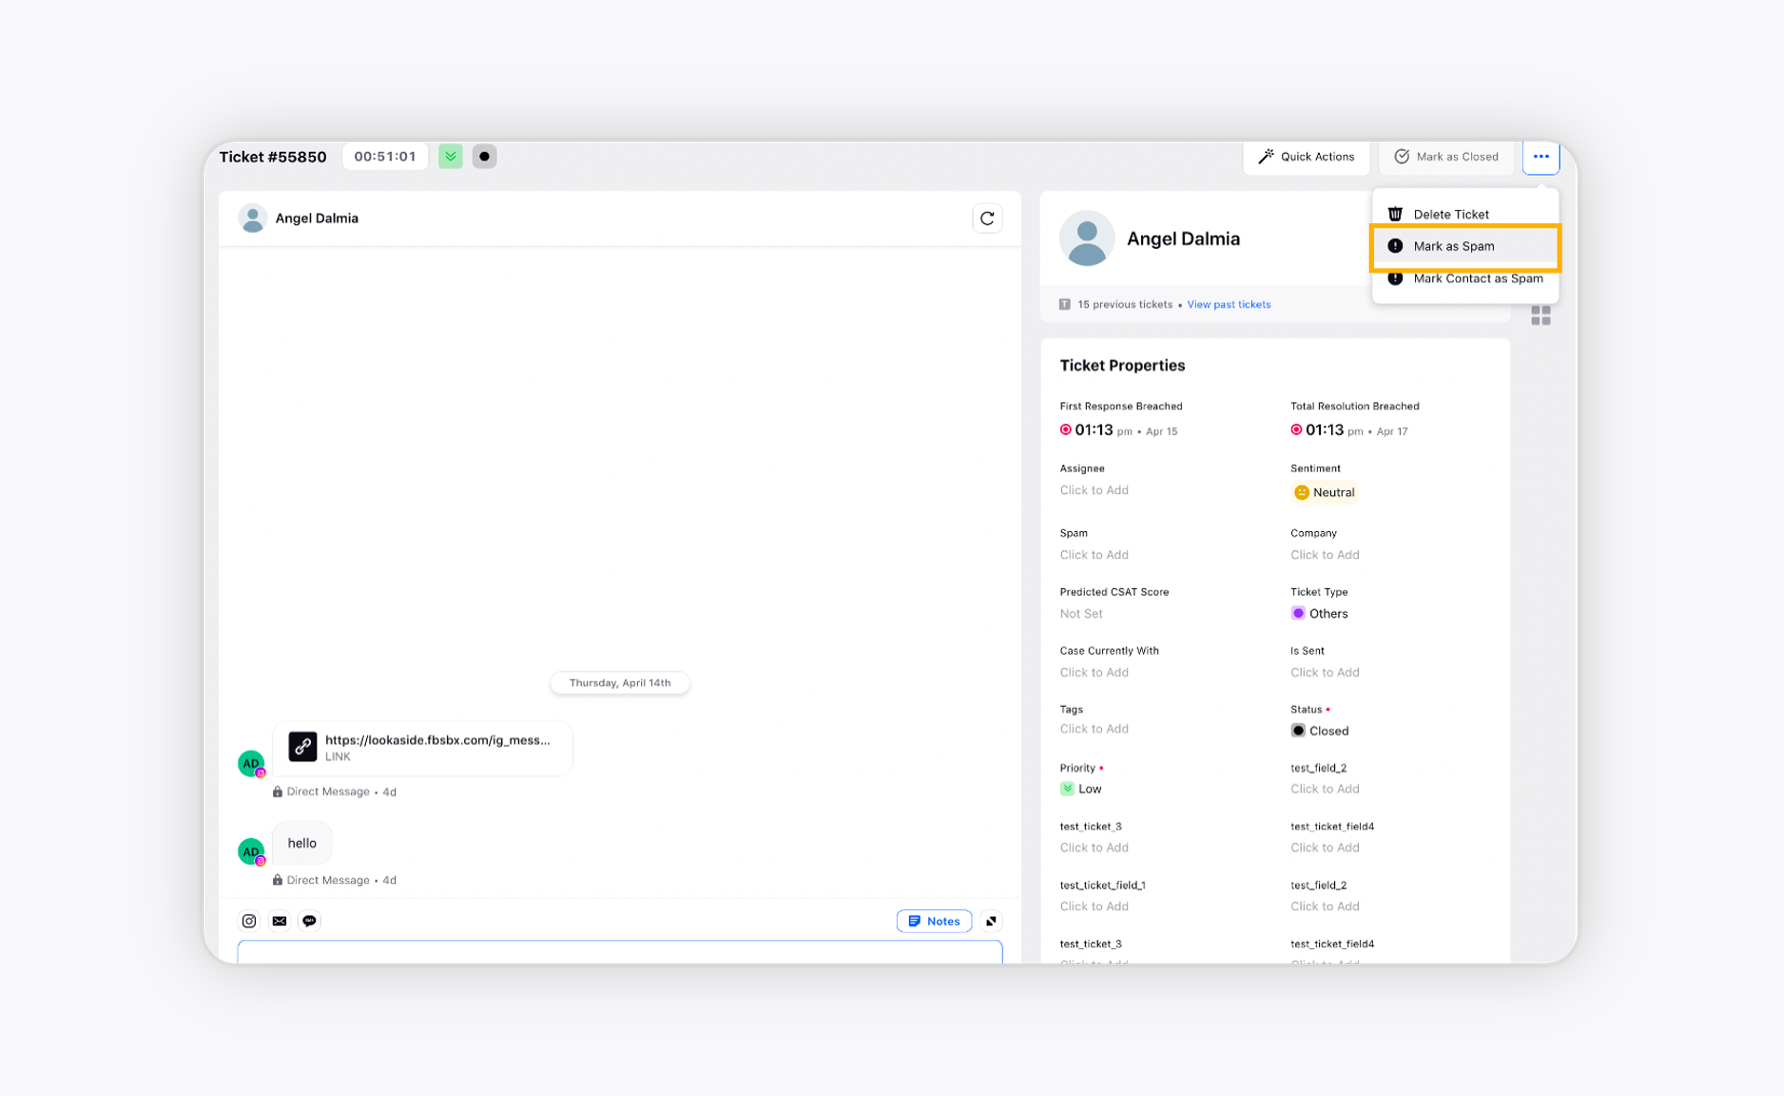
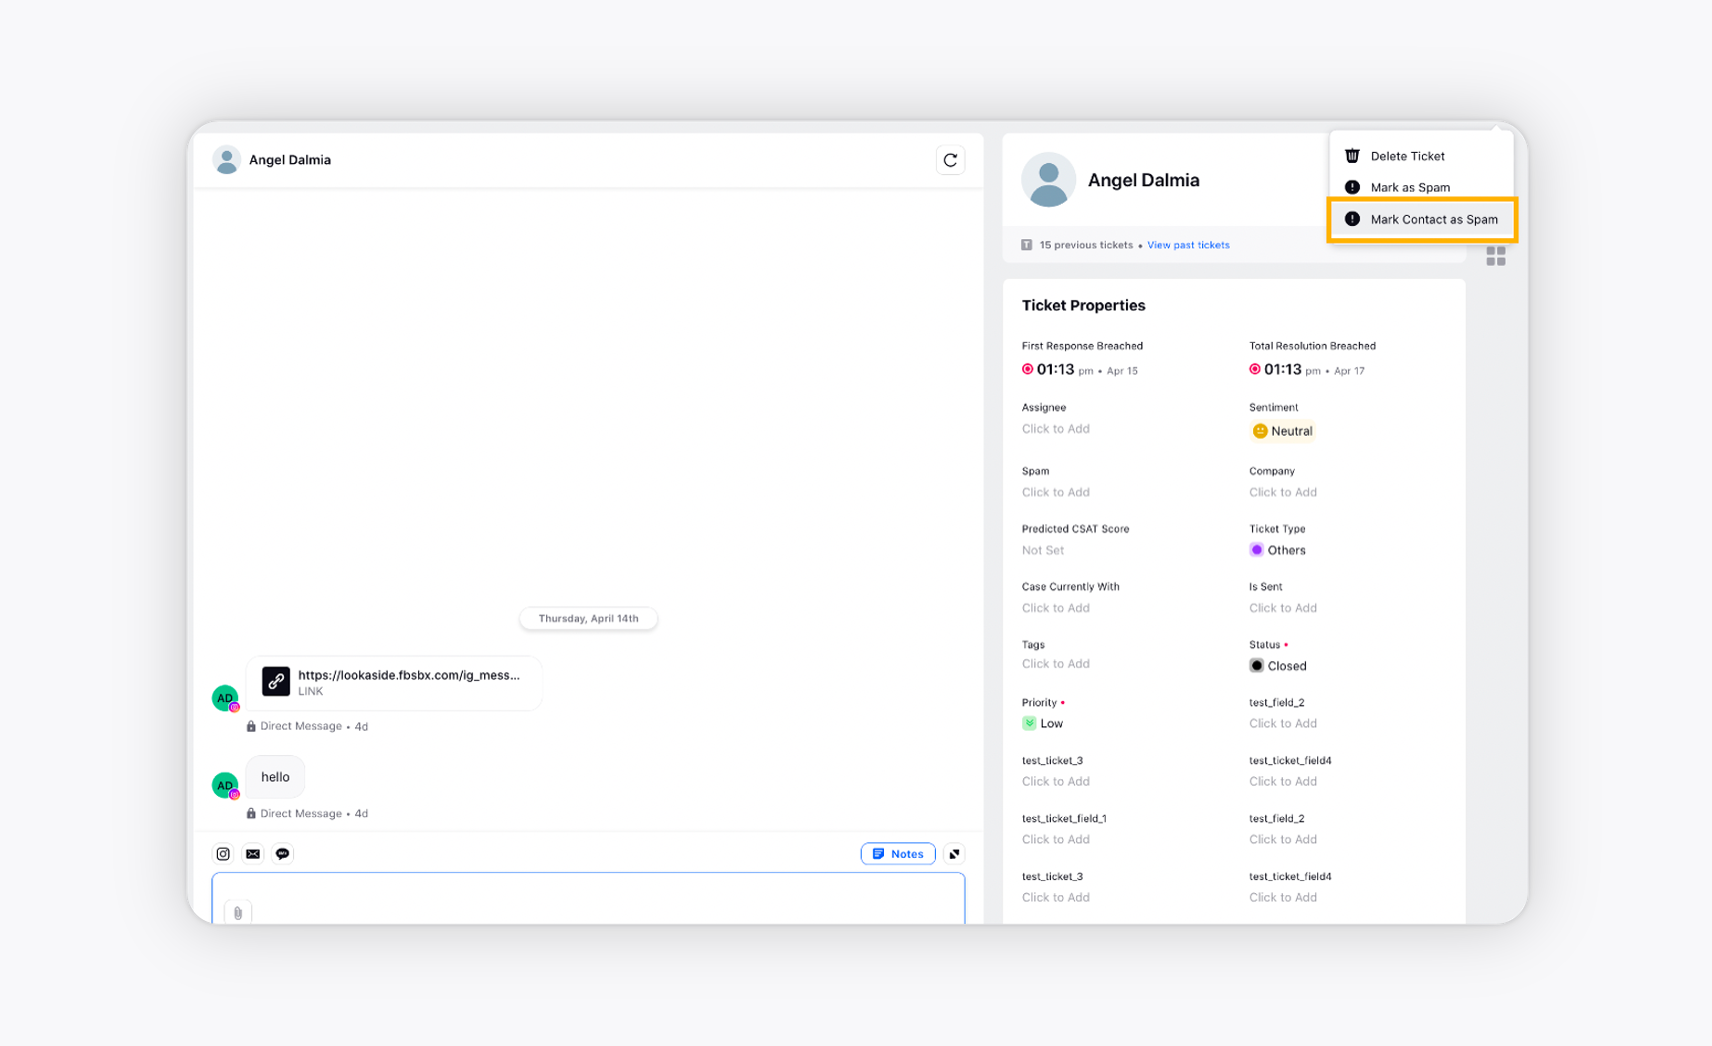
Mark Contact as Spam
If an agent finds that the customer's conversation pattern is abusive and not issue-oriented, they can mark the contact as Spam. This will treat all further communication from that particular contact as spam. Click here for more details.
Follow the below step to mark a contact as spam:
On the Care Console window, hover over the Options icon in the top right corner and select Mark Contact as Spam.