
Using Quick Actions to remove redundancies in workflows
Updated
How Quick Actions can help brands improve their work efficiency by reducing multiple repetitive actions to a single click.
Quick Actions are a combination of frequently performed actions on tickets. They help you and your agents bring down multiple repetitive actions to a single click, thereby saving time and increasing work efficiency.
For example, if you need to frequently perform a set of actions on a ticket, such as changing its status, changing the assignee, and adding a note, you can create a quick action to execute them all in one click.
Refer to the following video to better understand quick actions:
You can further read the below article to see the steps of creating a quick action and more:
To create a Quick Action
Log in to Care Console. On the Sprinklr Service window, click the Settings icon on the left-hand side. Click Quick Actions within Workflow.

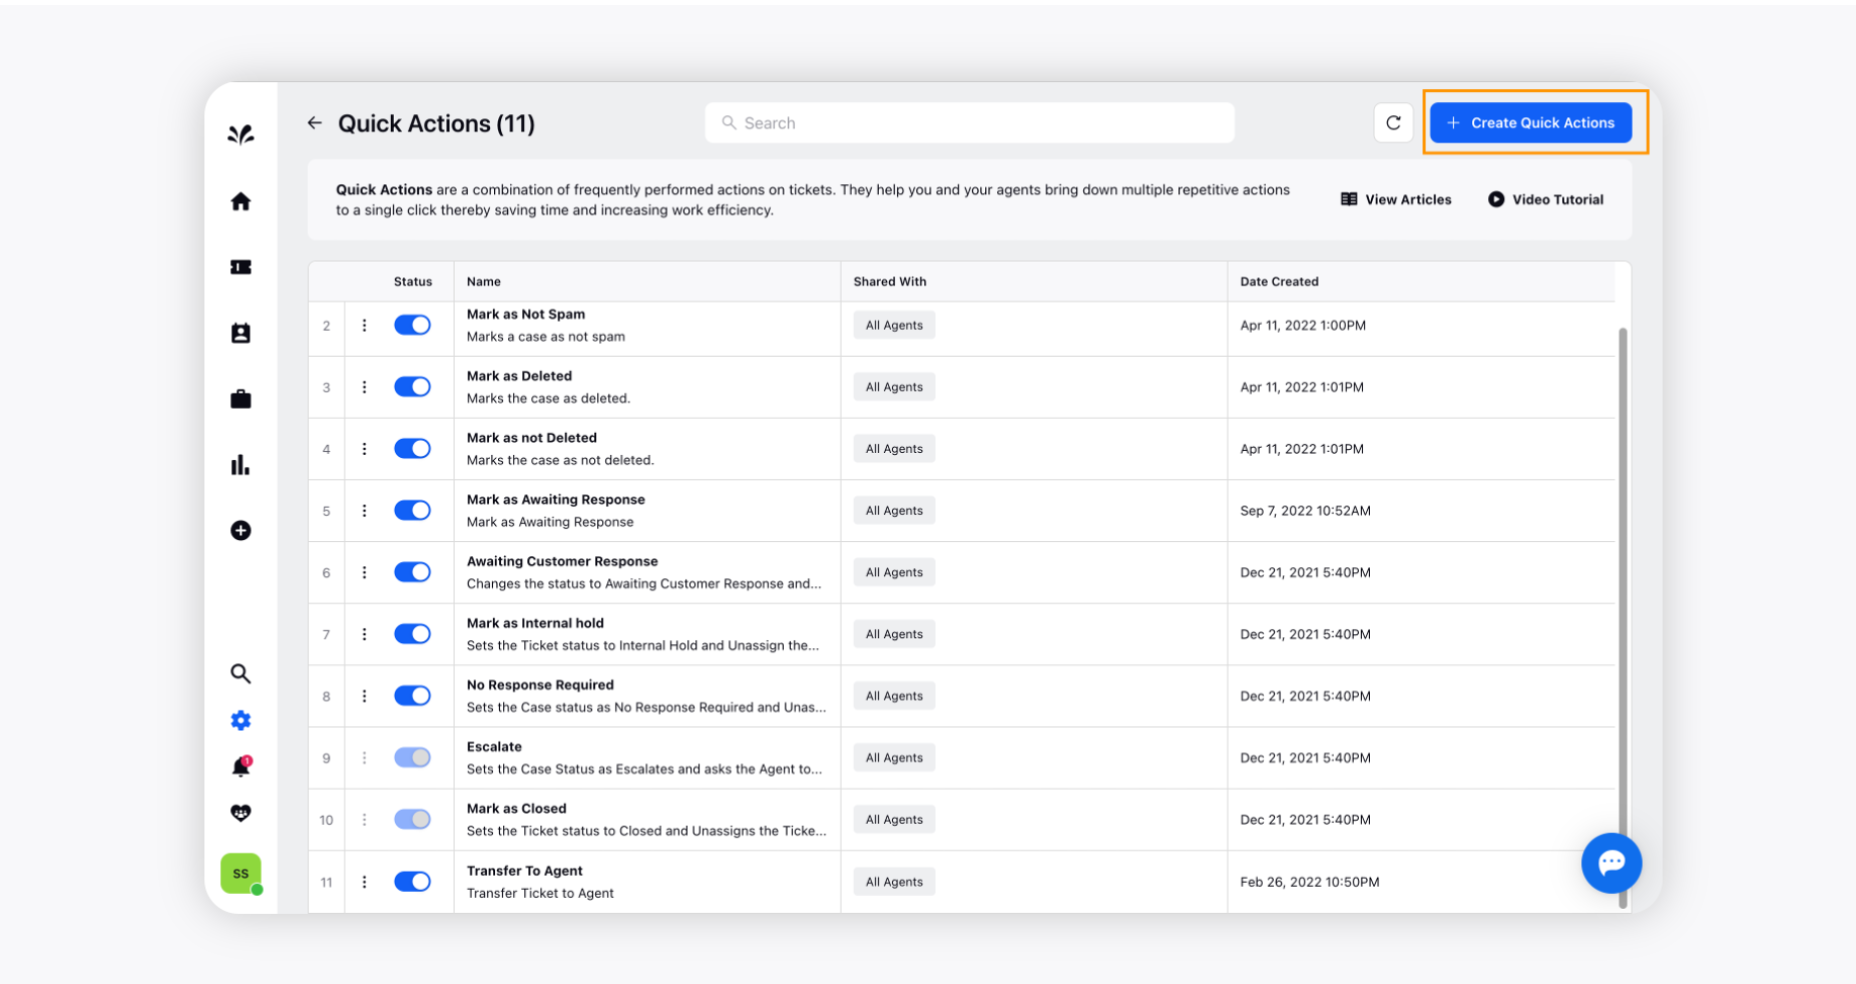
To create a new quick action, click Create Quick Action in the top right corner of the Quick Actions window.
On the Create Quick Actions window, provide a Name and an optional Description for your quick action.
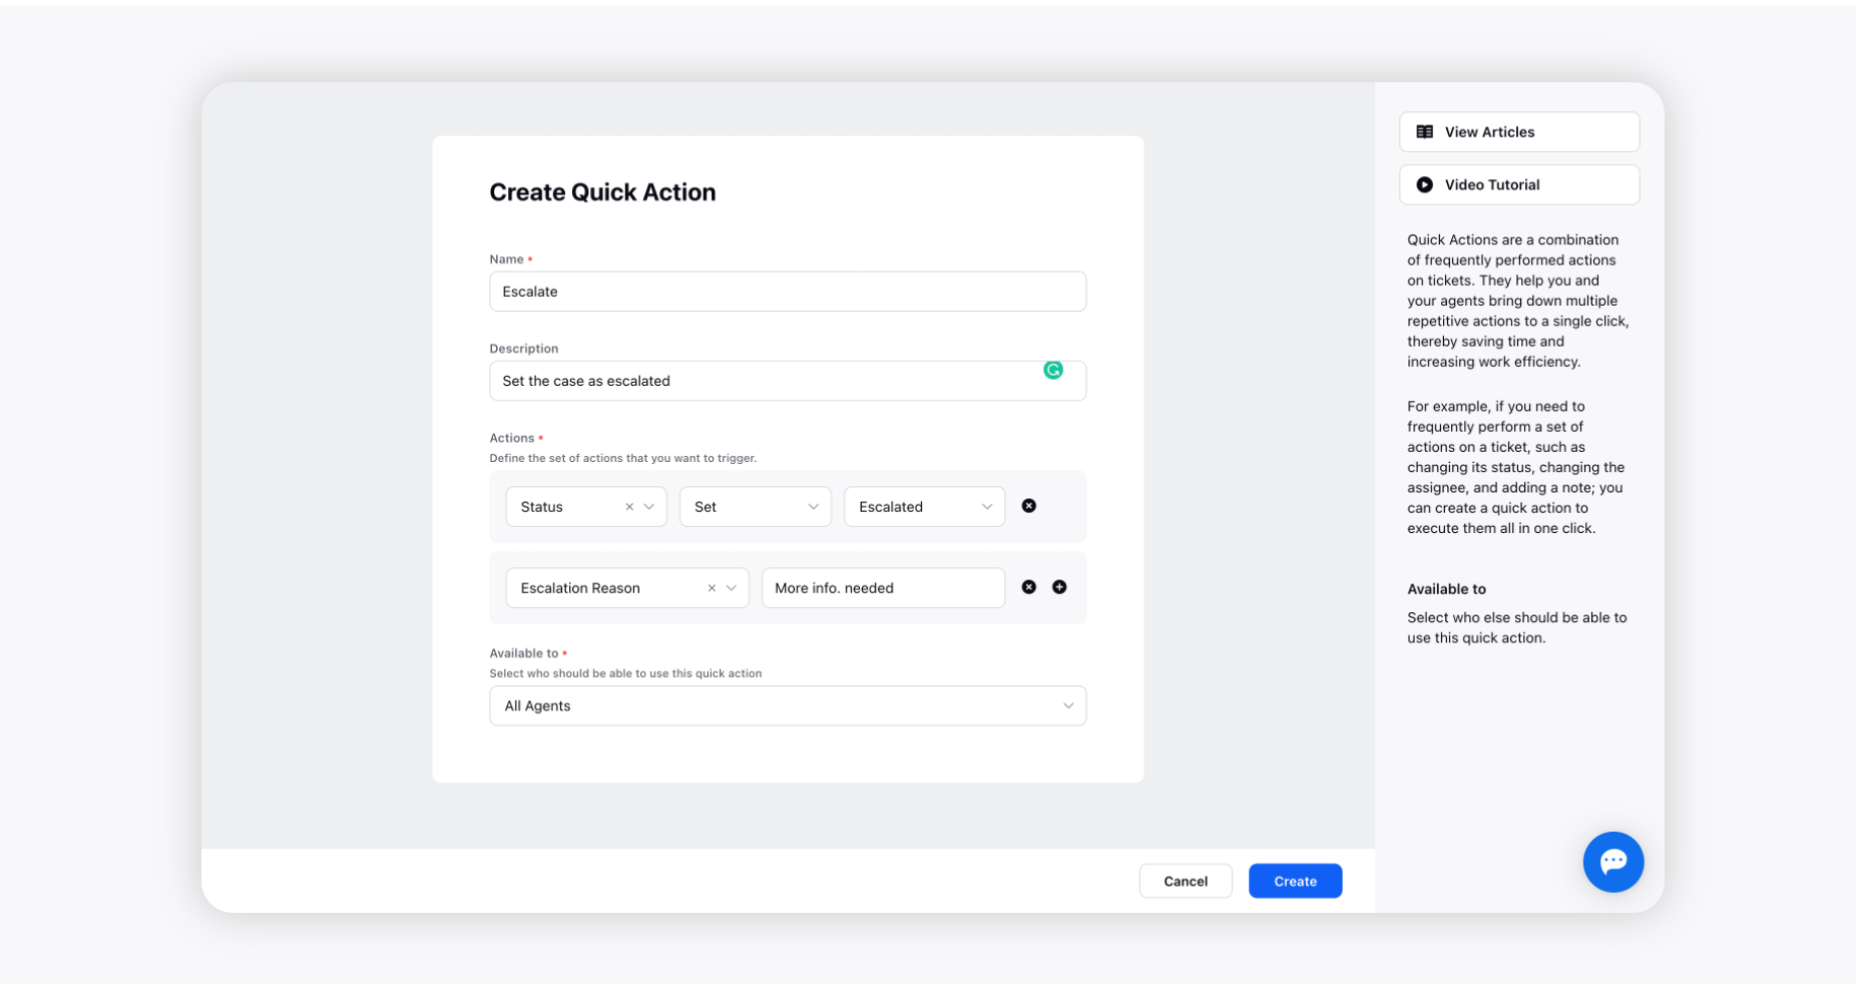
Action lets you set the task details that you want to perform on your tickets. Here, you can provide the set of conditions that will be triggered after applying quick actions to your desired tickets. You can add multiple actions at a time.
For example, if your quick action conditions are:
Status Set to Escalated
Escalation Reason [More information needed]
Then, all the tickets where you apply this quick action will be escalated with the escalation reason "more information needed." To learn more about the supported Quick Actions, see Quick Action — Description.
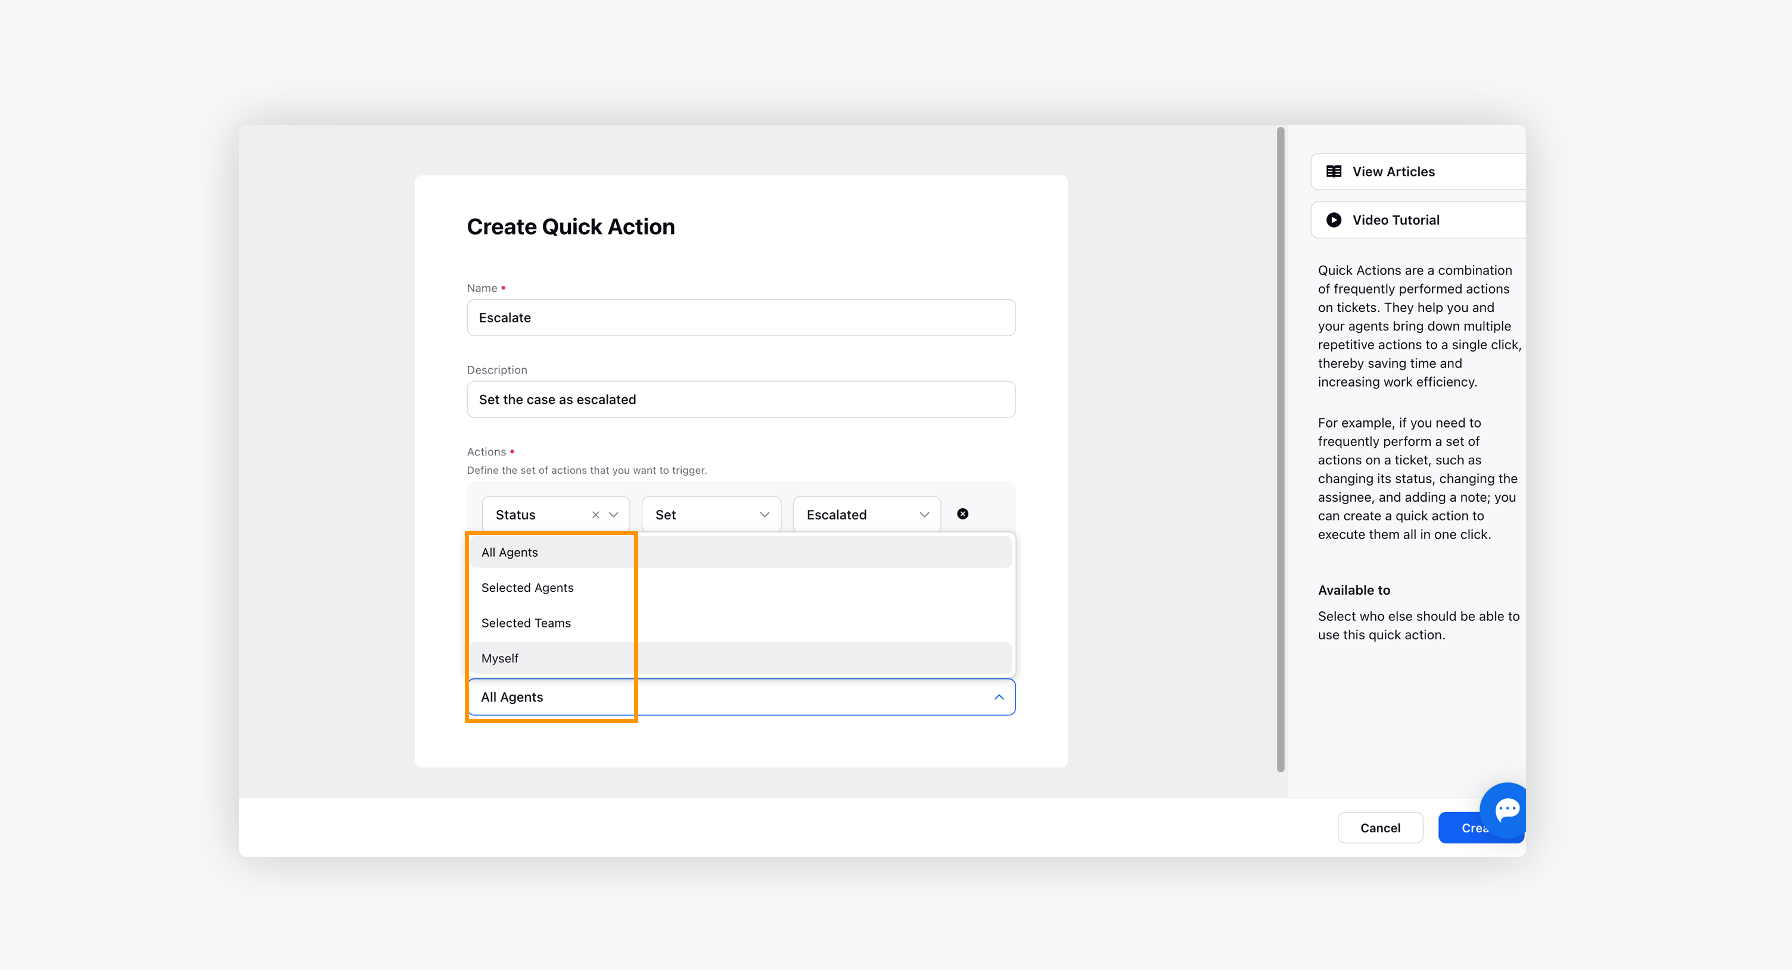
Select with whom you want to share the quick action you are creating from the Available to drop-down menu. You can share it with yourself, everyone in the organization, or a particular team(s).
Click Create in the bottom right corner to complete the task.
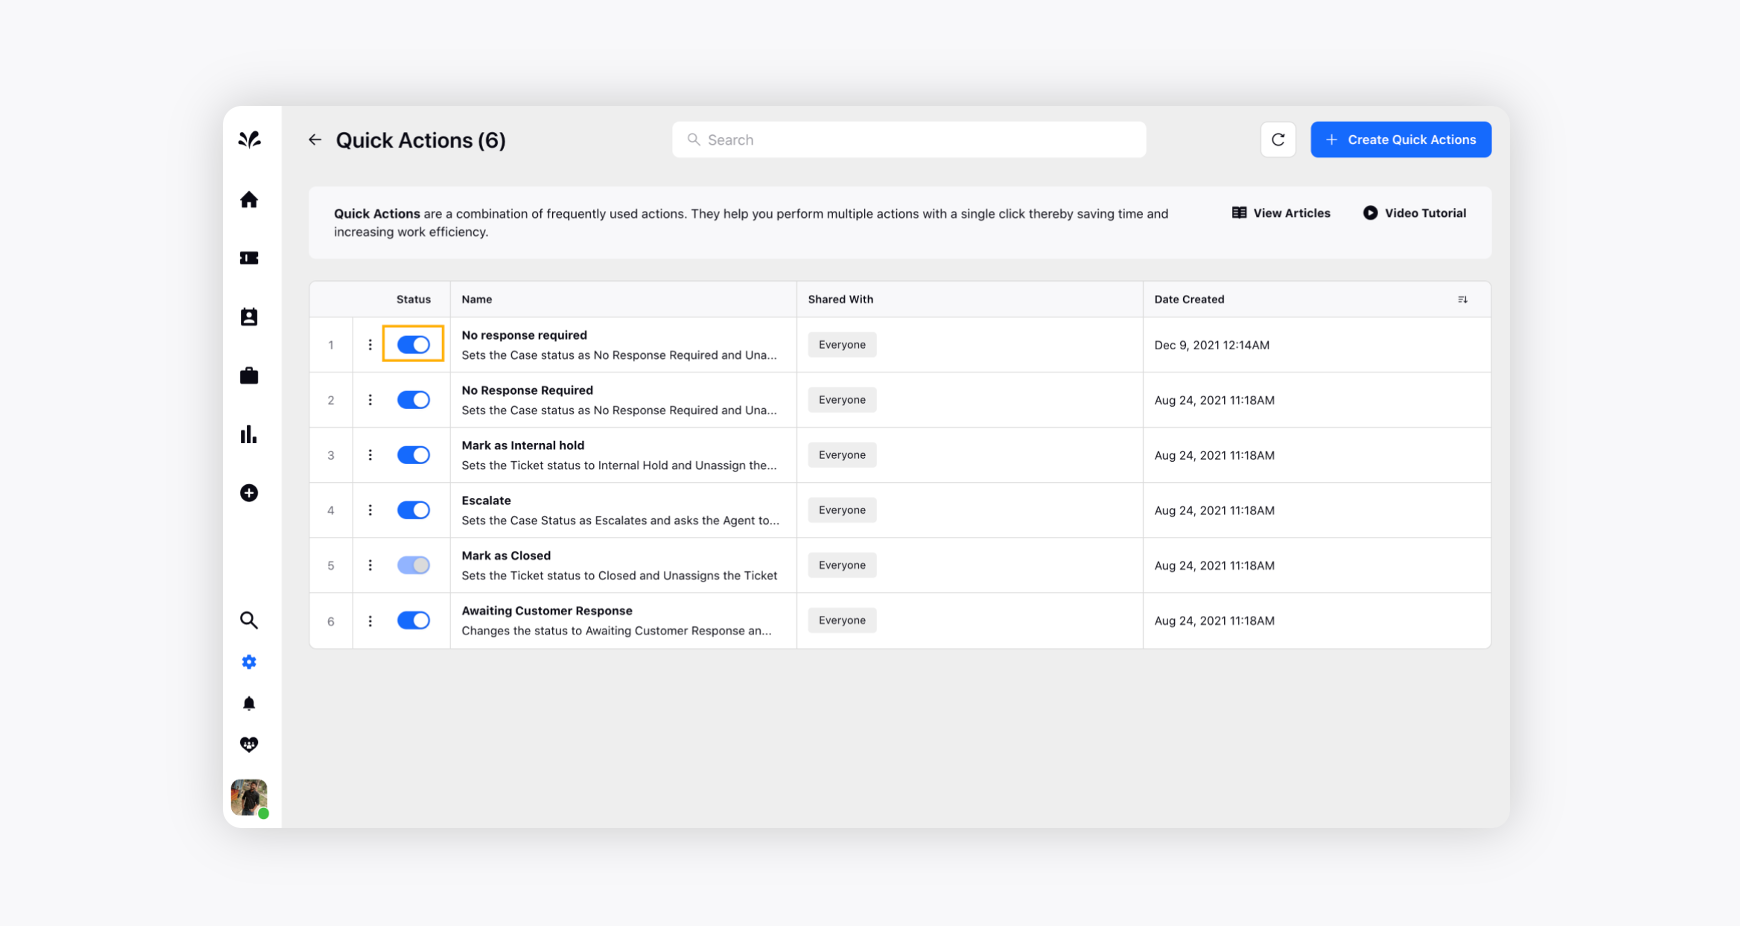
To change the Quick Action status
On the Quick Actions window under the Status column, locate the desired quick action and Toggle On to activate or Toggle Off to deactivate your quick action.
To edit a Quick Action
On the Quick Actions window, hover over the Options icon alongside the desired quick actions and click Edit.

On the Edit Quick Actions window, make the required changes and click Create in the bottom right corner to save.
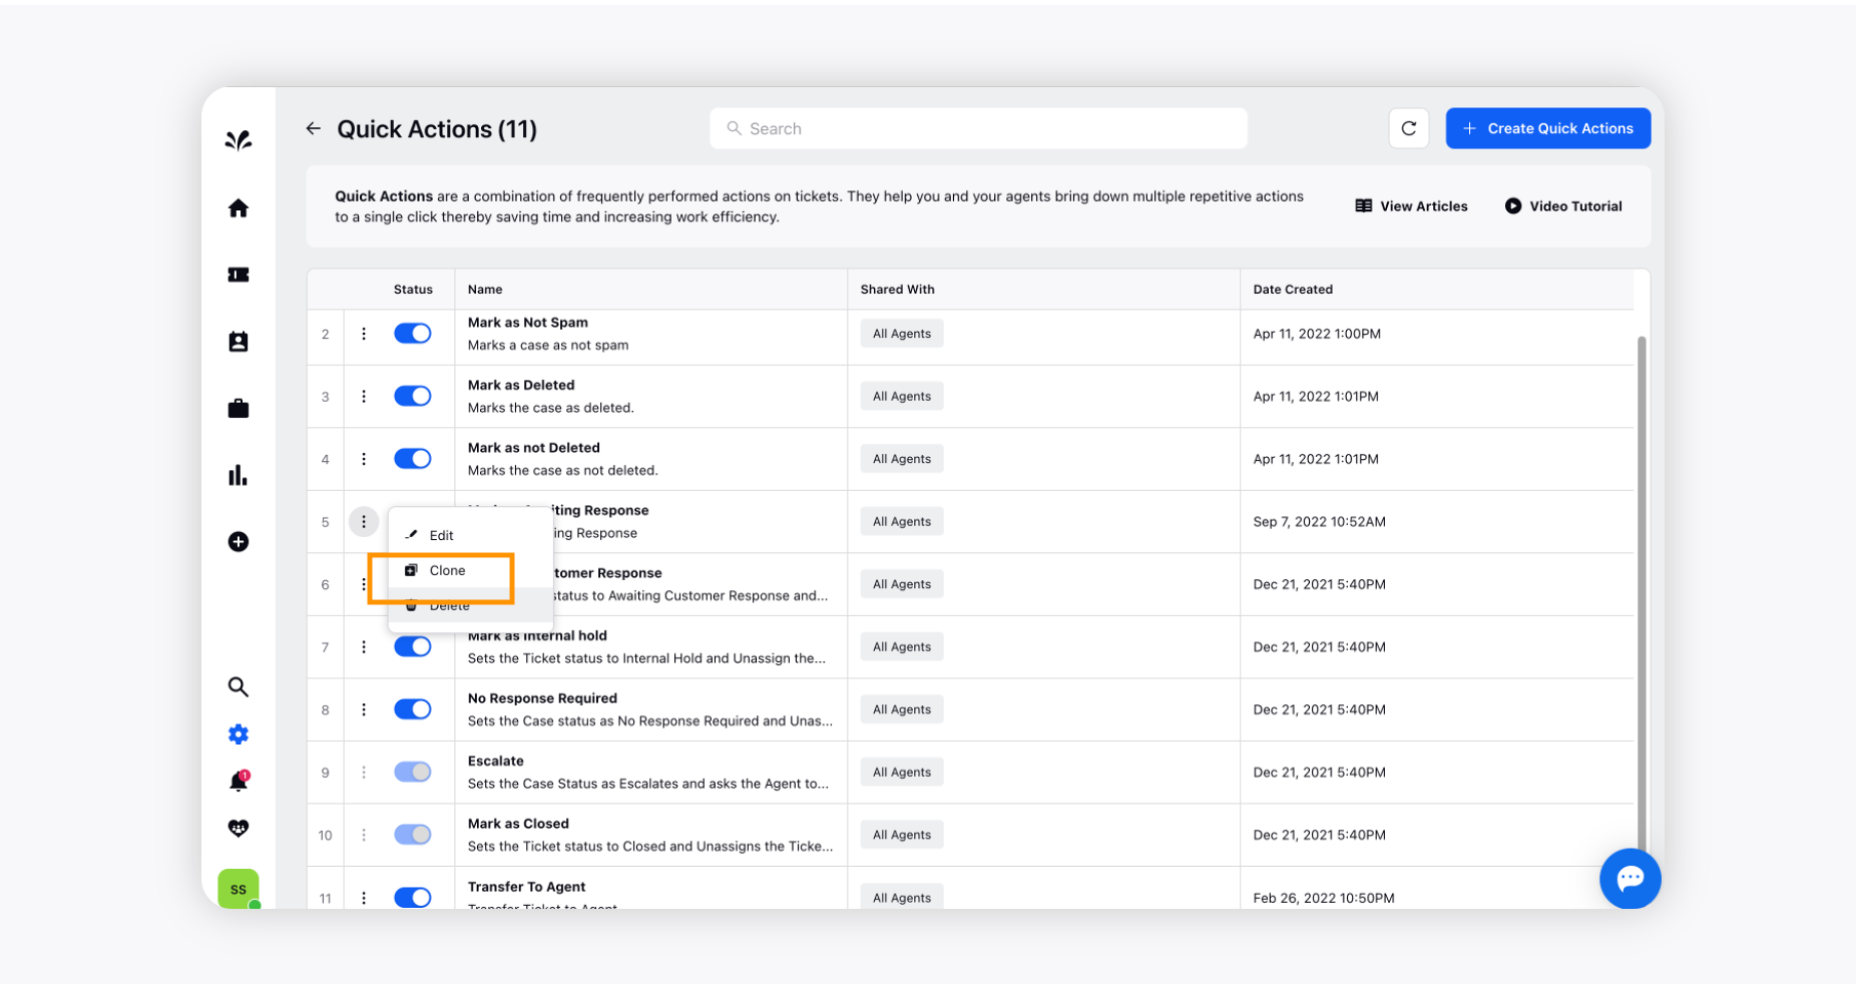
To clone a Quick Action
Cloning Quick Actions lets you make a copy of the original action and use it without having to create it from scratch. For example, if you have created a Quick Action for yourself and also need to create a similar quick action for Team A, click clone to create a duplicate of the quick action. After cloning, edit it and replace the share with an option from myself to Team A.
On the Quick Actions window, hover over the Options icon alongside the desired quick action and click Clone. You will be redirected to the Create Quick Action window.
On the Create Quick Actions window, you can edit it to make further changes. For more information, see Create a Quick Action.
Once done, click Create in the bottom right corner. Your quick action will be cloned successfully.
To delete a Quick Action
On the Quick Actions window, hover over the Options icon alongside the desired quick action and select Delete.
On the Quick Actions window, hover over the Options icon alongside the desired quick action and select Delete.
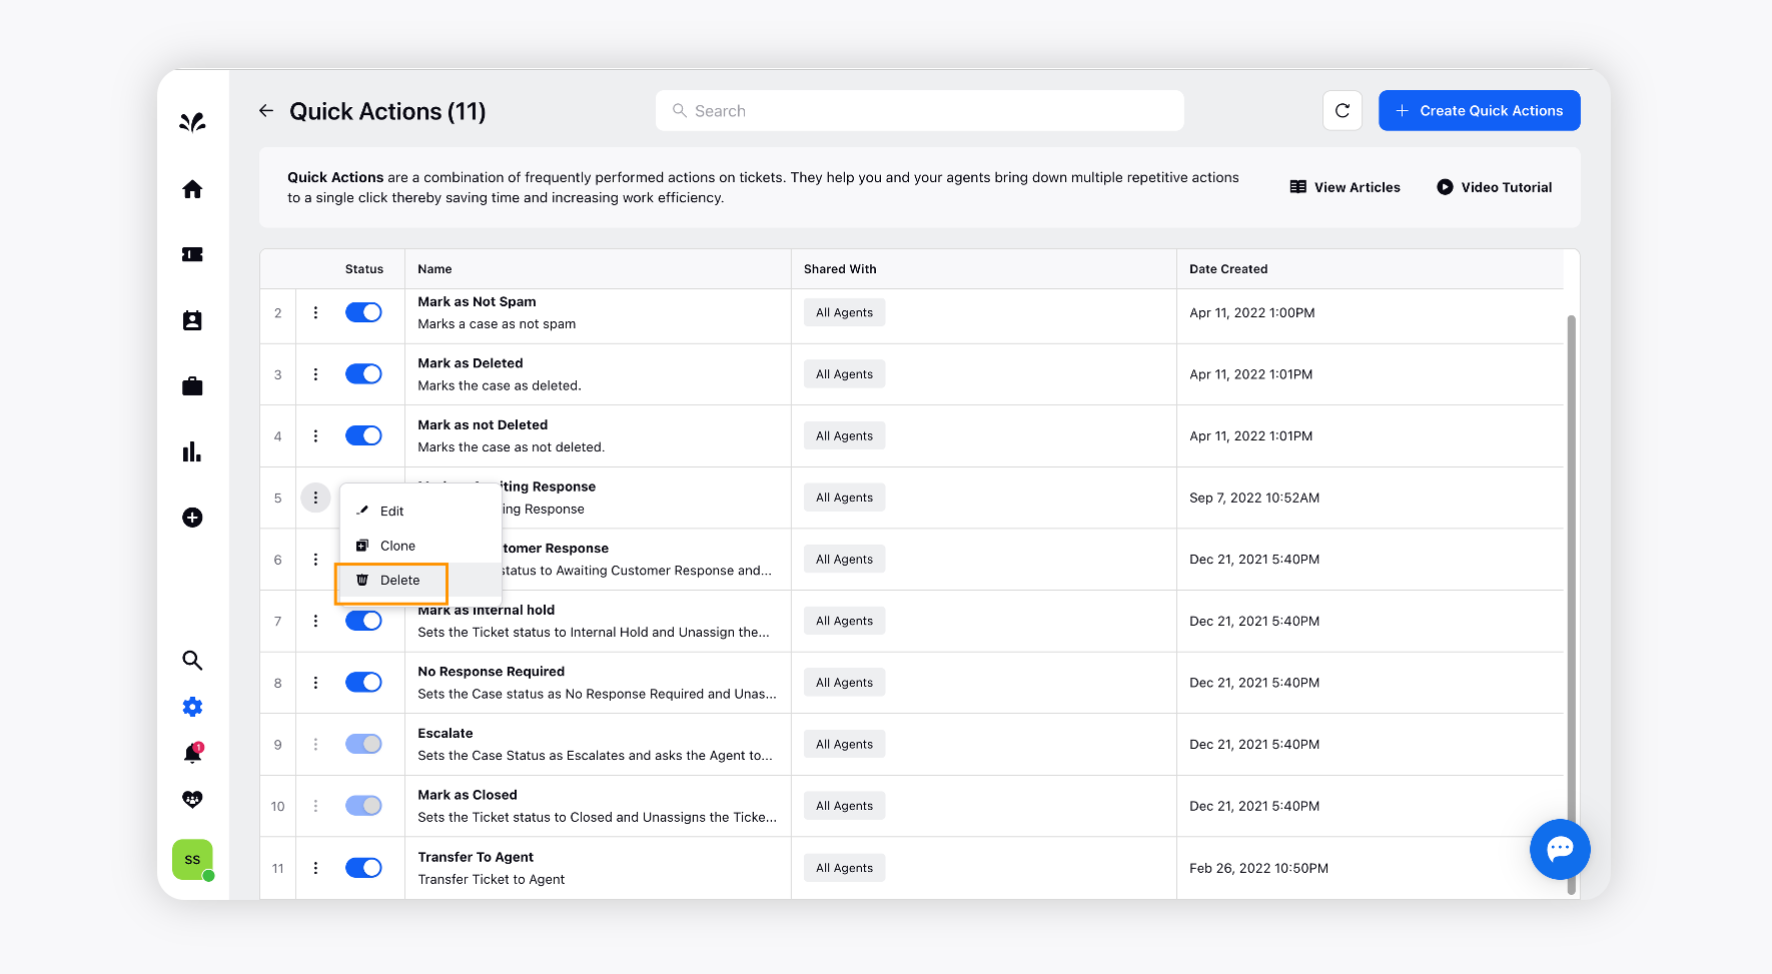
On the Delete Quick Action prompt window, click Delete. This will permanently delete your quick action.