
Asset Properties: Default & Custom Fields
Updated
Asset custom fields offer a flexible and dynamic way to manage and categorize assets according to your specific needs. In this article, we will explore the concept of asset custom fields, their purpose, and how they can be easily created and utilized to enhance asset management.
Understanding Asset Custom Fields
Asset custom fields allow you to define and assign unique properties to the assets beyond the default set of properties. Unlike predefined properties, custom fields can be tailored to suit individual requirements, ensuring optimal asset organization and categorization.
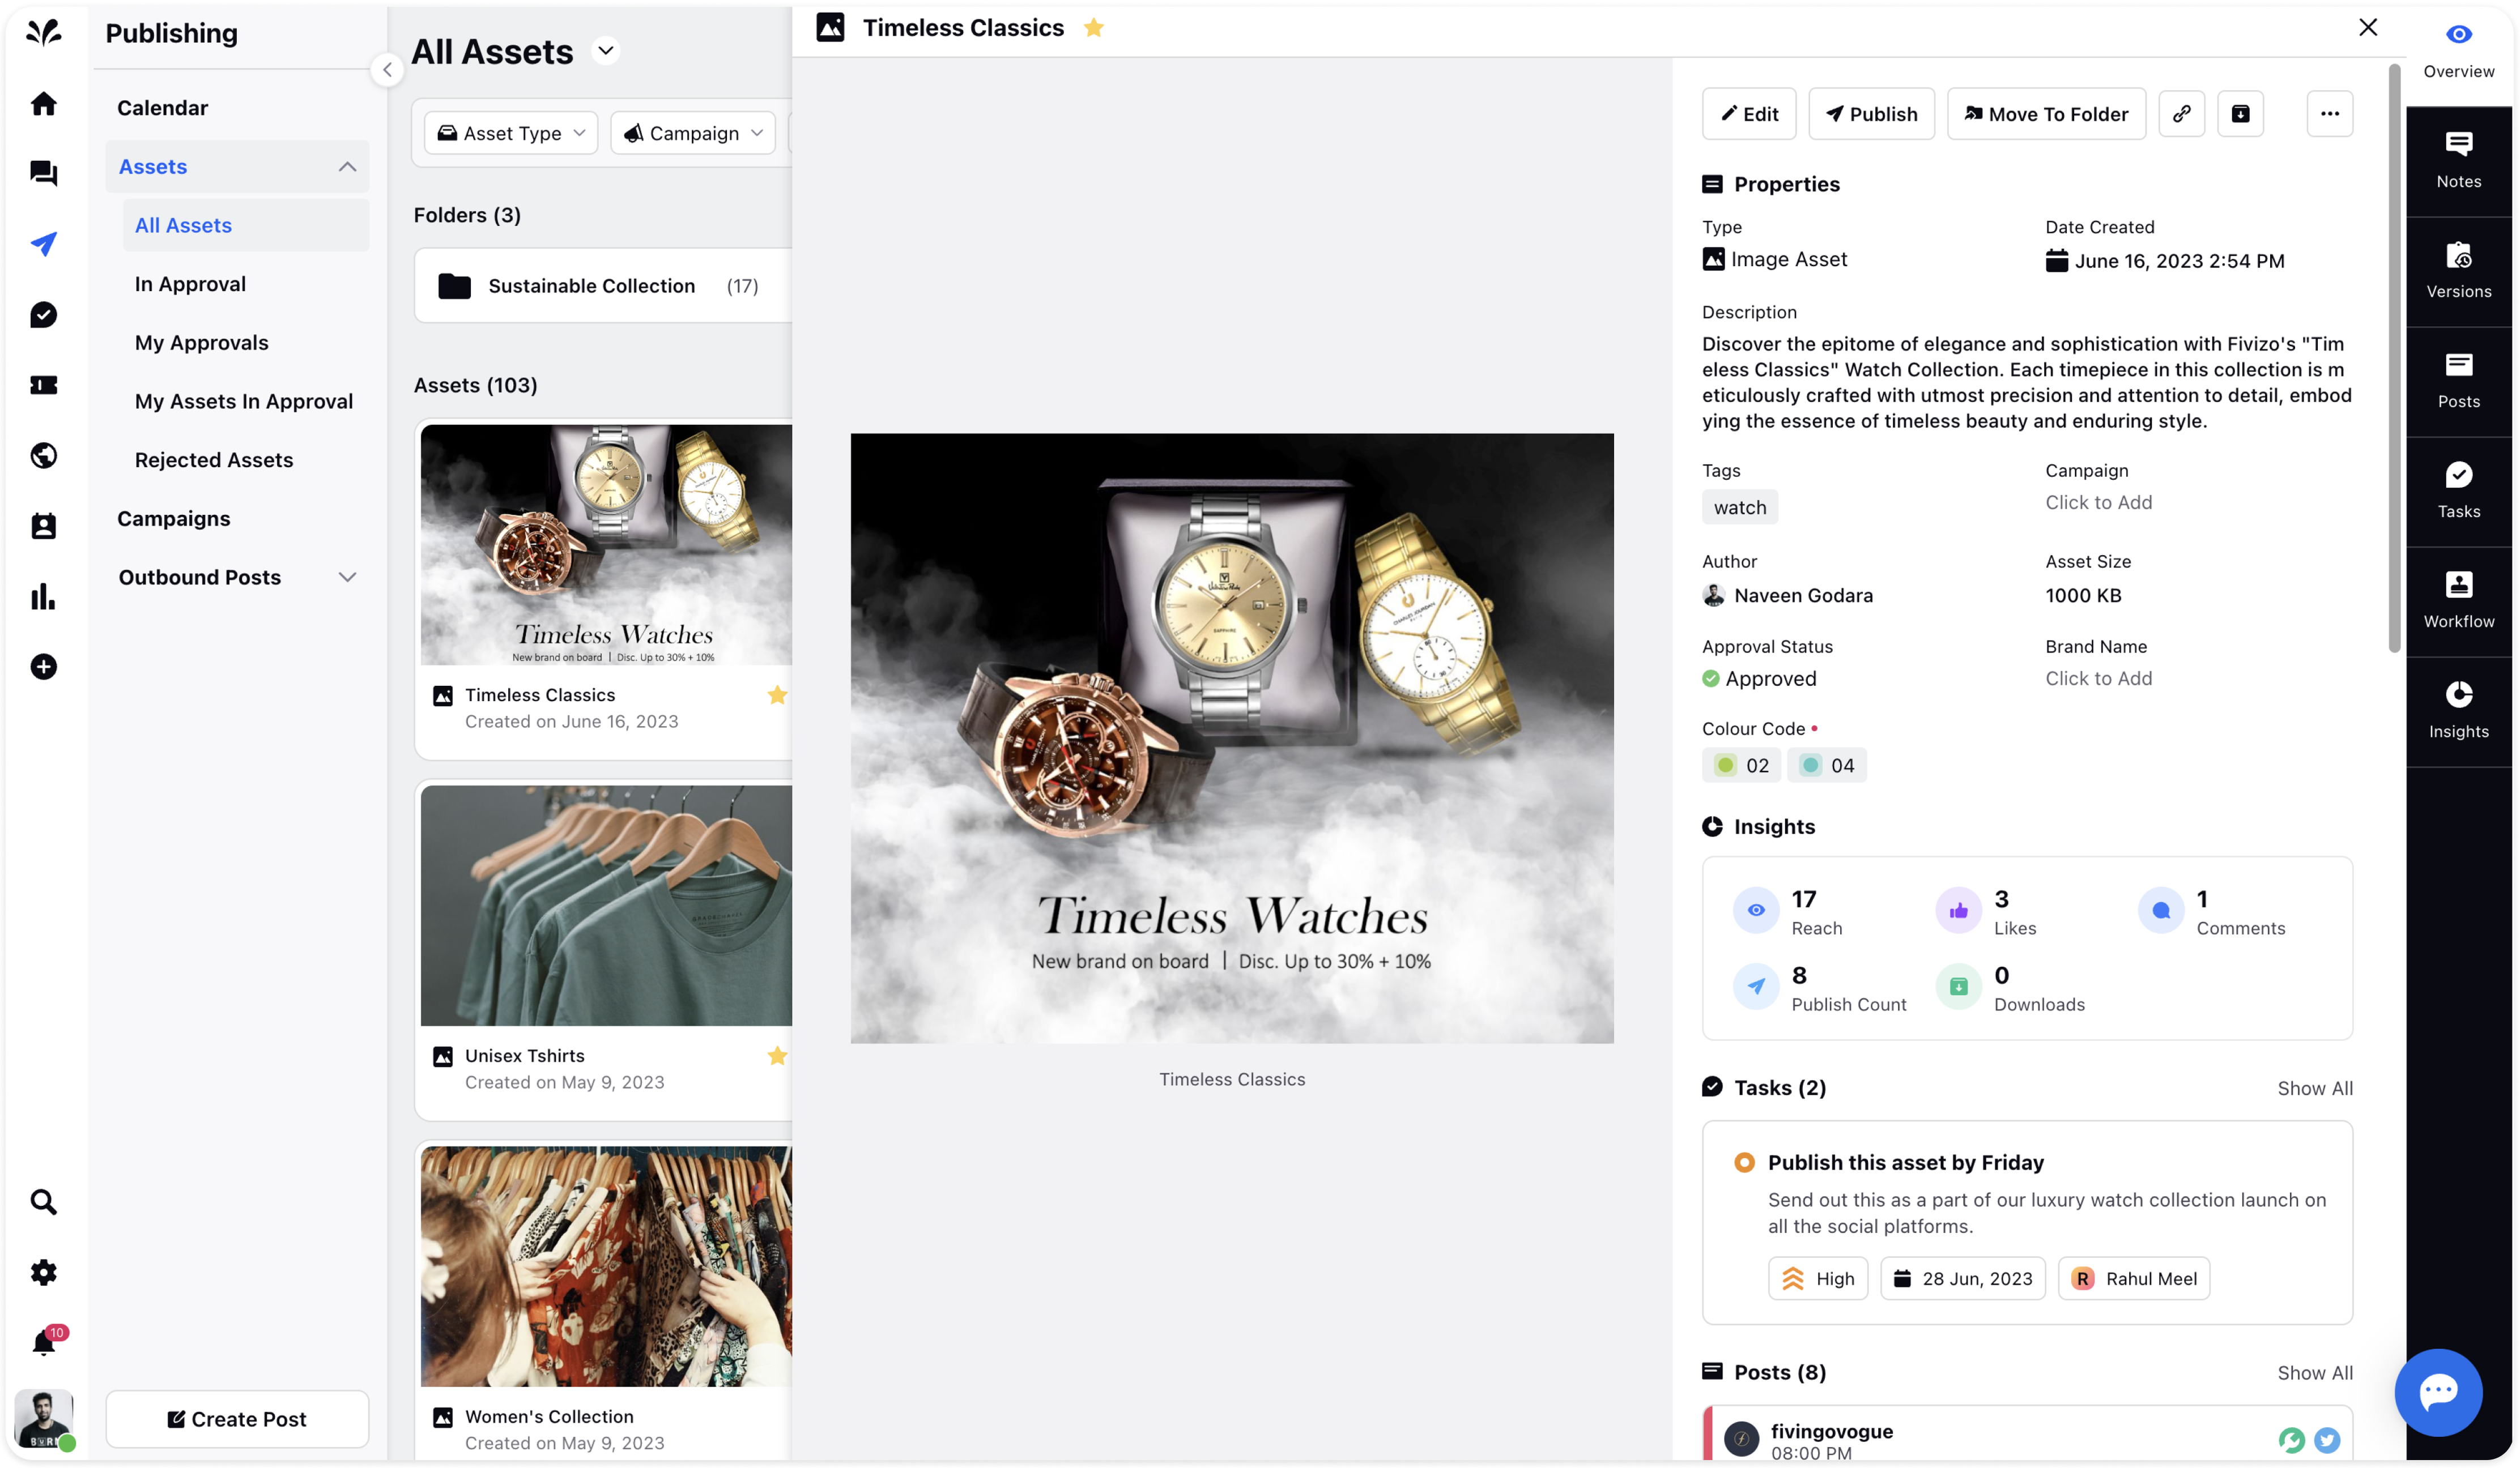
Viewing Asset Properties
To access custom fields or asset properties, navigate to the third pane of the asset. Here, you can find the Asset Properties section under the Overview Tab, which provides valuable information about the asset. However, it's important to note that the specific custom fields displayed will vary depending on your configuration.
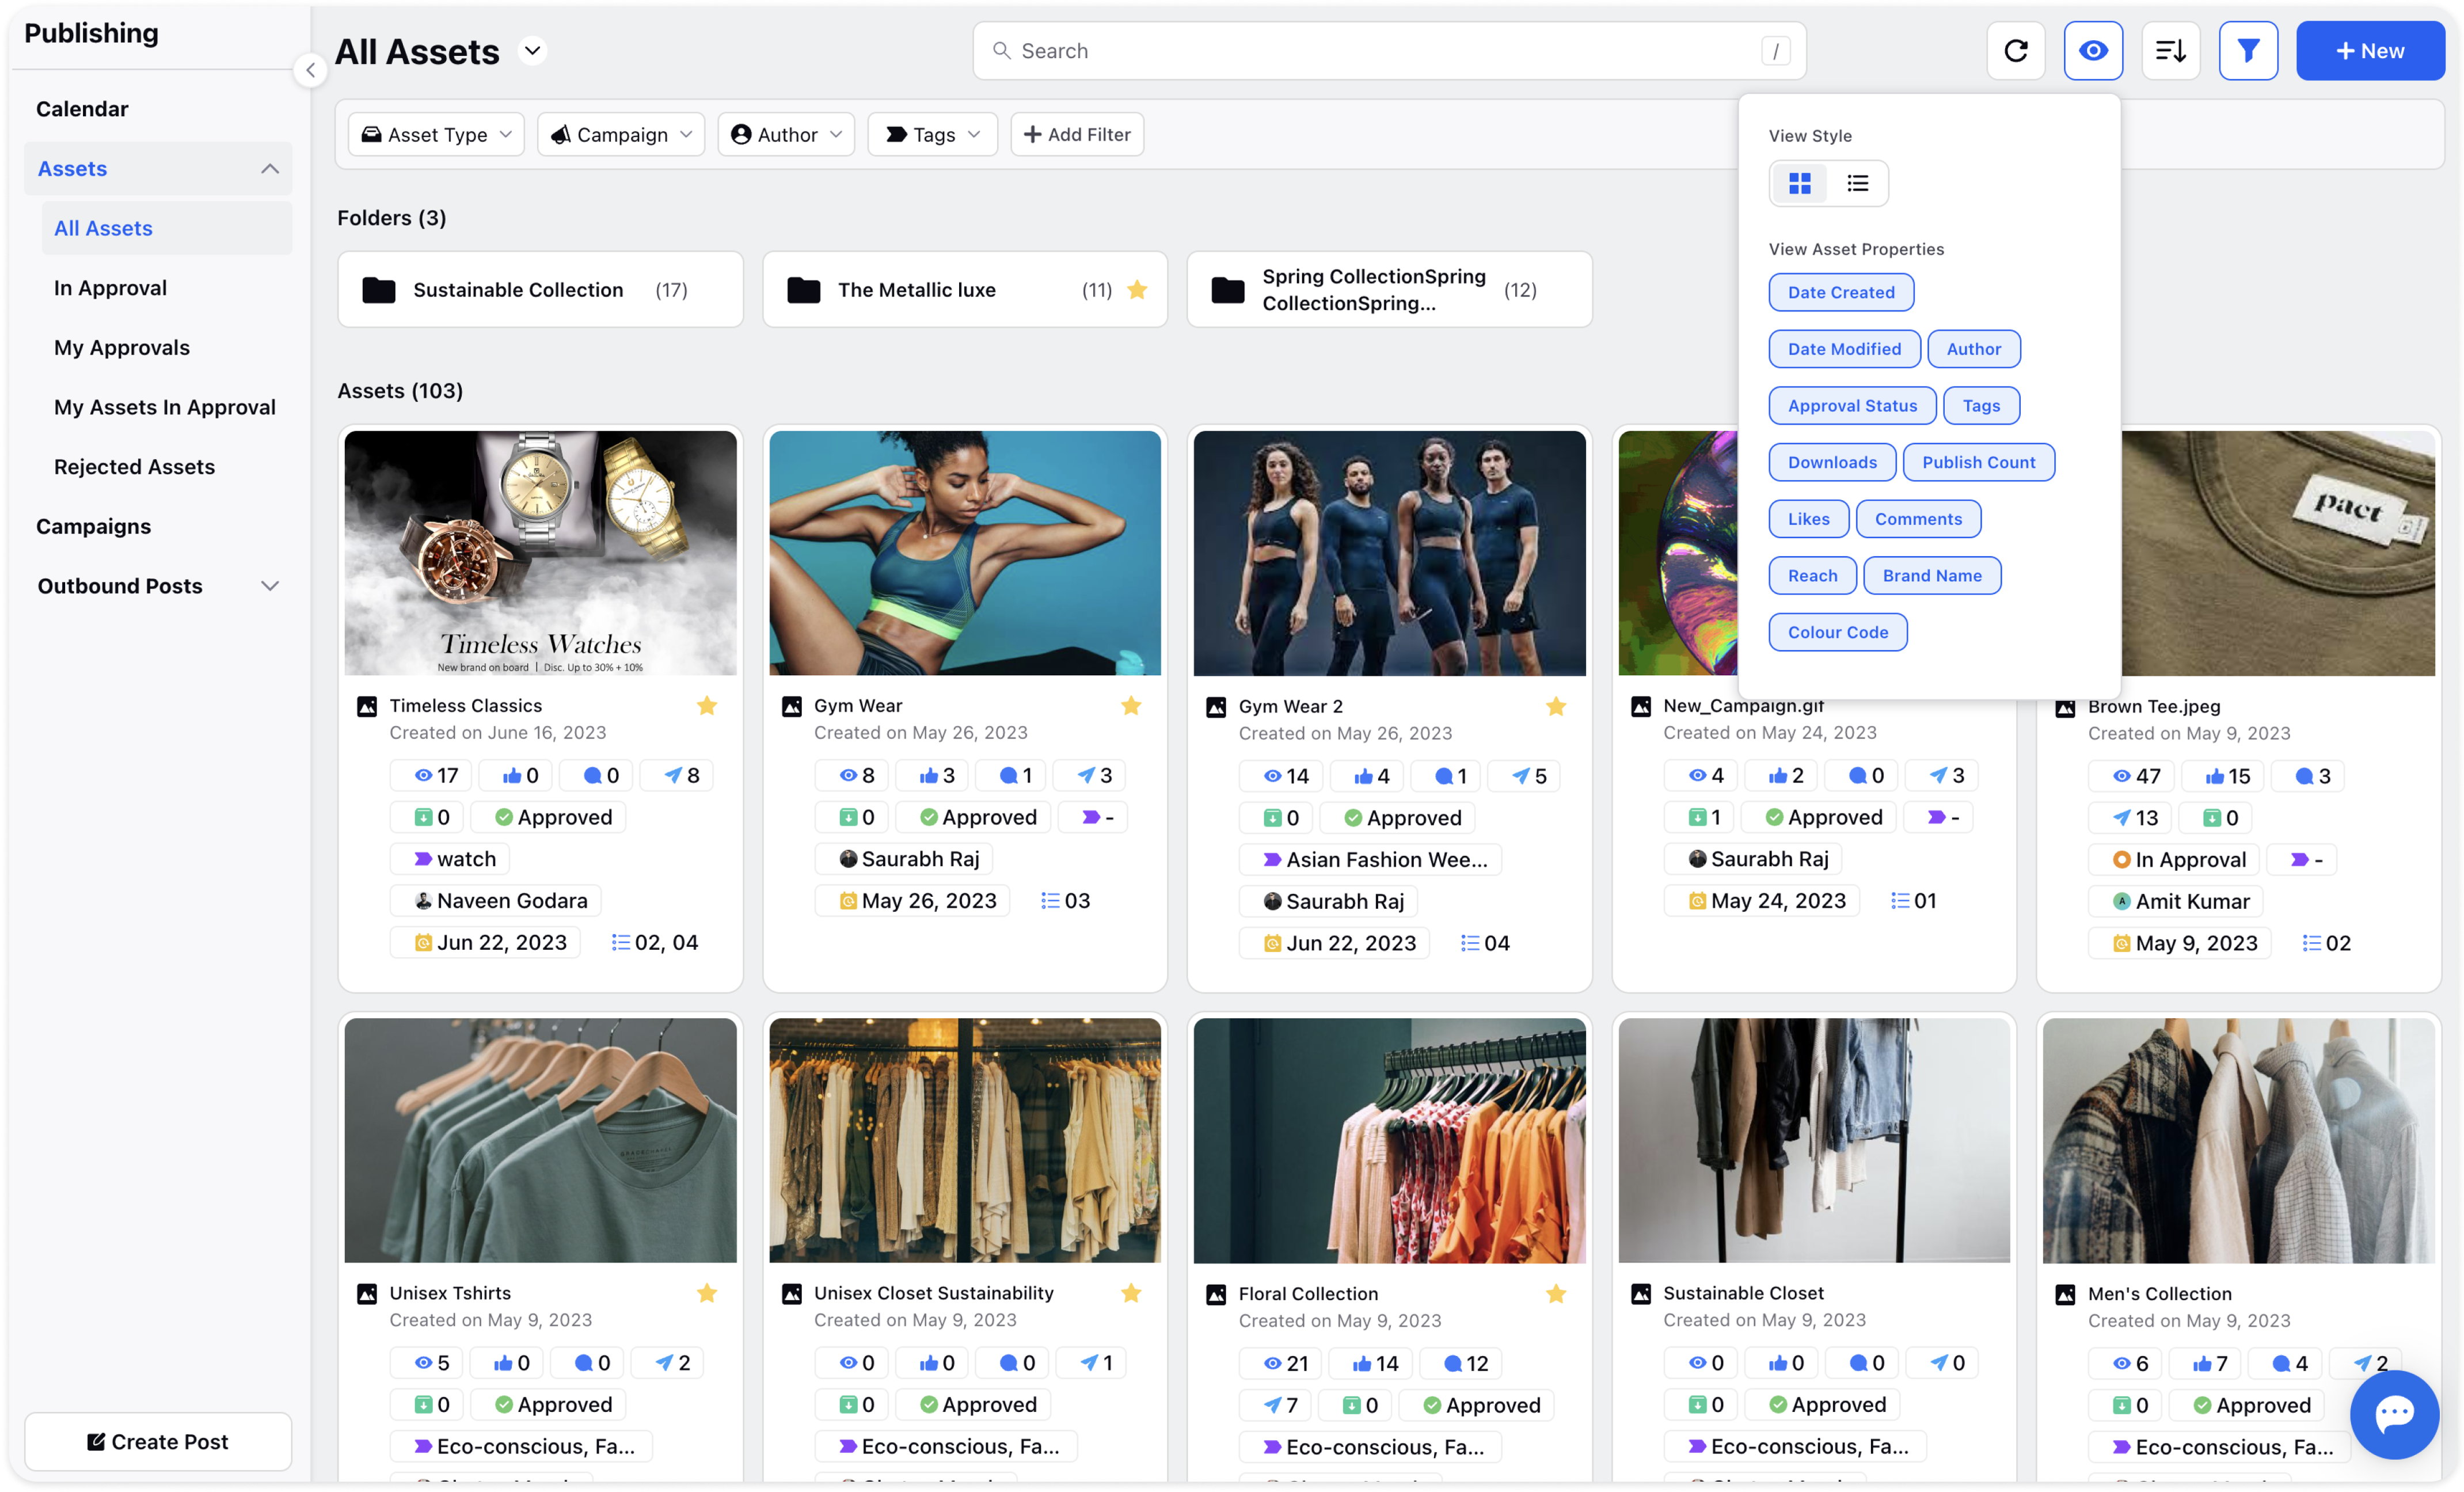
View Asset Custom Fields on asset cards: Customizing Asset Cards
In addition to the third pane, you can also choose to display asset properties directly on asset cards for quick reference. By accessing the Visibility Settings through the eye icon in the top right corner, you can enable or disable specific properties to be shown upfront. This customization empowers you to have essential asset details readily available.
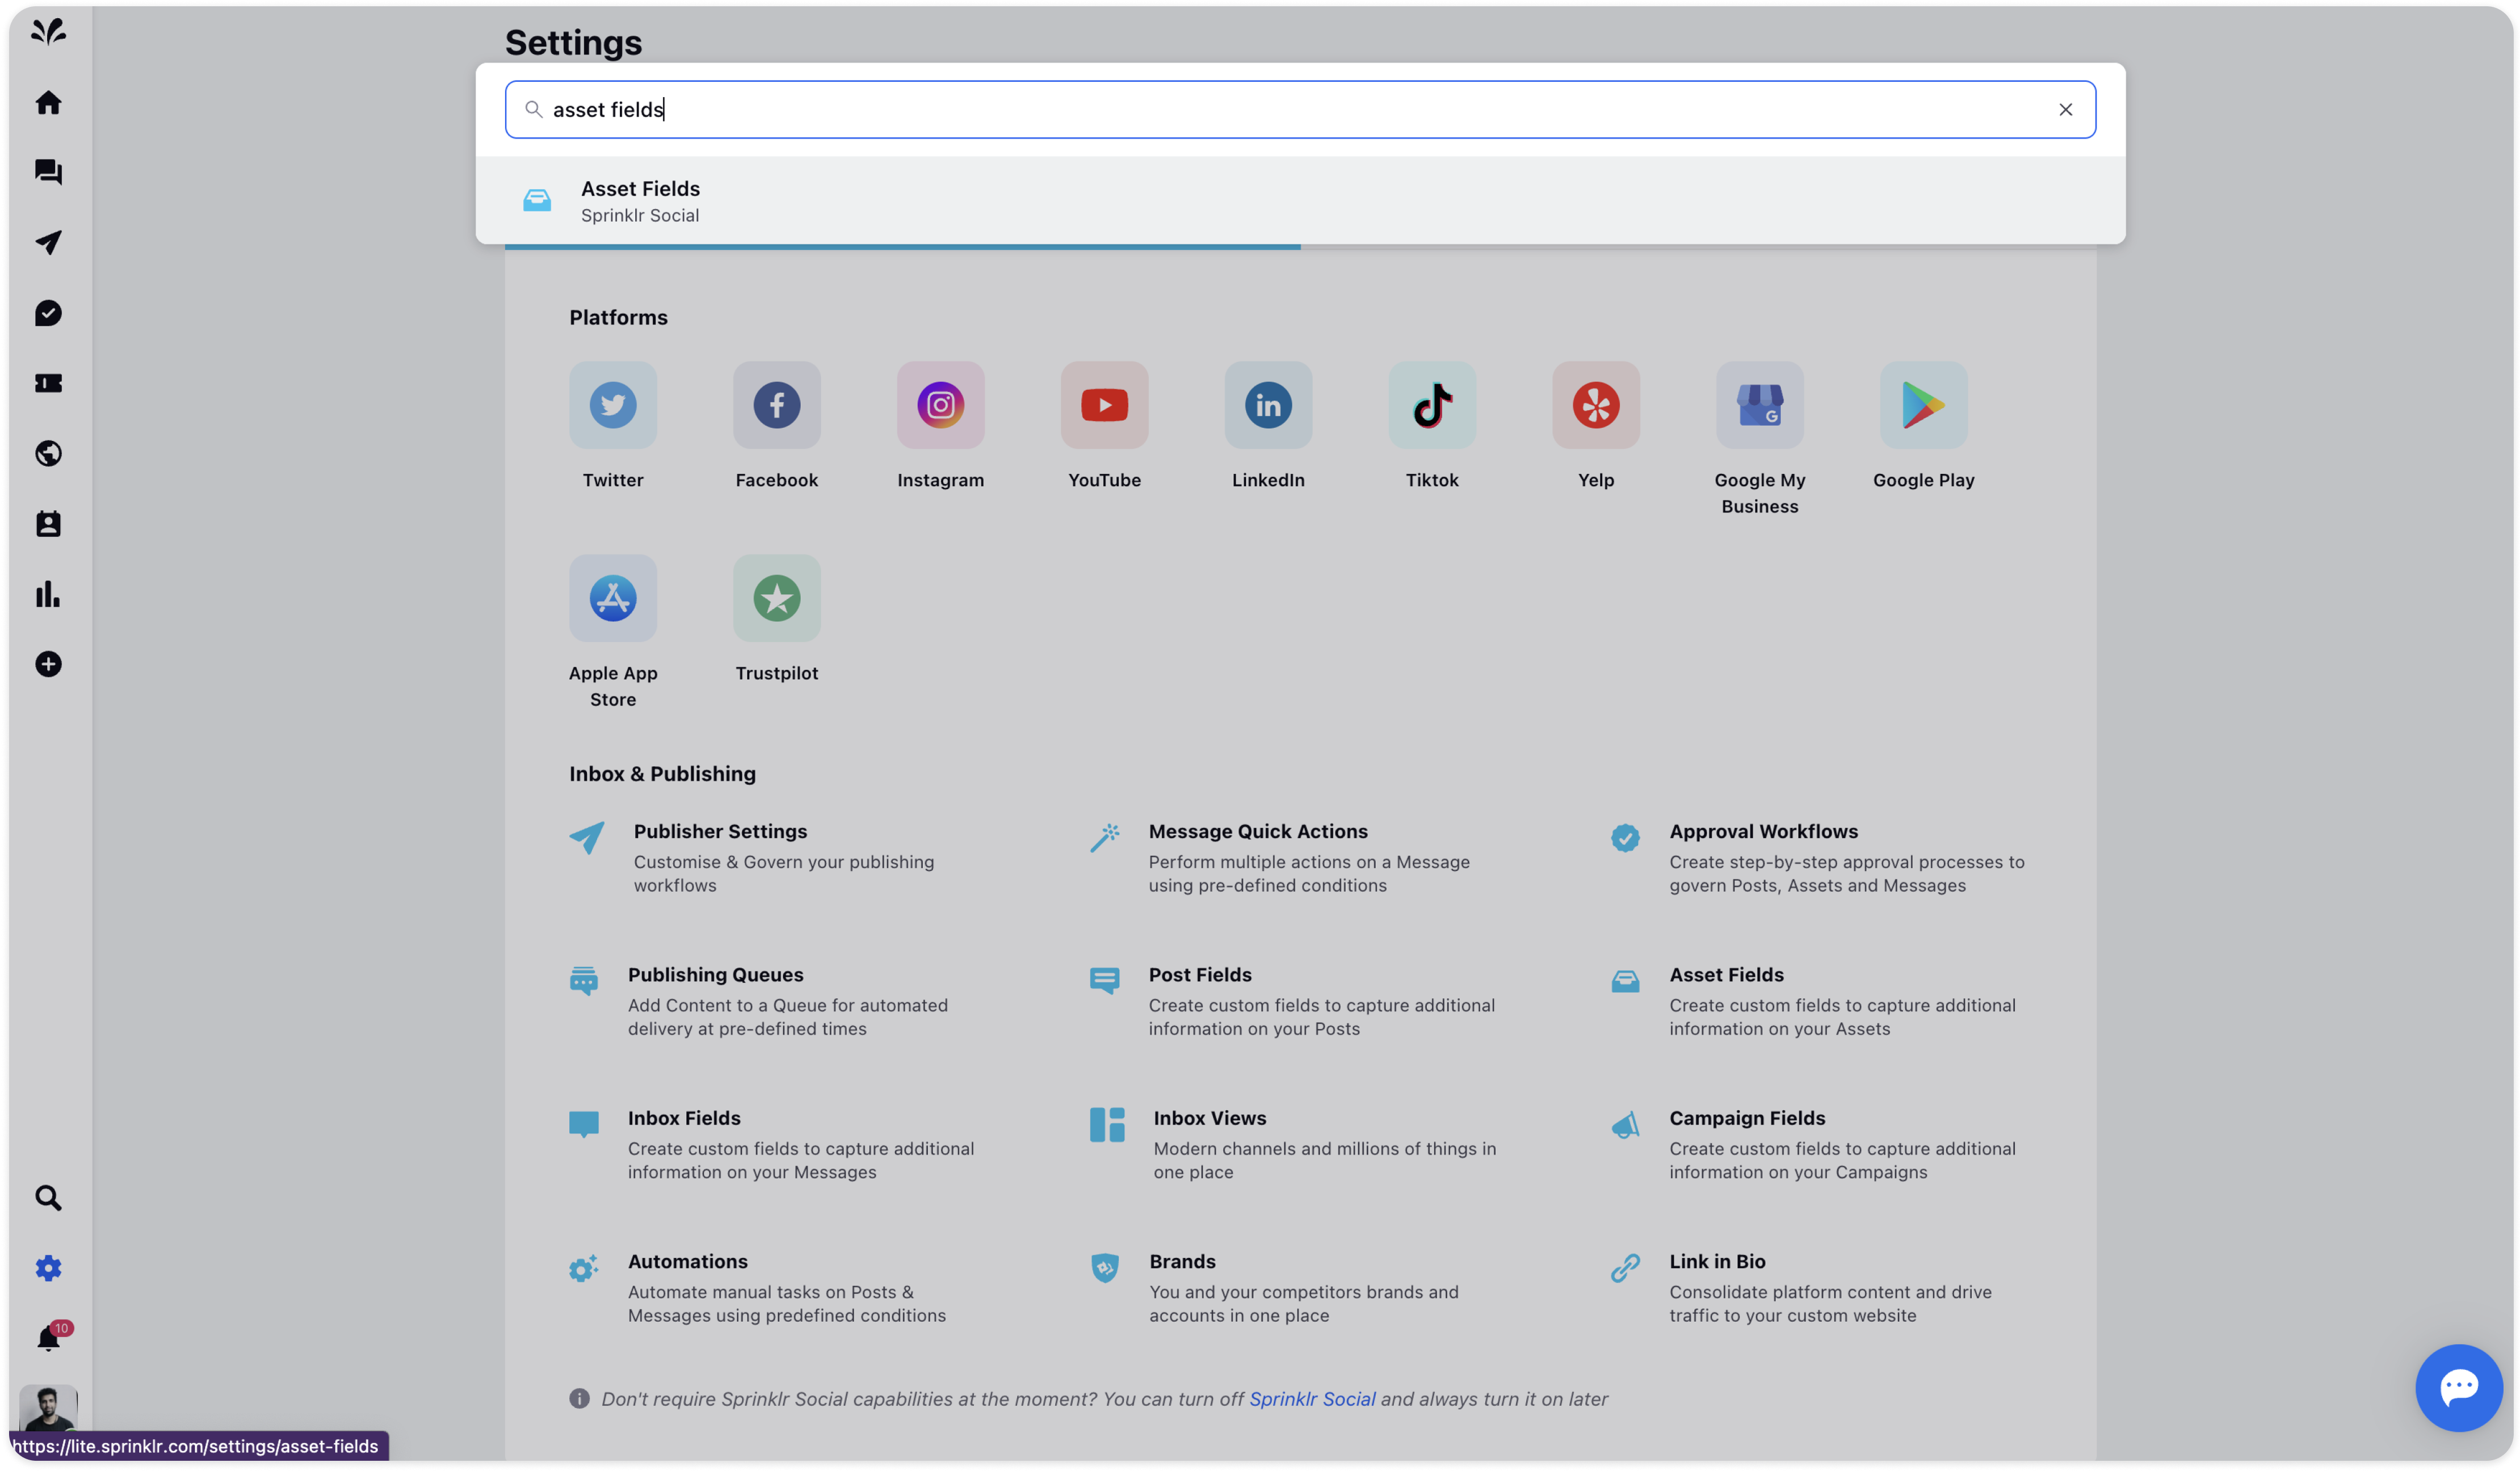
Creating Custom Fields
To create custom fields, access the Settings option in the left pane of Sprinklr. Under the Sprinklr Social section, search for 'Asset Fields' using the search bar. Clicking on it will open the Asset Fields page.
On Asset Fields Page, click on 'Create Asset Field' in the top right corner to initiate the custom field creation process.
Fill out the required details such as the name, description, field type, and whether color coding should be enabled. Additionally, you can mark the custom field as required, ensuring that it must be filled in when publishing asset posts.
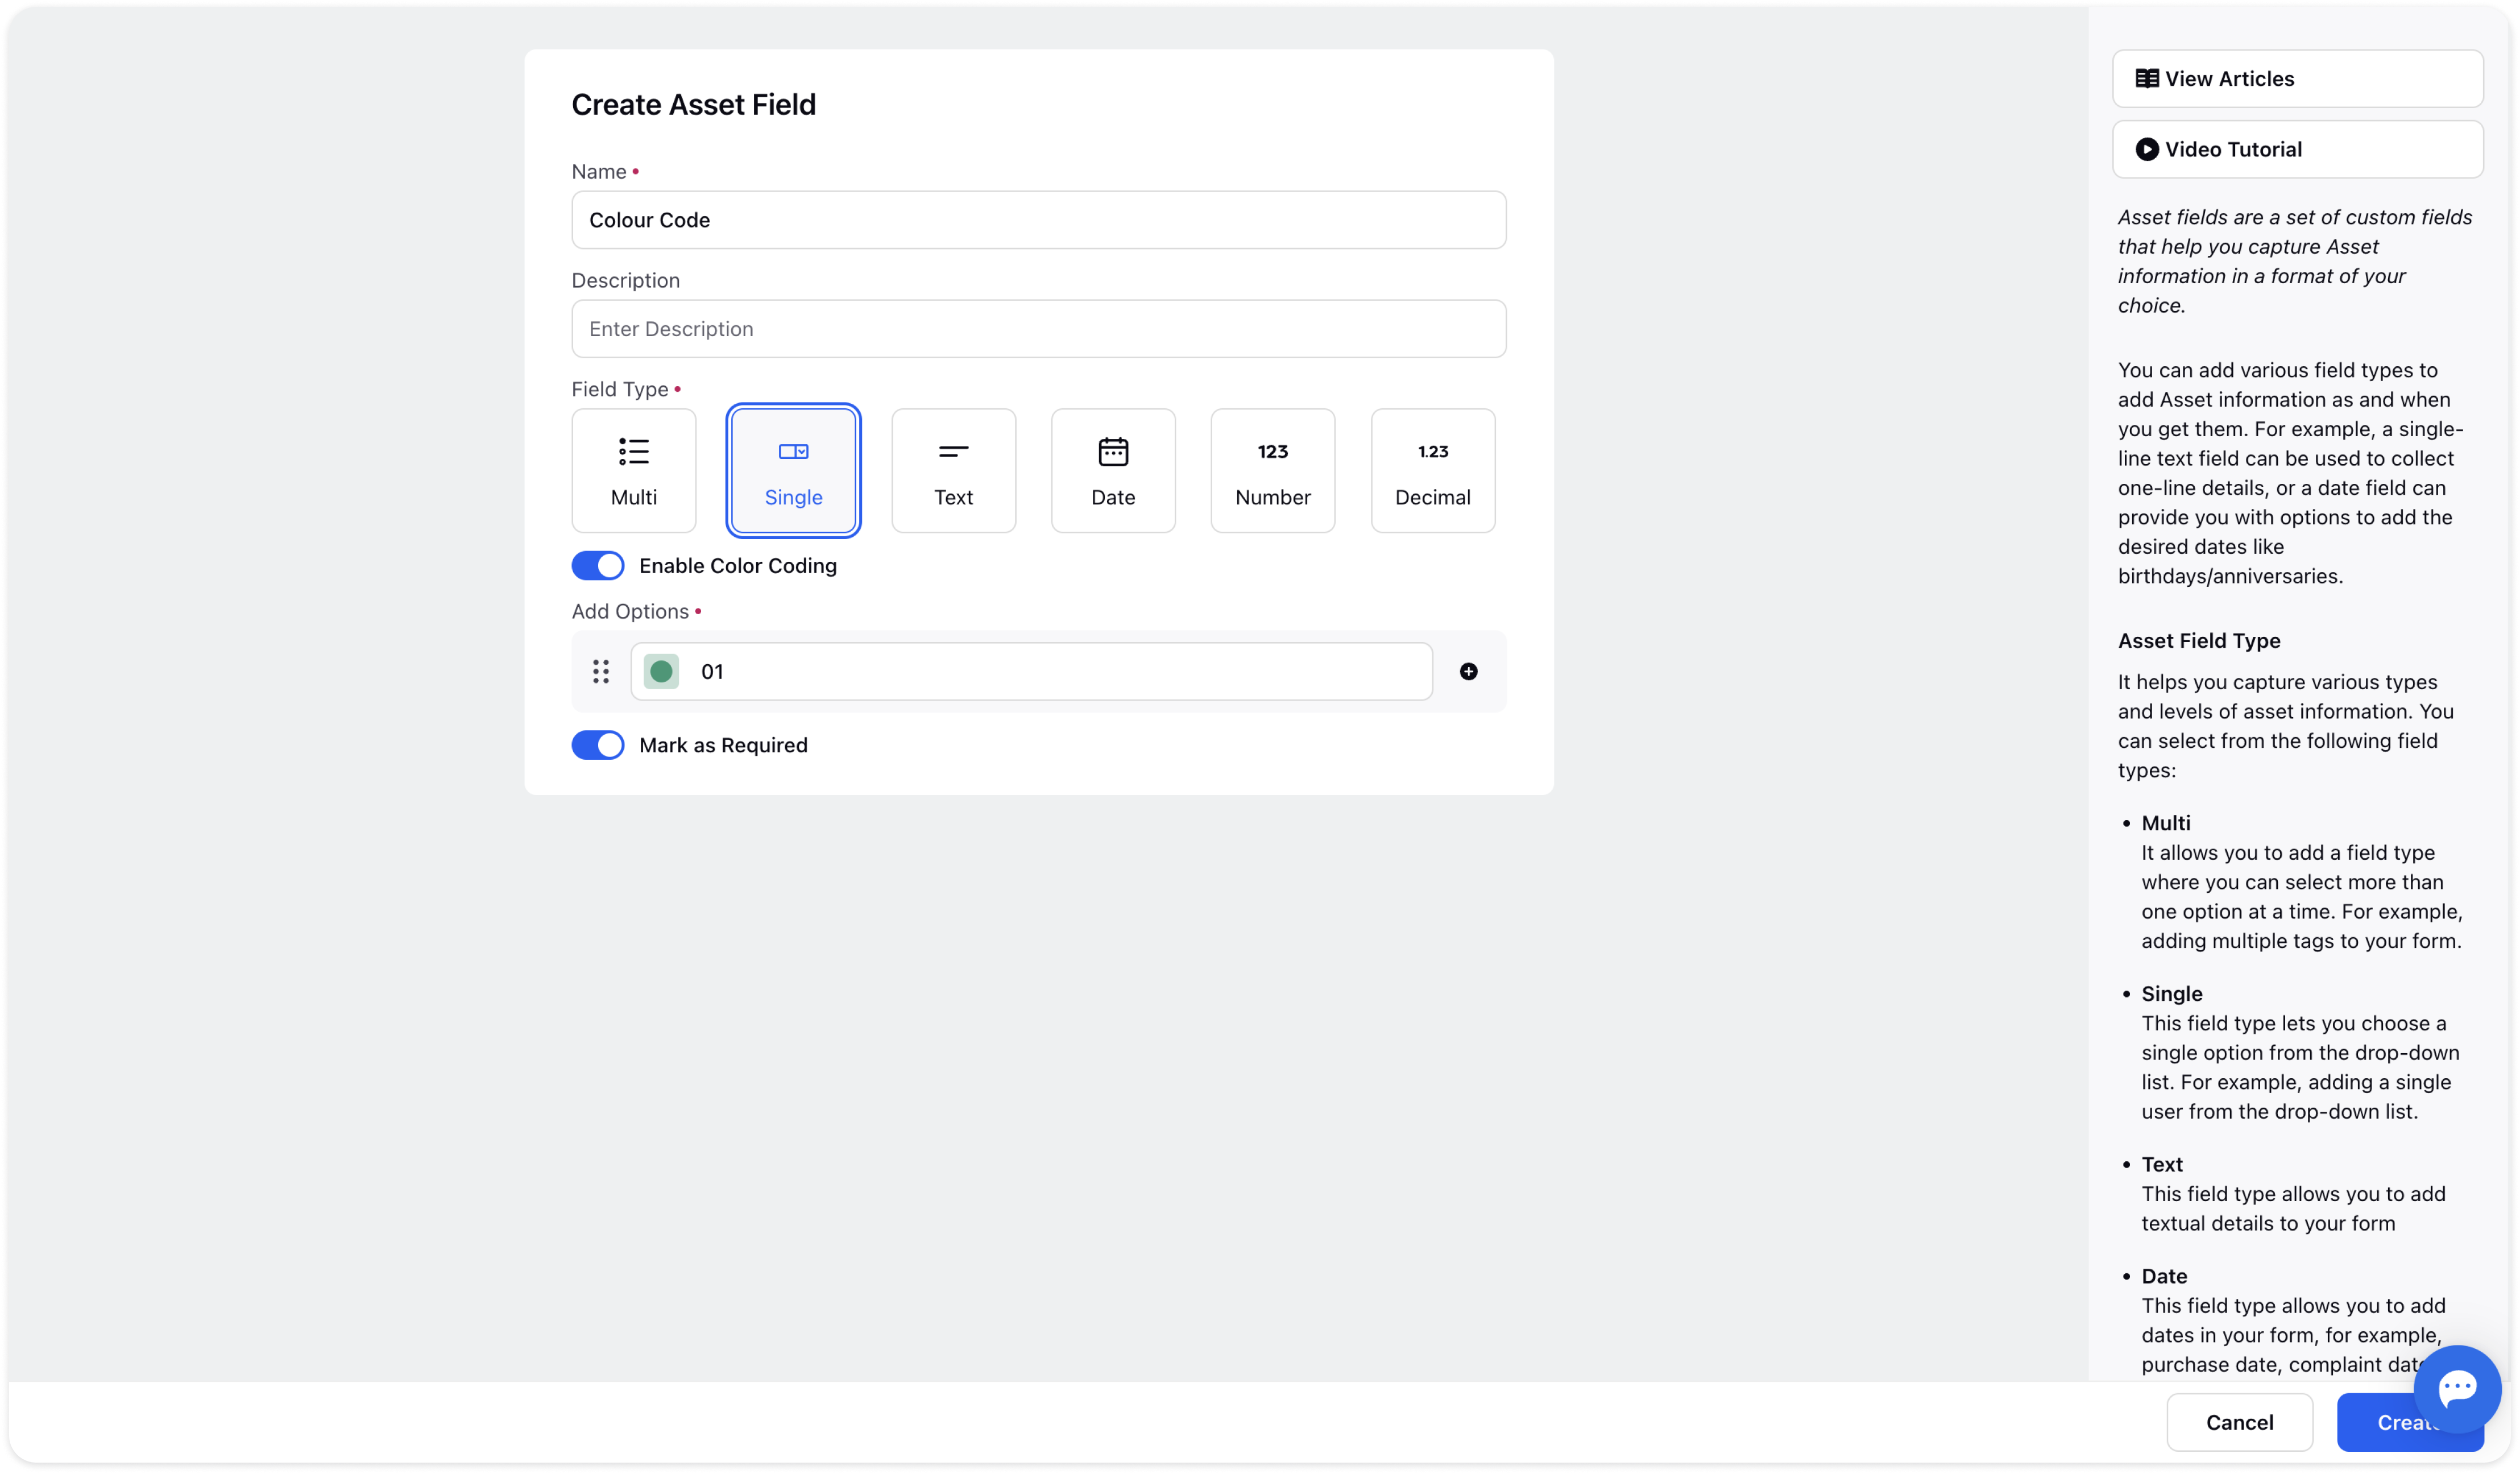
Once all the details are provided, click 'Create' at the bottom right corner to finalize the creation of the custom field.