Create, Share & Edit Asset Views
Updated
Asset management can be a time-consuming and complex process, especially for organizations with large numbers of assets to keep track of. However, Asset Views can help to streamline your workflow and make it easier to manage your assets. In this article, we’ll take a closer look at what Asset Views are, how to create them, and how to share them with others.
What are Asset Views?
Asset Views are personalised views of your assets, created by applying filters in the Asset Manager. Filters can include things like asset type, status, tags and more. By saving these filters as views, you can quickly access and manage assets that are relevant to you, reducing the time and effort required to find and review them.
How to create Asset Views:
Creating Asset Views is simple and straightforward. Here’s how to do it:
Go to the Asset Manager and apply any filters that you need to focus on specific assets.
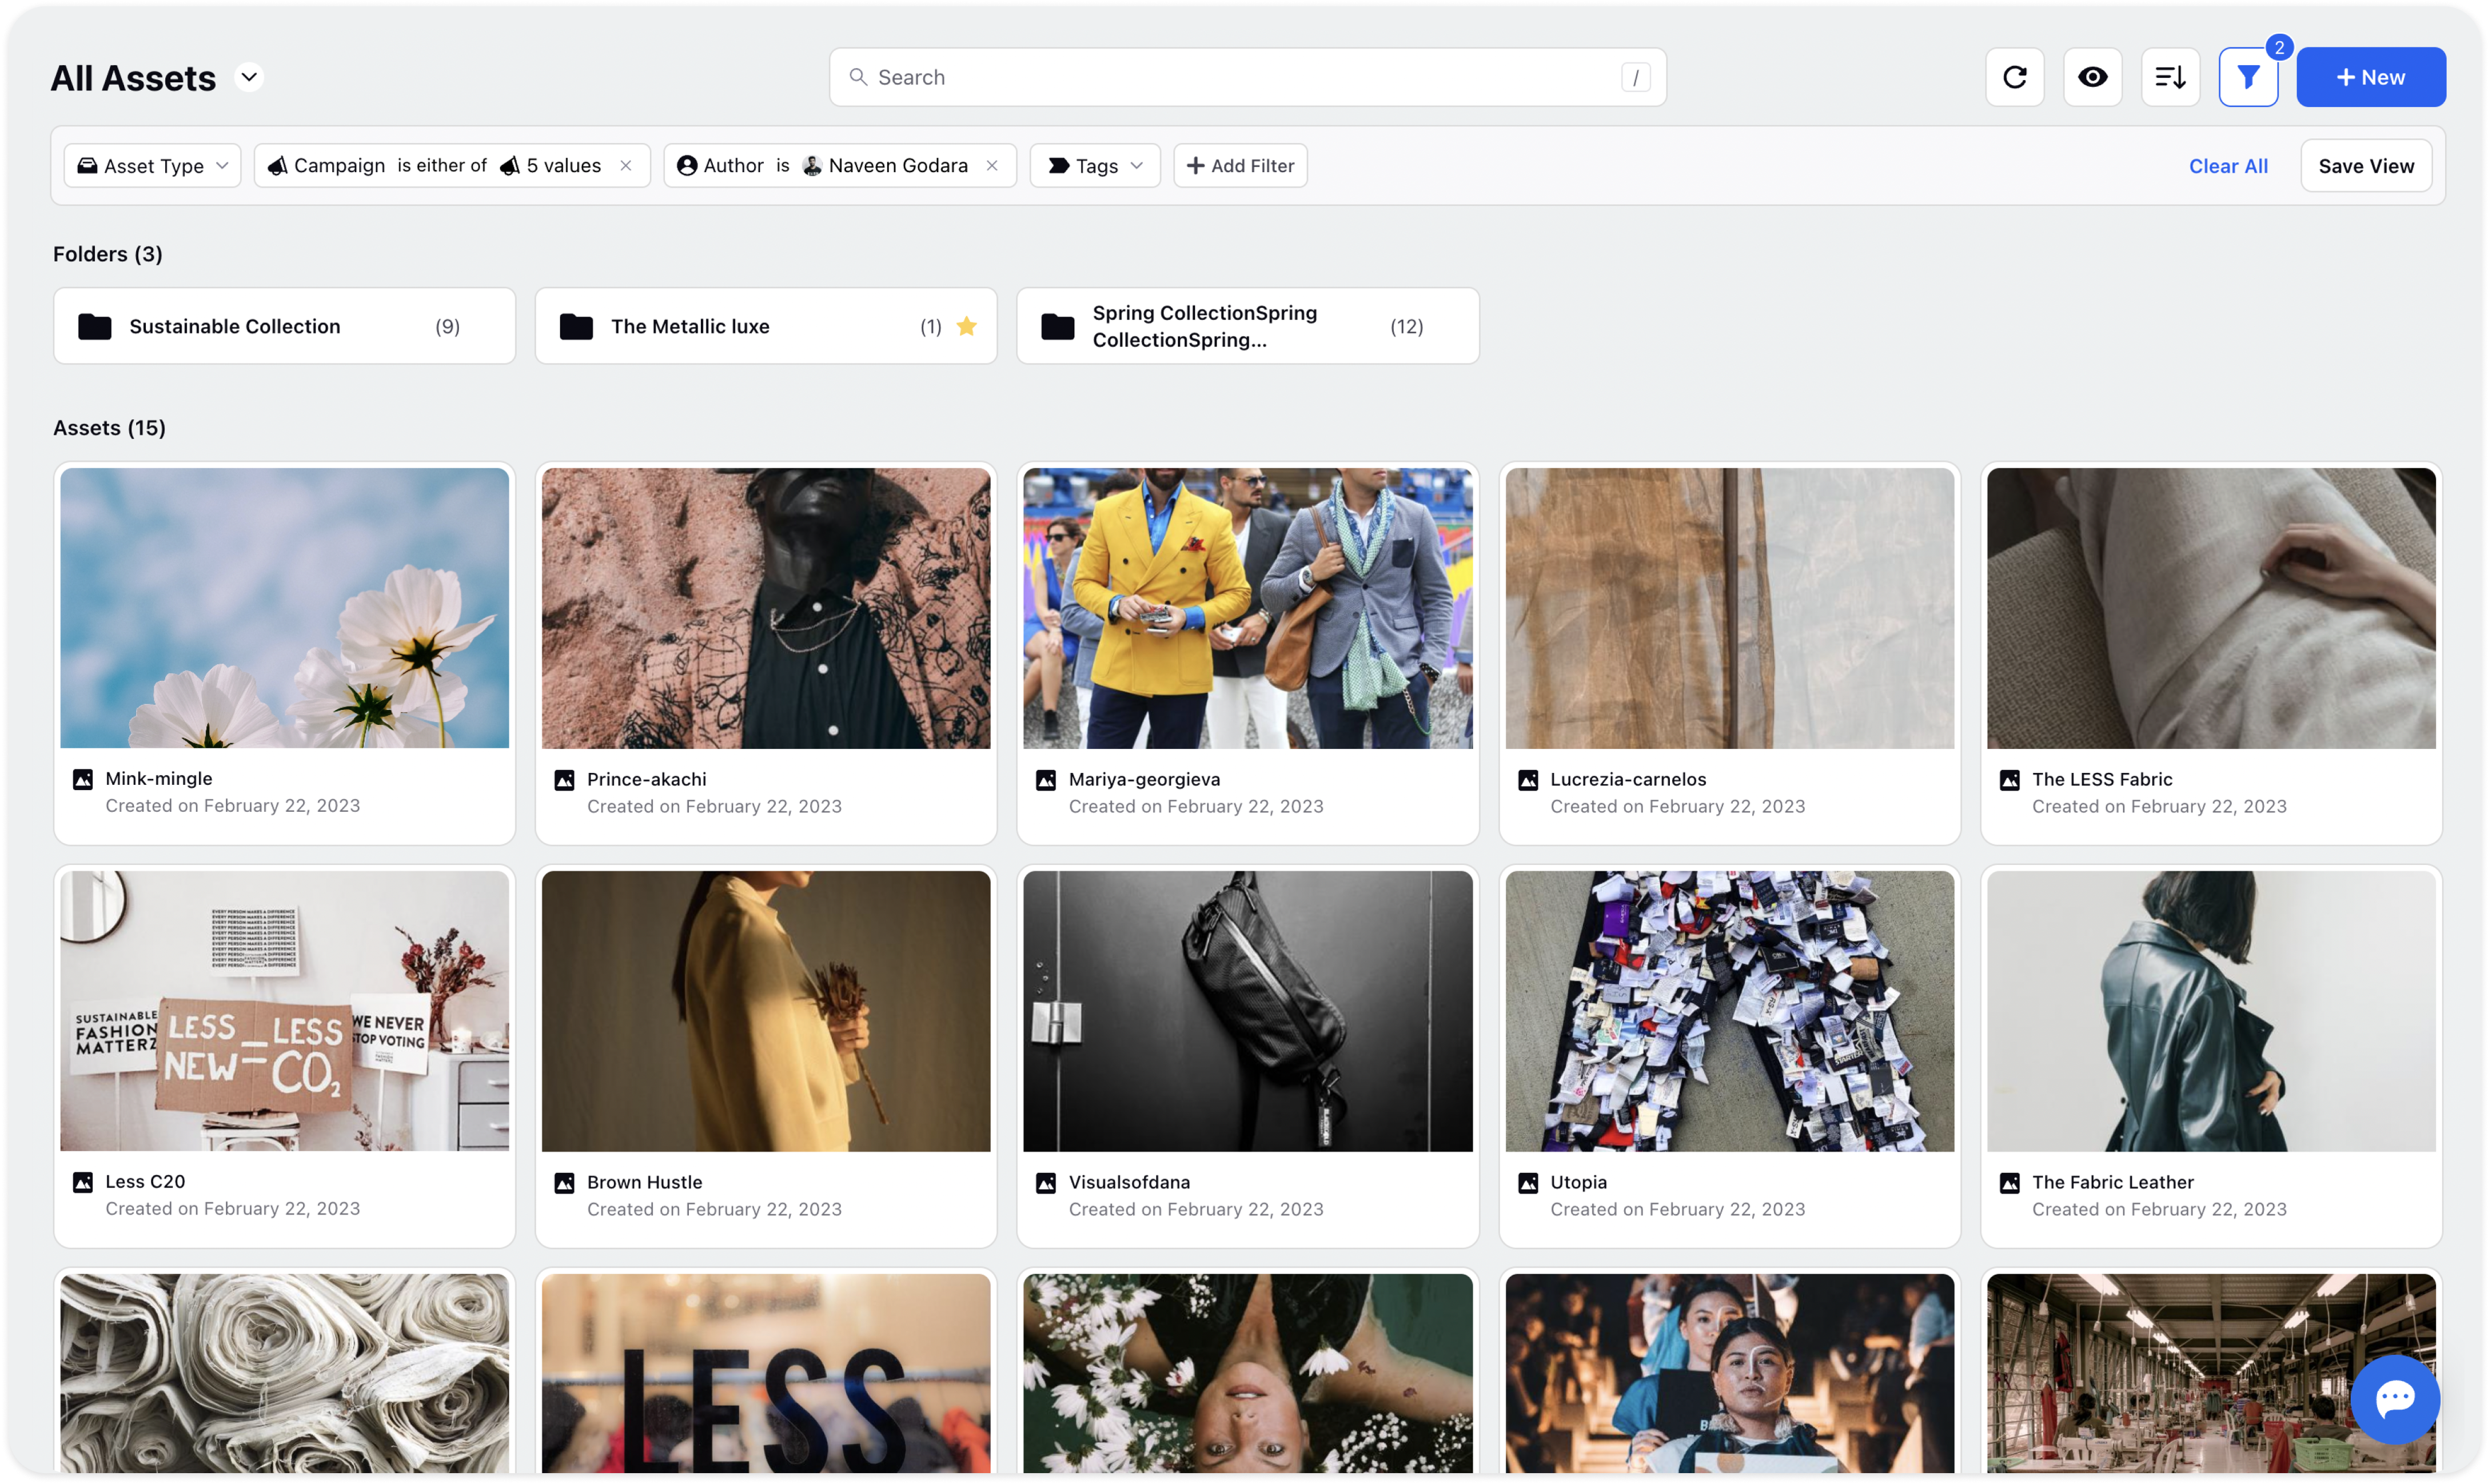
Once the filters are applied, click on the “Save View” button on the filter bar.
Give your View a name, take a look on the filters to be saved in the View and decide who should have access to it.
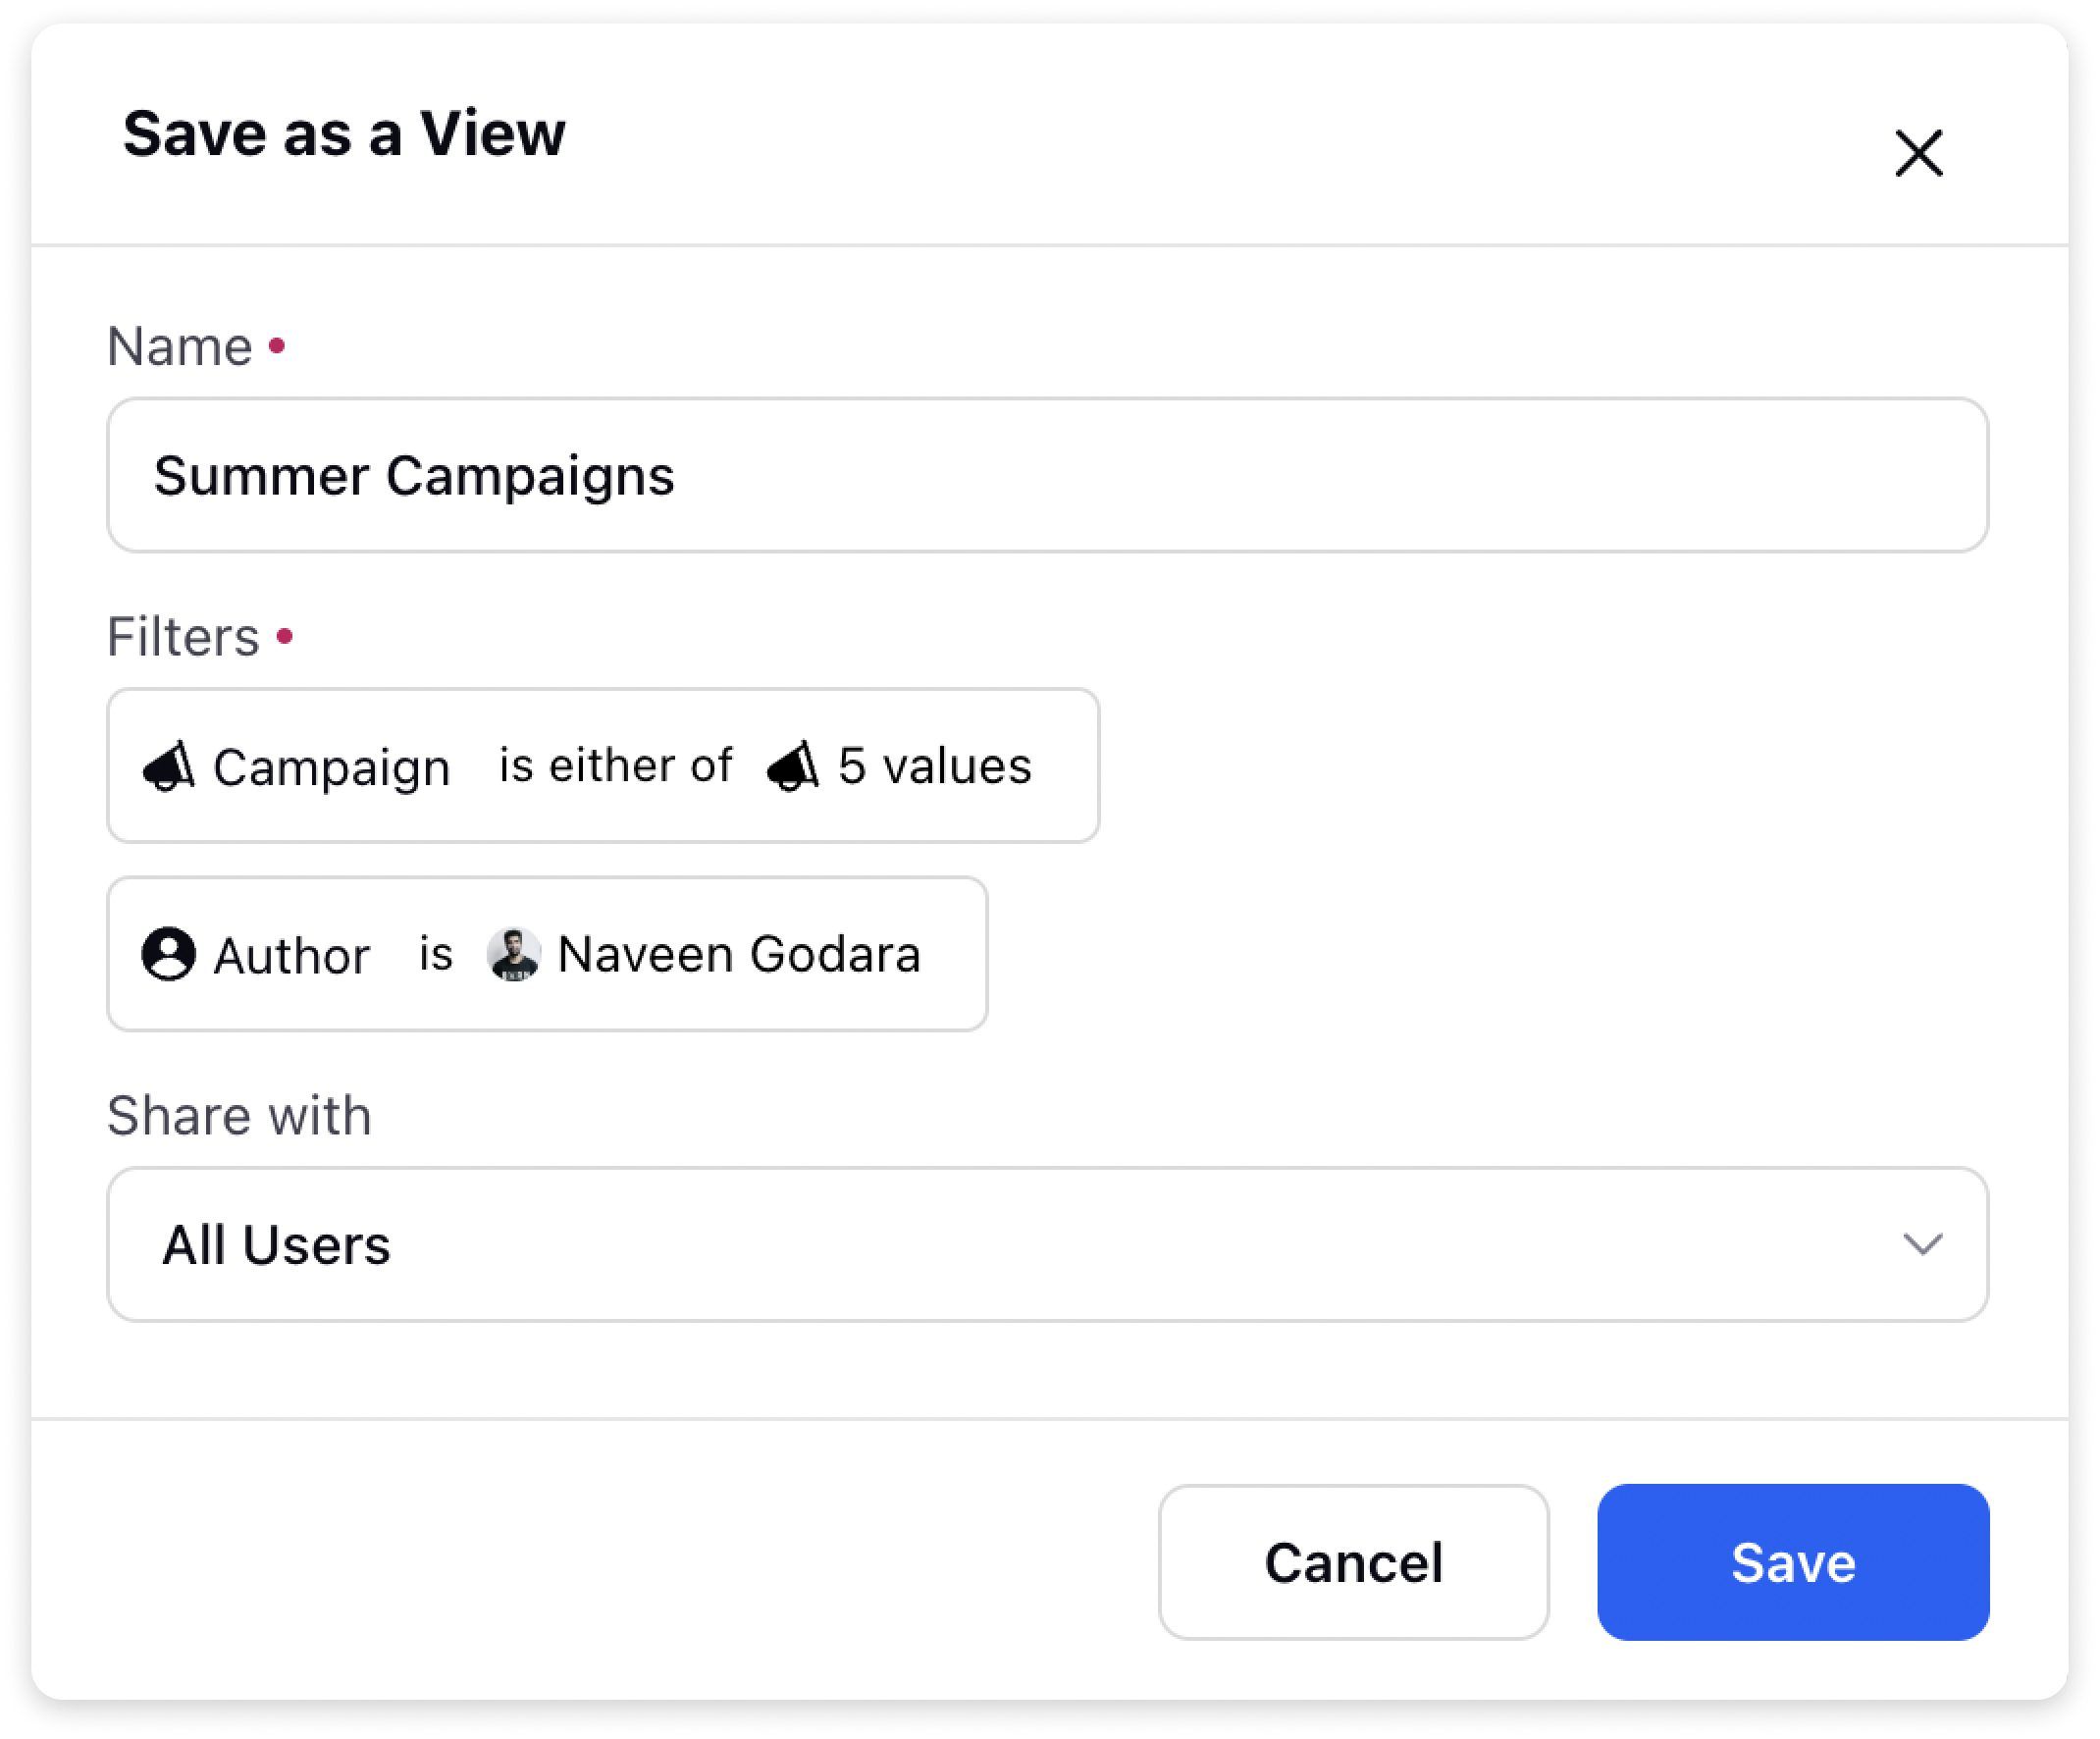
Click on “Save” to save the View.
Edit Asset Views:
One of the key benefits of Asset Views is the ability to share them with others. This allows you to collaborate and work together on assets that are relevant to multiple users and teams. Sharing Asset Views is just as simple as creating them:
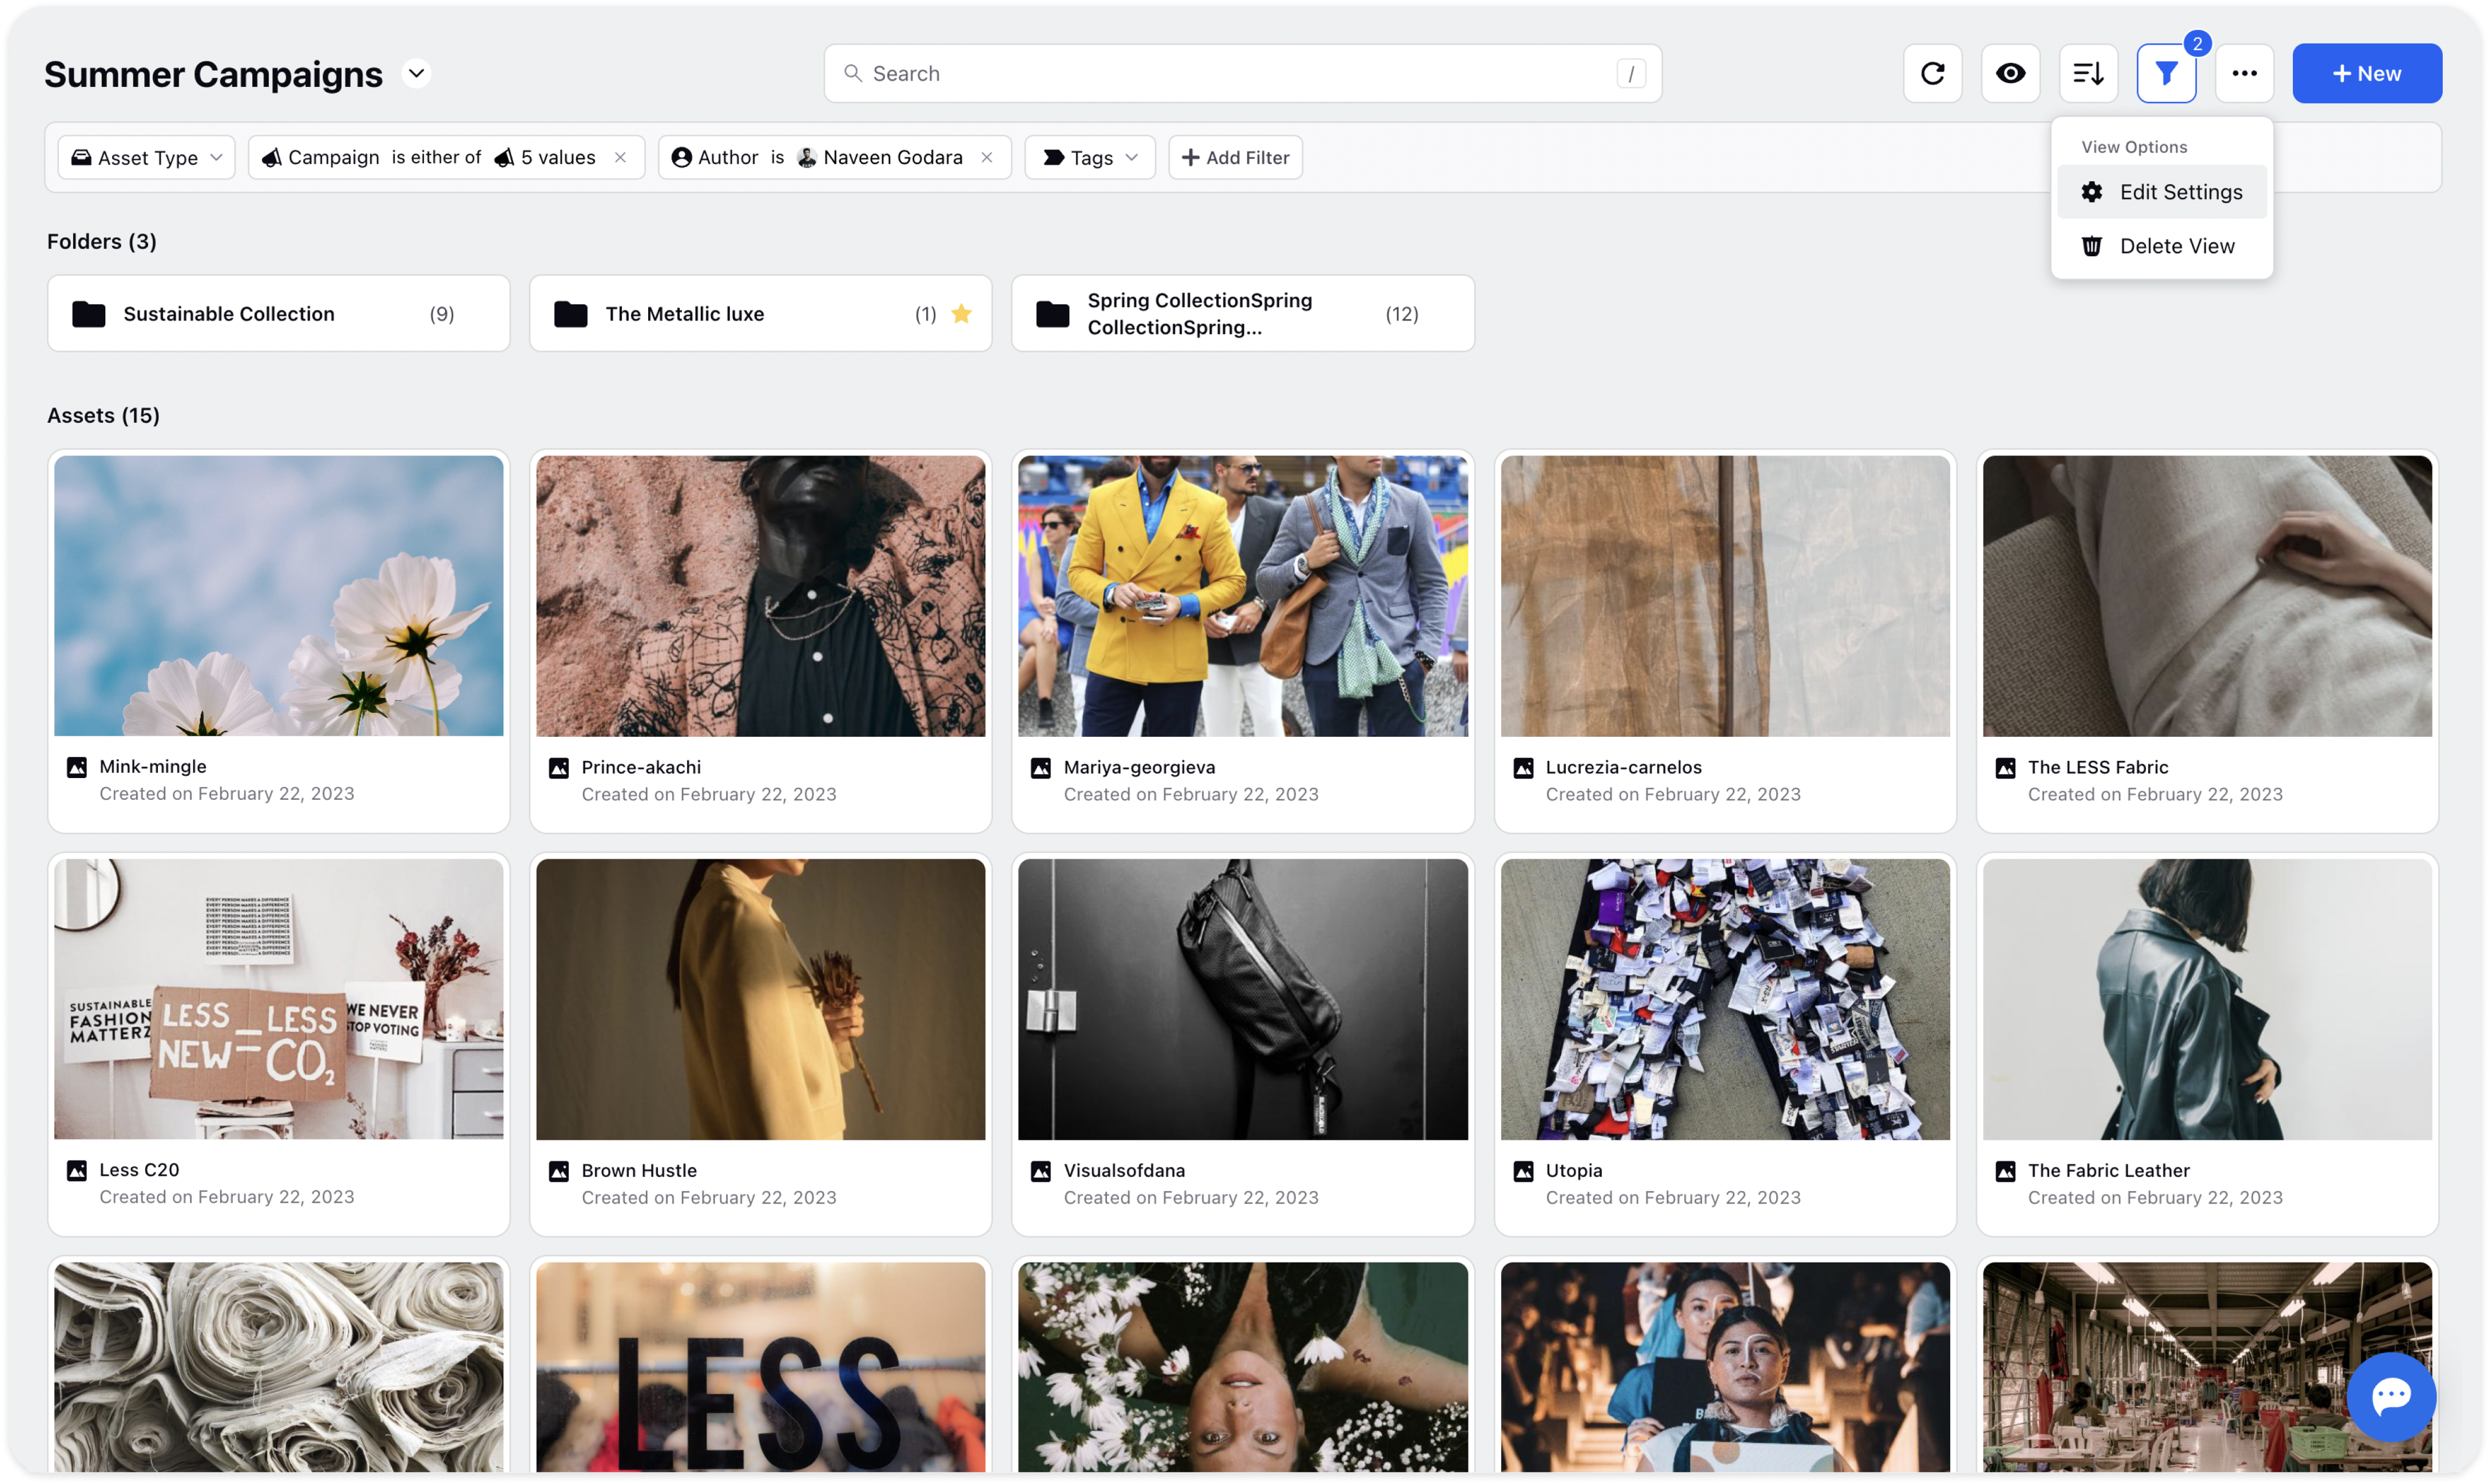
Click on the chevron icon next to All Assets and click on the Asset view you want to edit.

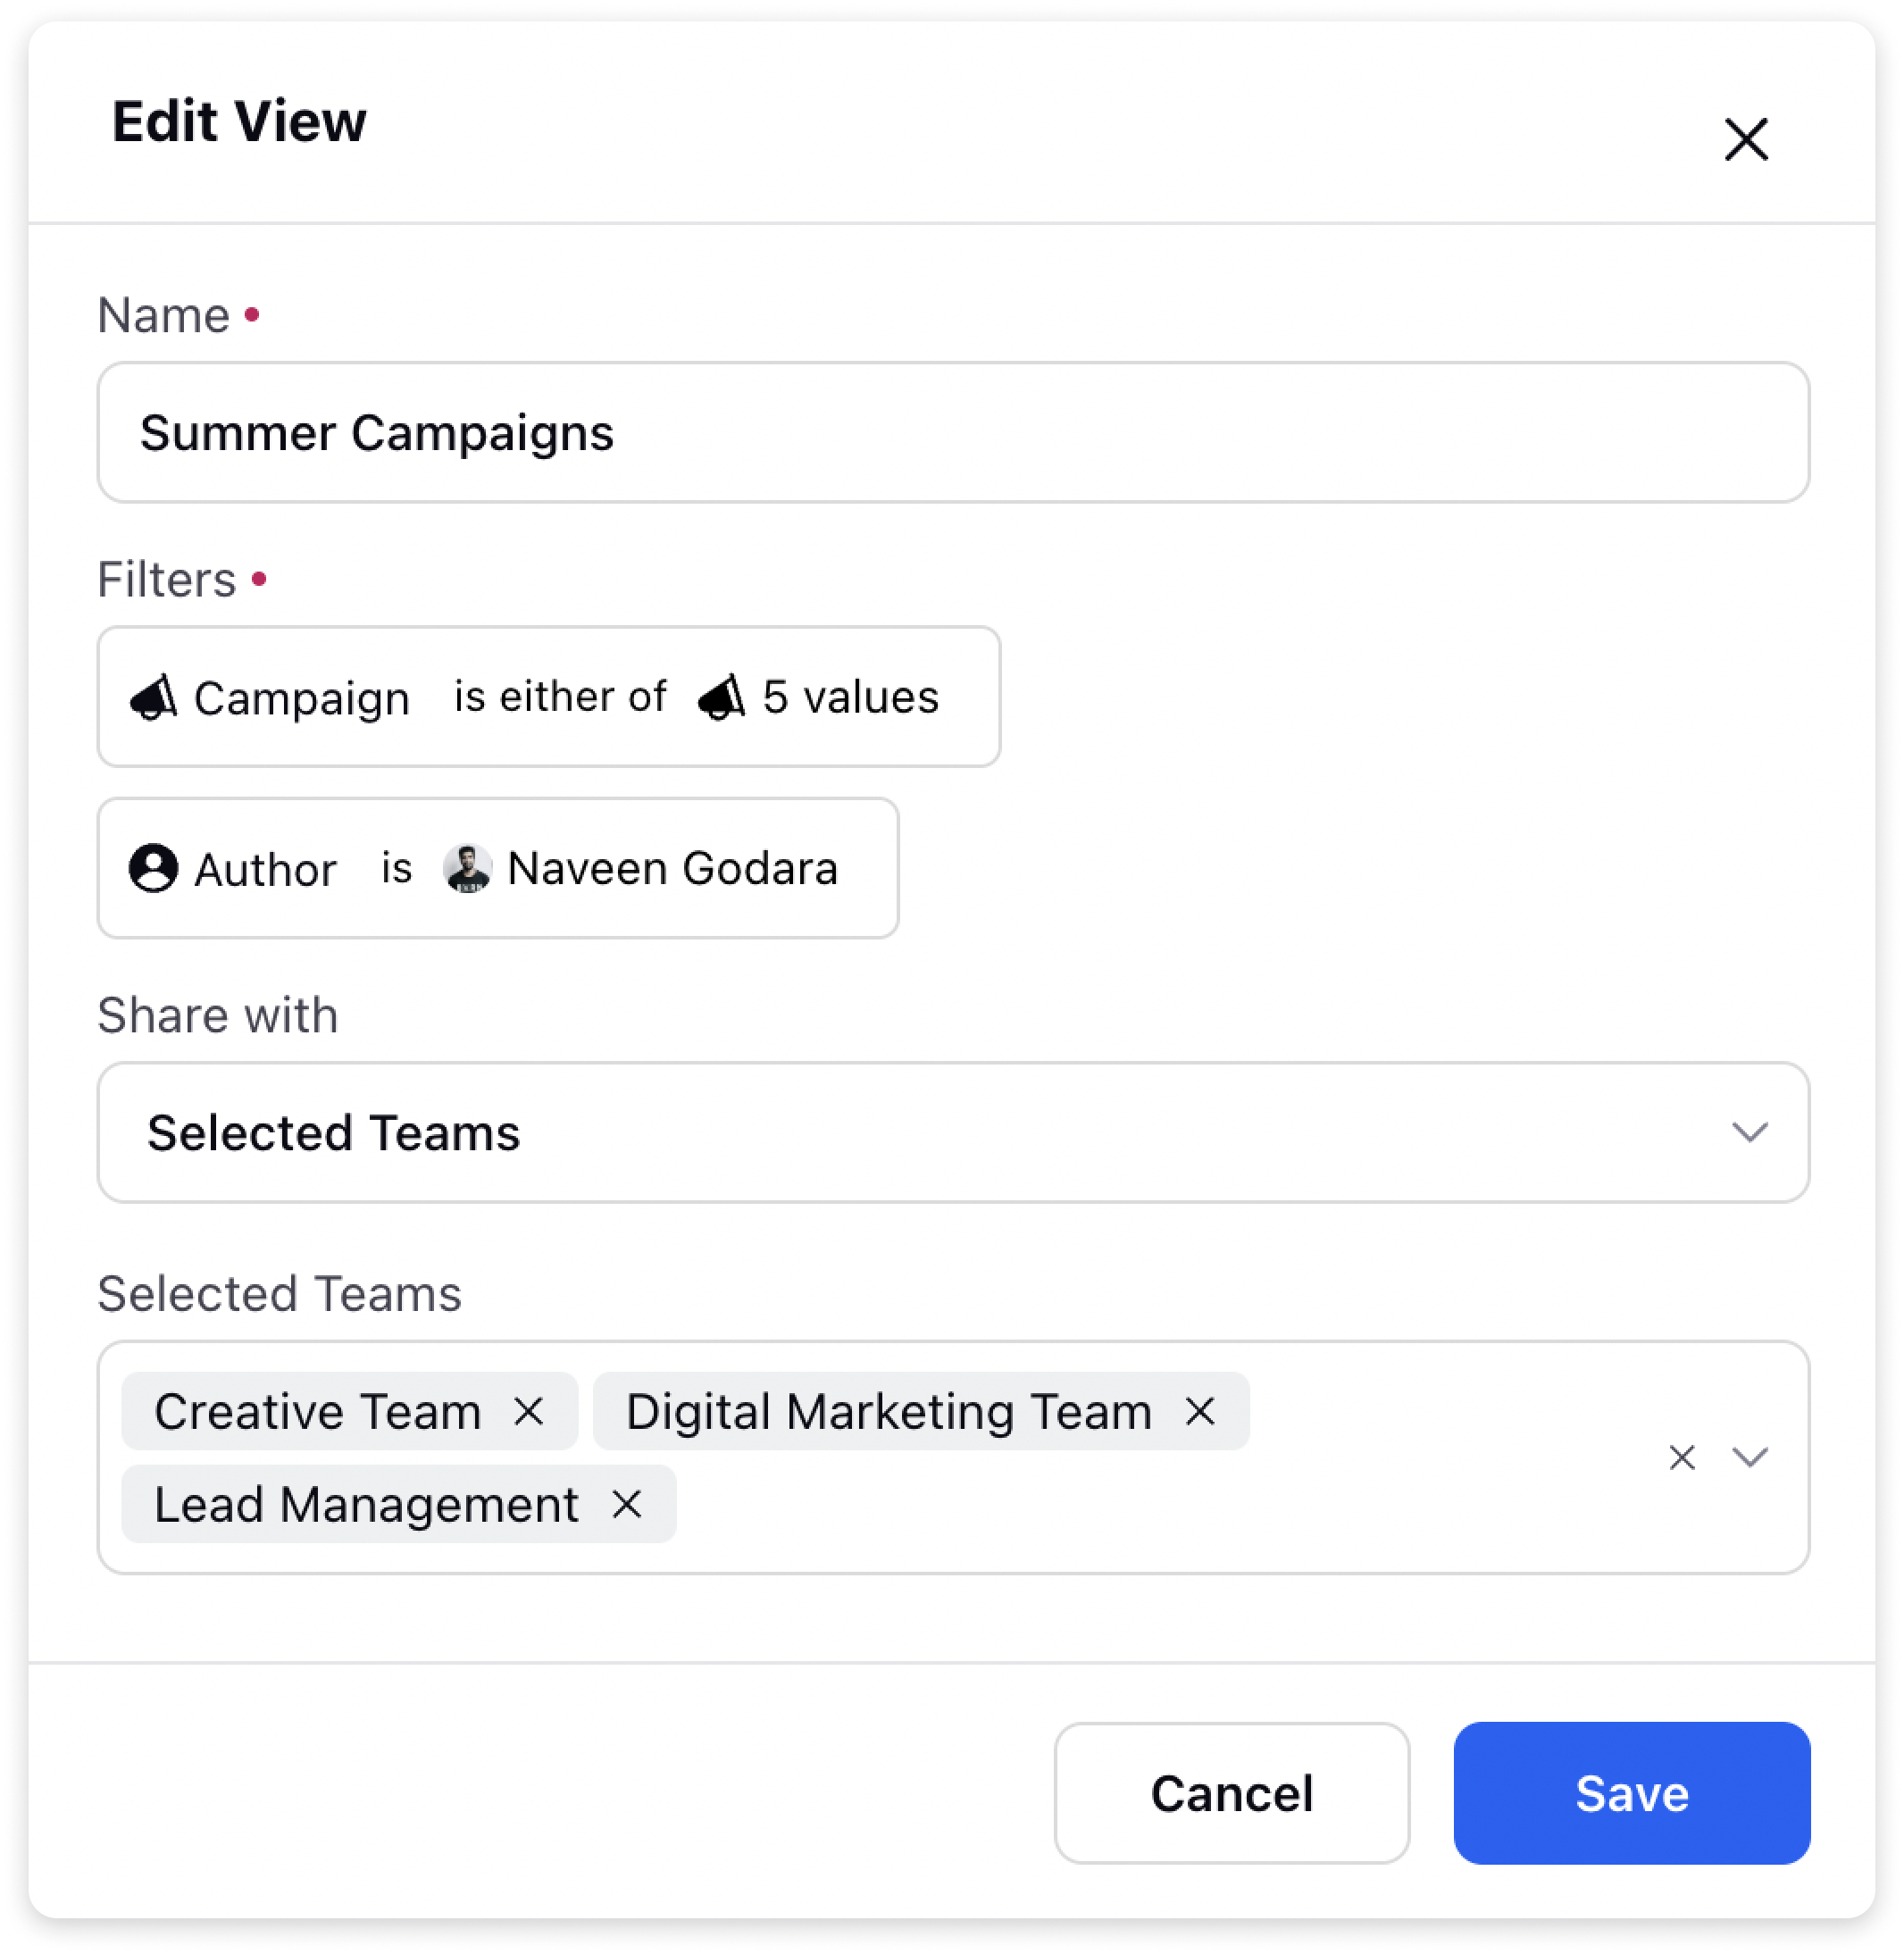
Click on the 3 dots icon in the top right corner and choose to Edit or Delete under View Options from the dropdown.
To edit, a window will pop up, where you can add details such as name of the view, filters, the users/teams to share the Asset view with. Once you're done, Click Save