
Publishing Calendar for Social
Updated
Campaign Visibility in Calendar provides visibility through multiple campaigns across days, months, weeks, and a number of days. You can use various customisation features of the calendar and can schedule your posts for specific campaigns seamlessly. With this feature, you can plan and streamline your campaigns and keep a check on the campaign performance effectively and efficiently.
Navigate to Campaign Visibility
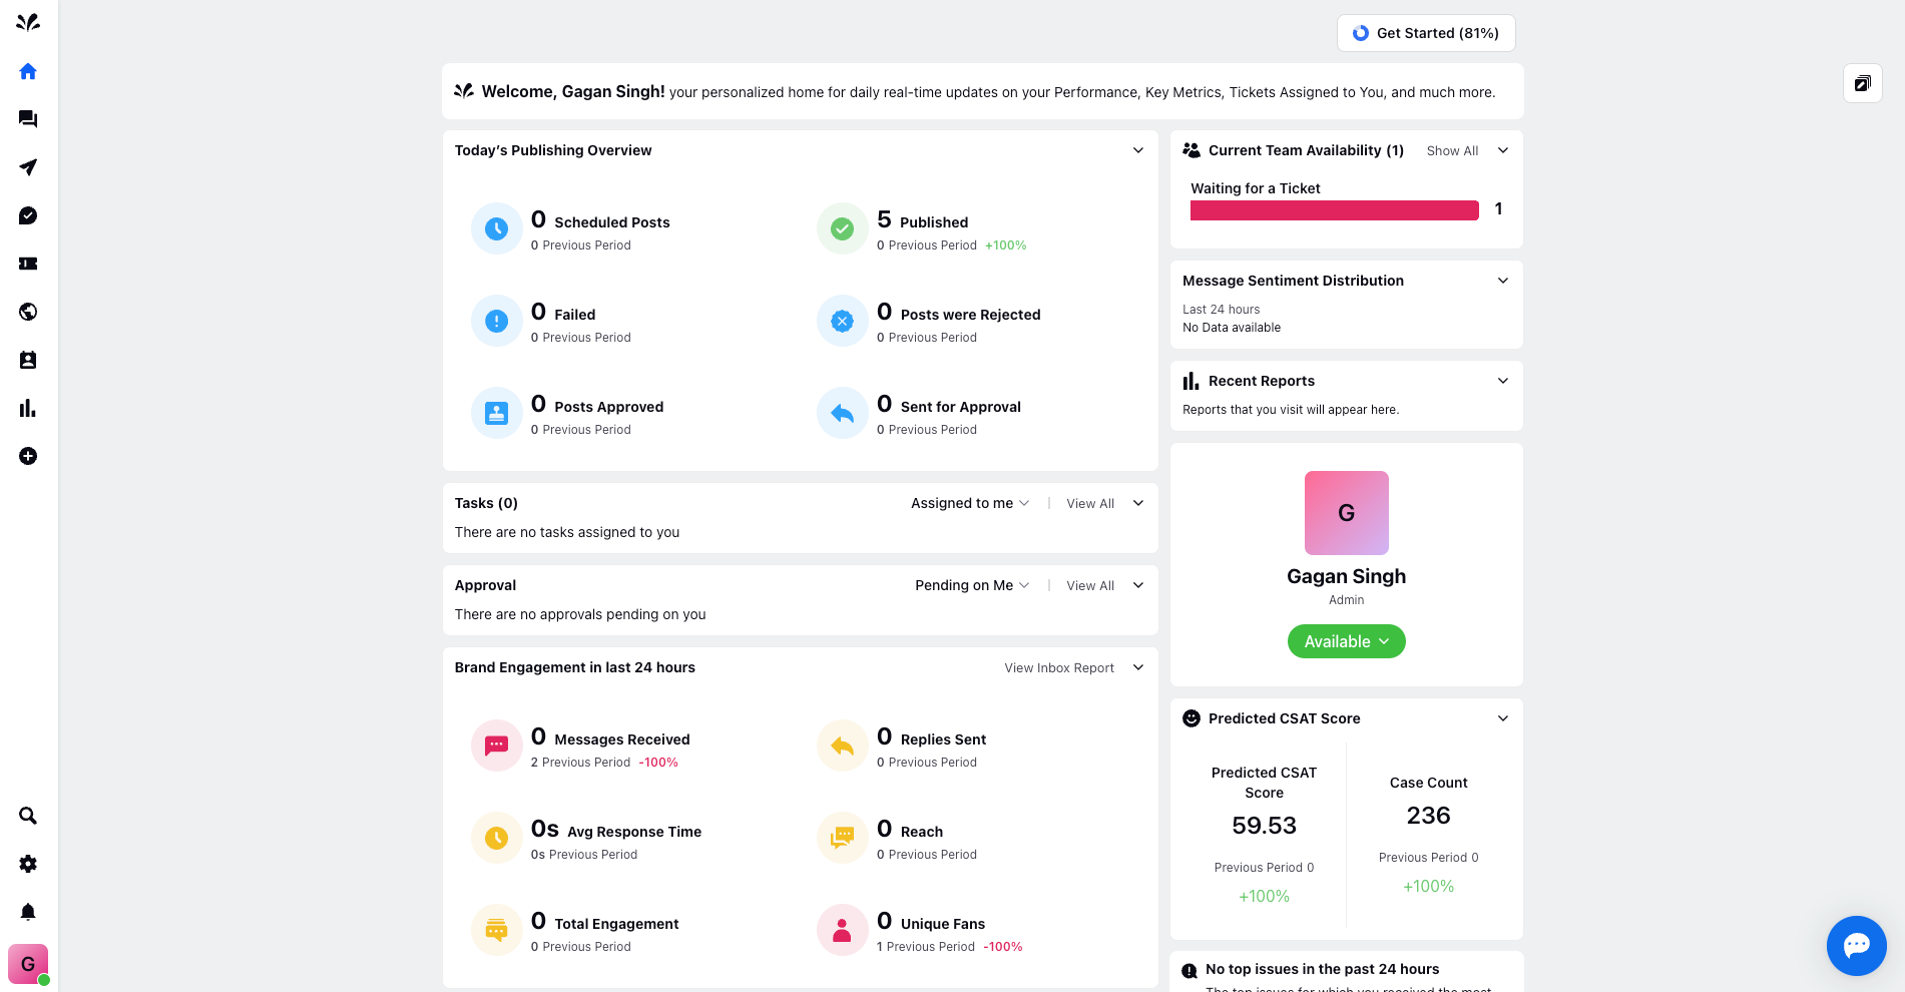
Click on the Publishing icon on the left side of the Sprinklr Social home page.
Click on the Calendar icon on the left pane and you will view the Calendar page where all the campaign posts are segregated by Days, Months, Weeks, Number of days, and Schedule View.
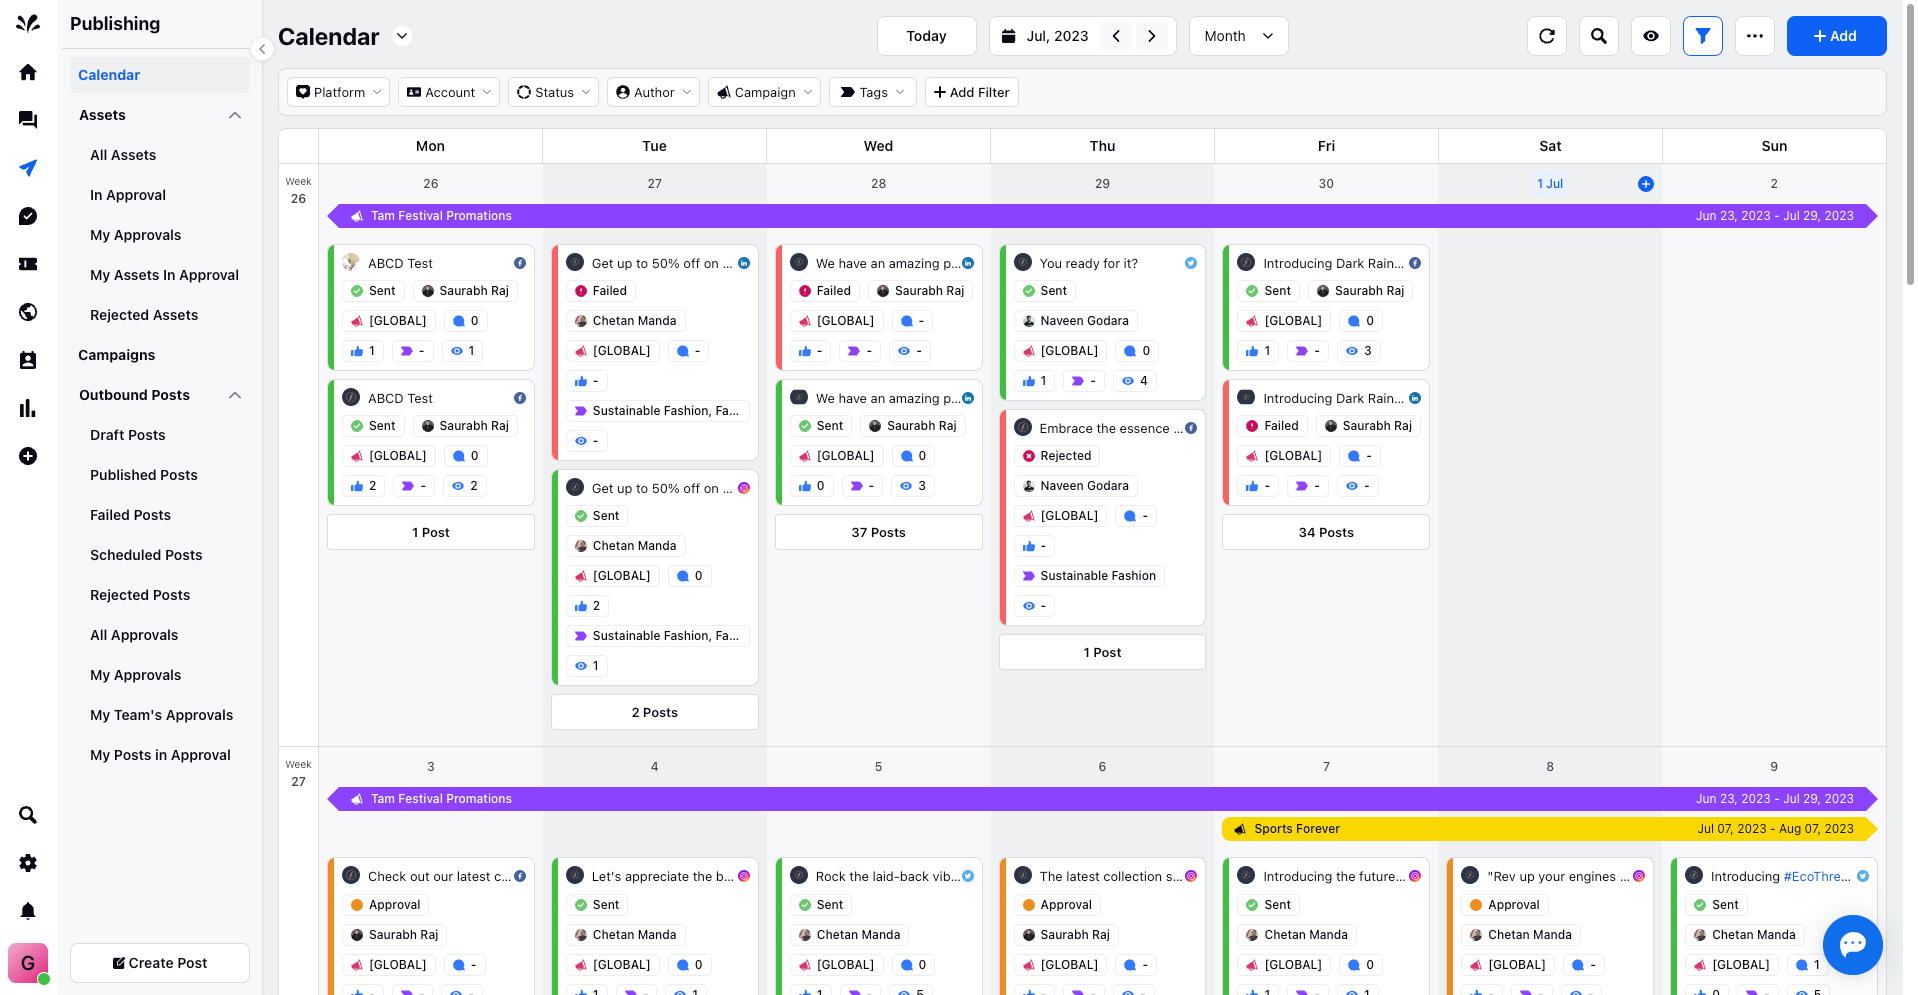
Click Visibility Settings in the top right corner of the Campaign page. The look and feel of the Campaign page are different for Day, Week, Month, Number of Days, and Schedule View. Each view has different Post Card styles and Visibility Settings.
Visibility Settings have different configurations based on different views
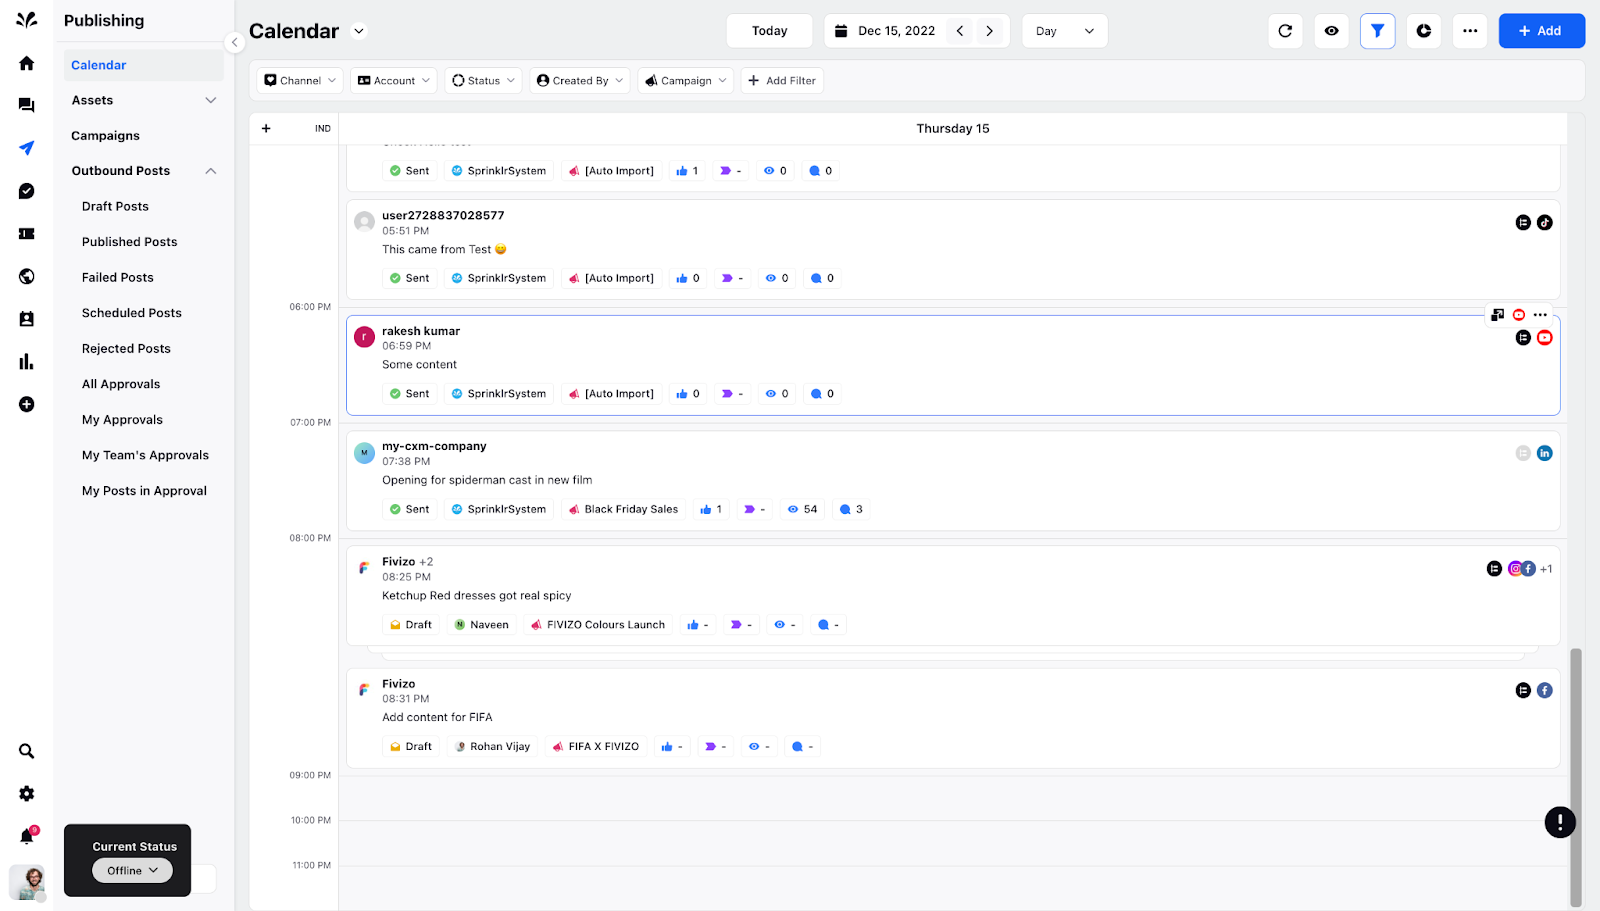
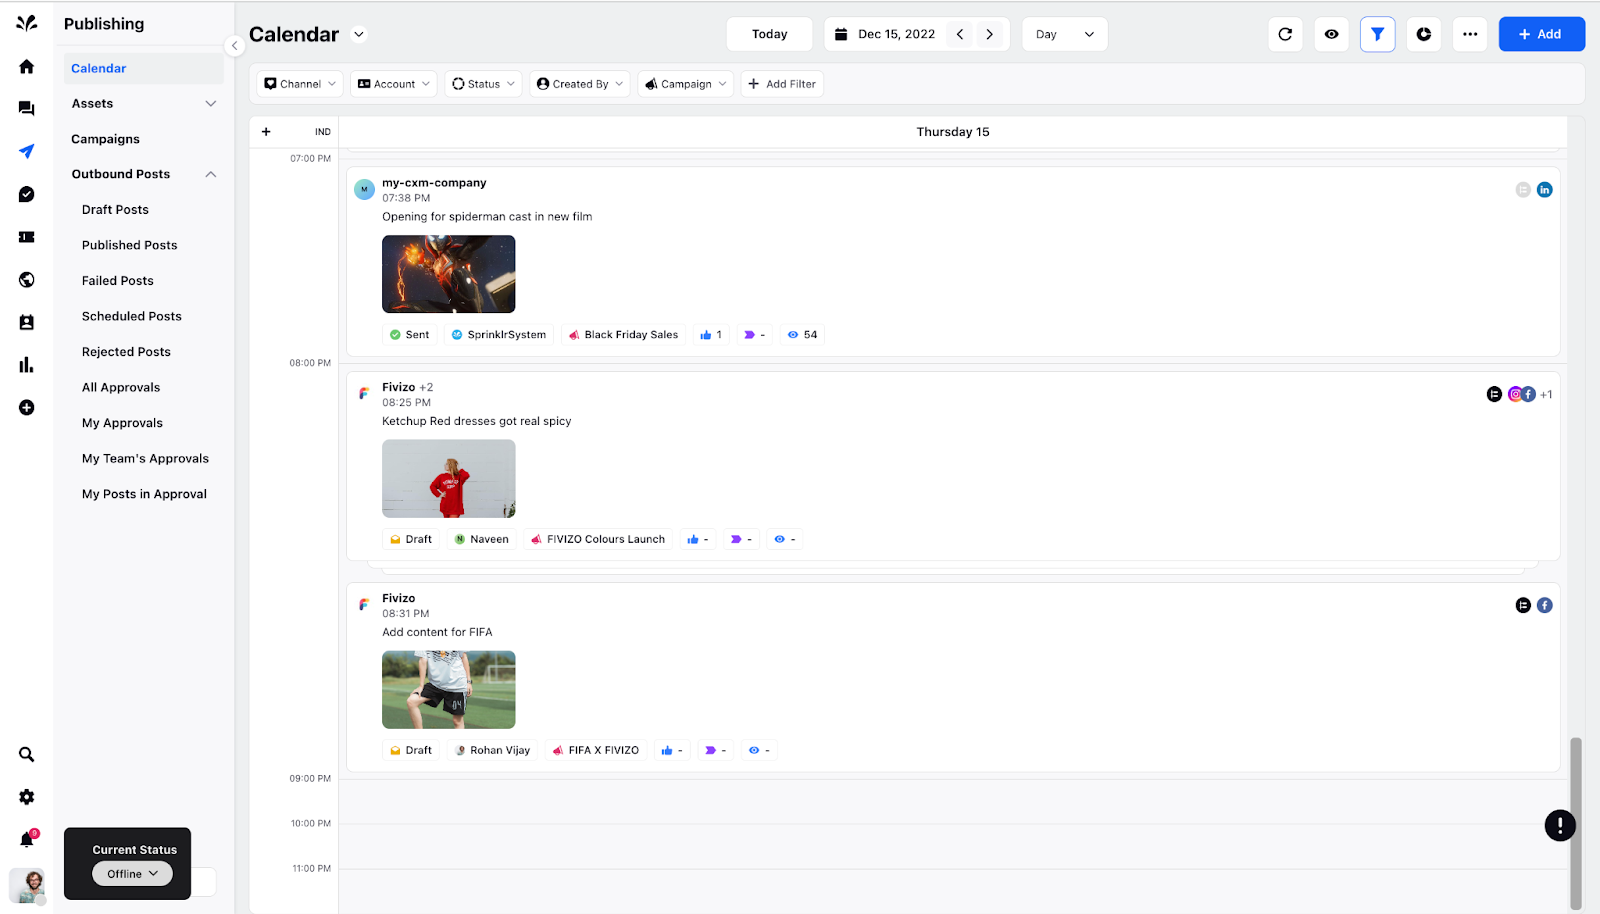
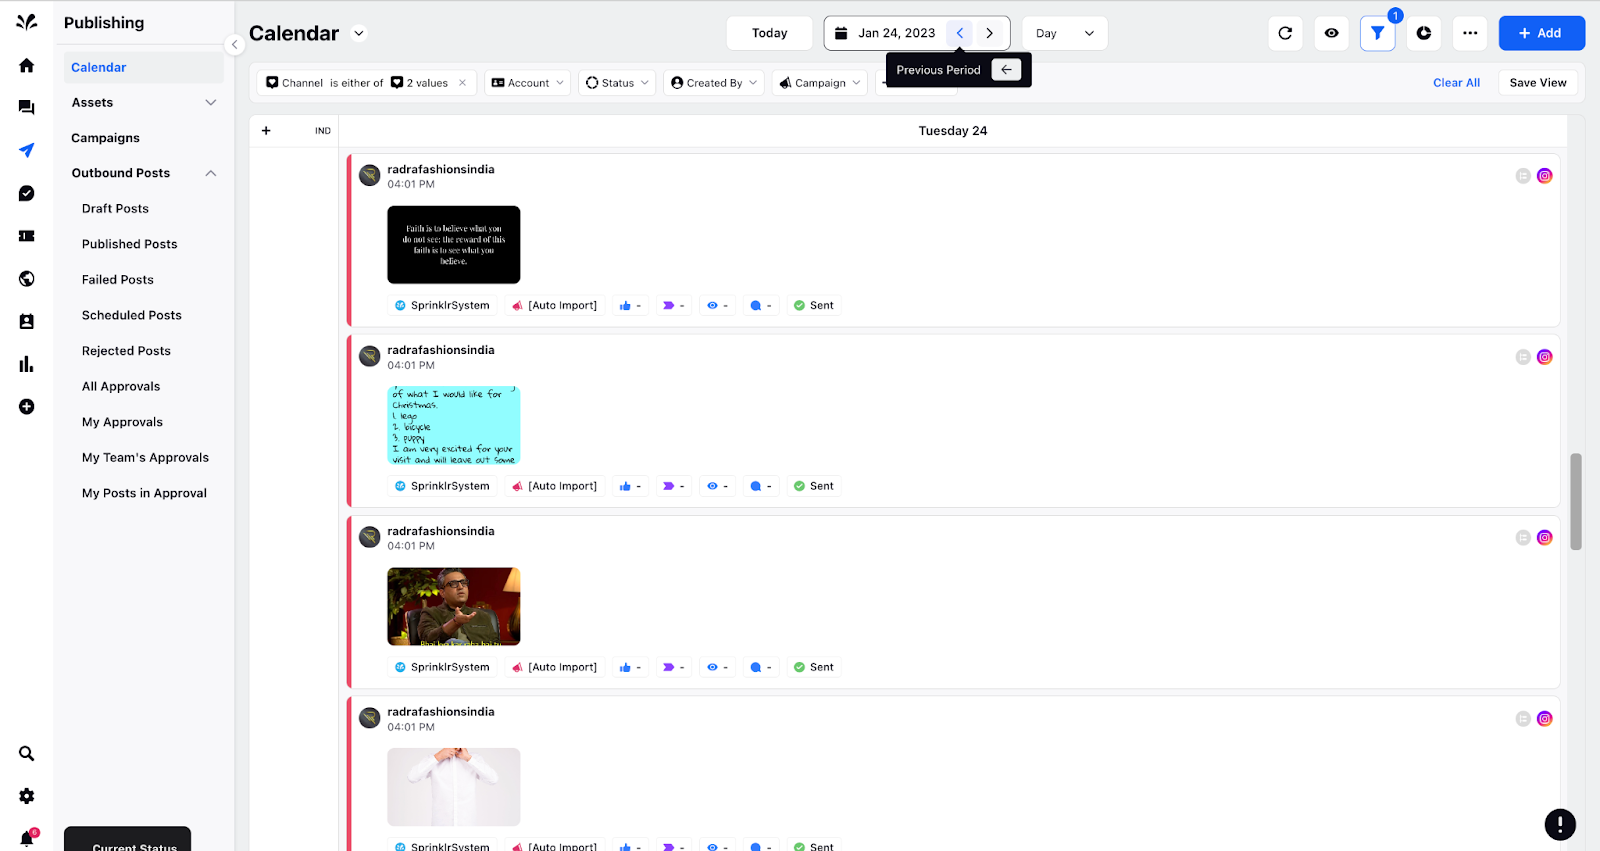
Day View: The posts are divided by the time for a particular day of a month in chronological order.
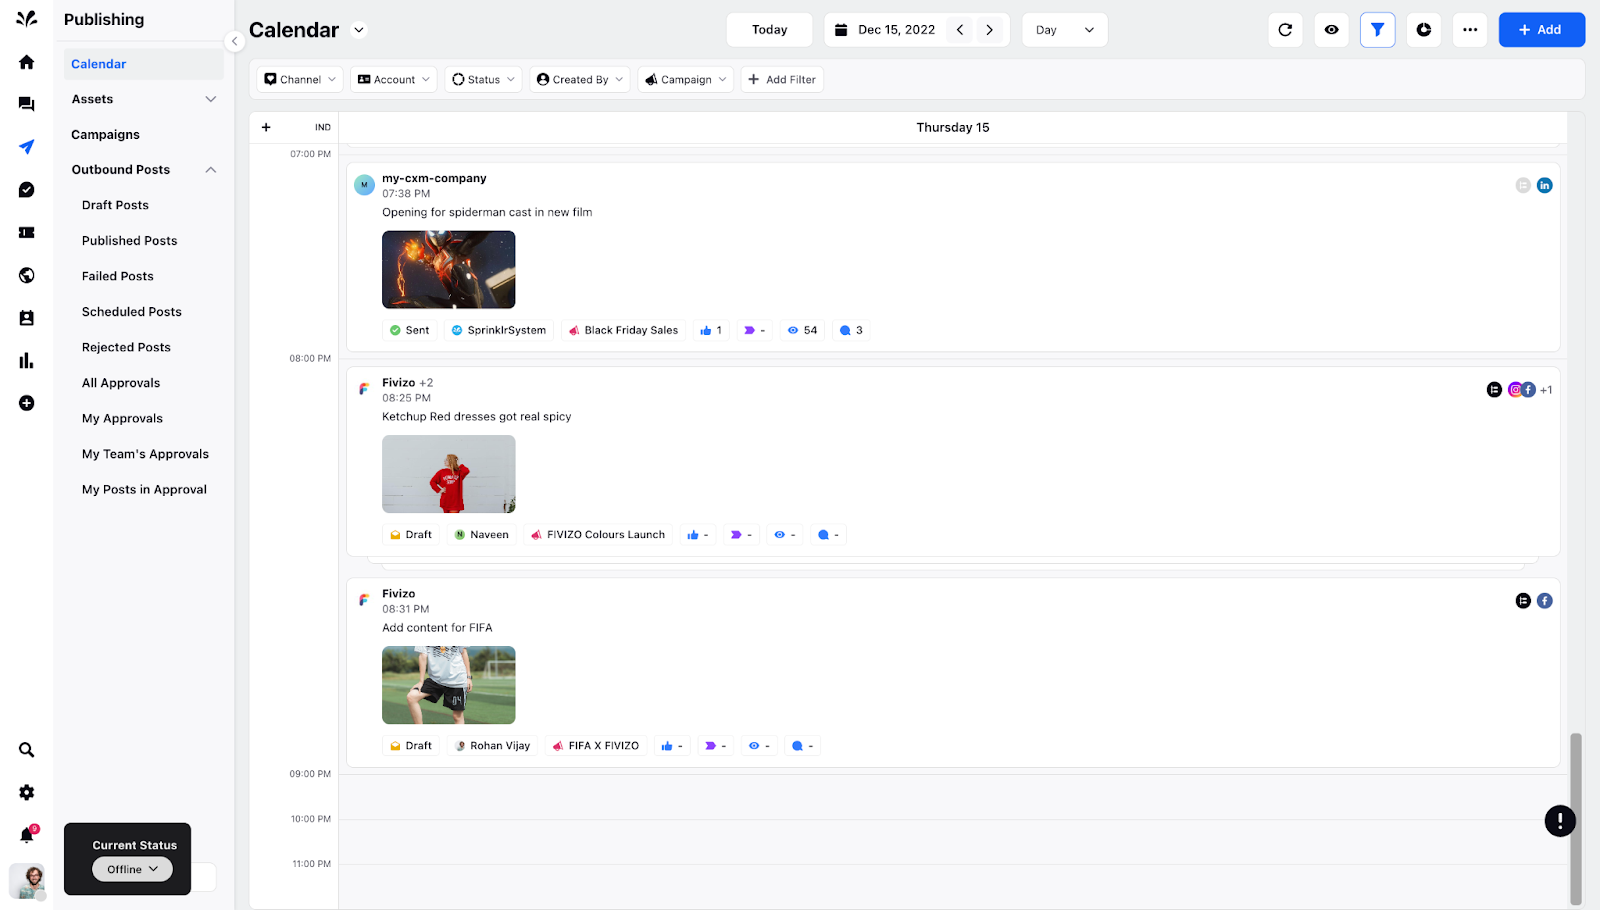
Card Style - The design of the postcard view is divided into 2 types Small and Large view. In the Collapsed view, the posts have 2 liner content and in the Large view, the post has content and the media as well.

Collapsed View
Large View
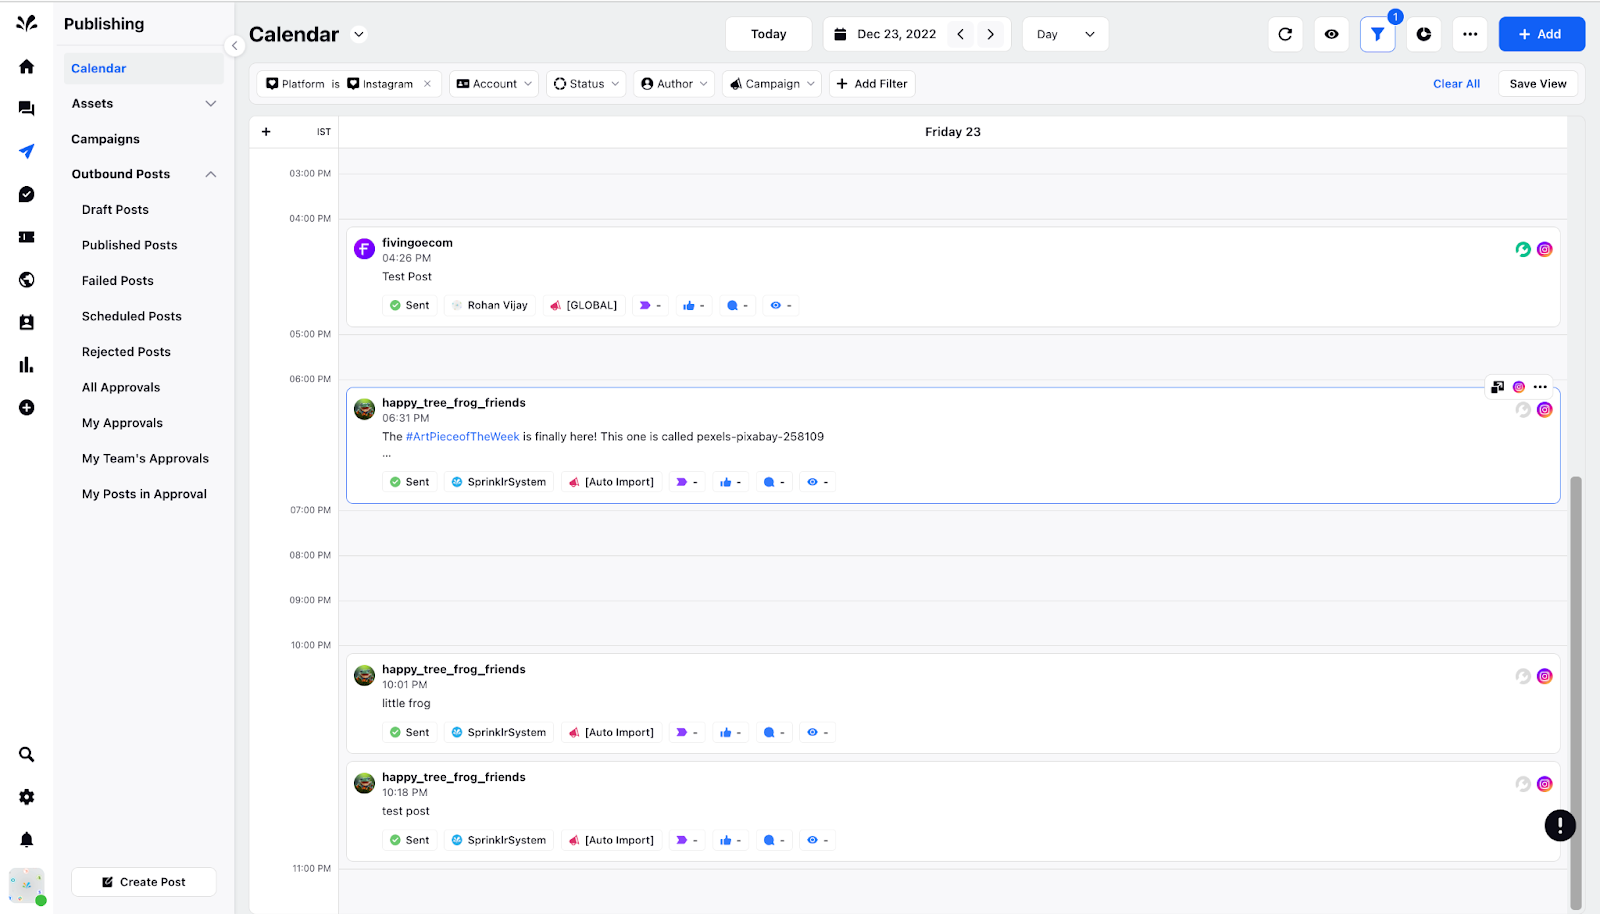
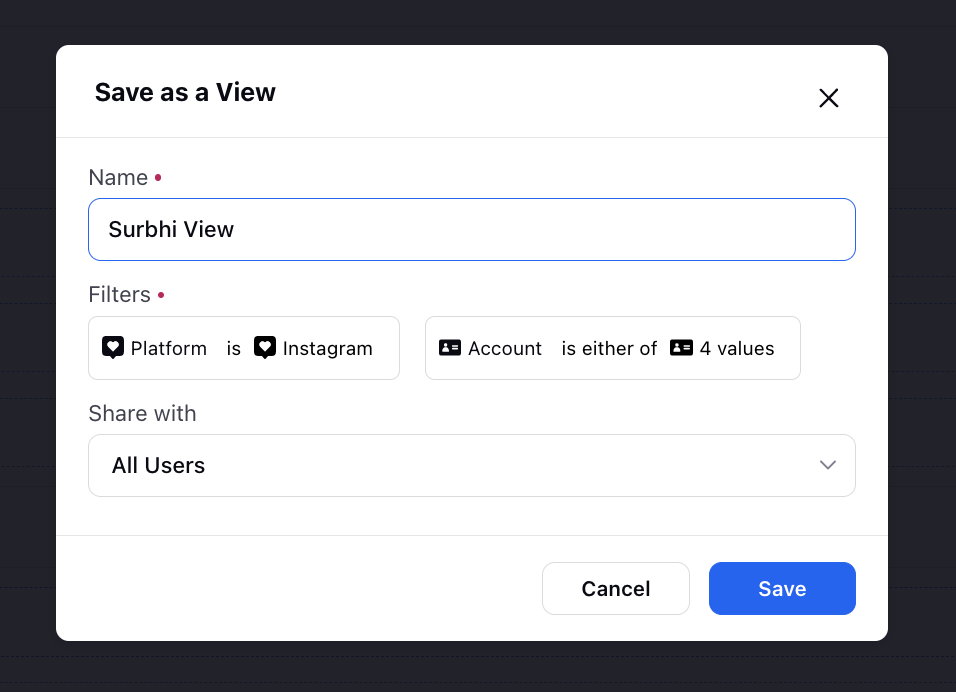
You can save Calendar views by clicking Save View in the top right corner by fixing filters such as Channel, Account, Status, Created By, Campaign, etc. Save as View pop will come where you need to provide the name of the View and choose whom to share the view with.
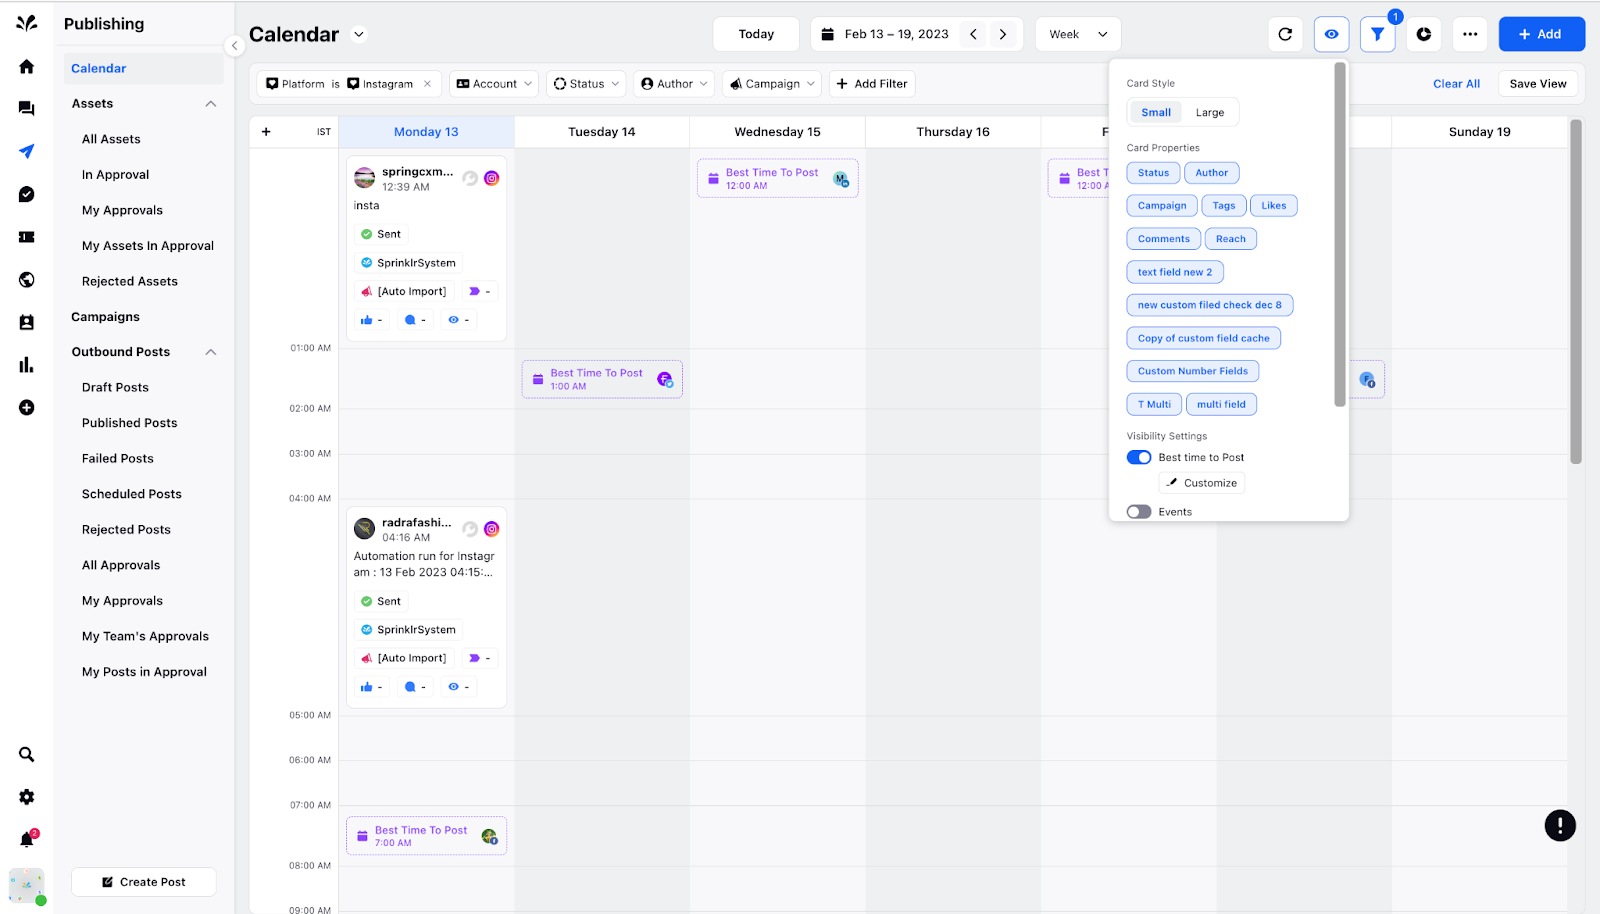
Card properties - There are different card properties. The posts scheduled to be published for specific accounts will be segregated by Status, Author, Campaign, Tags, Likes, Comments, Reach, and other custom fields.
Visibility Settings - It has a list of items such as:
Events - You need to Toggle On to tag events for a specific post and day respectively. Click on any of the events to view the details in the third pane.

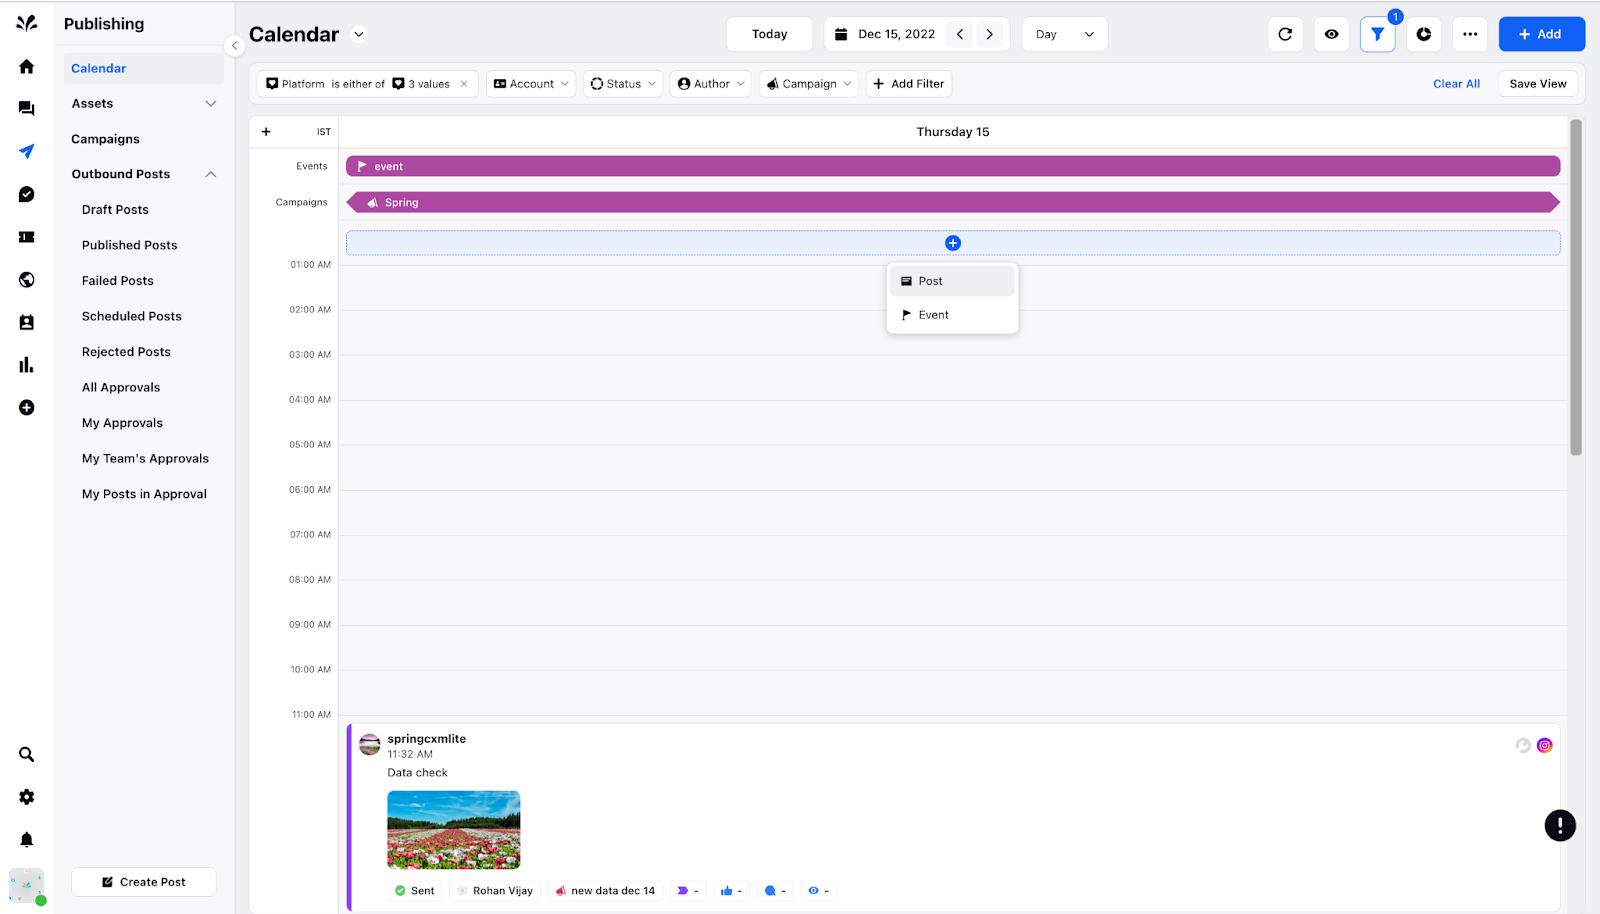
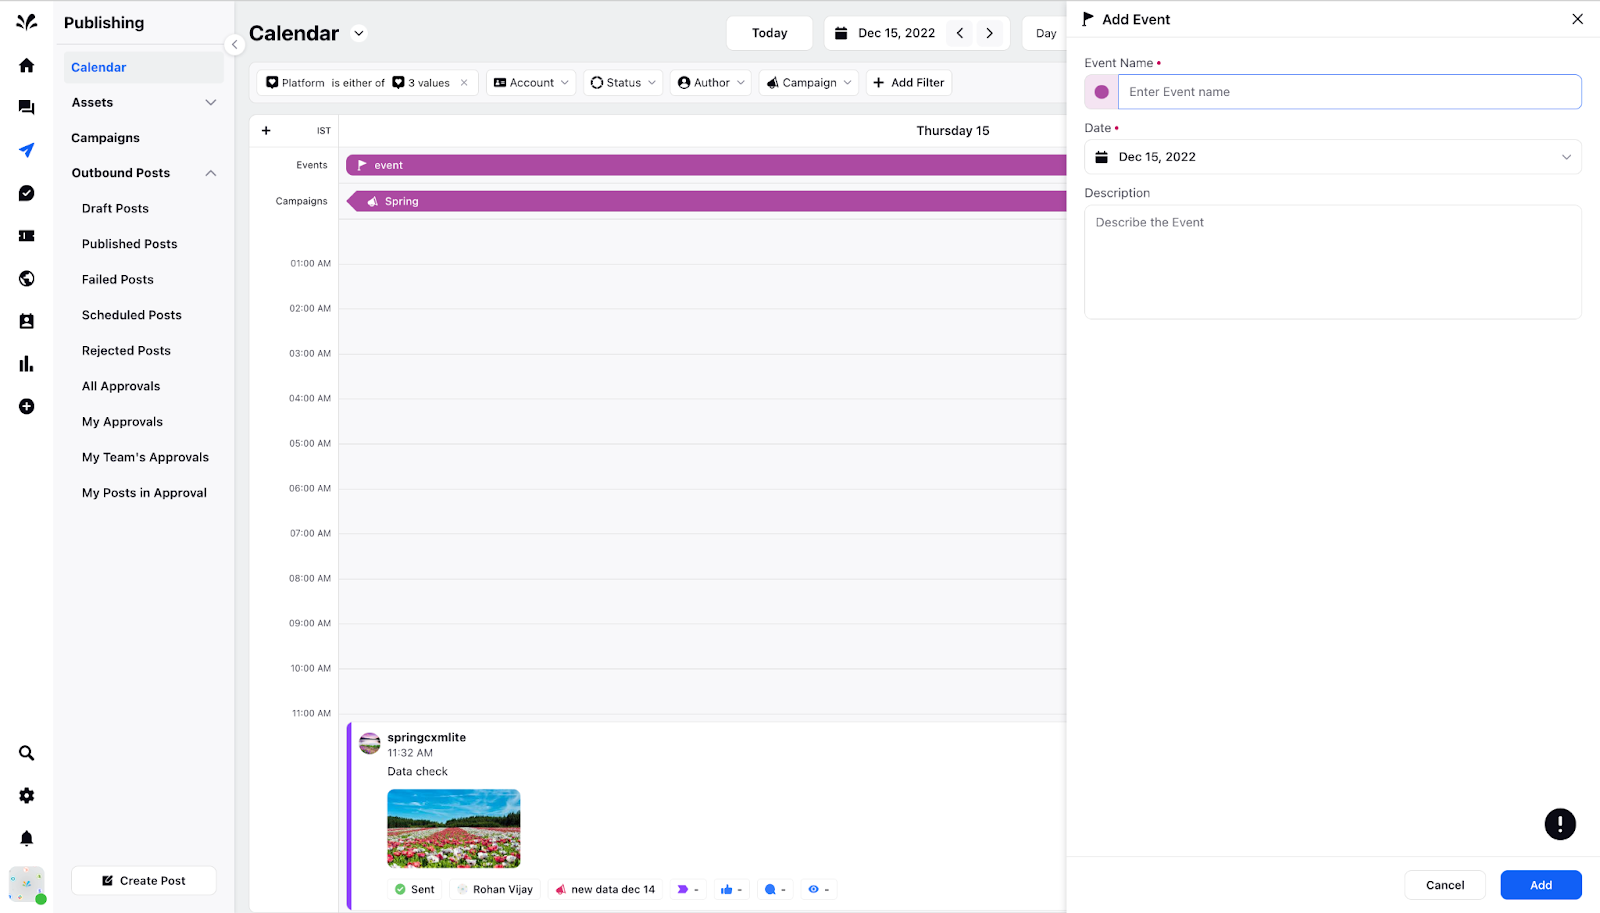
To create a new Event, you need to click on the + icon on any specific day. The Add Event page will appear where you need to provide the Event name, date, and description. You can click on any of the Events to view details in the third pane.
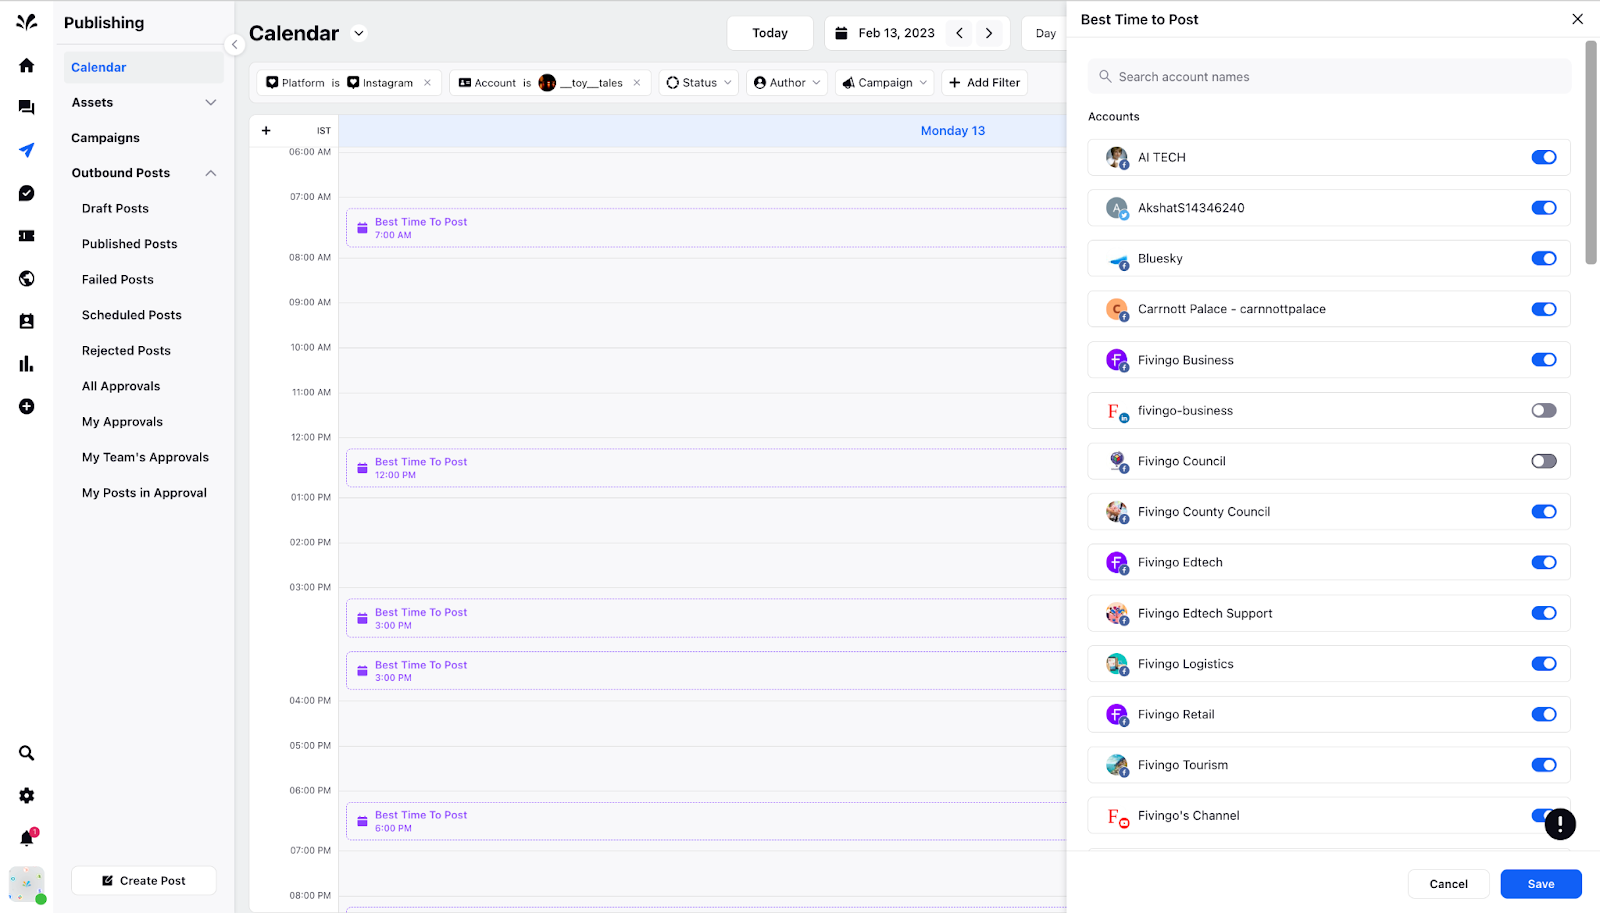
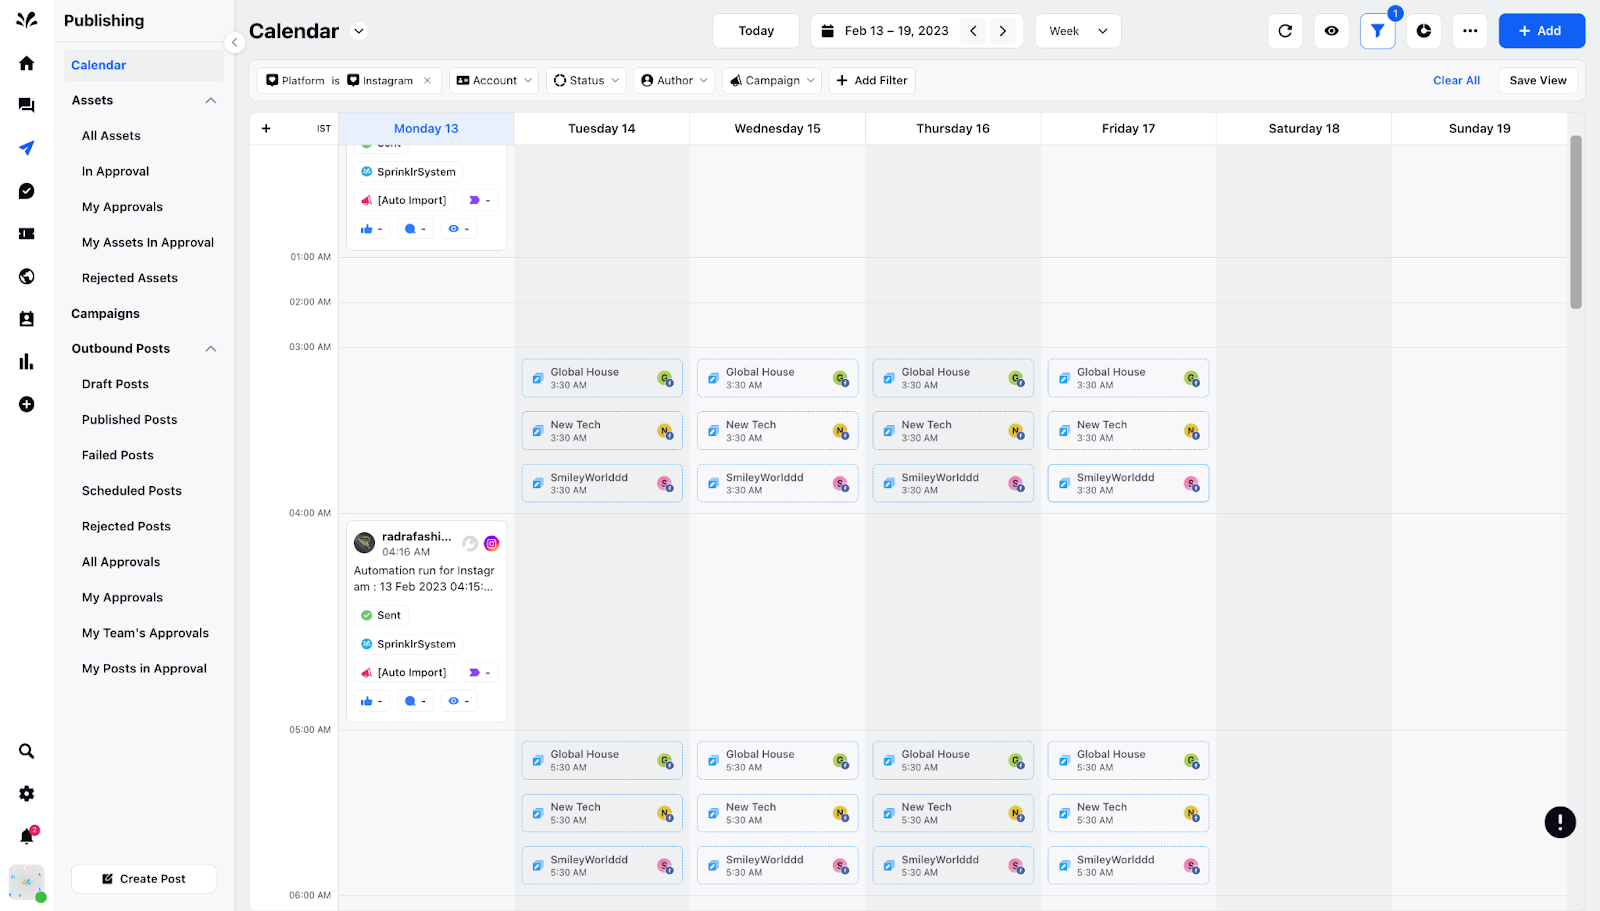
Best time to post - It shows the best time to publish the post in a day view. It shows the Account name and the time at which the post should be published. You can Toggle On if you want to view the best time to post.

You can click on Customize to toggle on and off the specific Accounts that you want to show in the Calendar. Click Save at the bottom.
Publishing Queue - You can Toggle On to fix the publishing queue of the post for a specific account. The post is scheduled to be published in 2 hours gap. You can view the post’s name, time, and the name of the platform on which the post will be published. Click on any of the posts to see the details on the third pane.

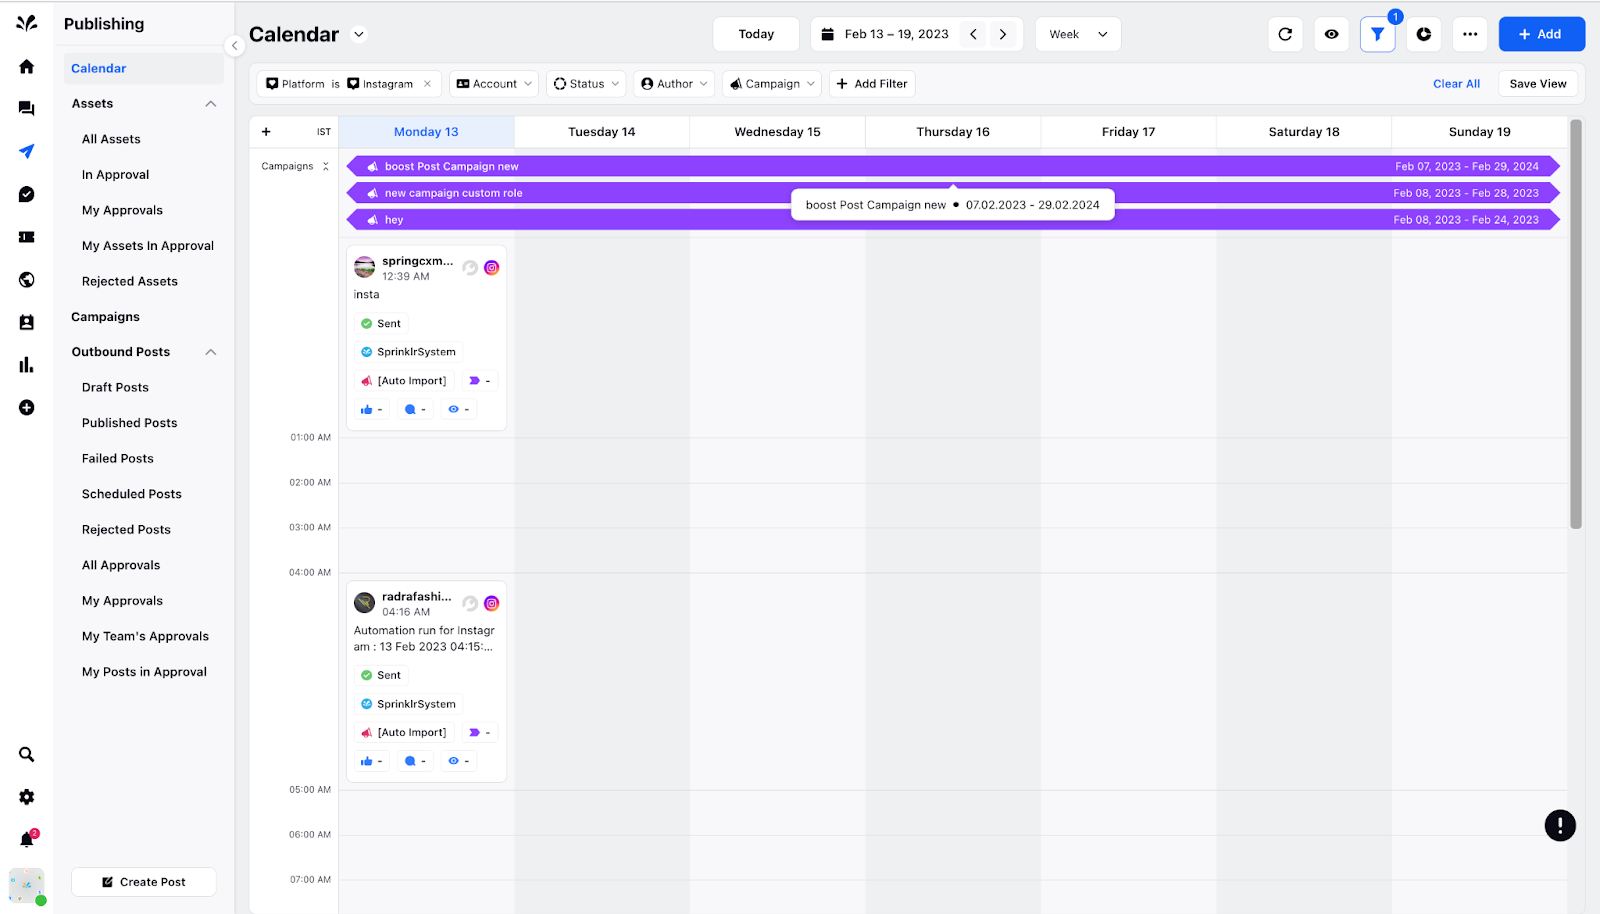
Campaigns - You can Toggle On to tag campaigns to the posts and tag the campaign by any color and view details of the same in the third pane by clicking on any of the campaigns scheduled for a specific day. You can view the campaign duration by hovering over the campaign bar.

Click on the Campaign bar to view the details in the third pane. The Overview tab will open in the third pane where you can view the campaign insights, posts, insights, tags, campaign, etc.

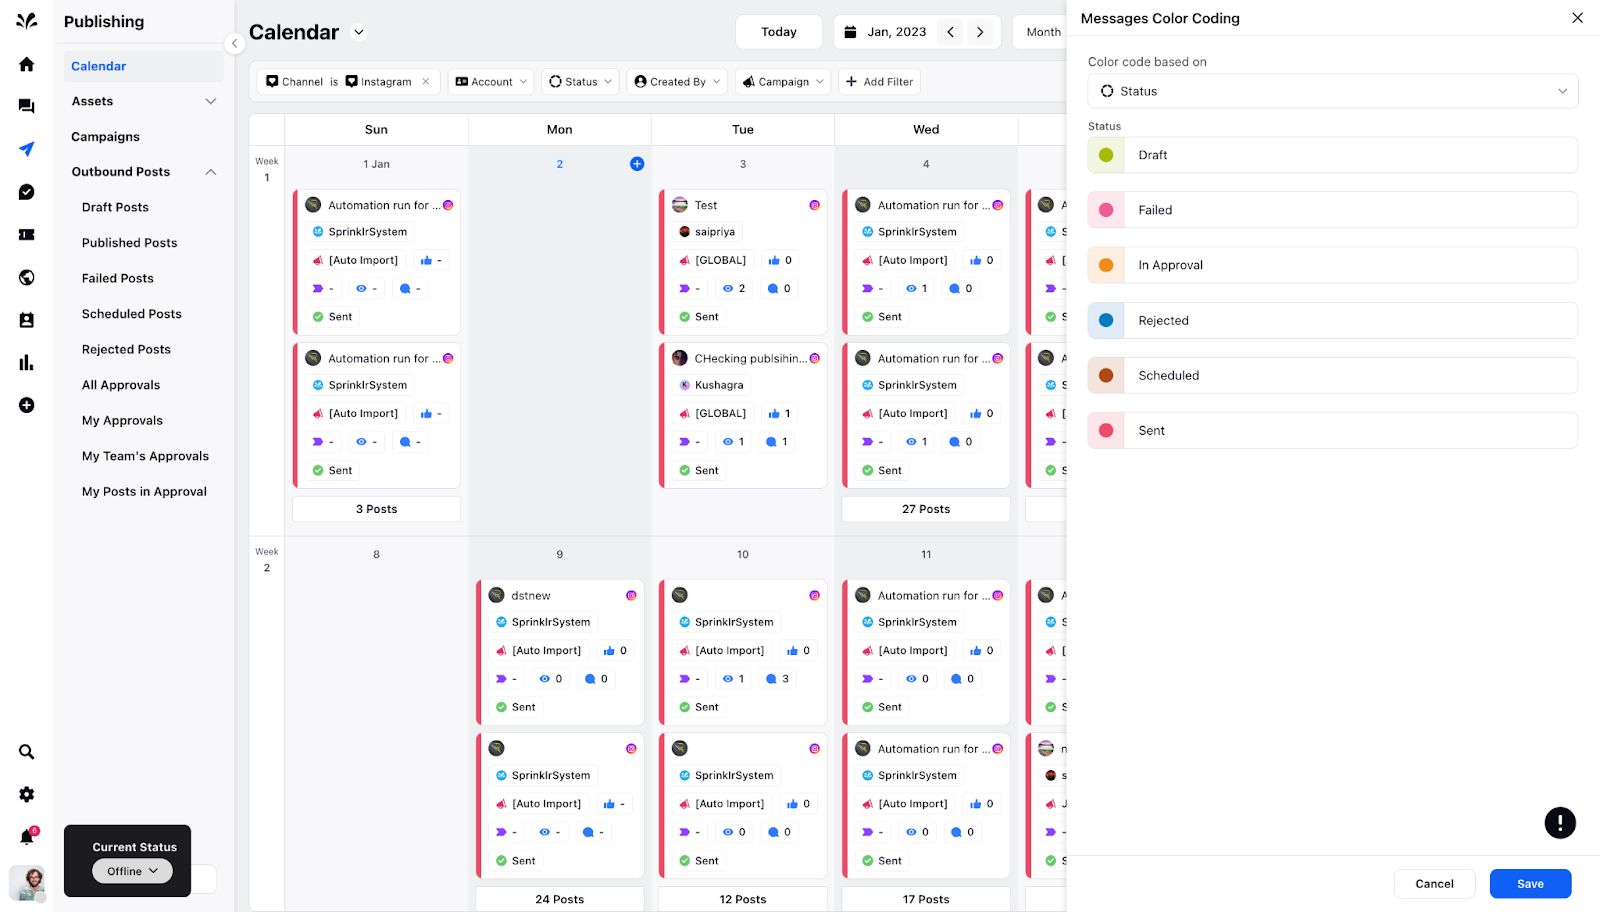
Color Messages: Visually identify postcards based on conditions. You can click on Customize icon and decide color code based on - Created by, Campaign, and Status.

Important Note:
The shortcut key to navigate to Day View is D or 1. There is a previous key and the next key to go to the next post.

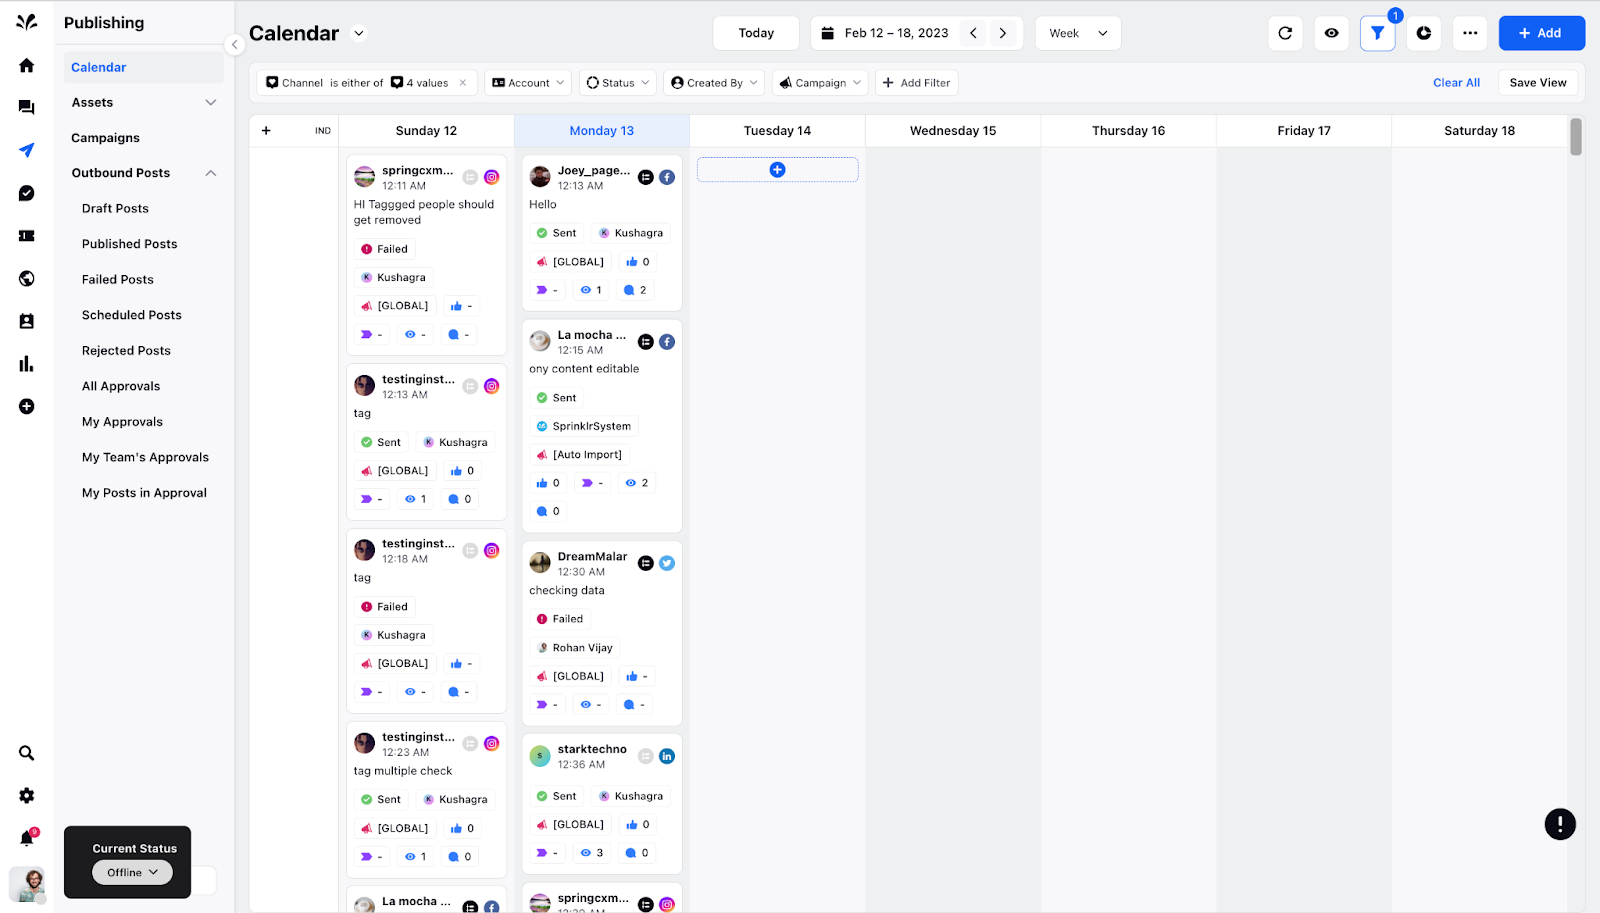
Week View
The posts are divided by week.
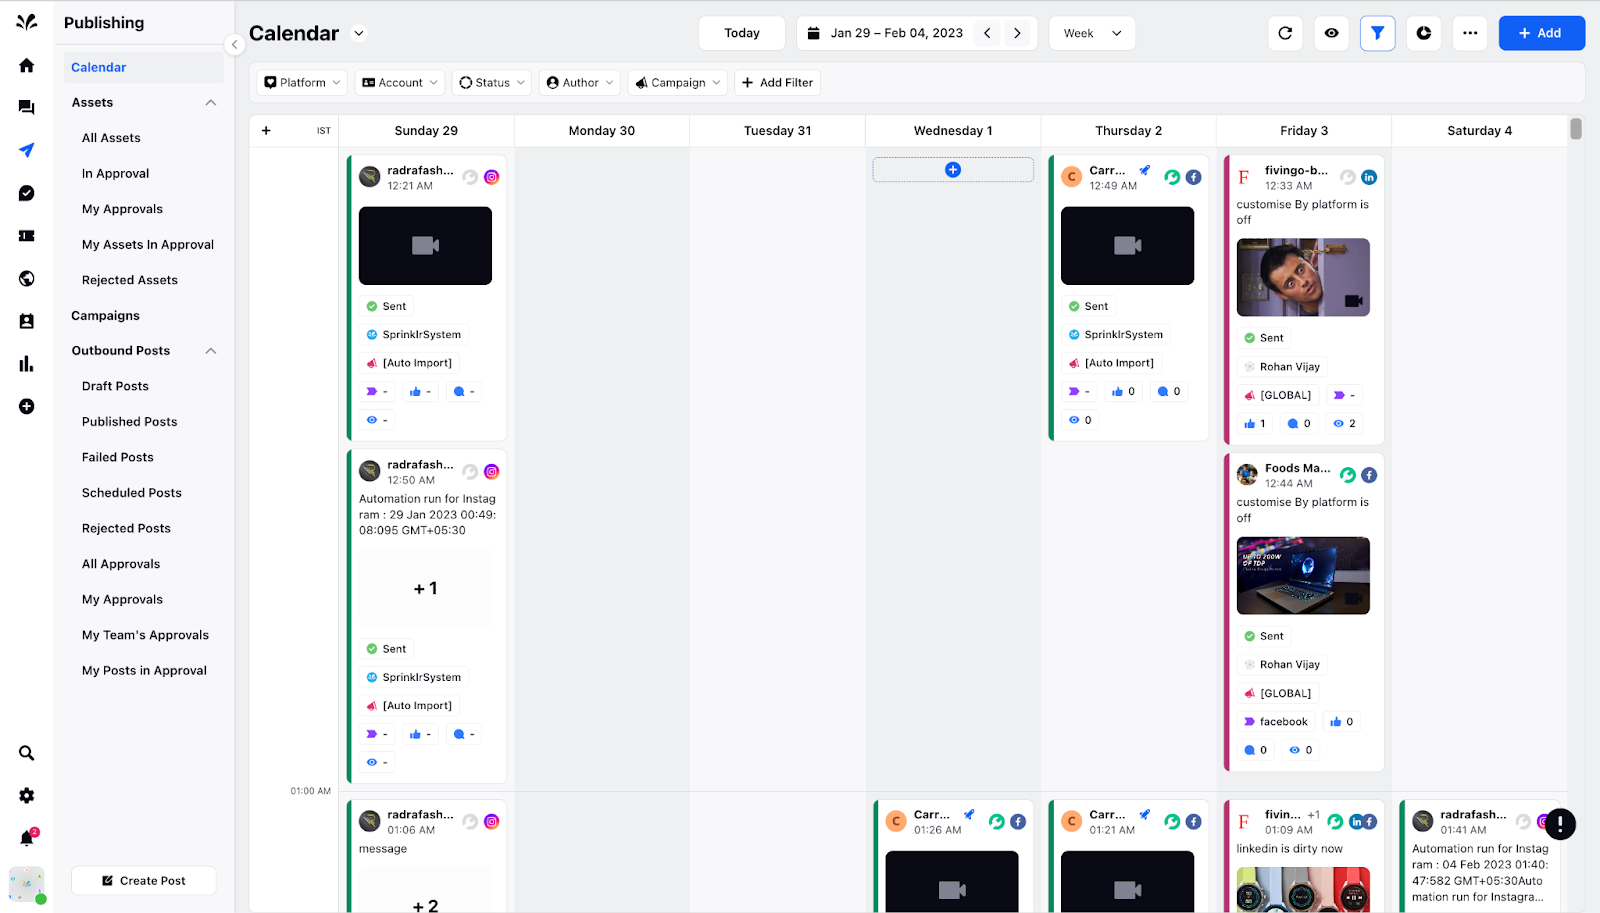
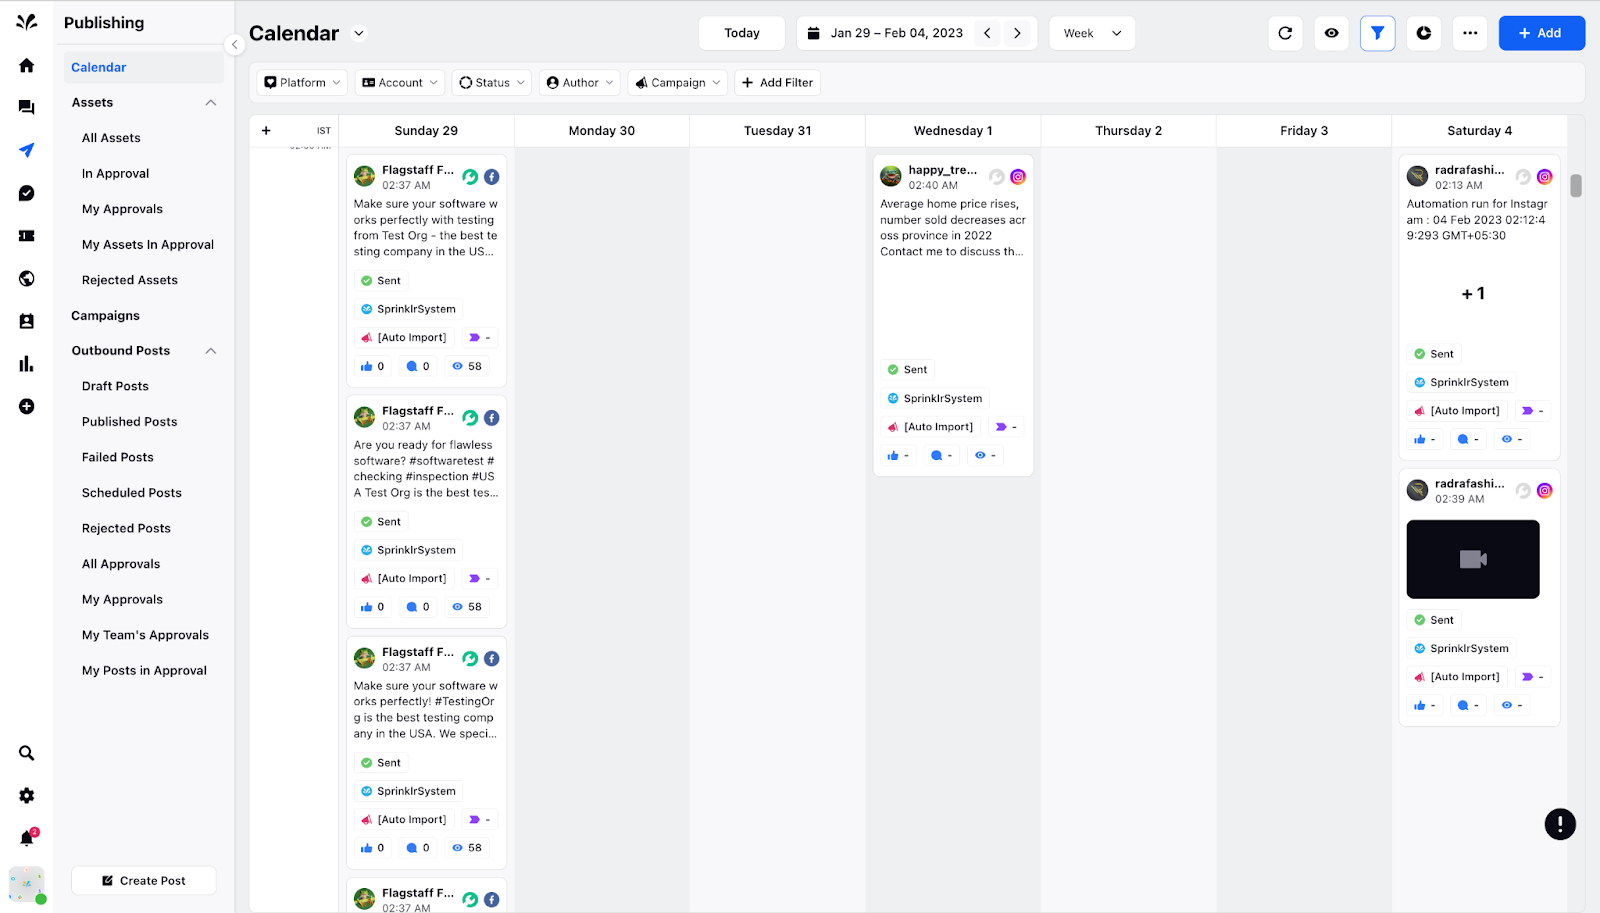
Card Style - The design of the card view is divided into 2 types Small and Large. In the Small view, the posts have 2 liner content and in the Large view, the post has content and the media as well.
Small view
Large View

You can save Calendar views by clicking Save View in the top right corner by fixing filters such as Channel, Account, Status, Created By, Campaign, etc. Save as View pop will come where you need to provide the name of the View and choose whom to share the view with.
Card properties - There are different card properties. The posts scheduled to be published for specific accounts will be segregated by Status, Author, Campaign, Tags, Likes, Comments, Reach, and other custom fields.
Visibility Settings - It has a list of other items such as:
Events - You need to Toggle On to tag events for a specific post and day respectively. Click on any of the events to view the details in the third pane. To create a new Event, you need to click on the + icon on any specific day. The Add Event page will appear where you need to provide the Event name, date, and description. You can click on any of the Events to view details in the third pane.

Best time to post - It shows the best time to publish the post in a week's view. It shows the Account name and the time at which the post should be published. You can Toggle On if you want to view the best time to post.
You can click on Customize to toggle on and off the specific Accounts that you want to show in the Calendar. Click Save at the bottom.

Publishing Queue - You can Toggle On to fix the publishing queue of the post for a specific account. The post is scheduled to be published in 2 hours gap. You can view the post’s name, time, and the name of the platform on which the post will be published.
Campaigns - You can Toggle On to tag campaigns to a specific post for a specific week. Besides that, you can tag the campaign by any color and view details of the same in the third pane by clicking on any of the campaigns scheduled for a specific week. You can view the campaign duration by hovering over the campaign bar.
Color Messages: Visually identify postcards based on conditions. You can click on Customize icon and decide color code based on - Created by, Campaign, and Status.
Configure Start Date: You can configure the Start date for every week in a monthly view. If you configure a start date as Sunday, the week will start from Sunday.
Important Note
The shortcut key to navigate to the Week view is W or 7.
Month View:
This calendar view is segregated into a monthly view.
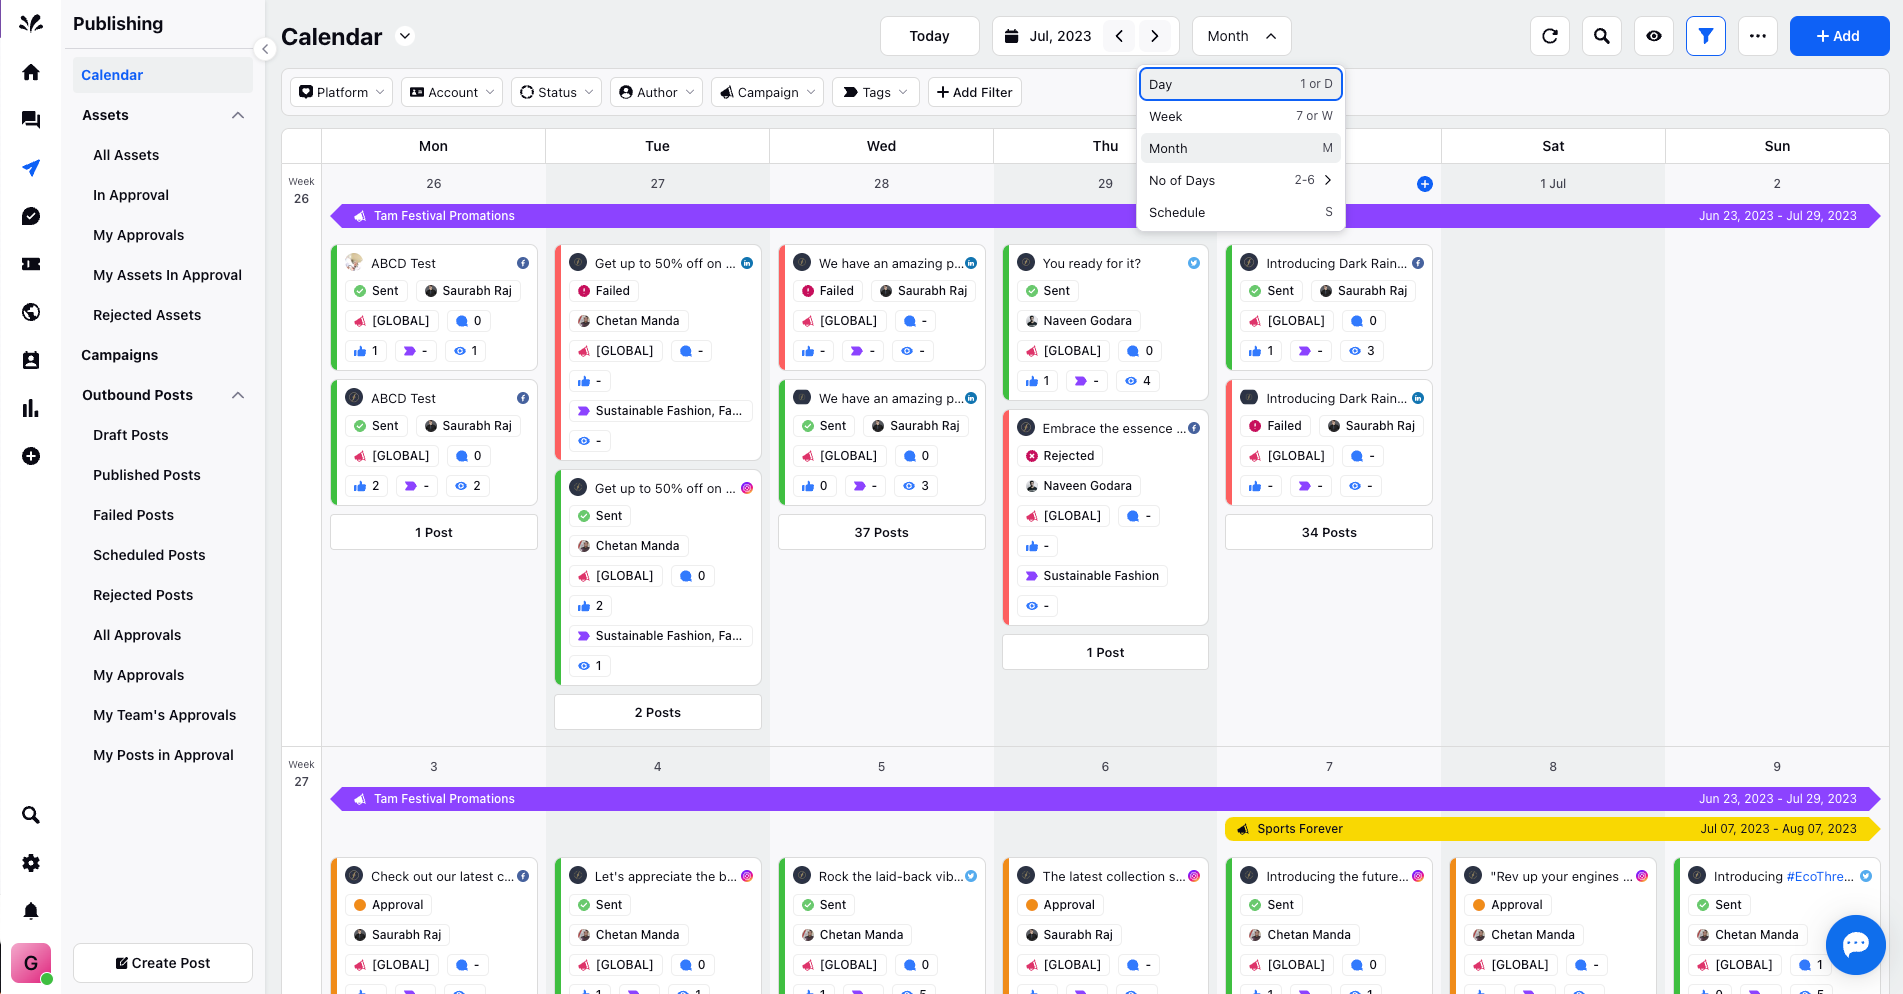
Card View - The design of the card view is divided into 2 types Collapse and Detailed view. In the Collapse view, the posts have brief content and it displays the number of posts to be scheduled for different platforms and in the Detailed view, the posts display content in detail.
Collapsed View

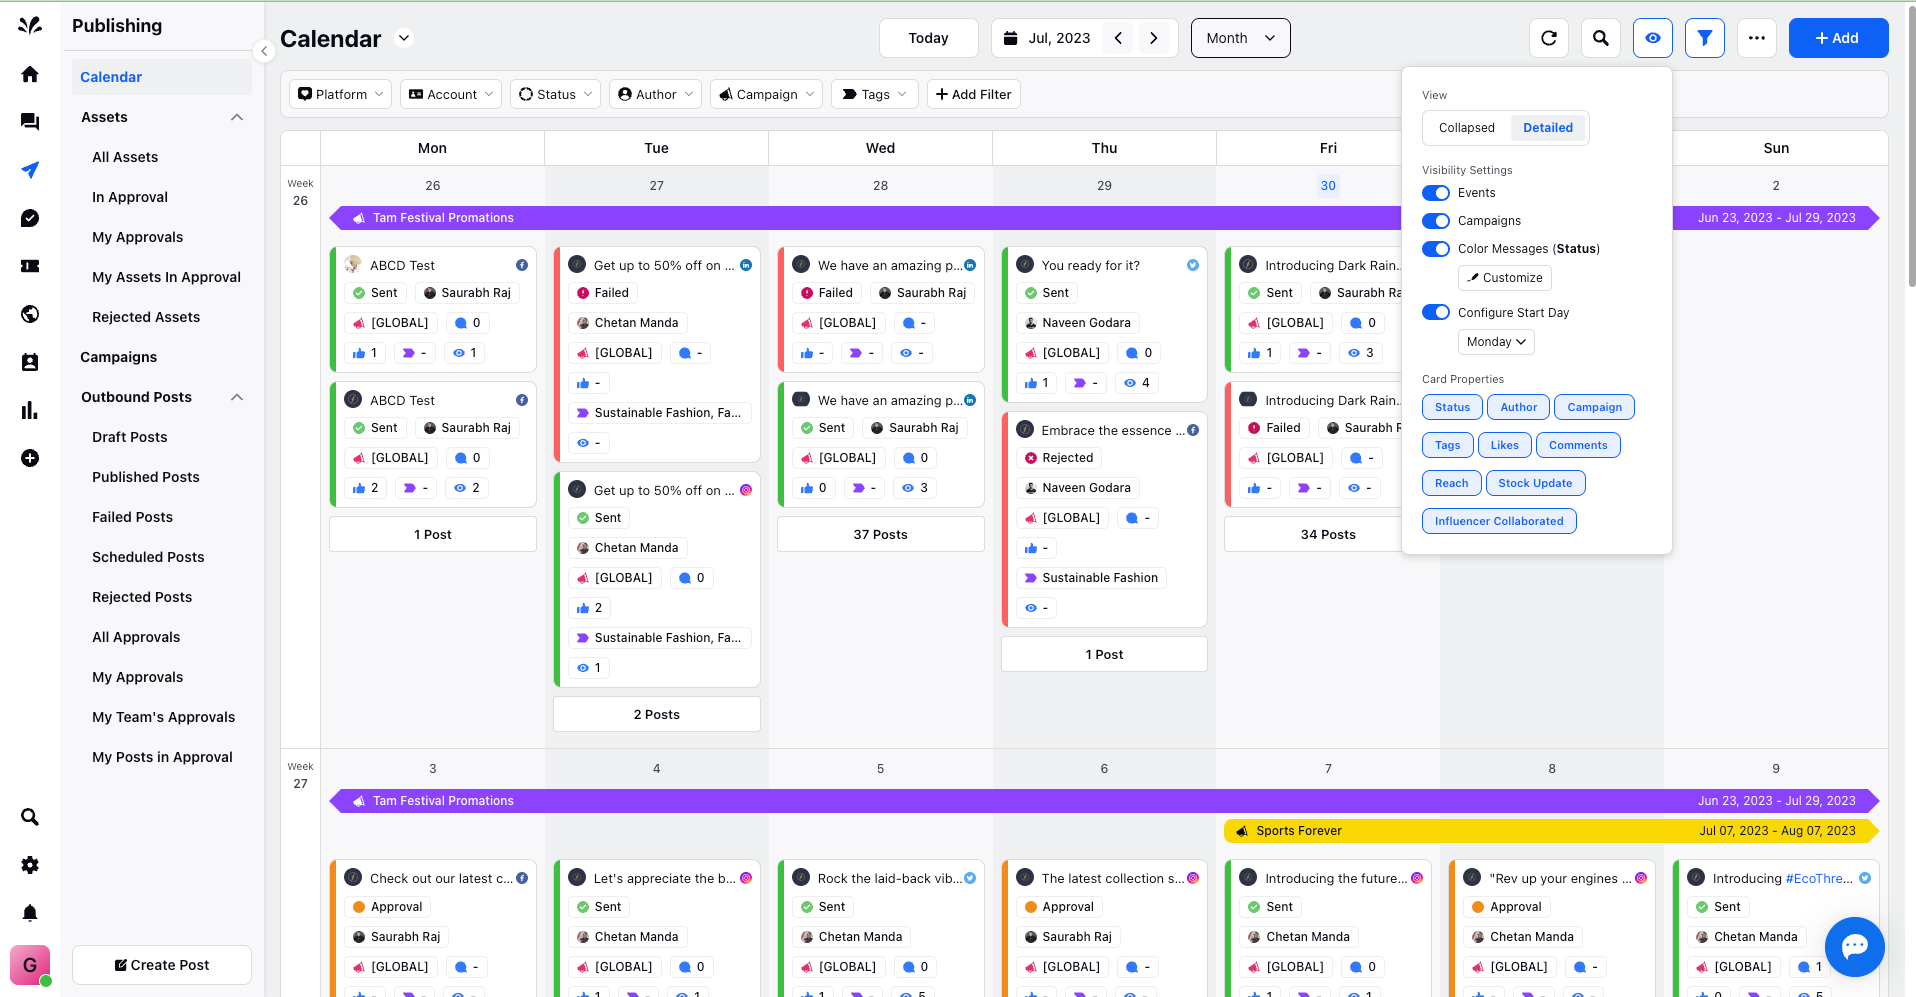
Detailed View

Card properties - There are different card properties. The posts scheduled to be published for specific accounts will be segregated by Status, Author, Campaign, Tags, Likes, Comments, Reach, and other custom fields.

Visibility Settings - It has a list of items such as:
Events - You need to Toggle On to tag events to a specific post.
To create a new event, you need to click on the + icon on any specific day of the week. The Add Event page will appear where you need to provide the Event name, date, and description. You can click on any of the Events to view details in the third pane.

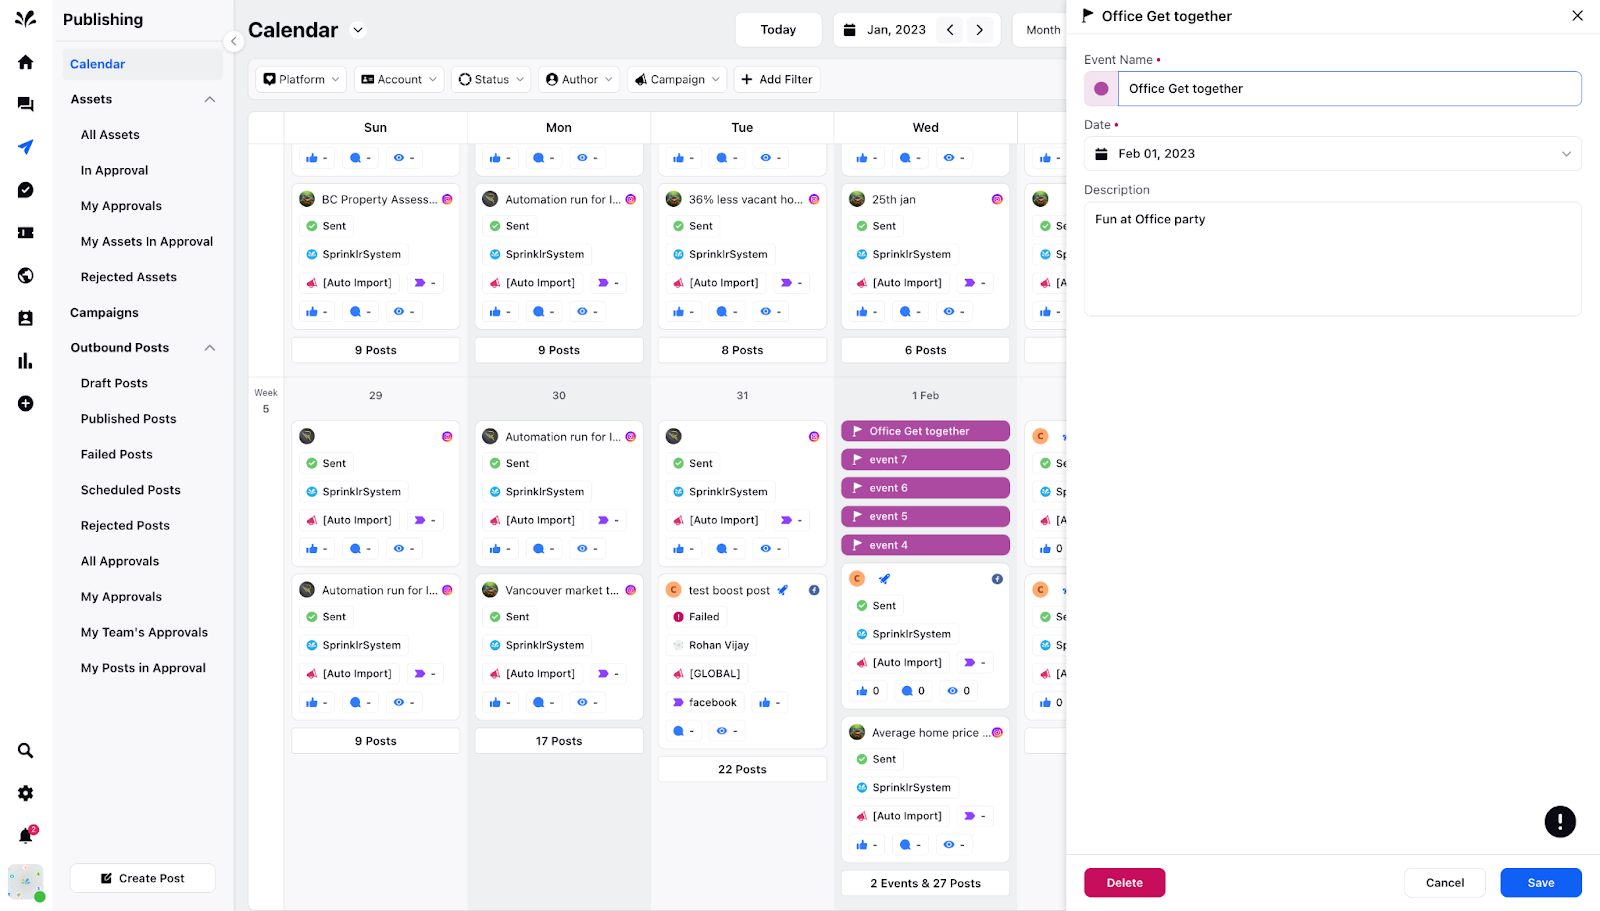
Campaigns - You can Toggle On to tag campaigns to a specific post for a specific month. Besides that, you can tag the campaign by any color and view details of the same in the third pane by clicking on any of the campaigns scheduled for a specific month. You can view the campaign duration by hovering over the campaign bar.

Color Messages: Visually identify postcards based on conditions. You can click on Customize icon and decide color code based on - Created by, Campaign, and Status.

Configure Start Date: You can Toggle On to configure the Start date for every week in a monthly view. If you select the starting date as Tuesday, the week will start from Tuesday.

Important Note:
The shortcut key to navigate to the Month view is M.
Number of Days
This calendar view is segregated into (2 - 6) day views. For a 2-day post, the calendar view will show posts for 2 days. It shows the content of the post, time of publishing, media, account name, and channel.
Card Style- The design of the card view is divided into 2 types Small and Large view. In the Small view, the posts have 2 liner content and in the Large view, the post has content and the media as well.
Small View
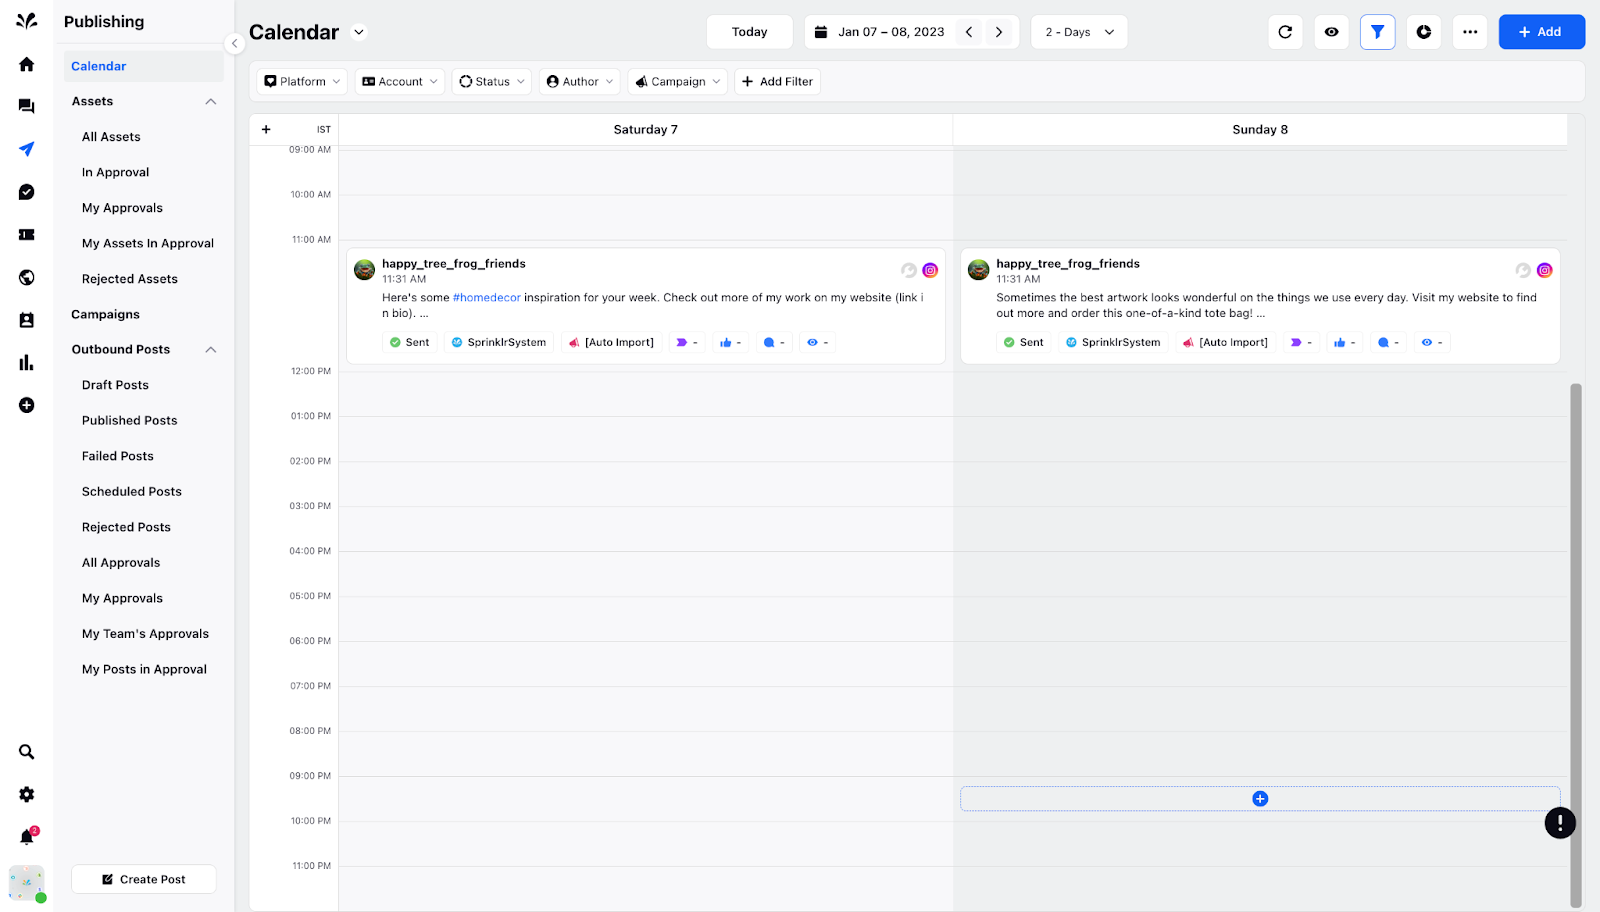
Large View

Card properties - There are different card properties. The posts scheduled to be published for specific accounts will be segregated by Status, Author, Campaign, Tags, Likes, Comments, Reach, and other custom fields.

Visibility Settings - It has a list of various features such as:
Events - You need to Toggle On to tag events to a specific post.
To create a new event, you need to click on the + icon on any specific day of the week. The Add Event page will appear where you need to provide the Event name, date, and description. You can click on any of the Events to view details in the third pane.

Best time to post - It shows the best time to publish the post in a 2/3/4/5/6 day view. It shows the Account name and the time at which the post should be published. You can Toggle On if you want to view the best time to post.
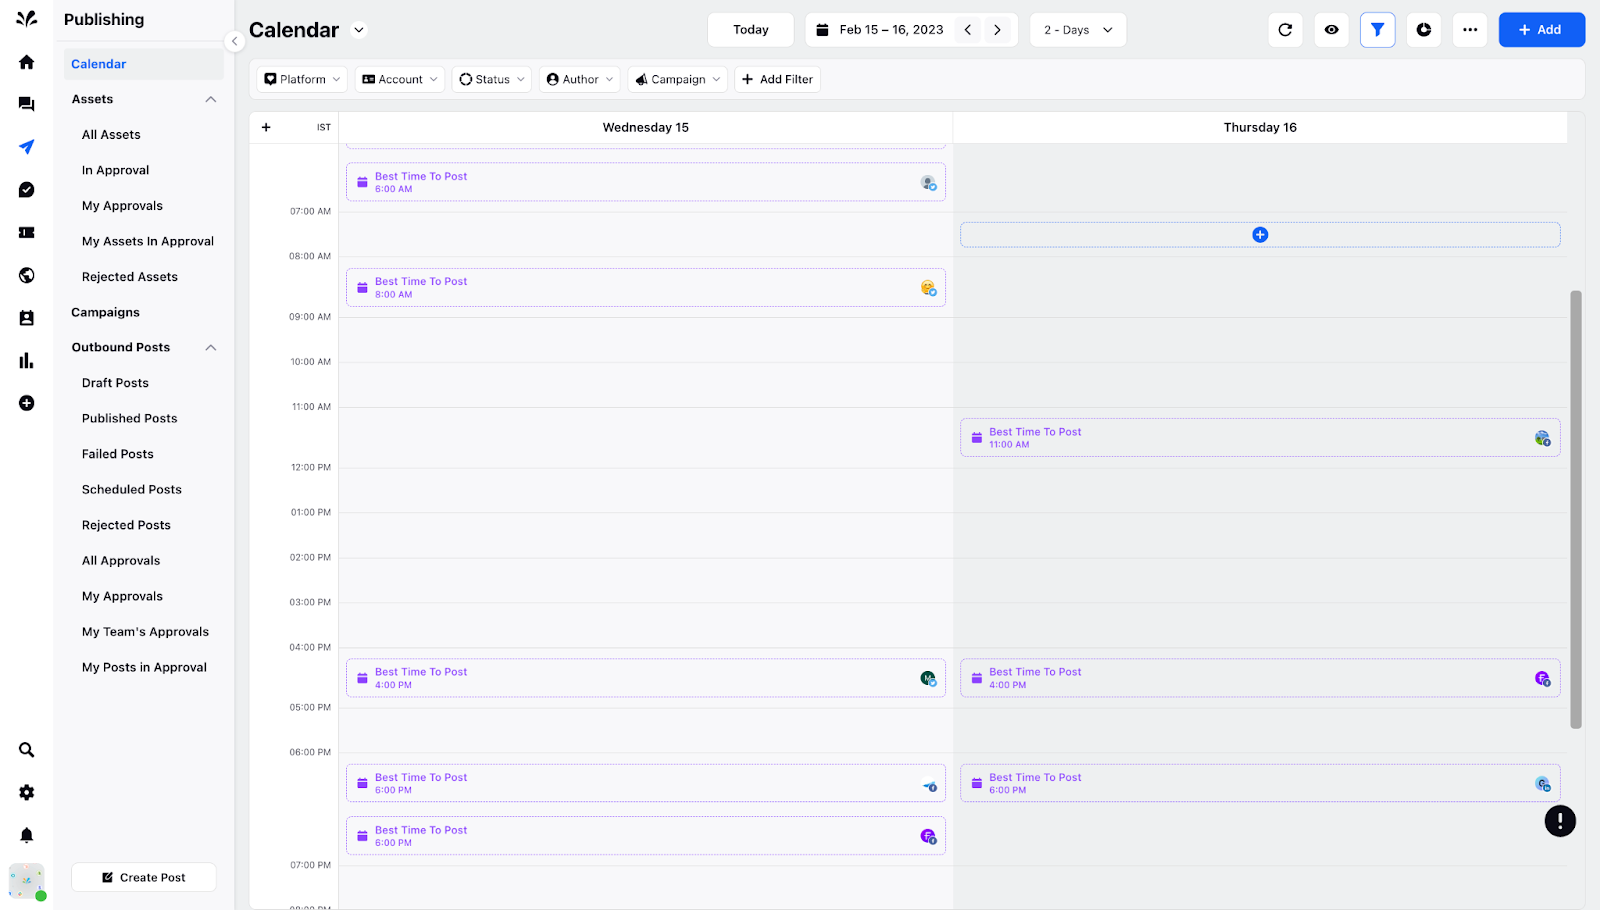
You can click on Customize to toggle on and off the specific Accounts that you want to show in the Calendar. Click Save at the bottom.

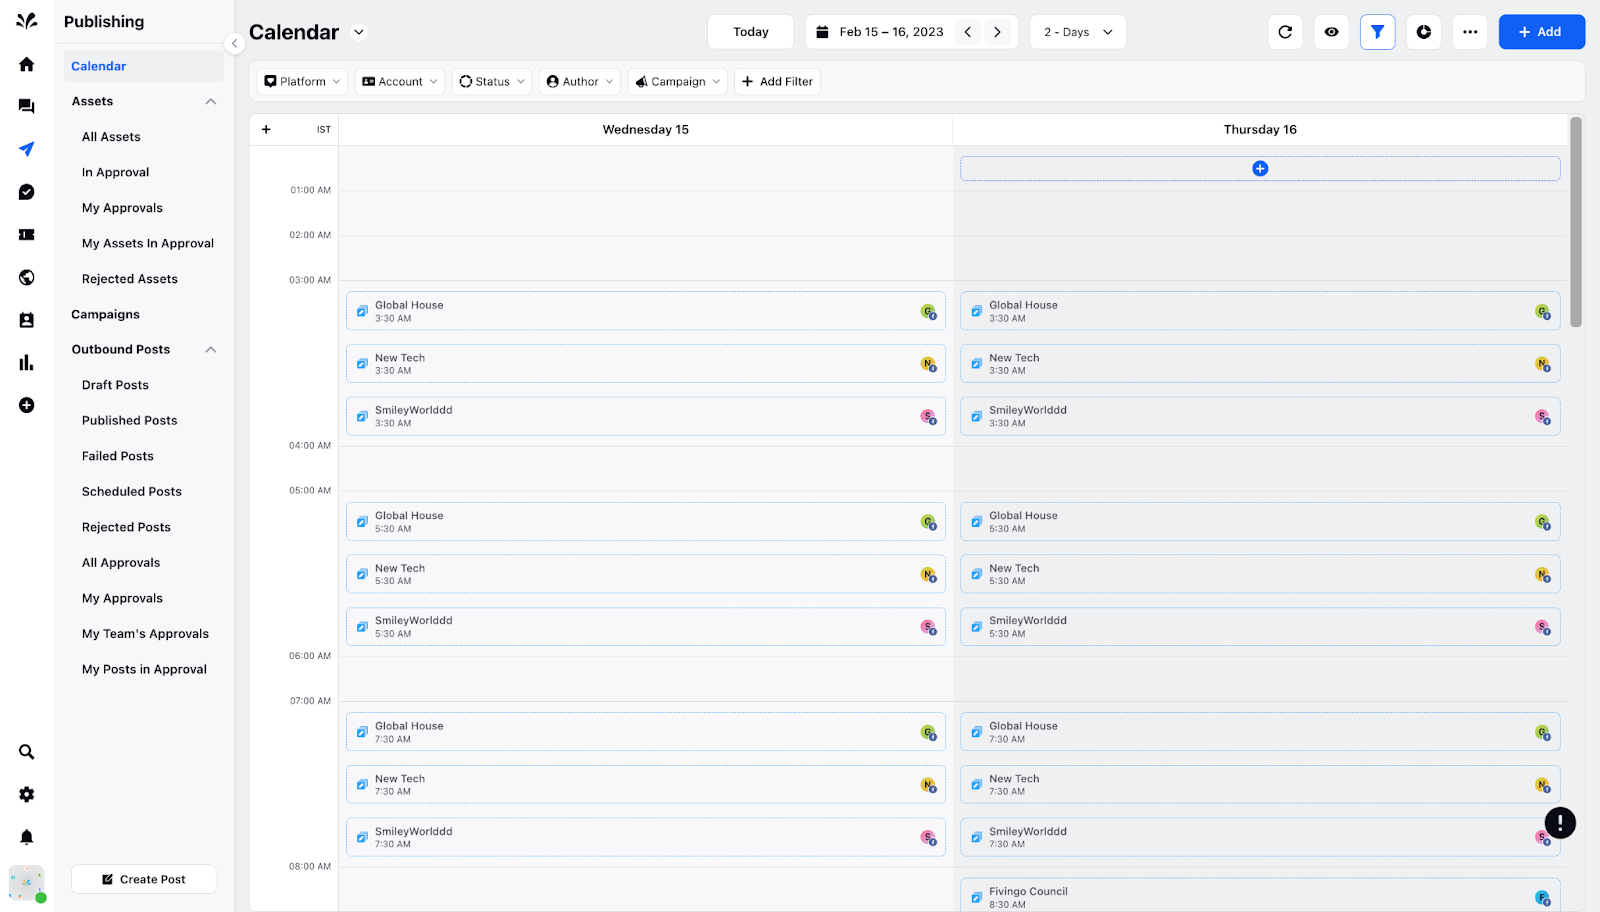
Publishing Queues: You can Toggle On to fix the publishing queue of the post for a specific account. The post is scheduled to be published in 2 hours gap. You can view the post’s name, time, and name of the platform on which the post will be published.
Campaigns - You can Toggle On to tag campaigns to a specific post for a 2-day view. Besides that, you can tag the campaign by any color and view details of the same in the third pane by clicking on any of the campaigns scheduled for 2 days. You can view the campaign duration by hovering over the campaign bar.

Color Messages: Visually identify postcards based on conditions. You can click on Customize icon and decide color code based on - Created by, Campaign, and Status.

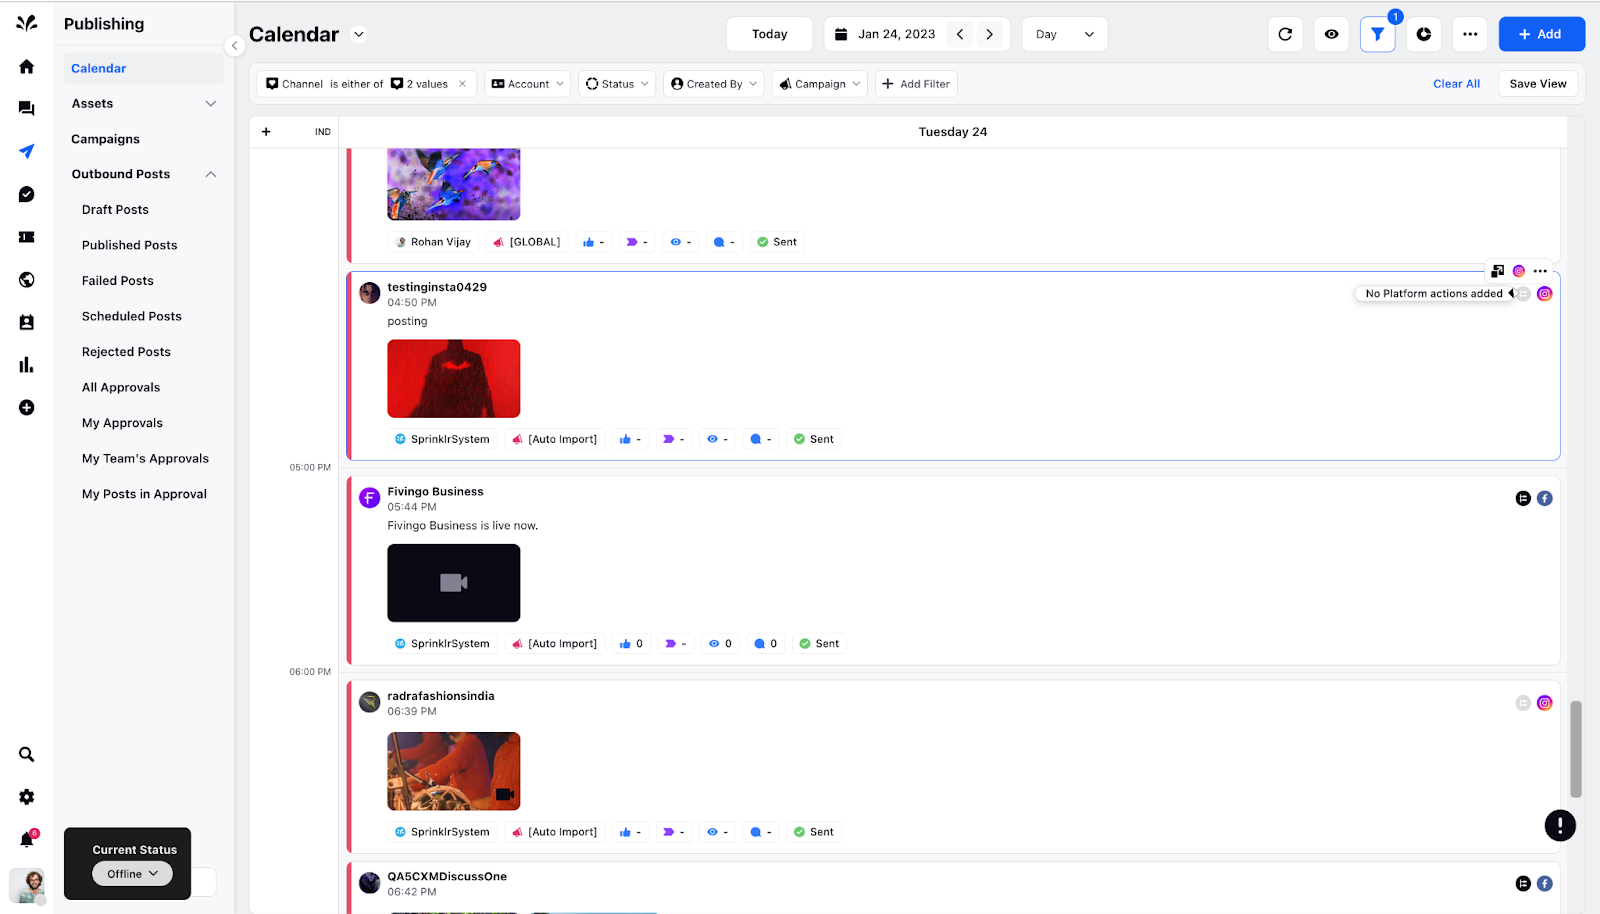
In the top right corner of the post of any day, you‘ll view the Platform icons and Platform options( draft post, dark post, stitches, etc.) for different platforms such as Instagram, Facebook, and other supported channels.

If you view the Black icon in the top right corner of any post, it means the Platform Options are enabled.
If you don't see the Black icon in the top right corner of any post, it means the Platform Options are not enabled.
Important Note:
The shortcut keys to navigate to the 2-day view is 2, the 3-day view is 3, and so on and so forth.
Schedule
This view is similar to Day or list view. The Posts are listed in a single order.
Card Style - The design of the card view is divided into 2 types Small and Large view. In the Small view, the posts have 2 liner content and in the Large view, the post has content and the media as well.
Large view
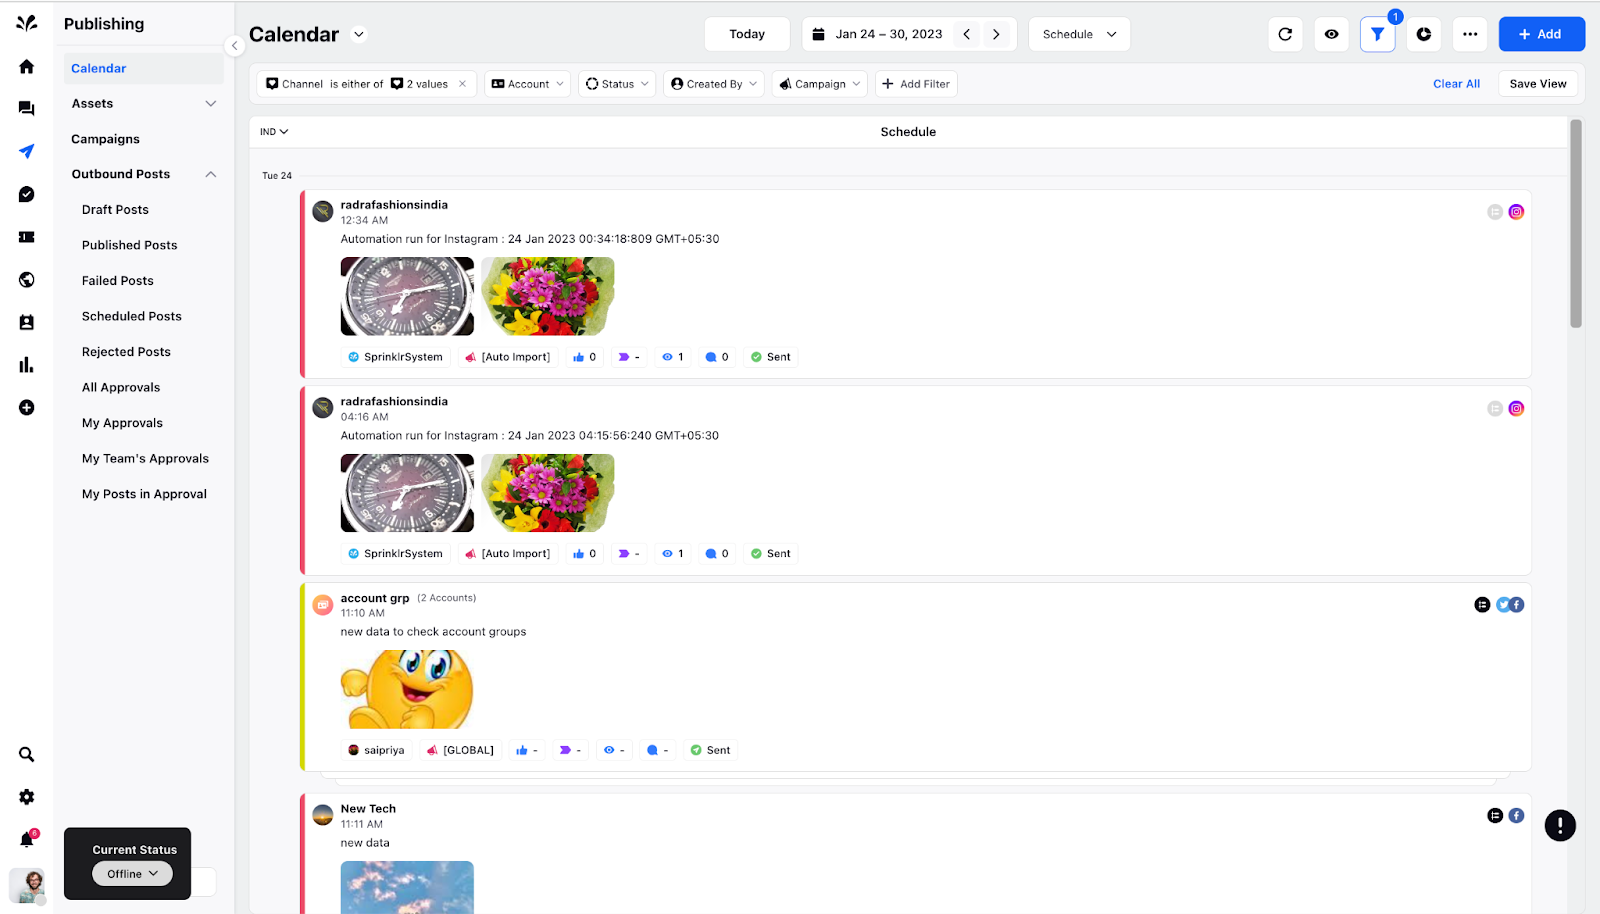
Small view

Card properties - There are different card properties. The posts scheduled to be published for specific accounts will be segregated by Status, Author, Campaign, Tags, Likes, Comments, Reach, and other custom fields.

Visibility Settings - It has 1 item:
Color Messages: Visually identify postcards based on conditions. You can click on Customize icon and decide color code based on - Created by, Campaign, and Status.

Important Note:
The shortcut key to navigate to the Schedule view is S.
You can add multiple filters such as choosing the specific Account, Channel, Status, Created By, and Campaign to narrow down the Schedule view.
You can club 2 accounts together under the Account group filter. Besides that, you can add custom filters as well to streamline your calendar view.

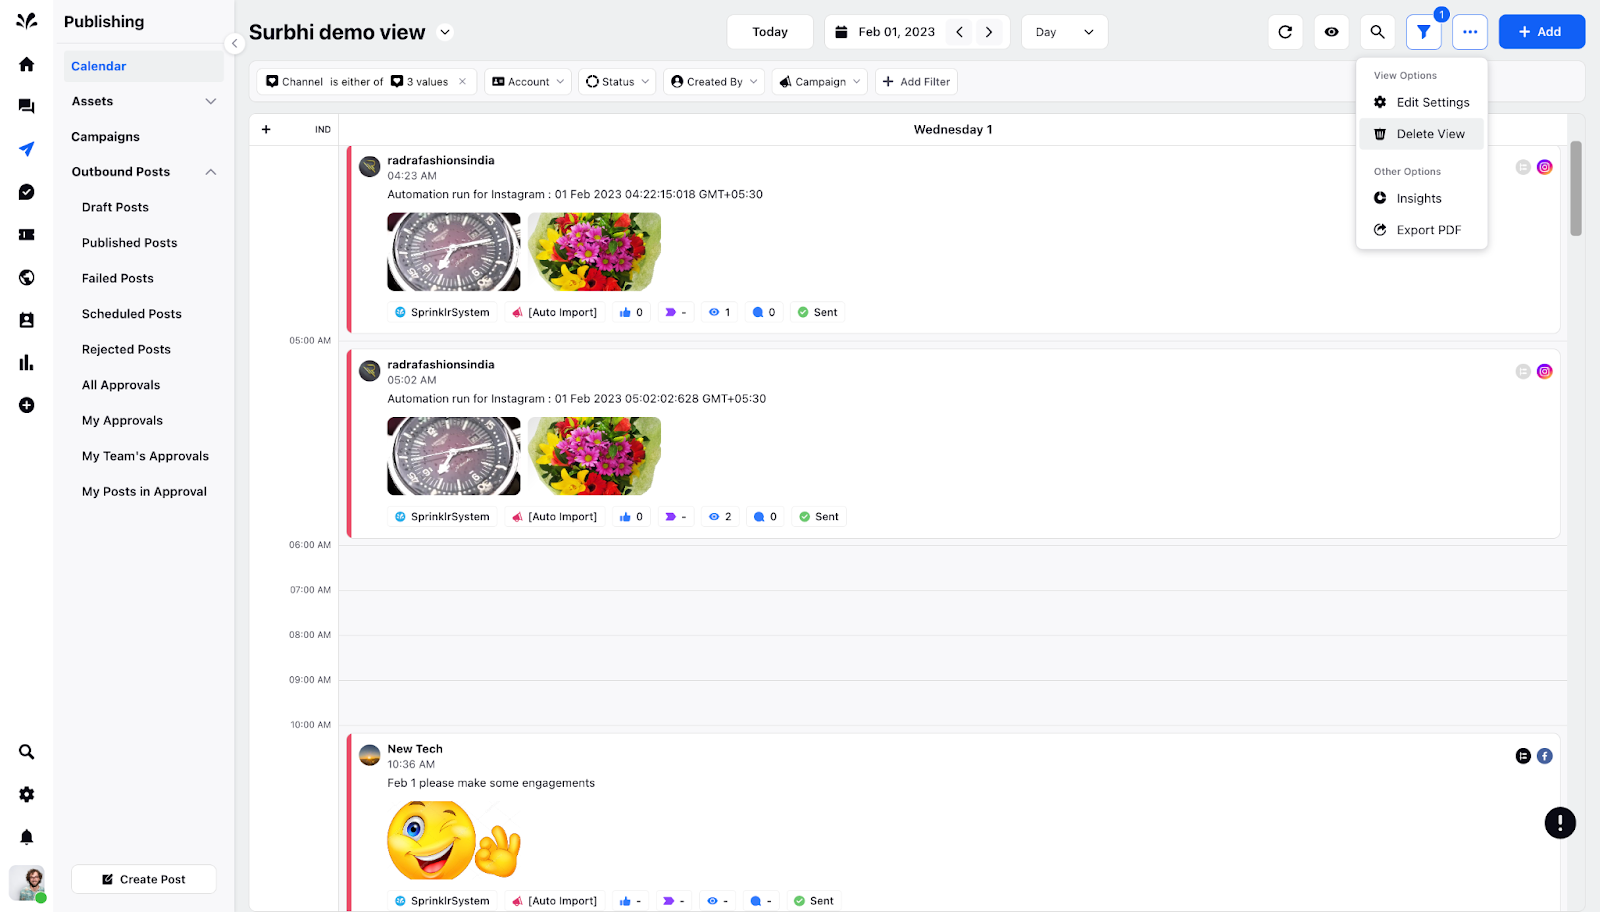
You can edit the newly added Calendar view also by modifying the filters and saving it again. As soon as you modify the filters, you can Reset or Save the view.

You can delete the newly created Calendar view by clicking on the 3 dots icon in the top right corner and selecting the Delete View option and the view will be deleted and it will redirect you to the default Calendar view.
Timezone in Calendar View
You can edit the Timezone of the post in any view by clicking on the existing timezone in the top left corner. You can modify details such as Time Zone, provide the desired label, and toggle on to make the timezone mandatory.

Besides that, you can add another timezone for the same post by clicking the + icon on the left side of the calendar. You can choose the desired timezone, provide the label, and choose it to make the timezone primary.
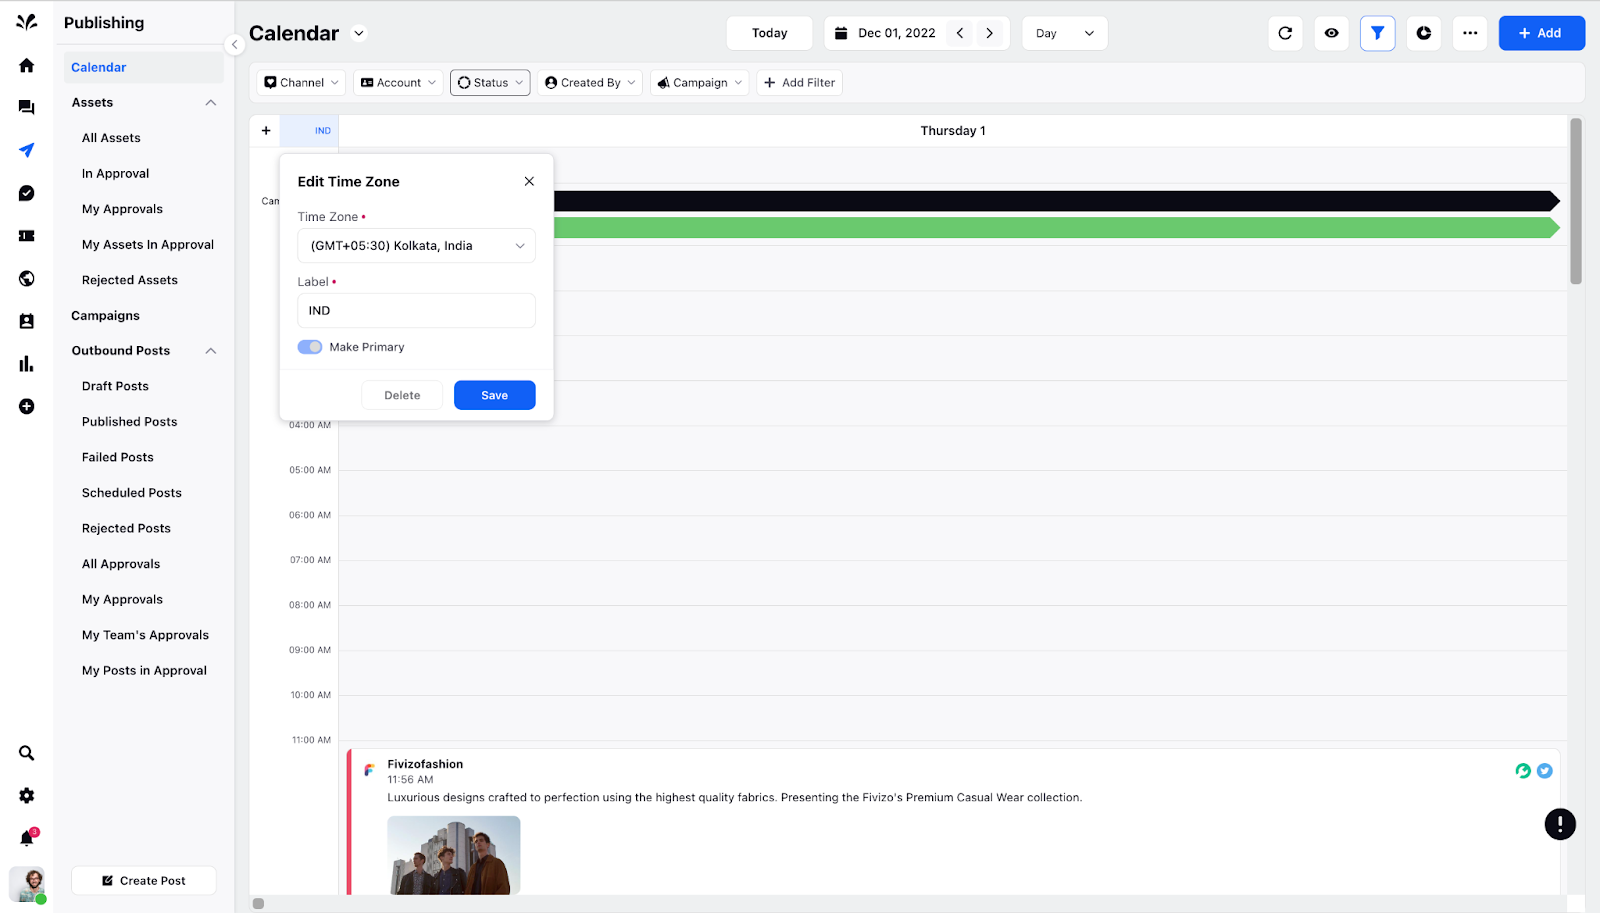
You can delete the timezone as well by clicking the Delete icon in the Edit Time Zone. Click on the timezone you want to remove from the Calendar and the timezone will be deleted.
Only the timezone which is selected as primary will be visible first against the post and the timezone selected as secondary will be visible next to the primary timezone.
