
Integrate JIRA with Sprinklr Advanced for a seamless two-way communication
Updated
Integrate JIRA with Sprinklr Advanced to communicate, receive, and manage all the JIRA tickets via Care Console and experience a seamless two-way workflow.
You can integrate JIRA with Sprinklr Advanced to bring JIRA tickets to Sprinklr Advanced and set up a seamless two-way workflow from chatting with a customer to creating and processing JIRA tickets. With this integration, you can:
Communicate with your JIRA team without leaving Sprinklr by posting comments.
Use the JIRA companion app to link JIRA conversations in Sprinklr, which will appear next to your conversations in Sprinklr Advanced.
Receive live updates in Sprinklr when the status of the ticket changes or someone leaves a comment in JIRA.
To integrate JIRA with Sprinklr Advanced
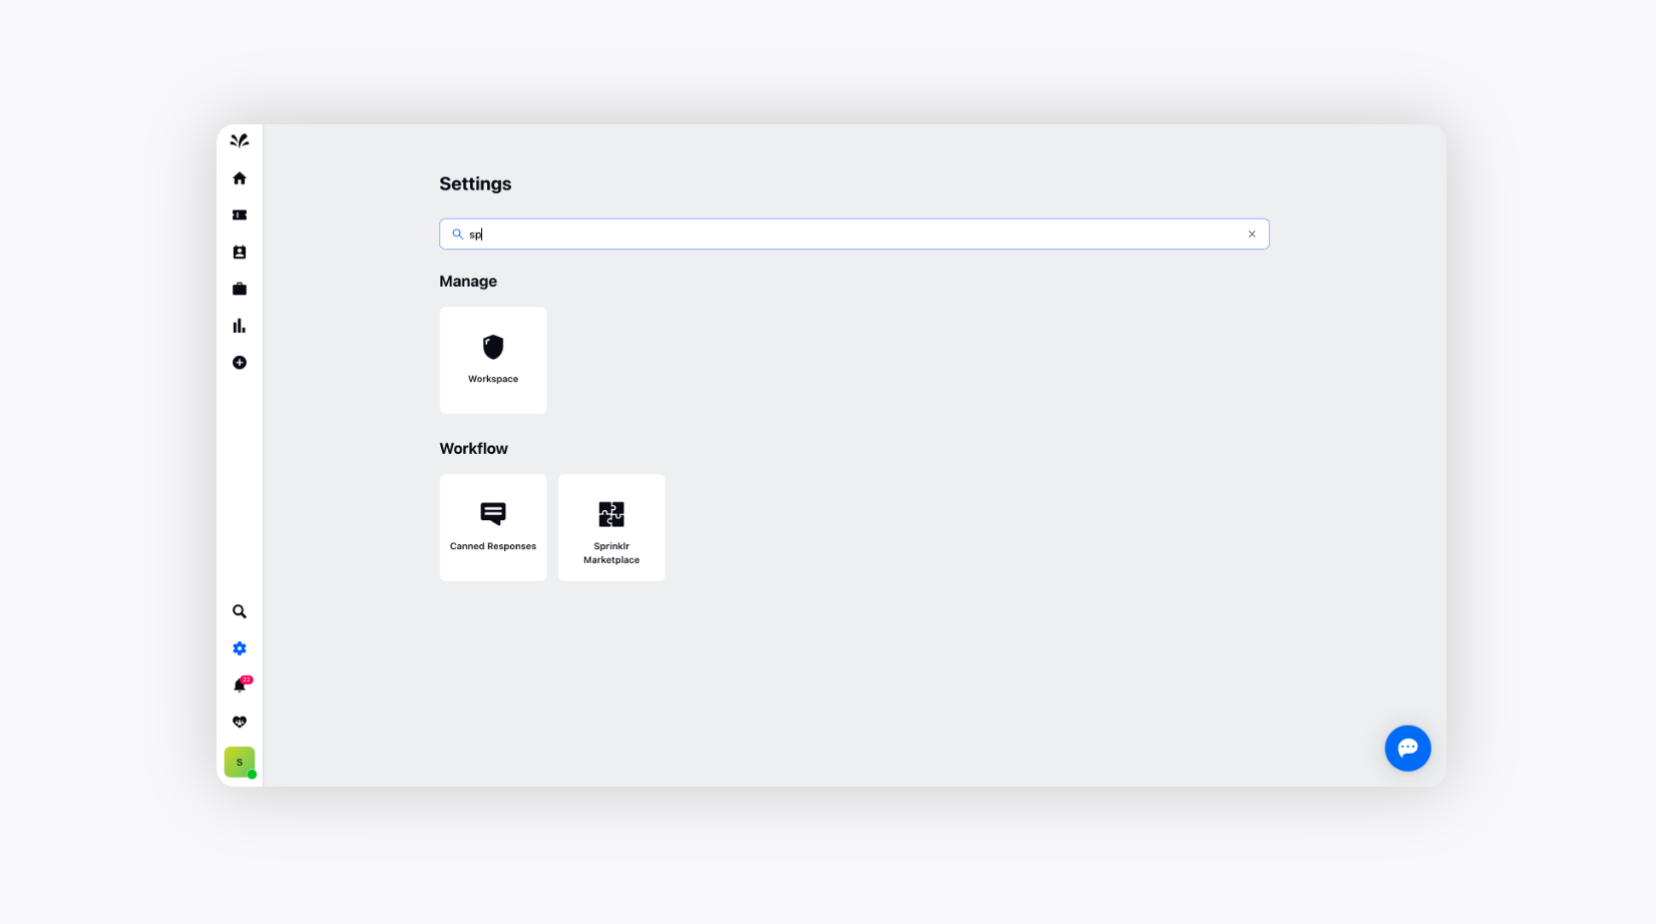
Log into Sprinklr Advanced as Admin. Click the Settings icon on the left navigation bar.
On the Settings window, select Sprinklr Marketplace under Workflow.
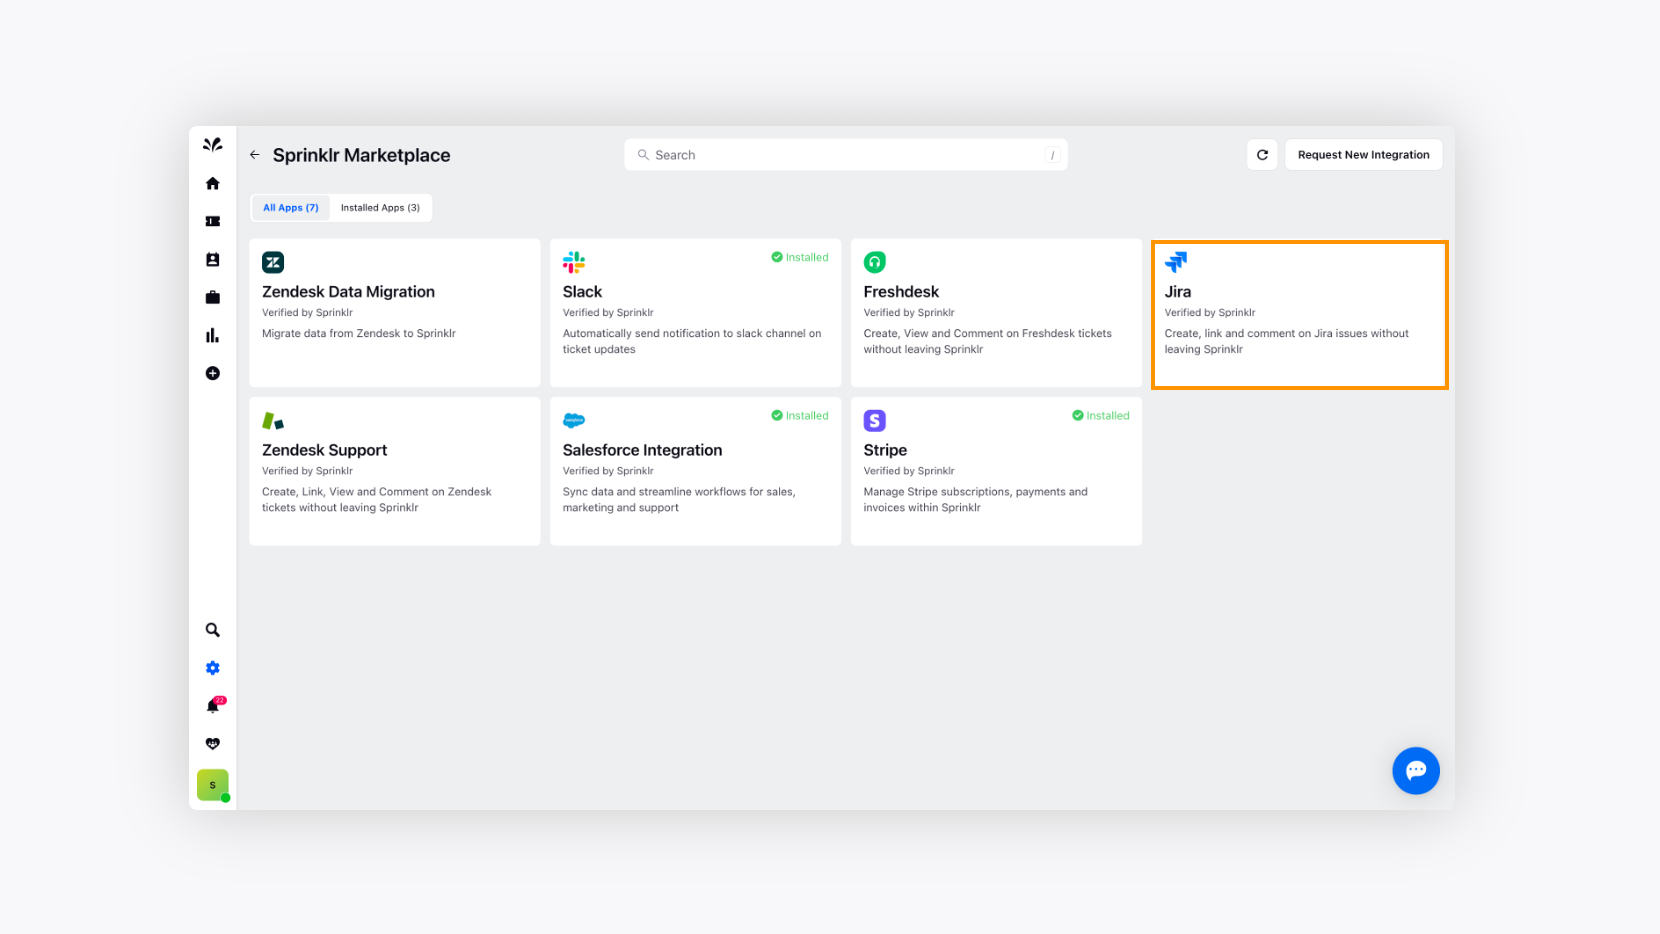
Select JIRA on the Sprinklr Marketplace window.
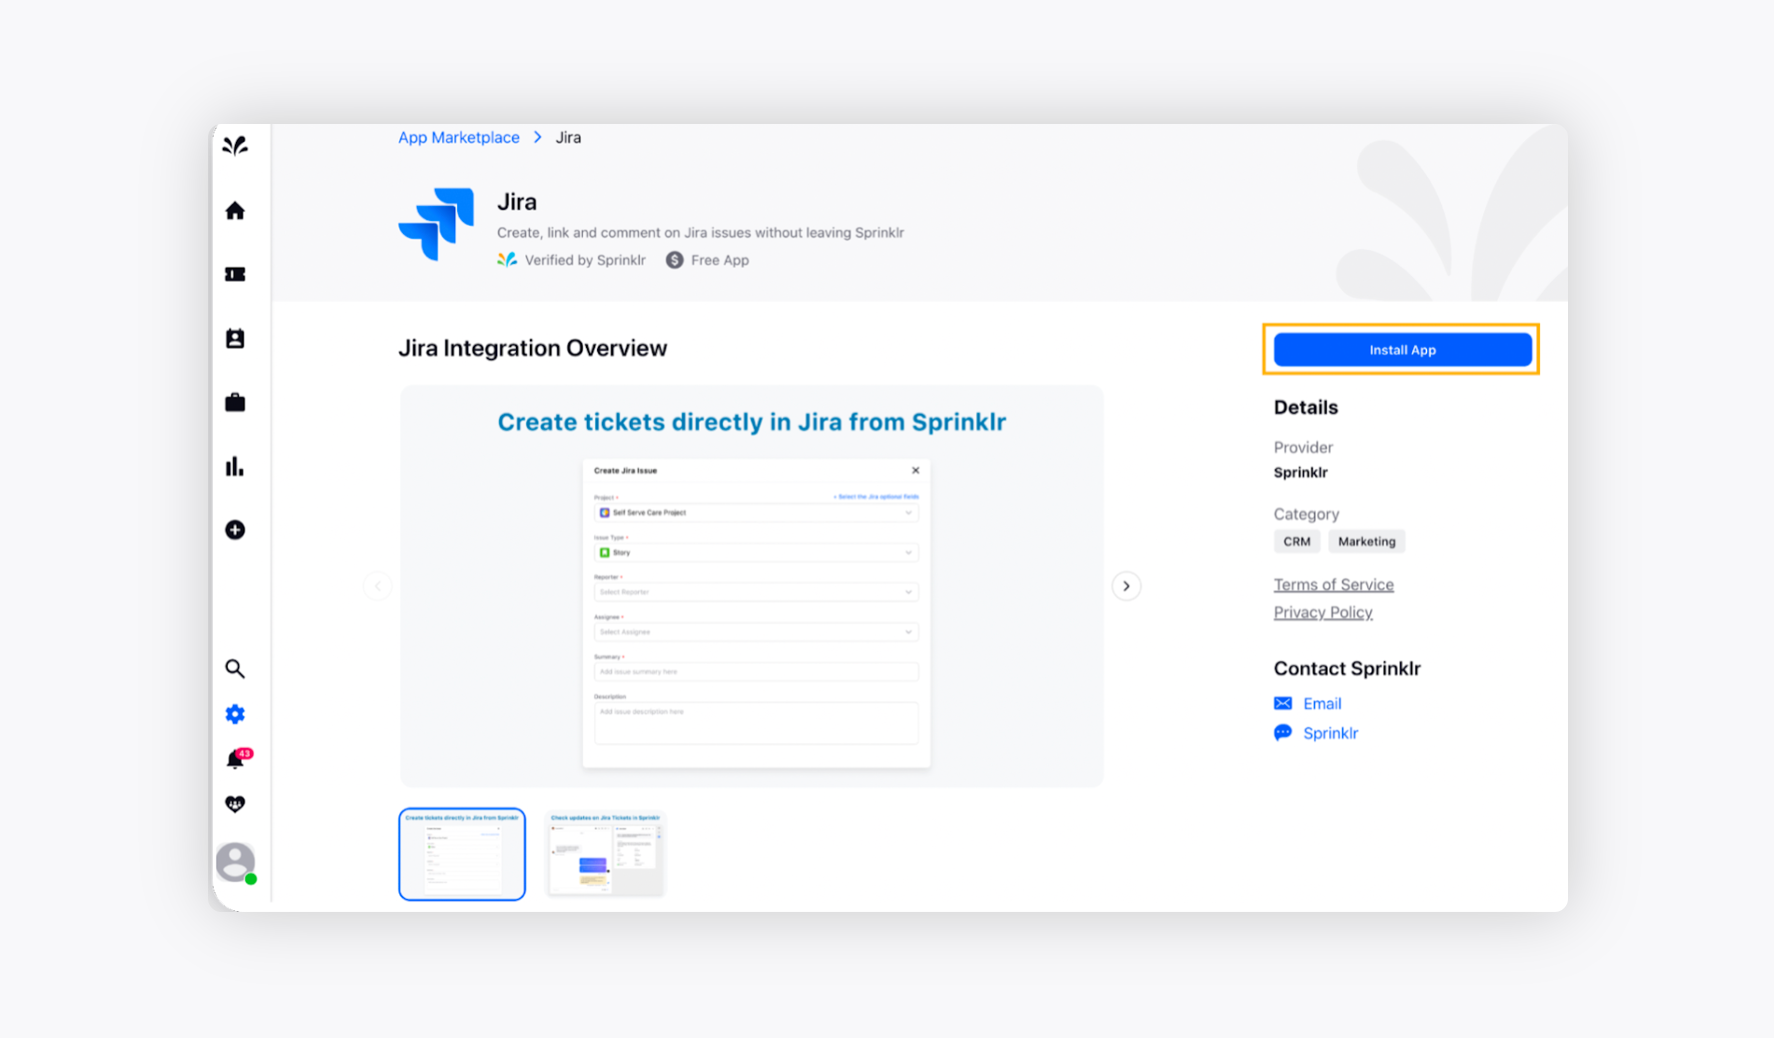
Click the Install App button.
Enter your JIRA Subdomain in the pop-up window and click Connect.
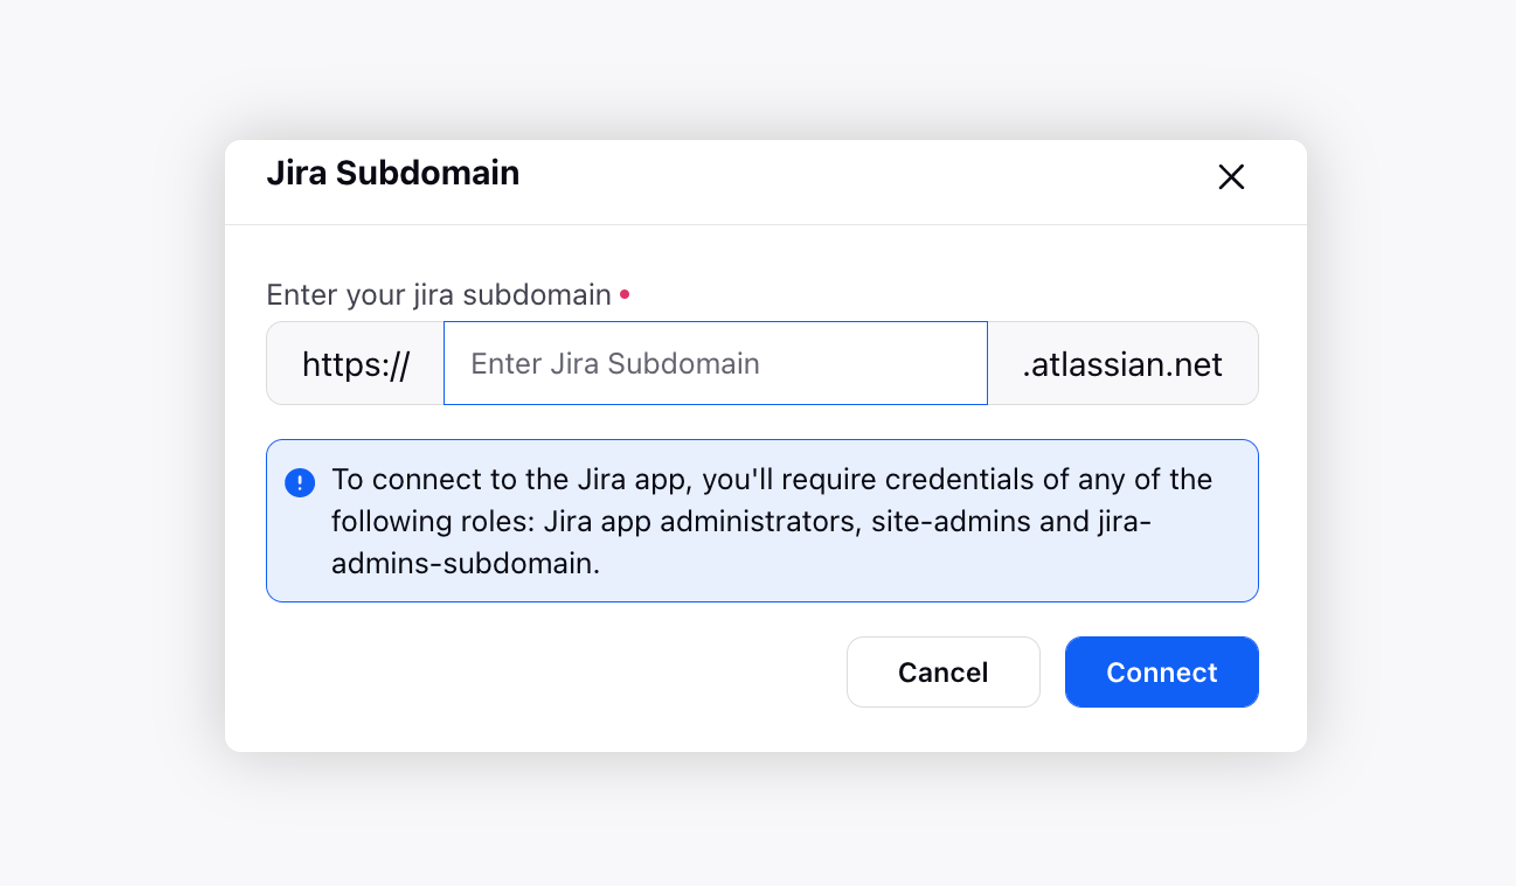
You will be redirected to Atlassian, where you’ll need to provide the Domain that you want to authorize and click Accept.
Once your account is successfully connected, follow the steps below to define your JIRA integration settings.
Step 1. Sync updates
In the section, you can configure the actions to be performed when a Sprinklr ticket is linked to a JIRA ticket.
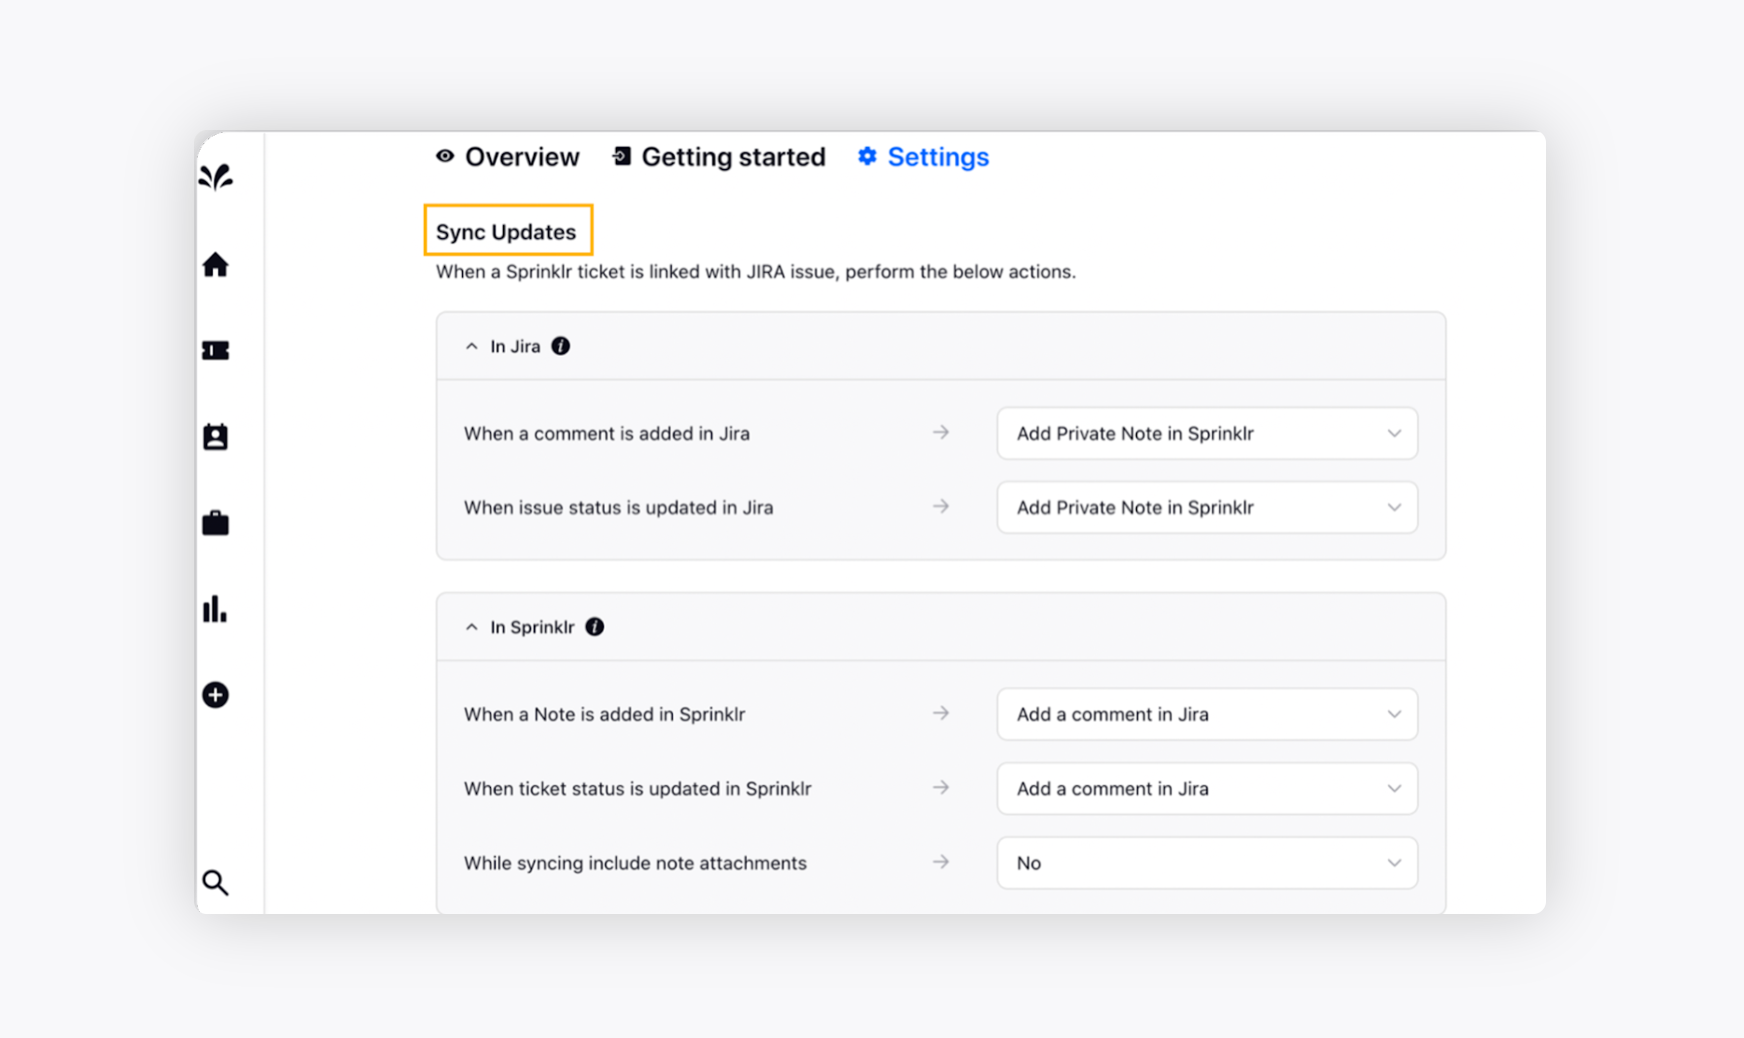
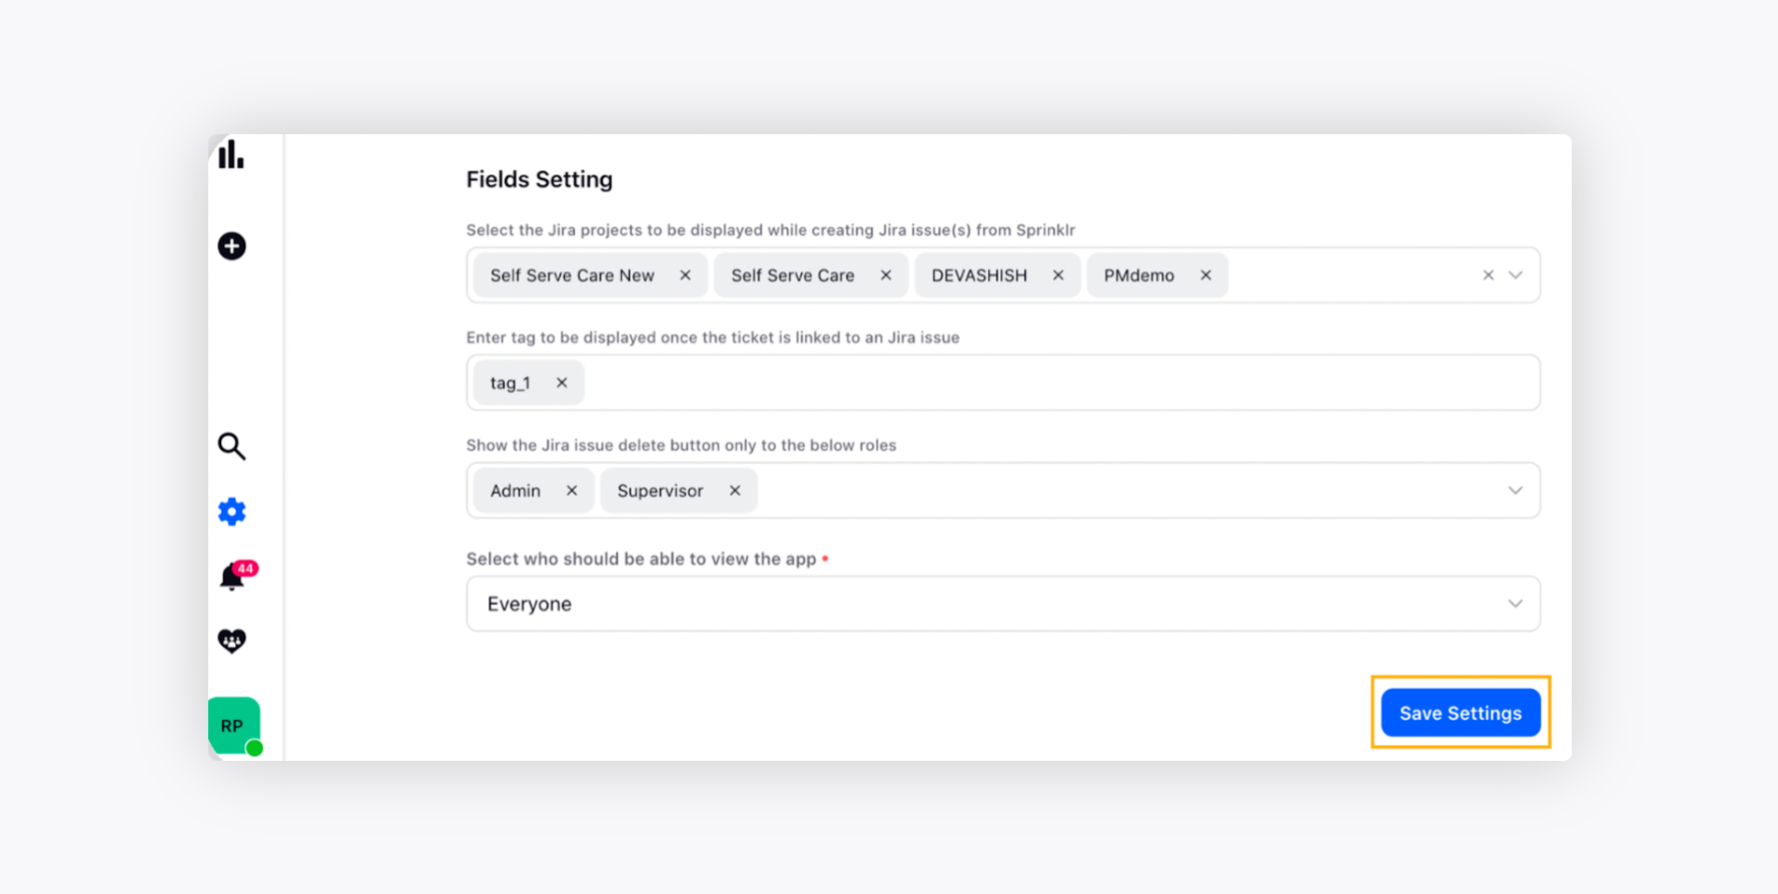
Step 2. Fields settings
Under the Other Settings section, you have the following options:
Under the Select the Jira projects to be displayed while creating Jira issue(s) from Sprinklr field, you can select the existing JIRA projects that you want to display while creating a ticket in JIRA via Sprinklr.
You can add tags like "JIRA_tickets" to Sprinklr tickets, which have the JIRA linked tickets under the Enter tag to be displayed once the ticket is linked to a Jira issue field.
Provide permission to roles in Sprinklr to delete a JIRA ticket under the Show the Jira issue delete button only to the below roles field.
Select who you want to display the app in Sprinklr from the Select who should be able to view the app drop-down menu.
Click Save Settings in the bottom right corner.
To create a JIRA ticket via Sprinklr Advanced
After installing the JIRA app in Sprinklr Advanced, you will then have the ability to create JIRA tickets via Care Console.
In this section, you will view the stepwise guide to creating a JIRA ticket:
On the Sprinklr Advanced Home window, click the Tickets icon on the left Navigation Bar.
Select any ticket from Ticket Stream.
Click the Marketplace icon on the right side of the window.
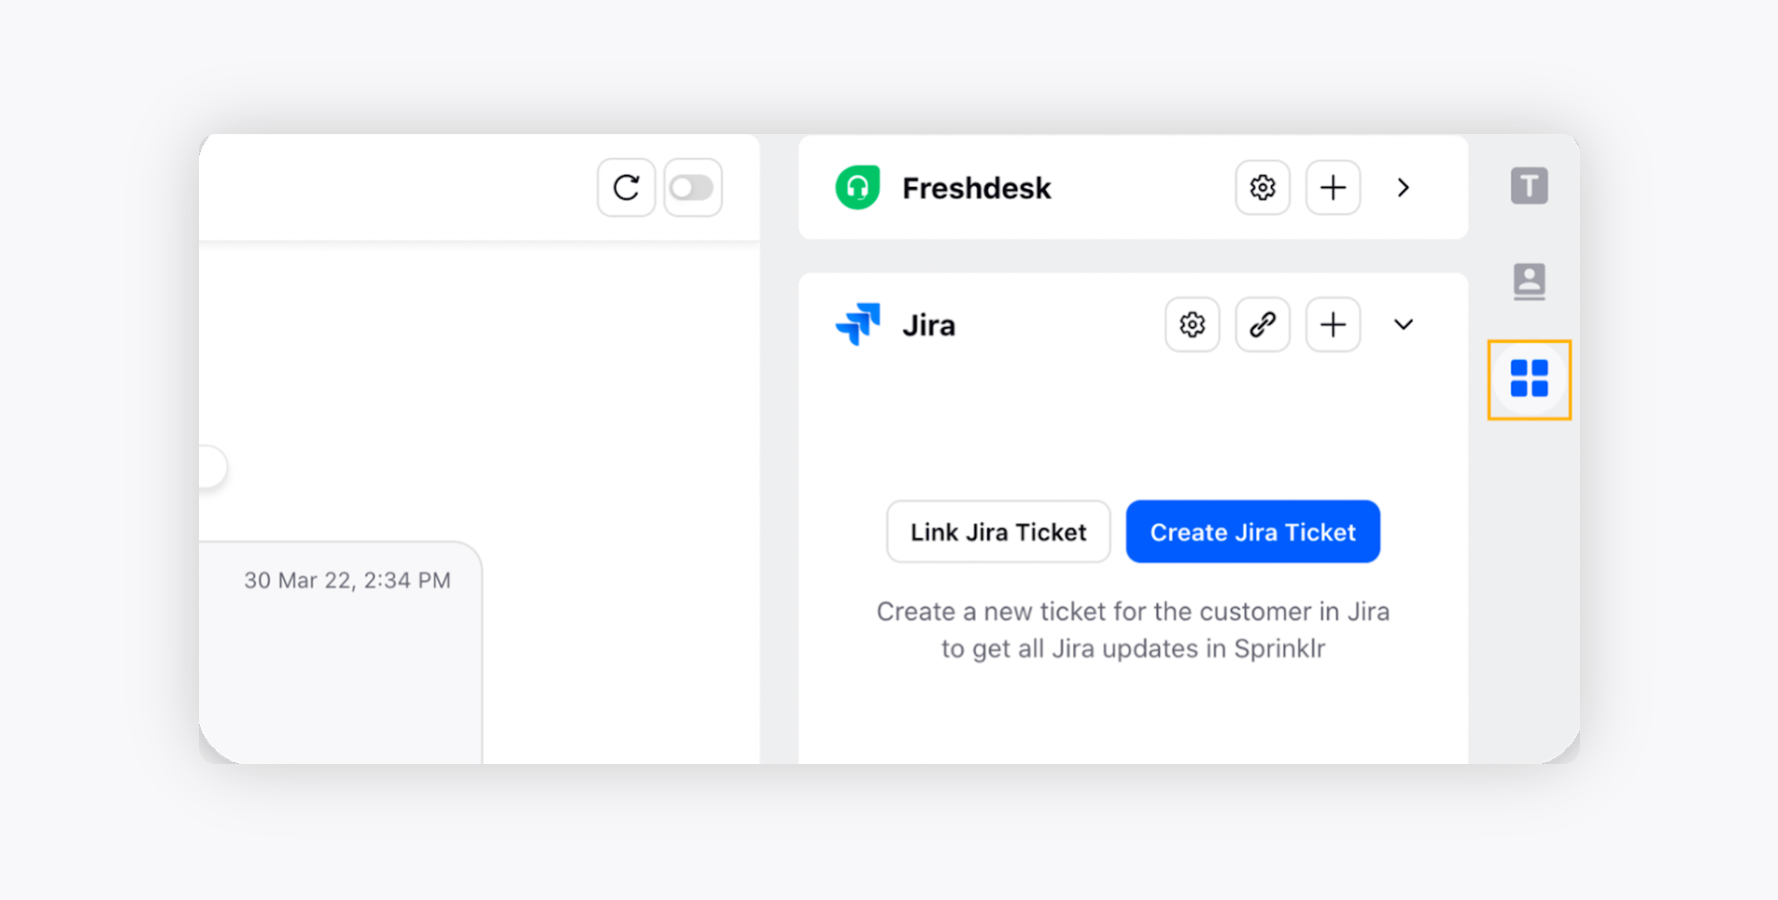
You can view all of your existing JIRA tickets linked to this specific ticket in the JIRA Card.
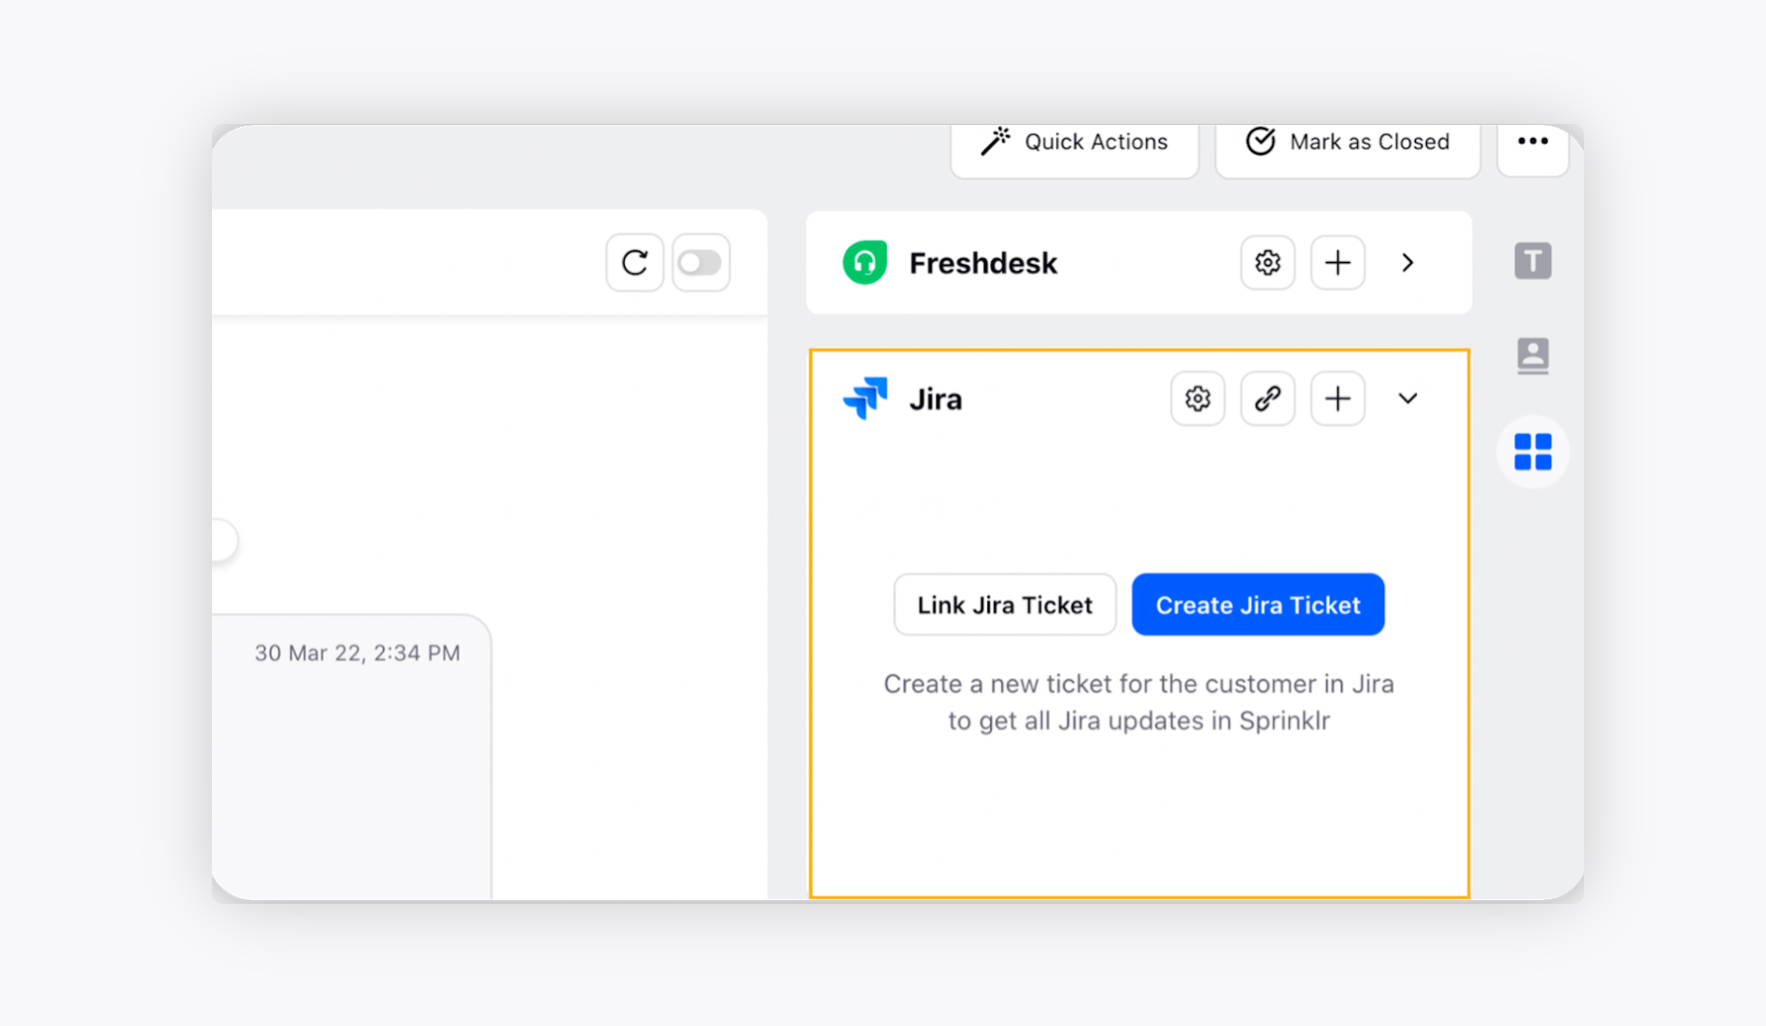
Click the Addition icon at the top of the card to Create a JIRA Ticket.
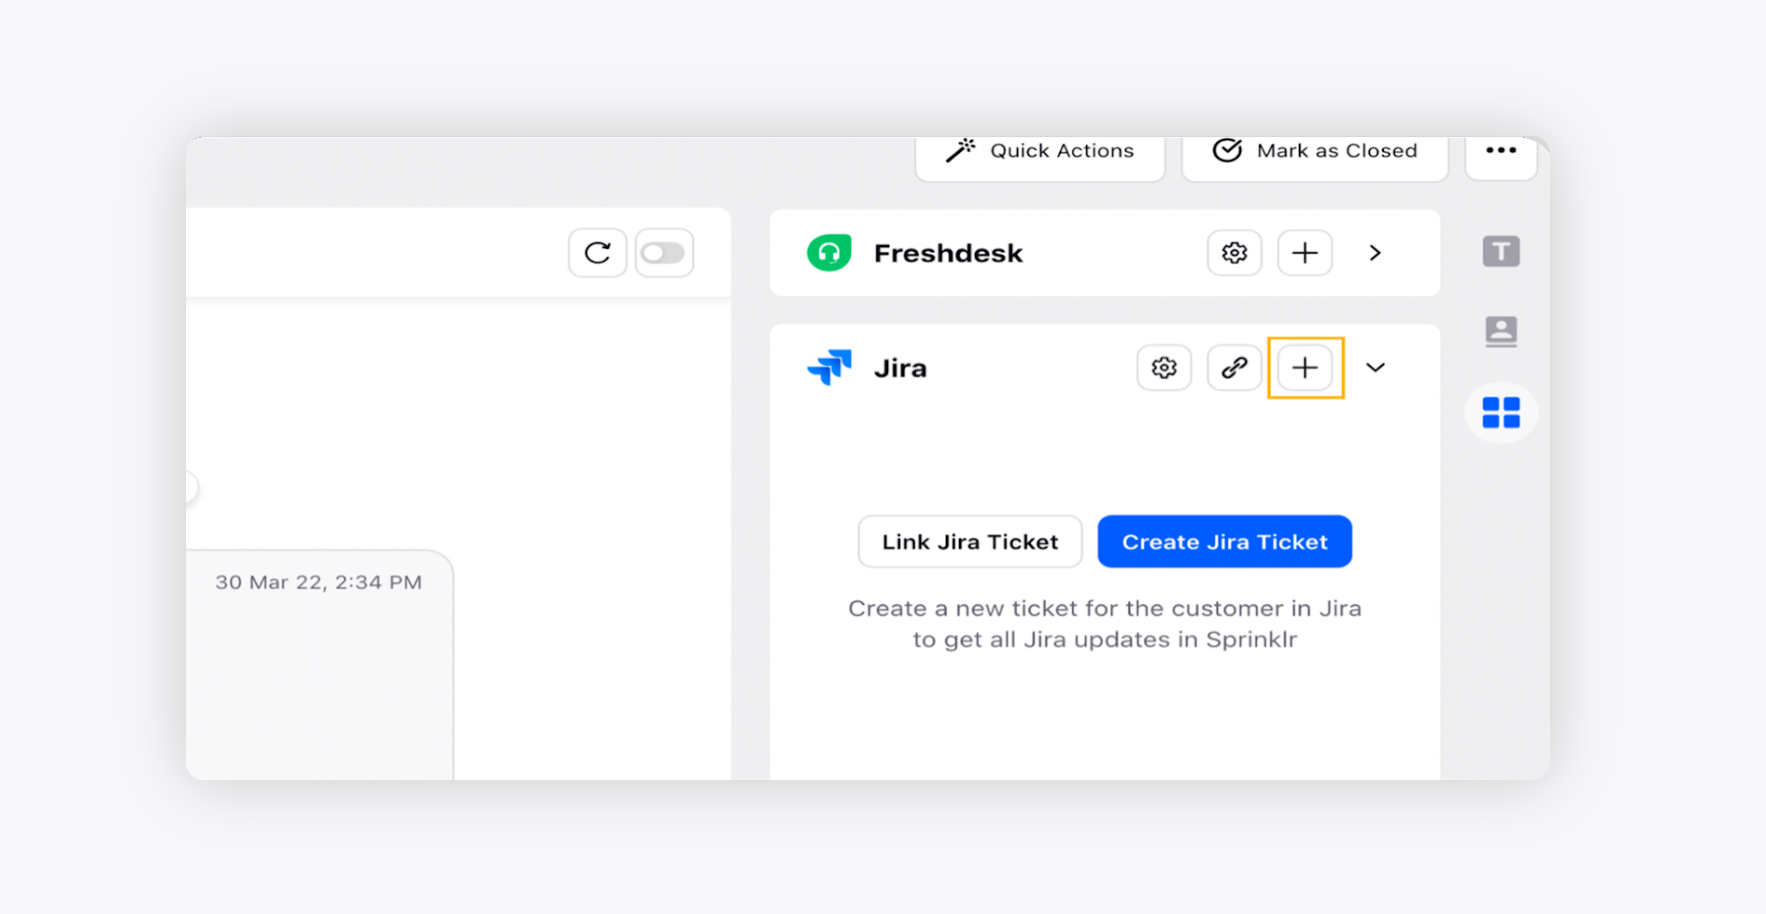
On the Create JIRA Ticket pop-up window, enter the various ticket fields required to create the ticket and click Create Ticket in the bottom right corner.
To link a JIRA ticket via Sprinklr Advanced
Click the Link icon at the top of the card to Link a JIRA Ticket.
On the Link JIRA Ticket pop-up window, search for the tickets that you want to link with the existing ticket using Keywords or Issue ID.
