Stripe integration in Sprinklr Service
Updated
How you can integrate Stripe into Sprinklr Service and have a complete context of customer purchase history and other customer details like subscriptions, payments, etc. from a unified platform.
Sprinklr Service provides you with the functionality to add your Stripe Account to the platform and link your customer’s Stripe details to a Sprinklr Service ticket. It offers the following major functionalities:
View complete customer details along with their Subscription, Payments, and Invoices.
Modify Subscriptions by Refunding and Canceling Subscriptions.
Edit customer details and sync them with Stripe.
To configure Stripe in Sprinklr Service
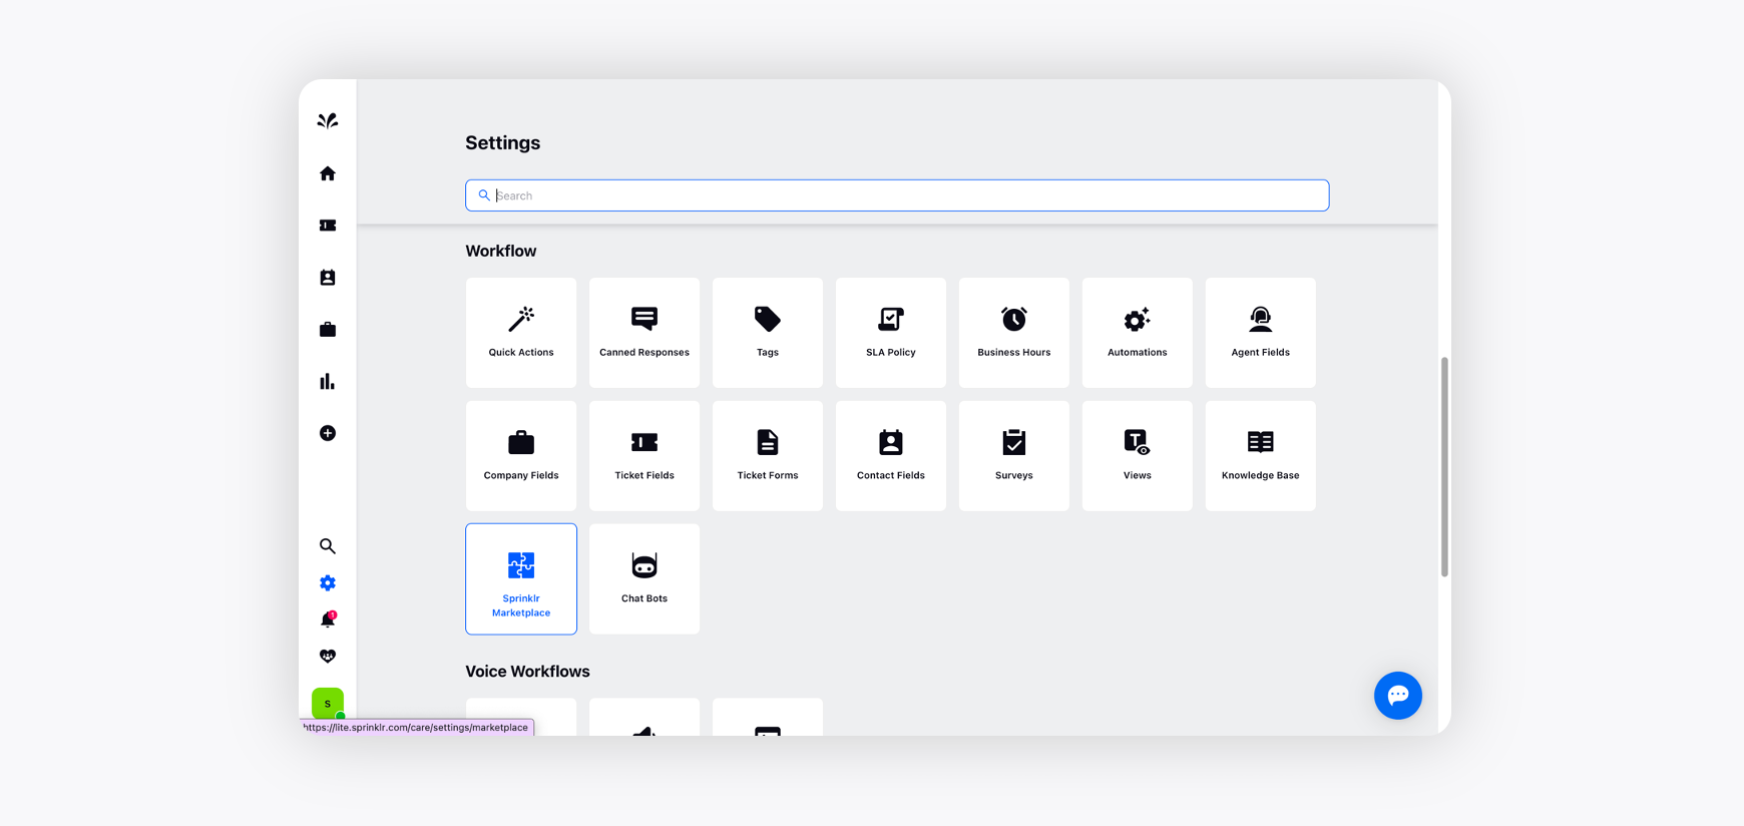
Log in to Care Console. On the Sprinklr Service window, click Settings on the left-hand side. Under Workflow, click Sprinklr Marketplace.
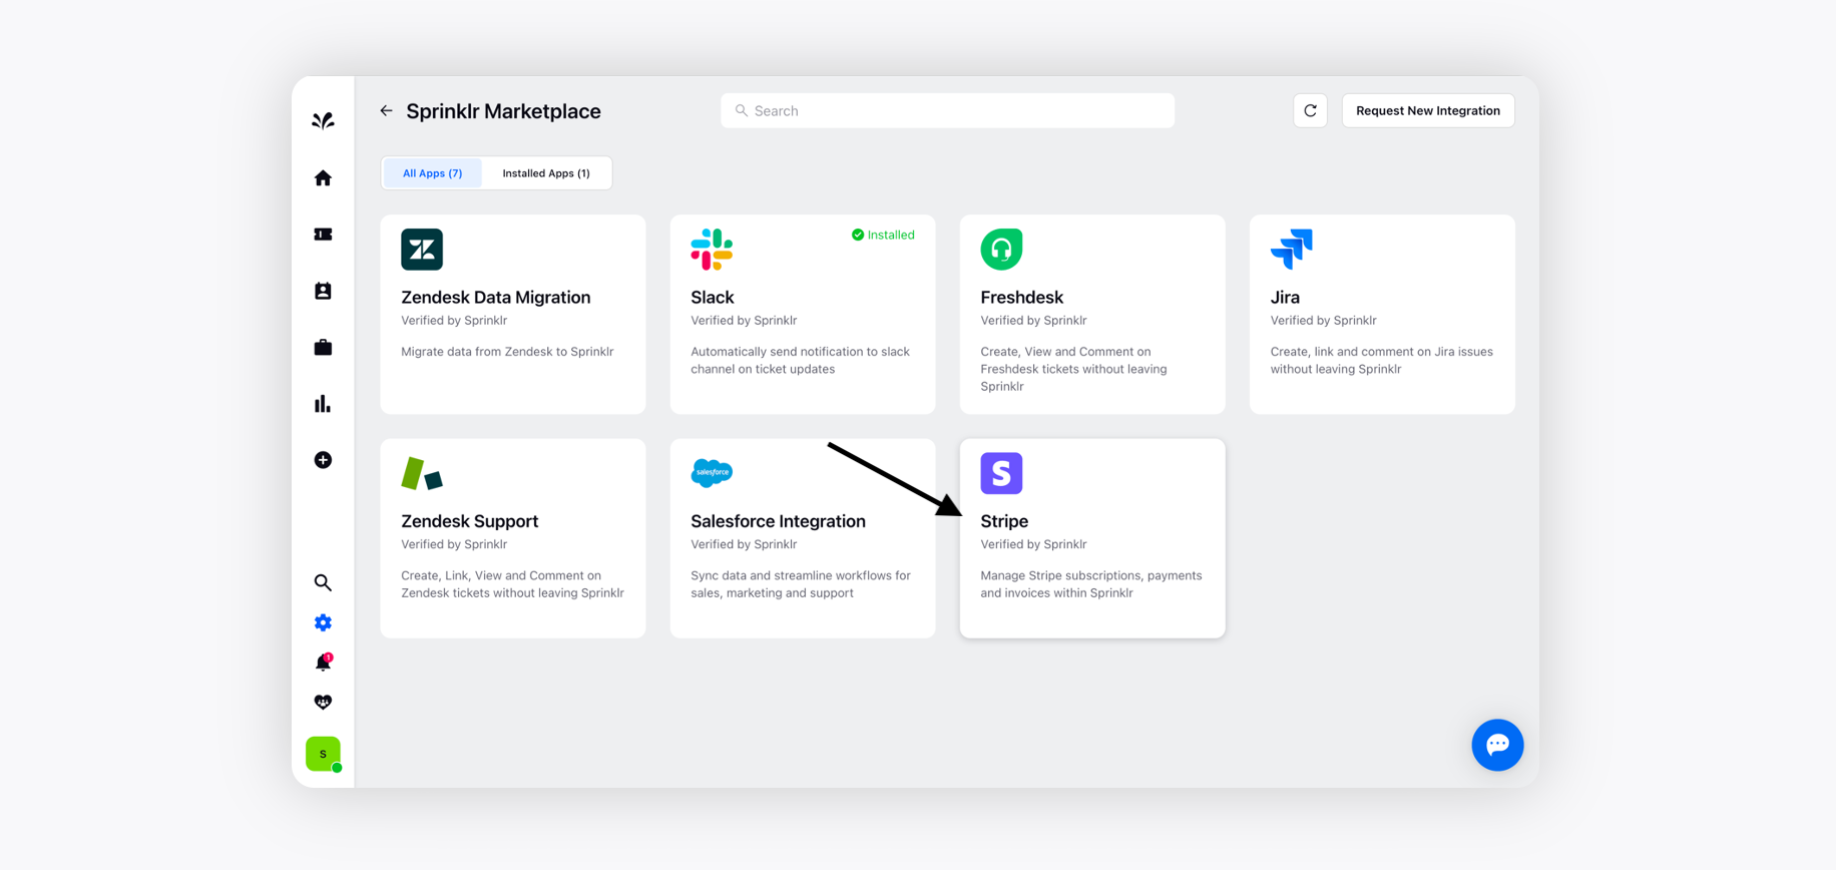
Select Stripe from the list of apps in the Sprinklr Marketplace.
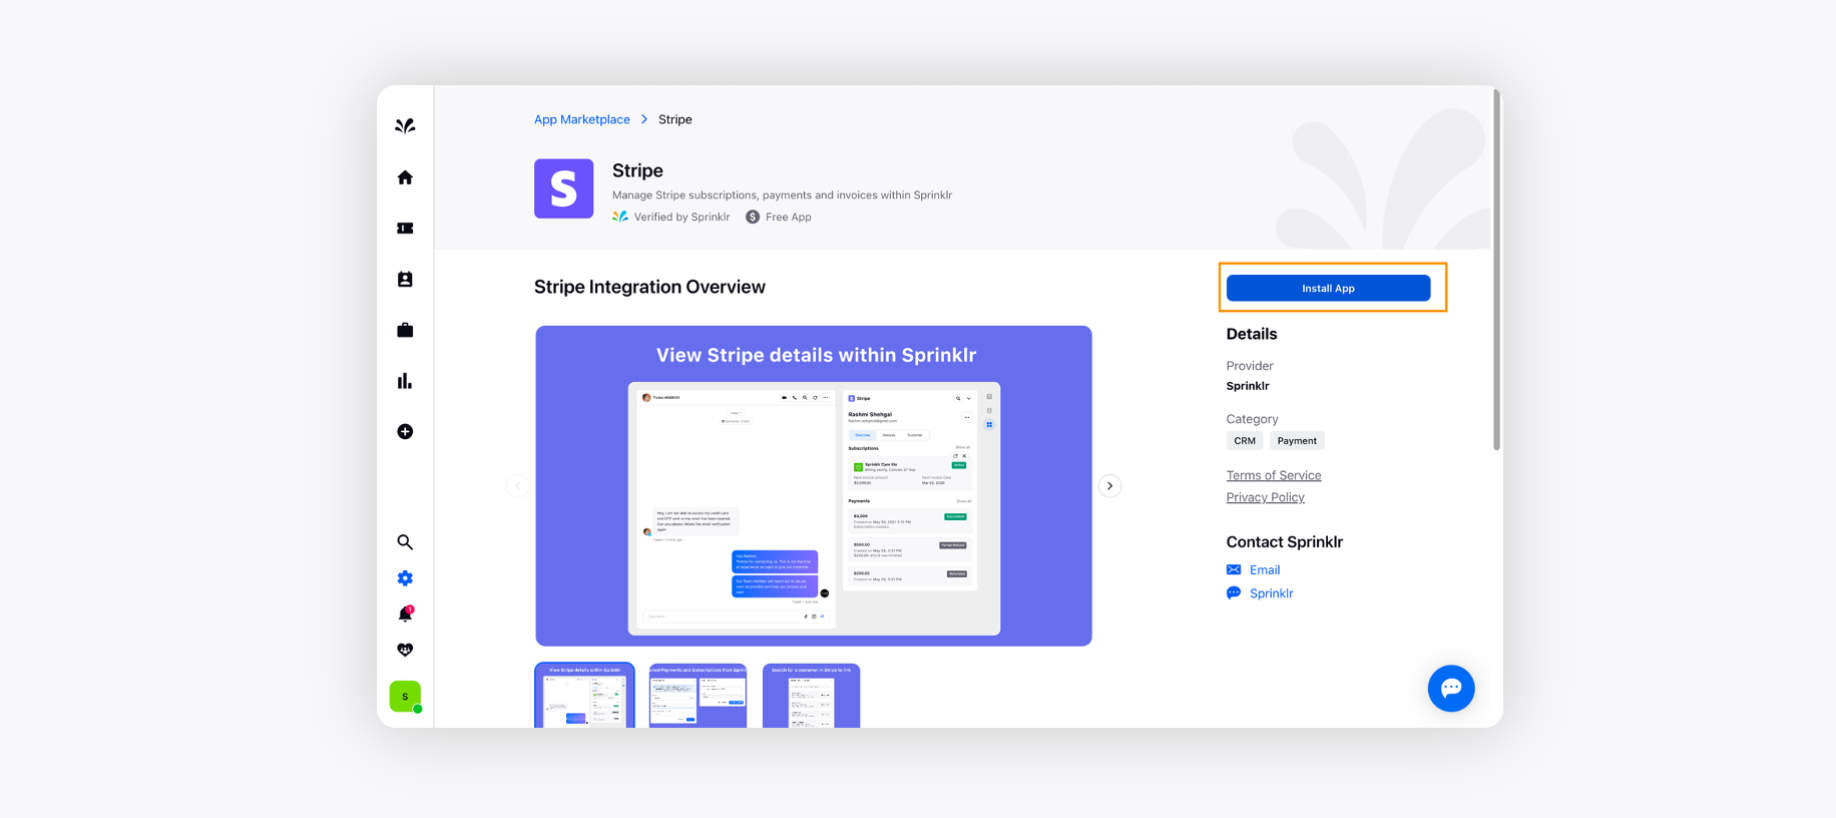
Now, click the Install App icon on the top right corner.
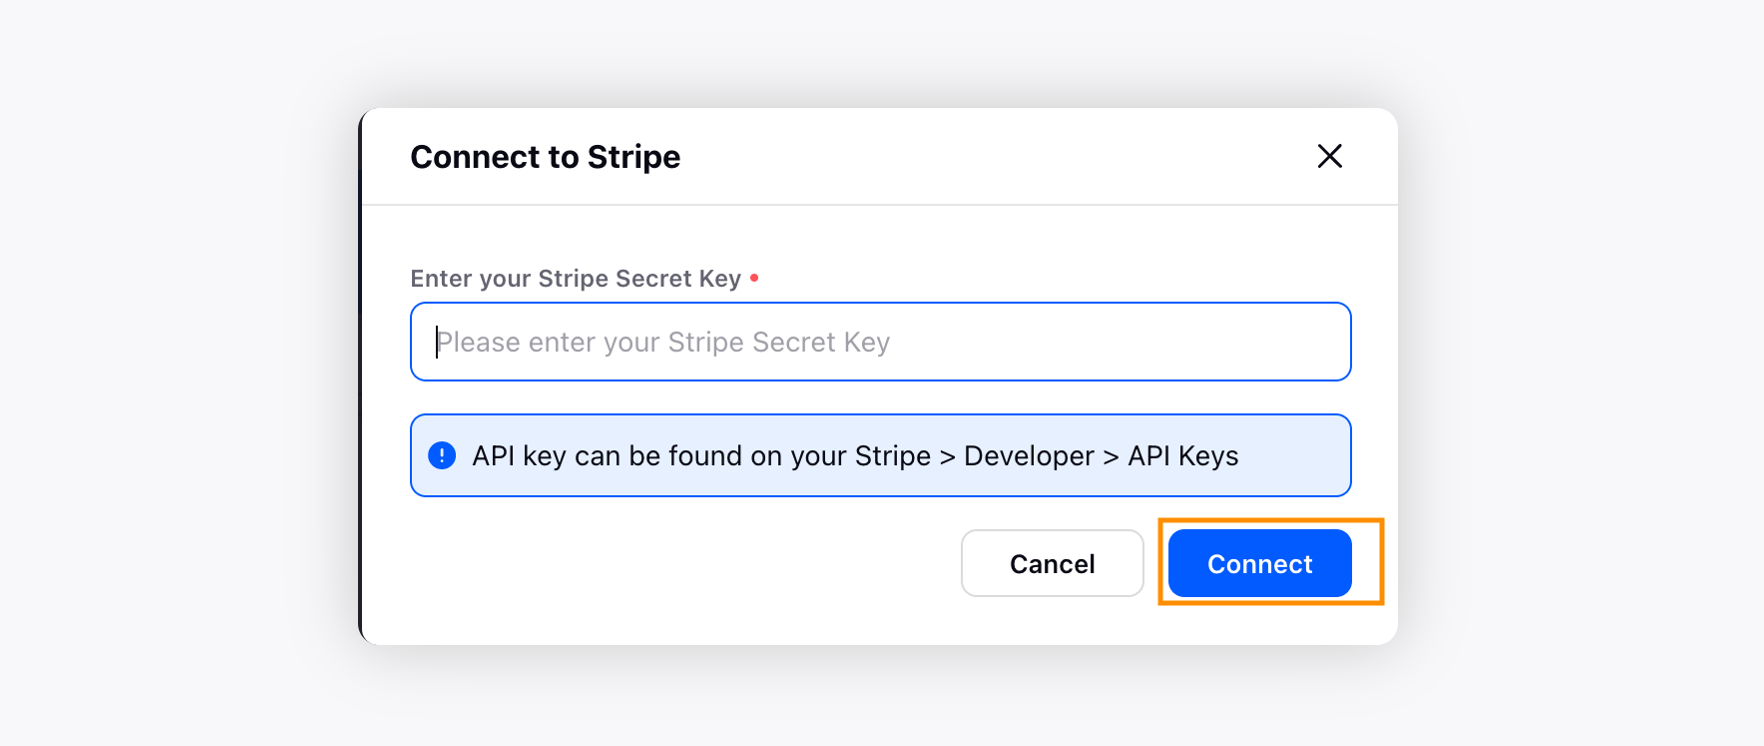
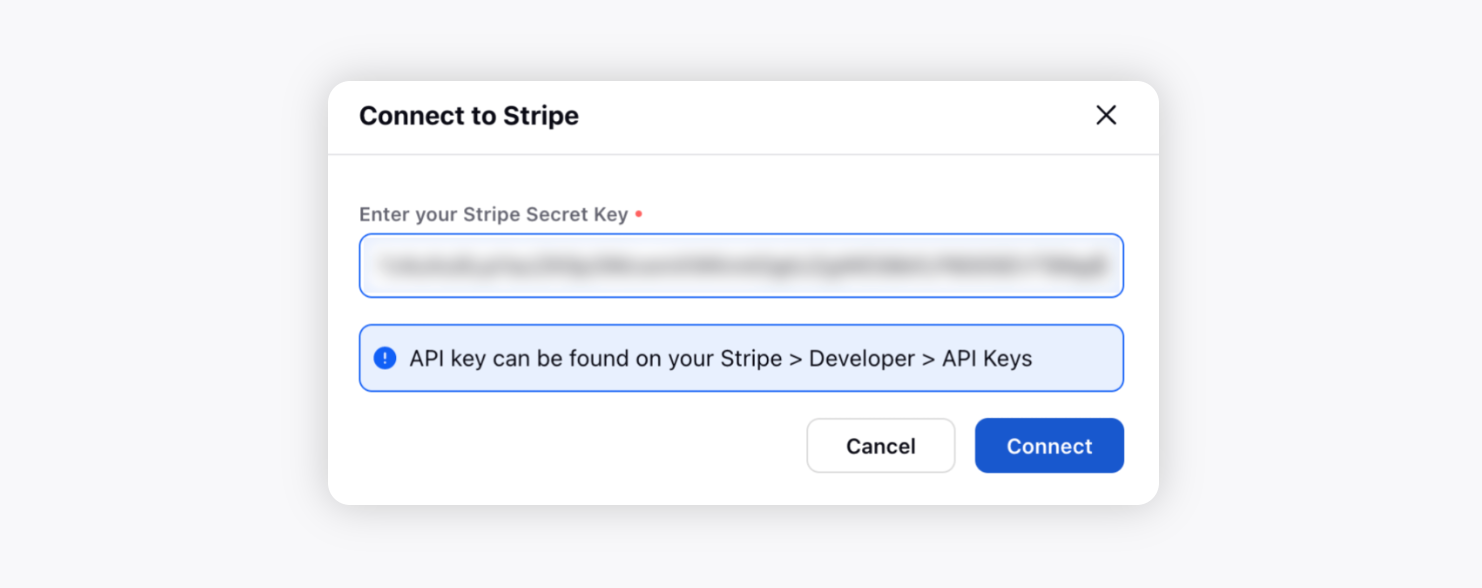
The Connect to Stripe window will pop up where you can populate your Stripe Secret Key.
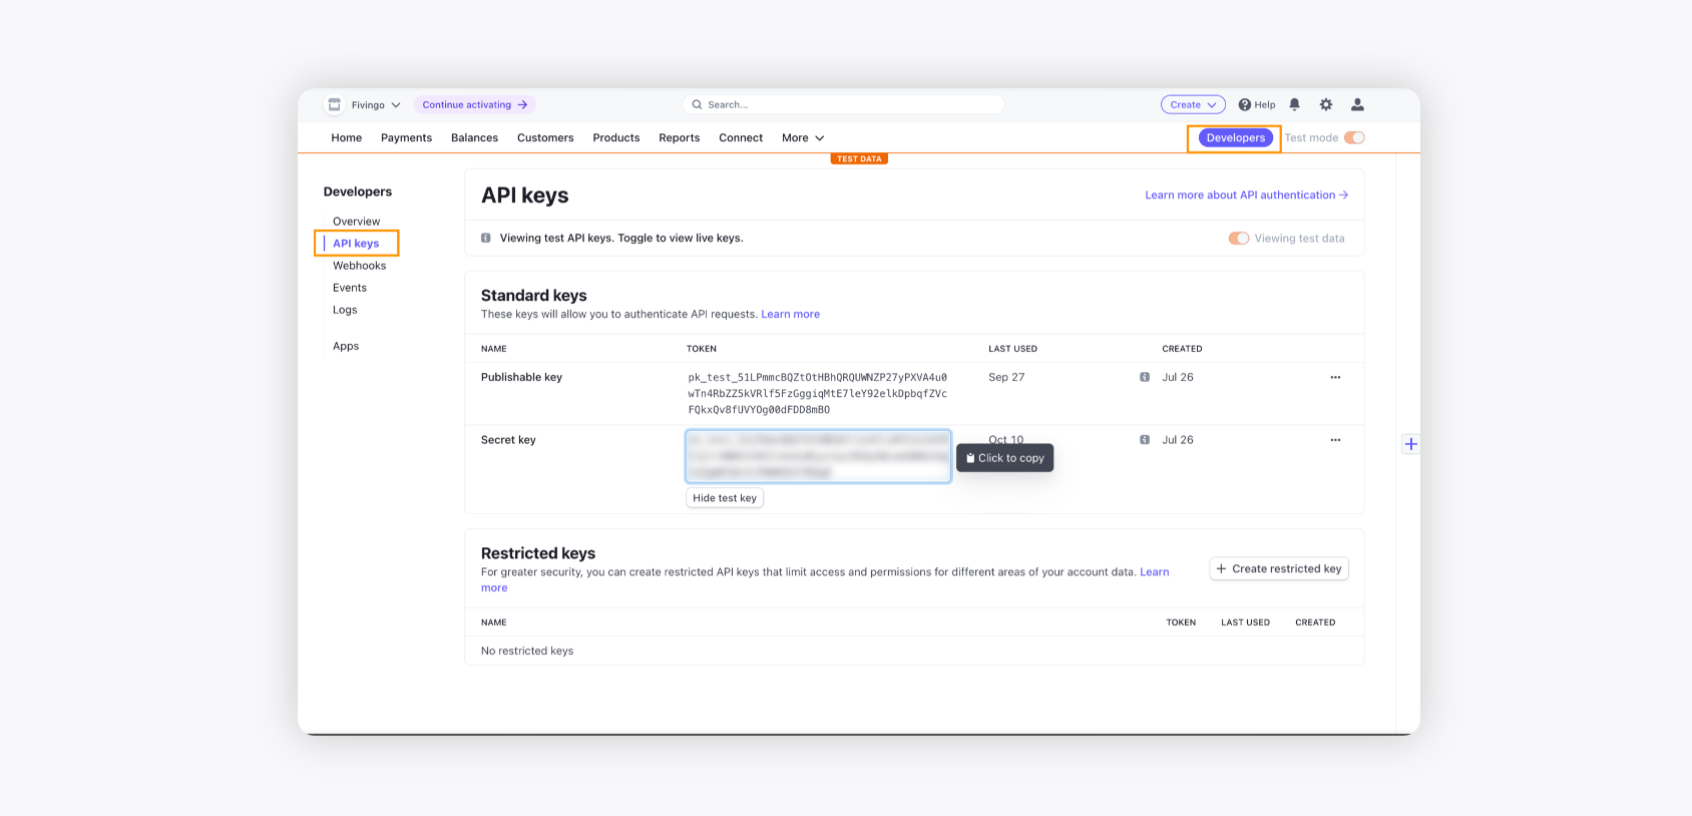
The key can be fetched by the Stripe admin user by clicking Developer options on the top right corner and then navigating to API Key on the left pane and copying the Secret Key.
After entering the Secret Key, click Connect.
This would open up the Settings page, which can be used to configure further Settings for the Stripe Integration.
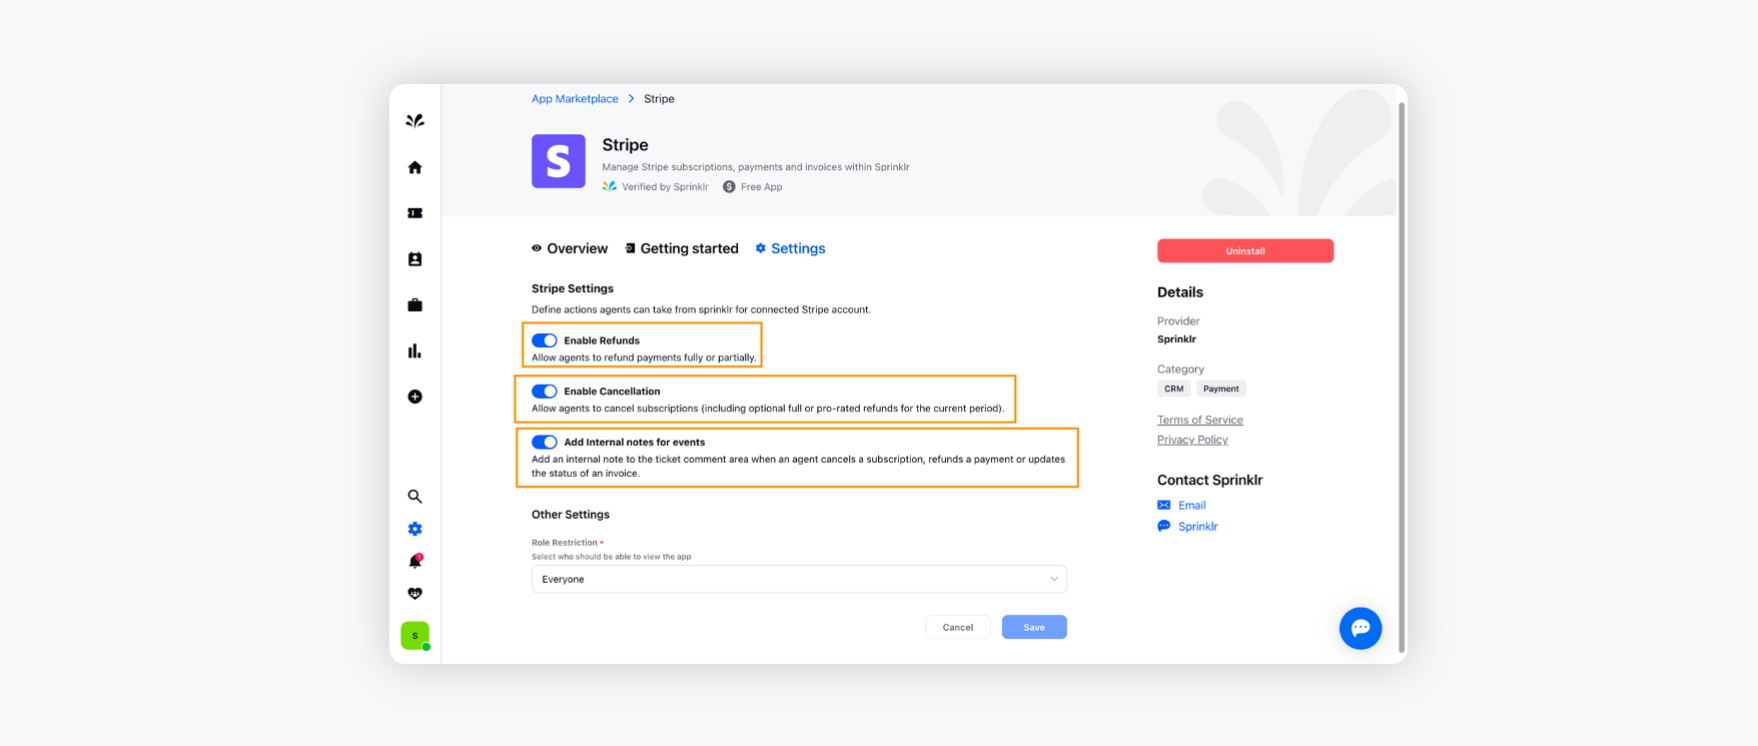
After configuring the Settings page, toggle on Refunds, Cancellation, and Internal notes for events, and click Save at the bottom right. This way, you will complete the Stripe configuration in the Sprinklr Service.
Working with Stripe in Sprinklr Service
In cases where tickets are received from customers who have an email id associated with them, Sprinklr Service tries to link the customer to any customer in Stripe. If it is successful in mapping the ticket to a Stripe customer, then all the customer details are fetched from the Stripe widget and listed under the same on the right panel under the Marketplace tab next to a ticket.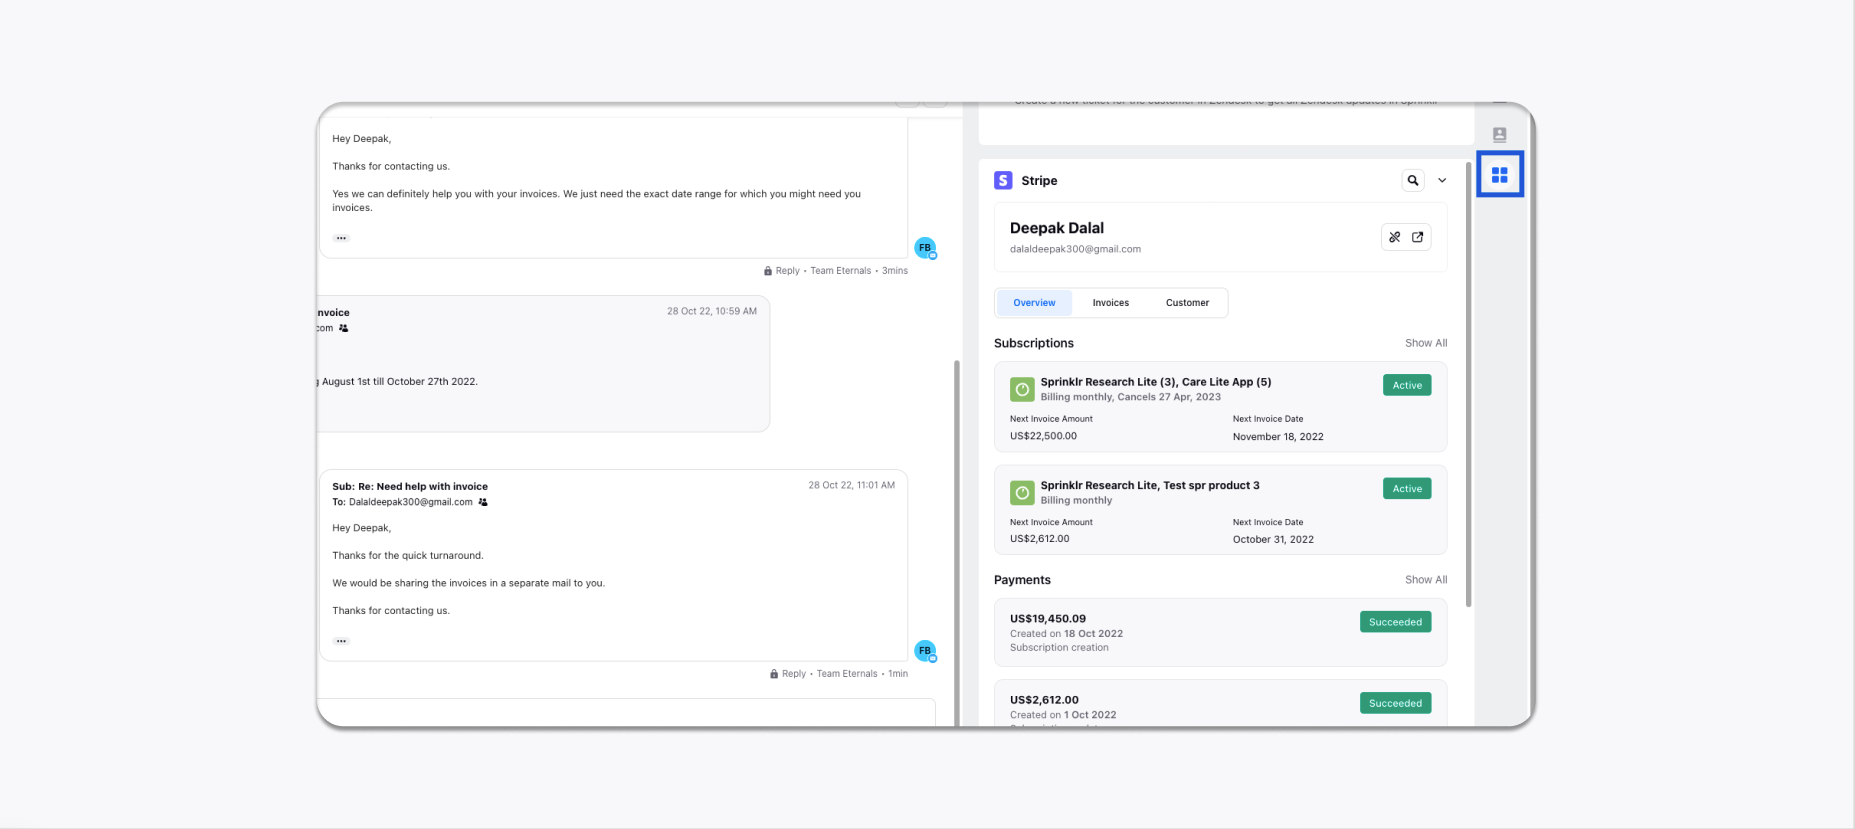
Linking a Stripe Customer to a ticket
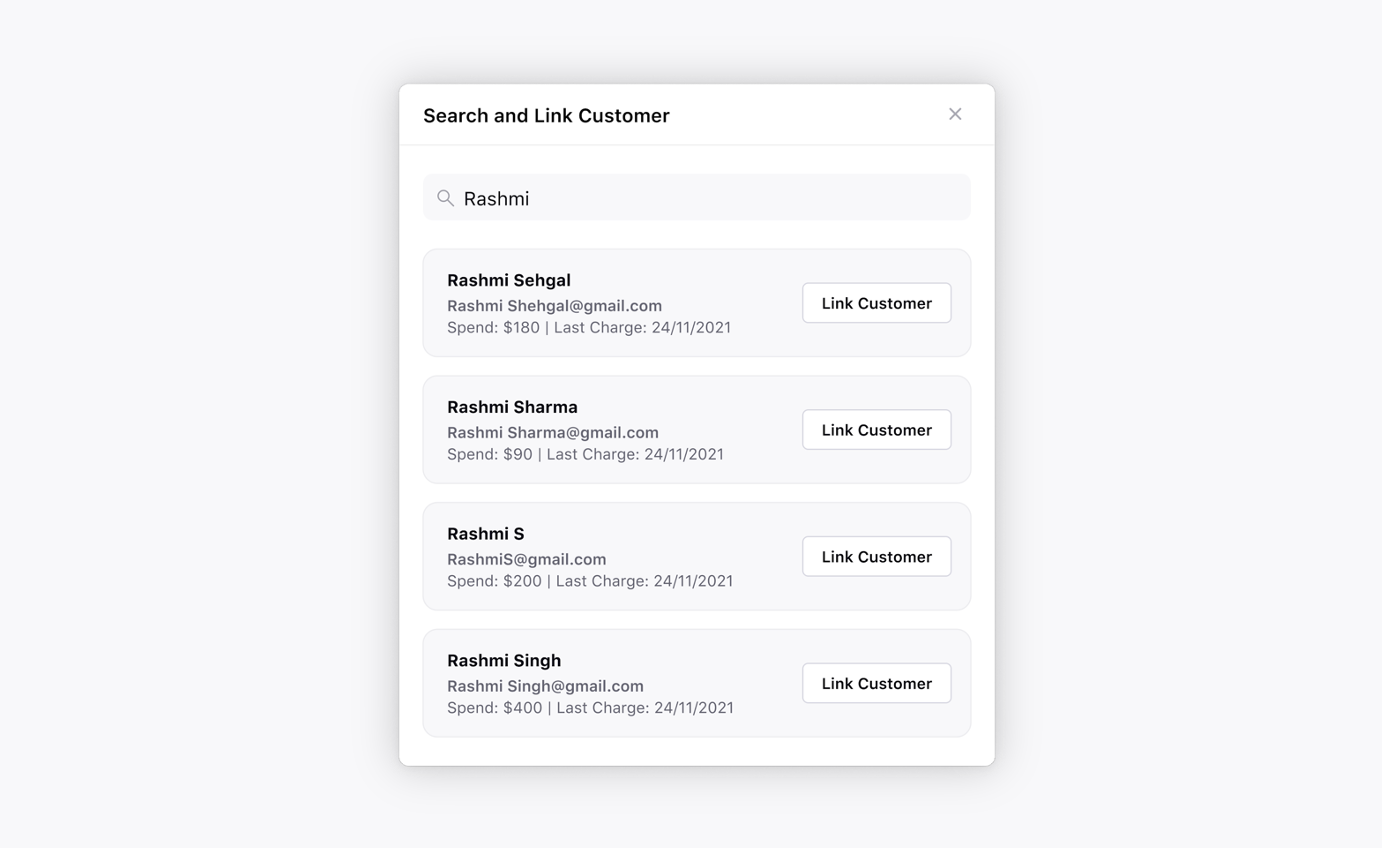
If Sprinklr Service cannot map the customer automatically to a Stripe customer, then you can link a customer to a ticket by searching for their name or email in the search bar inside the Stripe widget by clicking the Search and Link Customer icon.
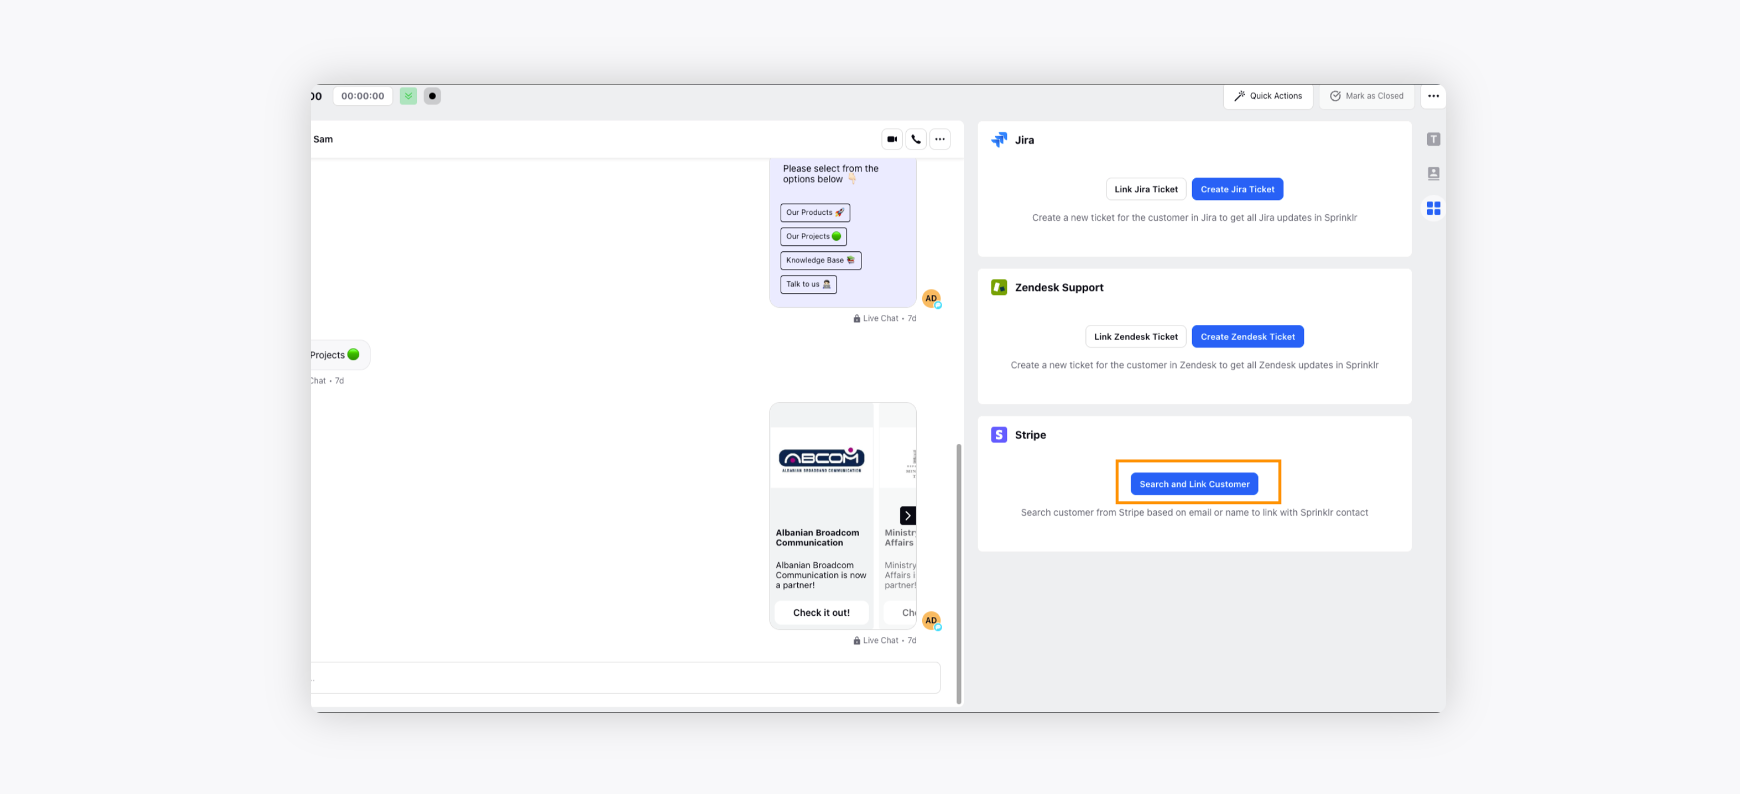
This can also link another customer to the ticket and replace the previous one by searching for the desired customer and clicking the Search and Link Customer icon.
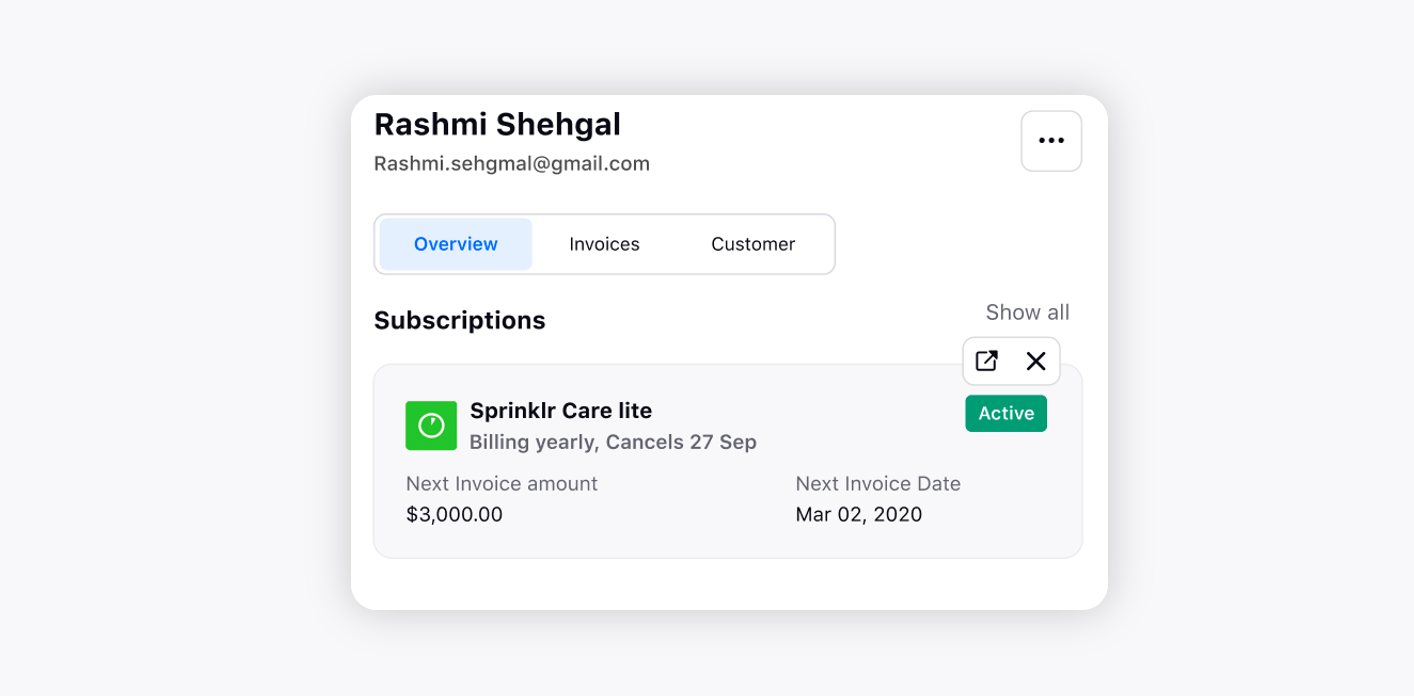
Viewing the Subscription details
The subscription details sit under the Subscription subsection under the Overview tab of the Stripe Widget. Here you can view various Subscription details of the customer.
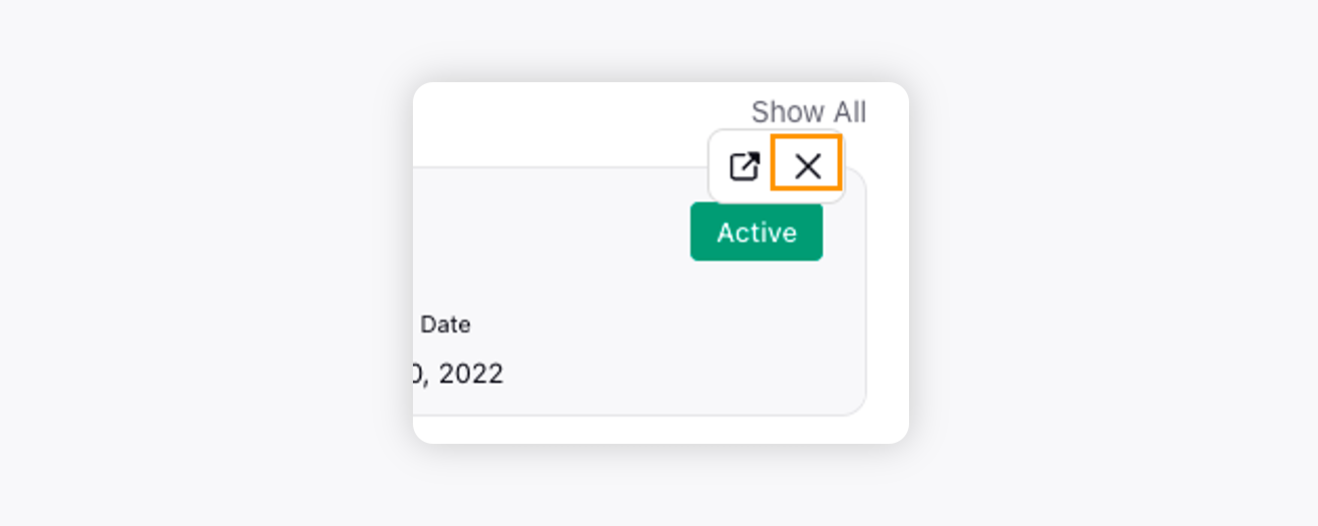
Subscription Cancellation
You can cancel the Subscription by clicking the X icon at the top right of the Subscription window.
This would open up the Cancellation window where you can configure the Cancellation conditions.

The list of Cancellation conditions is shown below in the dropdown.
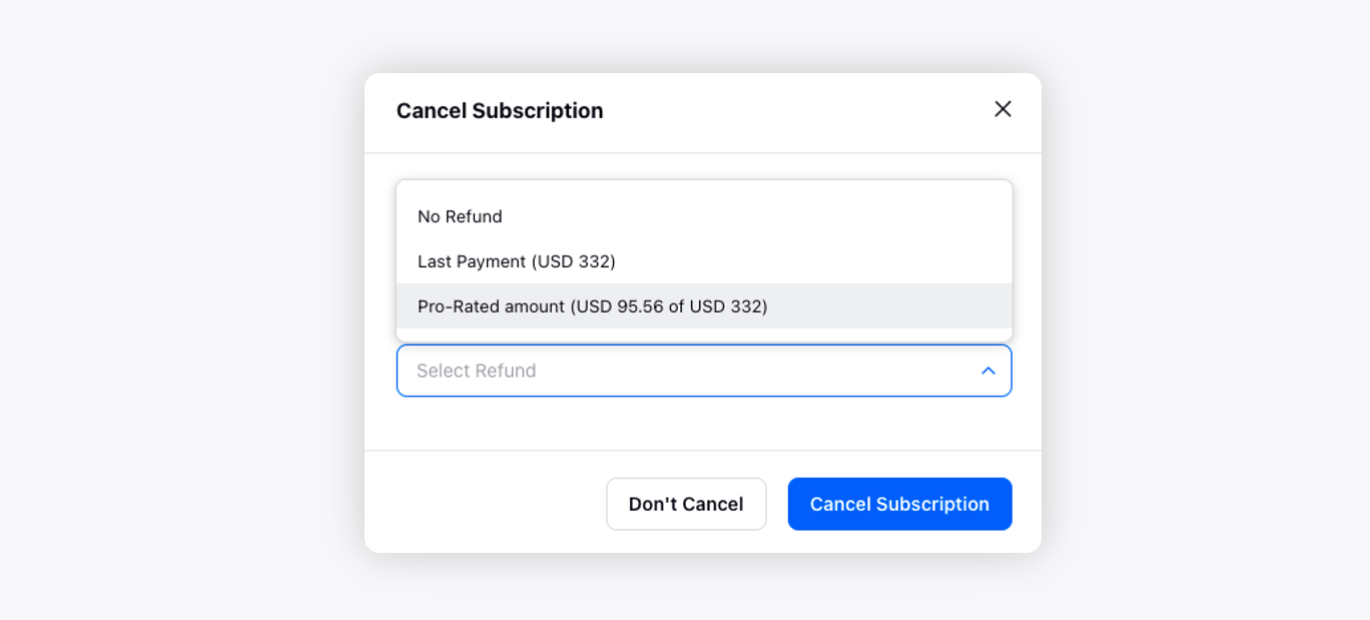
Here you can select the method of Refund for this cancellation, and the amount would be adjusted accordingly.
Cancellation creates a private Note on the Sprinklr Service platform to register a change in the Subscription.

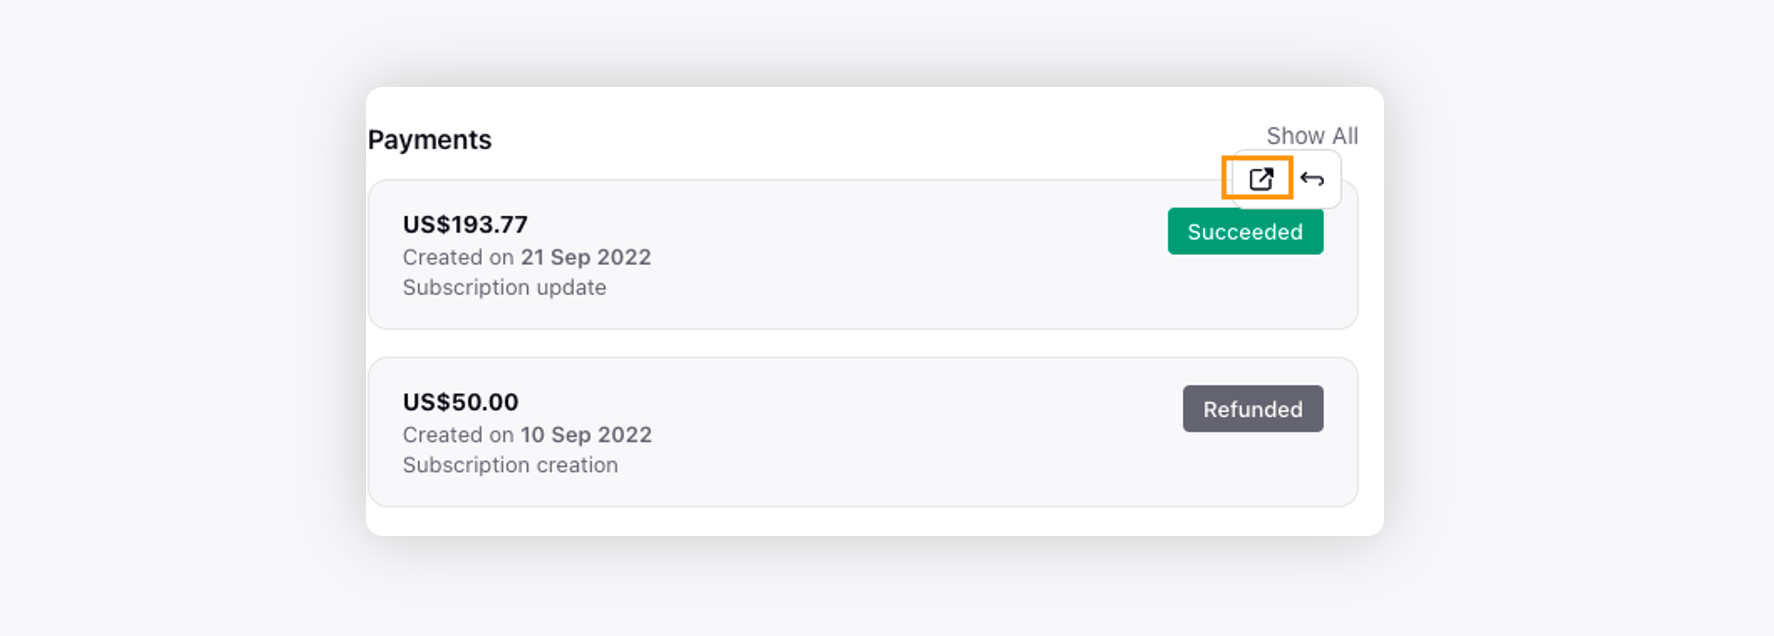
Payment Cancellation
Payments can be canceled in the Stripe widget by clicking the Reverse Arrow icon on the top right of each Payment.
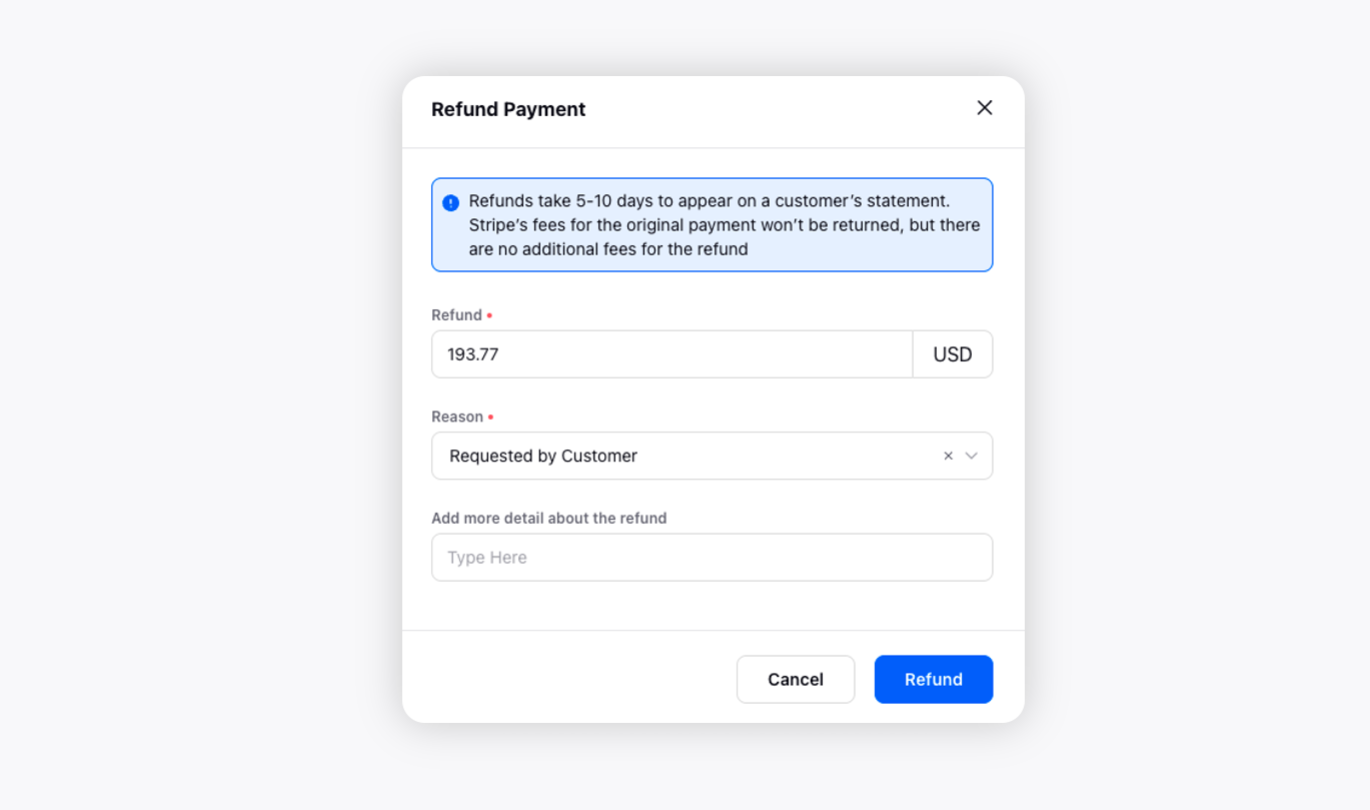
Once you cancel the payment, you’ll get an option to configure the Refund for that canceled payment.
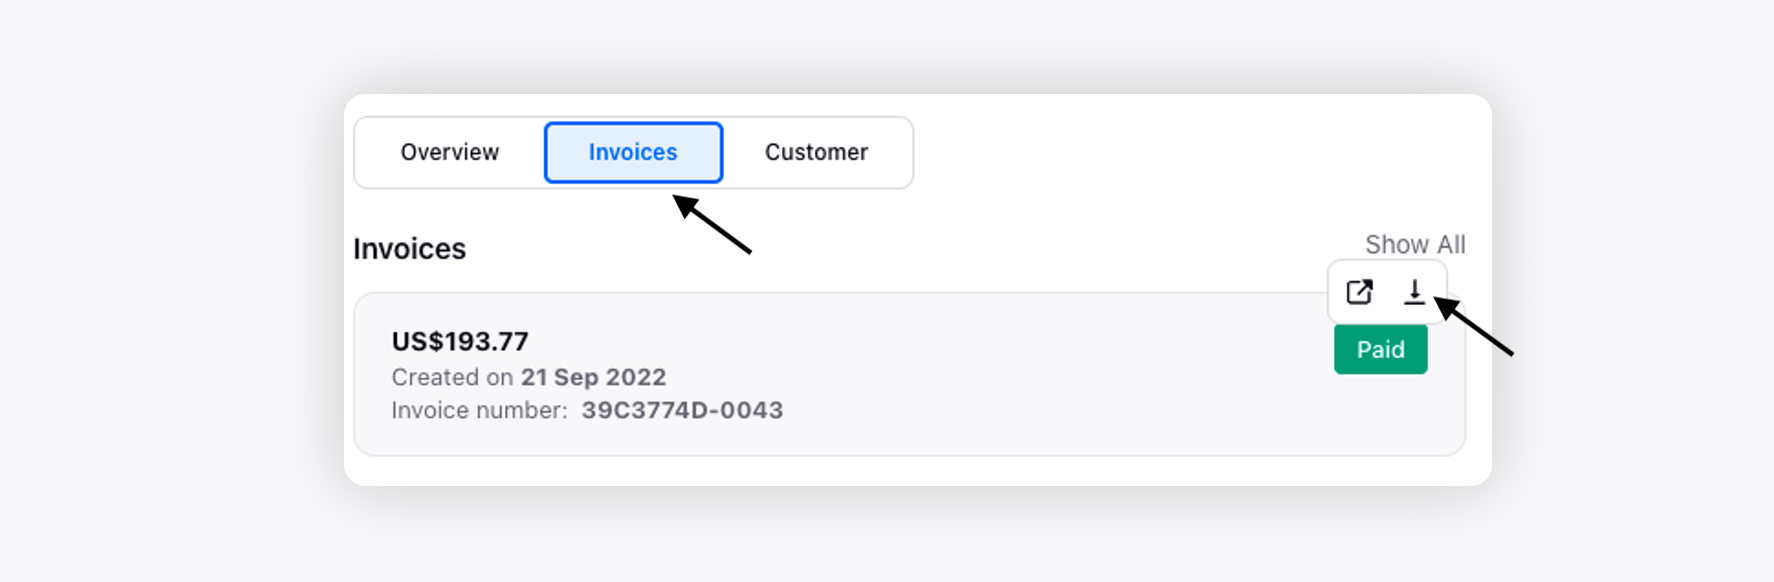
Invoice Download
Invoices can be easily downloaded from the Stripe Widget inside Sprinklr Service by clicking the Download icon on the top right of each Invoice indicator.
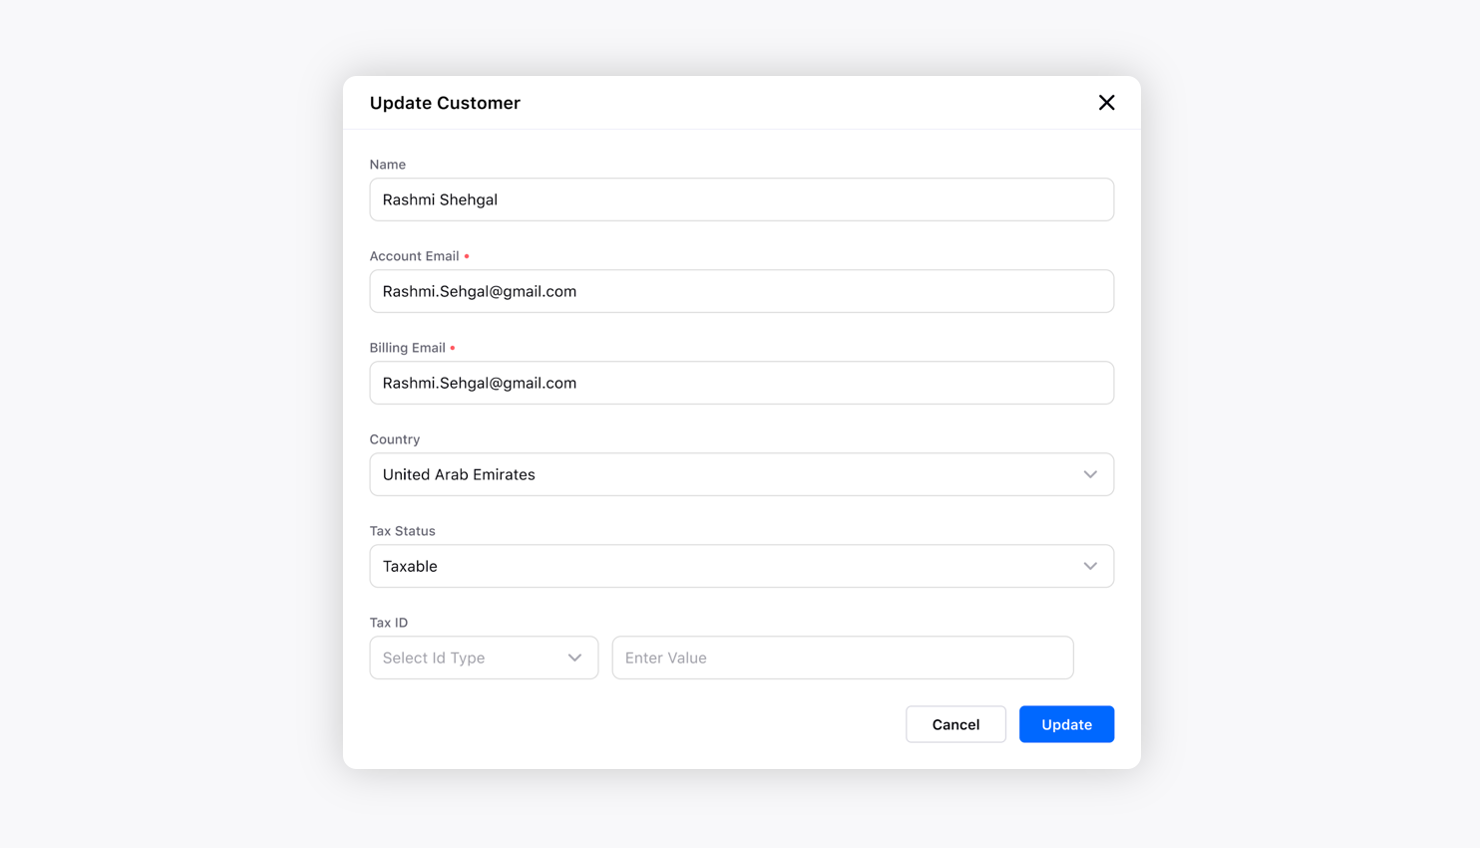
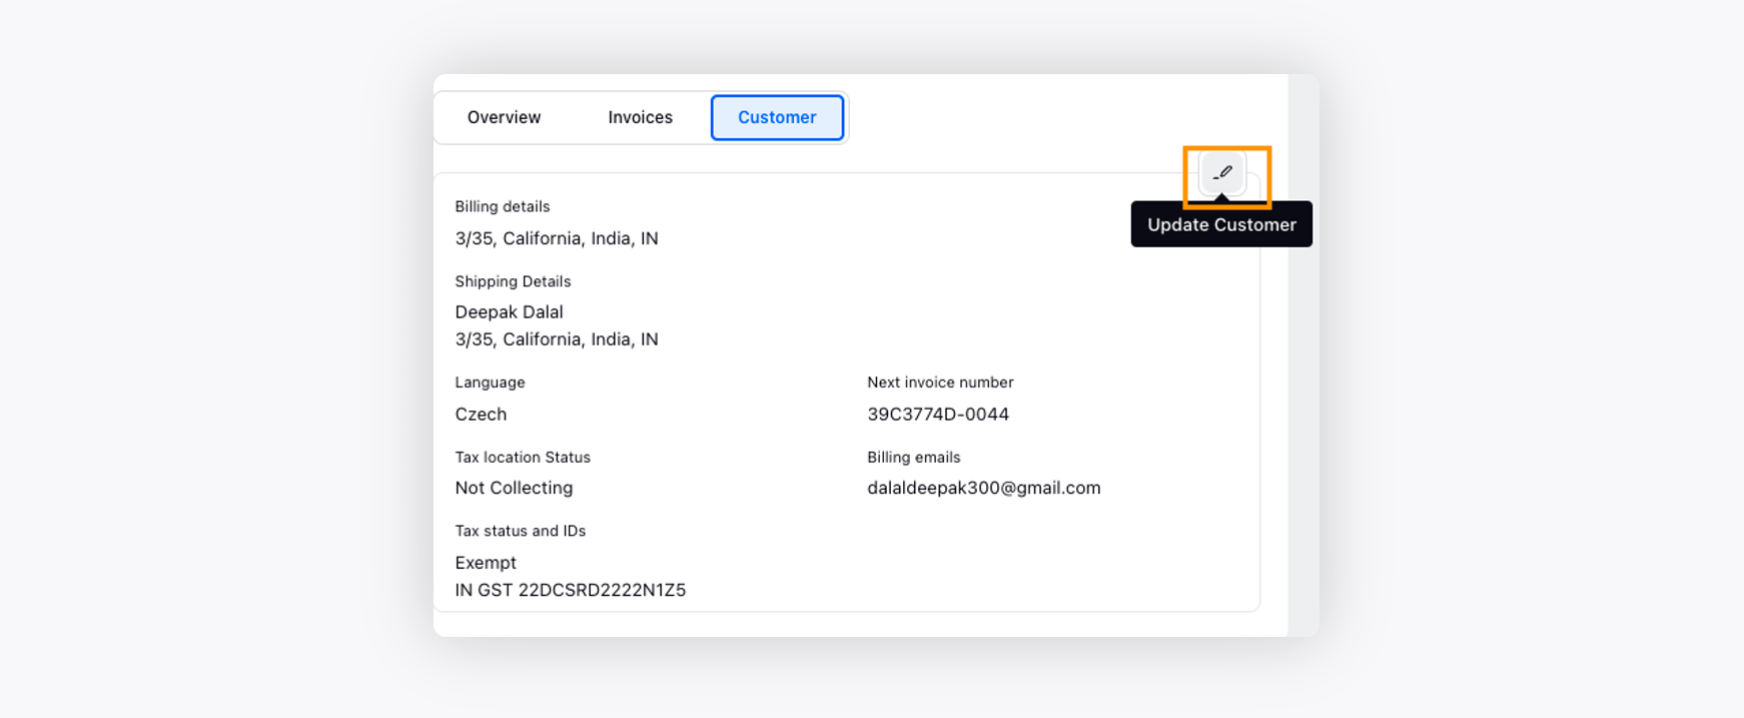
 Update Customer Details
Customer details can be edited by clicking the Update Customer icon on the top right of the customer info. section under the Customer tab.
 This is how you can update the customer details by clicking Update at the bottom right.