Zendesk Support Integration with Sprinklr Service
Updated
Integrate Zendesk Support with Sprinklr Service to communicate, receive, and manage all the Zendesk tickets via Care Console and experience a seamless two-way workflow.
You can integrate a Zendesk instance into Sprinklr Service. The integration will help you quickly create Zendesk tickets for any conversations you’ve had with the customers. You can also talk to your Zendesk team without leaving Sprinklr by posting a private note.
With this integration, you can:
Communicate with your Zendesk team without leaving Sprinklr by posting private comments.
Create or link Zendesk tickets for your customer conversation in just a few steps.
Get live updates on Sprinklr when the status of the ticket changes or someone leaves a comment in Zendesk.
To integrate Zendesk
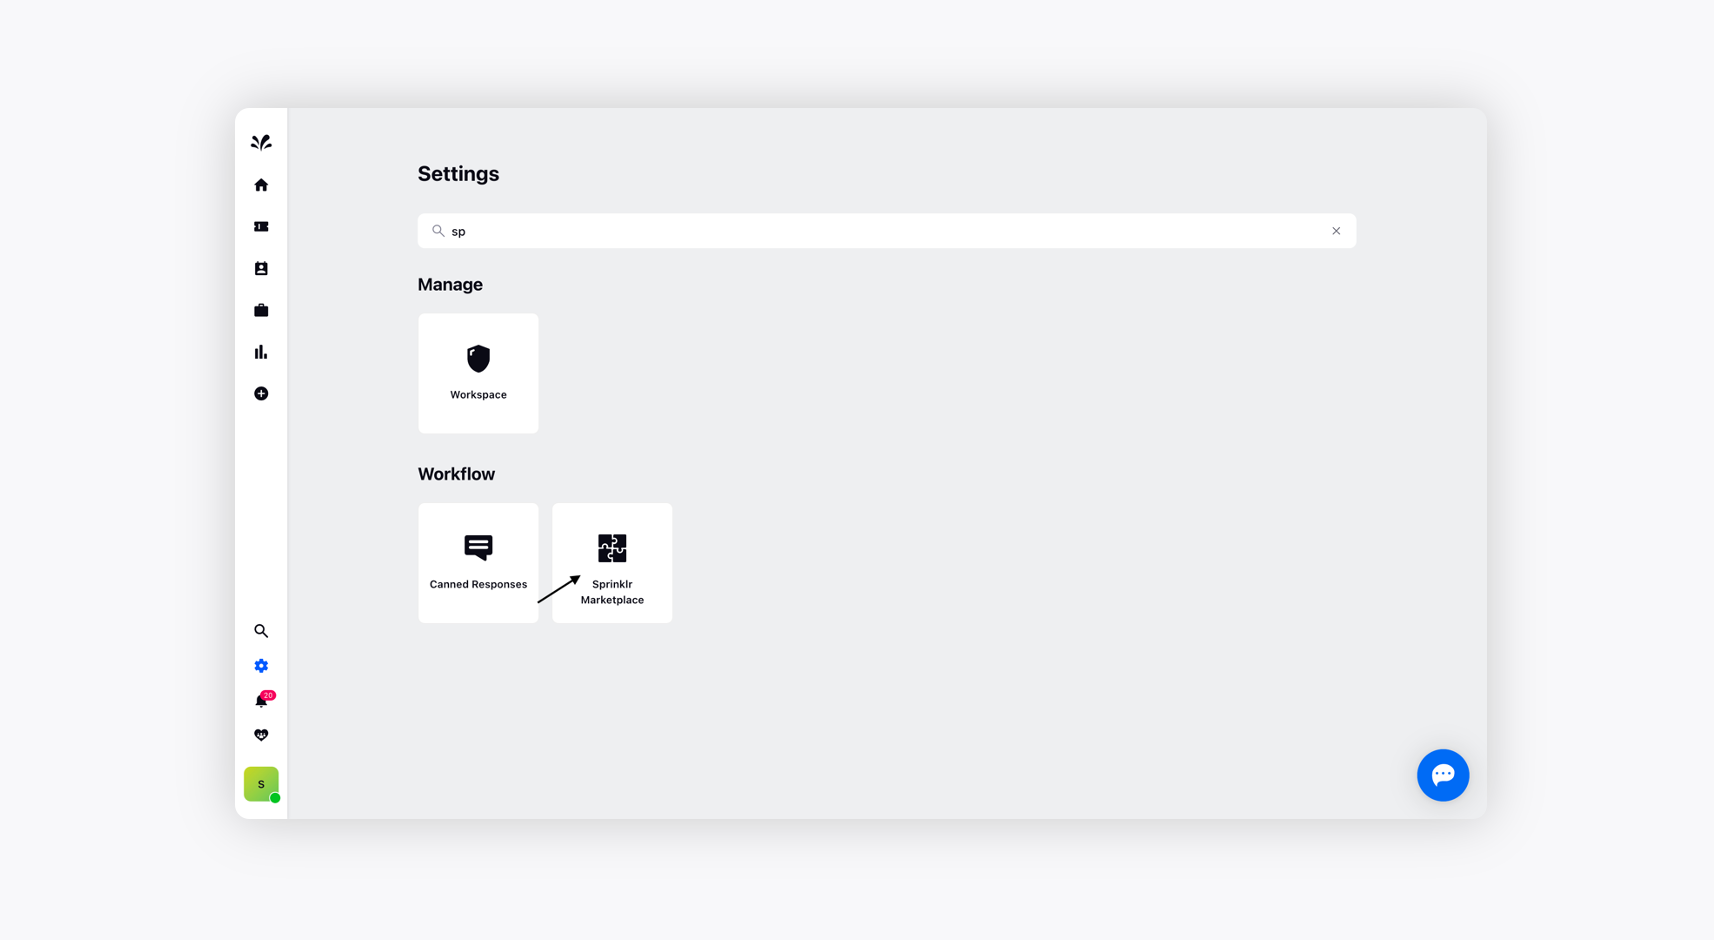
Log into Sprinklr Service. Click the Settings icon on the left Navigation Bar.
On the Settings page, select Sprinklr Marketplace under Workflow.
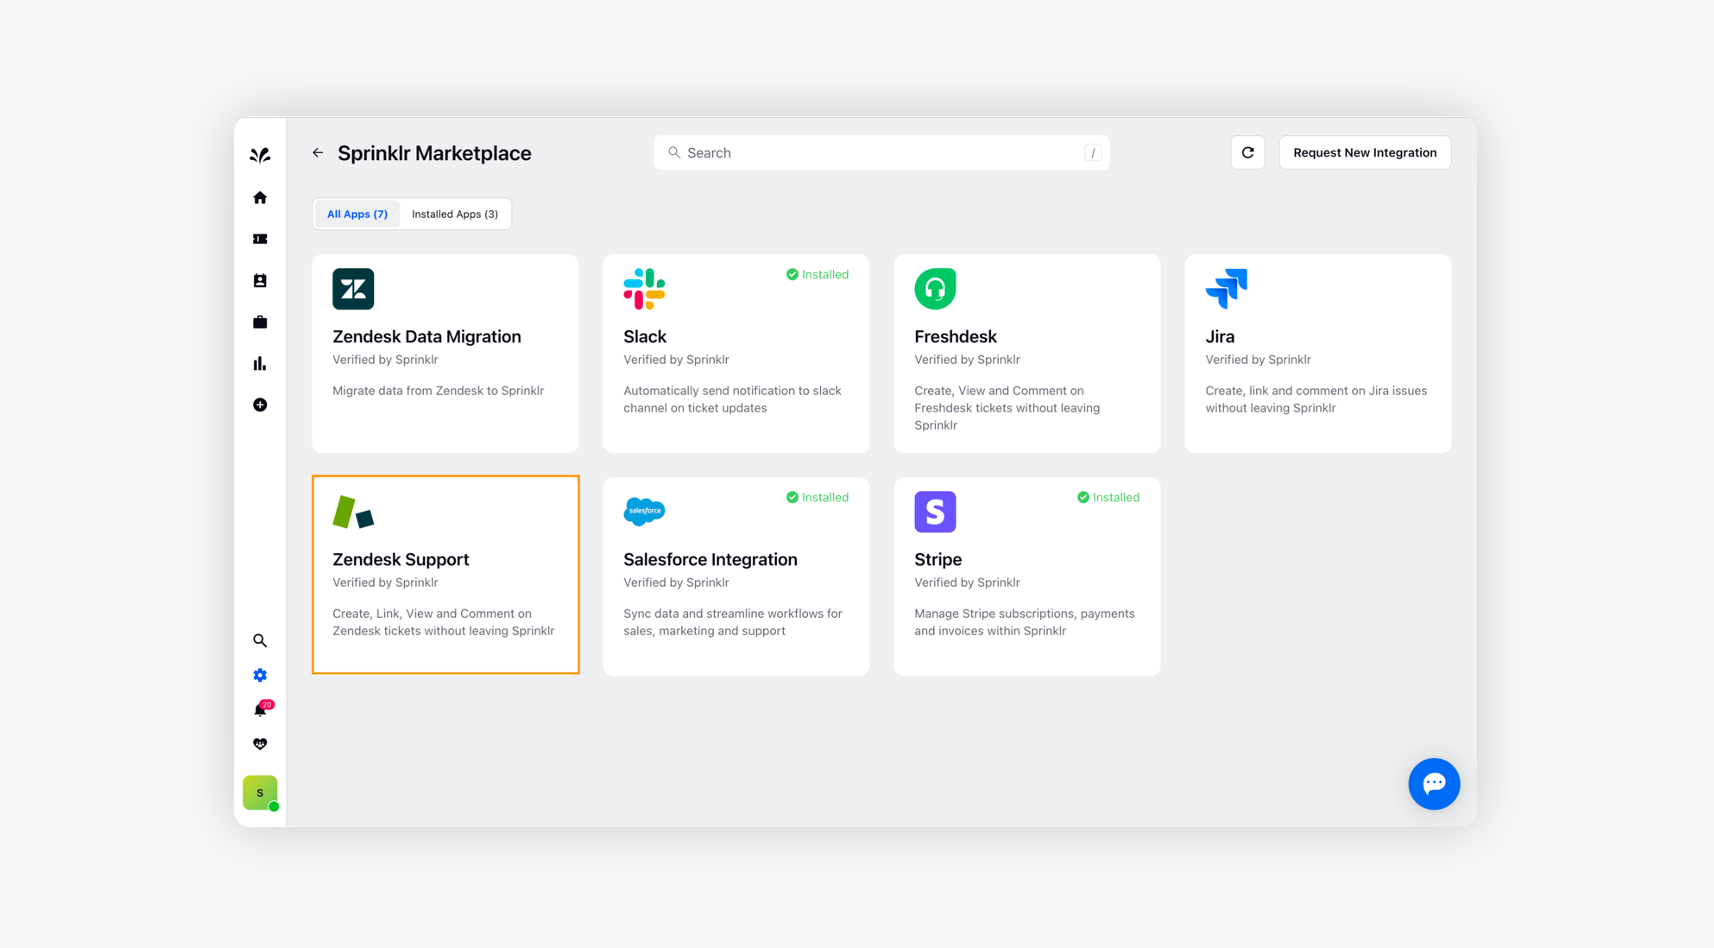
Select Zendesk Support on the Sprinklr Marketplace window.
Click the Install App button.
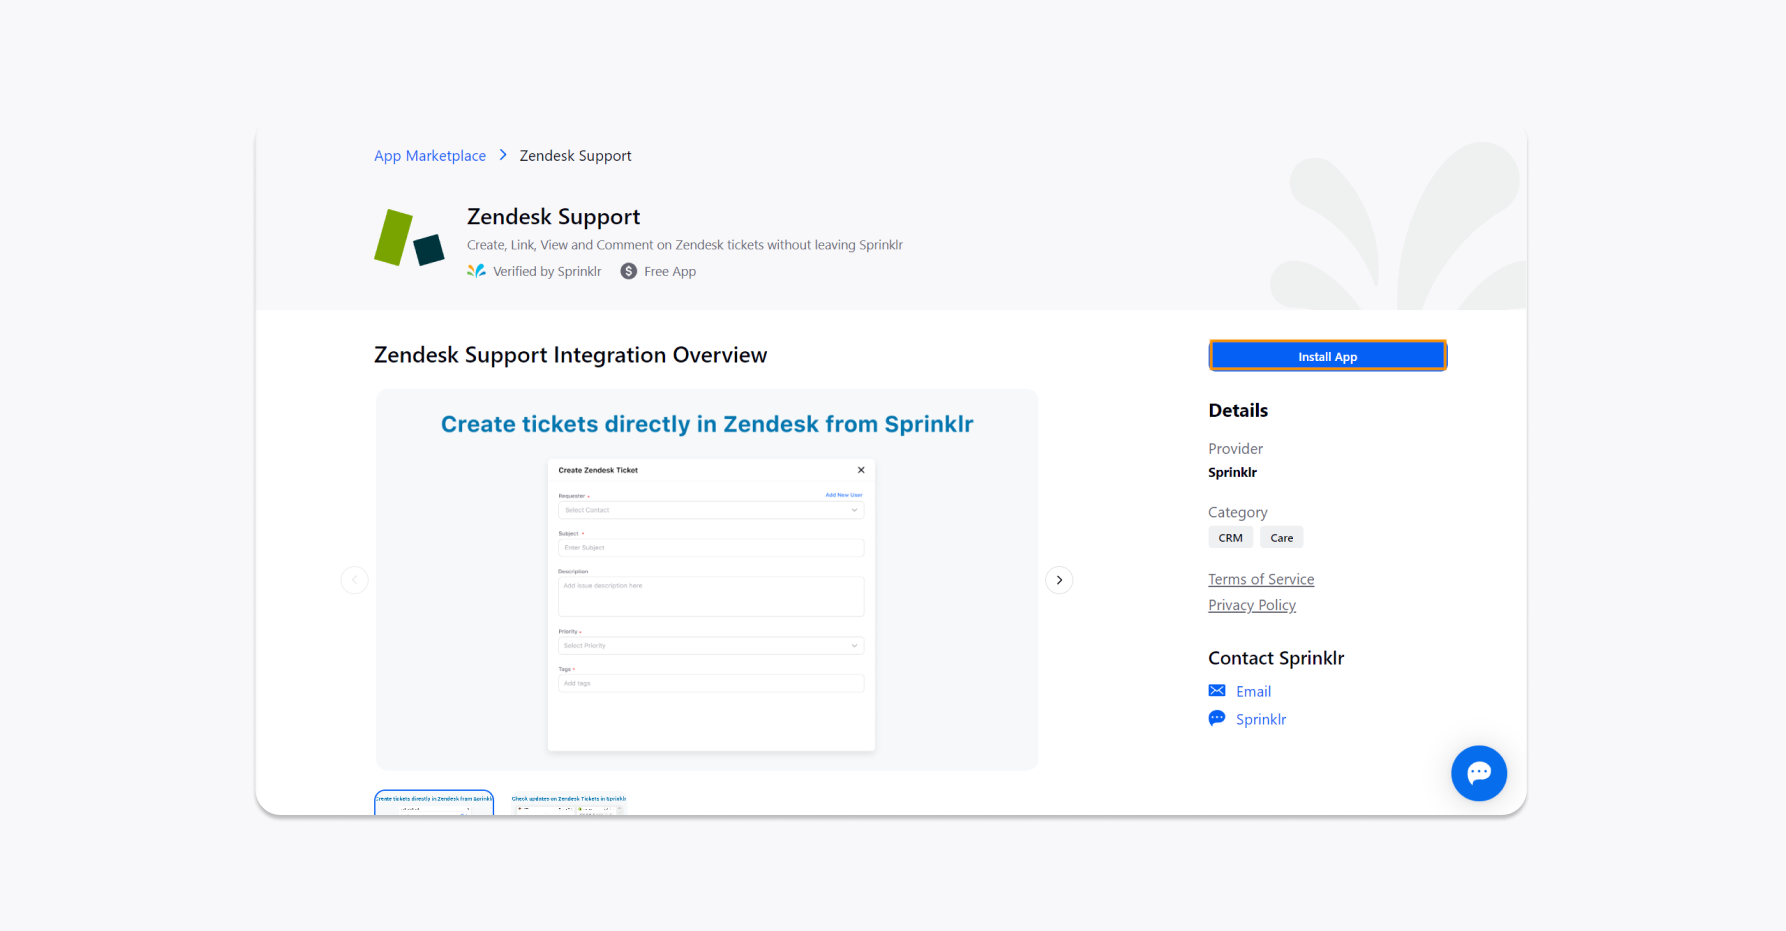
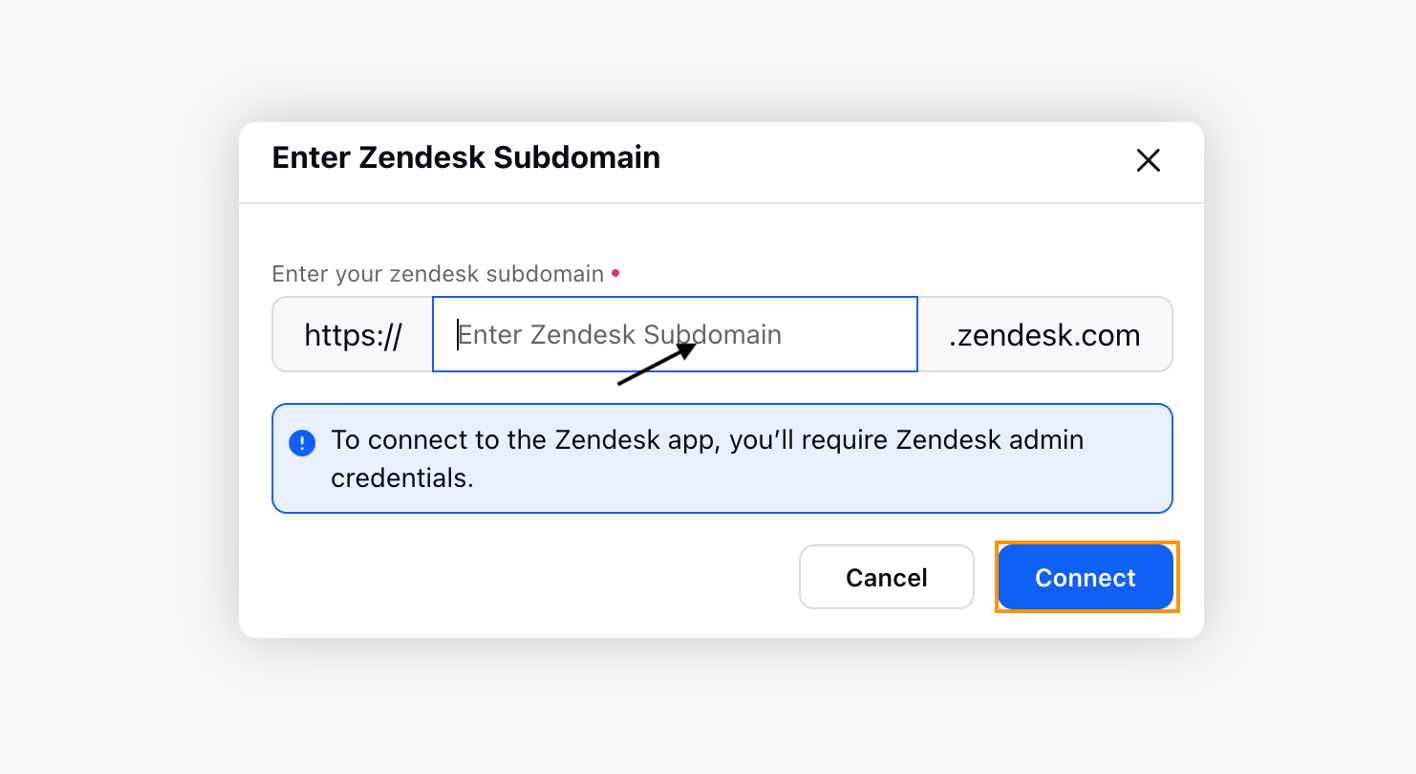
Enter your Zendesk Subdomain in the field and click Connect. It will automatically connect your account. It may take a few minutes to connect. Once connected, you can configure your settings as below steps.
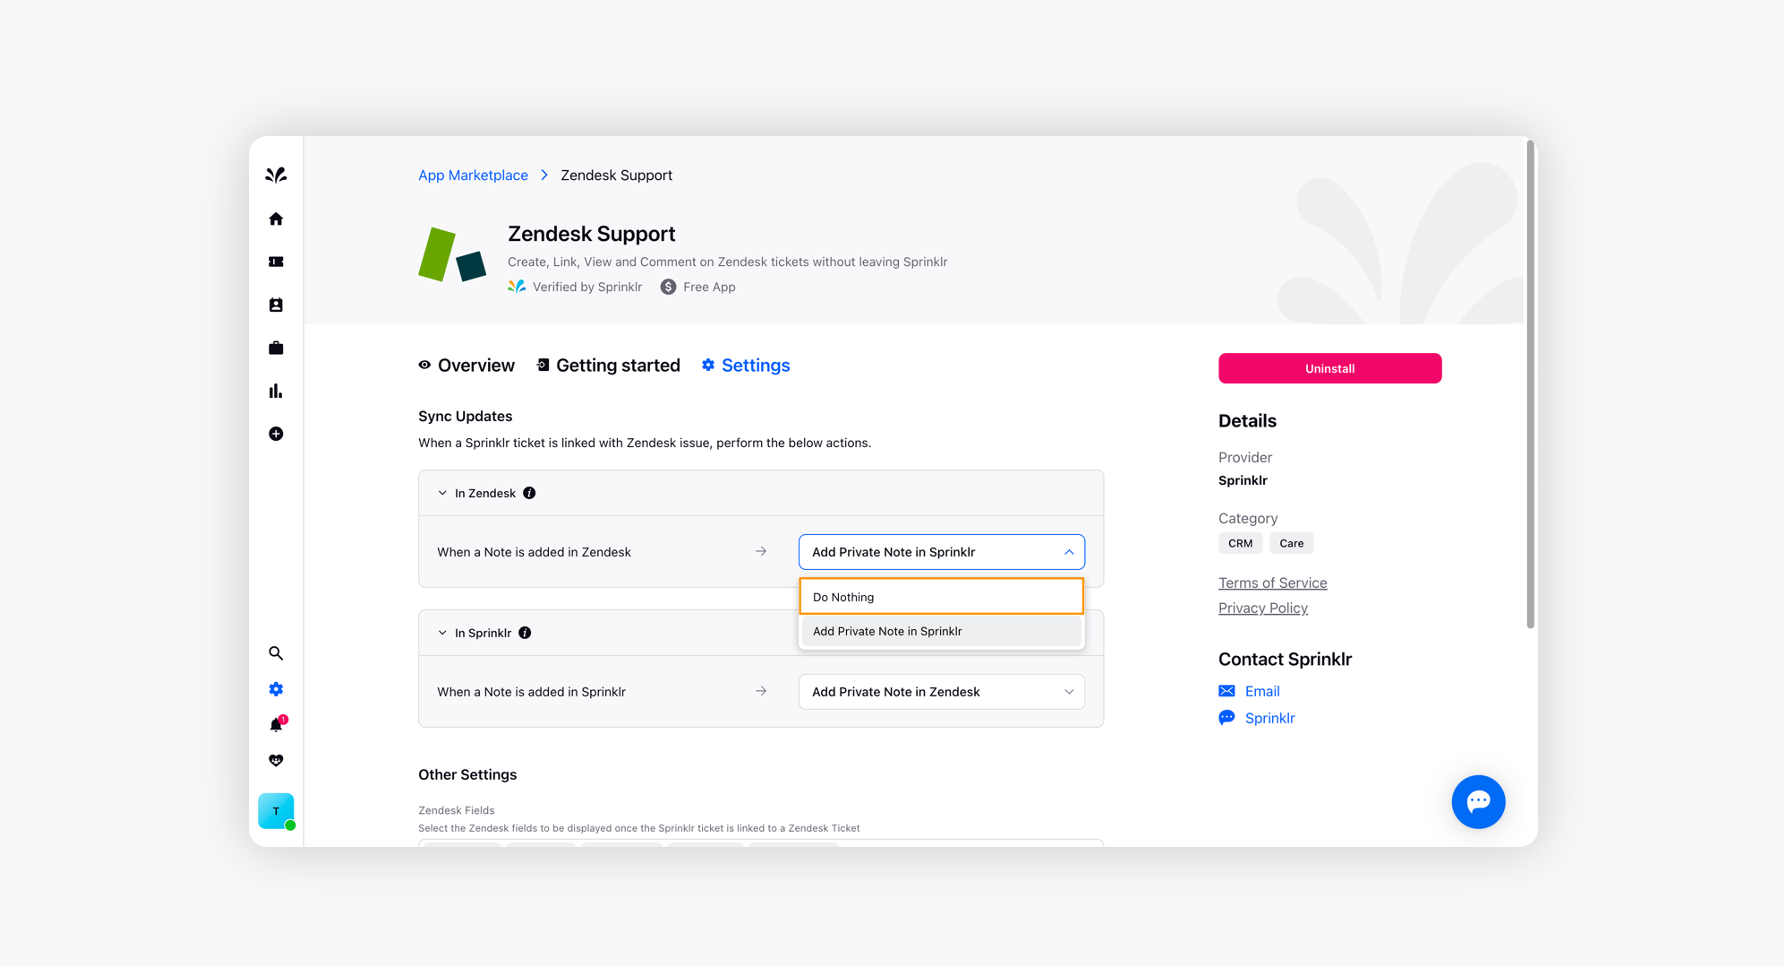
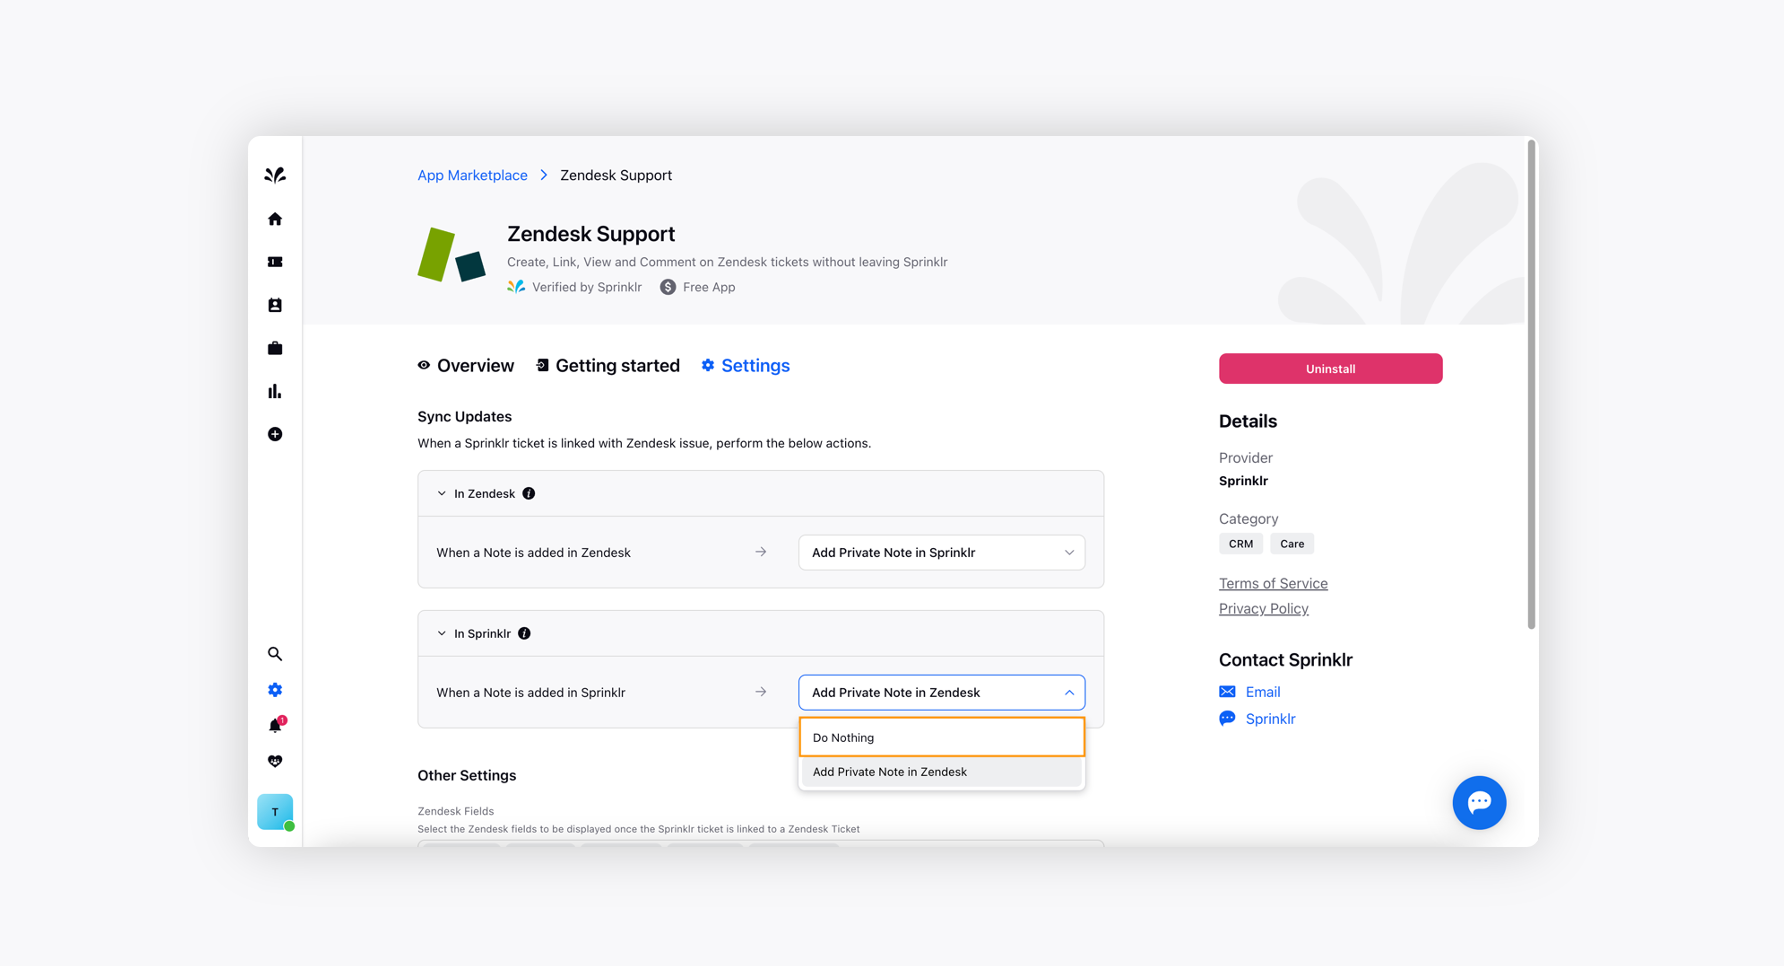
Step 1. Sync updates
In this section, you can configure the actions when a Sprinklr ticket is linked to a Zendesk case.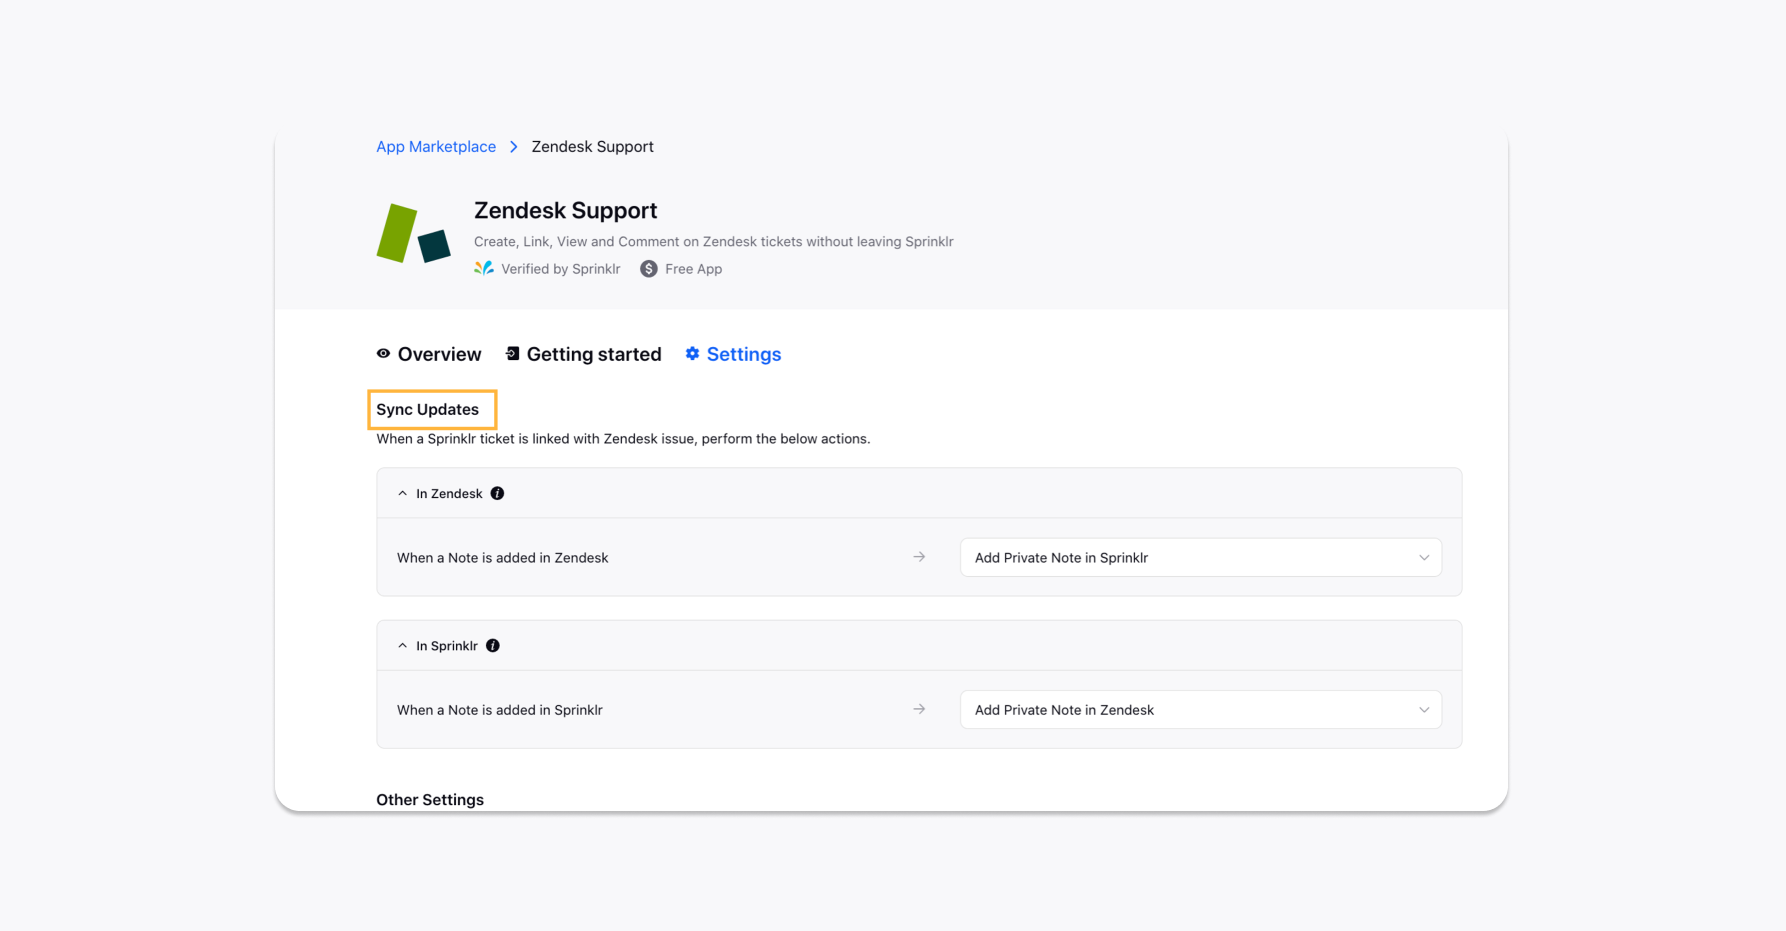
Step 2. Other settings
Under the Other Settings section, configure the following: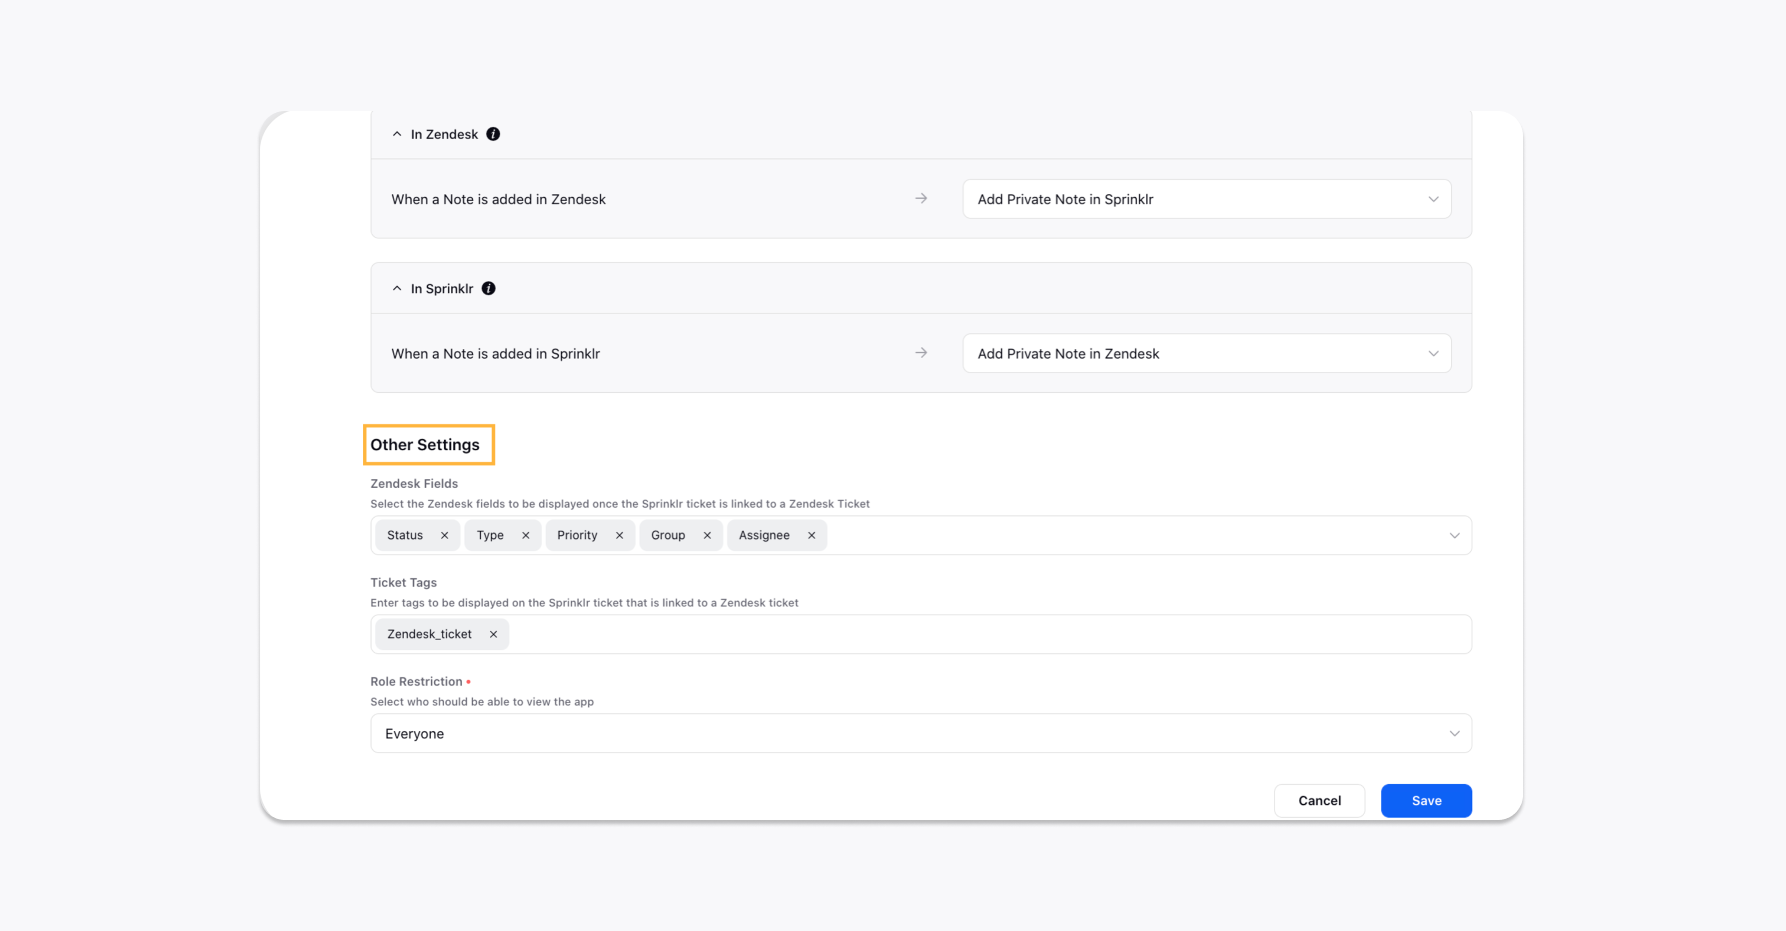
Under the Zendesk Fields option, you can select the Zendesk fields which you want to see when a Sprinklr ticket is linked to the Zendesk case.
Under the Ticket Tags field, enter the tags you want to display on the Sprinklr tickets linked to the Zendesk cases.
Select who you want to display the app in Sprinklr from the Role Permission drop-down menu.
Click Save in the bottom right corner.
To create a Zendesk case via Care Console
After installing the Zendesk support app, you will have the ability to create Zendesk cases via CareConsole.
On the Sprinklr Service Home window, click the Tickets icon on the left Navigation Bar.
Select any ticket from Ticket Stream.
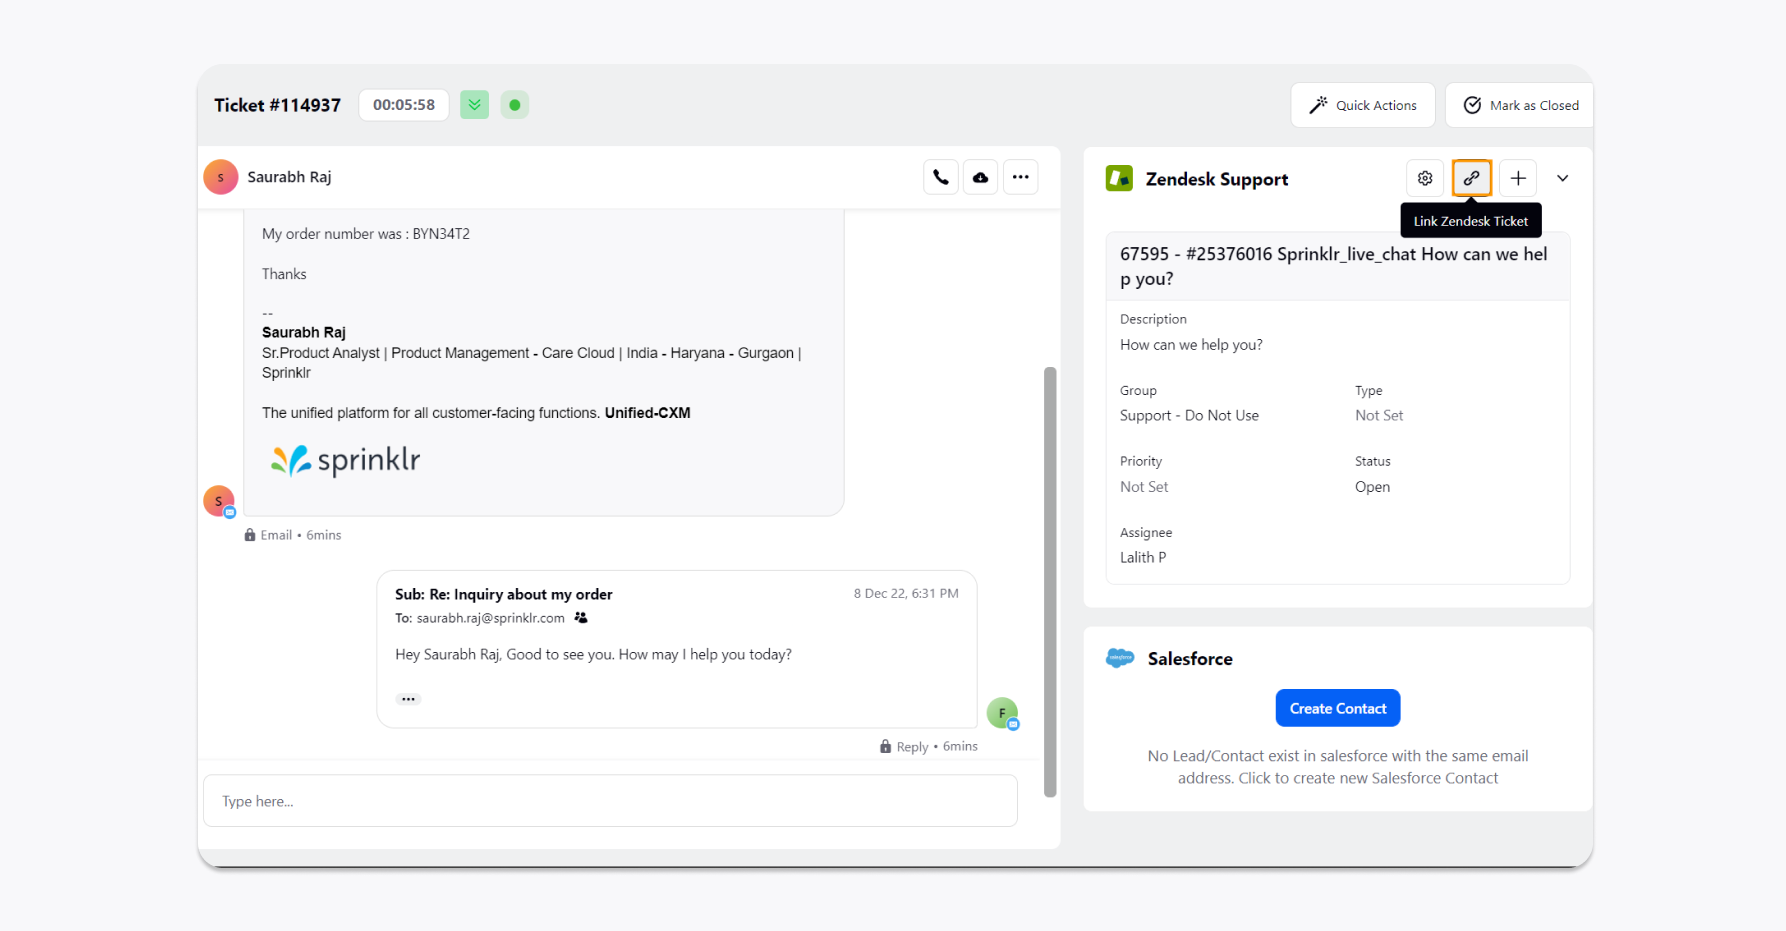
Click the Integrations icon on the right side of the window.
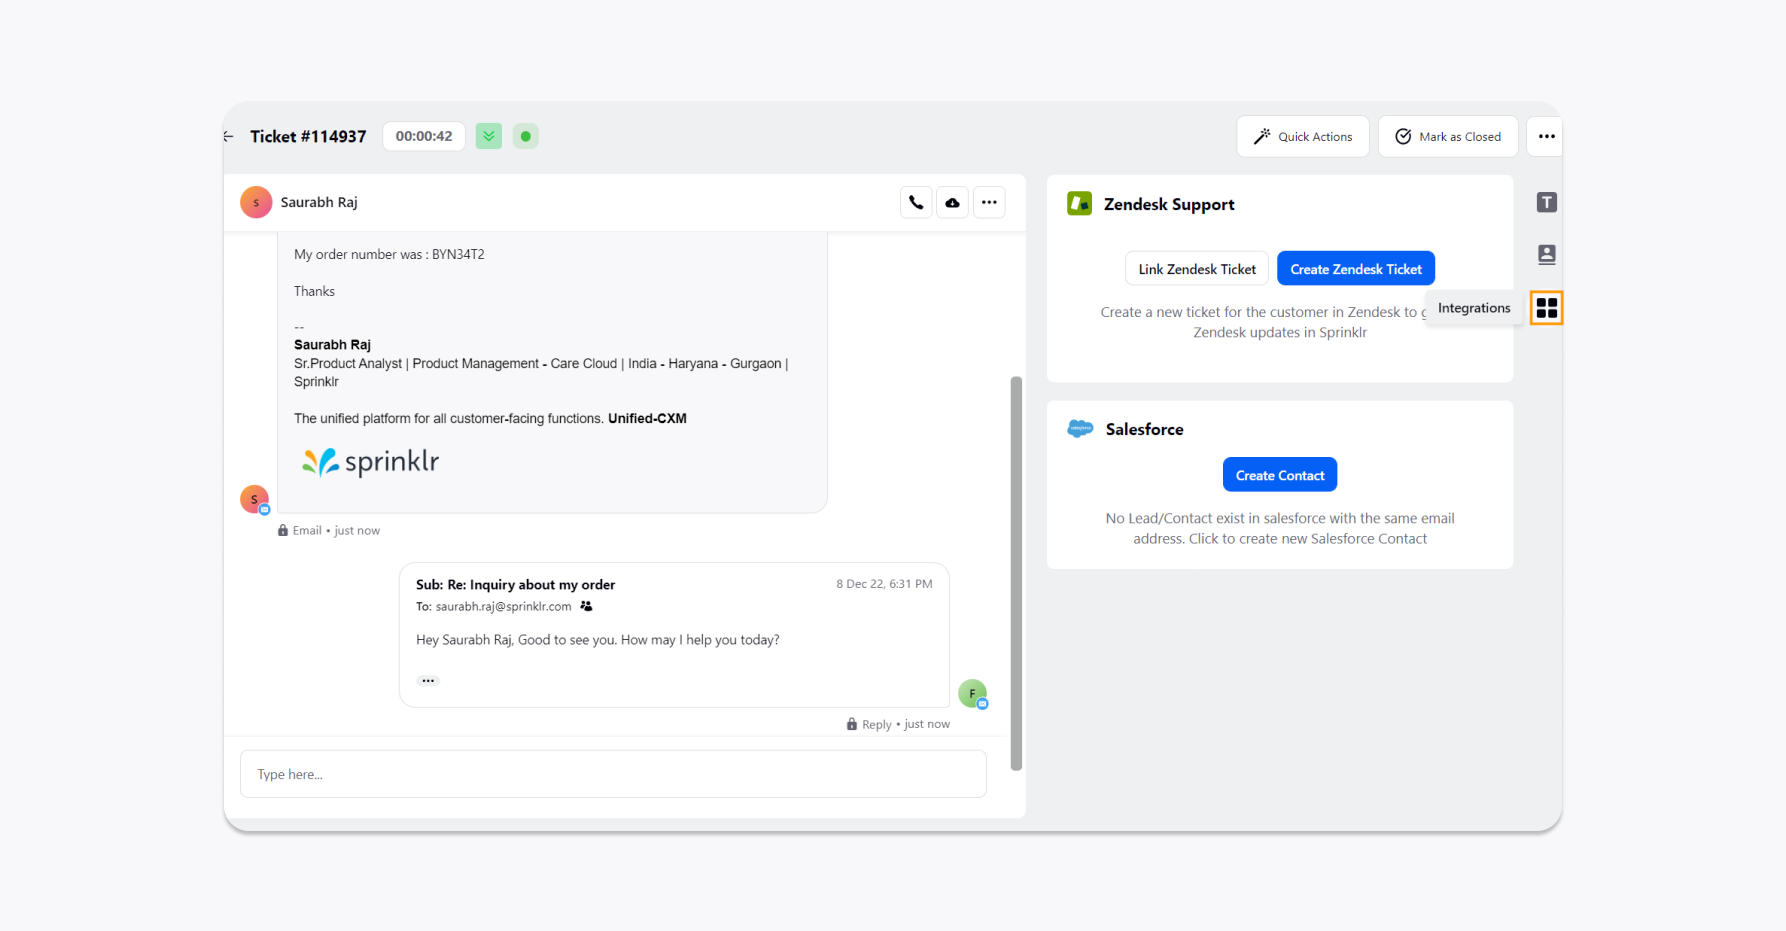
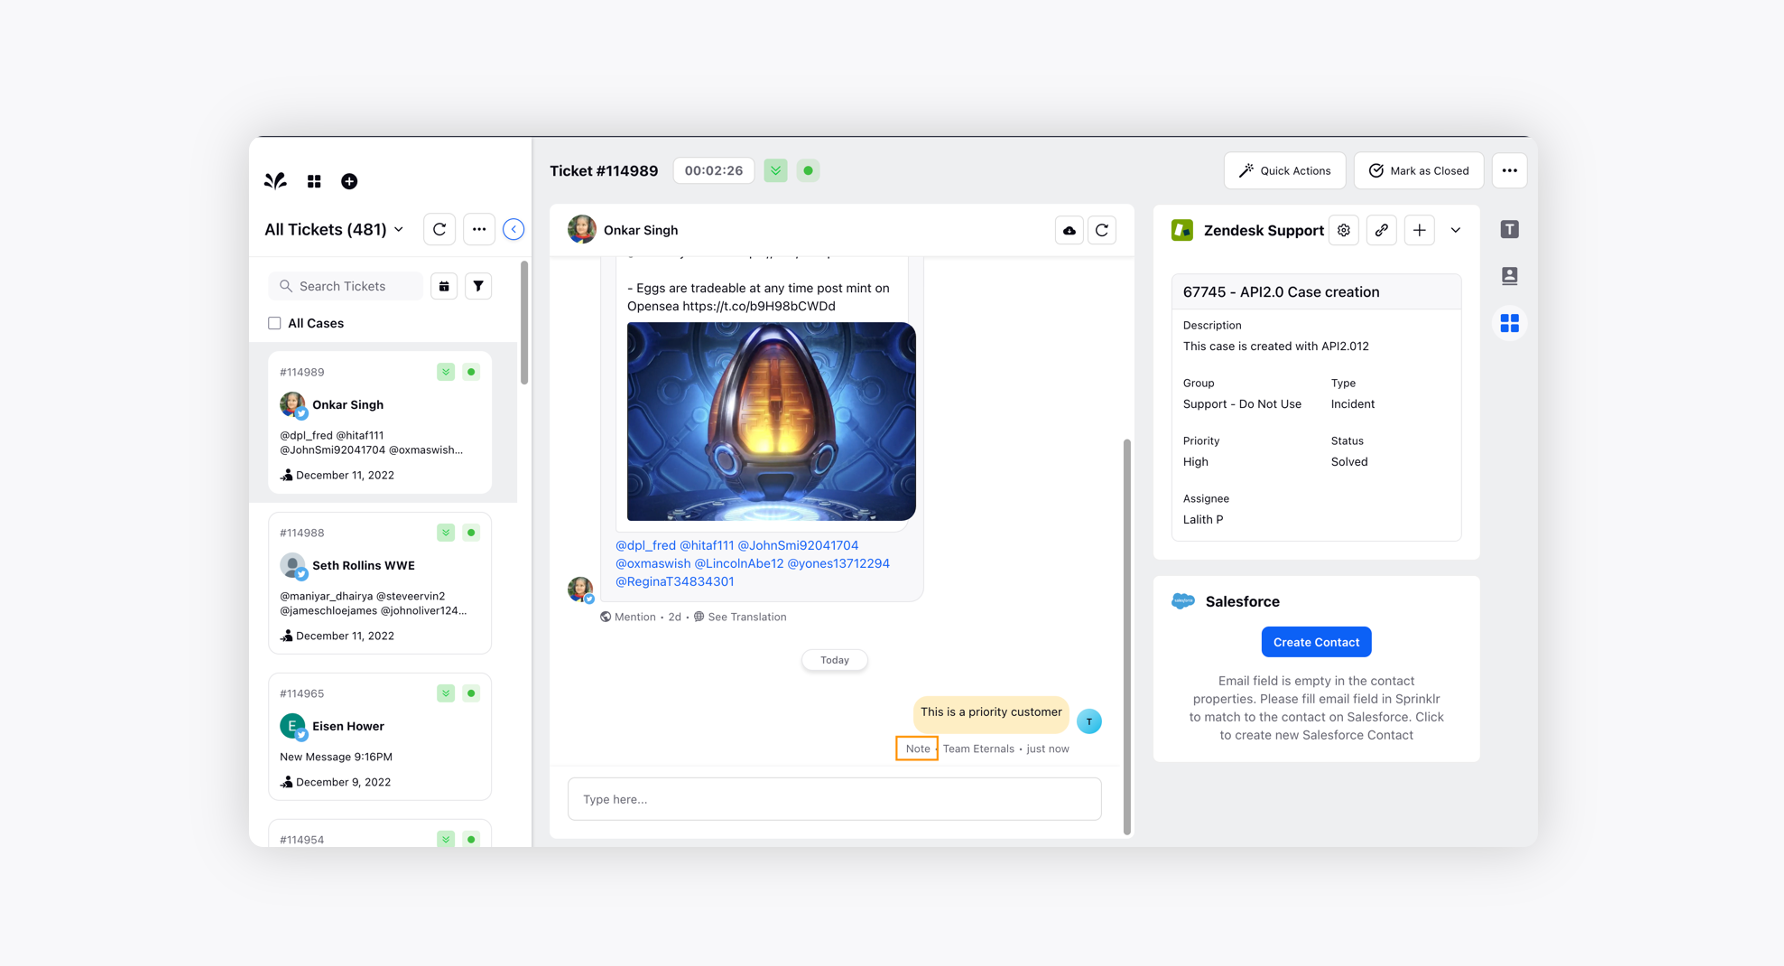
You can view all of your existing Zendesk cases linked to a specific ticket in the Zendesk Card.
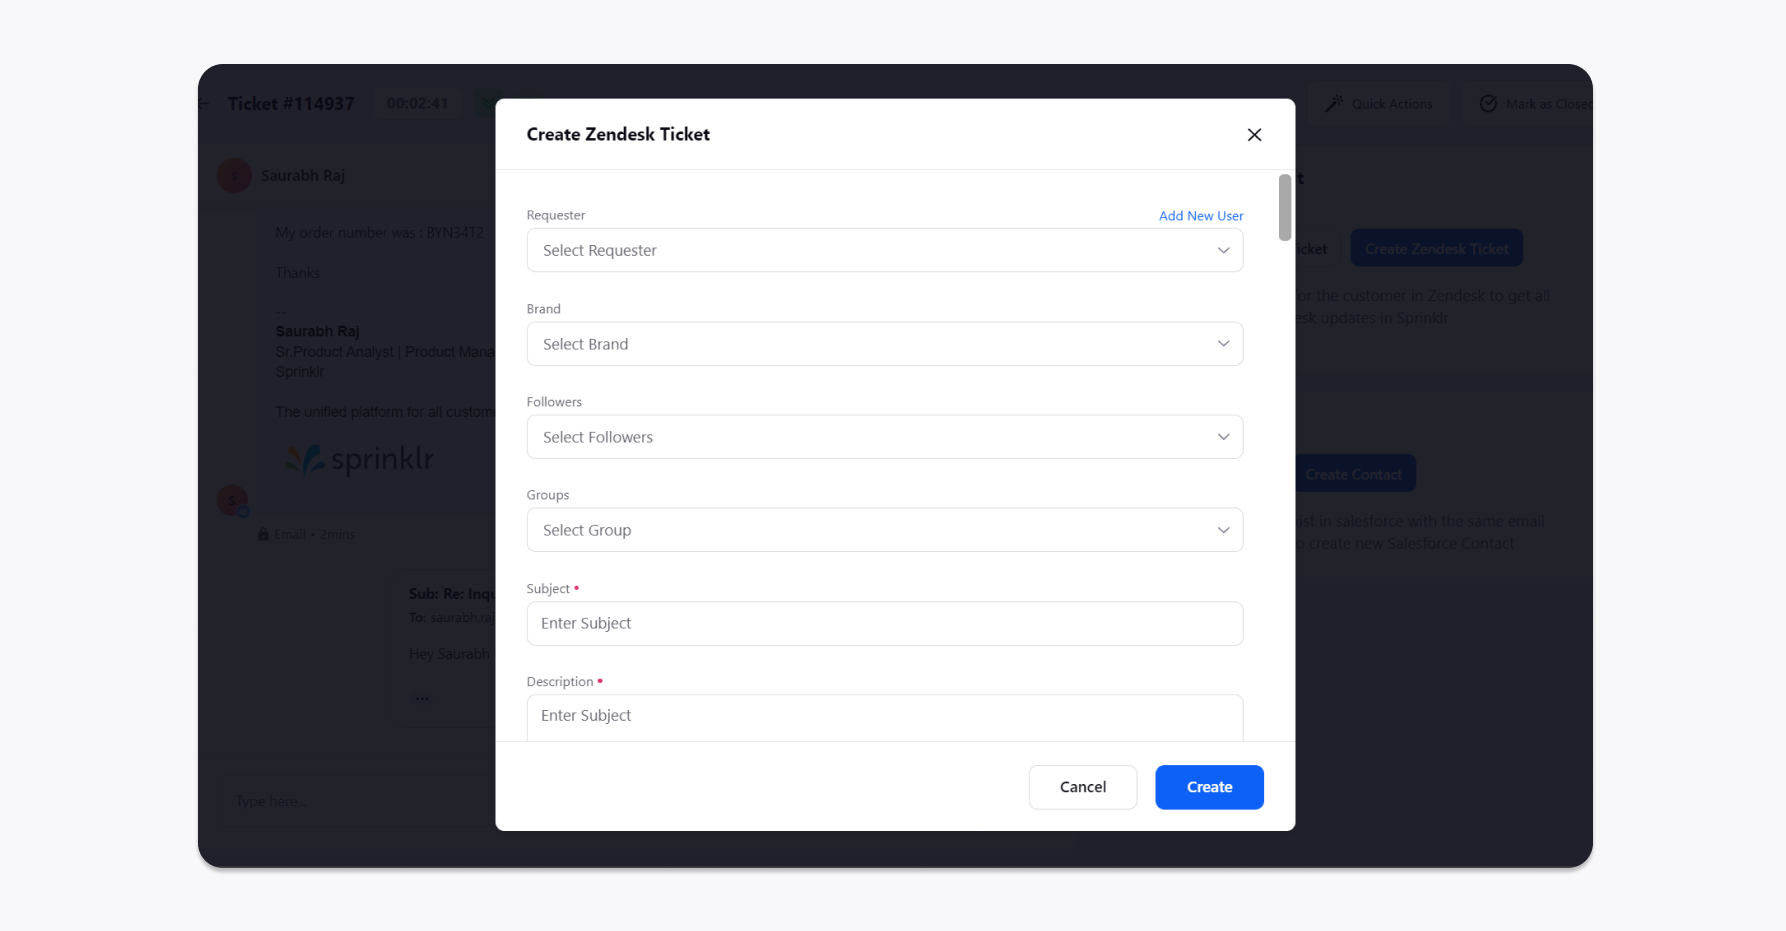
Click the Create a Zendesk Ticket button on the Zendesk Card.
On the Create Zendesk Ticket pop-up window, enter the various ticket fields required to create the ticket and click Create in the bottom right corner.
It will create a new Zendesk case. You can view all the case details on the Zendesk card. You can also:
Unlink from Sprinklr - This option will unlink the added case from Sprinklr.

View in Zendesk - This will open the case in the Zendesk platform.
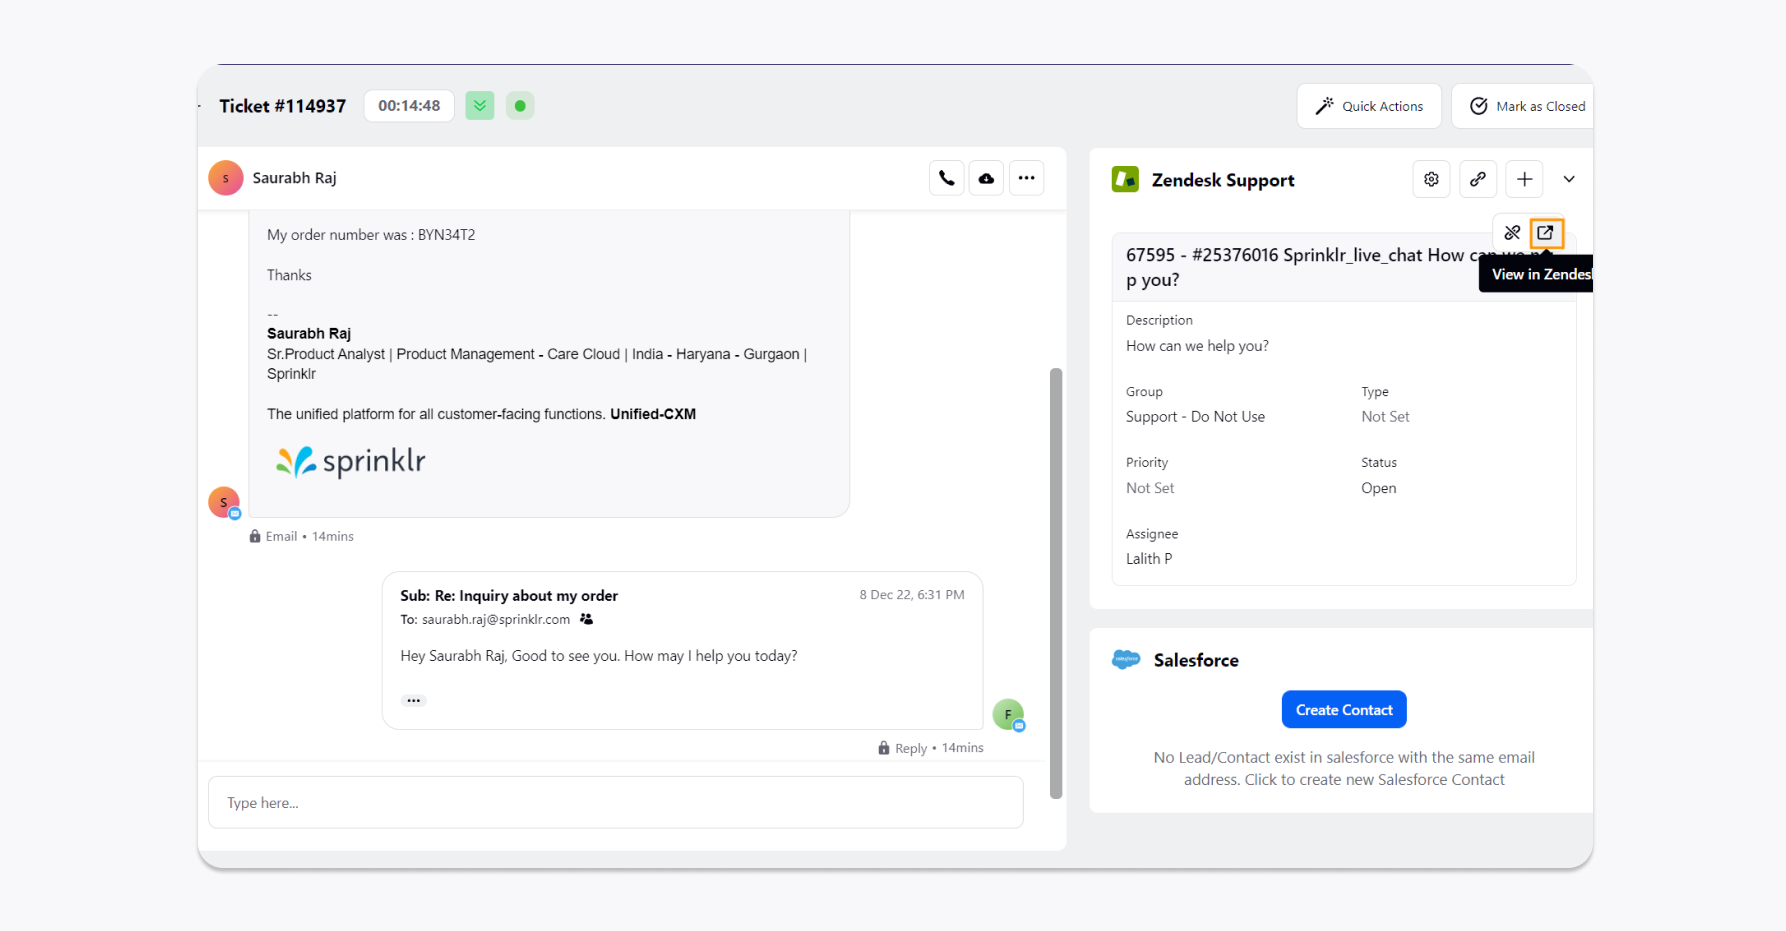
Any Note added to this linked ticket in Sprinklr will also be visible in Zendesk.
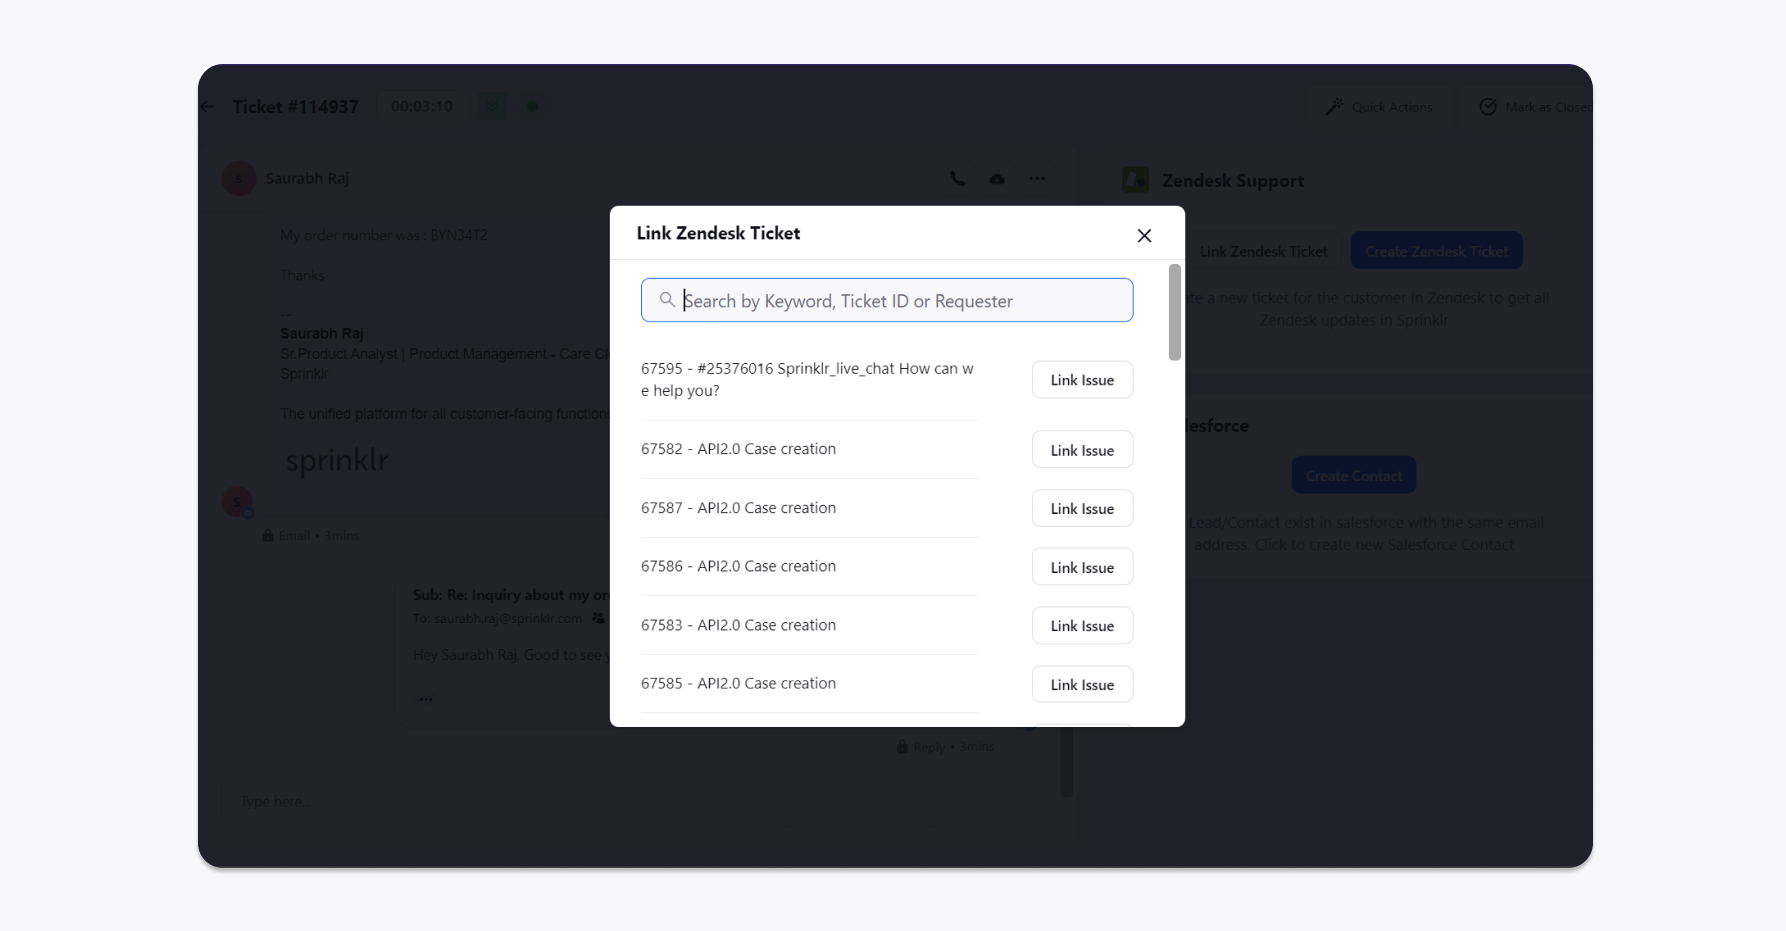
To link a Zendesk ticket to an existing ticket via Care Console
Click the Link icon at the top of the card to Link a Zendesk Ticket.
On the Link Zendesk Ticket pop-up window, search for the tickets that you want to link with the existing ticket using Keywords, Ticket ID or Requester. Click Link Issue.
Once linked, you can see the ticket details on the Zendesk card. You can also:
Unlink from Sprinklr- This option will unlink the added case from Sprinklr.
View in Zendesk - This will open the case in the Zendesk platform.
Any Note added to this linked ticket in Sprinklr will also be visible in Zendesk.
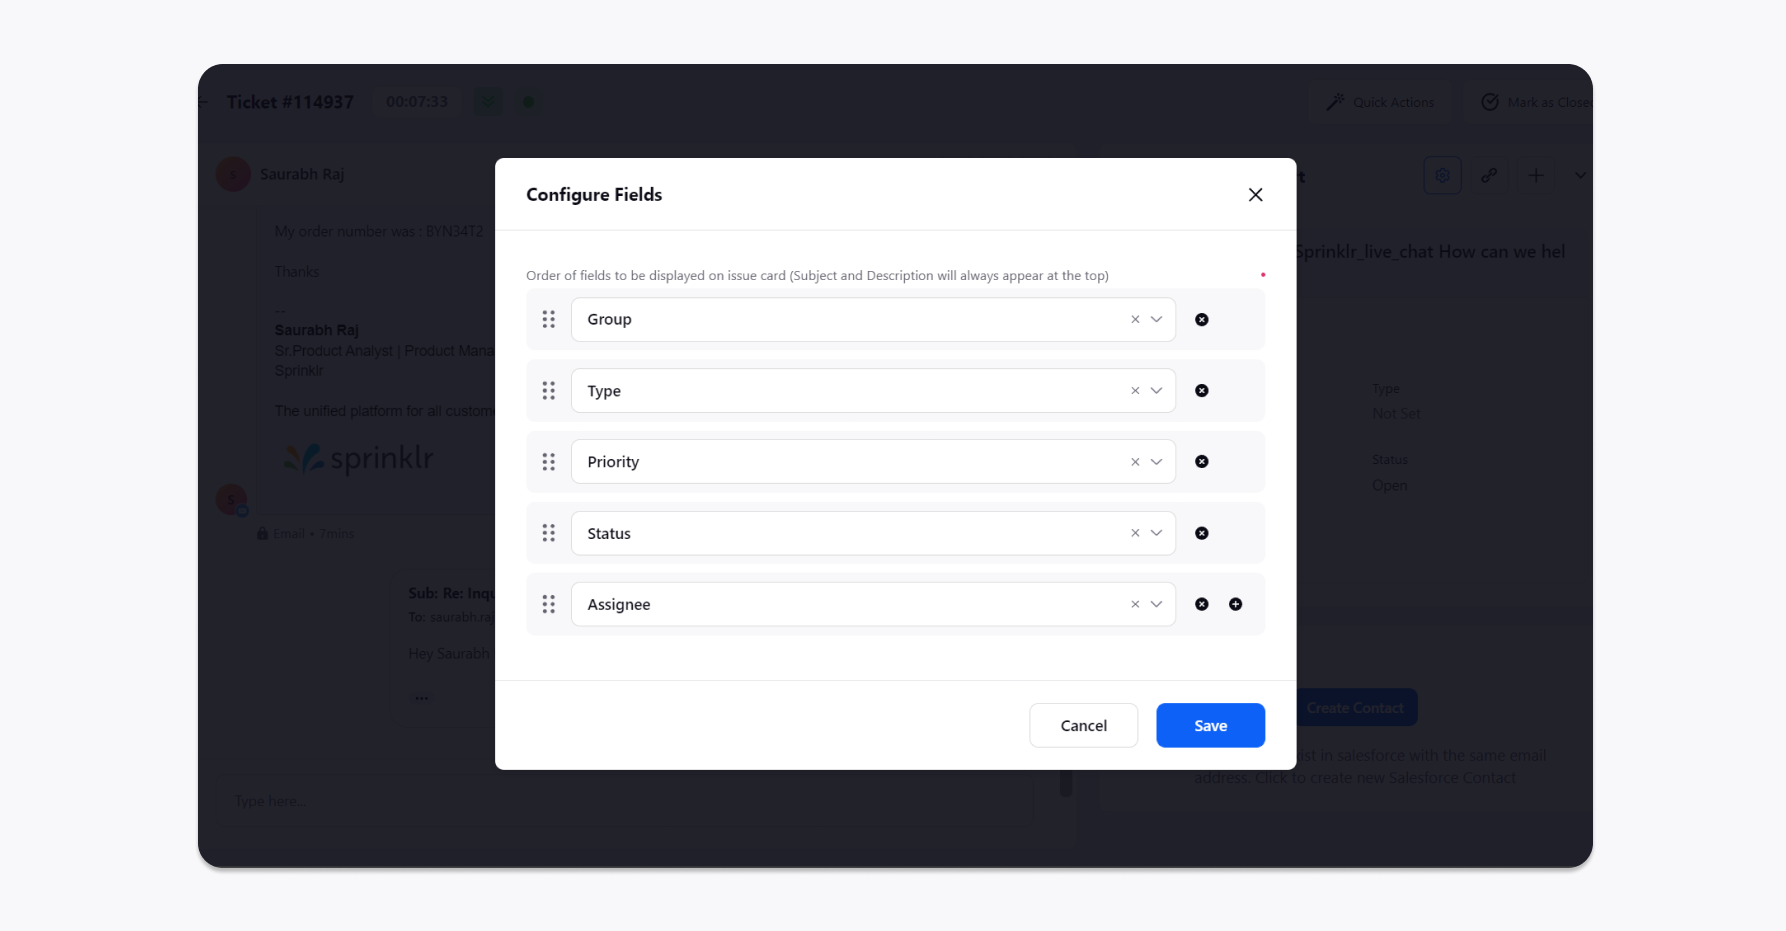
To configure the Zendesk case field
Click the Settings icon at the top of the card to add/remove a Zendesk case field.
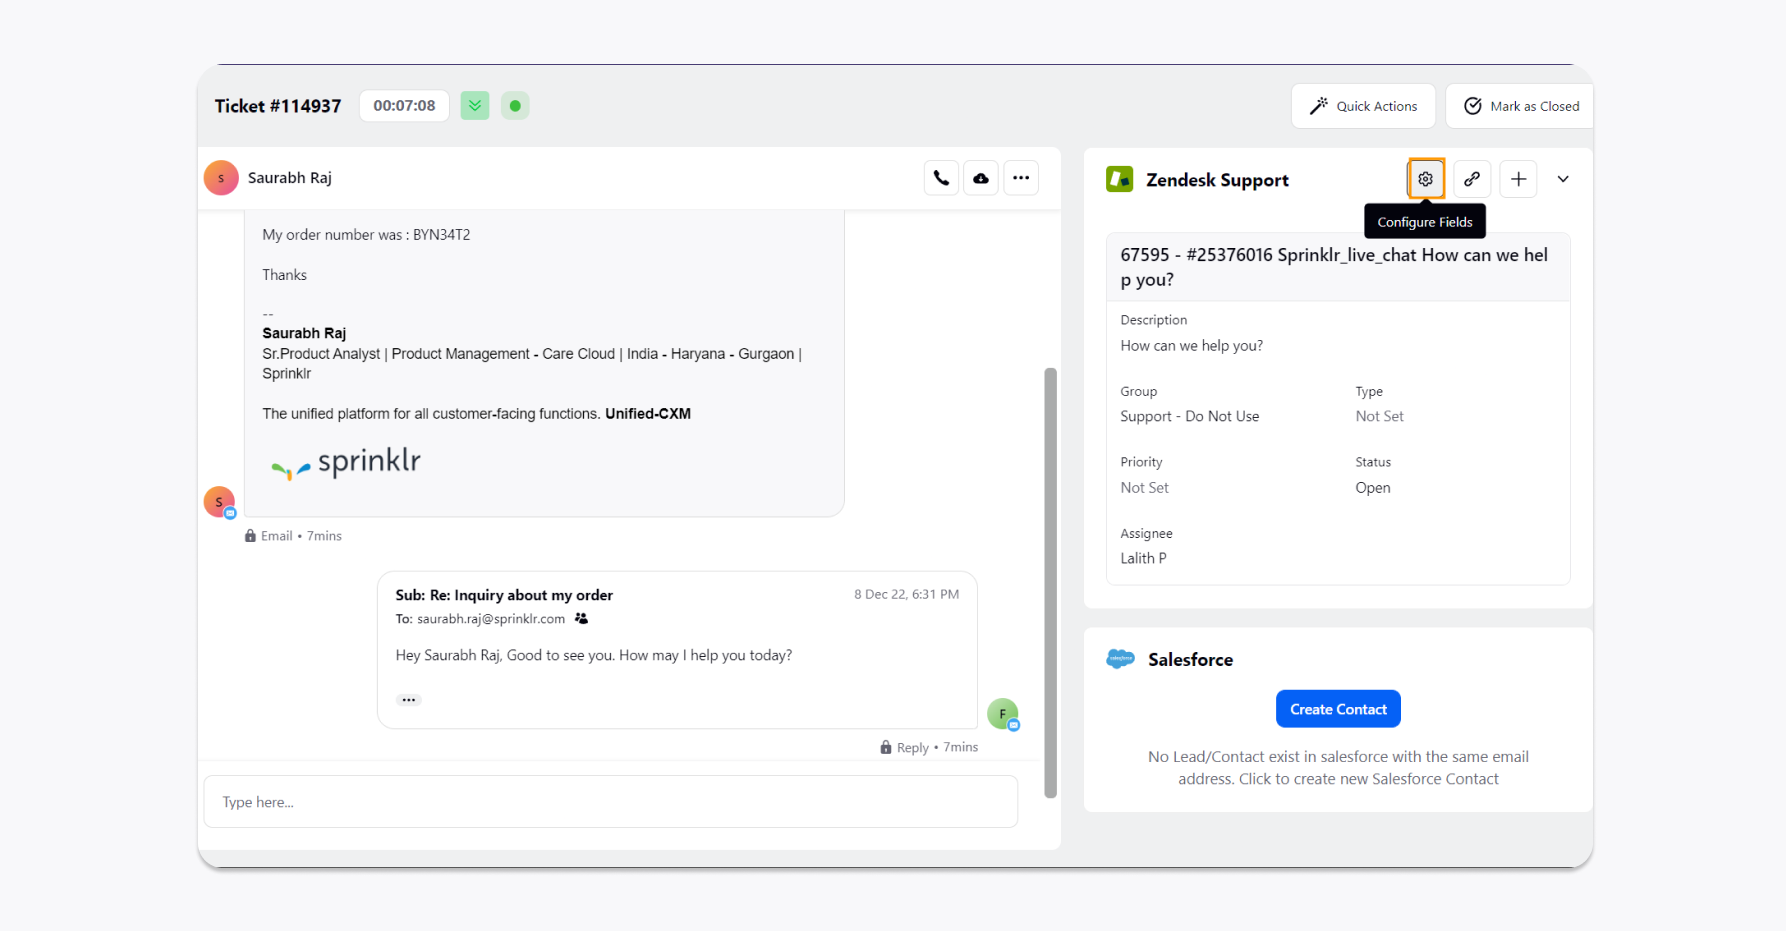
On the Configure Fields pop-up window, you can add the desired ticket field. These fields will be displayed on the cases card in the same order. Click Save in the bottom right corner to save them.