
Publisher Settings
Updated
Publisher Settings in Sprinklr's Social platform empowers you to customize and govern your workflows within Sprinklr Social. This feature provides essential options to tailor your publishing preferences and optimise your content management processes.
Publisher Settings include workflow customisation, improved control over publishing activities, and streamlined asset management. These settings empower you to fine-tune your workflows, make campaign fields mandatory, auto-save assets, manage approval and rejected assets, and enable link shortening. By utilising them, you can optimise your publishing processes, ensure efficient organisation of assets, and enhance your overall publishing experience.
In this section, we will explore each of the Publisher Settings options in detail, discussing their functionalities and the benefits they offer. We will guide you through the configuration steps for each setting and provide insights into how they can improve your content management and publishing efficiency.
Go to Settings from the left pane of Sprinklr and choose Sprinklr Social. Further, select Publisher Settings under Inbox and Publishing.
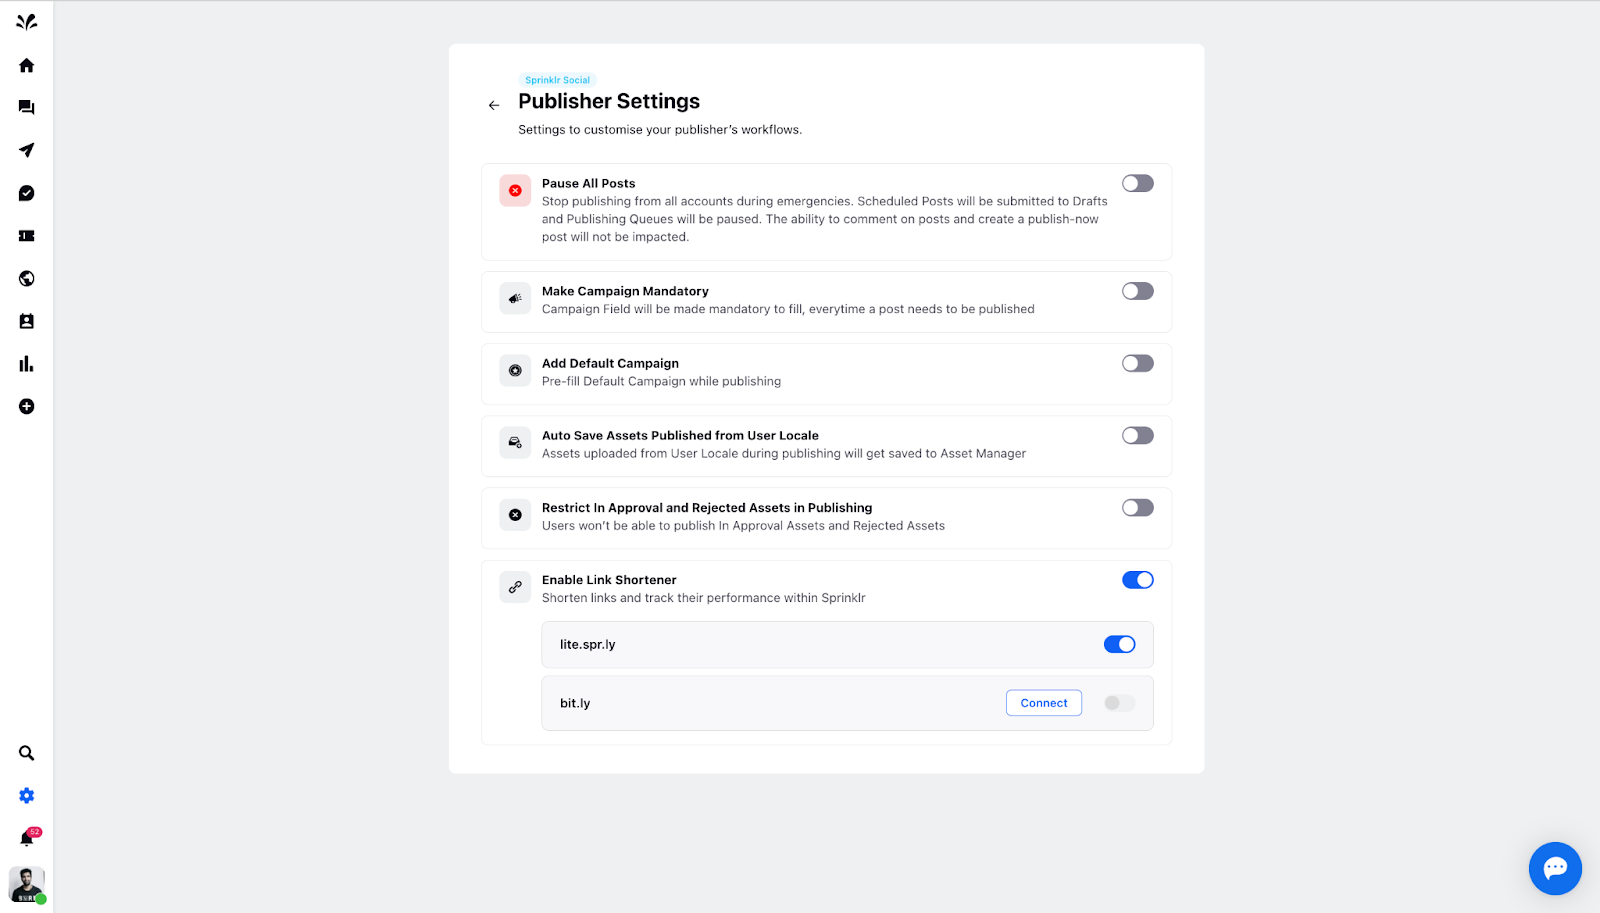
Publisher Settings enables you to control and manage Publishing preferences to customize your workflows. It has a list of 6 options to manage your workflows. Let's discuss all of them:
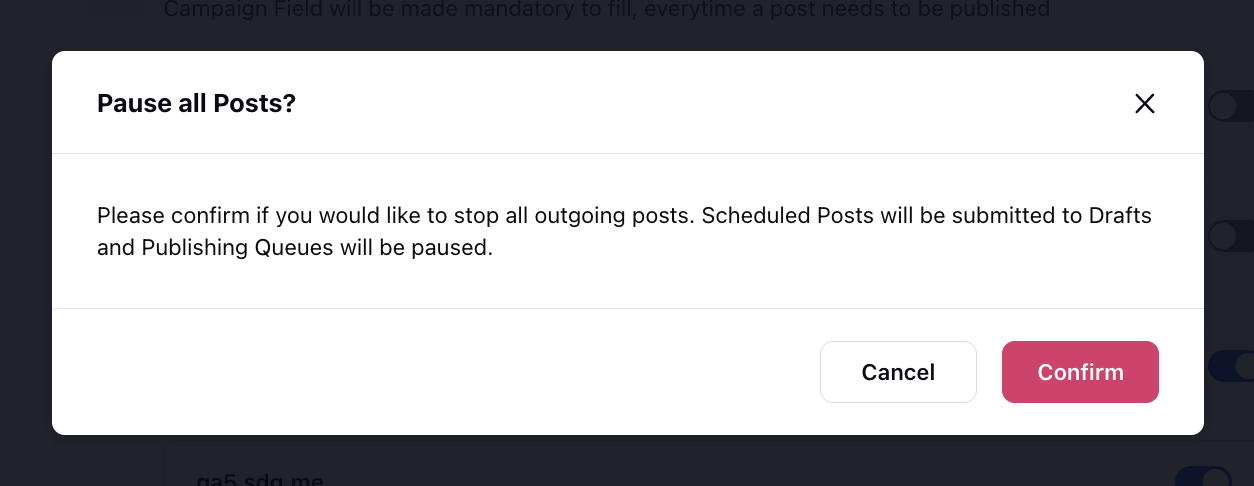
Pause All Posts: This feature stops publishing from all accounts during emergencies. Scheduled Posts will be submitted to Drafts and Publishing Queues will be paused. The ability to comment on posts and create a publish-now post will not be impacted. You can Toggle it On if you want to pause all posts.

Make Campaign Mandatory: Campaign Field will be made mandatory to fill, every time a post needs to be published. You can Toggle it On if you want to make campaigns mandatory.

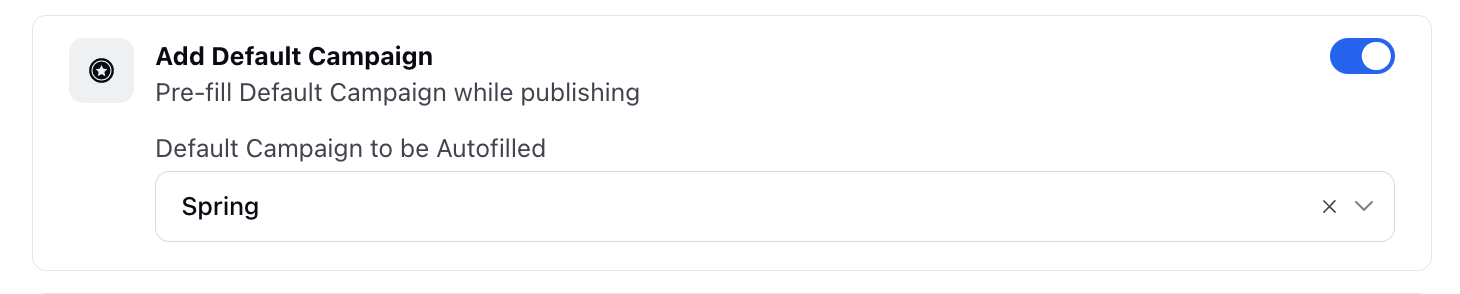
Add Default Campaign: Pre-fill Default Campaign while publishing. You can Toggle it On if you want to add a default campaign. Whenever you are planning to publish a post, the campaign will be added by default under Publishing Properties.
Auto Save Assets Published from User Locale: Assets uploaded from User Locale during publishing will get saved to Asset Manager.
Toggle it On if you want to autosave assets published from the user locale.

Now, while creating a new post from the Publisher, all images uploaded from the media feature will be auto-saved in the Asset Manager.
To locate and navigate to the auto-saved assets via this functionality in the Asset Manager tool:

A) Go to Publishing on the left pane of the Sprinklr Self-Serve home page, click on Assets on the extreme left under the All Assets section, and search for Auto-Saved assets and you will view the image uploaded from the Media feature.
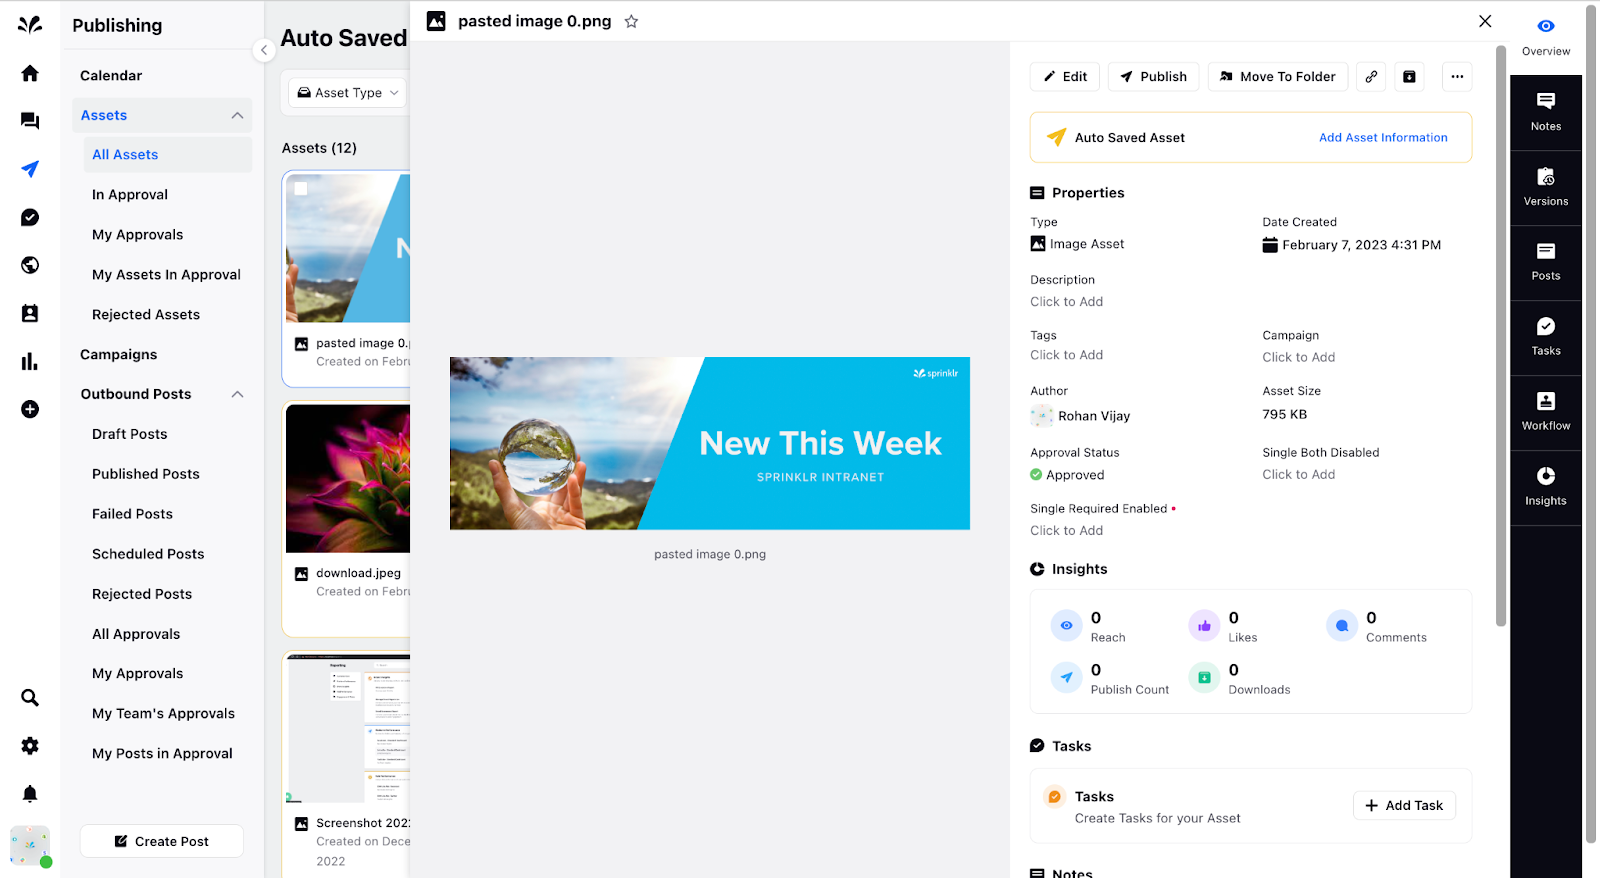
B) You can add asset information as well if it is required. Click on Add Asset Information in the top right corner and provide all the mandatory details. The information will only then be saved by clicking Save at the bottom right.
Restrict In Approval and Rejected Assets in Publishing - You can Toggle On so that users won’t be able to publish In Approval Assets and Rejected Assets.
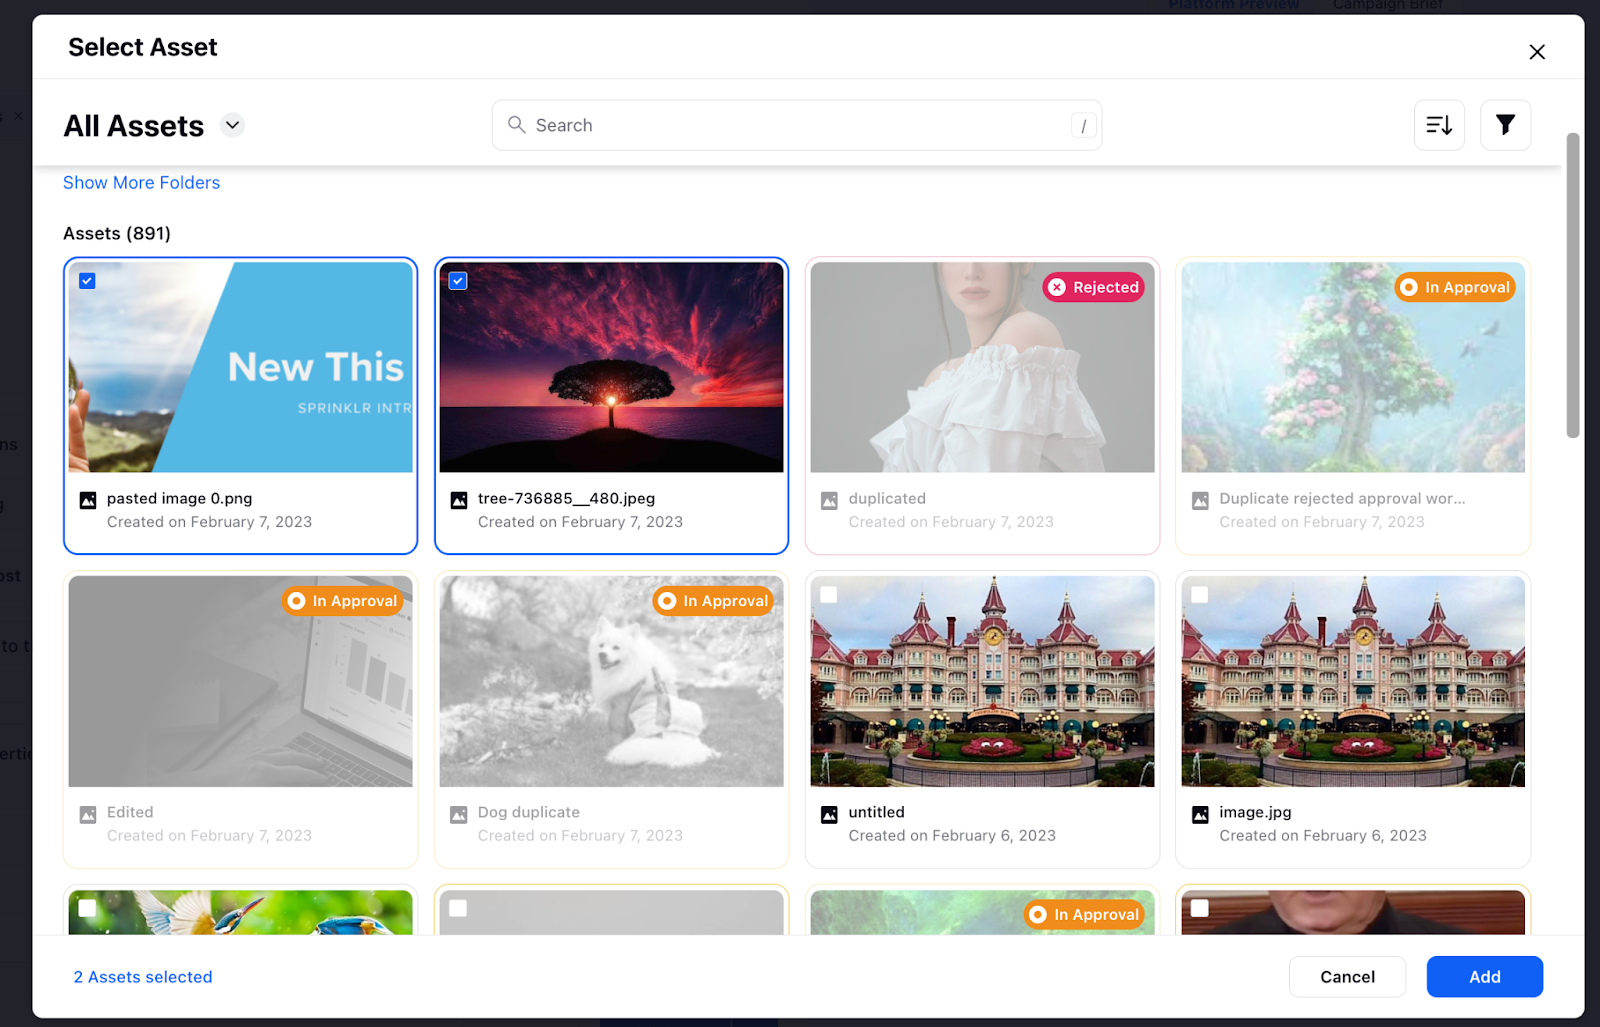
When you are planning to publish a post for a specific social account, you have the option to upload assets from the Asset Library. So, if you will Toggle On this feature, you will not be able to select assets that are under approval or rejected.
When you will click on Asset Library from the Media feature, you will view the list of assets that are rejected, in approval, and which are allowed to publish. You can select the assets which are not rejected or in the approval state. Click Add at the bottom right.
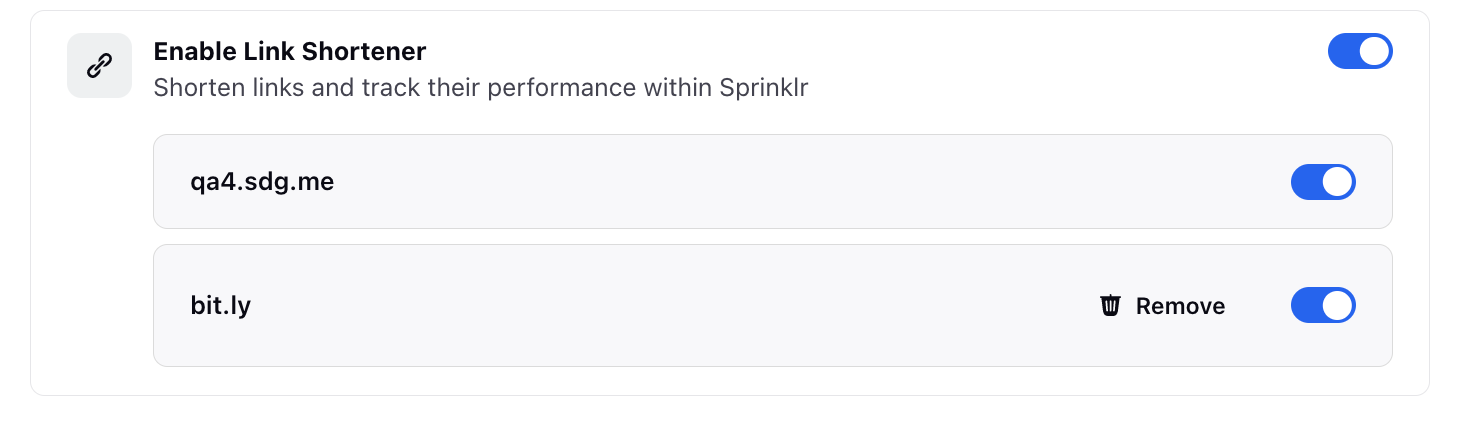
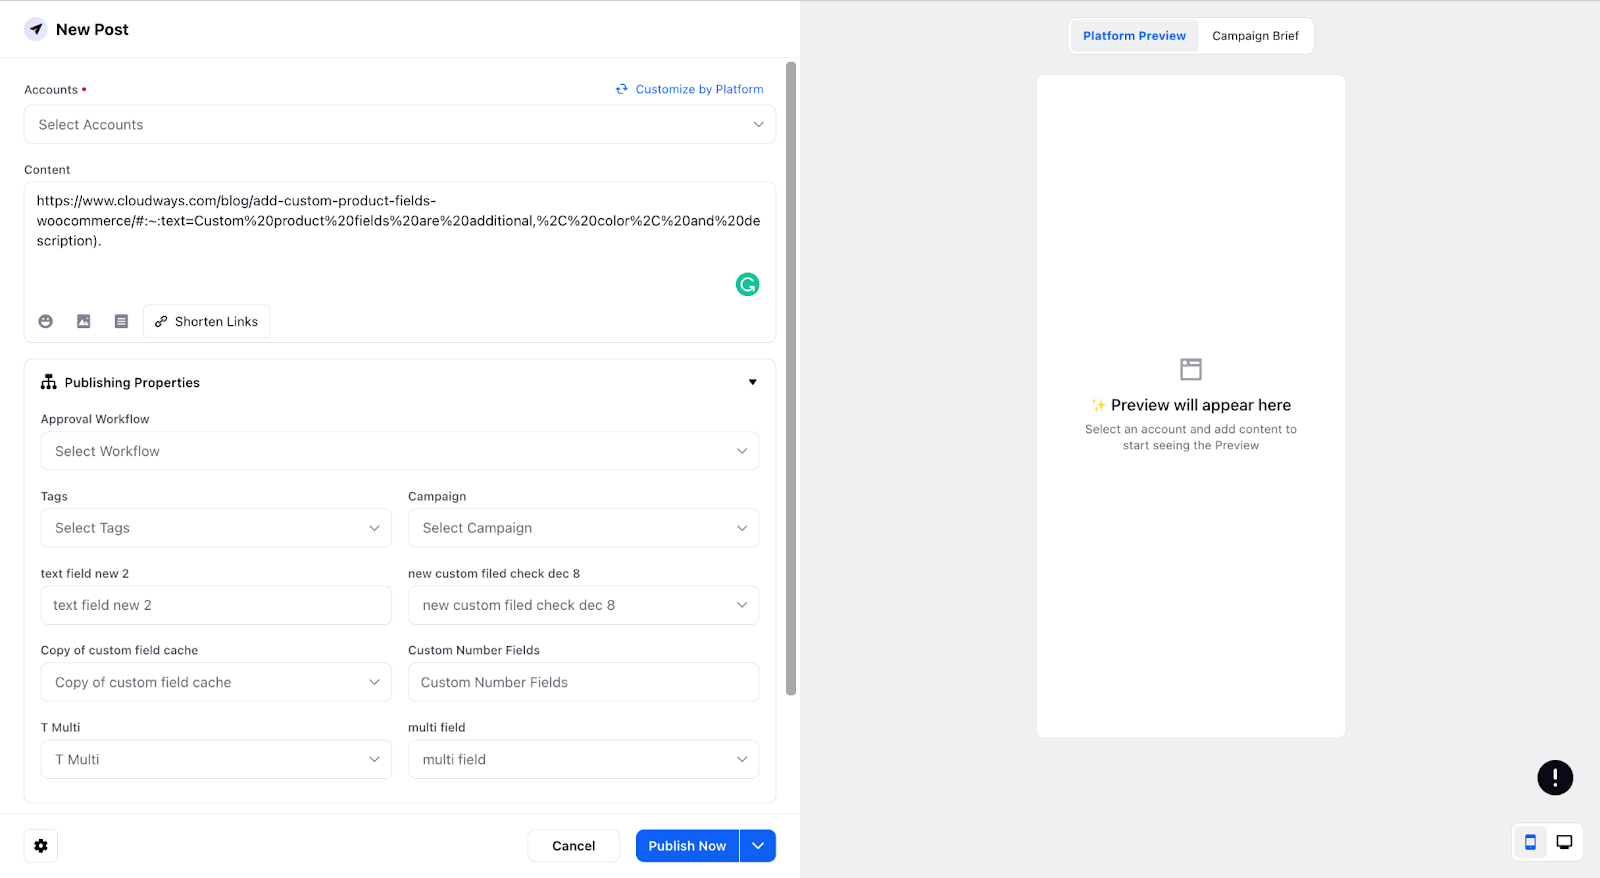
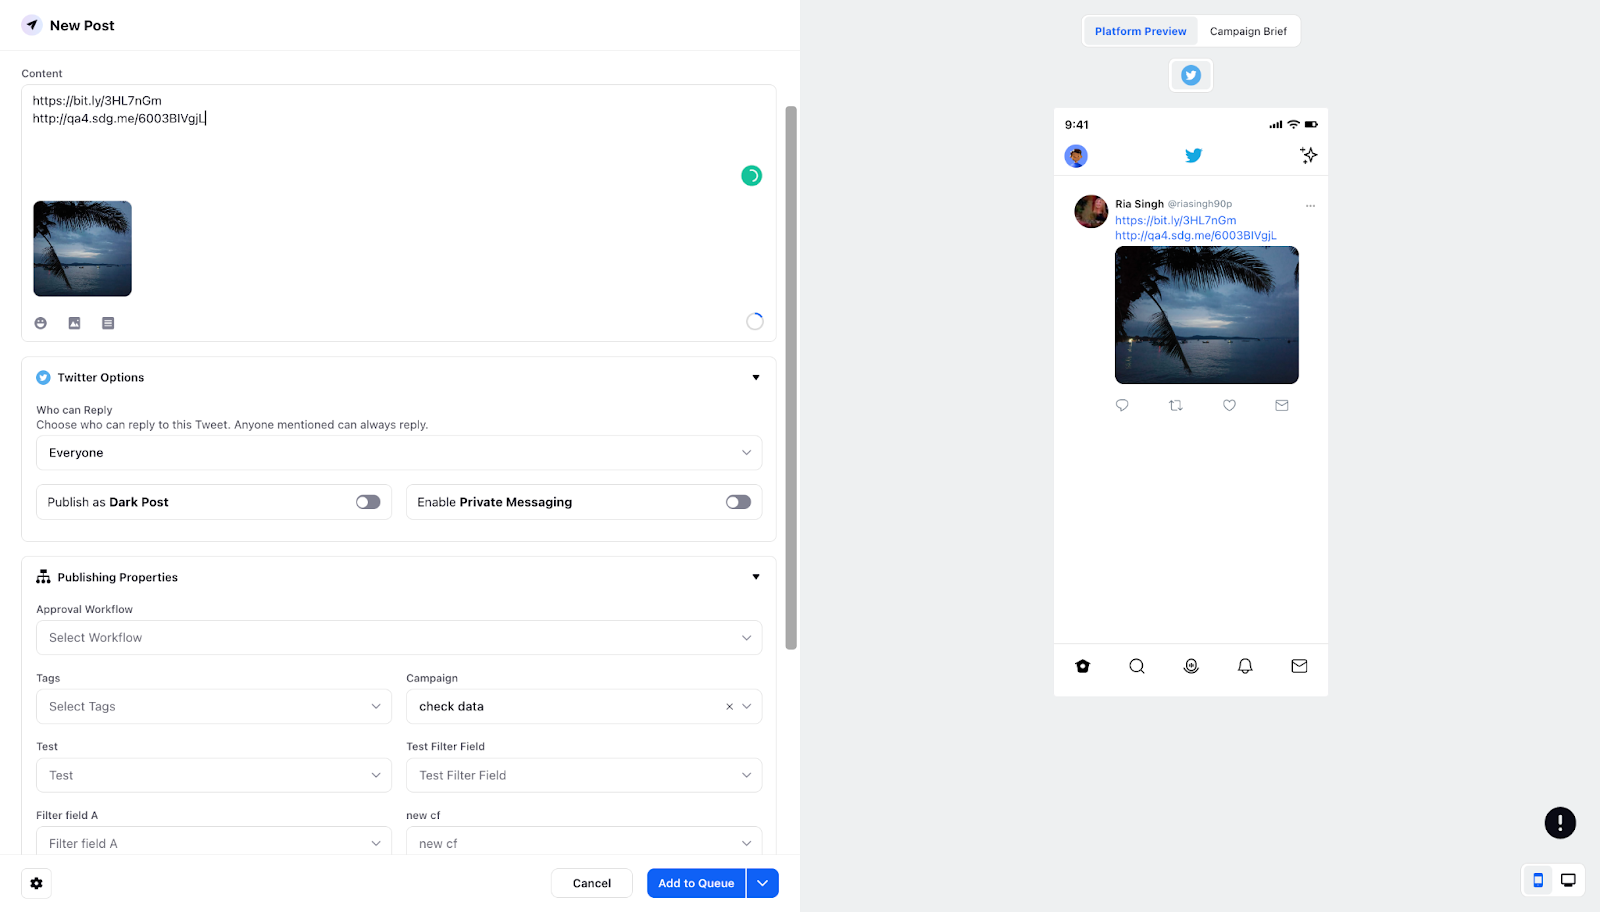
Enable Link Shortener: When you are planning to publish a link to a website for a specific account and the link is too long at times. So, you can use a link shortener to cut short the link.
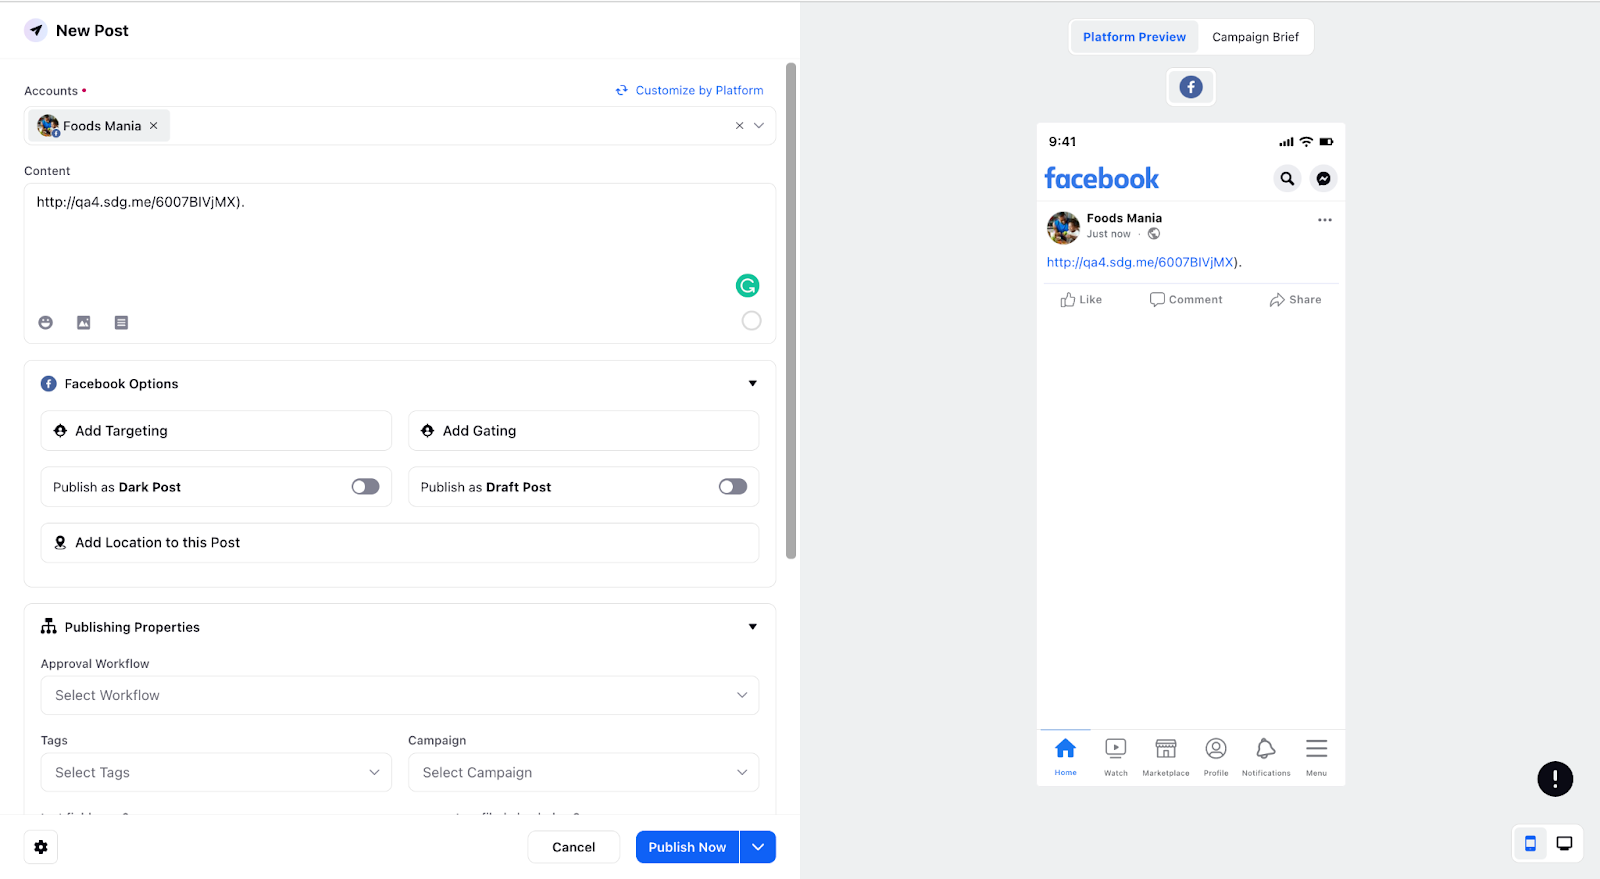
A) Shorten the link through Sprinklr: You can shorten the links and track their performance within Sprinklr. You can Toggle it On if you want to enable the link shortener. This is how the link is shortened when qa4.sdg.me is enabled.
B) Shorten the link through bit.ly: If you want to shorten the link through bit.ly, you need to create an account on bit.ly.
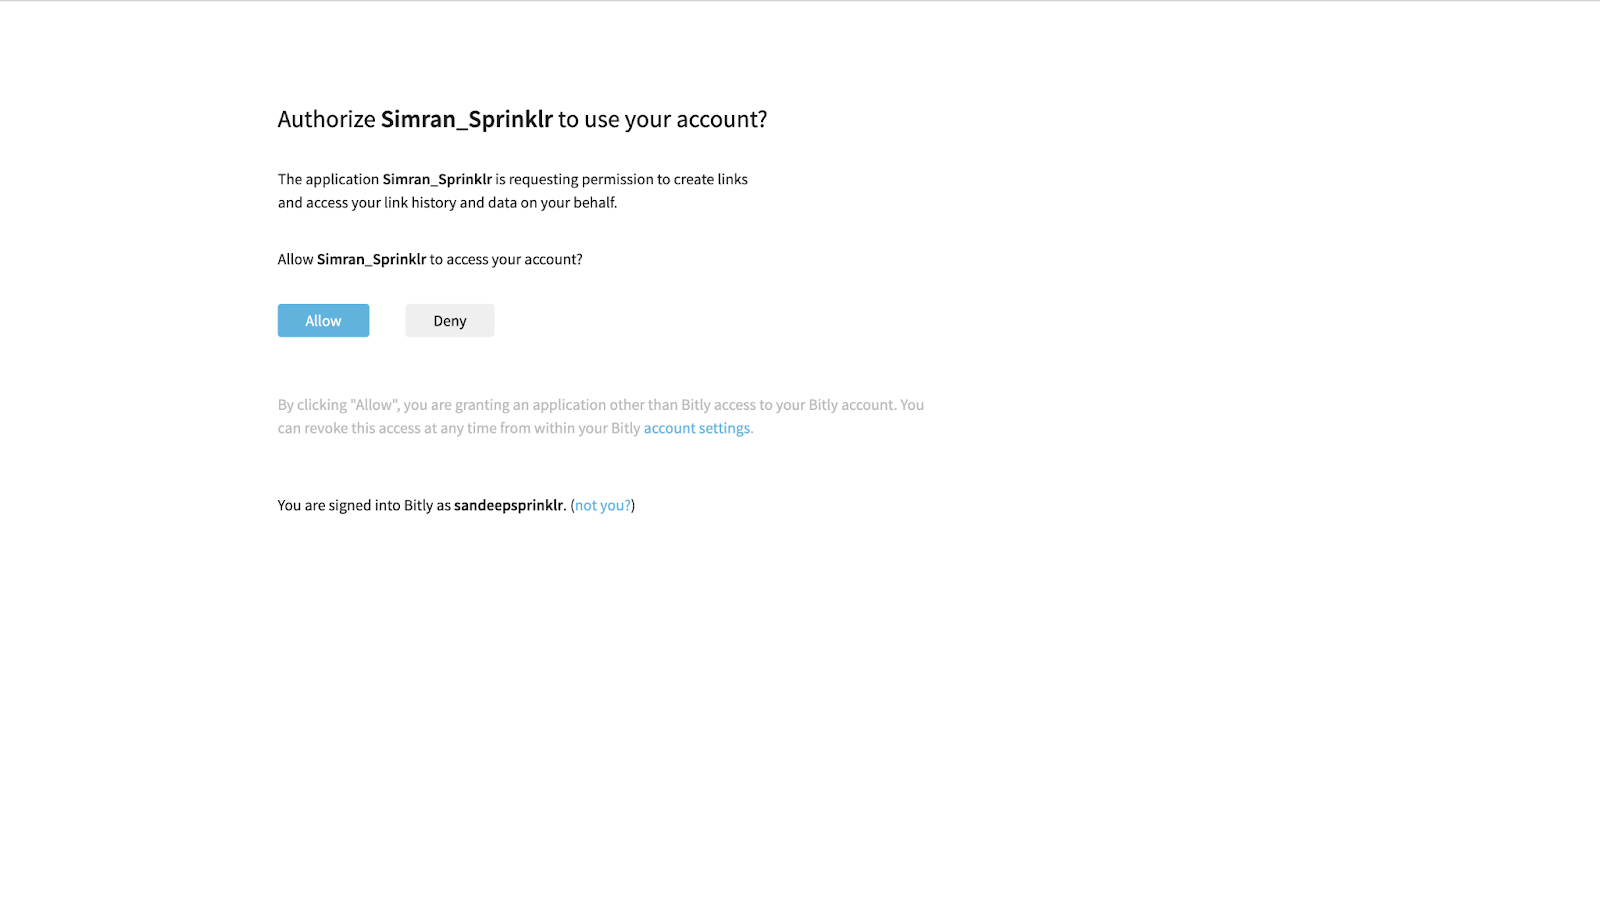
Click on Connect icon next to bit.ly from the Publisher Settings page.
It will redirect you to the bit.ly account. Click Allow to provide authorisation to use the account.
Now, select the Group you want to connect to bit.ly. Check box bit.ly and click Add once you select the desired Group.
Once the desired account is added to bit.ly, you can cut short the link through bit.ly. If the account has not been added to bit.ly, you need to generate a new username and password
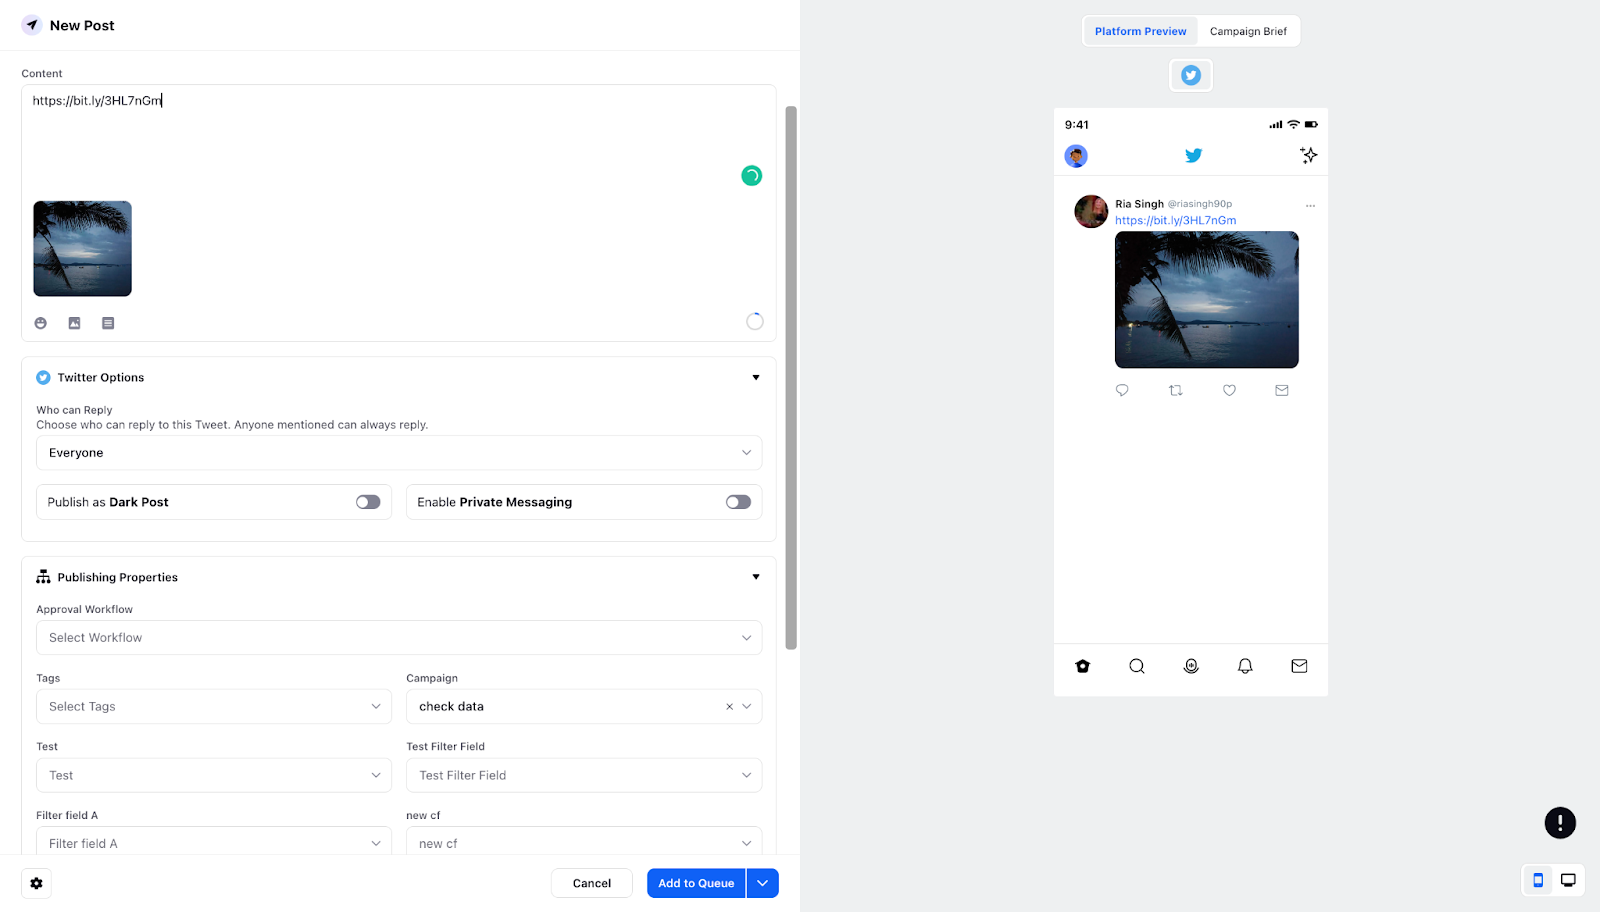
Go to the Publisher tool and paste the desired website link in the Content box which you want to cut short via bit.ly.
Click Shorten link next to the Text Asset icon, you will get the list of domains to add from. Click bit.ly and the link will be shortened.


Note: If you Toggle On the qa4 domain as well along with bit.ly from Publisher Settings, then you have the option to paste another website link in the Content box and cut short the link via another domain.

When you paste another website link in the content box of the Publisher tool
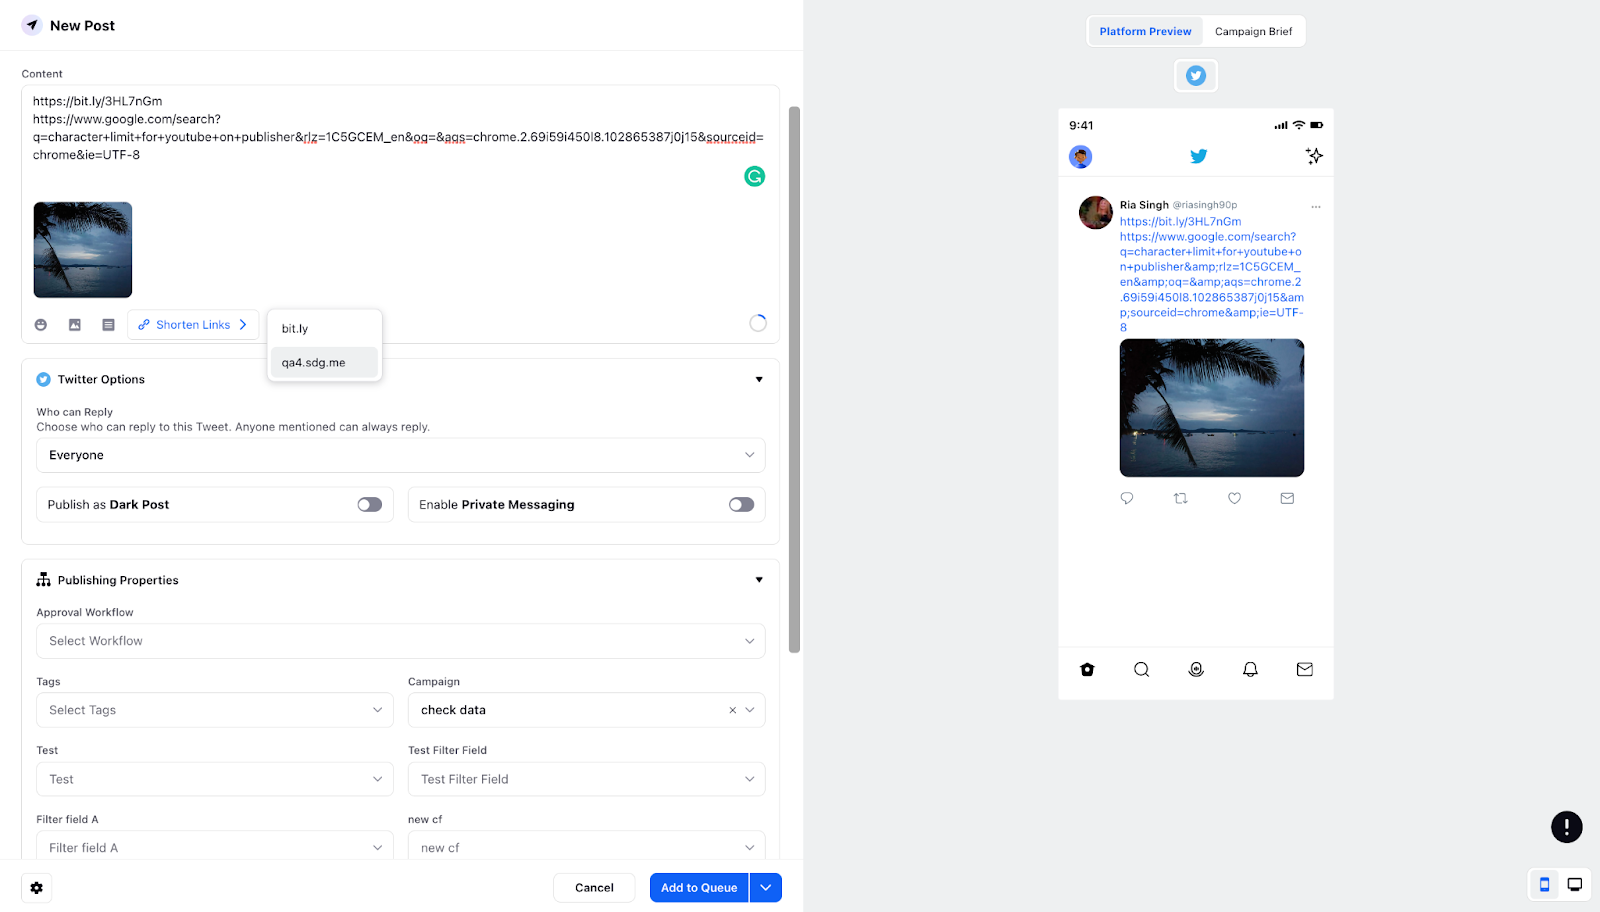
Select another domain qa4 from the Shorten Link dropdown and the website link will be shortened.
Important Note: There is a shortcut navigation for the Settings icon in the bottom left which will take you to the Publisher Settings page directly.
