Actions within the Supervisor Console
Updated
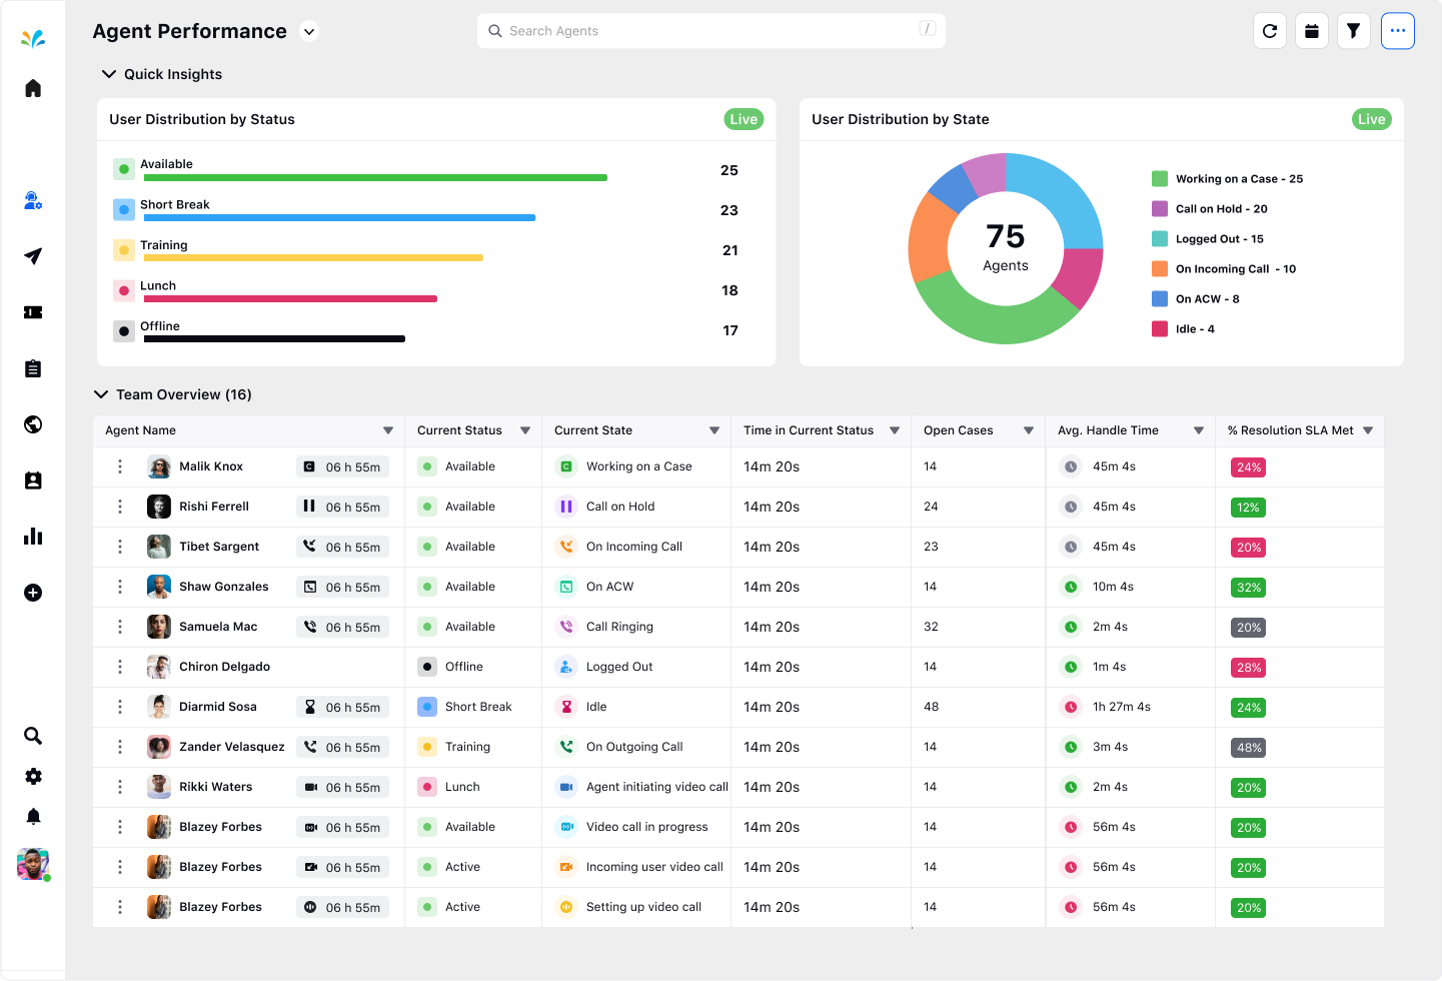
Supervisors can perform various tasks or functionalities to facilitate efficient supervision, management, and decision-making within an organization.
You can customize the Supervisor Console dashboard with a set of different actions:
Filter
Refresh
Calendar
Manage Column
Options – Edit, Clone, Delete View
Save view
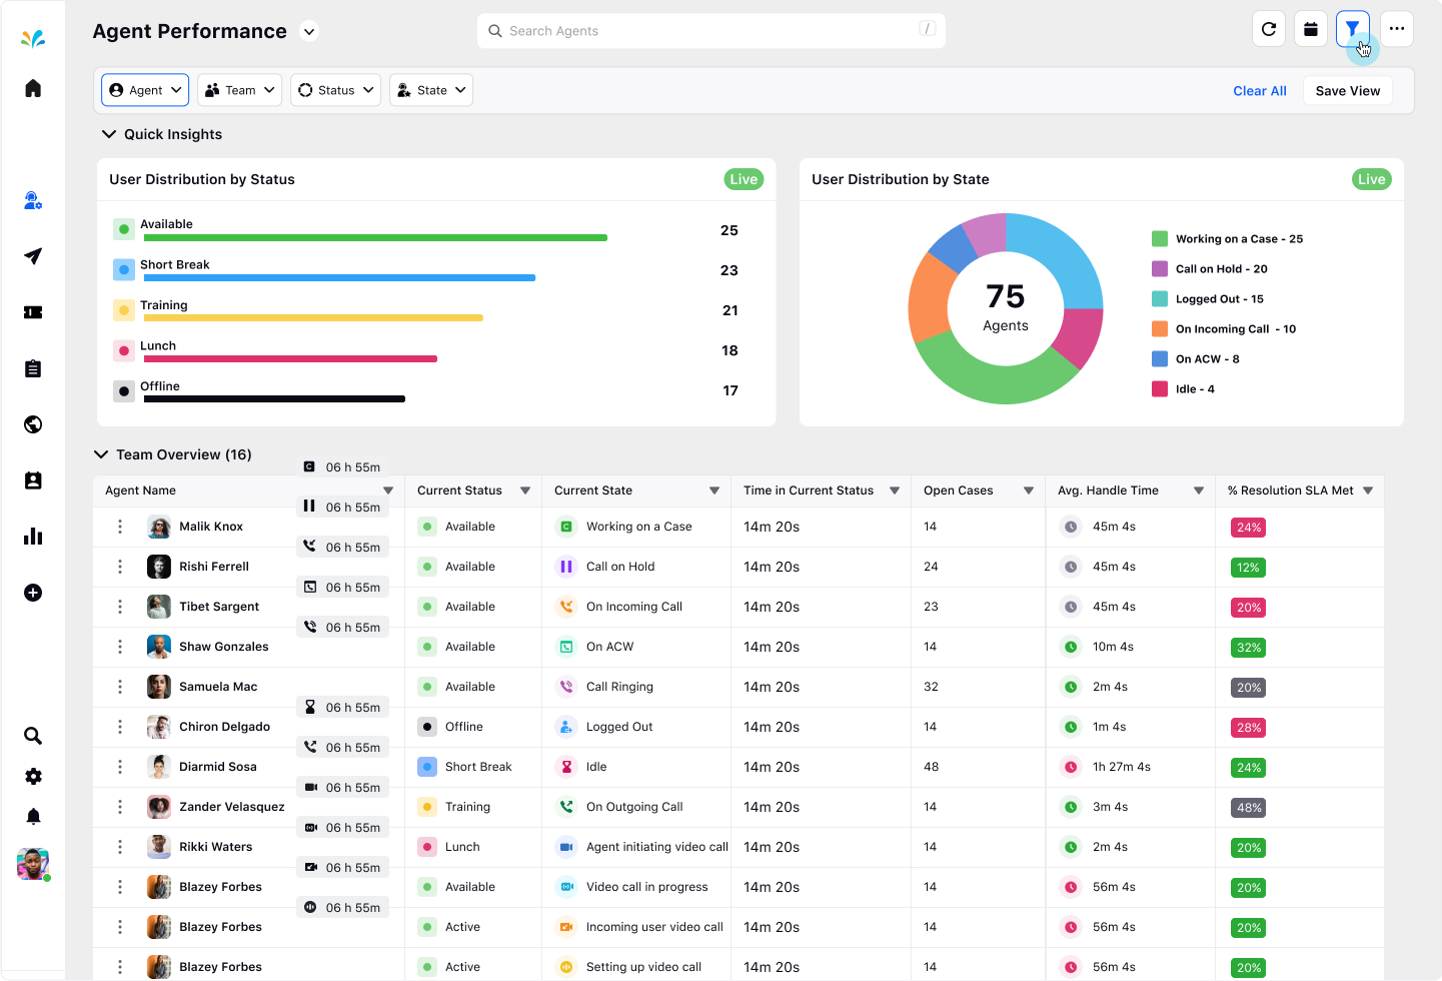
Filter: Click on the Filter icon to filter the Supervisor Console by:
User/Agent : You can filter the Supervisor Console dashboard by different users. Click Apply once you select a particular agent to keep track of their daily activities and availability status.
User Group/Team: You can filter the Supervisor Console dashboard by different teams. Click Apply once you select the particular user.
Status: You can filter the Supervisor Console dashboard by different agent status such as available, short break, lunch, training, offline, etc. Click Apply once you select the particular status.
State: You can filter the Supervisor Console dashboard by different states such as call on hold, logged out, on incoming call, on ACW, etc. Click Apply once you select the particular state.
Refresh: Click on the "Refresh" icon and the system will fetch and display the latest information, ensuring that the supervisor has the most up-to-date insights into the monitored activities, statistics, or metrics.
Calendar: View specific data sets within a specified period of time. These options include custom ranges as well as a lifetime range.
Manage Column: Click on the pencil icon in the top right corner and select the Manage column. This feature helps you to enable and disable the specific columns you would like to view.

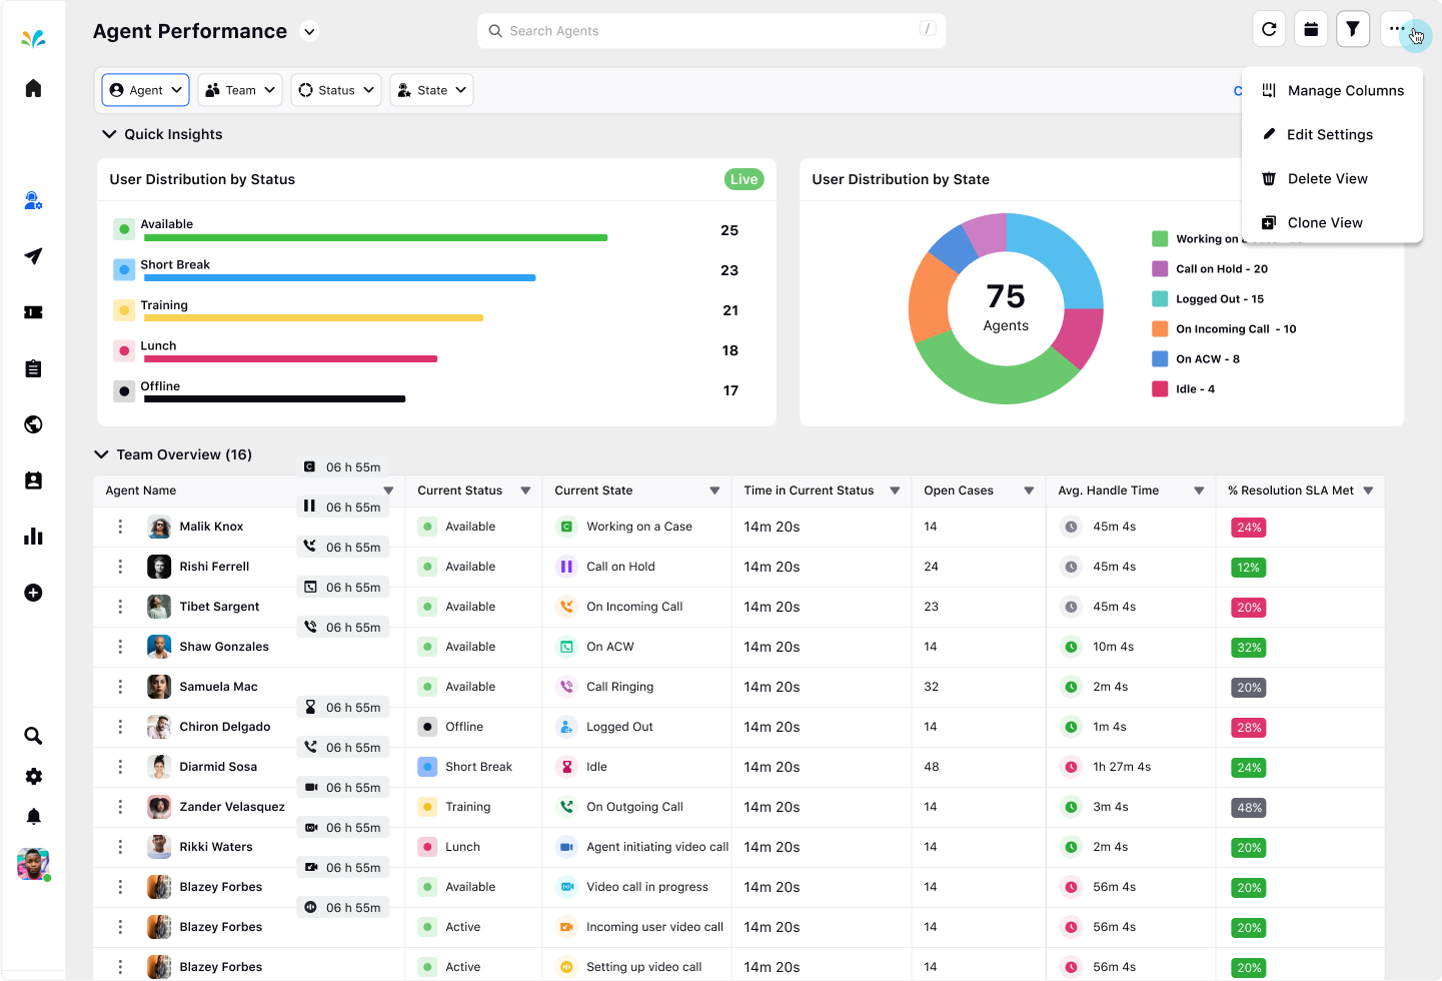
Options icon: Click on the 3 dots icon and perform action such as:
Edit: You can edit the Supervisor Console view by modifying the name, user visibility, and the users.
Clone: You can make a copy of the Supervisor Console view.
Delete: You can delete the Supervisor Console view if you dont need it further.
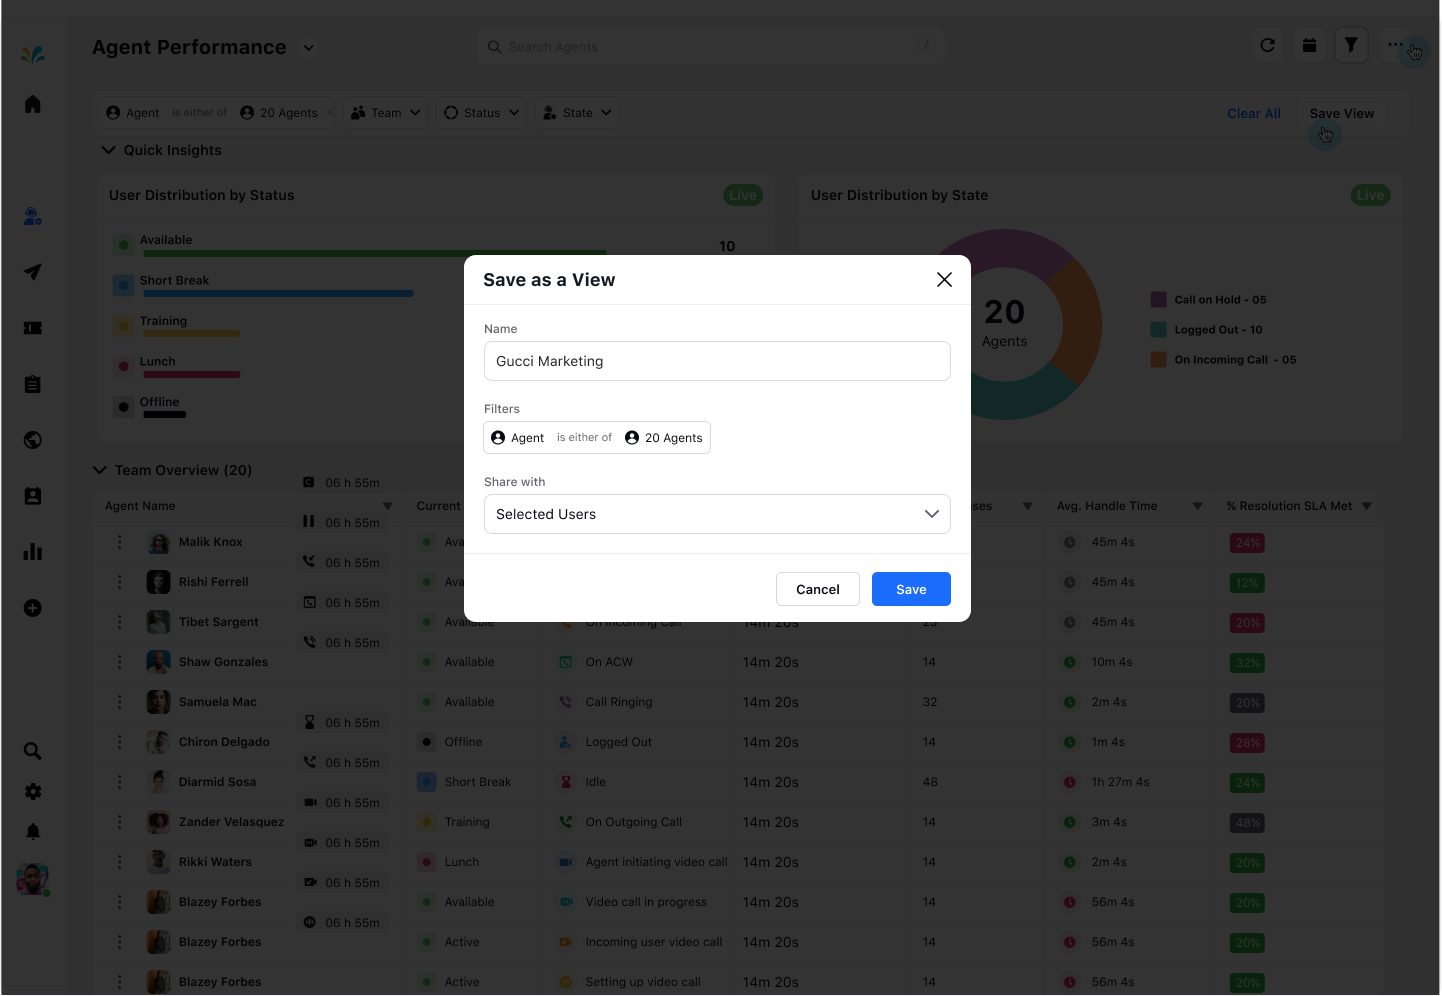
Save View: You can save a particular view once you select a particular user(s), user group(s), user current state, and user current status. Click on the Save View icon in the top right corner to save the view.

Provide a name, add the users you want to share the view. Click Save at the bottom after entering all the details.
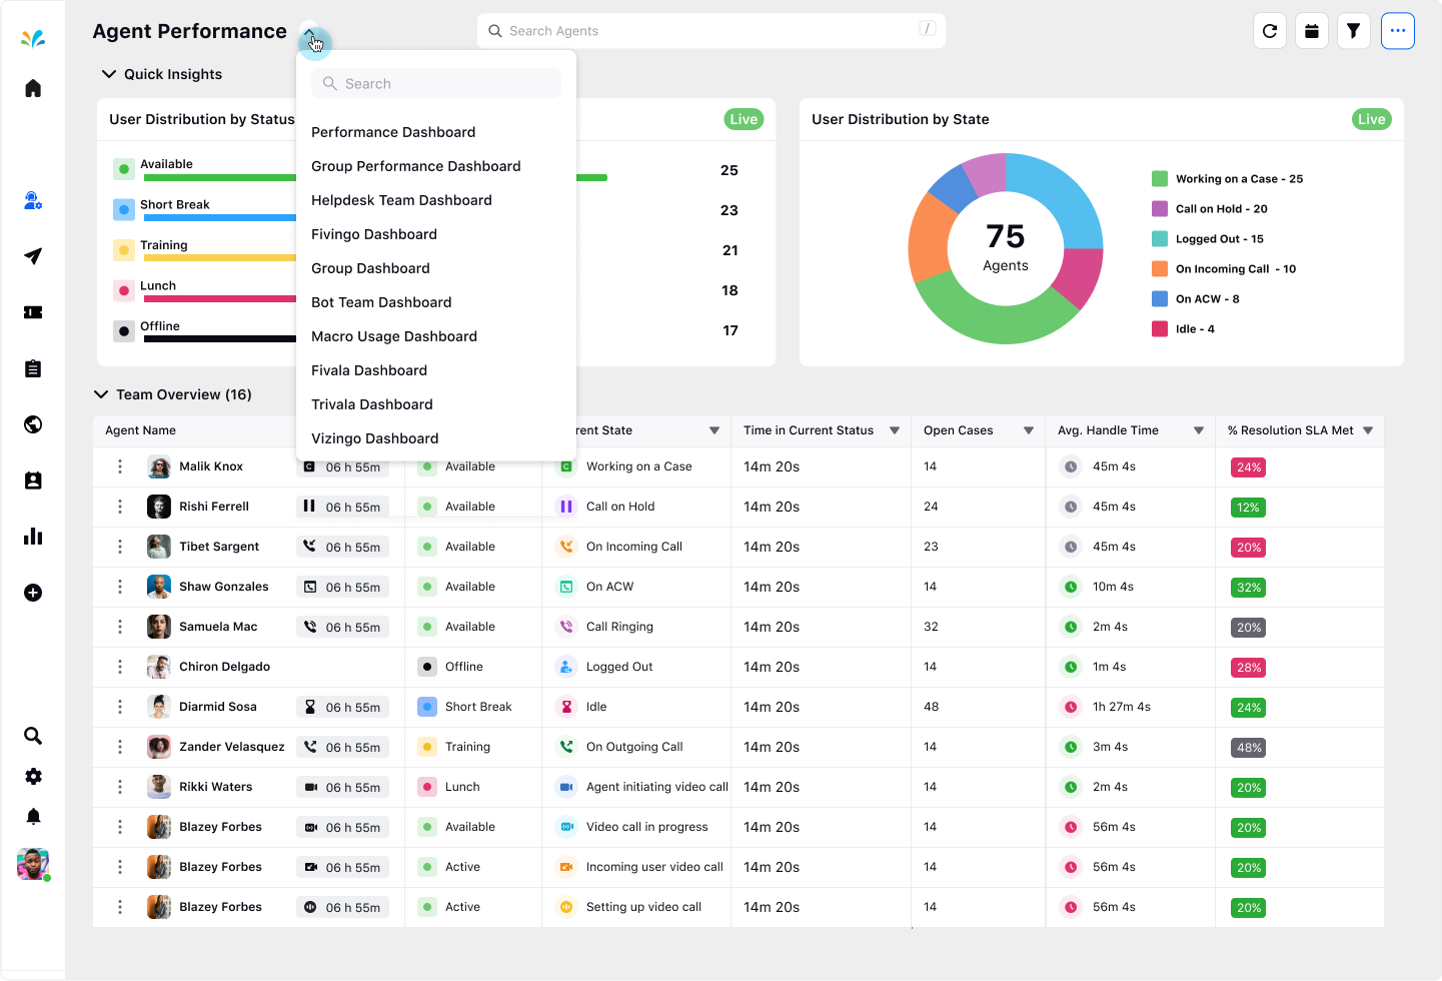
Once the view is saved, you can view the newly created view in the top left corner by clicking the dropdown icon.