Collect important customer information using Chat Bot Custom Form
Updated
Collect important customer information via Chat Bot Custom Form and eliminate the need to ask customers for the details manually.
Customer data is critical for businesses; from tracking customers' purchase histories to monitoring their social media activity, an enormous quantity of data is generated and collected daily. Managing all these data manually is either impossible or time-consuming.
Sprinklr Advanced introduces Chat Bot Custom Forms to make your life easy. It helps you collect customer data. You can create and integrate a Custom Form on Chat Bot to collect essential customer details upfront and eliminate the need to ask them for details manually.
Why do you need to collect customer information?
Understand your market better - Customer information helps you understand your target customer and how they market. Based on this information, you can make future business decisions.
Improve customer database - Collecting customer information helps you improve the overall customer database. It gives you a broader assessment of your customer behavior.
Improve marketing strategies - Data gives you insight into how and what market tactics your target audience responds to. You can create more effective and targeted marketing strategies based on your customer responses.
Provide personalized services - Data helps you understand customer interests, payment methods, or devices. You can use this data to target your customers and pitch them for similar products or services they use.
To create and use a Custom Form
Log into Sprinklr Advanced. Click the Settings icon on the left Navigation Bar.
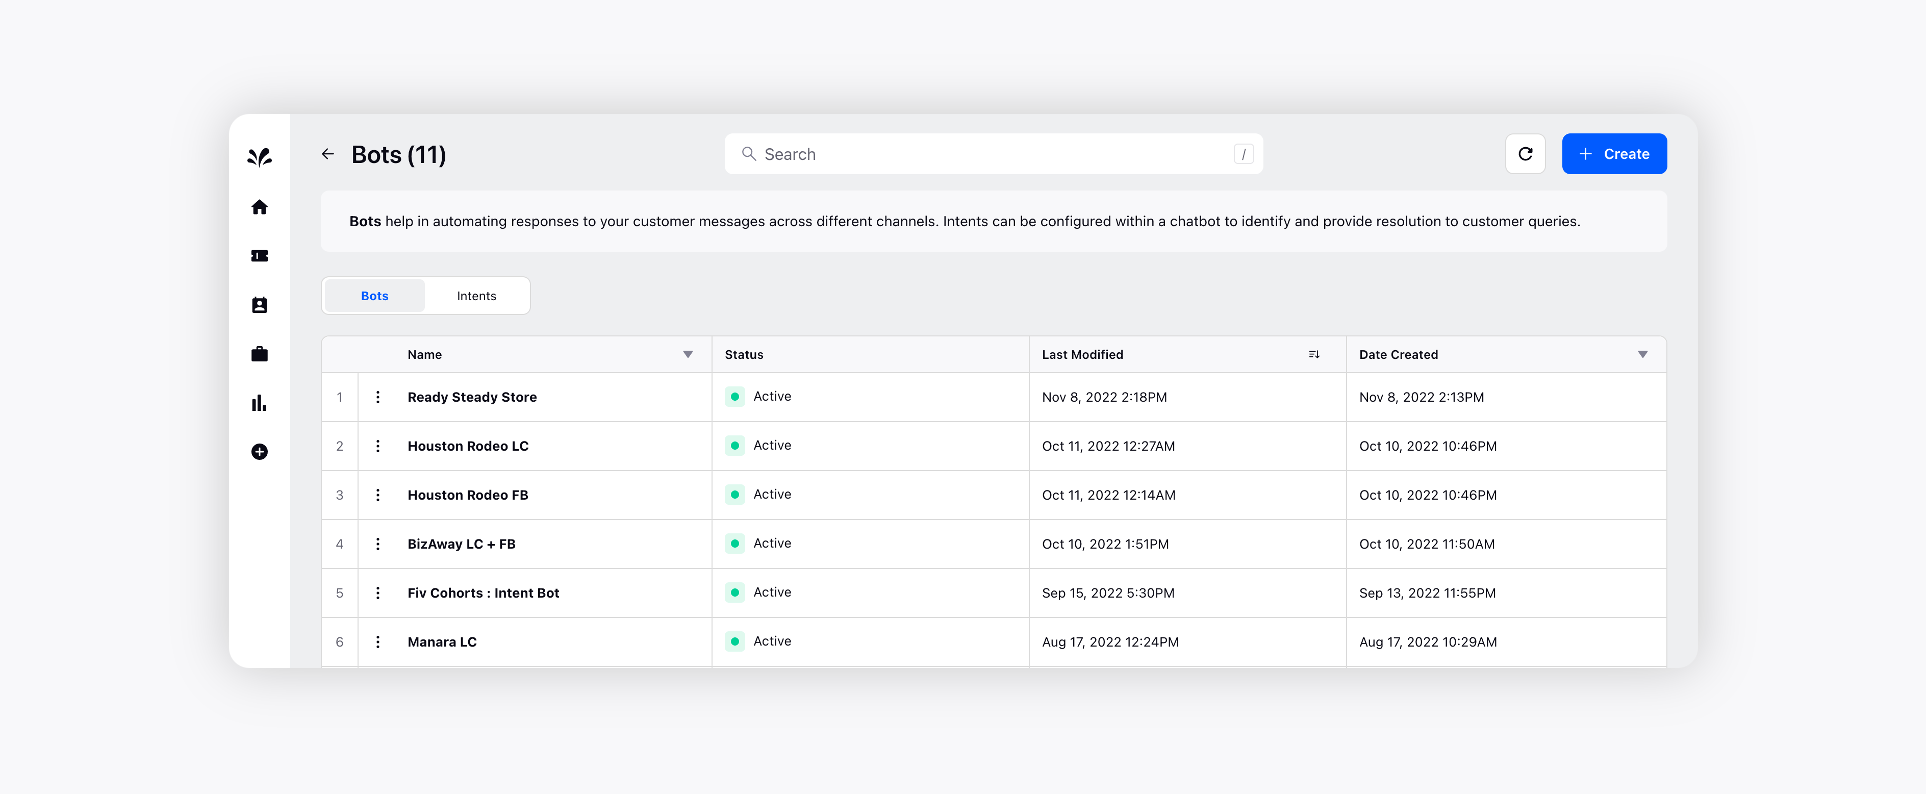
On the Settings window, select Chat Bots under Workflow.

Click Create and select Create New Bot in the top right corner of the Bots window.
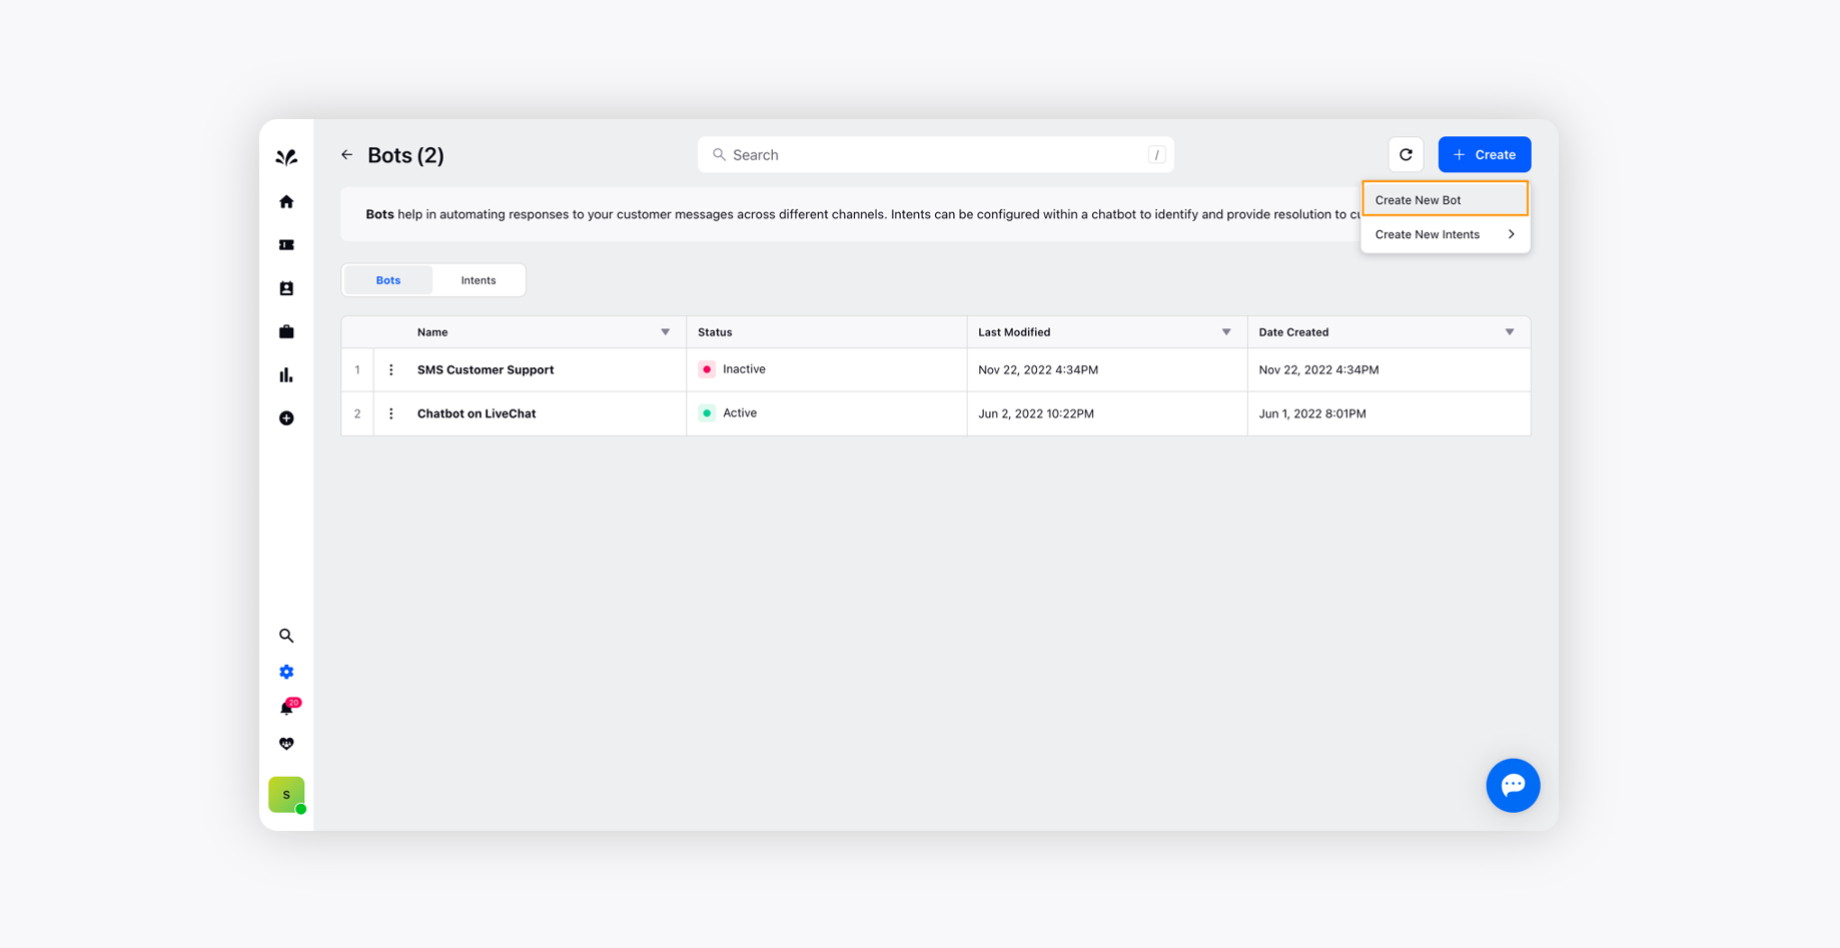
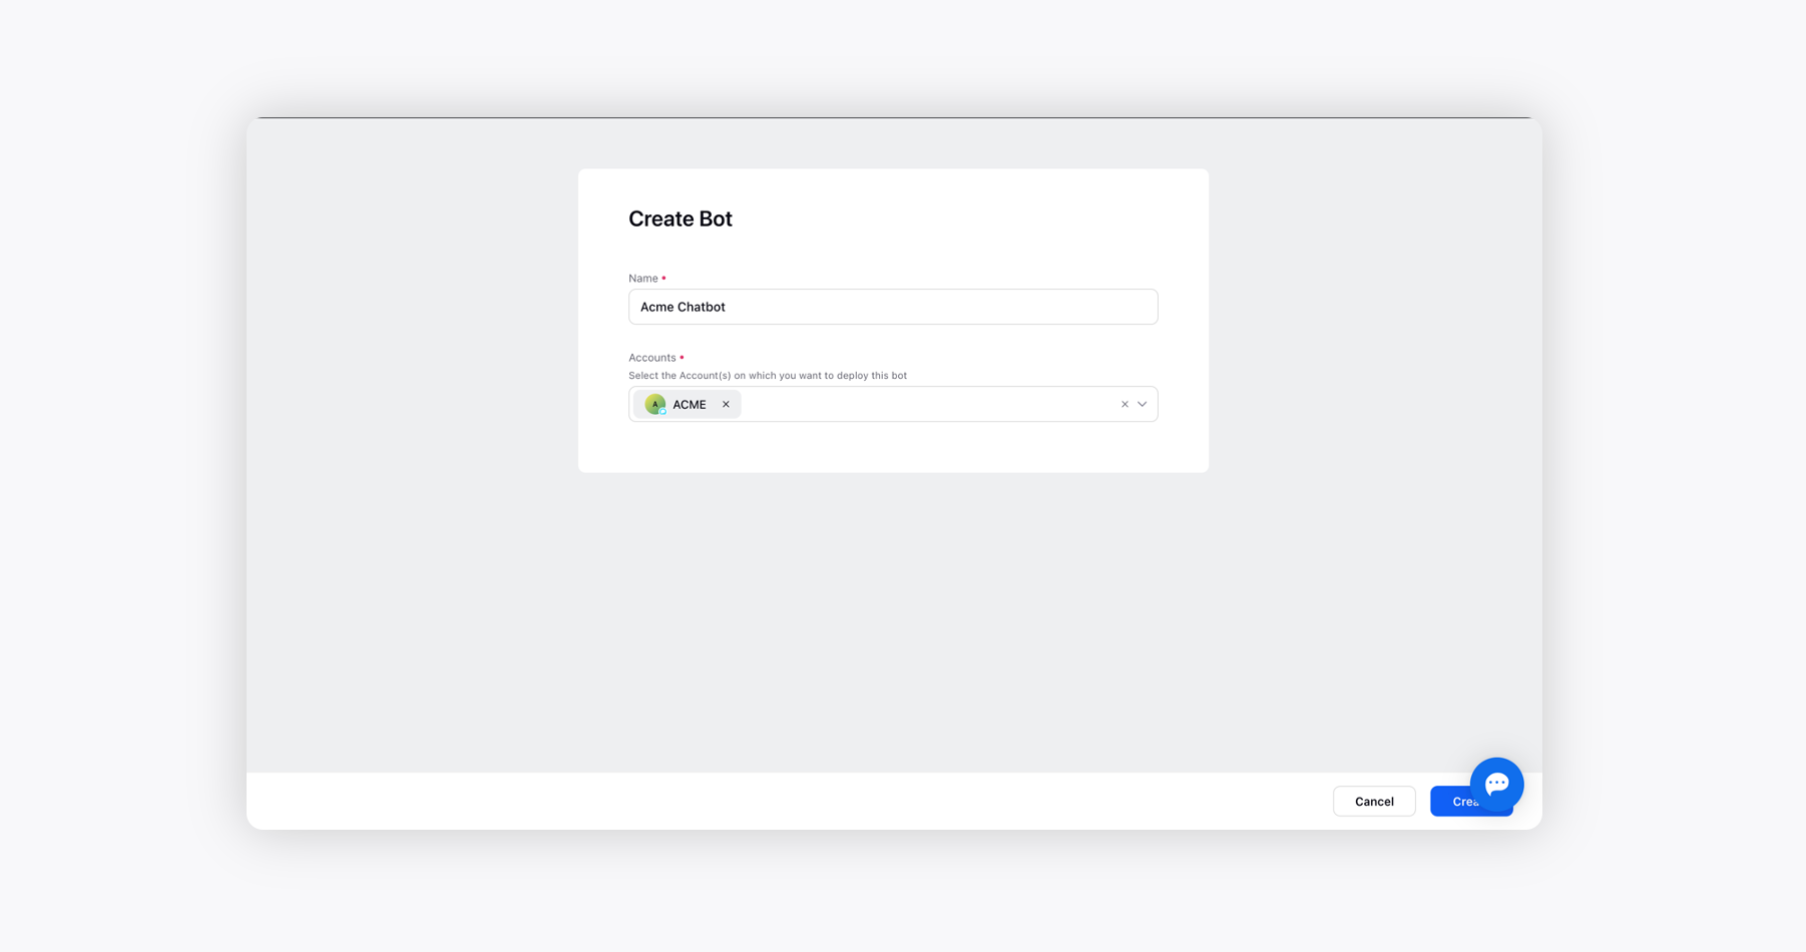
Provide a Name and select a Live Chat Account where you want to deploy your Chat Bot.
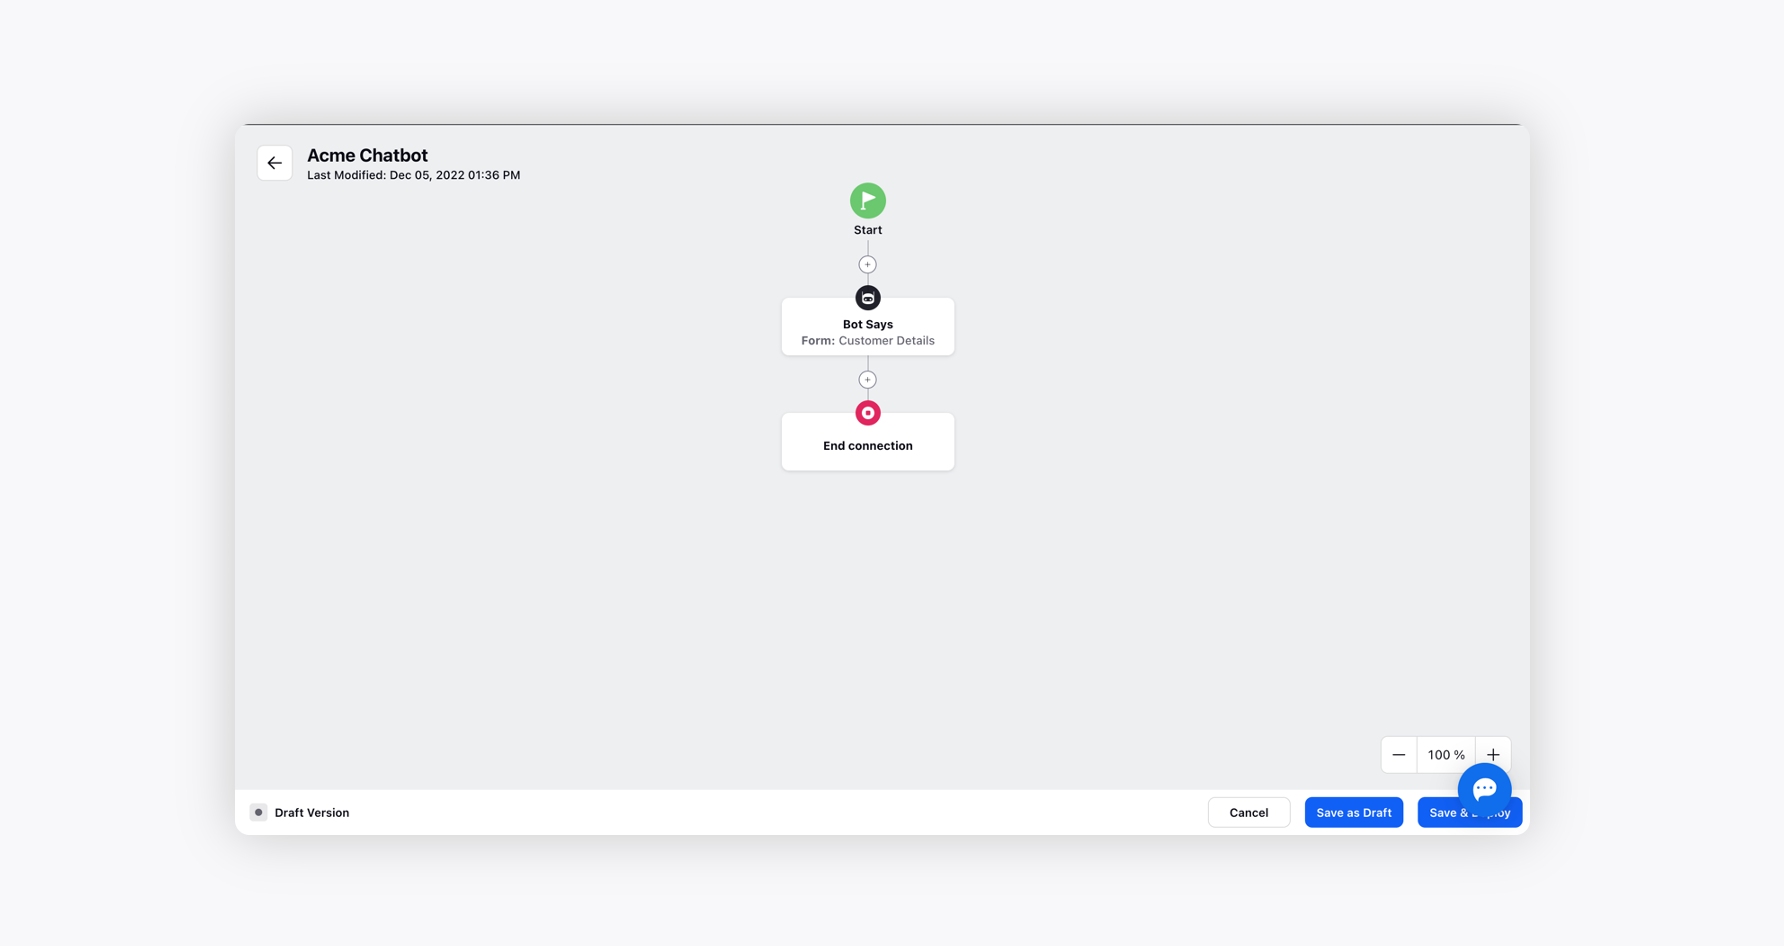
On the Edit window, click the Addition icon, and select Bot Says.
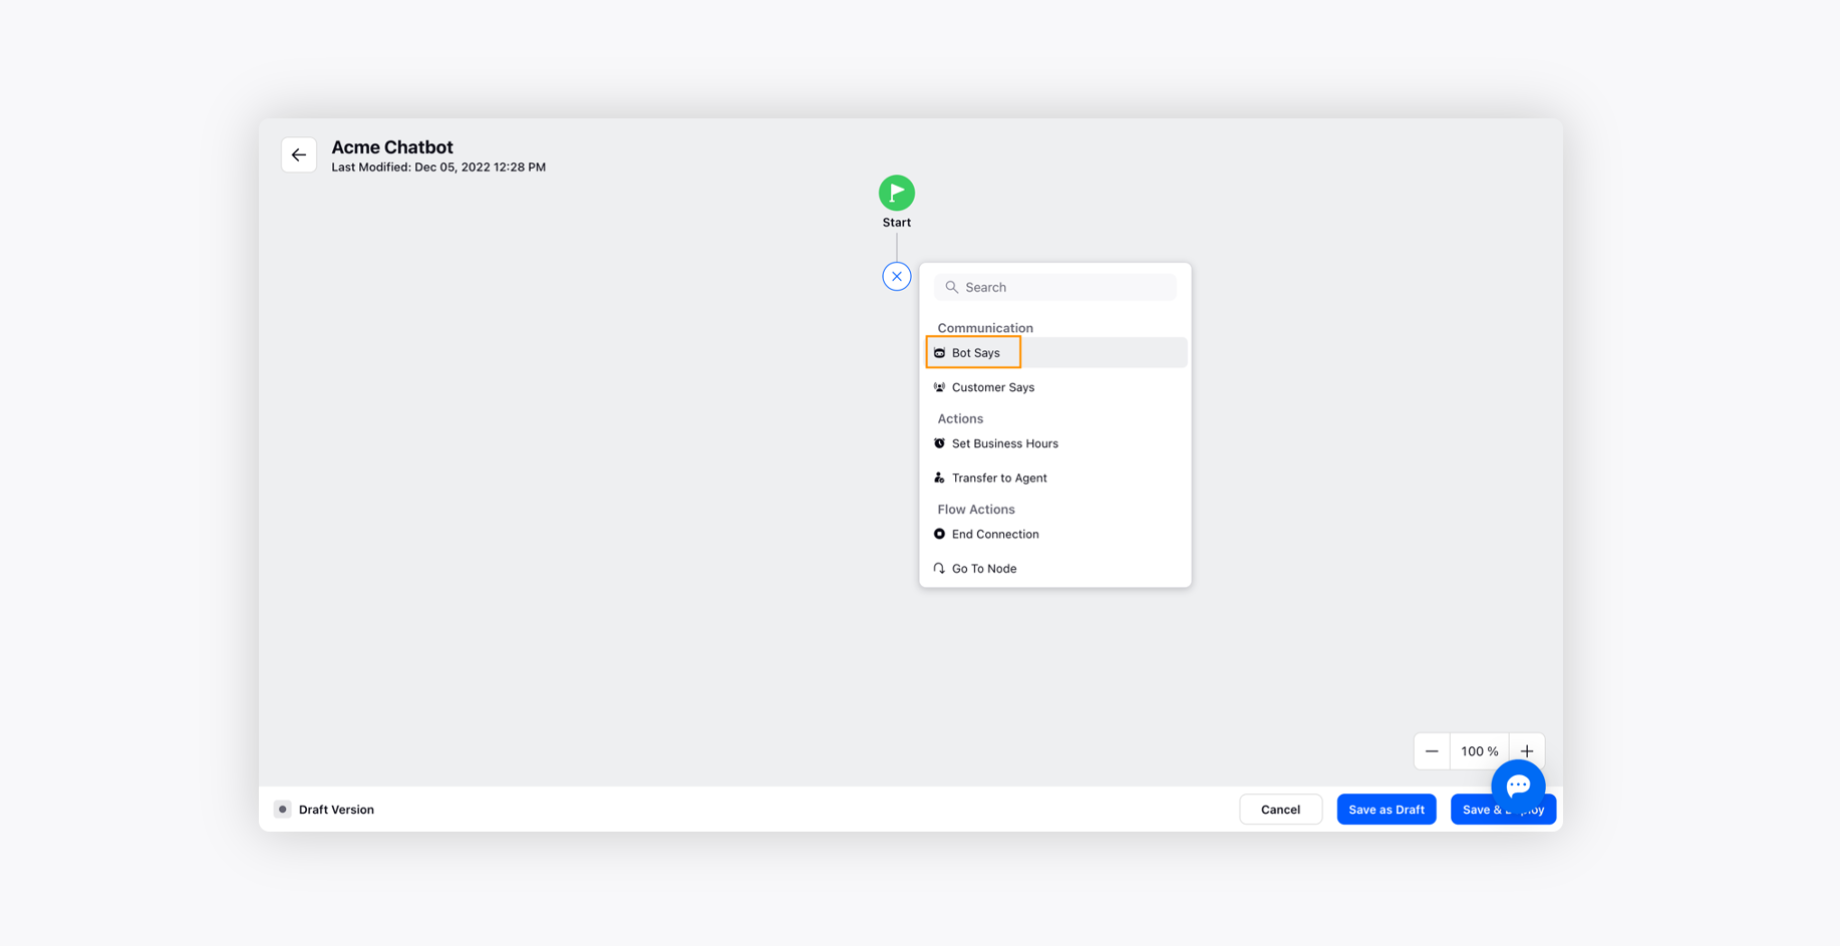
On the Bot Says pop-up window, select Custom Forms and provide a custom form title.
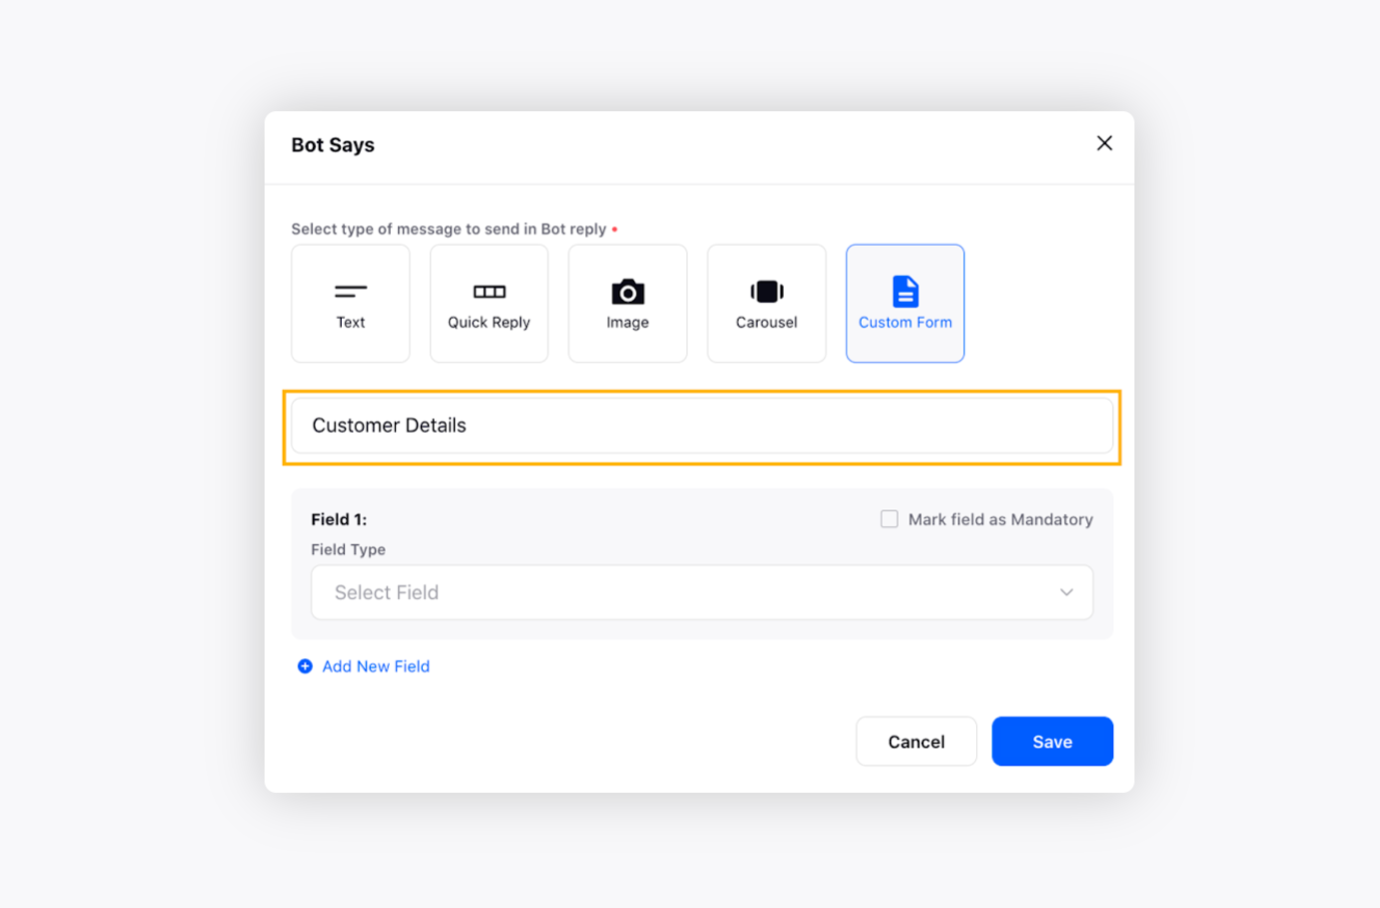
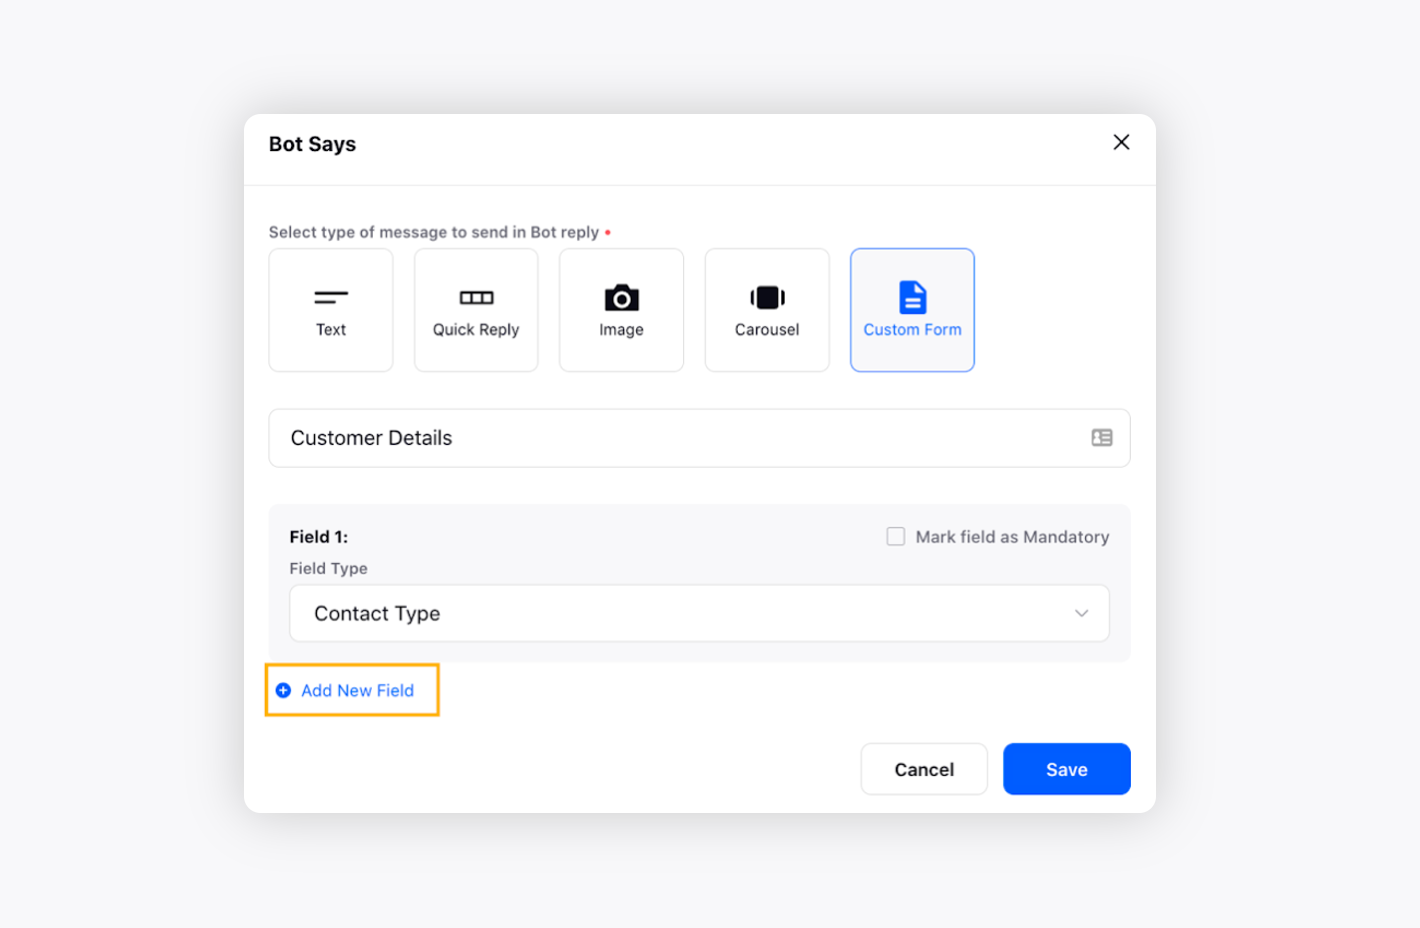
Under the Field Type drop-down menu, you can specify the fields you want to add to your Custom Form.
Click Add New Field to add another field to your form.
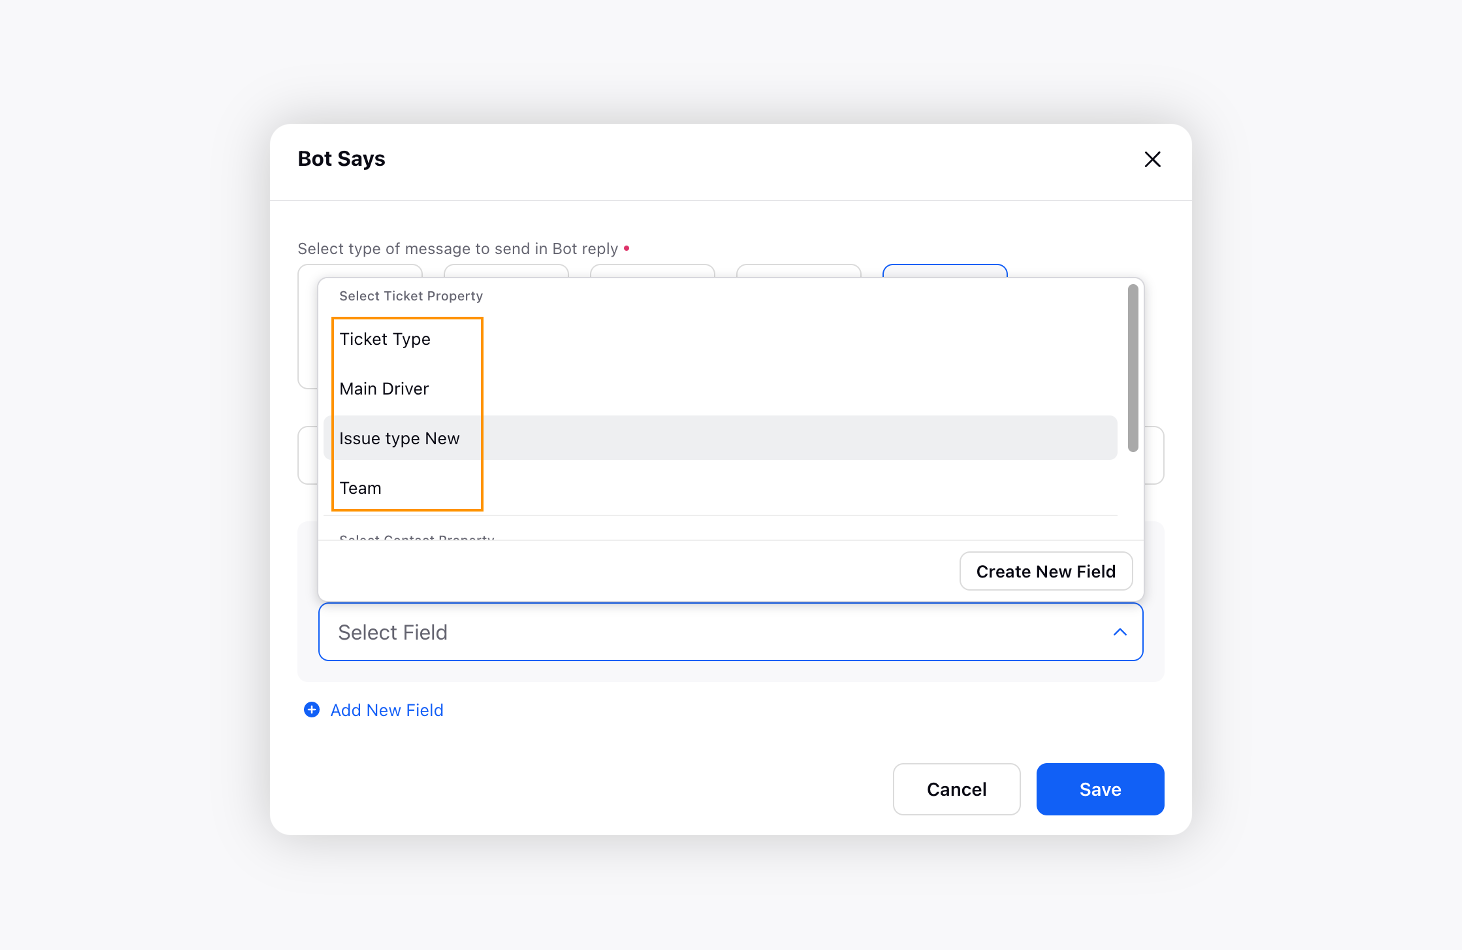
If you want to add a new field to your form, click Create New Field.
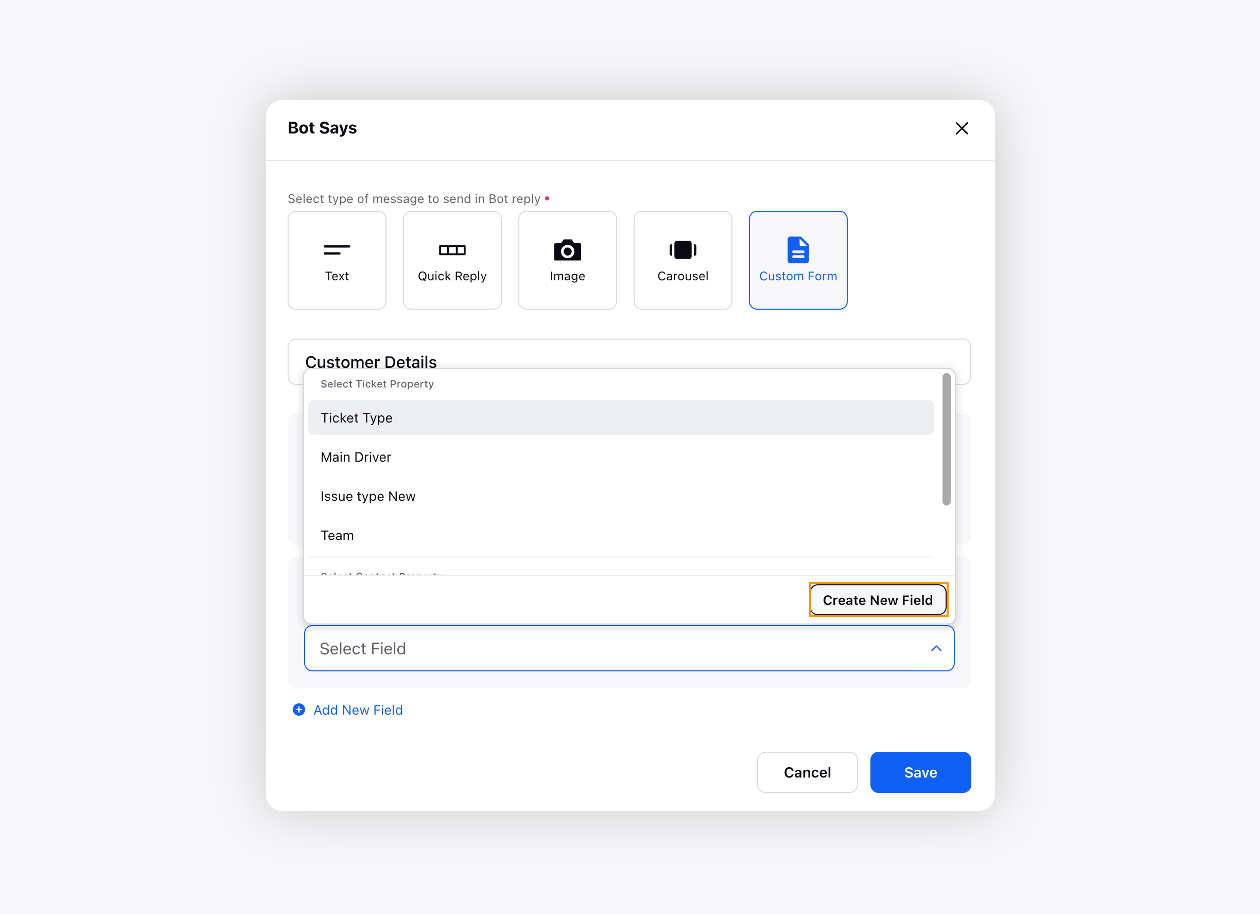
Select the Field Type option and the corresponding Label.
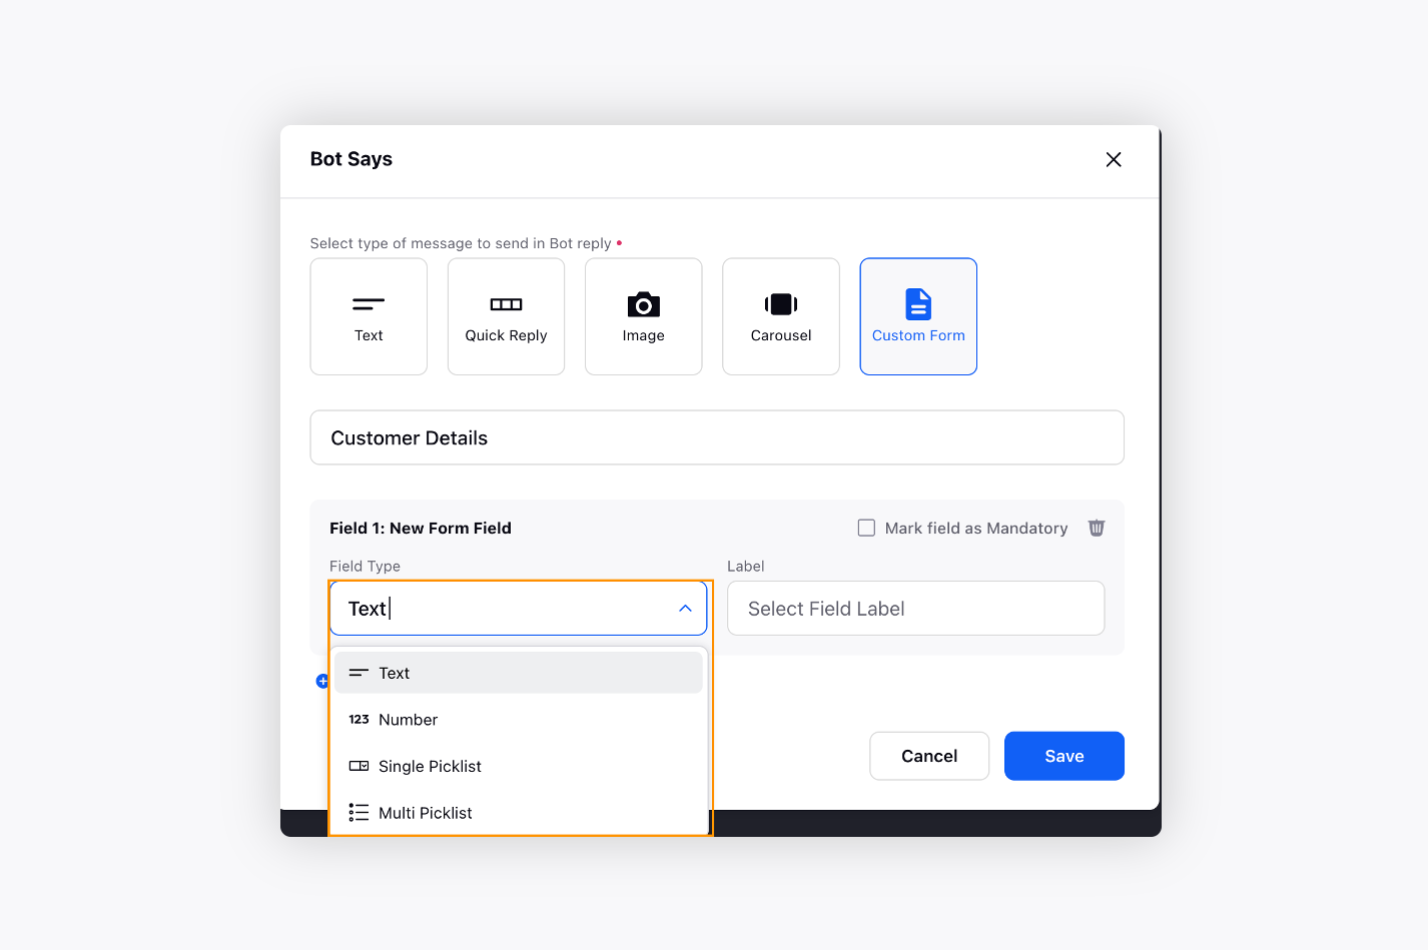
The field types help you define the information you need from customers. The available Field Types are:Text - Helps you collect data in text format, for example, Name, Address, etc.
Number - Helps you collect information in numerical form, for example, Phone Numbers, etc.
Single Picklist - Helps you provide one option to pick from the multiple options. For example, if you want to collect customer gender information, you can simply select Single Picklist and provide options such as Male, Female, Don’t want to say, for customers to choose from. They can select one from the multiple.
Multi Picklist - Helps you provide multiple options for customers to pick from. For example, suppose you want to collect information related to customer interest. In that case, you can simply select Multi Picklist and provide options such as Art, Literature, Books, Science, etc. They can select more than one option.
You can also mark specific custom fields mandatory by clicking the check box alongside Mark Field as Mandatory in the top right corner of every field.
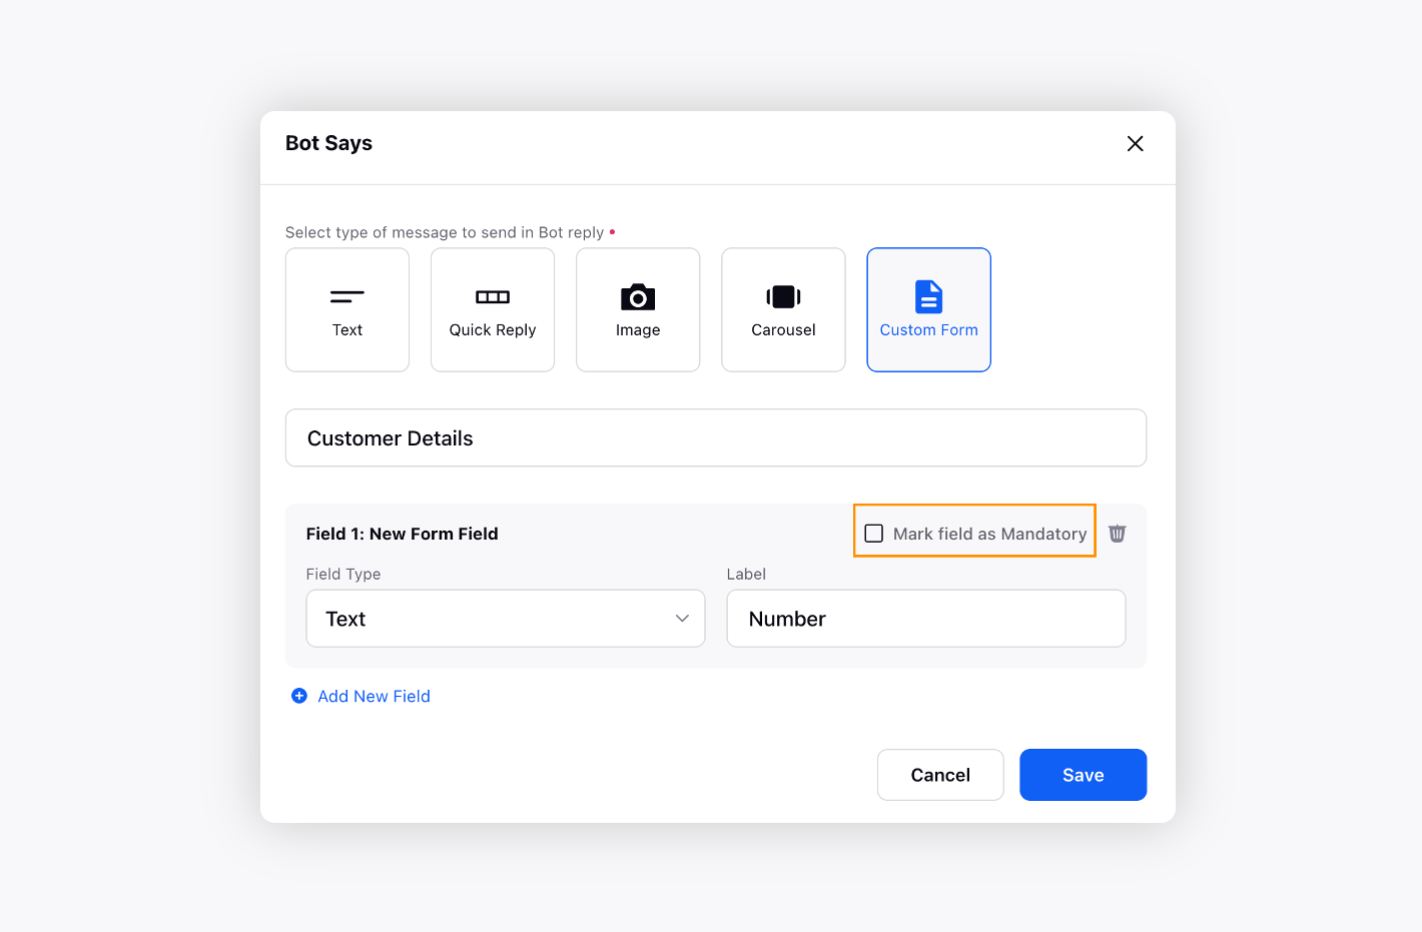
Click the Delete icon in the top right corner of every field to delete the wanted field from your form.

Click Save in the bottom right corner.
Make sure to End Connection and click Save and Deploy in the bottom right corner.
To insert a Custom Form in the existing Chatbot
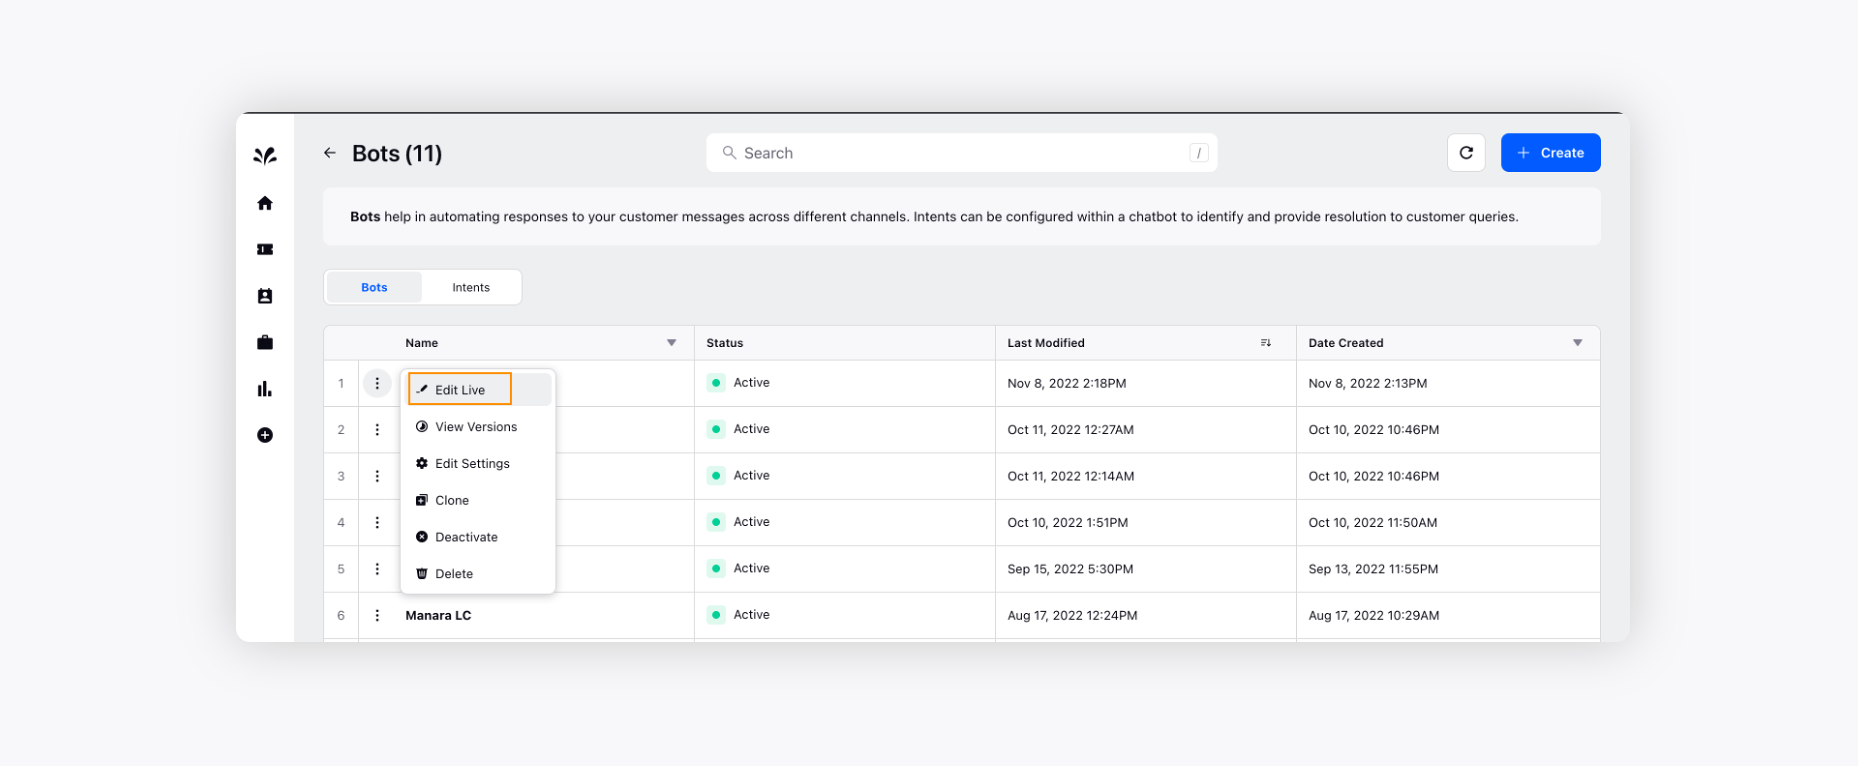
Log into Sprinklr Advanced. Click the Settings icon on the left Navigation Bar.
On the Settings window, select Chat Bots under Workflow.
You will see the list of existing Chatbots.
Hover over the Vertical Ellipsis icon and click Edit Live alongside the desired Bot.
Click the + icon after the desired node and click Bot Says.
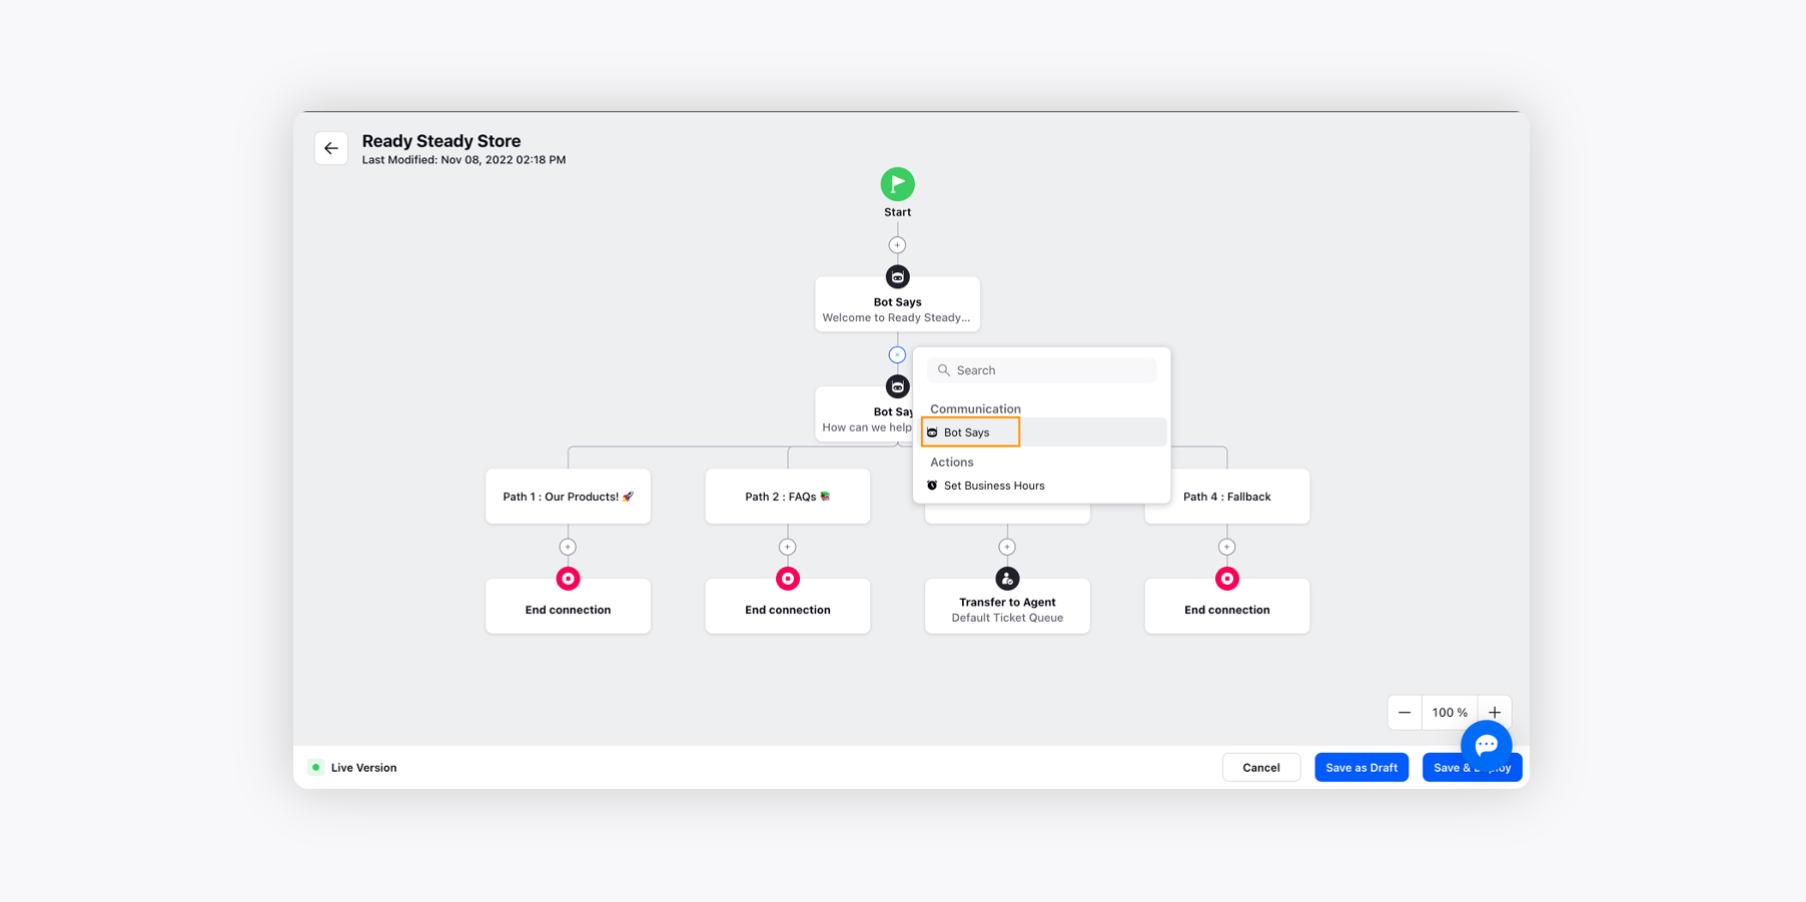
On the Bot Says pop-up window, select Custom Forms.
If you want to add a new field, refer to steps 9 to 12 above.
To view the Custom Form in Live Chat Bot
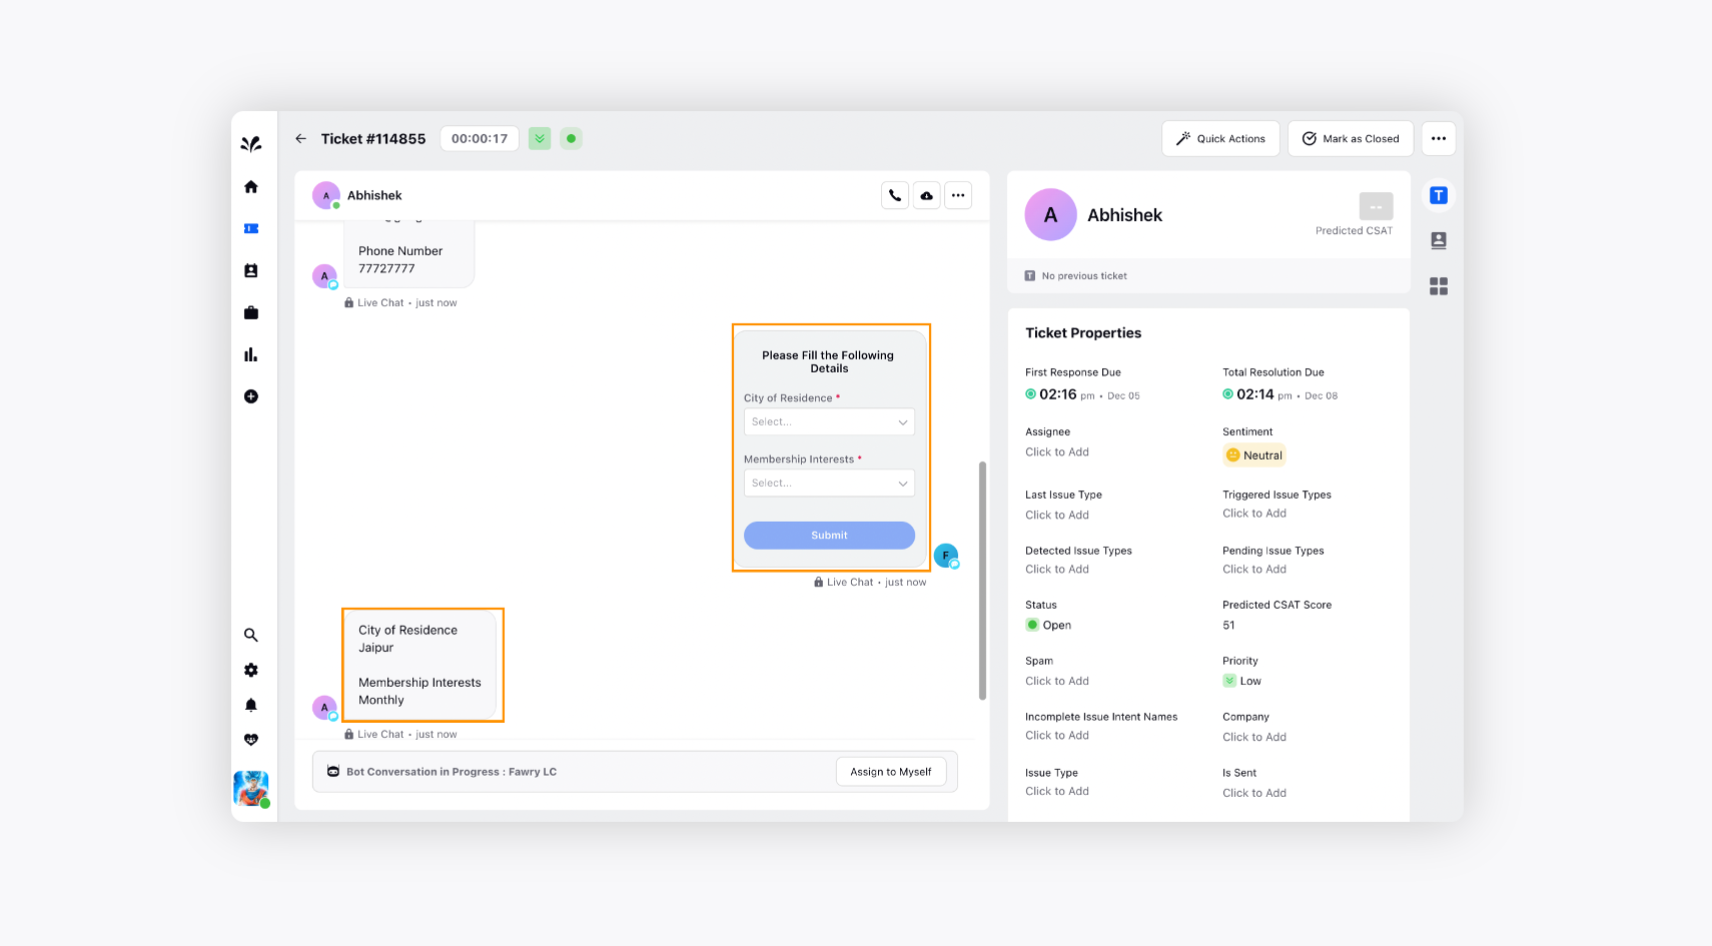
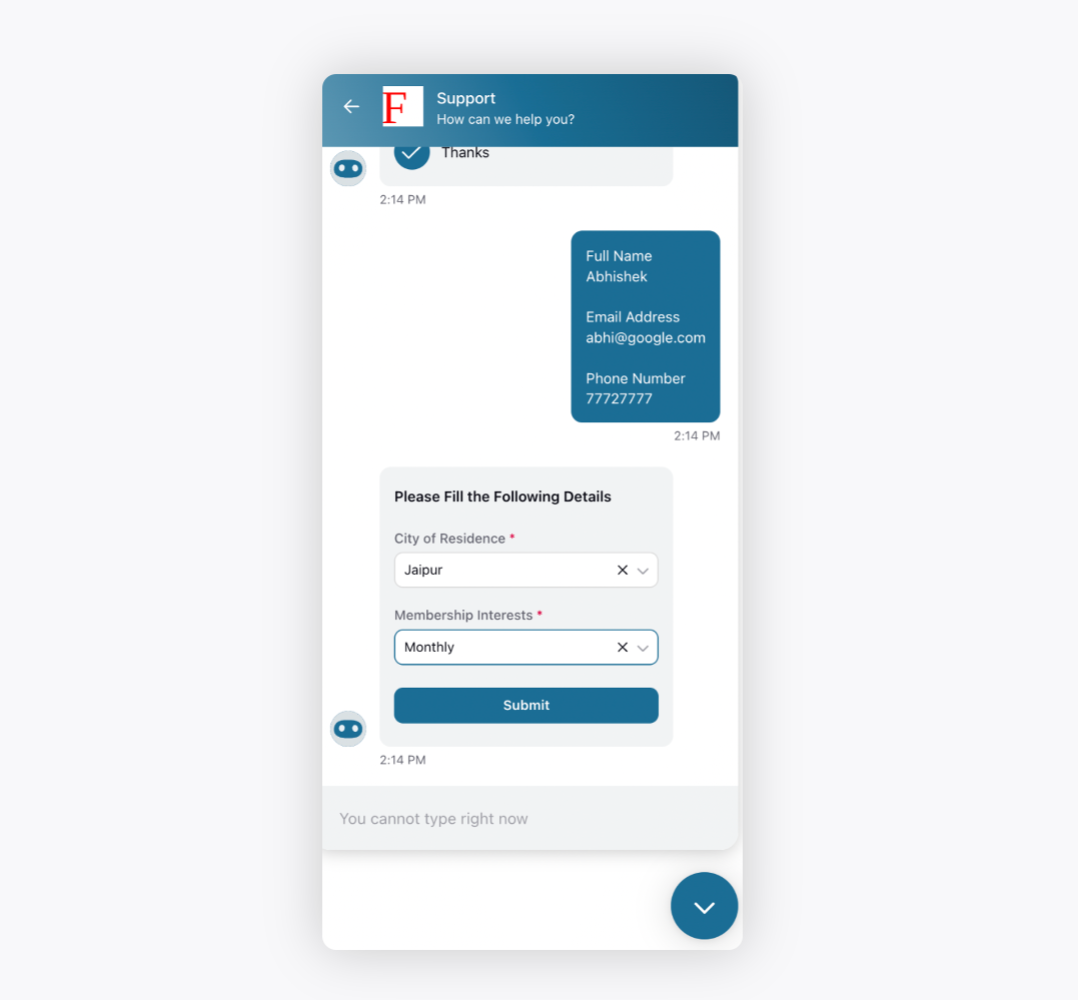
Once you have configured and deployed your Chat Bot on your website, you can receive all the customer information in Care Console.
A Live Chat Bot Custom Form will look like this:
To view the Custom Form information in Care Console and interact with customers
Navigate to the Care Console and click the required Ticket.
In the Chat section, you can view the Custom Form and the information provided by the customer. Based on the information provided by the customer, the agents can start the conversation.