Understanding ChatBots
Updated
How you can leverage Chat Bots to handle complex customer queries on social channels and Live Chat widgets, enhancing customer engagement, self-serve capability, and reducing wait time.
Chat Bots are tools developed to ingest customer queries and provide possible resolutions using Automations and AI Engine. It assists in reducing the First Response Time and gathering the customer’s context before the customer even interacts with the agent. It works like an instant messaging application, where the customer asks the Bot a question, and the Bot answers automatically based on configured conditions.
In other words, a Chat Bot simulates and processes conversation, allowing a customer to interact with automated messages as if they were communicating with a real person.
Benefits of Chat Bots
Enhanced Customer Engagement - Chat Bots can initiate proactive conversation and provide personalised recommendations to improve customer experience.
Around-the-Clock Availability - Chat Bots are available 24/7 and are always available to interact with customers and provide immediate answers to frequently asked questions unless the business explicitly defines the Business Hours.
Reduced Customer Waiting Time - Bots are a smarter way to ensure that customers get the immediate response they need without waiting in line to resolve their initial queries.
How do Chat Bots work?
Chat Bots are made to process data to respond to requests of all kinds. For example, an e-store would most likely prefer Chat Bot services which assist customers in placing an order. In contrast, a telecom company might want to create a Bot that can address queries related to services, their plans, refunds, etc.
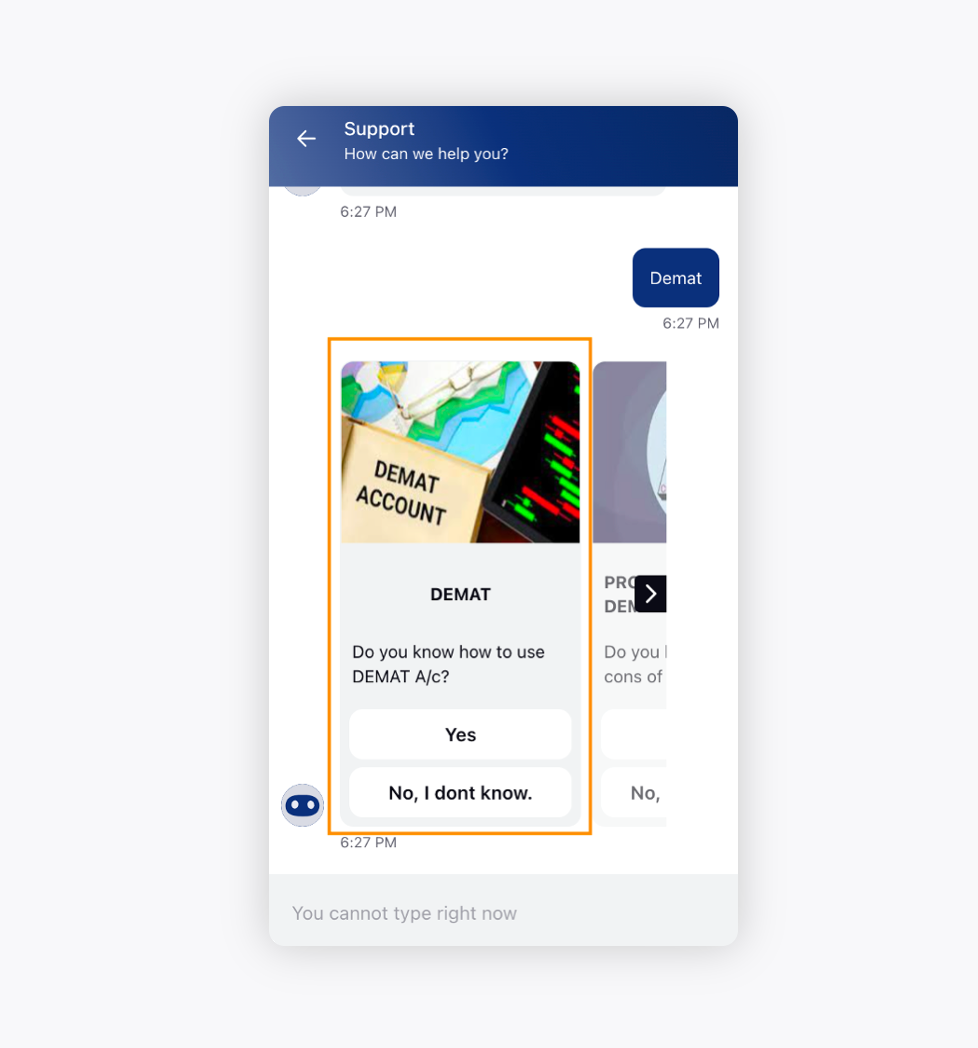
Bots help in automating responses to customer messages across different channels. It uses a tree-like flow to help customers with their questions. This means that the Chat Bot guides the customers with follow-up questions to eventually get to the right answer.
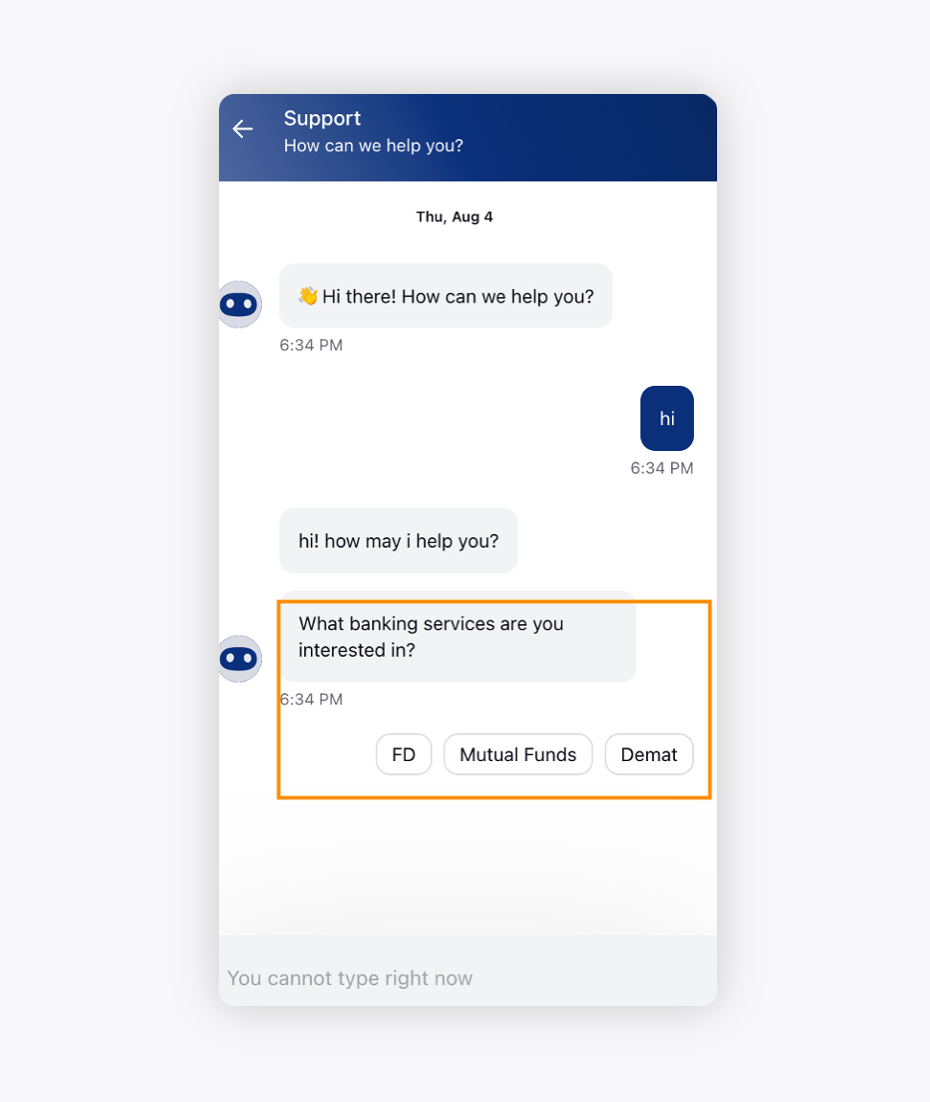
For example, if the customer says “they want to replace XYZ product”, the Chat Bot will respond with a “List of Reasons” along with the “Contact Support” option for customers to choose from.
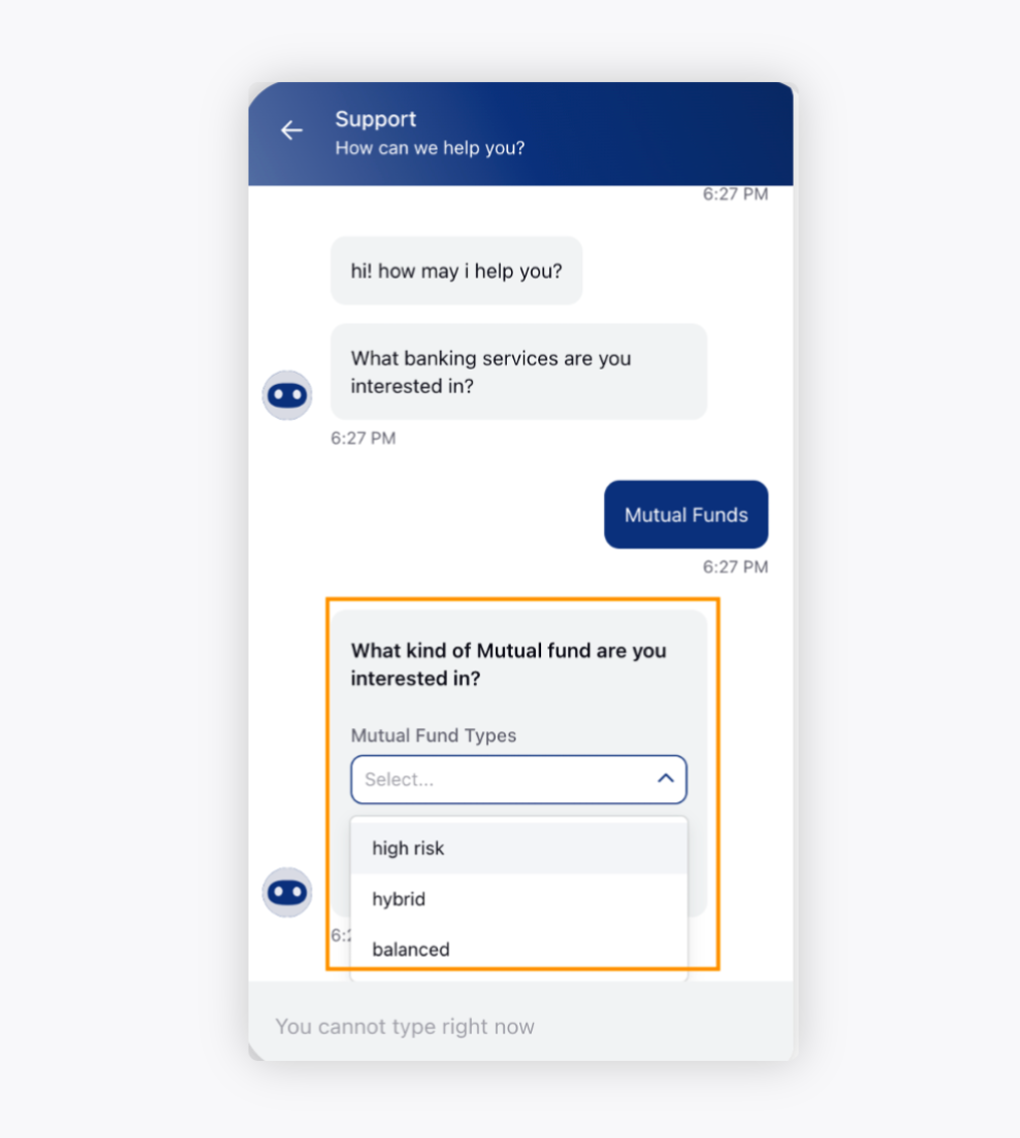
Intents can be configured within a Chat Bot to identify and provide resolution to customer queries by detecting intent from customer’s text reply. A machine-learning-based Chat Bot is provided with an artificial brain that develops by learning from user actions and act accordingly. These Chat Bots can identify the languages, intent, and context, offer various resources to help answer customers’ questions, and more. It learns and improves over time.
For example, a customer wishes to see blue coloured jackets and queries for the same albeit with a typing error in the sentence i.e. “blue jackets”. These Bots nevertheless identify the customer's intent and respond with the right result.
To create a new Chat Bot
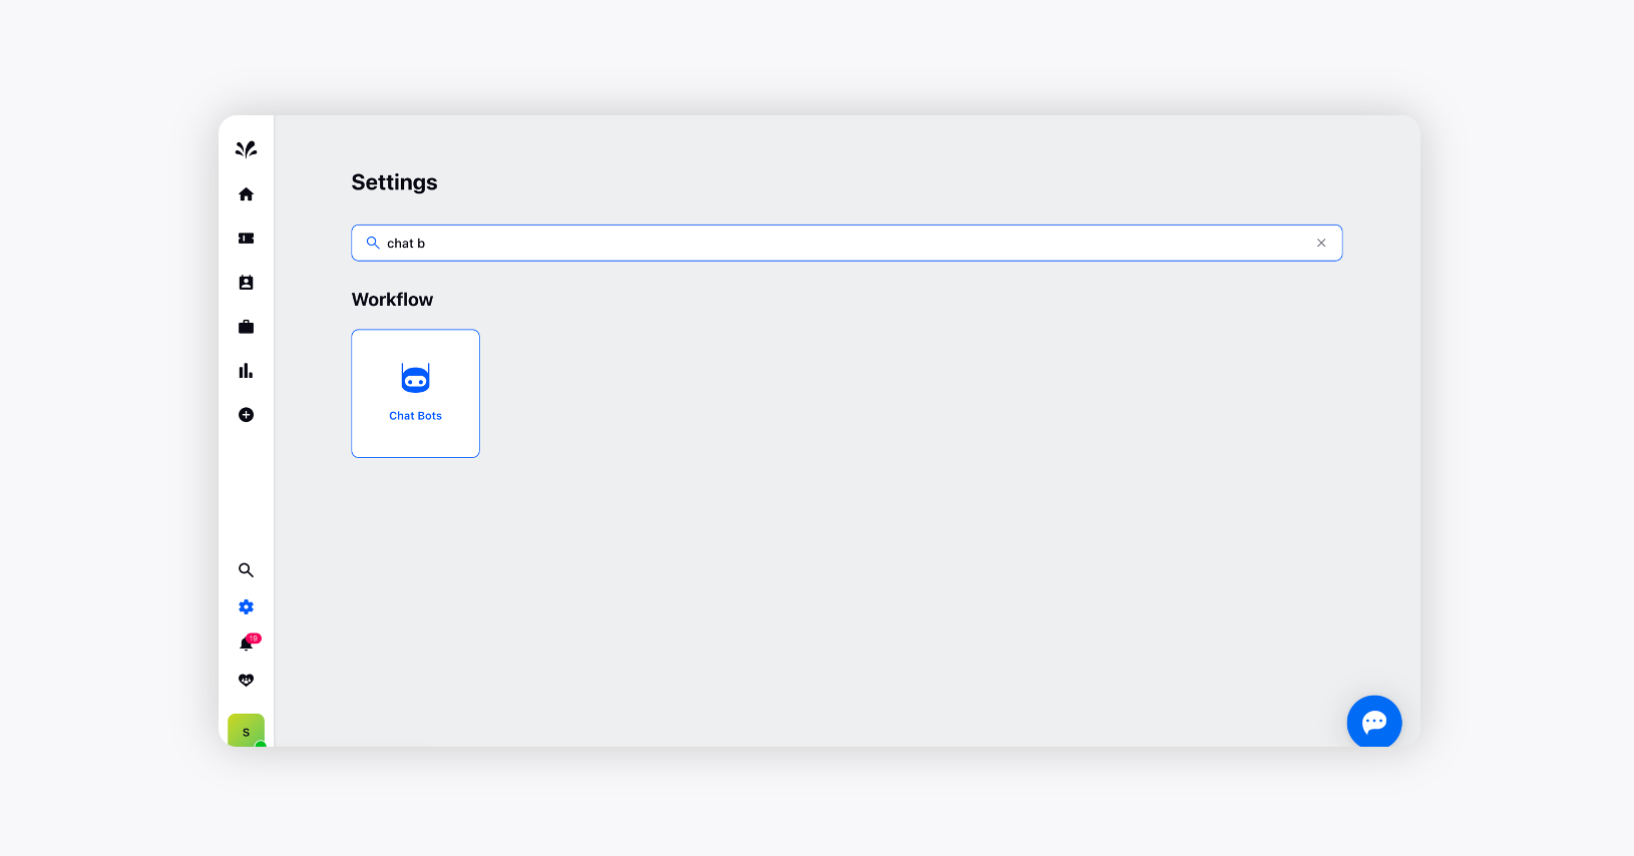
Log into Sprinklr Advanced. Click the Settings icon on the left pane and under Workflows, click Chat Bot.
Click Create and select Create New Bot from Create in the top right corner of the Chat Bot window.
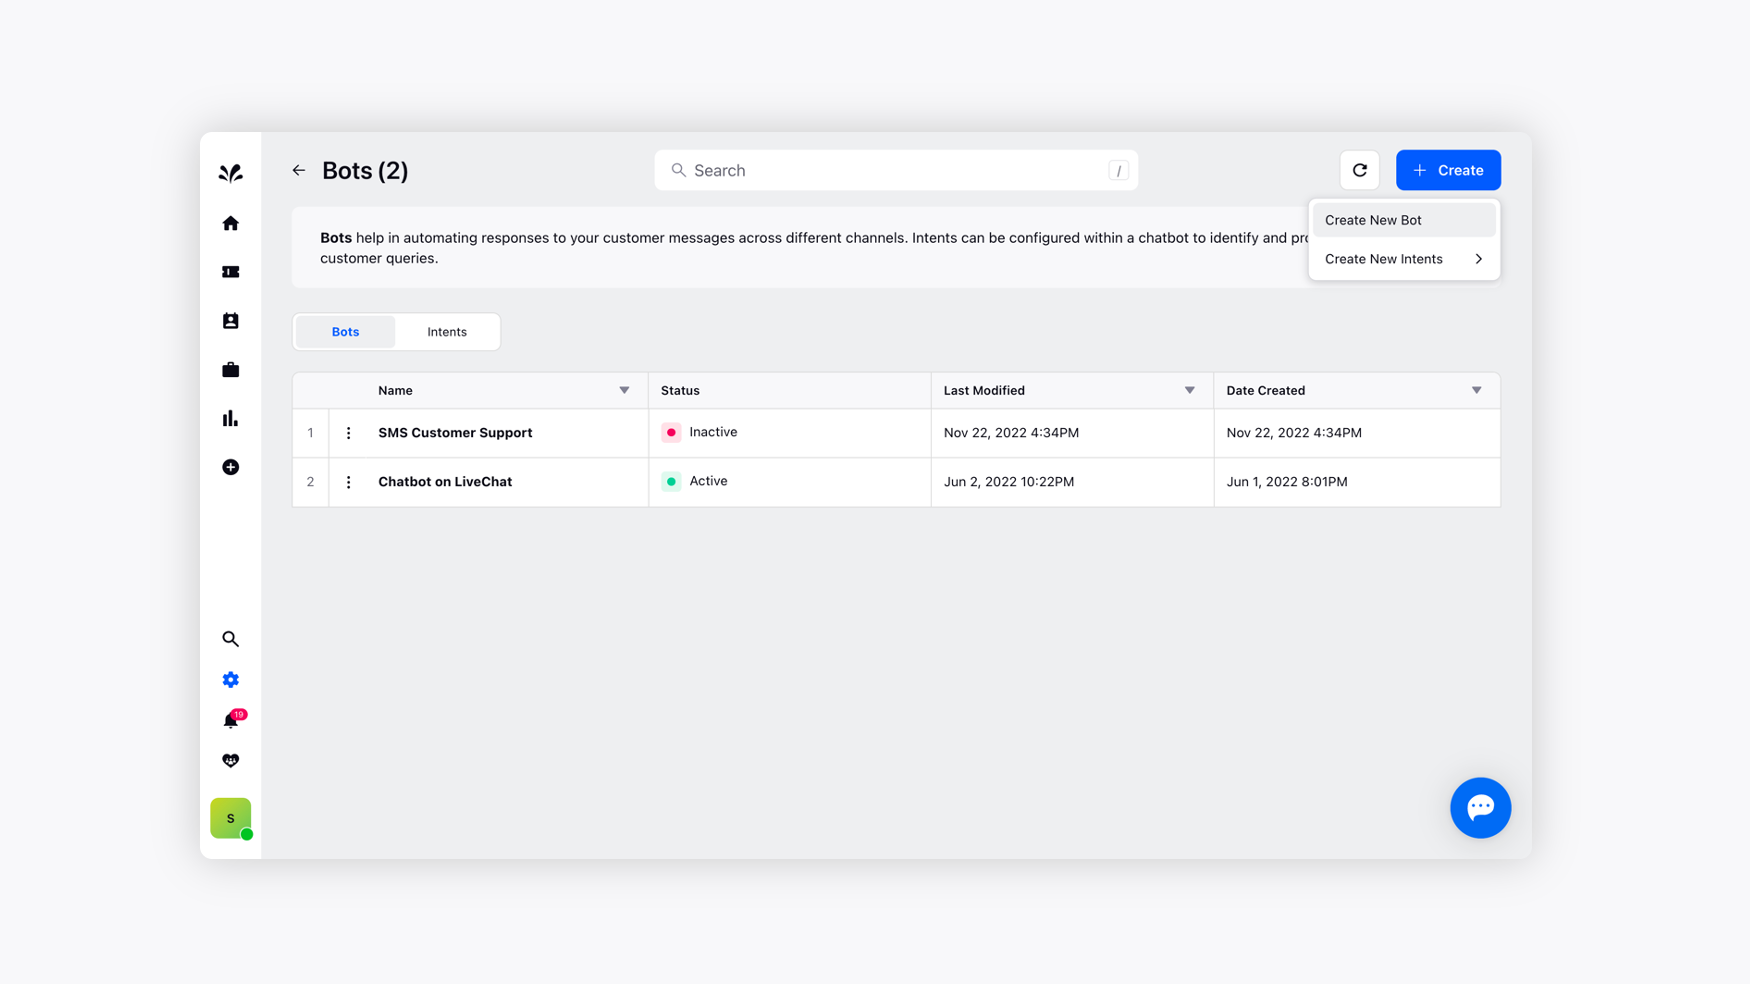
On the Create Bot window, provide a Name for the Bot and select the Account(s) on which the Bot has to be deployed.
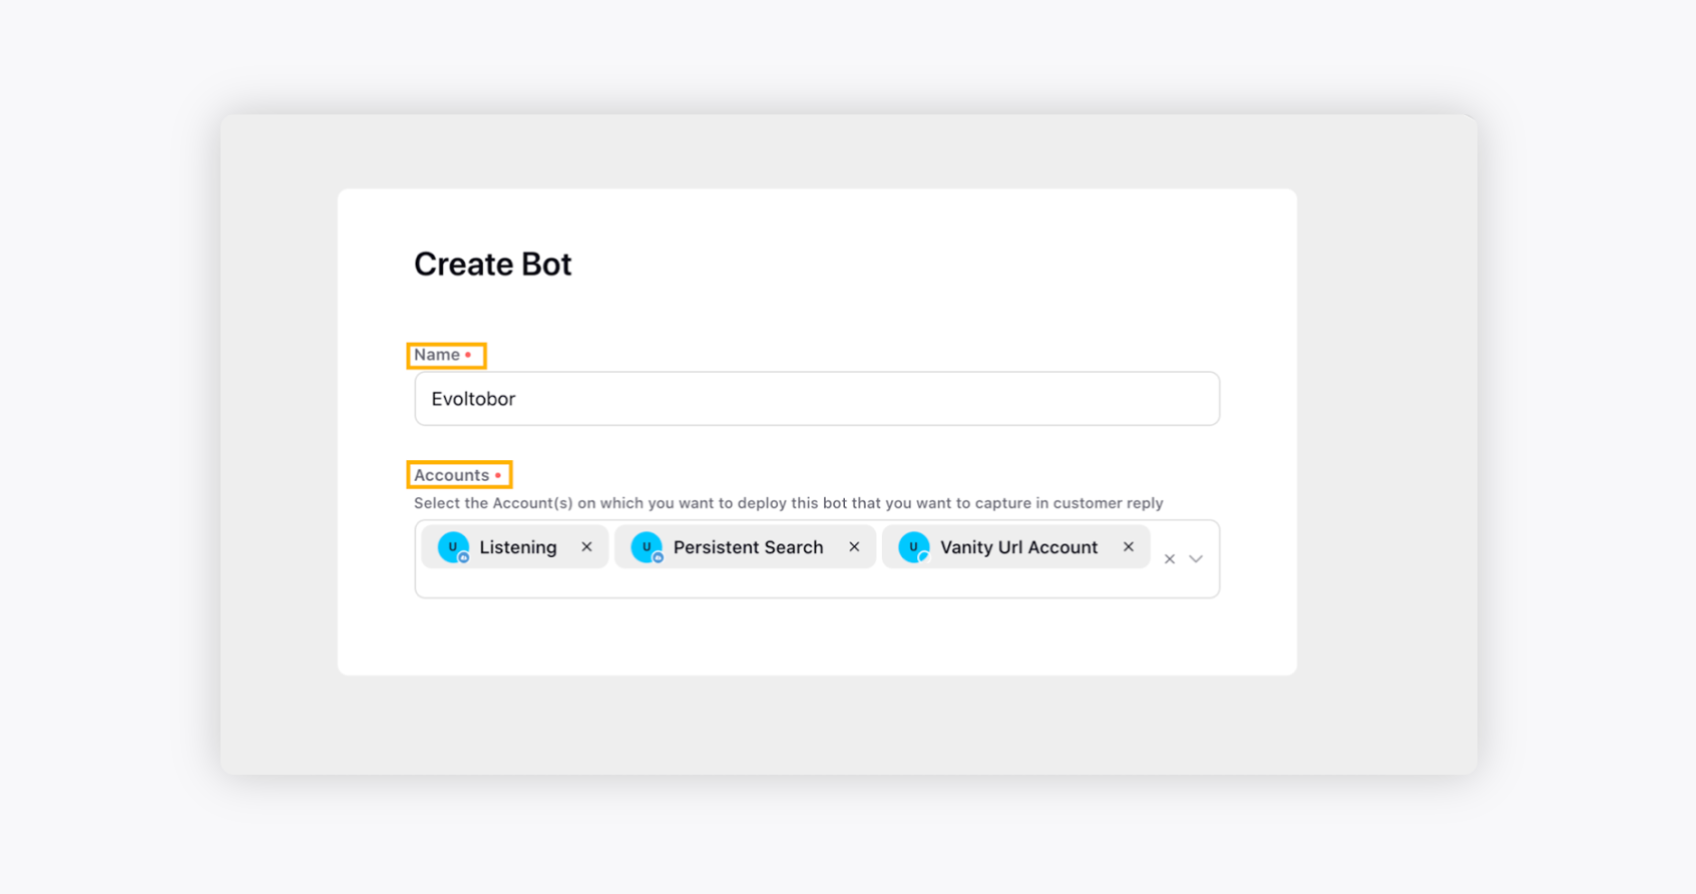
Click Create in the bottom right corner. In the next window, you can configure the conversation flow of the Chat Bot.
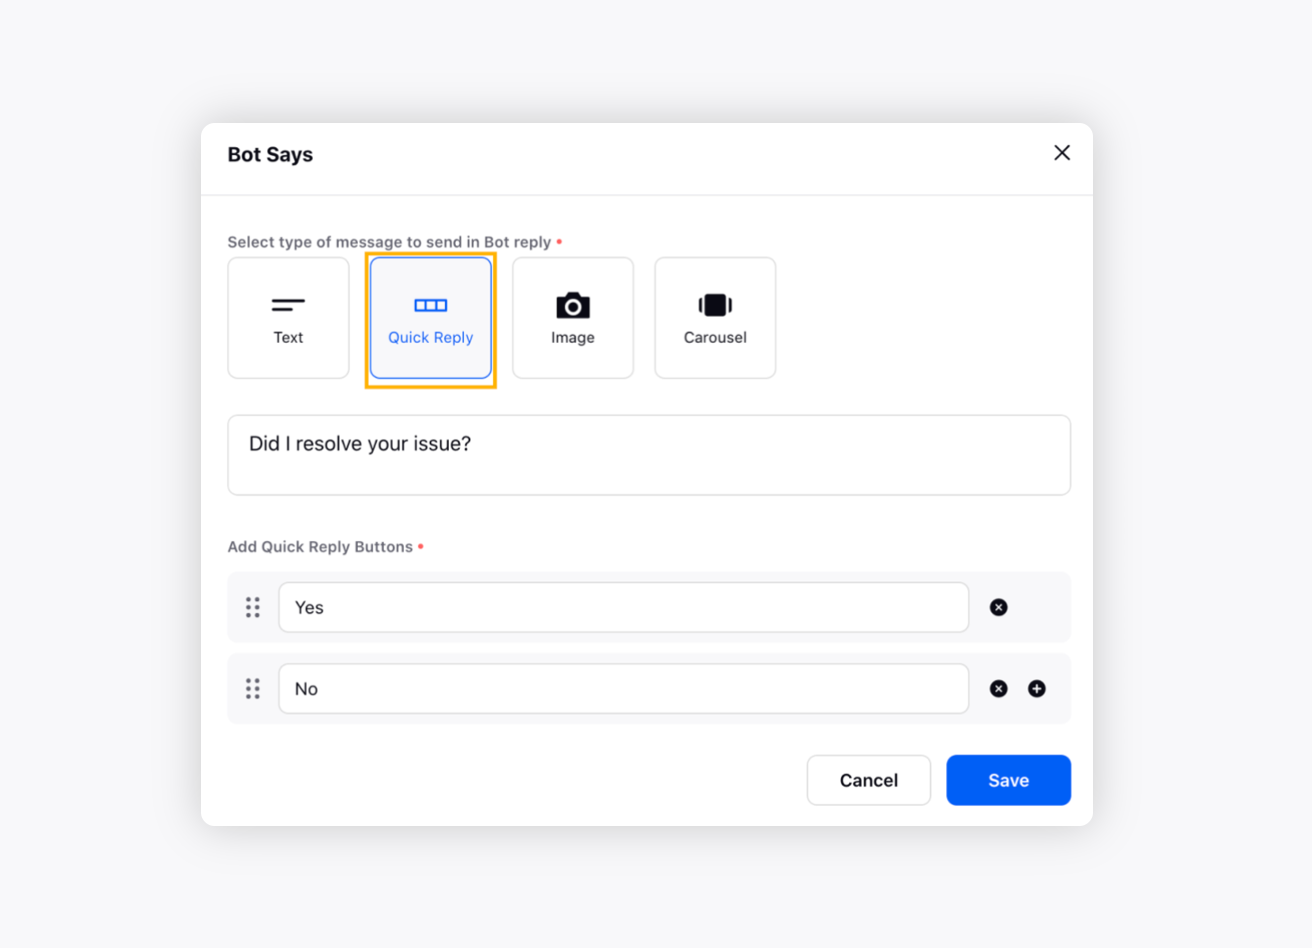
Click the Plus icon and select Bot Says to set a message that would be sent to a customer as a reply or as a proactive message.
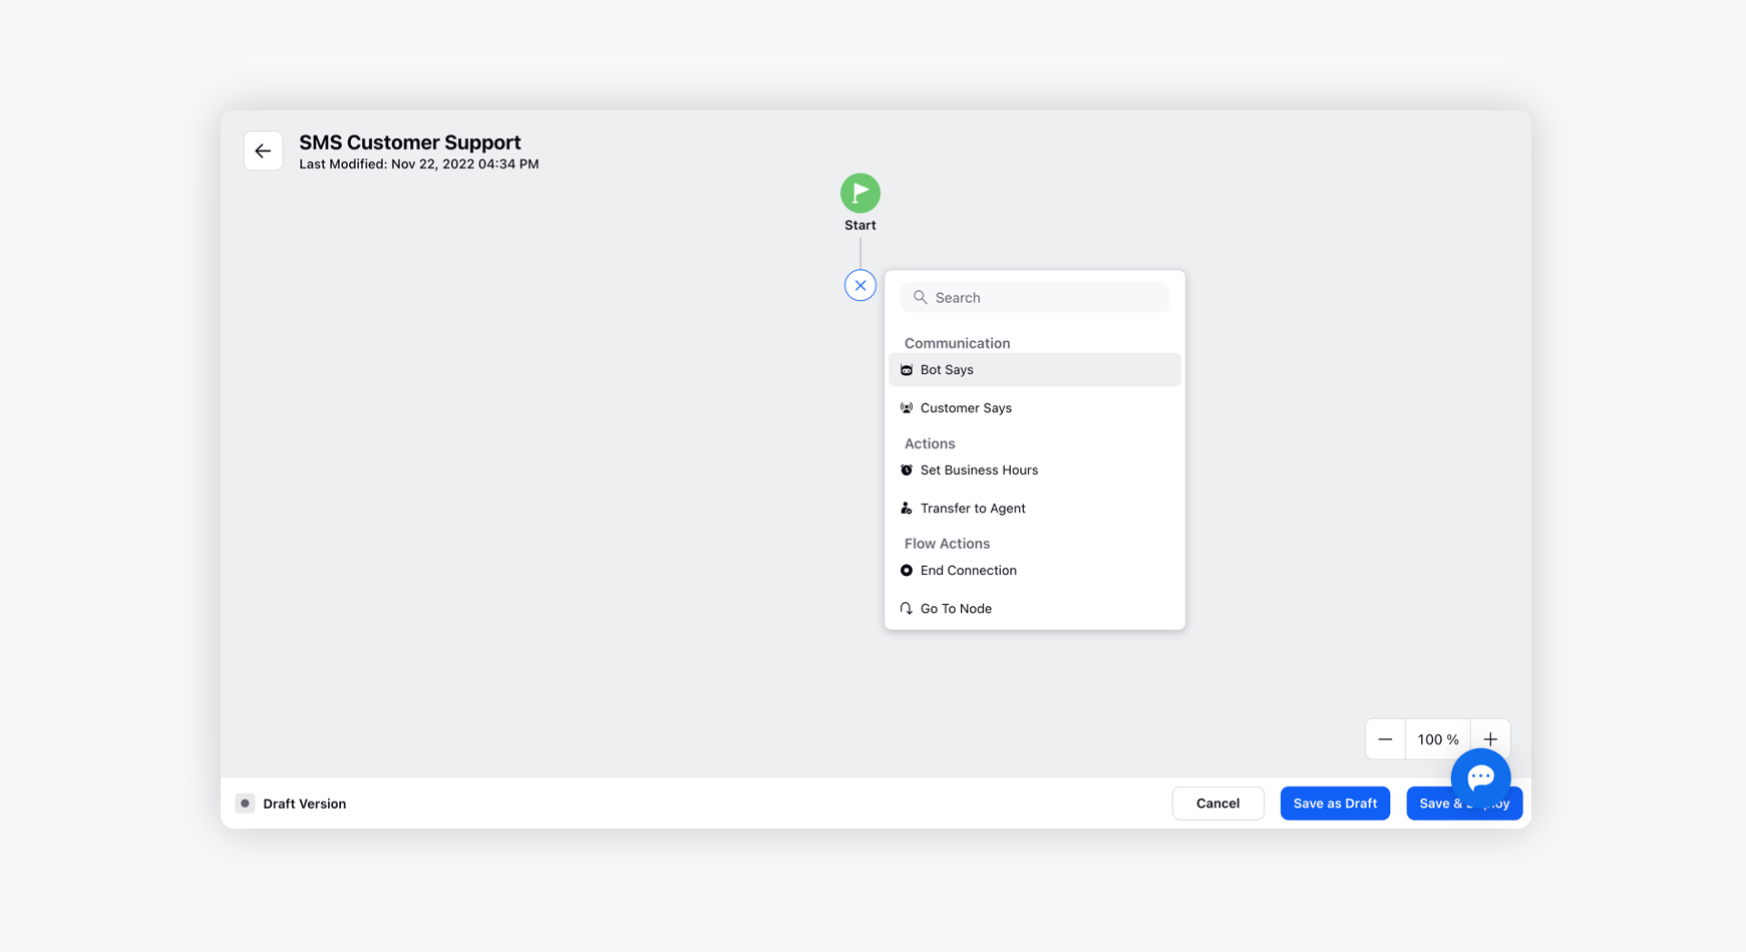
Communications
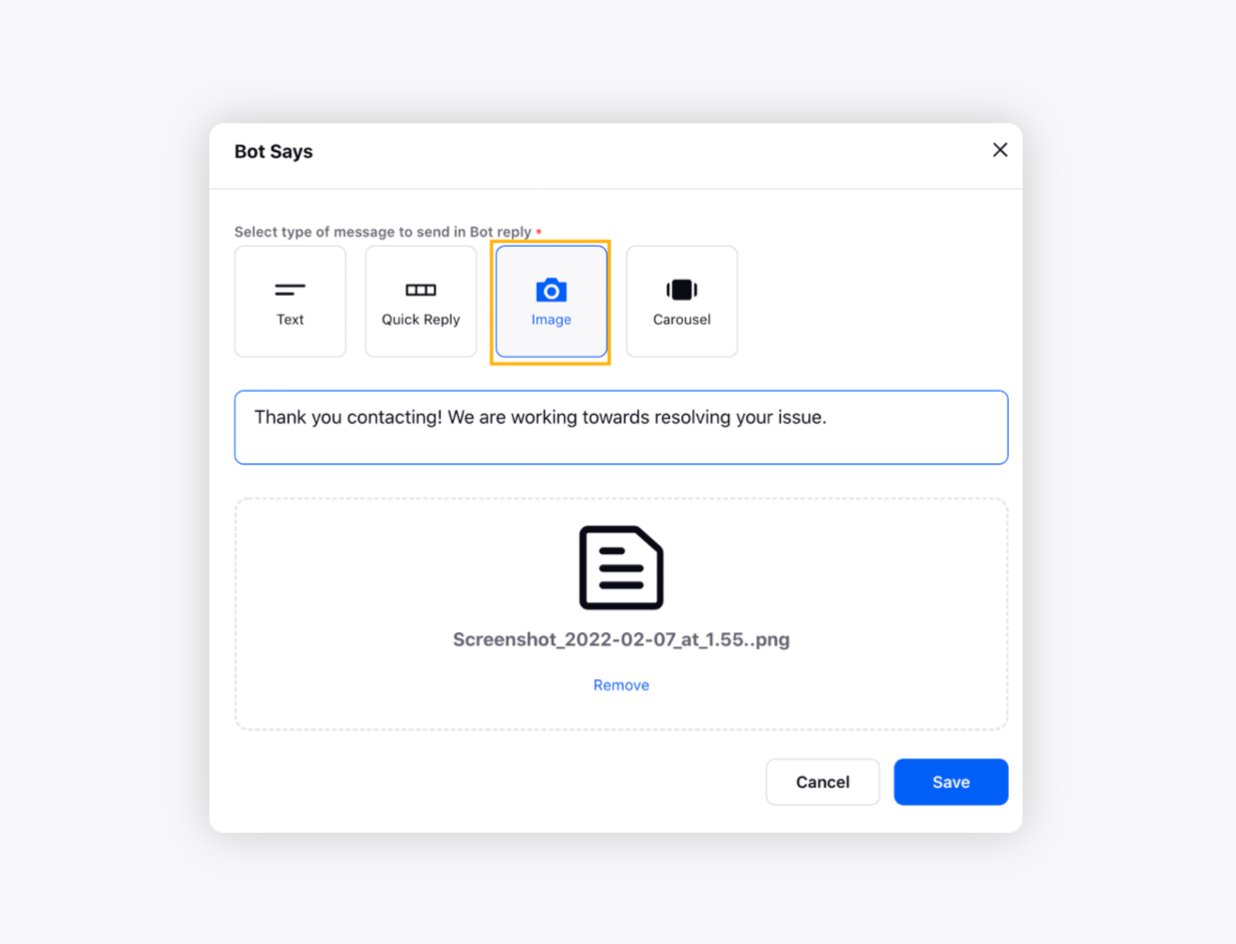
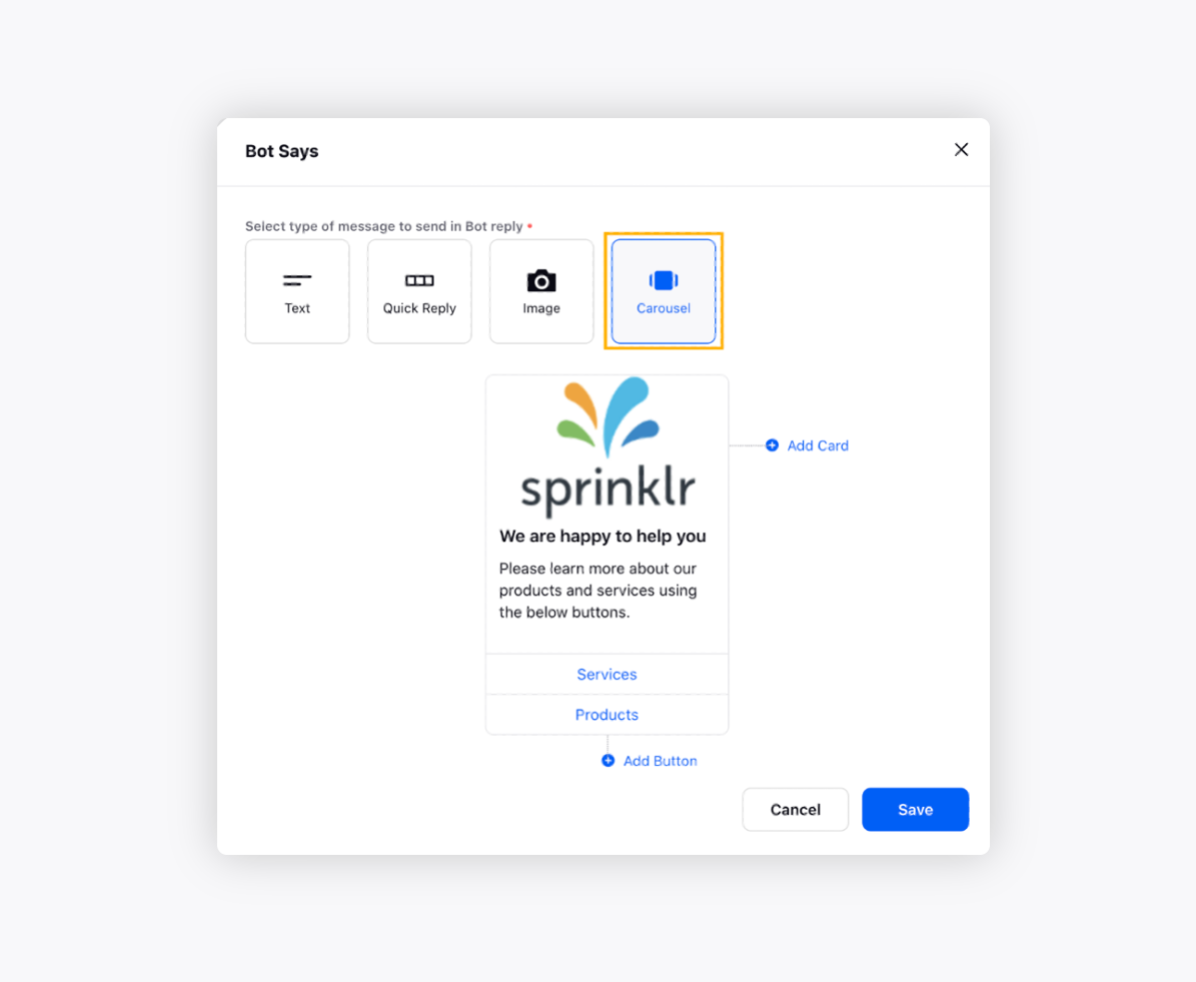
On the Bot Says pop-up window, select the desired message type. For more information, see Message Type — Description.
Click Save.
Again, click the Plus icon and select the Customer Says option to configure customer intent based on their reply. To learn more about Intent, see Chat Bot Intents.

Actions
Click Set Business Hours and select the desired business hour from the drop-down. You can even create a new Business Hour by clicking Create Business Hour as well. Setting up a Business hour in a Bot is similar to Automation. It helps to define scenarios outside business hours in Chat Bots. To learn more about creating business hours, see Business Hours.
If a customer wishes to talk to an agent, you may select the Transfer to Agent option and select the specific Queue from the drop-down menu. This action will automatically route the customer to an agent queue to resolve the customer issue.
Flow Actions
Finally, select End Connection to conclude the conversation between the Bot and the customer.
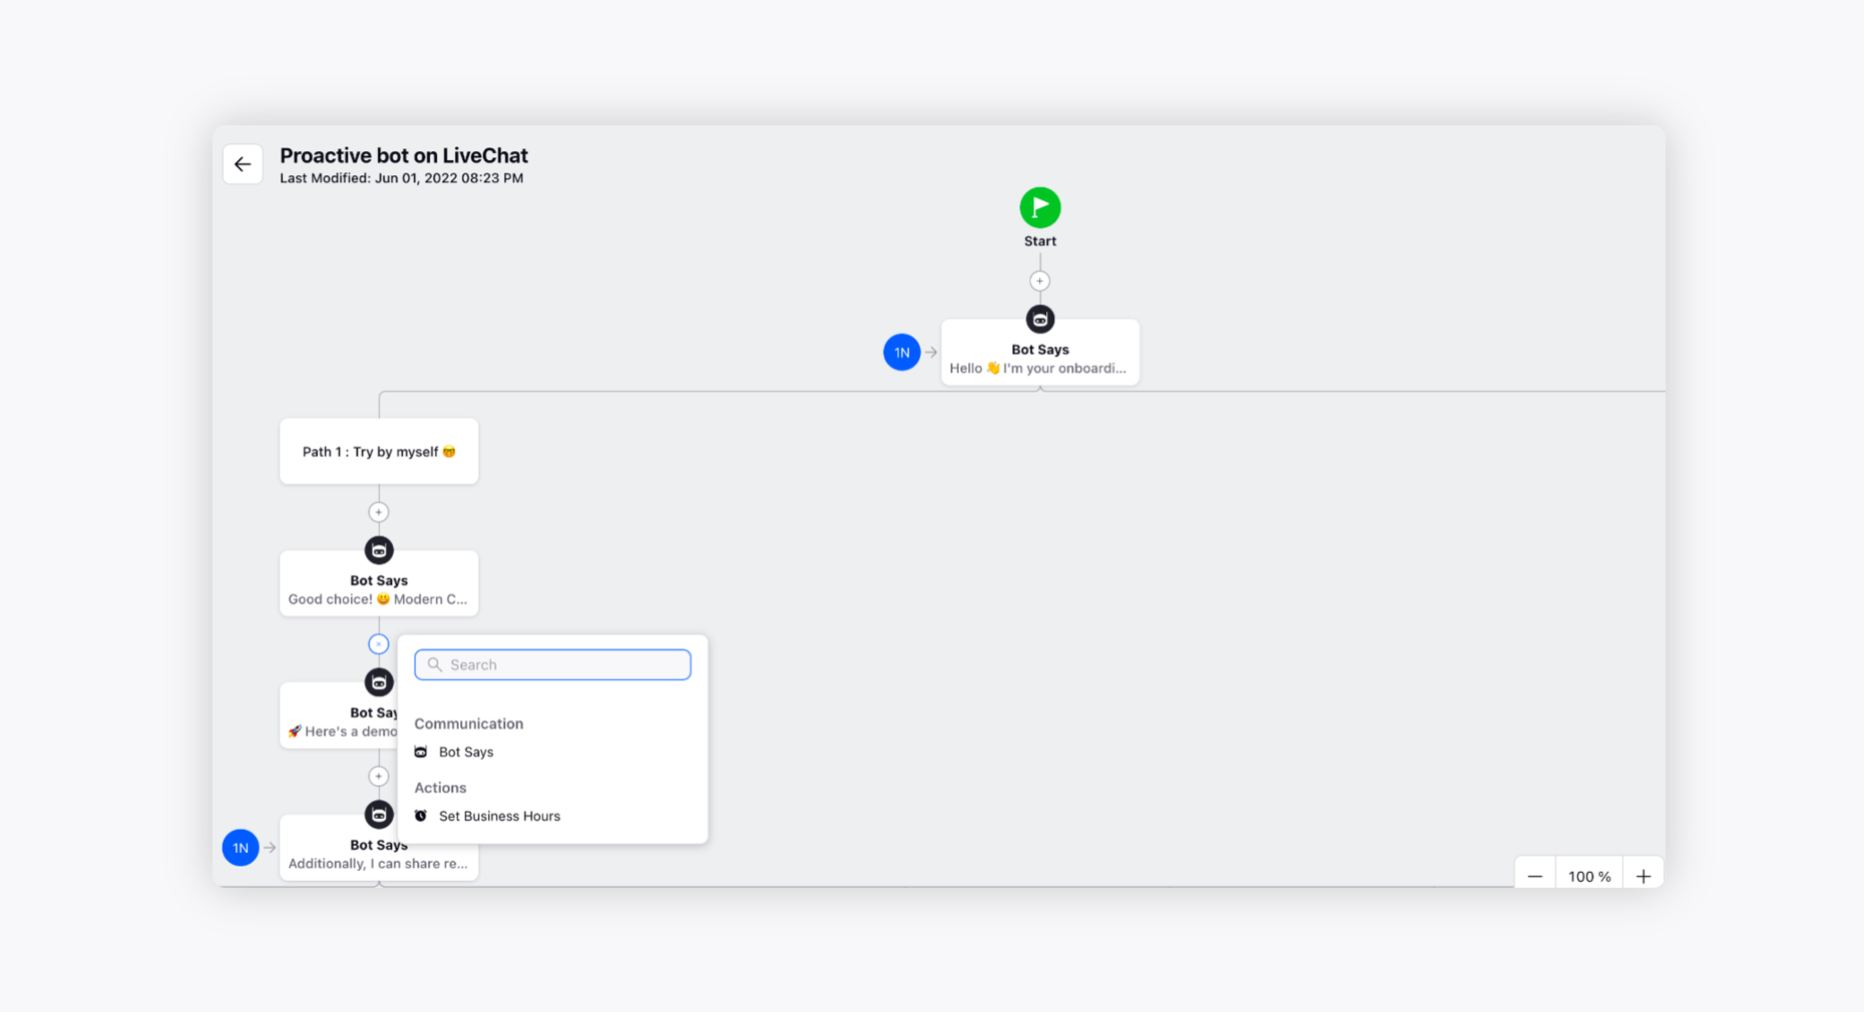
To insert a node in between the Chat Bot flow, click the + icon below any path and choose the desired communication or action point depending upon the conversation flow.
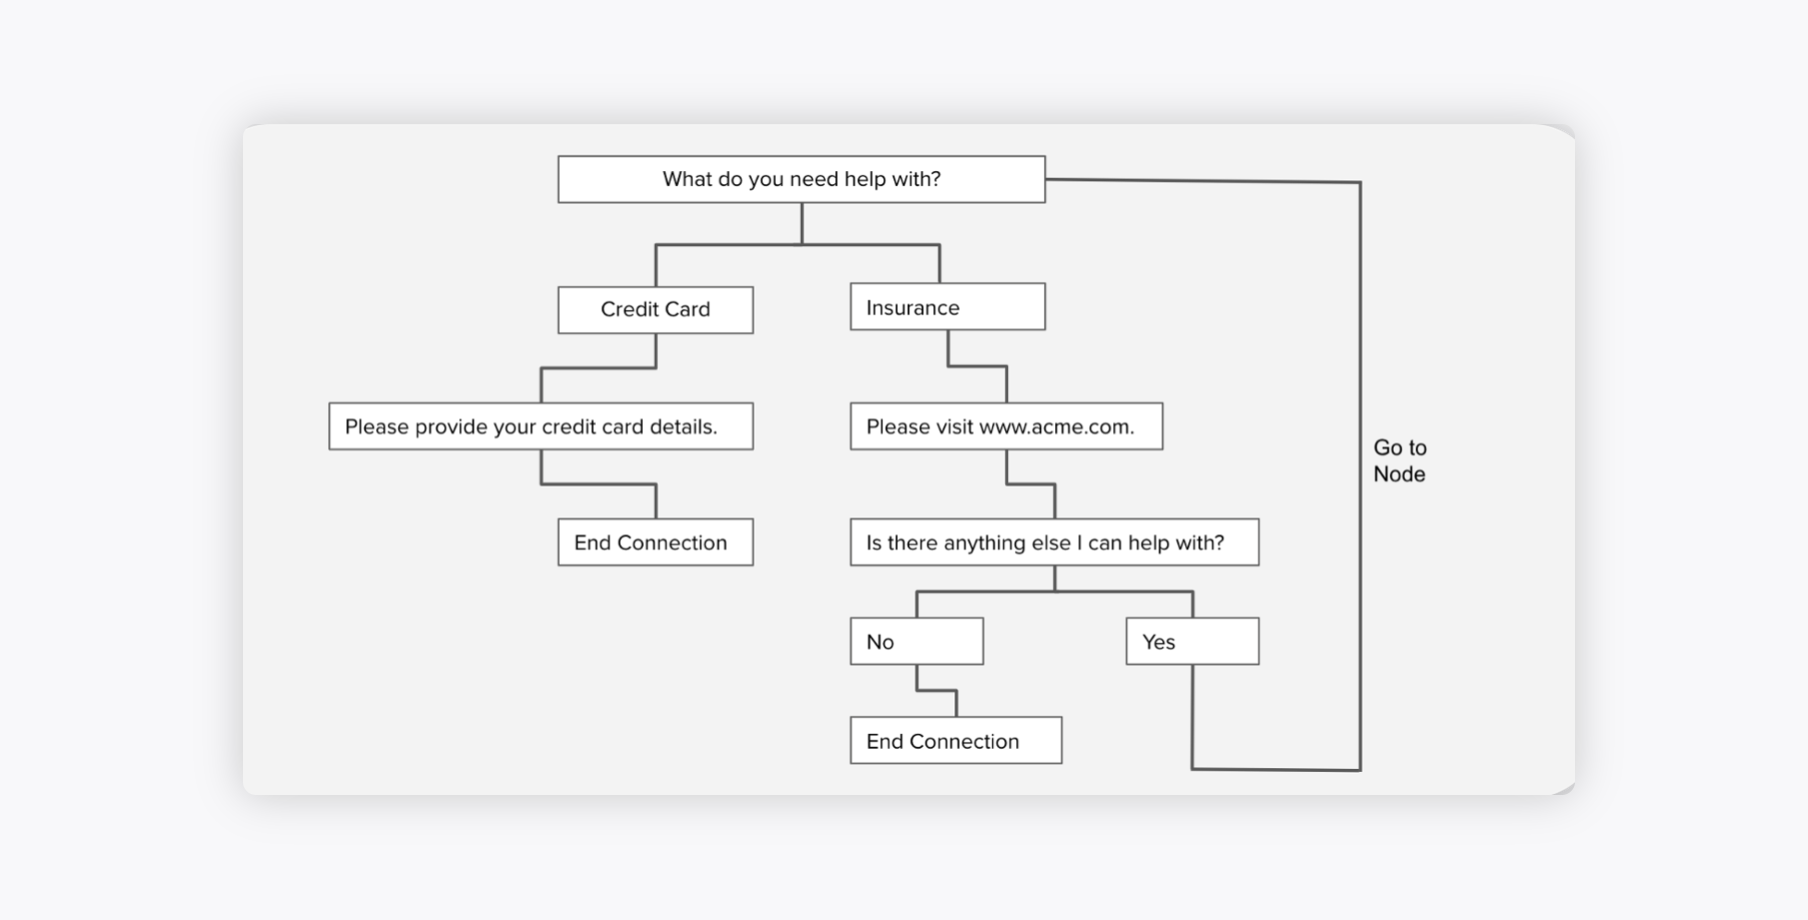
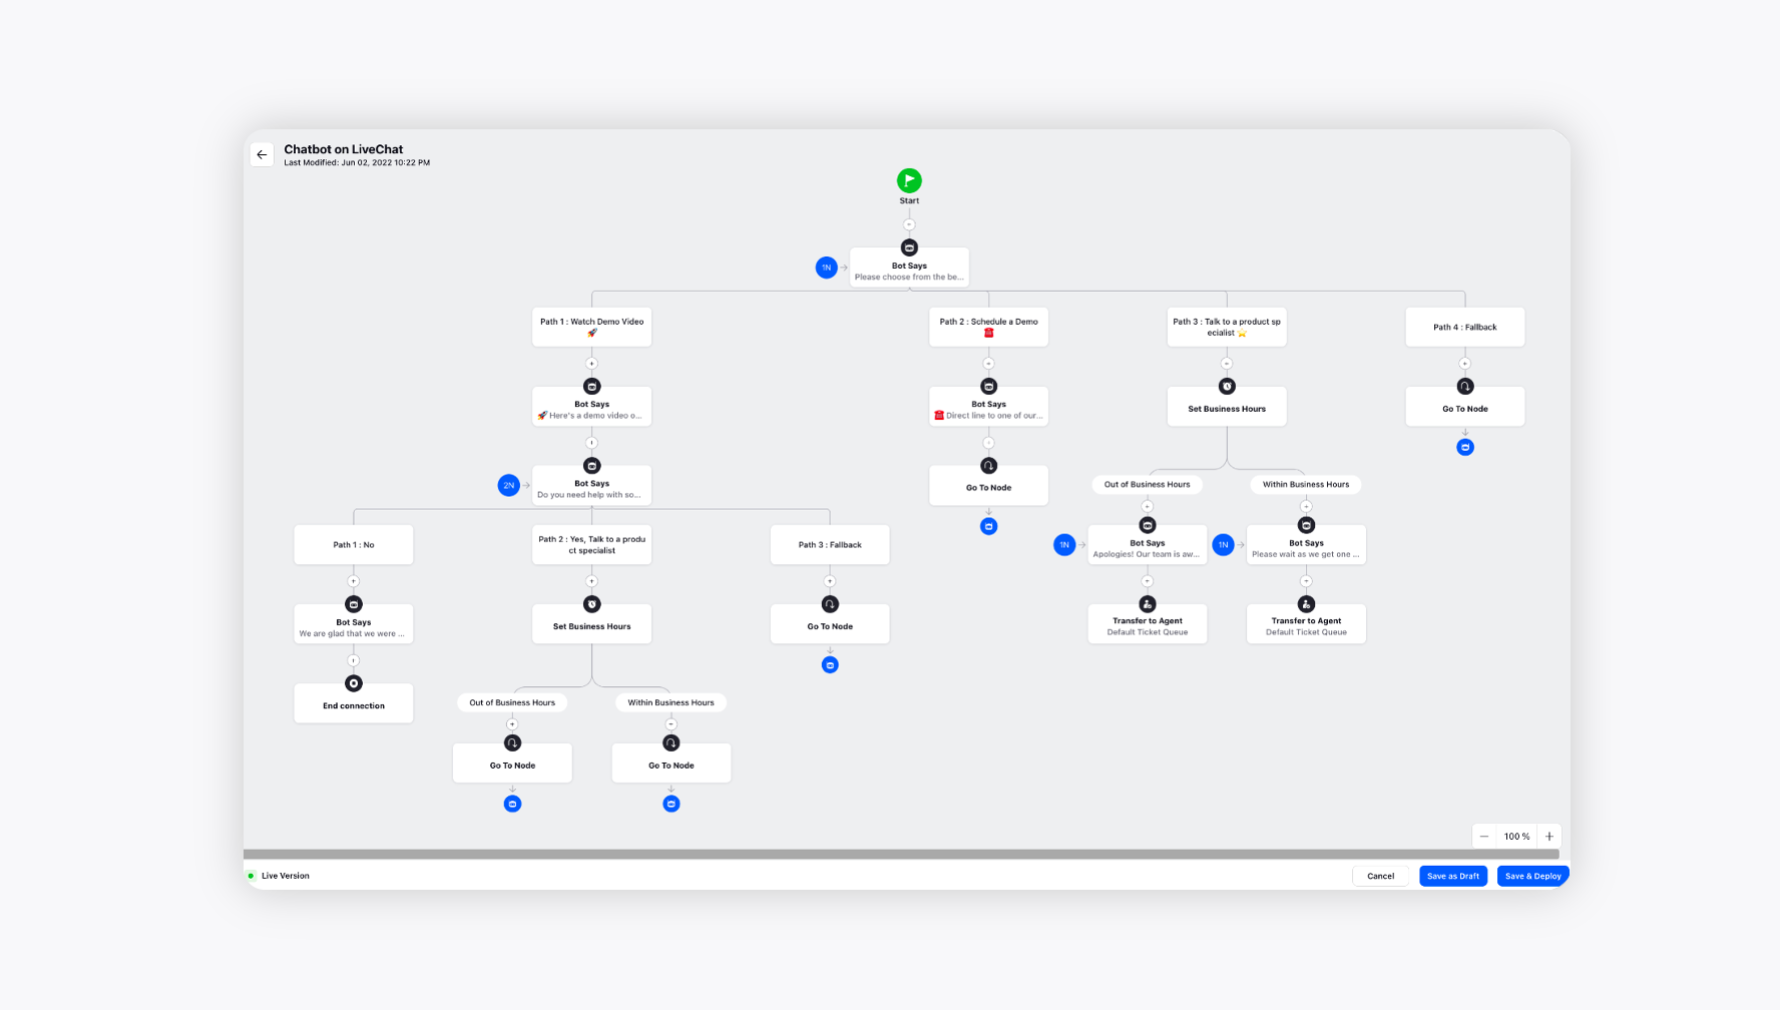
Click the Go to Node option and select the conversation point where one needs to redirect the customer in the conversation. This option can help in creating a loop (as depicted in the below image) with the previous conversation and redirect customers to a specific conversation point. It can also be used to switch from one conversation flow to another given within the same Chat Bot.
Click Save as Draft in the bottom right corner in case you want to come again and make changes to the Bot flow and then click Save & Deploy in the bottom right corner to finalise and enable the Chat Bot on the configured channels.
To edit Chat Bot responses
Based on customer questions and responses, one can add and remove the specific responses of the Chat Bots and ensure a smooth engagement between the Bot and the customers.
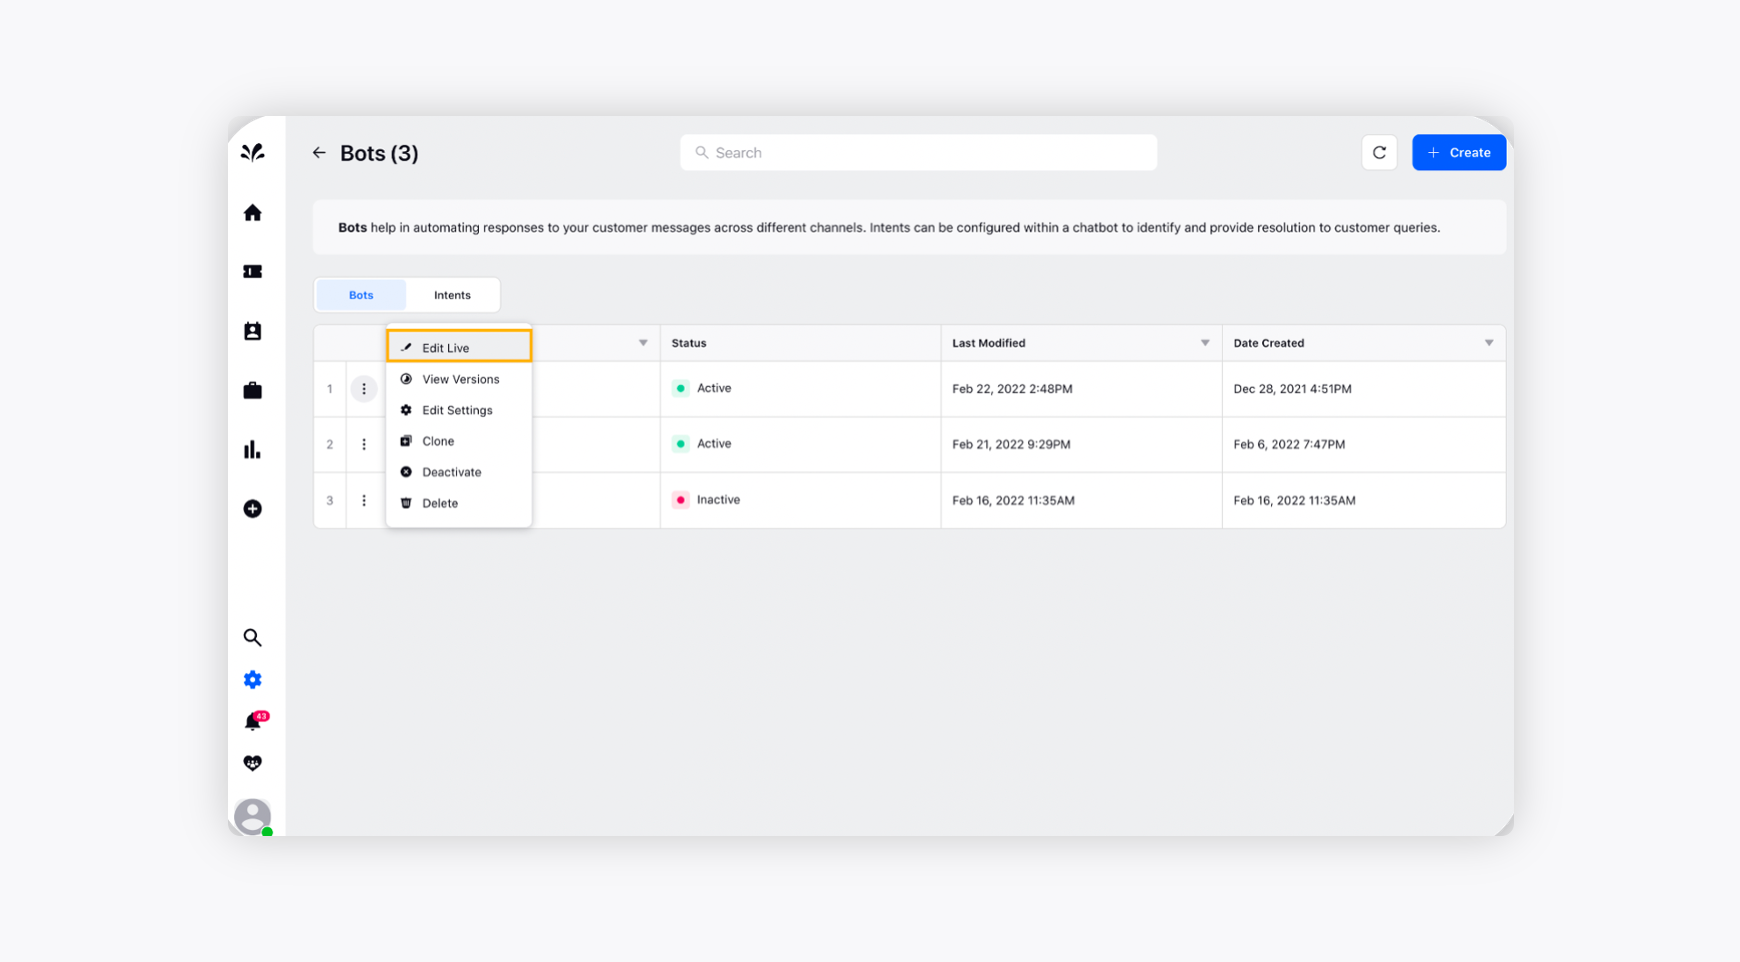
Hover over the Vertical Ellipsis icon on the Bots window and click Edit Live alongside the desired Bot.
Now, you can make changes to the Chat Bot flow wherever it is required. Click Save and Deploy after finalising the changes. You can also Save as Draft if you are not sure about the Bot workflow and want to come back again and make changes.
To check the Chat Bot version history
Sprinklr Advanced supports the version history of Chat Bots. It gives a running list of the changes that have occurred in the Bot over its lifetime. Specifically, version history gives you an access to old copies of the Bot and shows the information about who created each version and when.
Hover over the Vertical Ellipsis icon on the Bots window and click View Versions alongside the desired Bot.

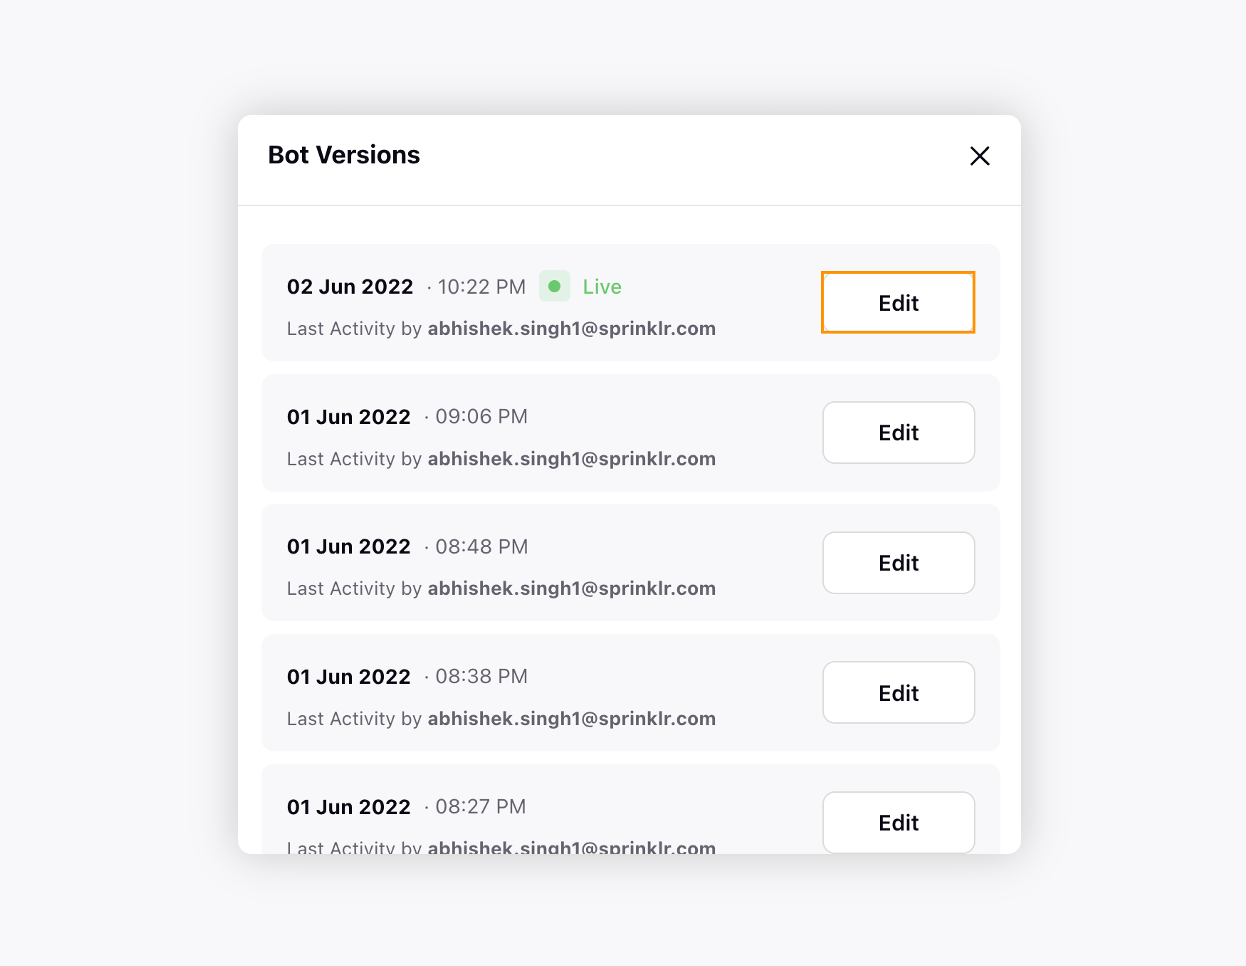
On the Bot Versions pop-up window, you can view the copies of the previous versions along with the time and name of the creator. Click View alongside the desired copy. It will redirect you to the edit window, where you can make changes as per your requirements.
To view Chat Bot conversation in Care Console
To keep the agents in the loop and to avoid any information gap, you can also view all the Chat Bot tickets in the Care Console. It helps the agents understand the customer's queries and provide resolution accordingly.
On the Sprinklr Advanced Home window, click on the Tickets icon in the left navigation pane.
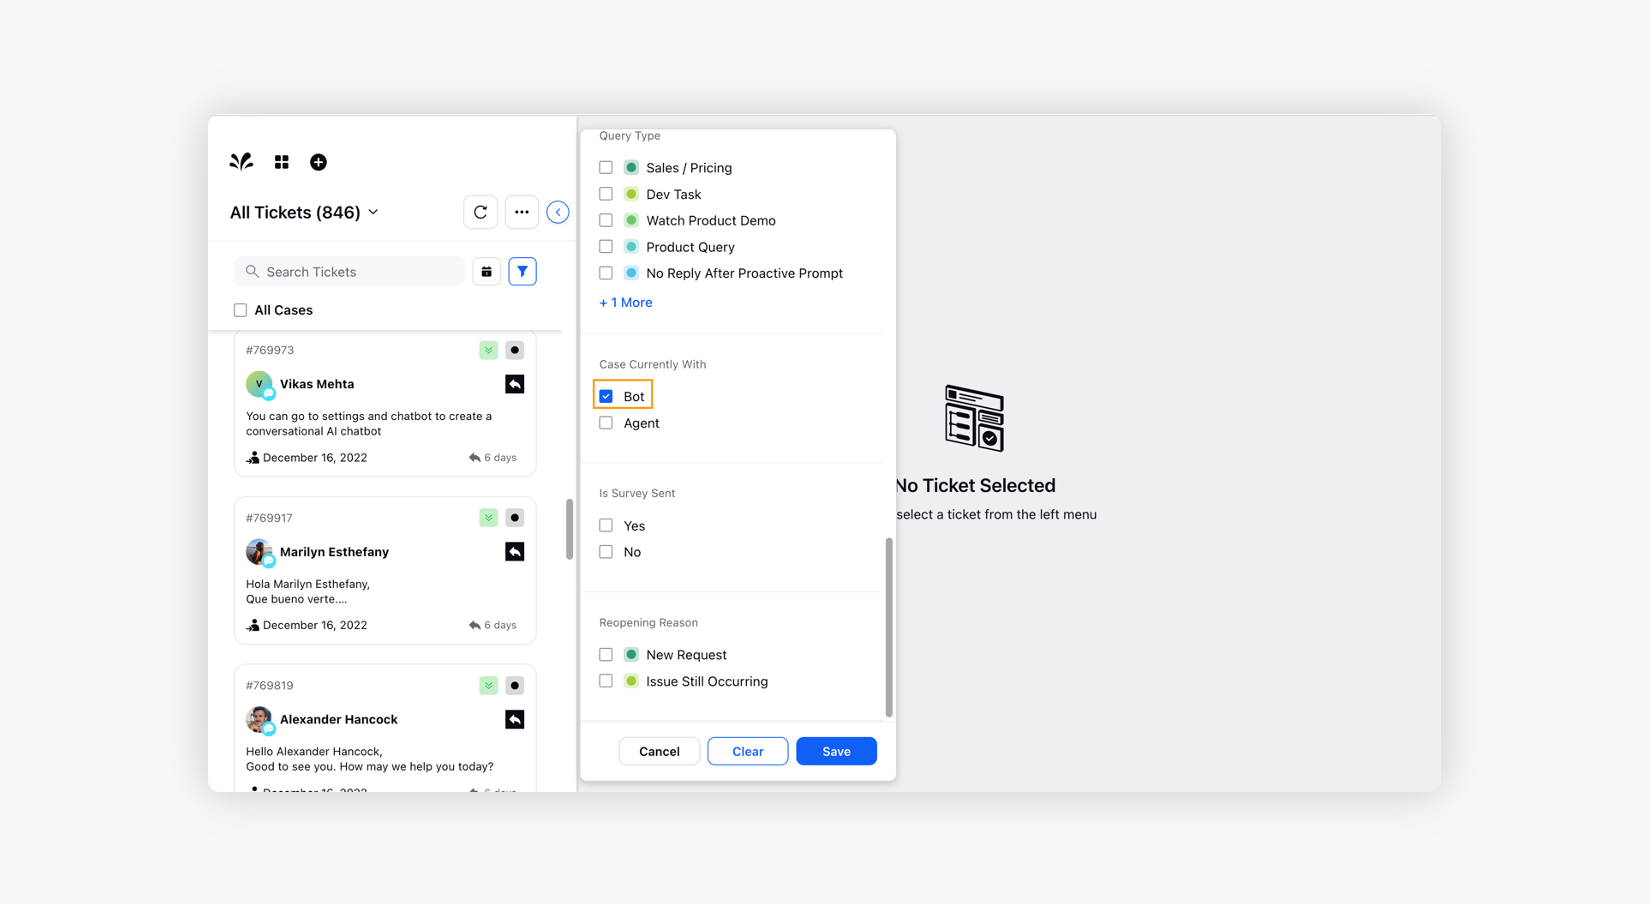
Select the Filter icon on Ticket Stream.
Scroll down to the Case Currently With section and check the box alongside the Bot filter. Click Save in the bottom right corner. This way, an agent can view all the Chat Bot tickets in the ticket stream and take action as they like.
To use Assign to Myself option in Care Console
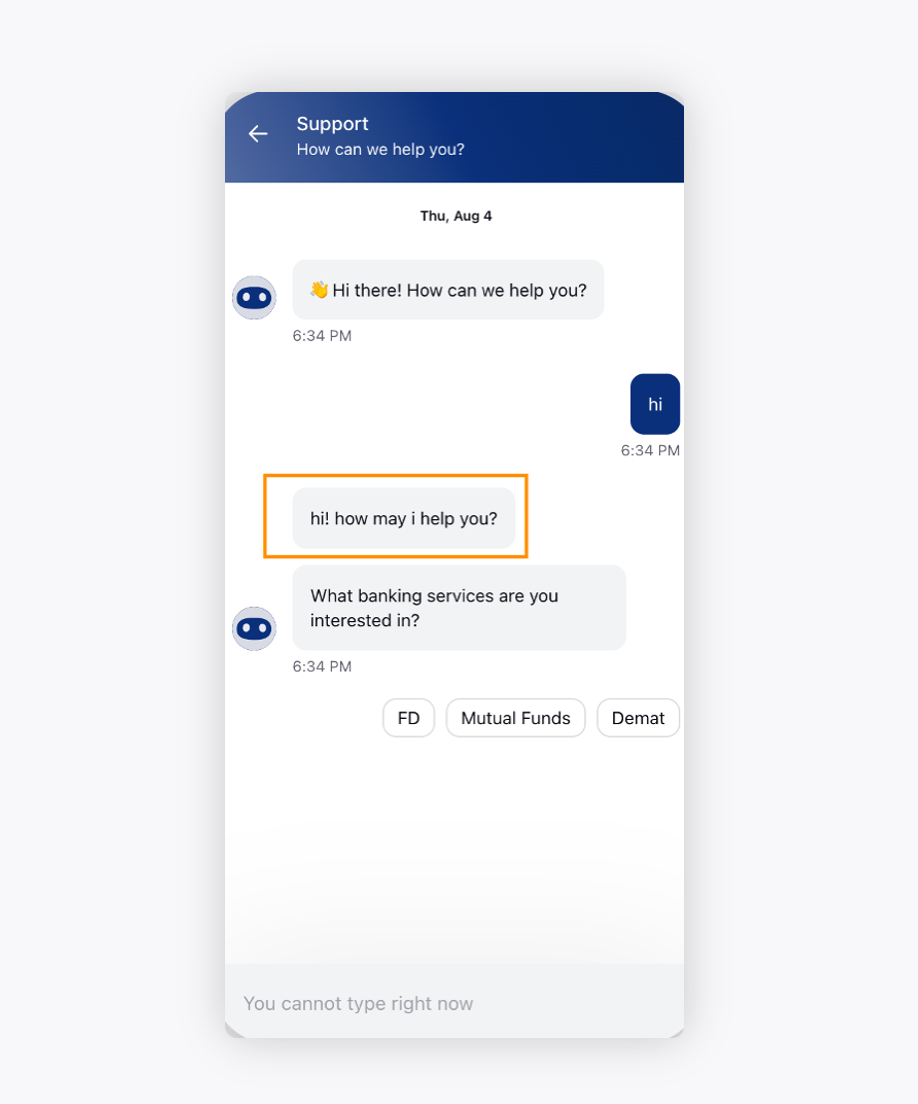
You can hand over a Bot conversation to an agent anytime during the conversation with the Assign to Myself option in the Care Console. Once enabled, this option allows agents to attend to the customer in the middle of a Bot conversation. With the help of this capability, the agents have the option to manage disgruntled or VIP customers more diligently and manage the CSAT scores.
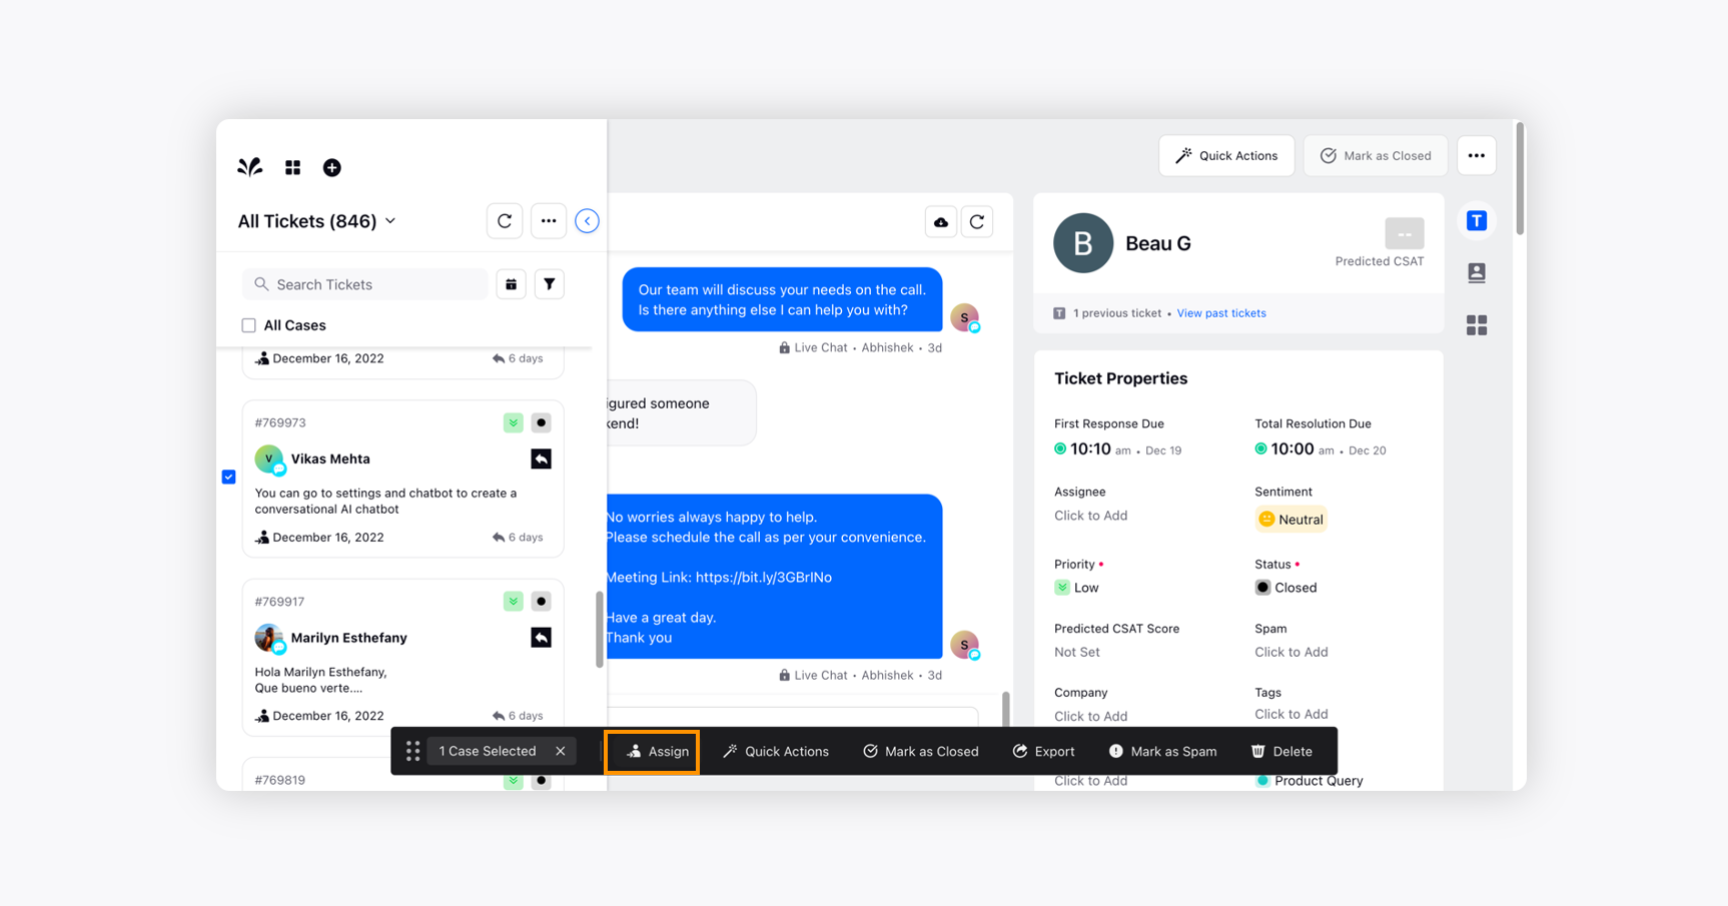
On the Sprinklr Advanced Home window, an agent needs to check box the desired Bot Ticket that they want to assign themselves.
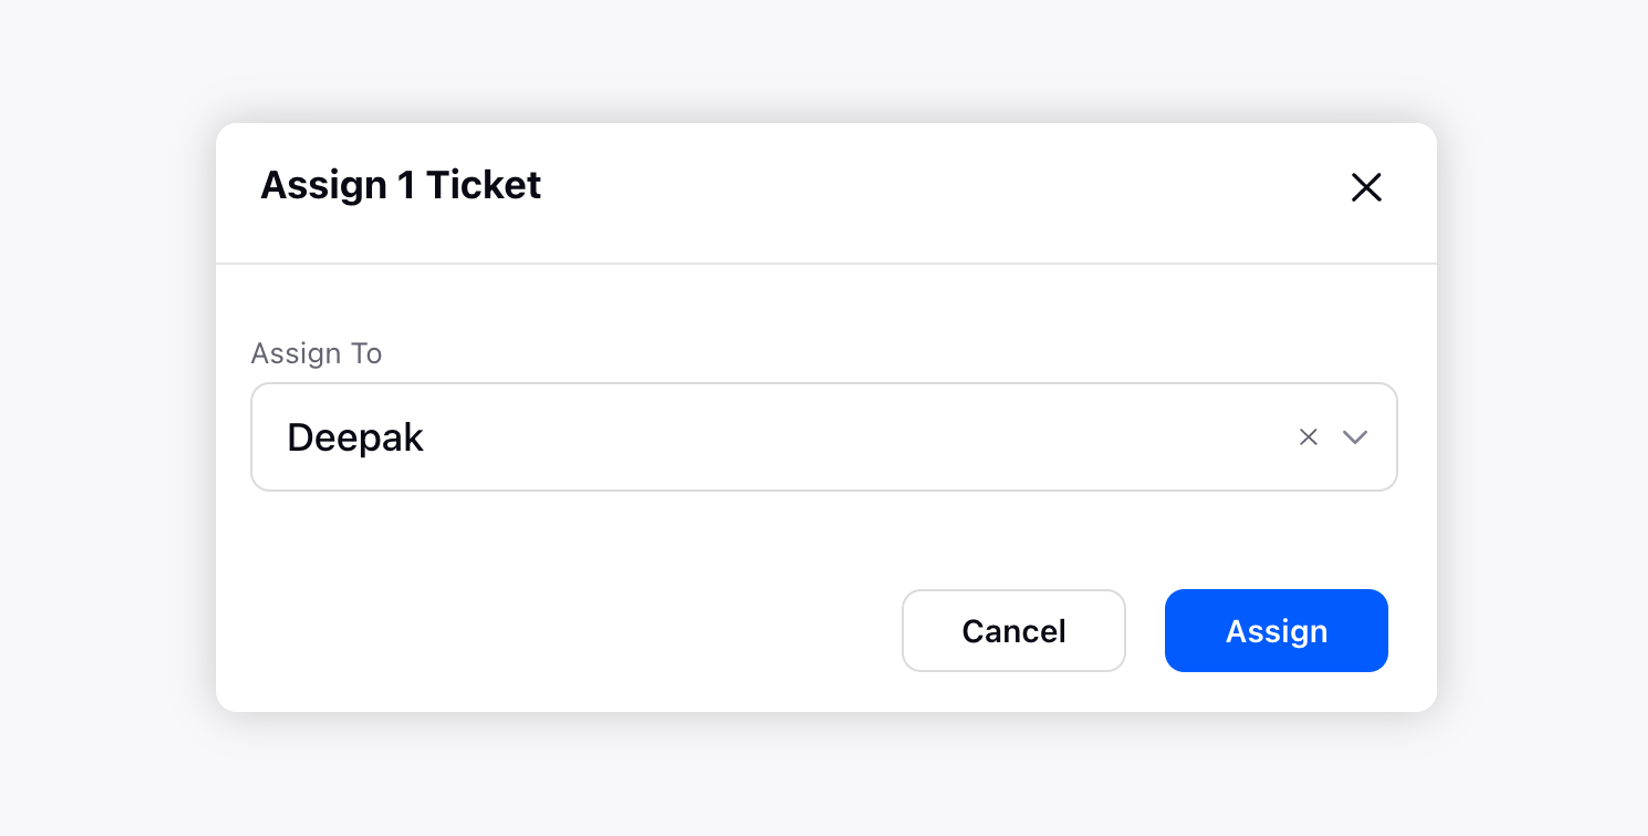
The agent may then click Assign button at the bottom
. This will assign the case to that particular agent. They can now start addressing the customer query.