
Creating & Using Approval Workflows: Assets, Posts & Messages
Updated
In the dynamic landscape of Sprinklr Social, the Approval Workflow feature emerges as a pivotal asset to streamline and regulate your approval processes for Posts, Messages, and Assets. This intuitive feature empowers you to establish step-by-step approval sequences, enhancing your governance over these essential components of your digital presence.
Approval Workflow serves as the guiding force that ensures your Posts, Messages, and Assets receive the necessary approvals in a structured manner. By enabling you to define approval steps and approvers, this feature guarantees smoother processes, reduced bottlenecks, and enhanced collaboration across your teams.
Let's explore creating and implementing Approval Workflows step-by-step:
1. Initiating Approval Workflow Creation: Initiate the process by navigating to Settings via the left pane of Sprinklr platform. From "Sprinklr Social" tab and choose "Approval Workflows" under the "Inbox and Publishing" section.

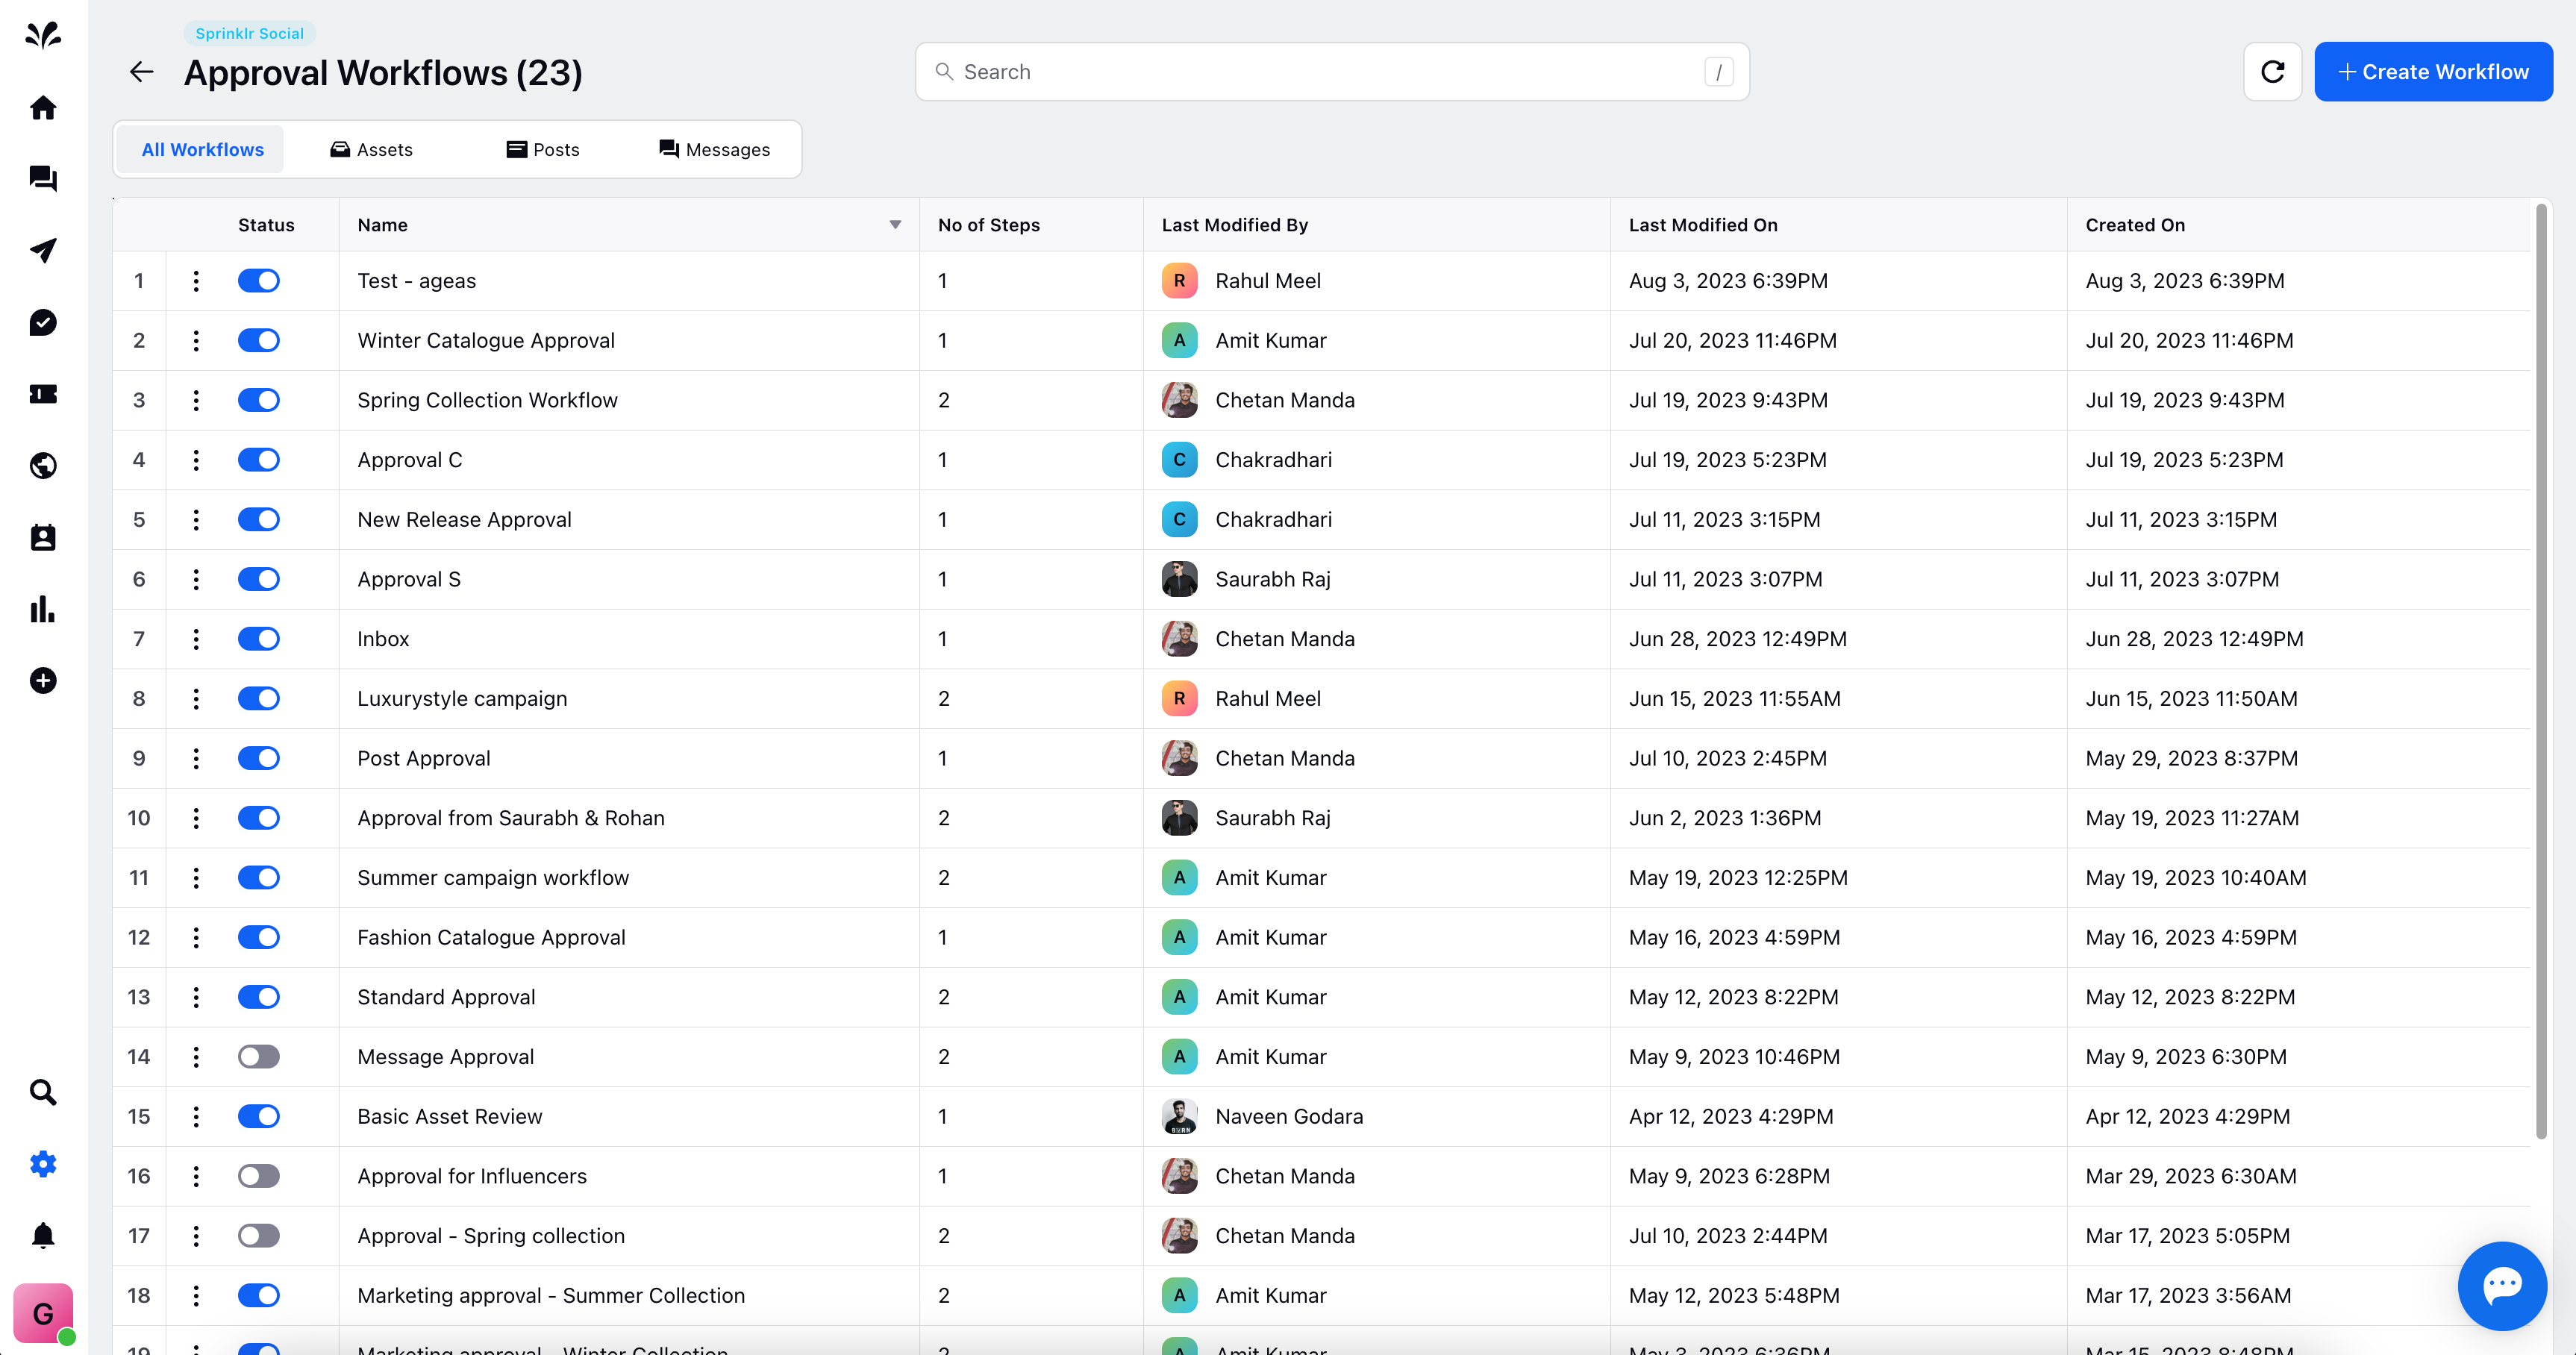
2. Creating an Approval Workflow: Begin your journey by accessing the Approval Workflow section. Click on "Create Workflow" situated at the upper right corner of the record manager page.
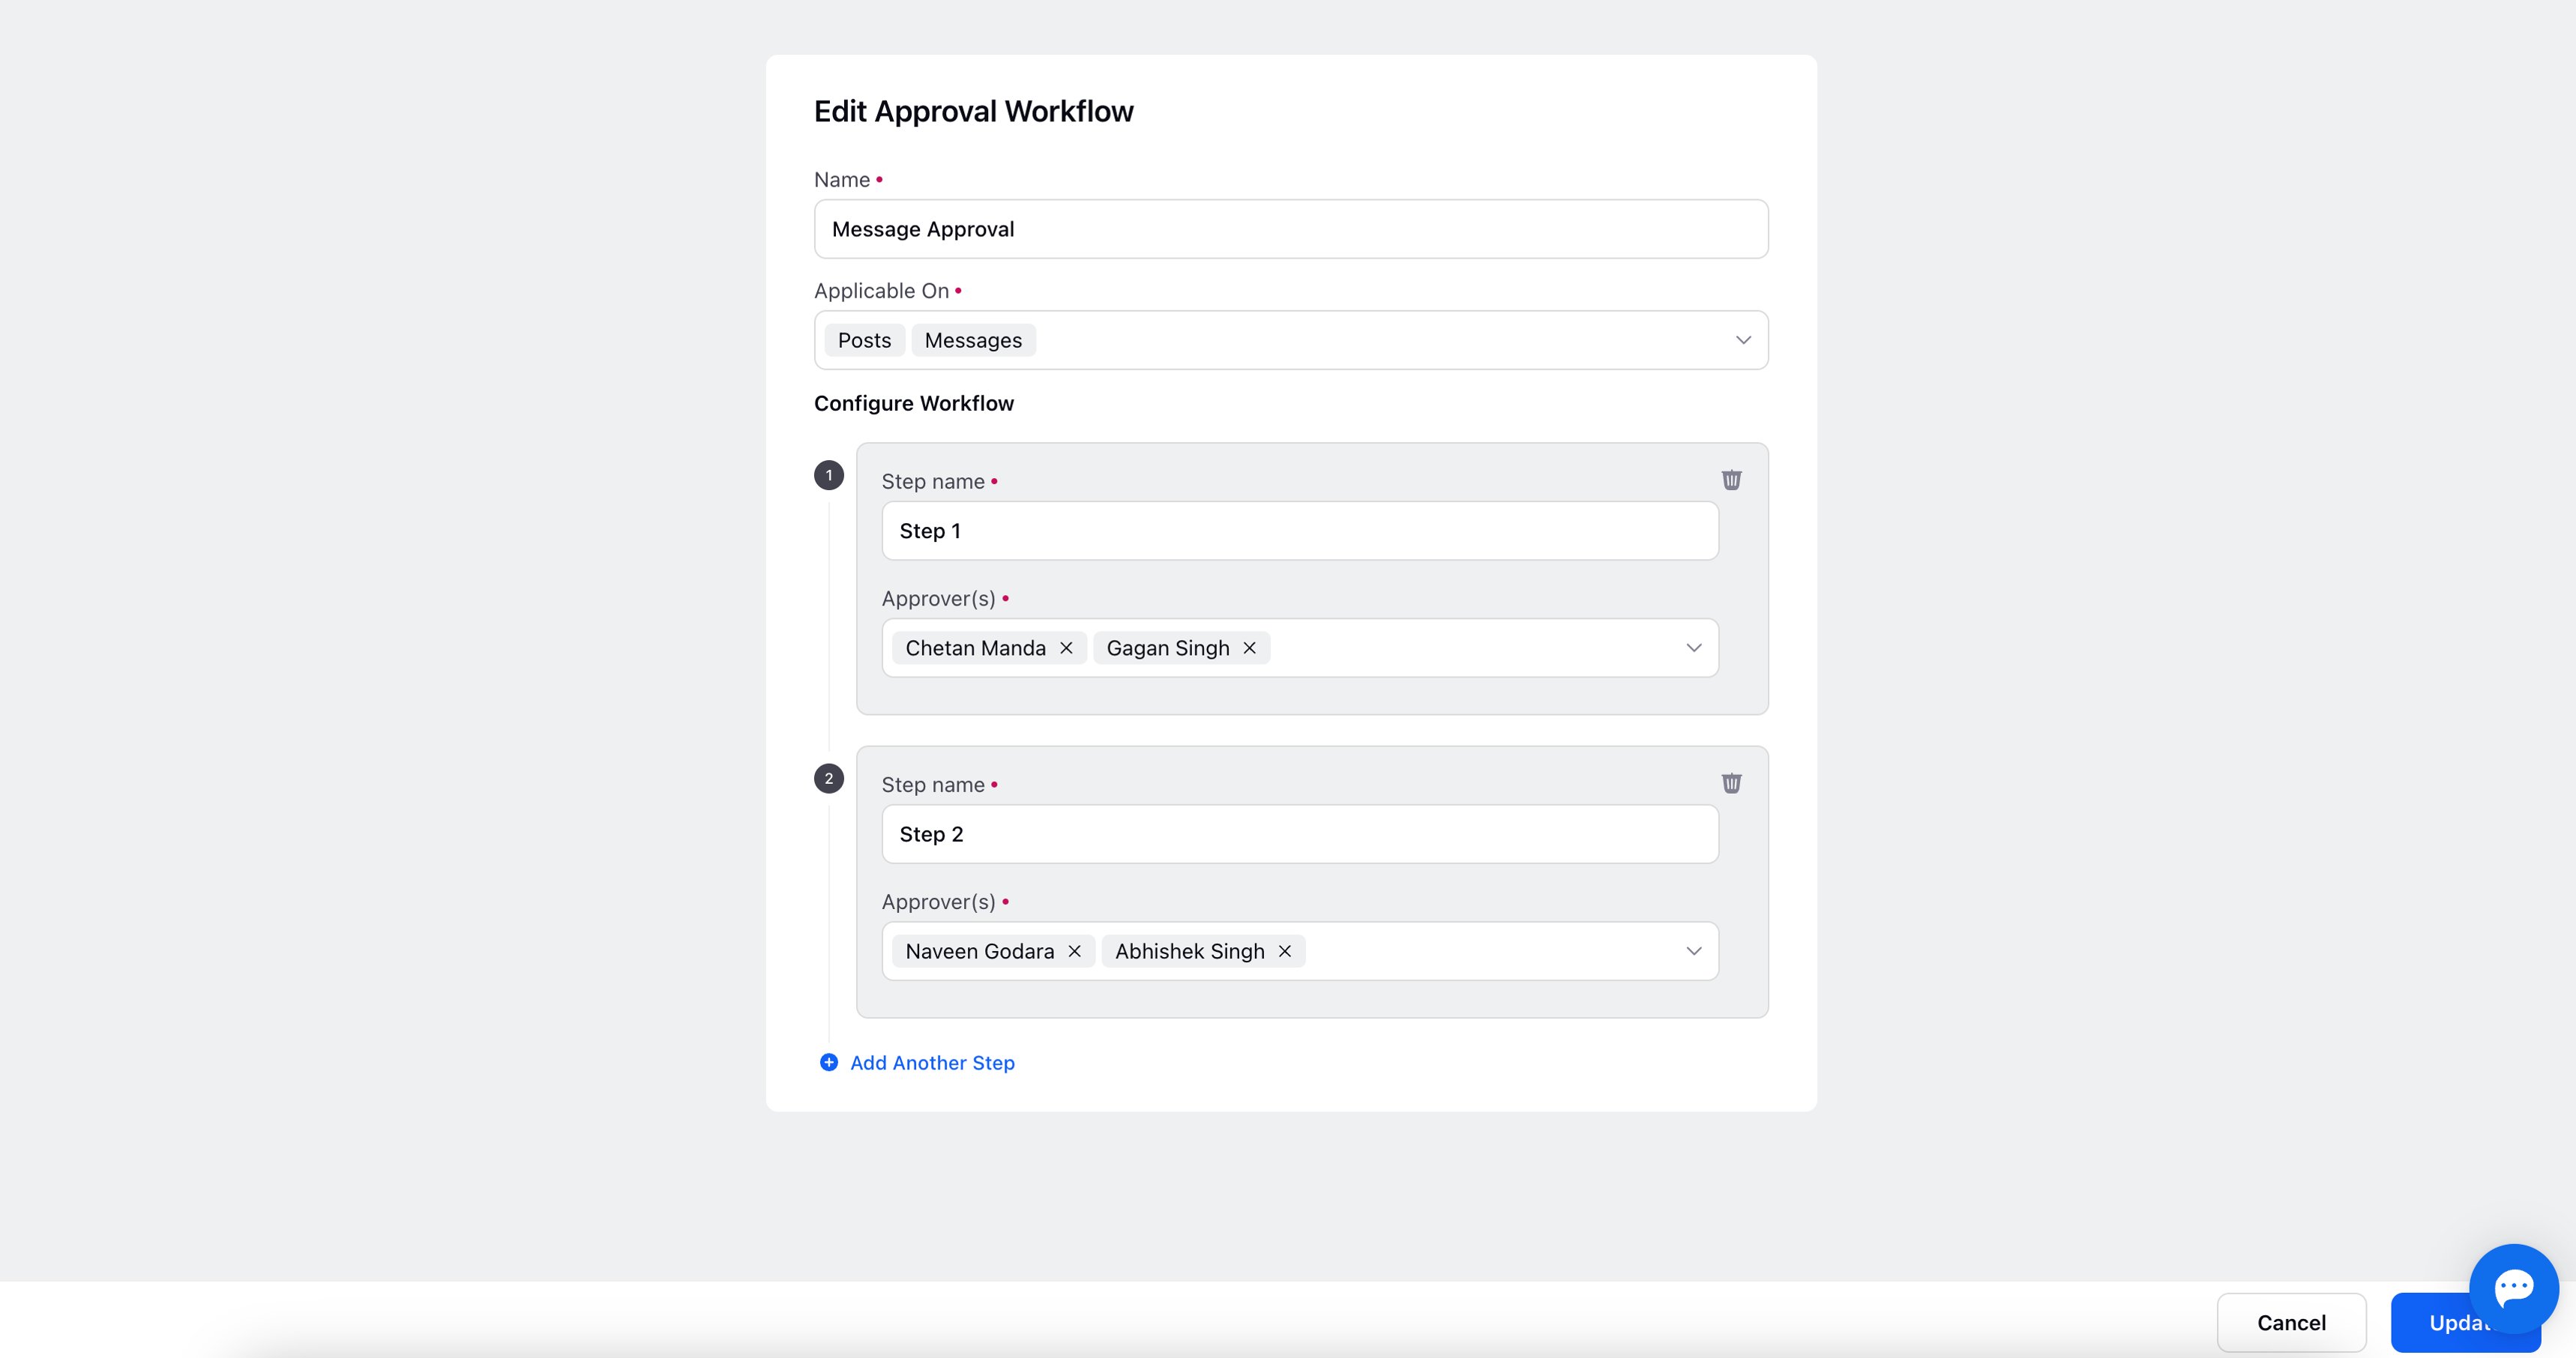
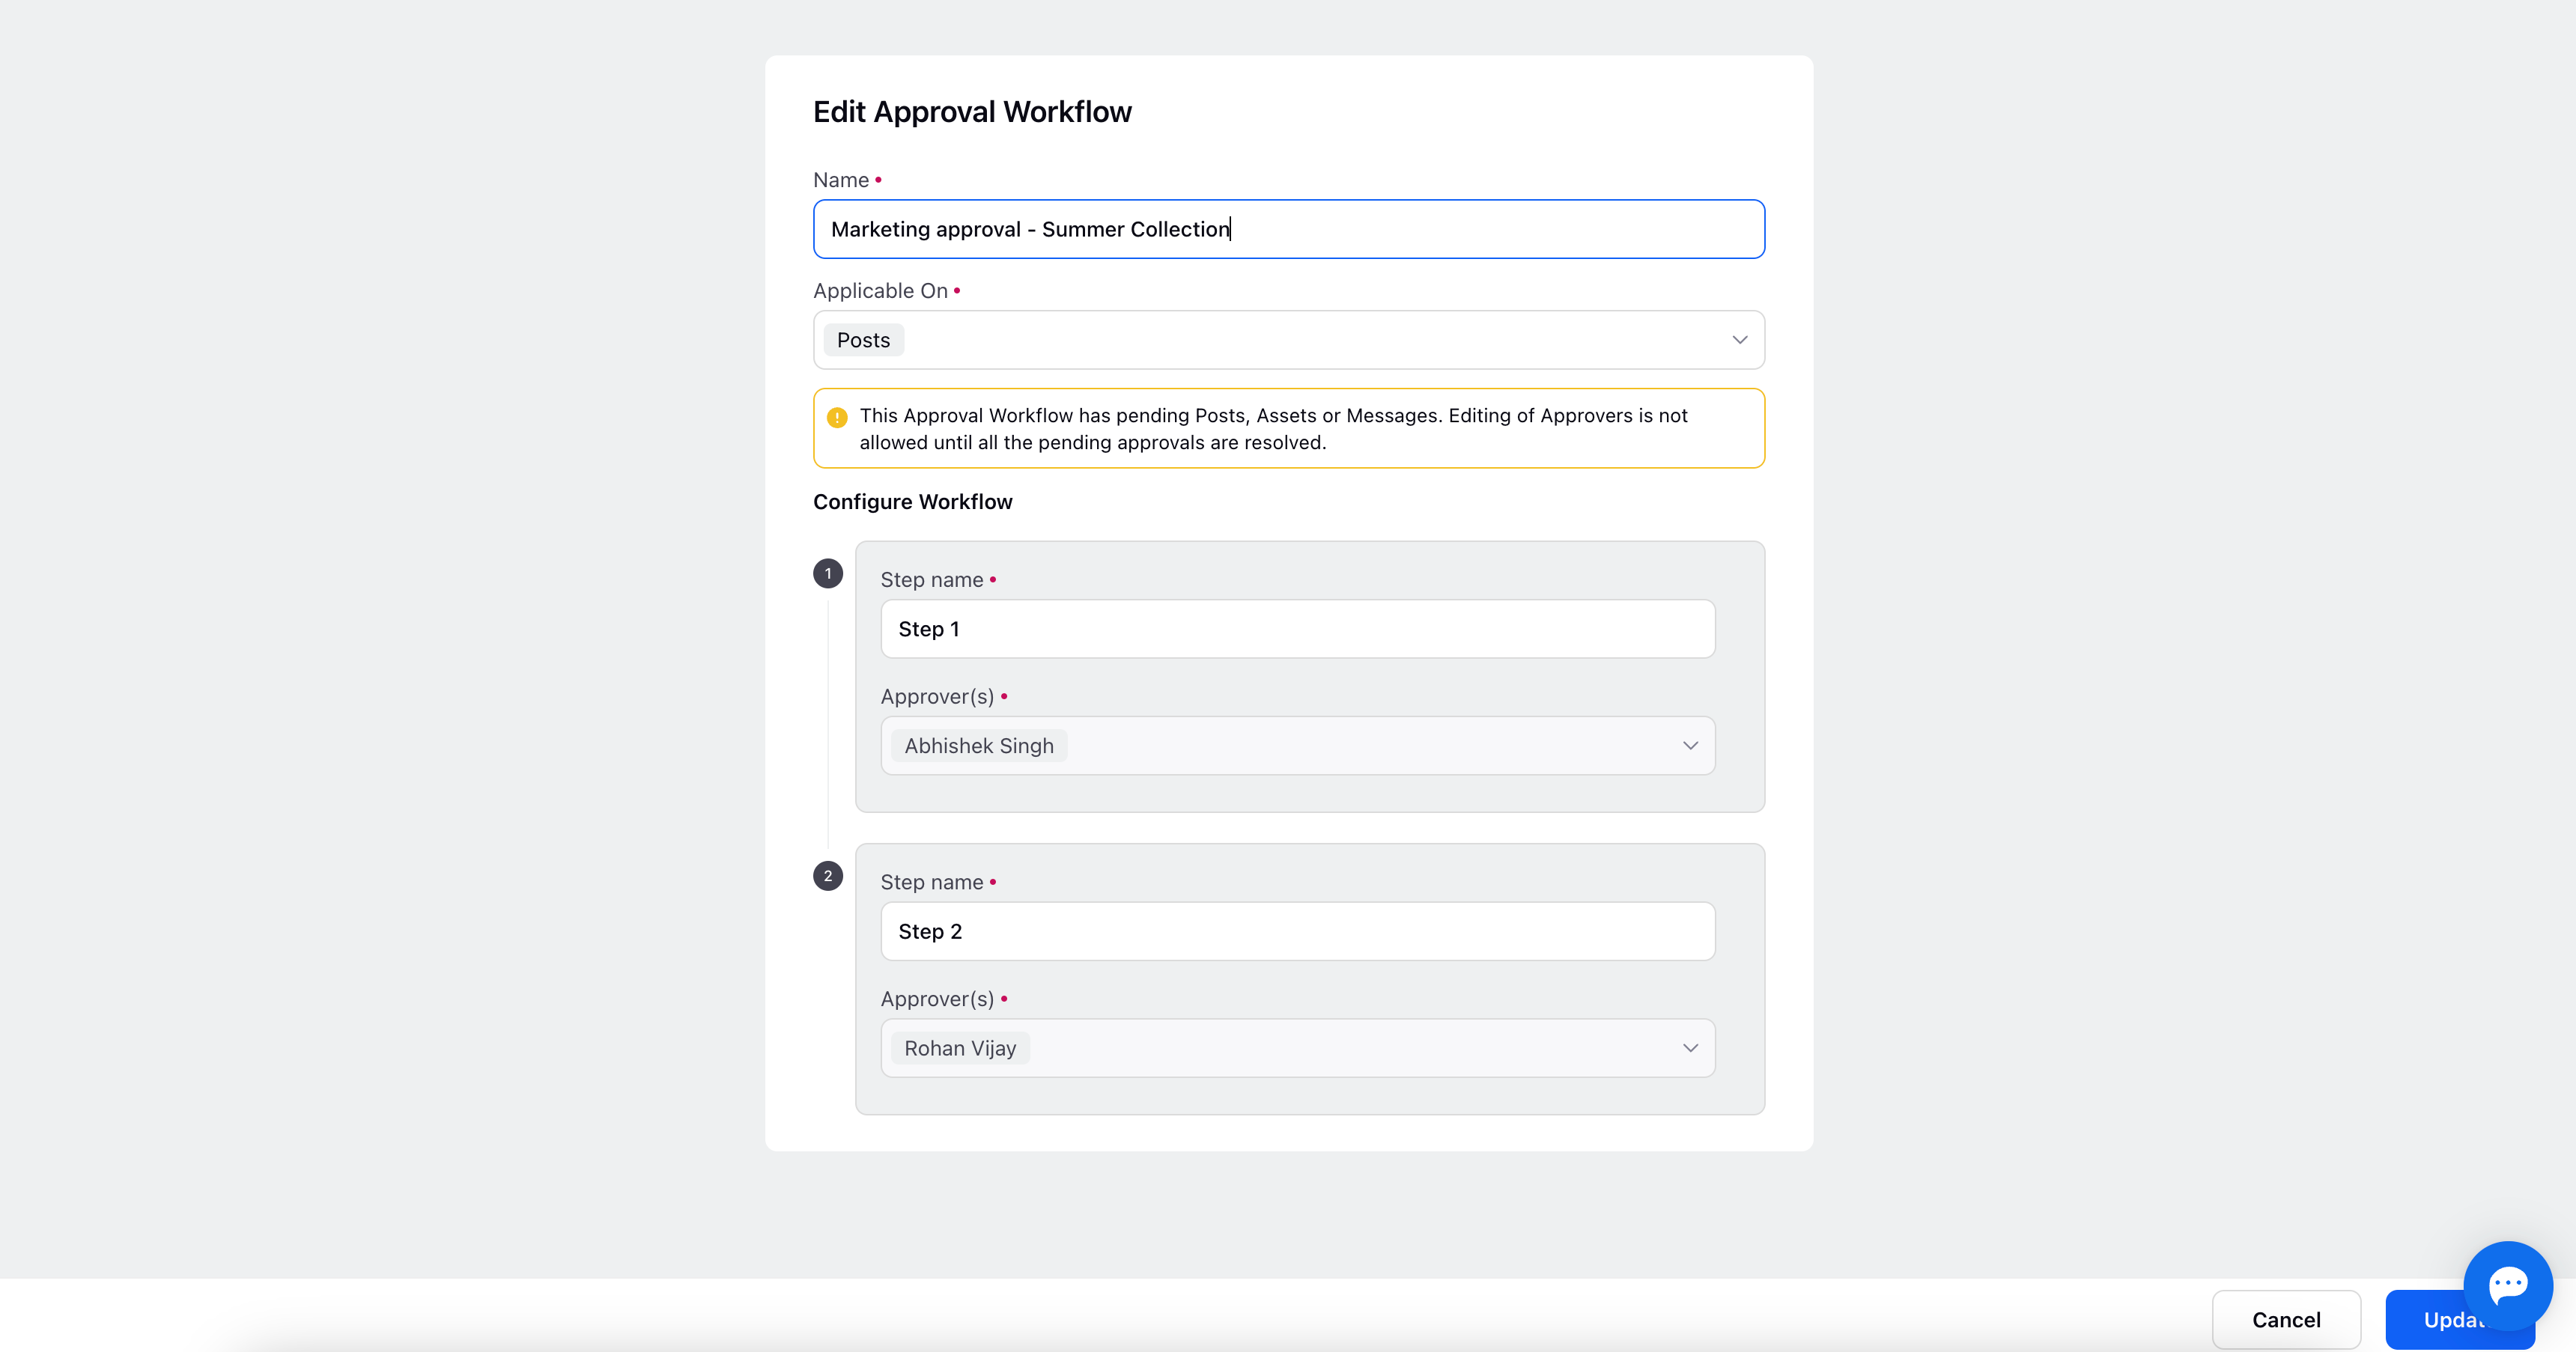
3. Configuring Approval Workflow: Provide essential details to tailor the Approval Workflow to your needs:
Name: Assign a distinctive name to the Approval Workflow.
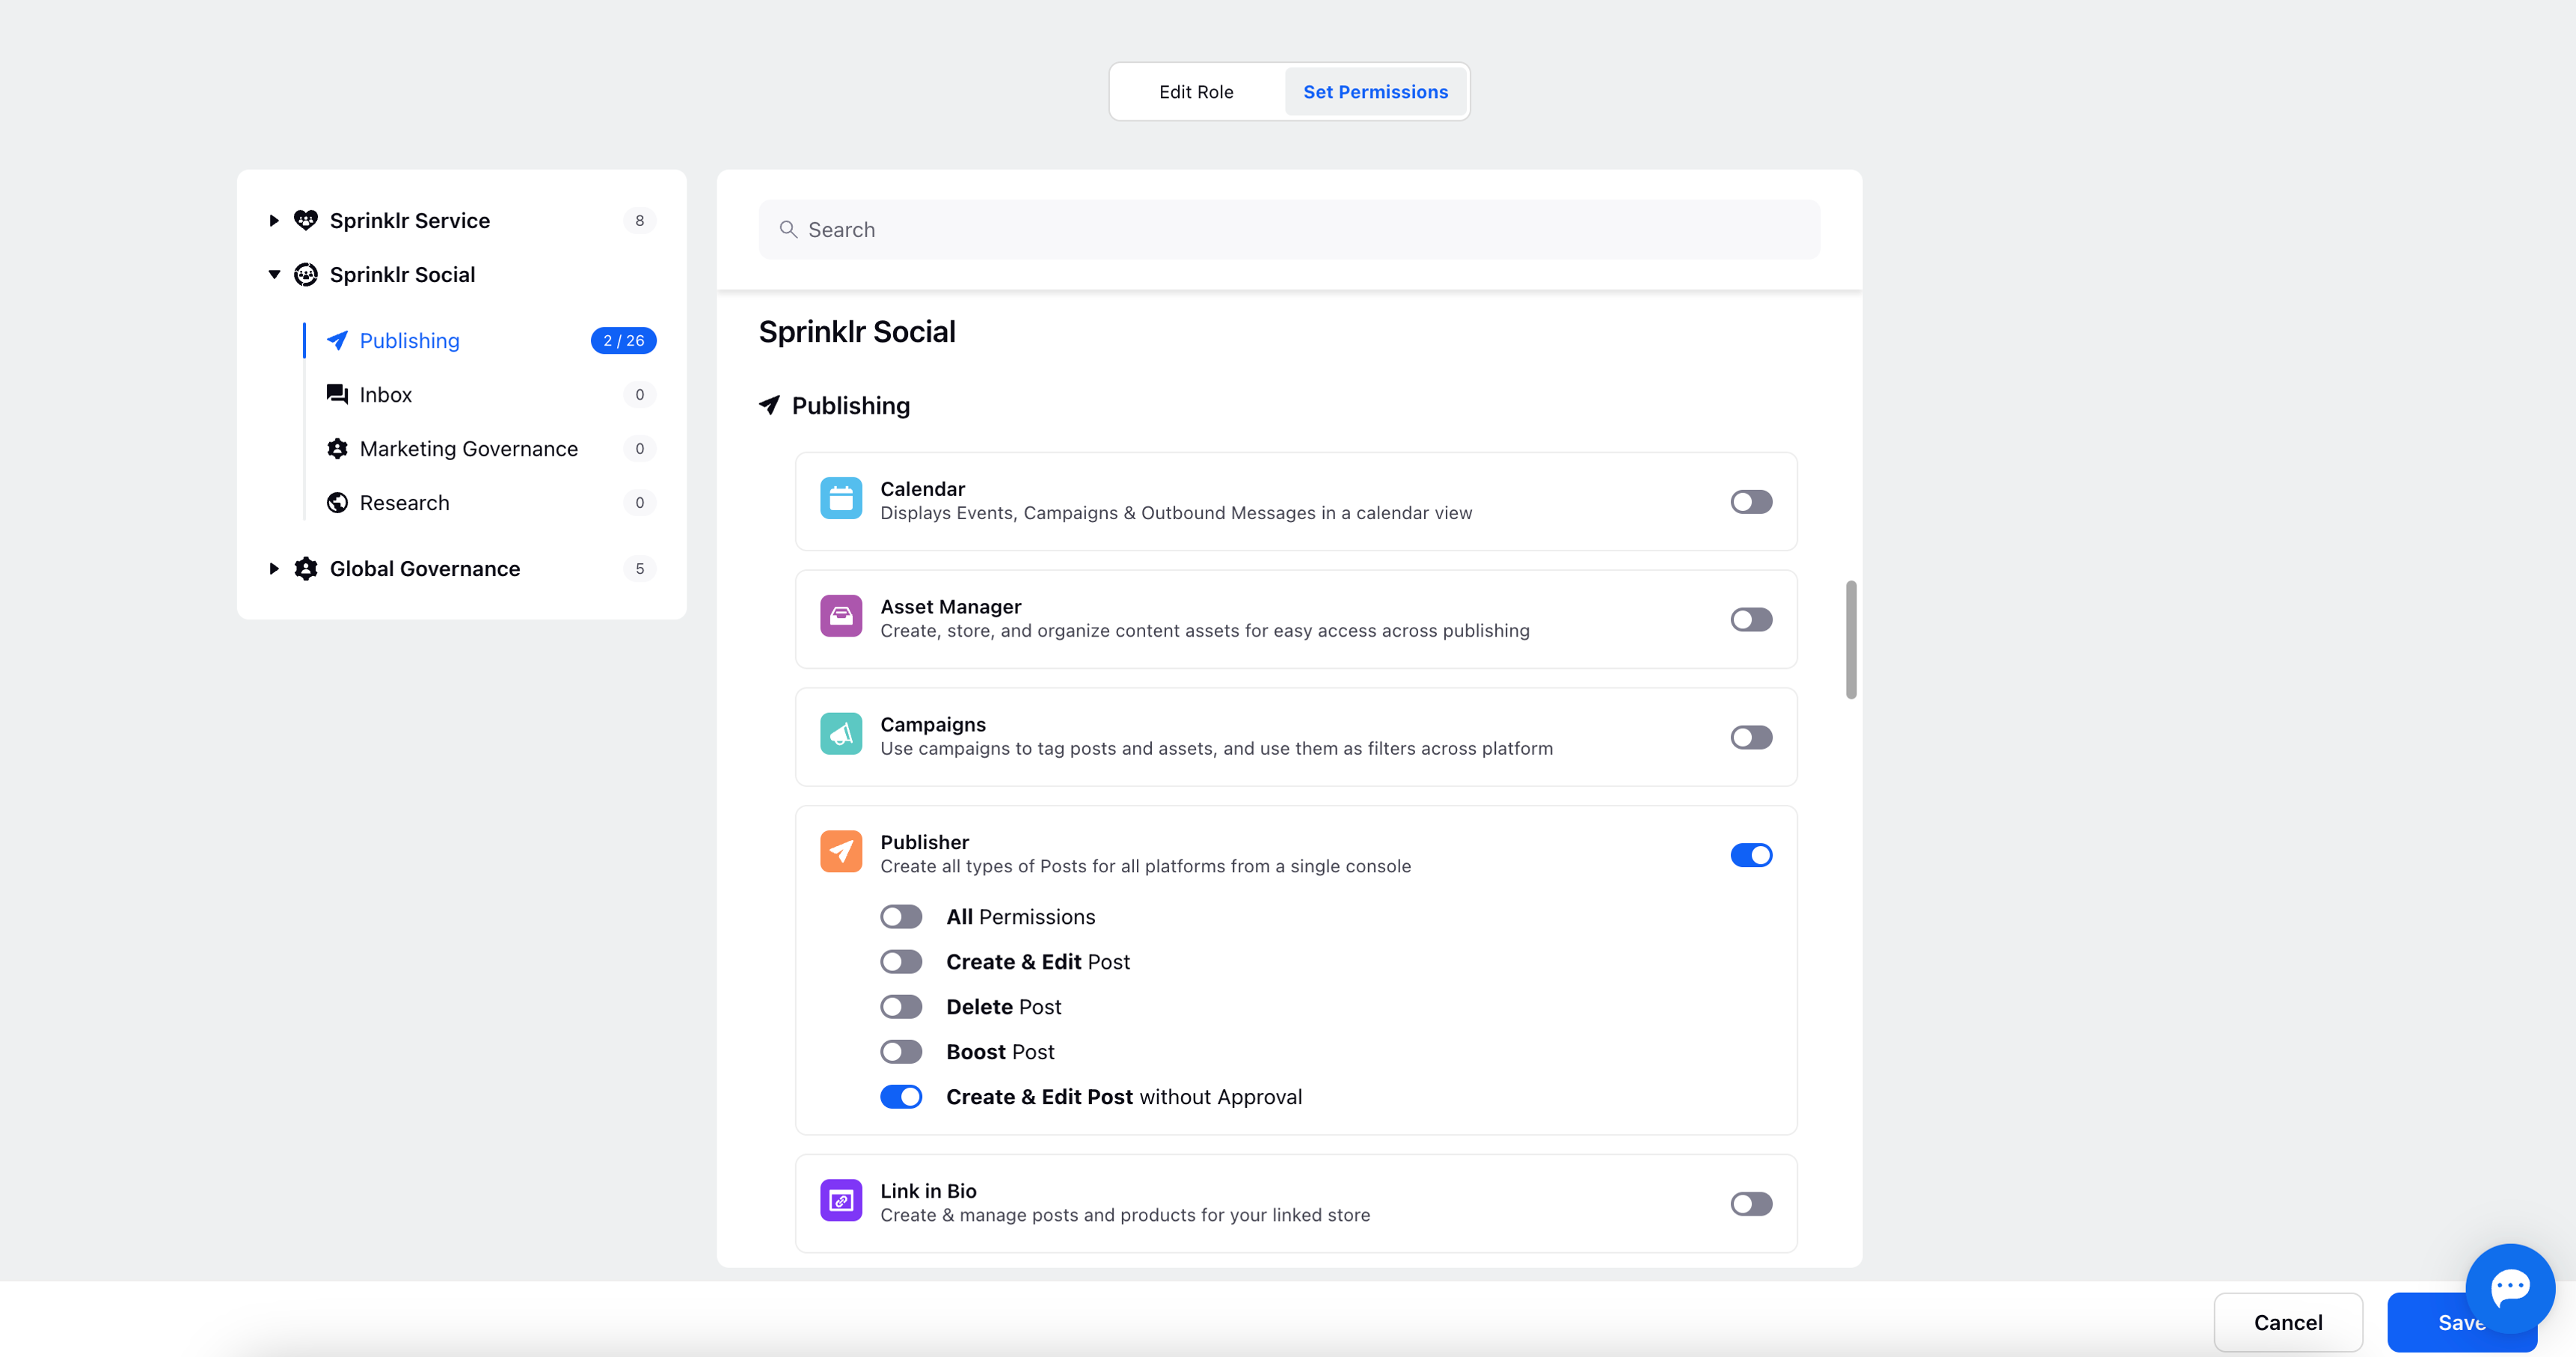
Applicable On: Choose the scope of the Approval Workflow - Assets, Posts, or Messages.
Configure Workflow: Design your approval sequence by specifying step names and approvers. The flexibility exists to include multiple approvers within a step, where an "OR" condition allows any one of them to grant approval.
4. Creating the Approval Workflow: Finalise your approval sequence by clicking the "Create" icon located at the bottom right. Once the Approval Workflow is established, you have the option to toggle its status from the record manager page, enabling or disabling it as per requirement.
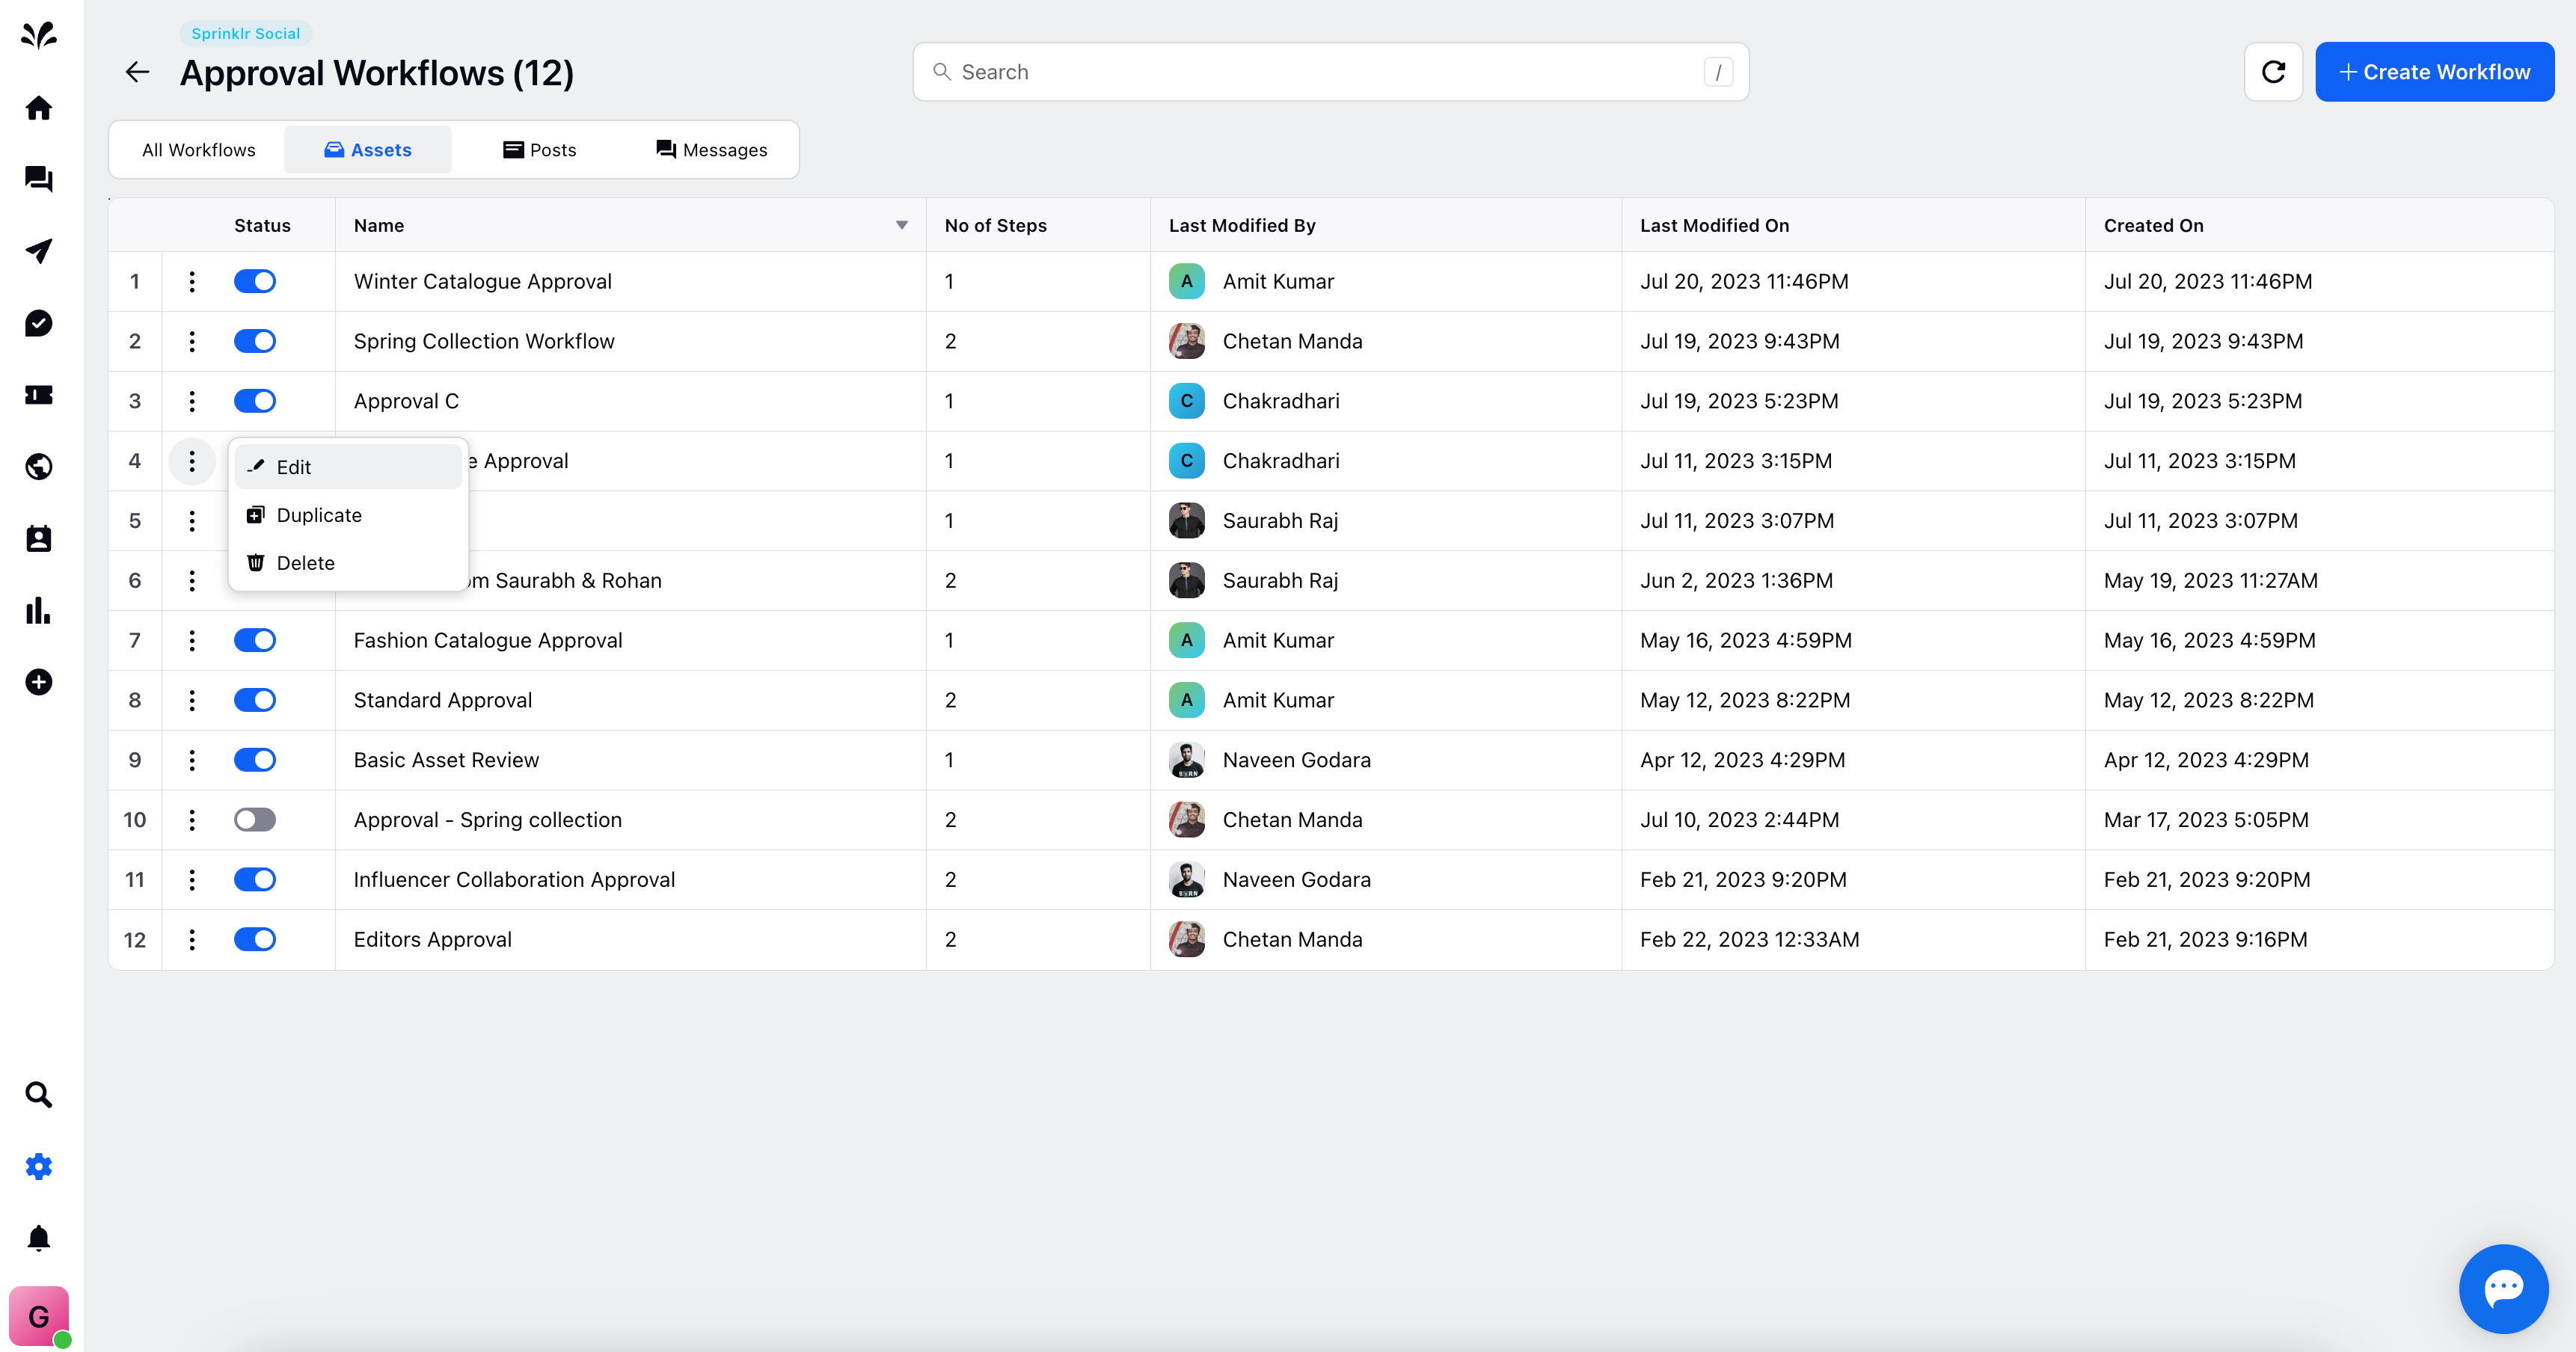
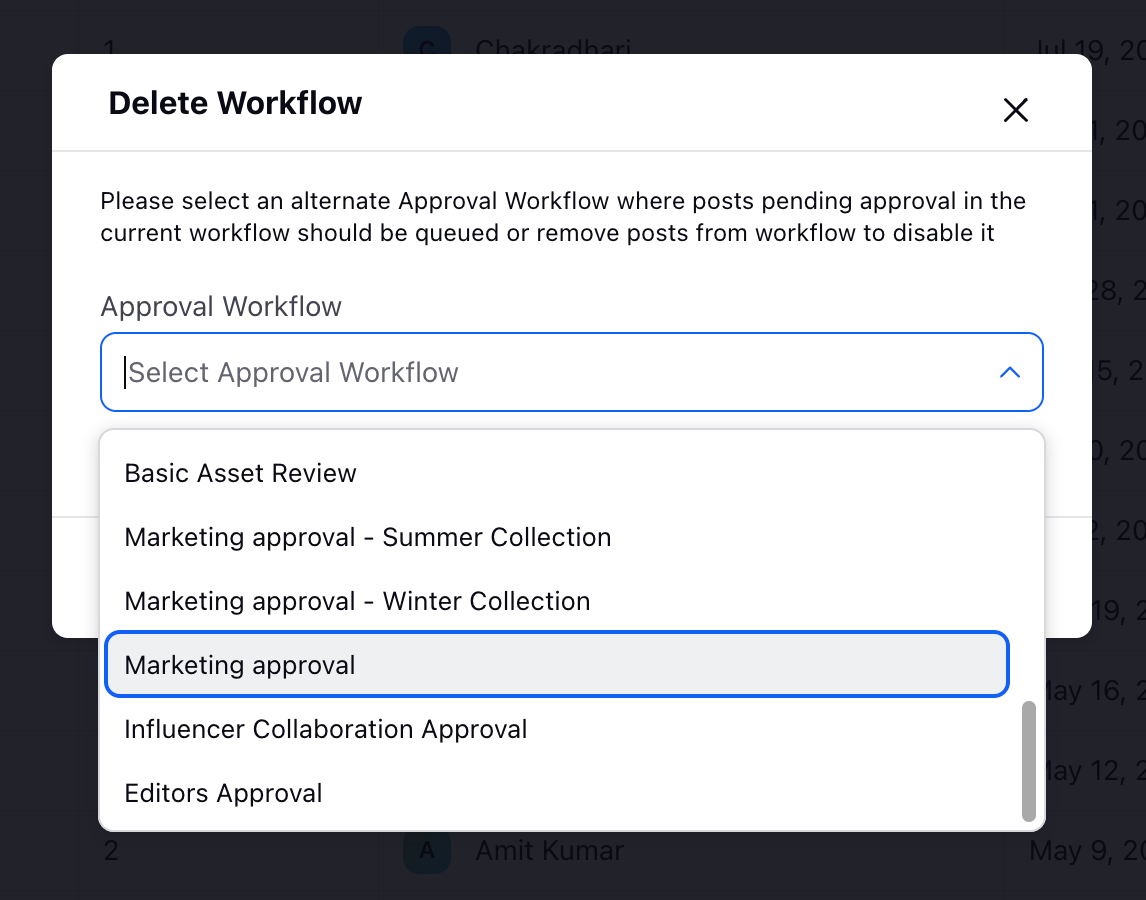
For added flexibility, you can perform actions such as editing, duplicating and deleting the approval workflows. Access these options via the three dots icon adjacent to any workflow.
Understanding Approval Workflow for Assets, Posts, and Messages
In the subsequent sections, we will delve into the nuances of applying and executing Approval Workflows on individual components - Assets, Posts, and Messages. By comprehending these specifics, you will be well-equipped to orchestrate a organised and efficient approval process that aligns seamlessly with your operational requirements.
Asset Approval Views in Asset Manager
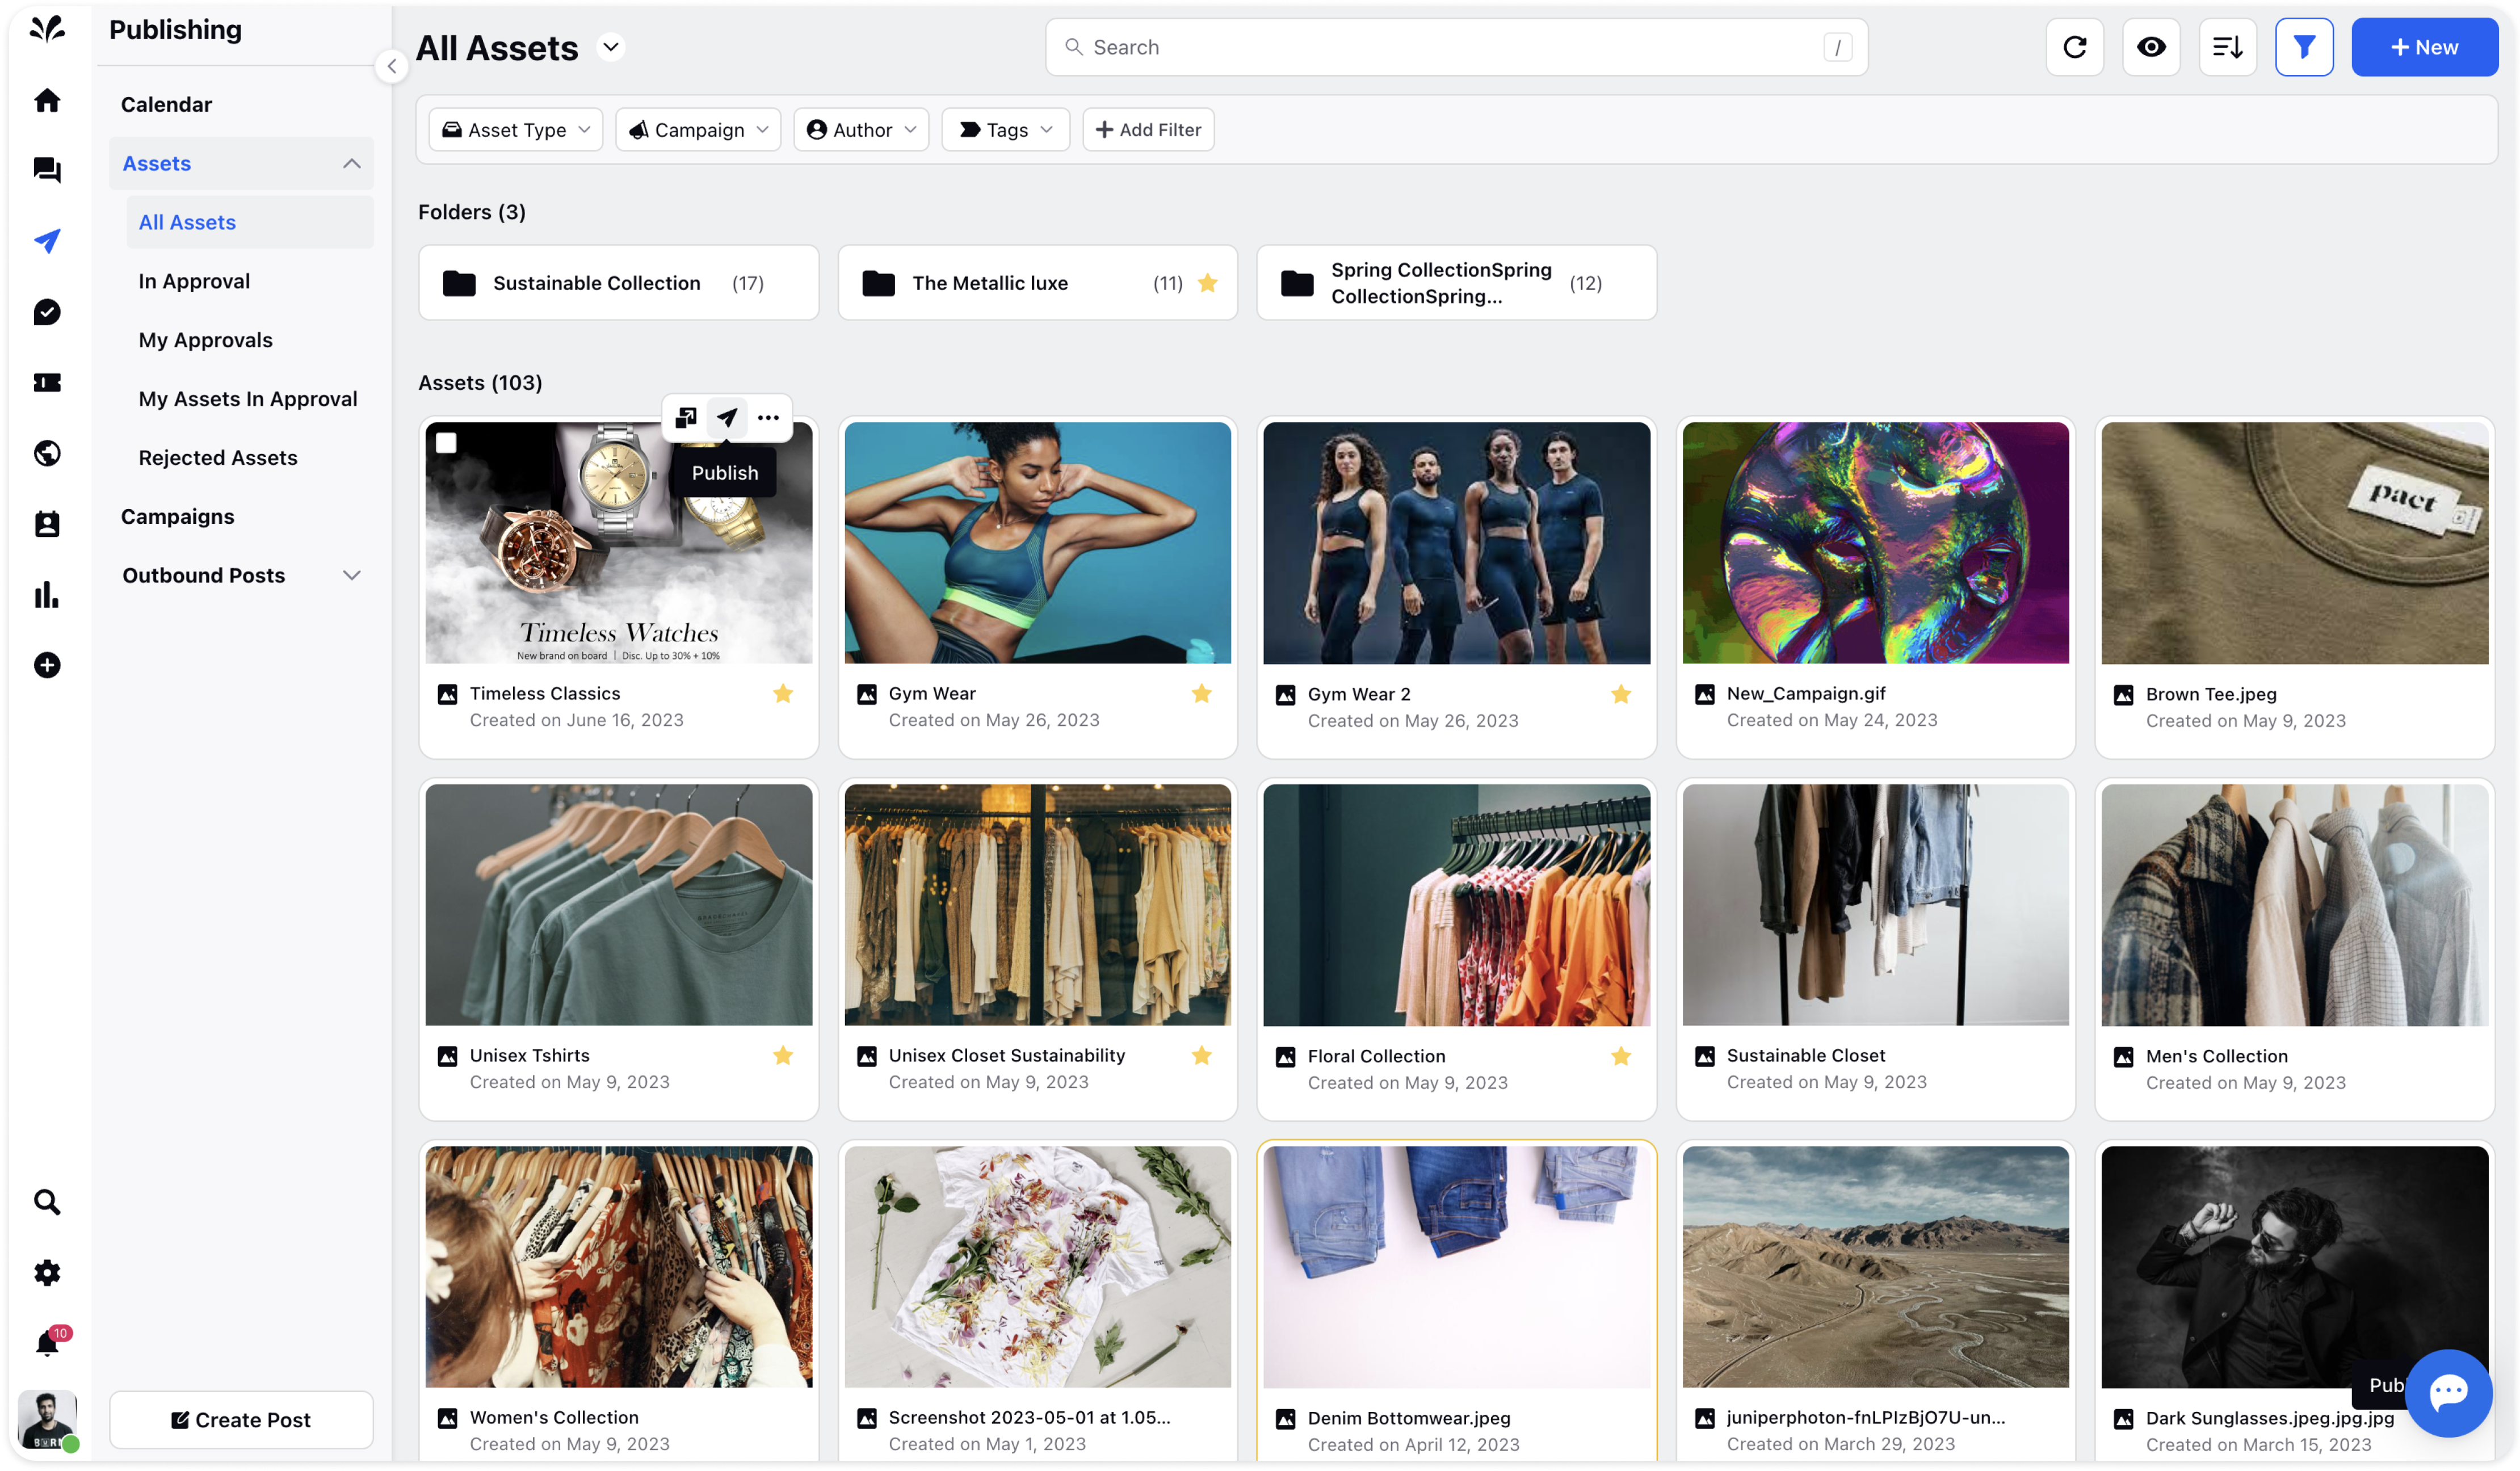
There are several pre-configured streams or Views to access & manage assets approvals. These views can be accessed from the sub-navigation pane or from the Views dropdown on top left i.e. All Assets
All Assets: This View displays the list of created assets. Clicking on an asset provides a detailed view in the third pane.
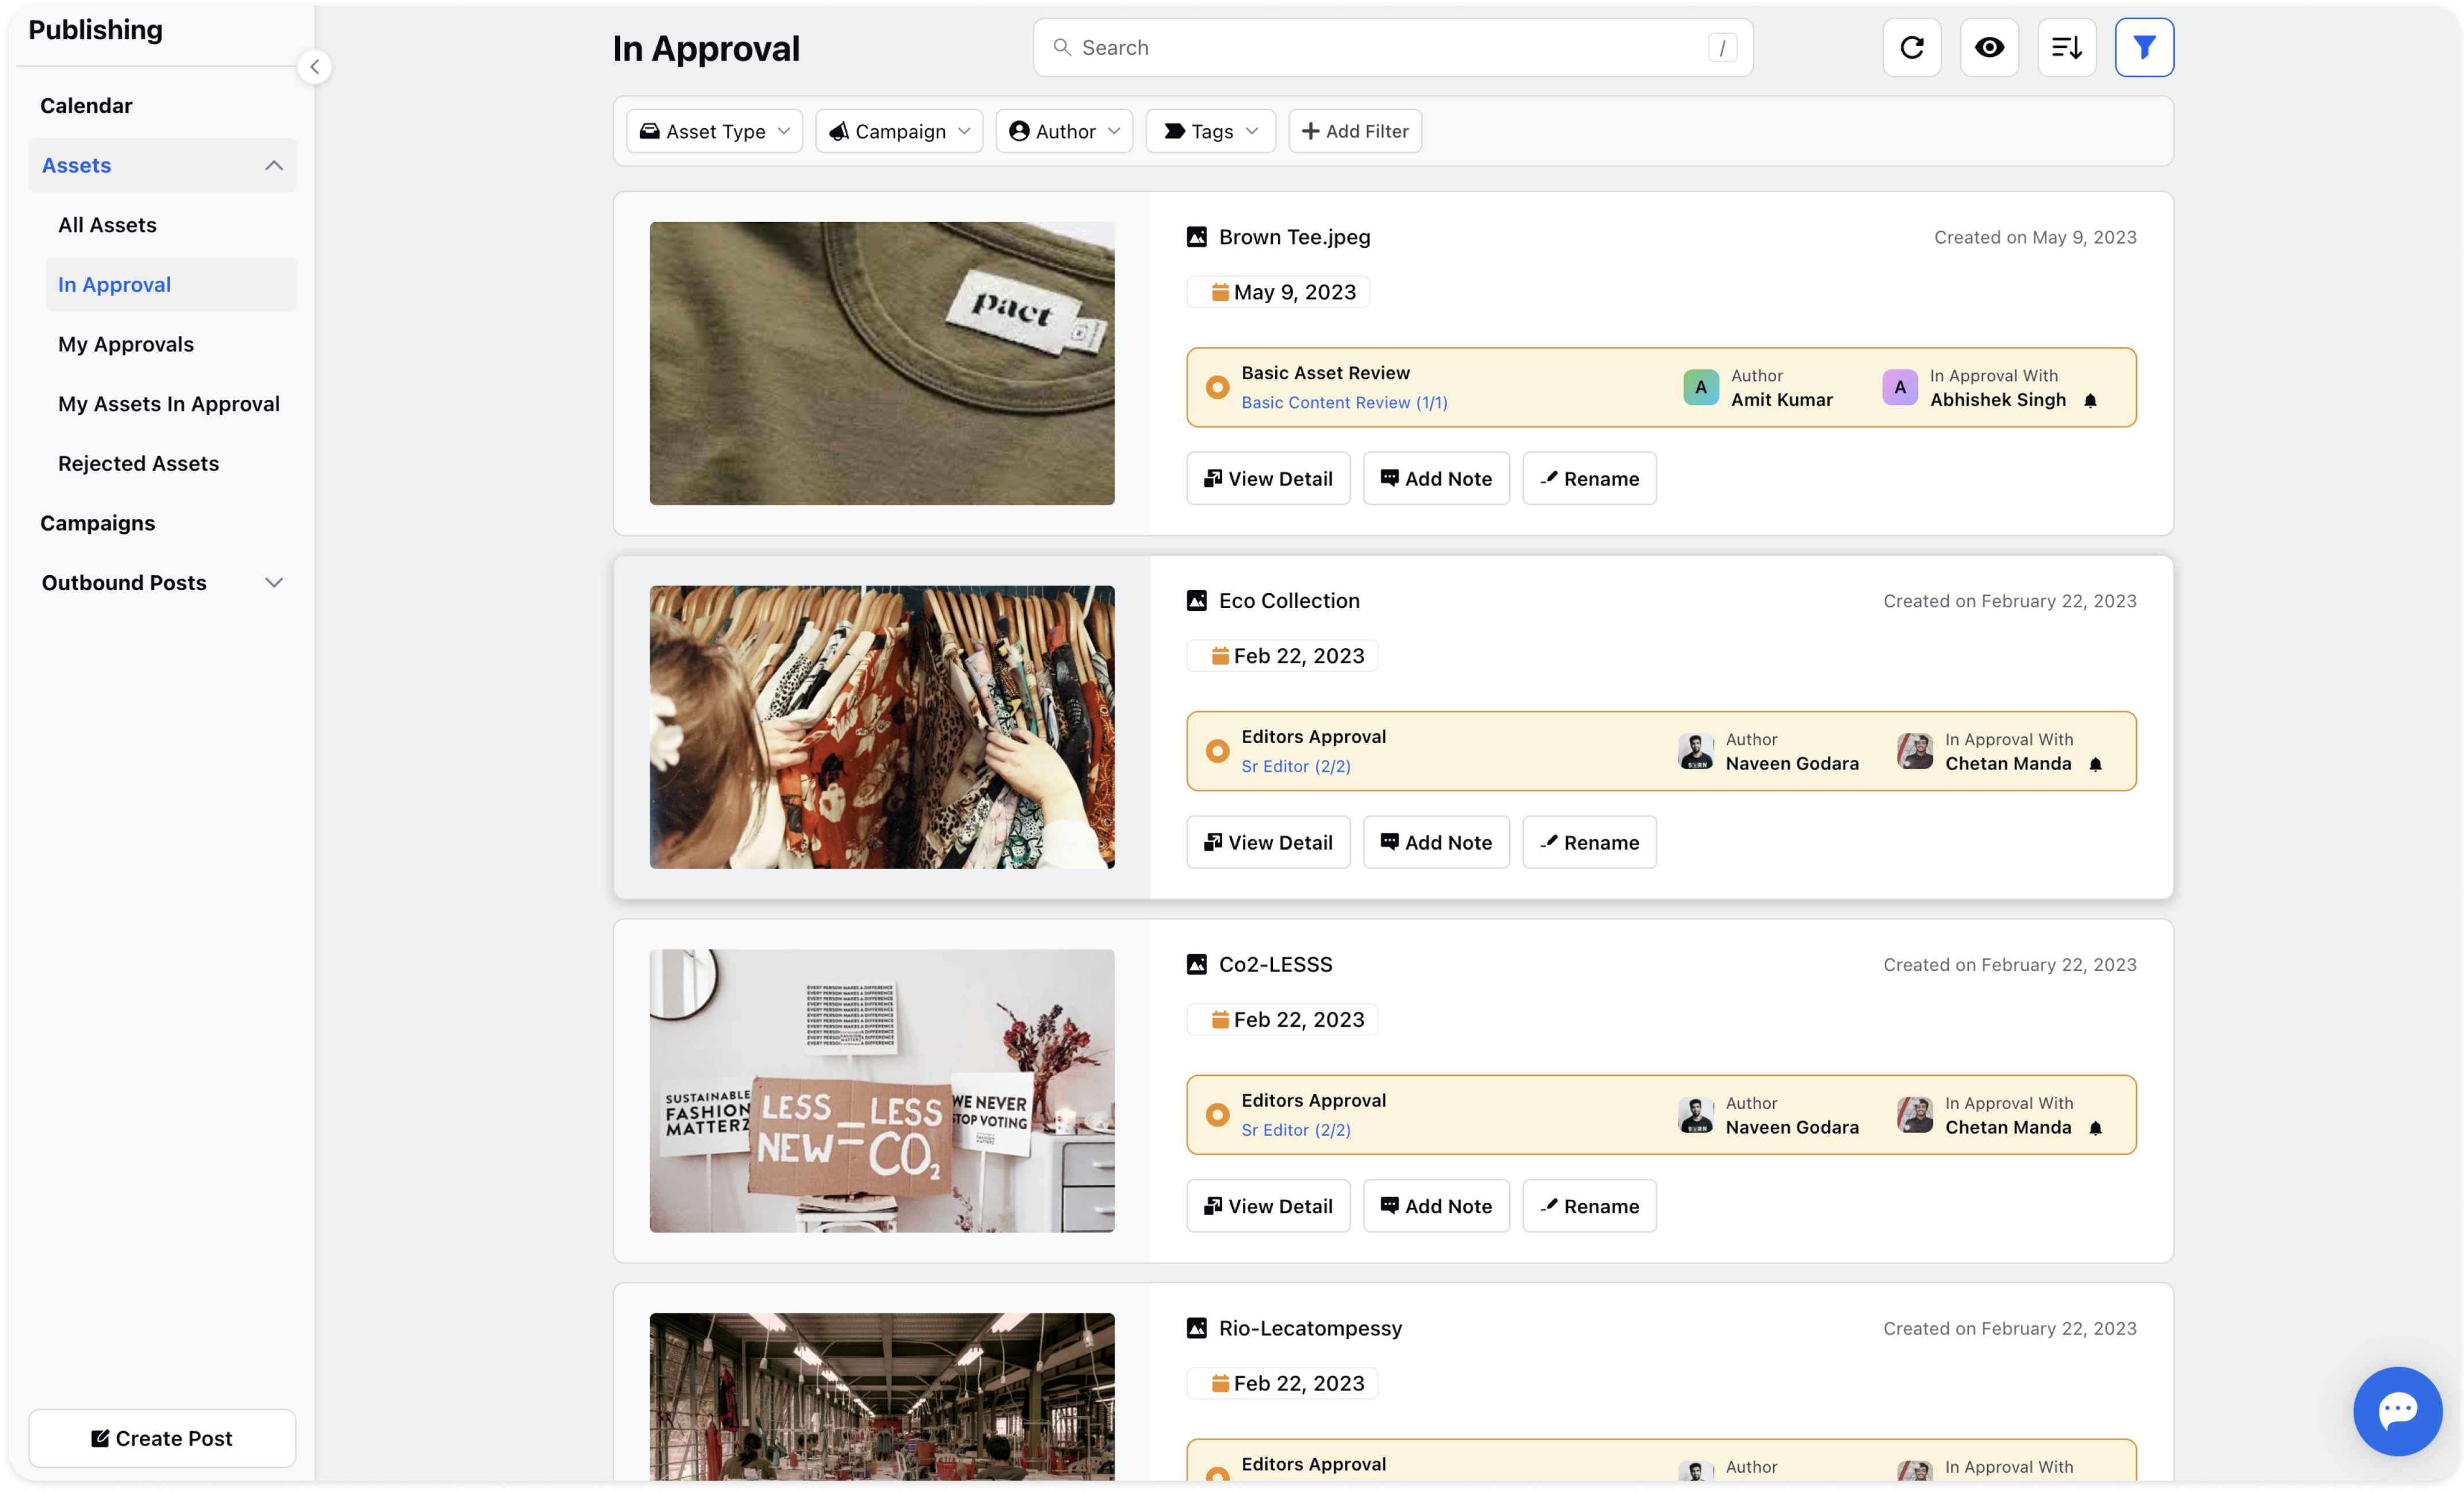
In Approval: Assets that require approval are listed in this section. Each asset shows the author's name, the approver's name, and the date the asset was submitted for approval. Actions available include View Detail, Add Note, and Rename.
My Approvals: In this section, you can find a list of assets that require your approval.
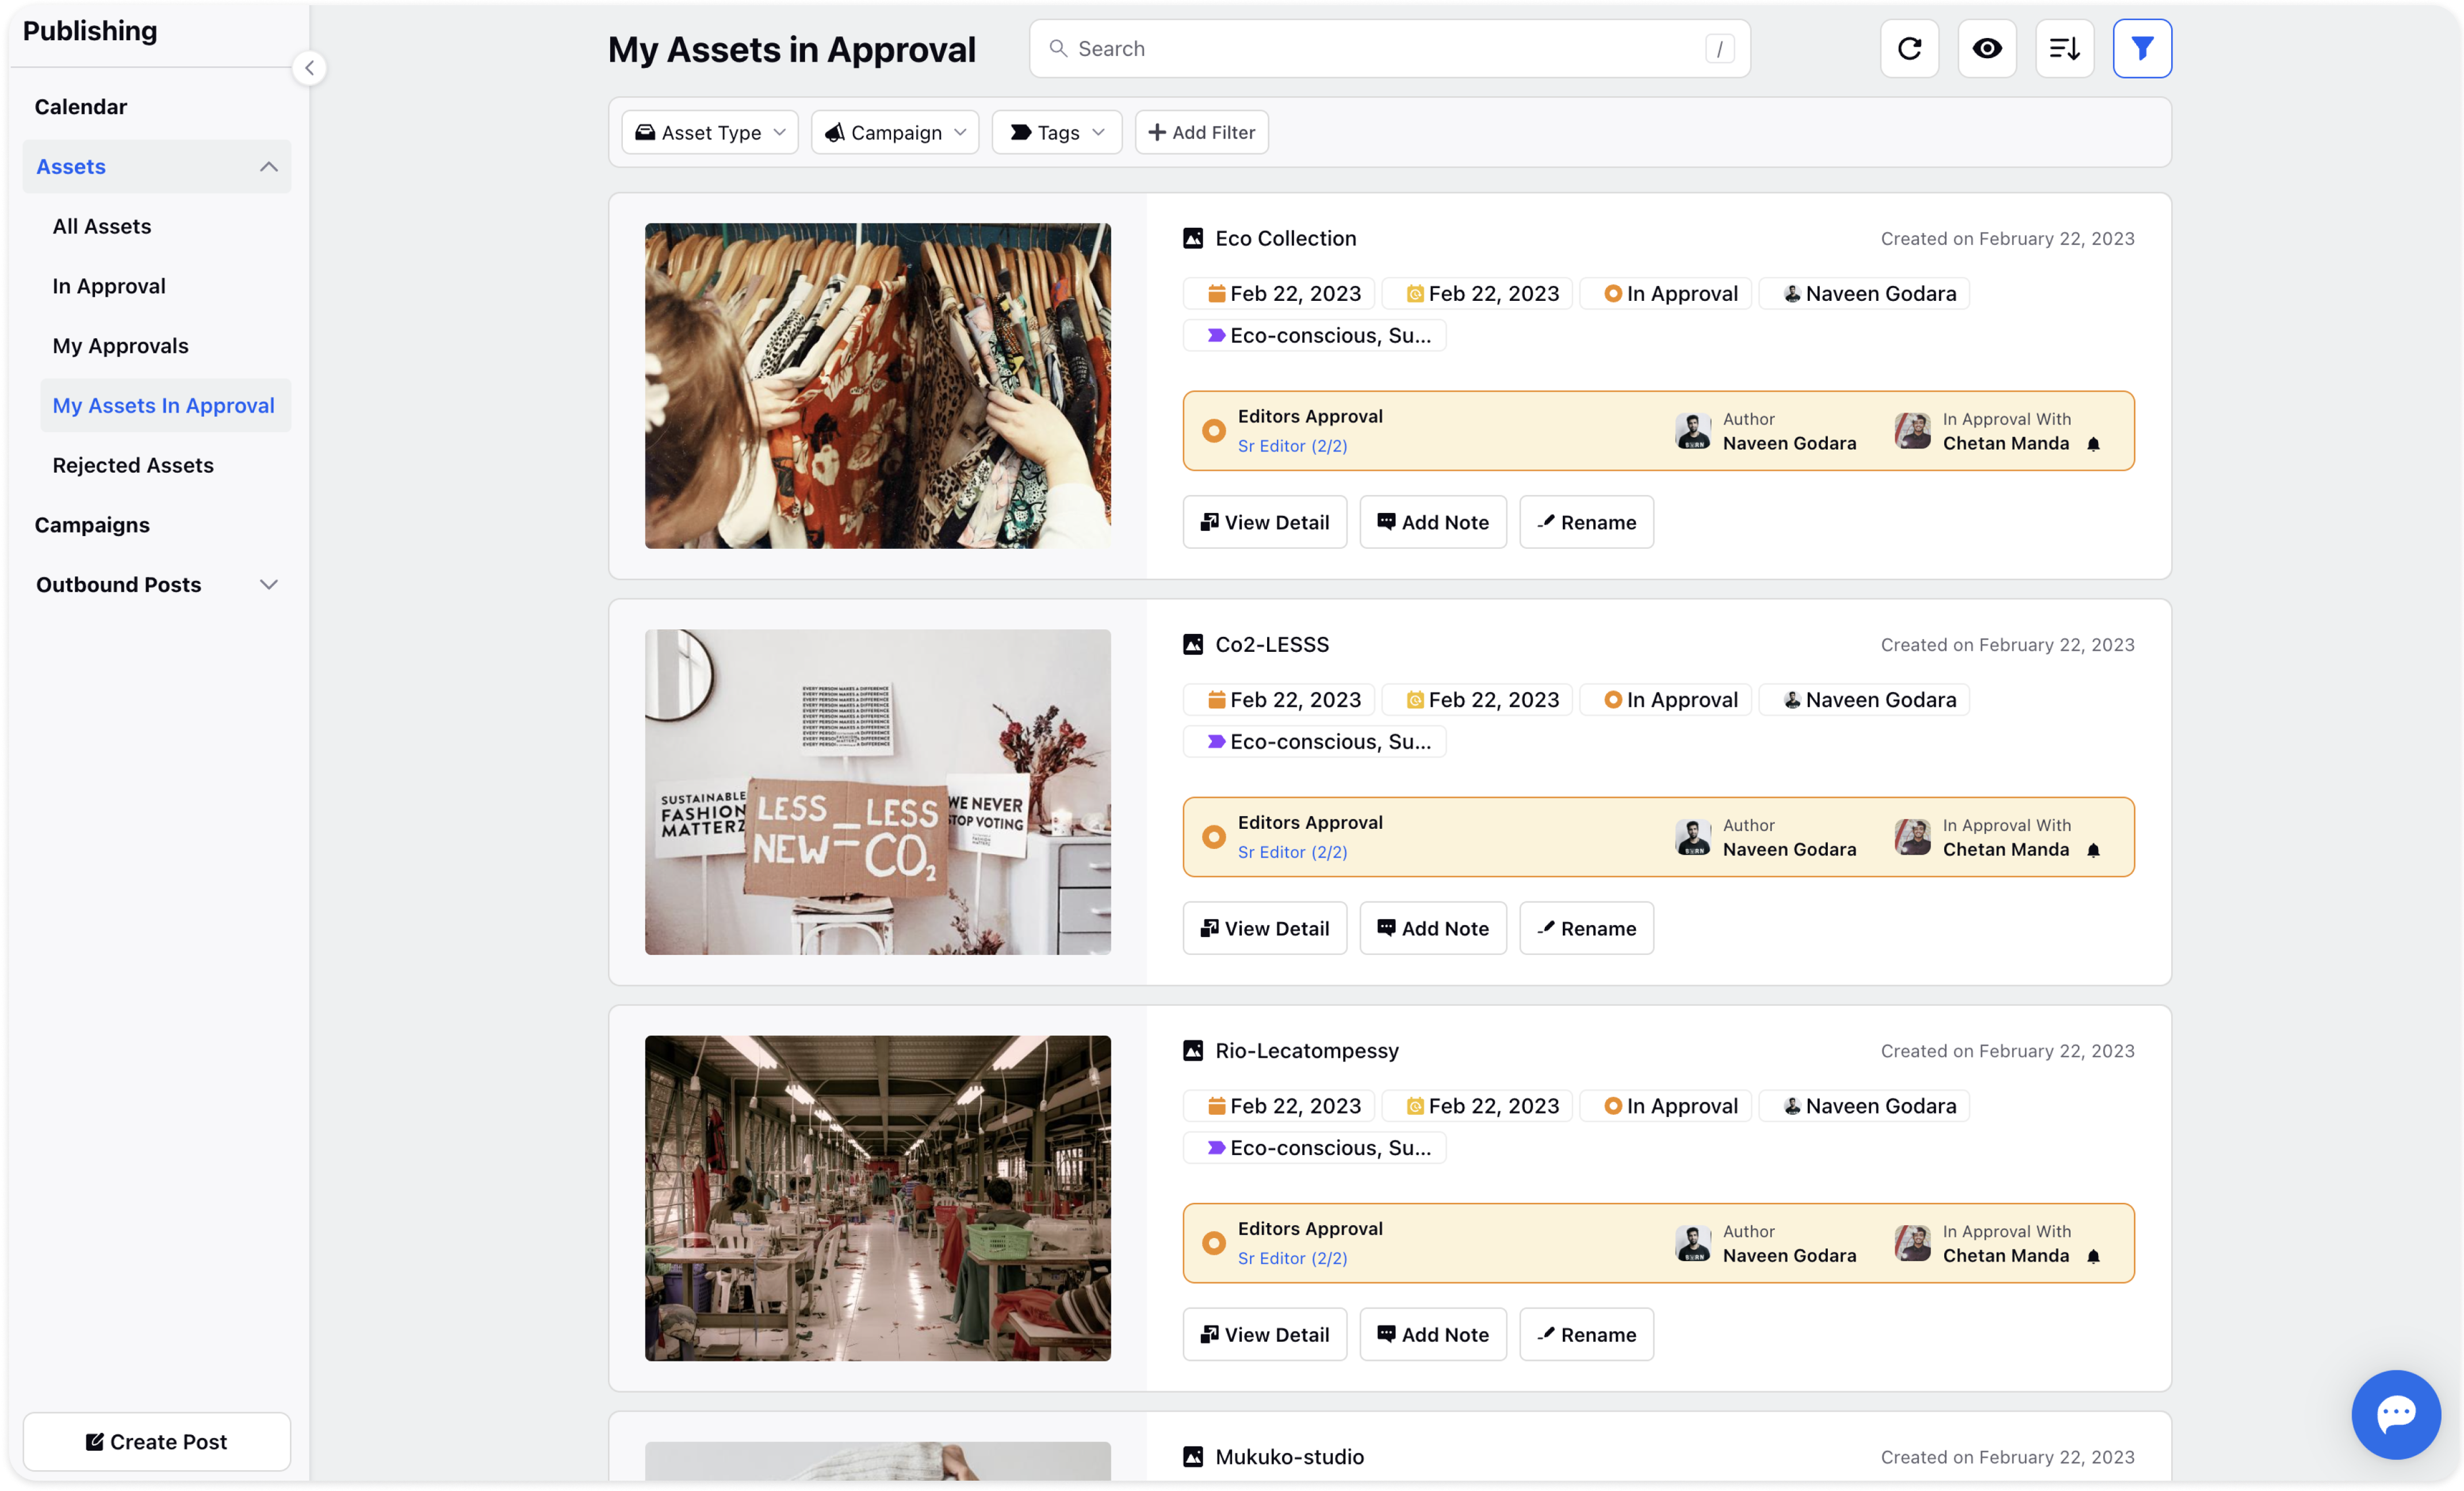
My Assets in Approval: This section displays assets created by you that require approval from another approver.
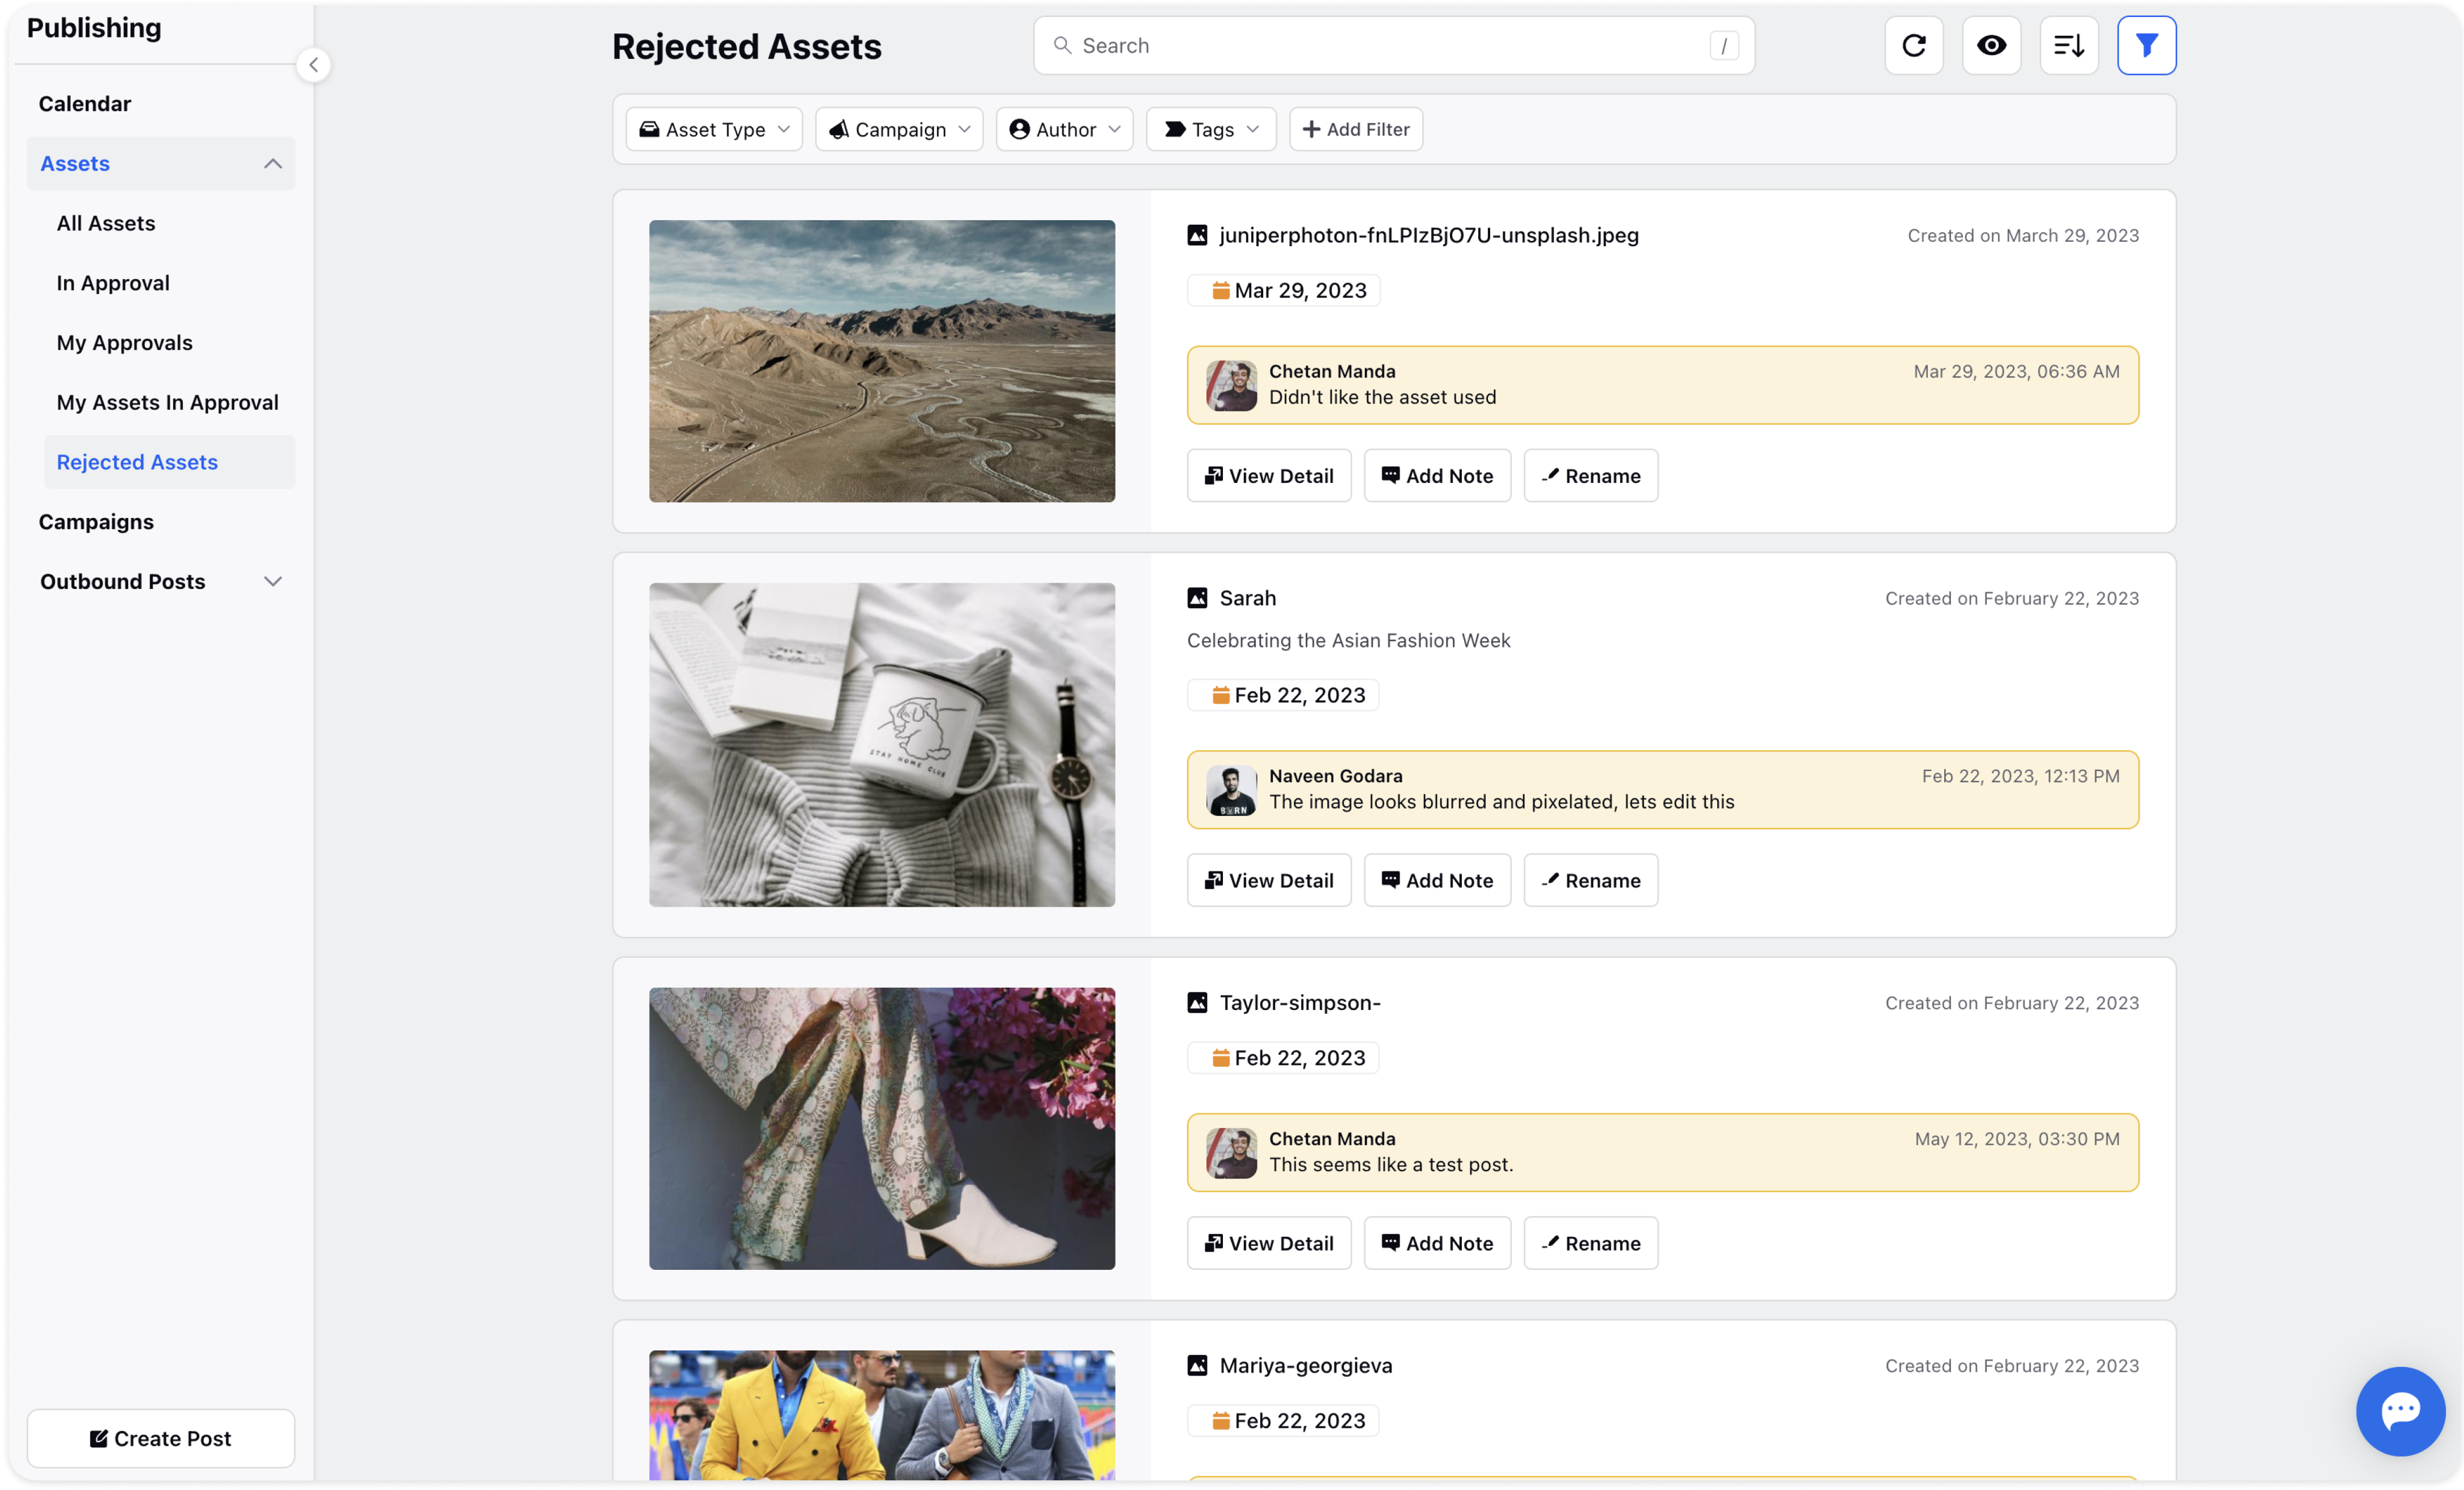
Rejected Assets: Here, you can find a list of assets that have been rejected by the approver. The rejection reason is stated in a yellow box.
Restrict In-approval & Rejected Assets Publishing
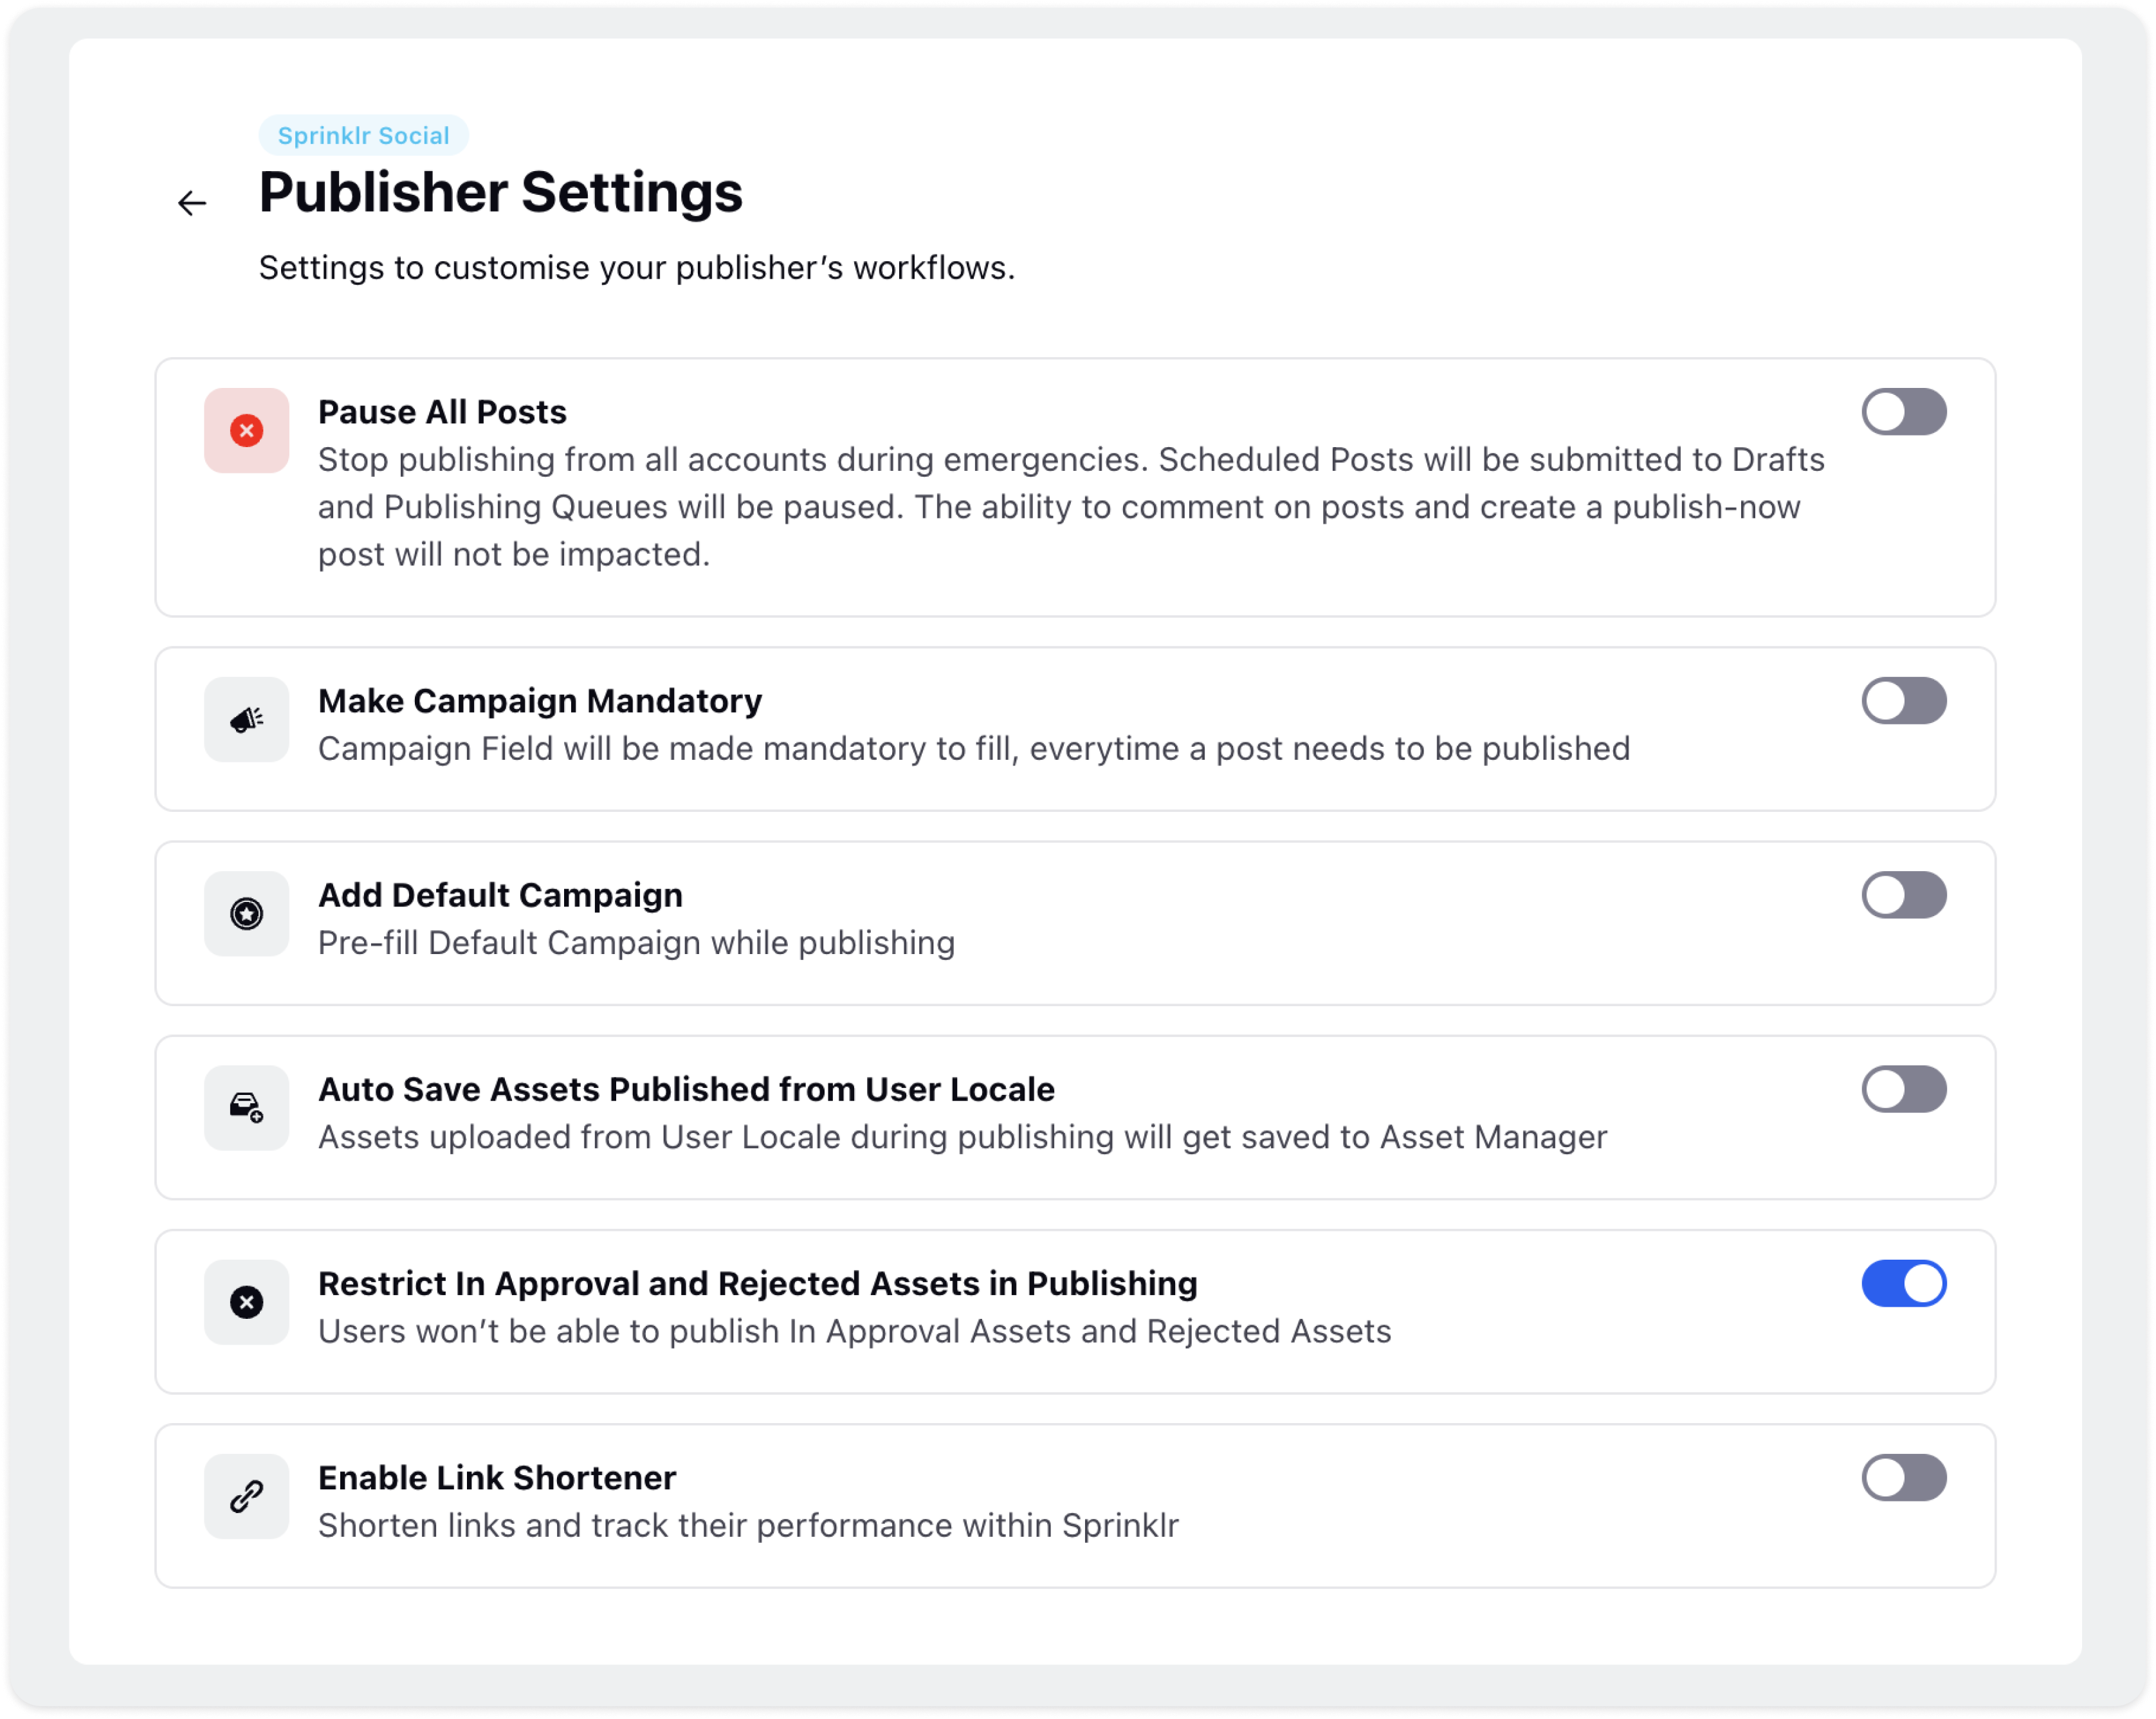
To restrict pending approval assets from being published, go to Settings on the platform and search for Publisher Settings.
Toggle on the option to Restrict In Approval and Rejected Assets in Publishing. This ensures that users cannot publish assets in the approval or rejected state.
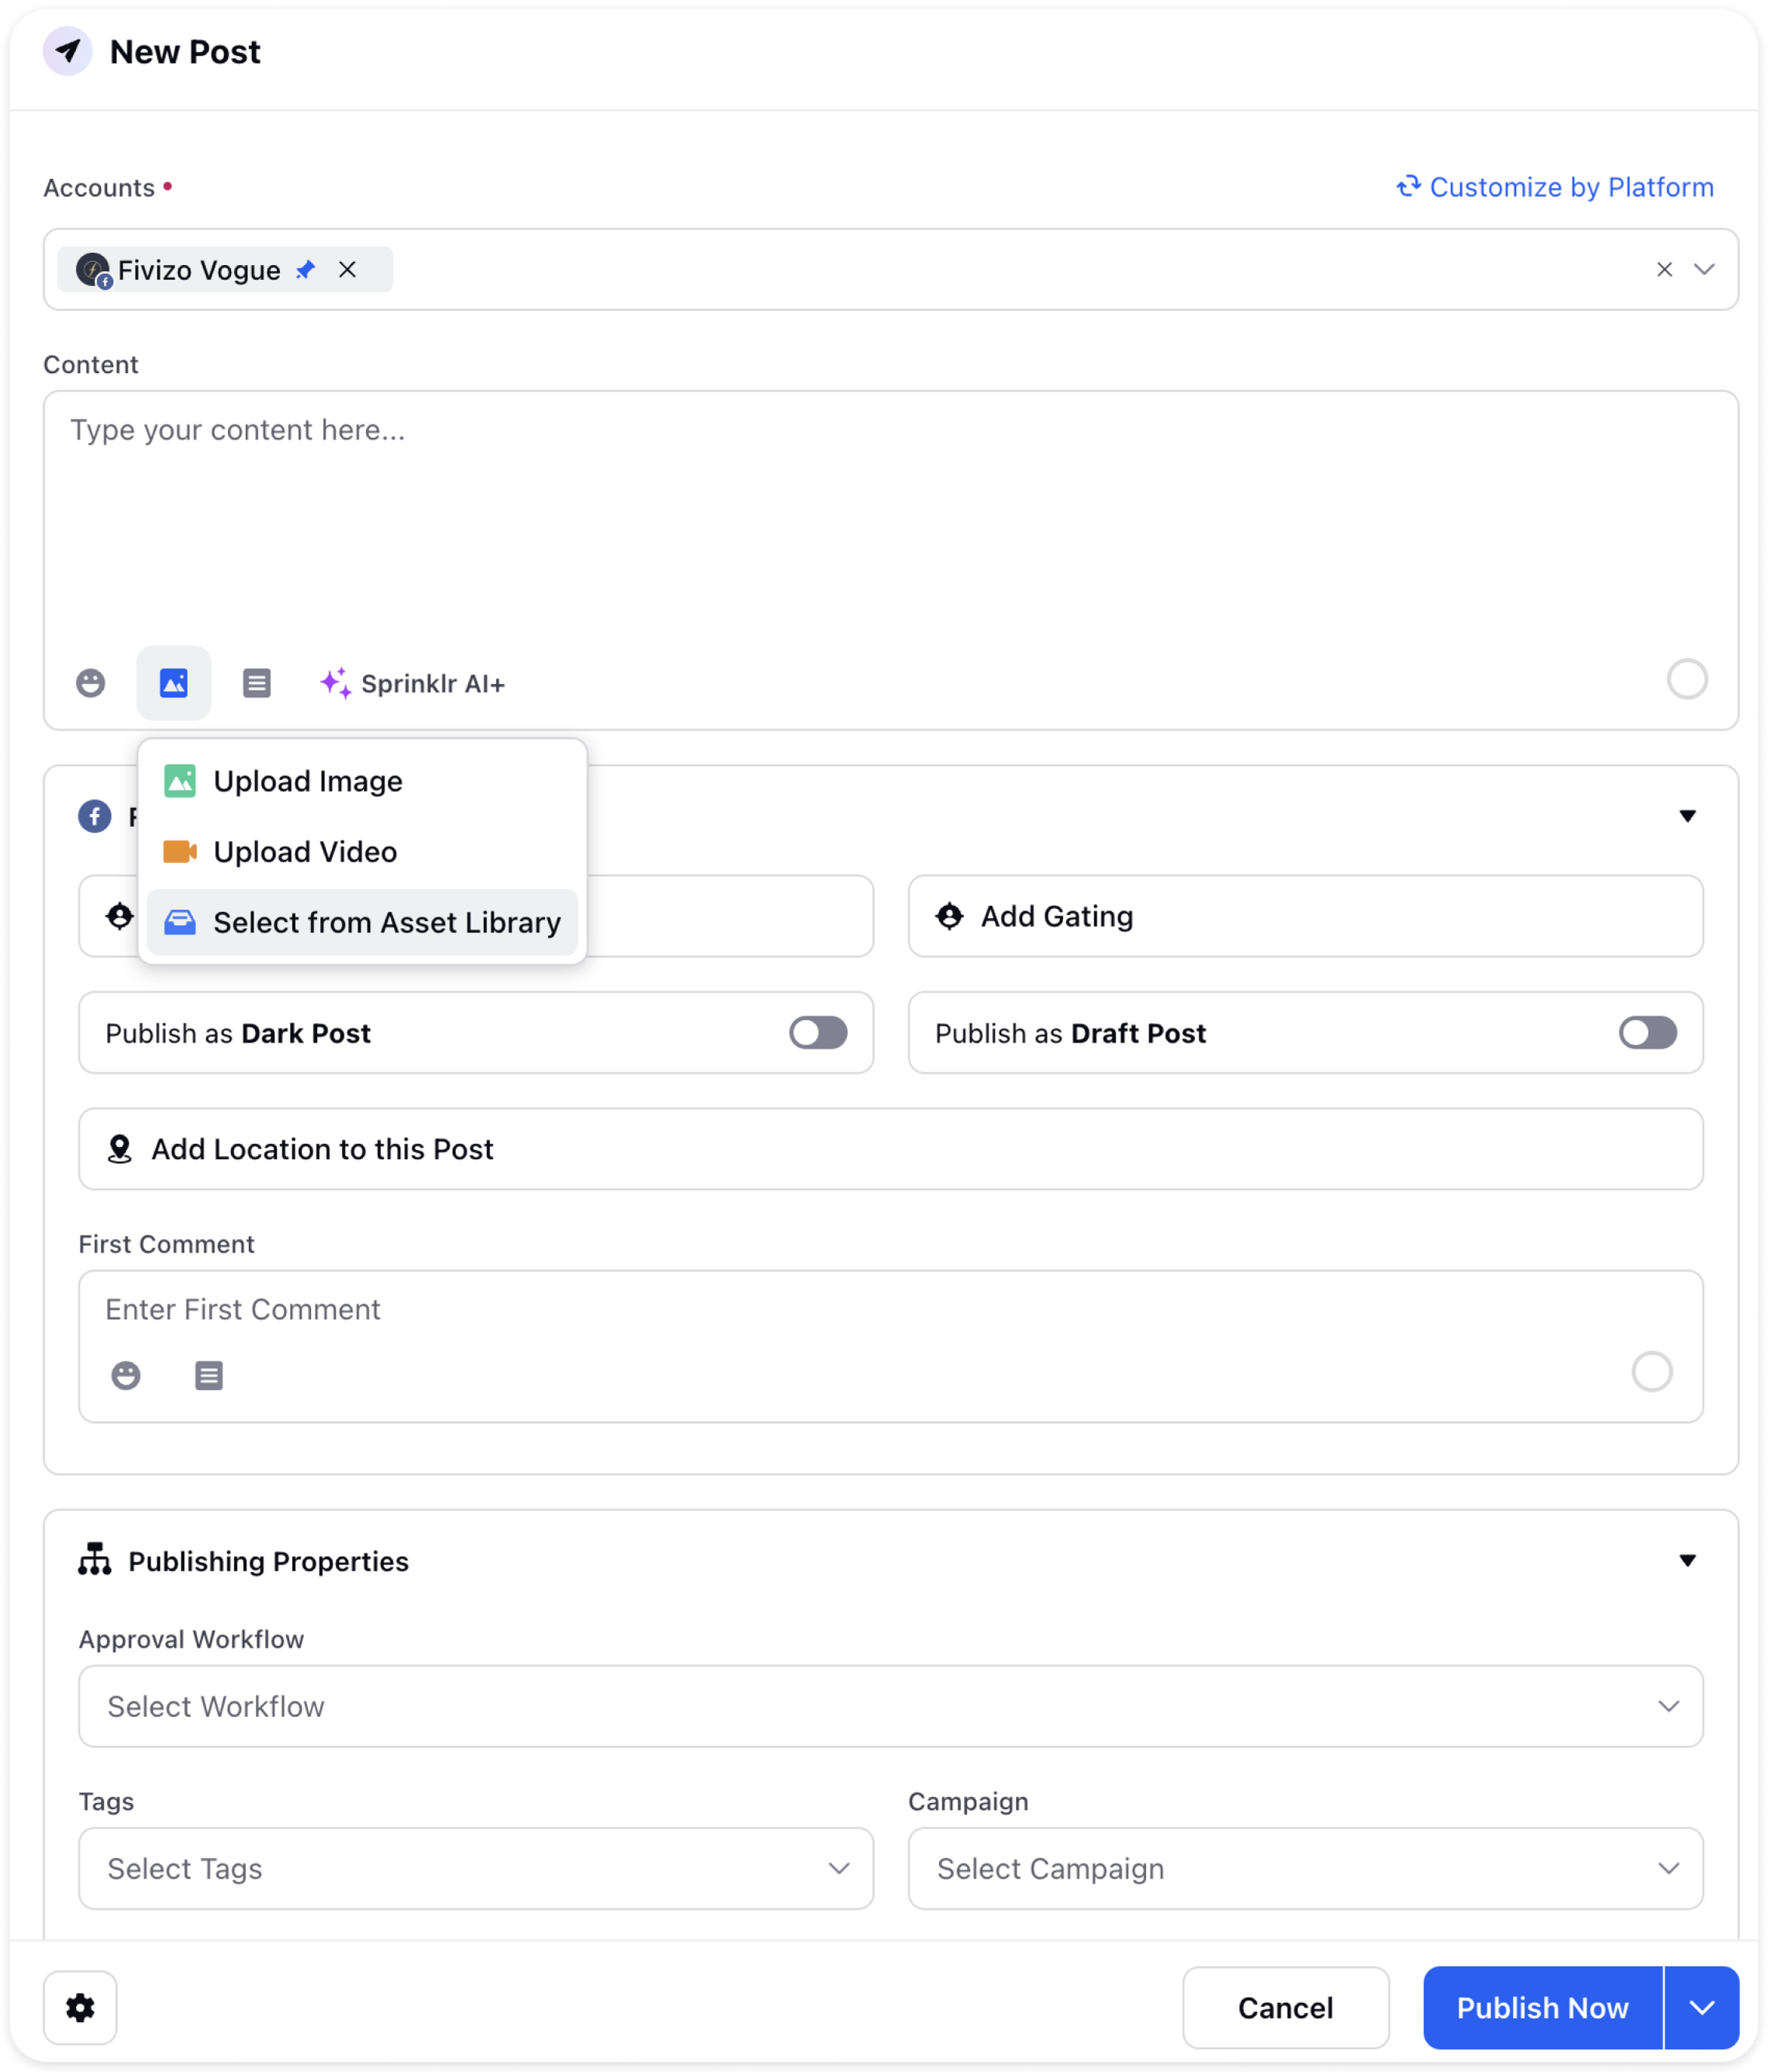
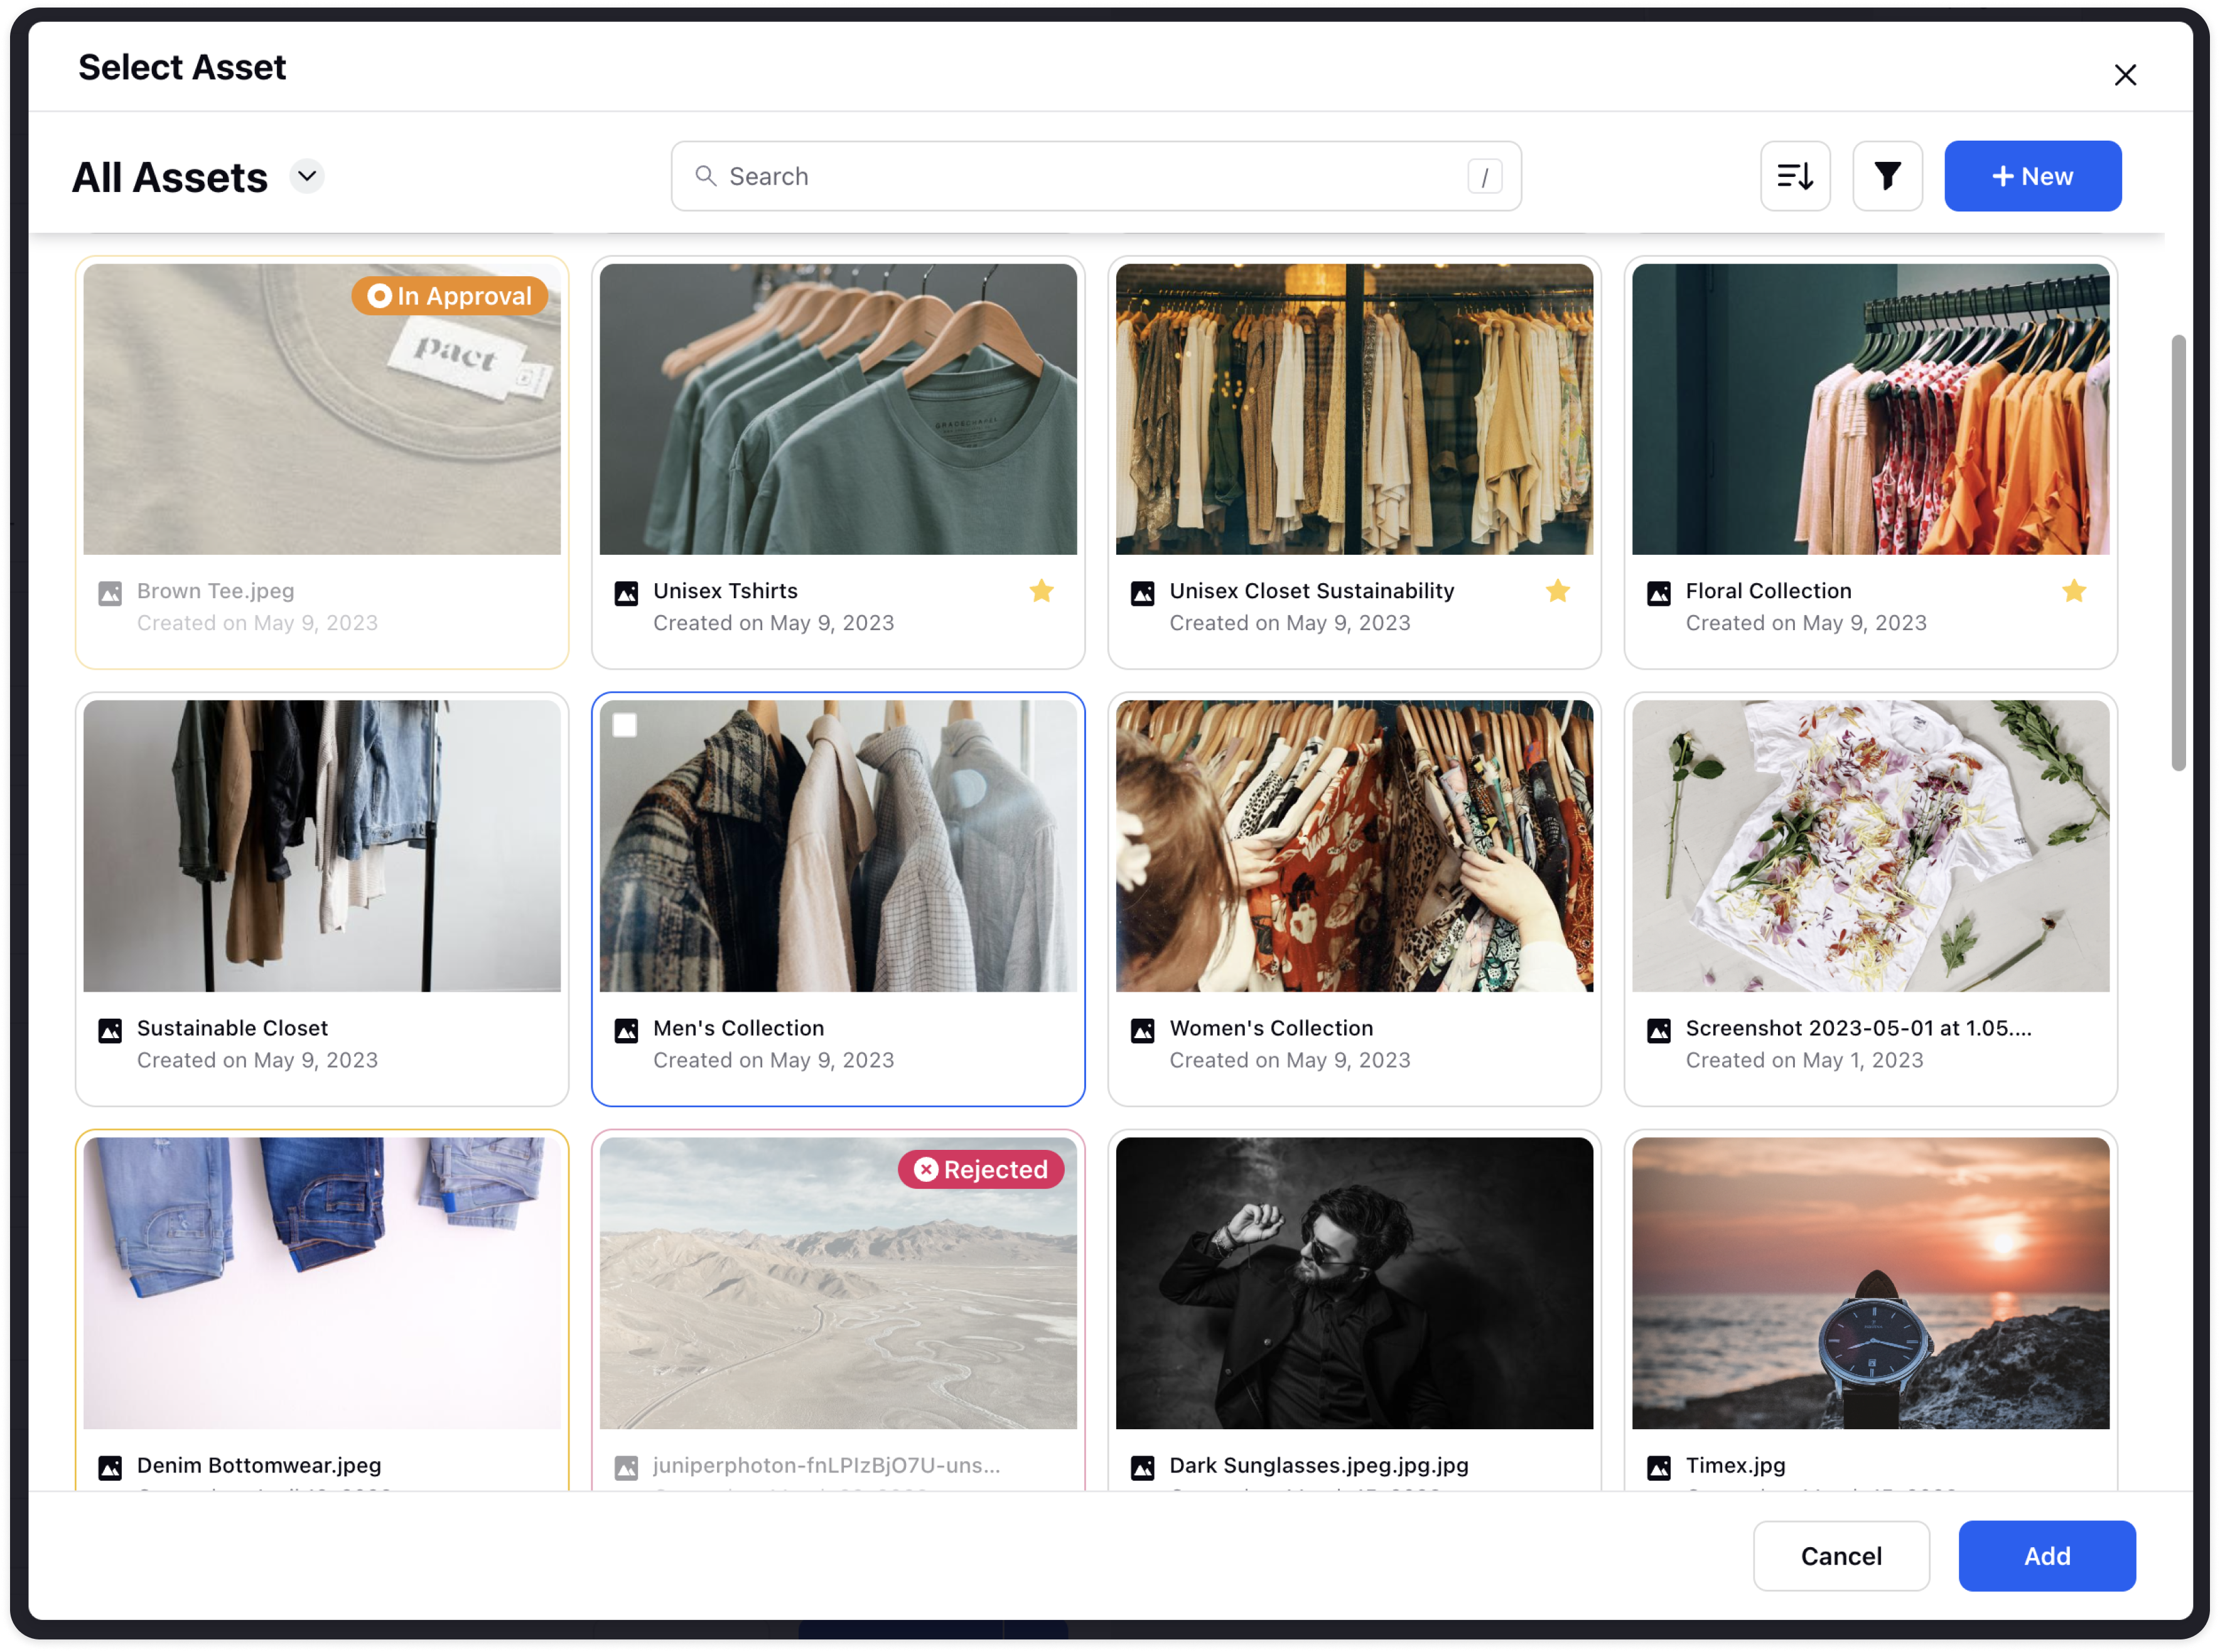
When selecting assets for publication, assets under In-approval or Rejected status will be unavailable if the corresponding toggle is enabled. Only approved can be selected.
Post Approval Views in Publishing
In the subsequent sections, we will delve deeper into the nuances of the Post Approval Workflow, ensuring that you possess a comprehensive understanding of its applications and potential benefits.
Managing Post Approval Workflow: After creating the workflow, navigate to the "All Approval" section within "Outbound Posts" under "Publishing" Module. Click on any post card to access the third pane.
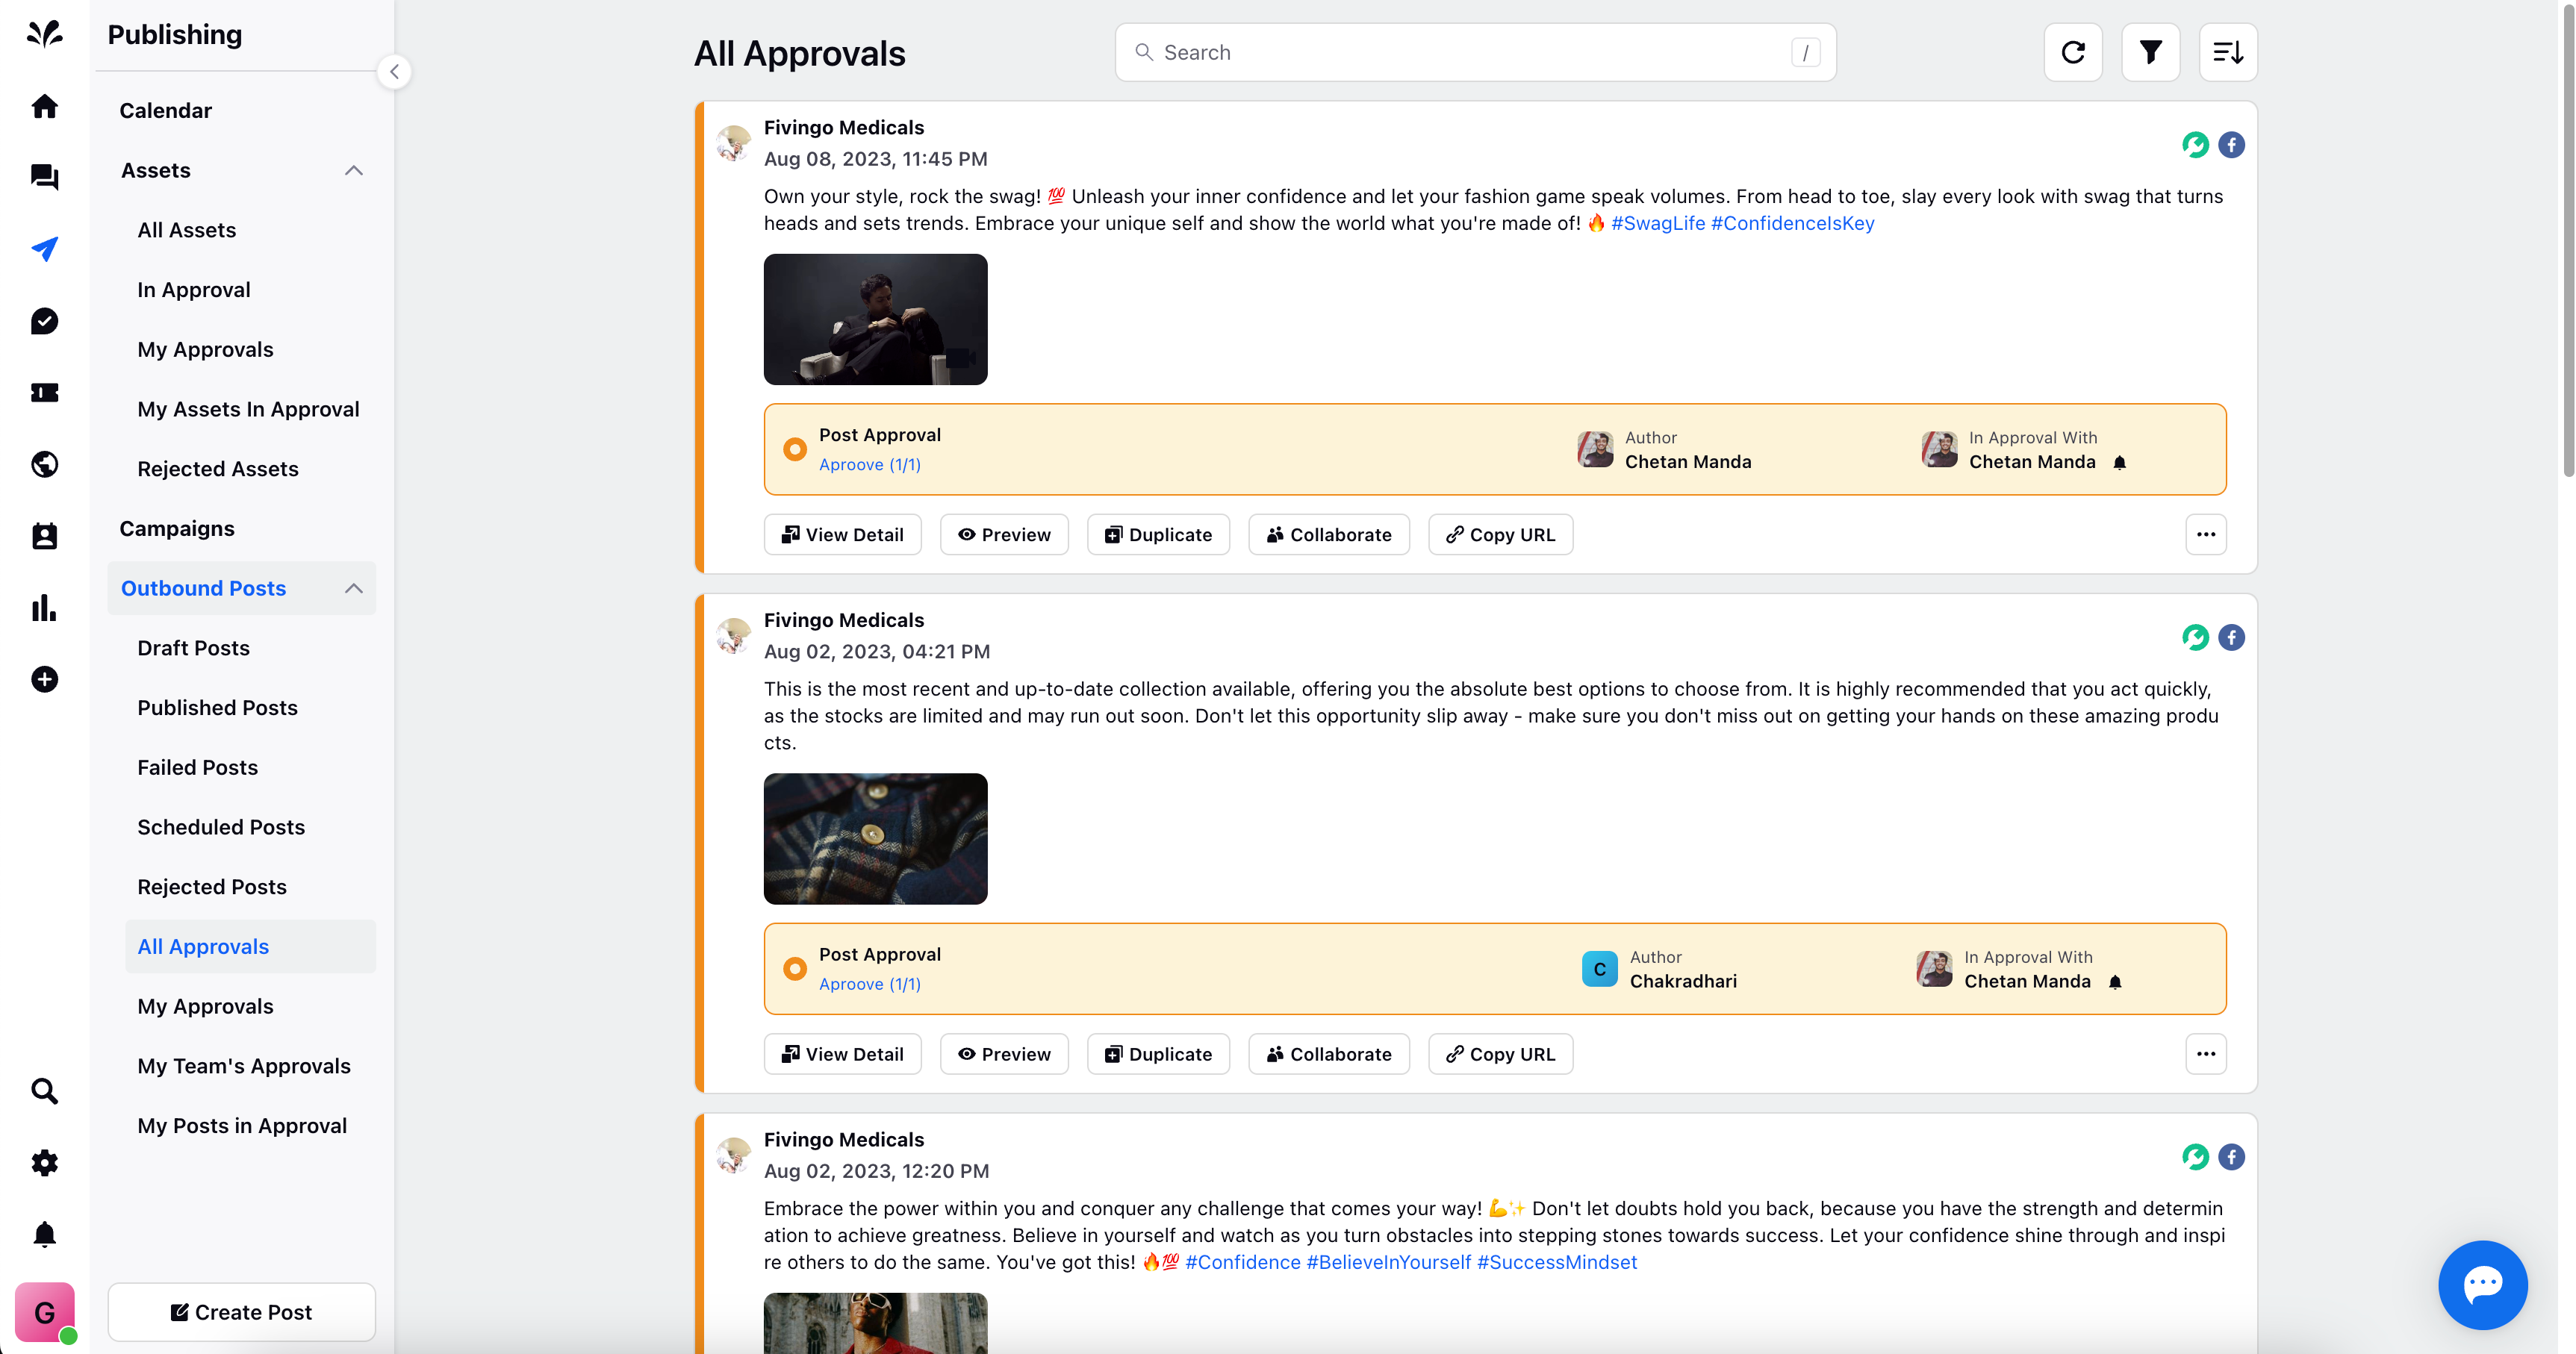
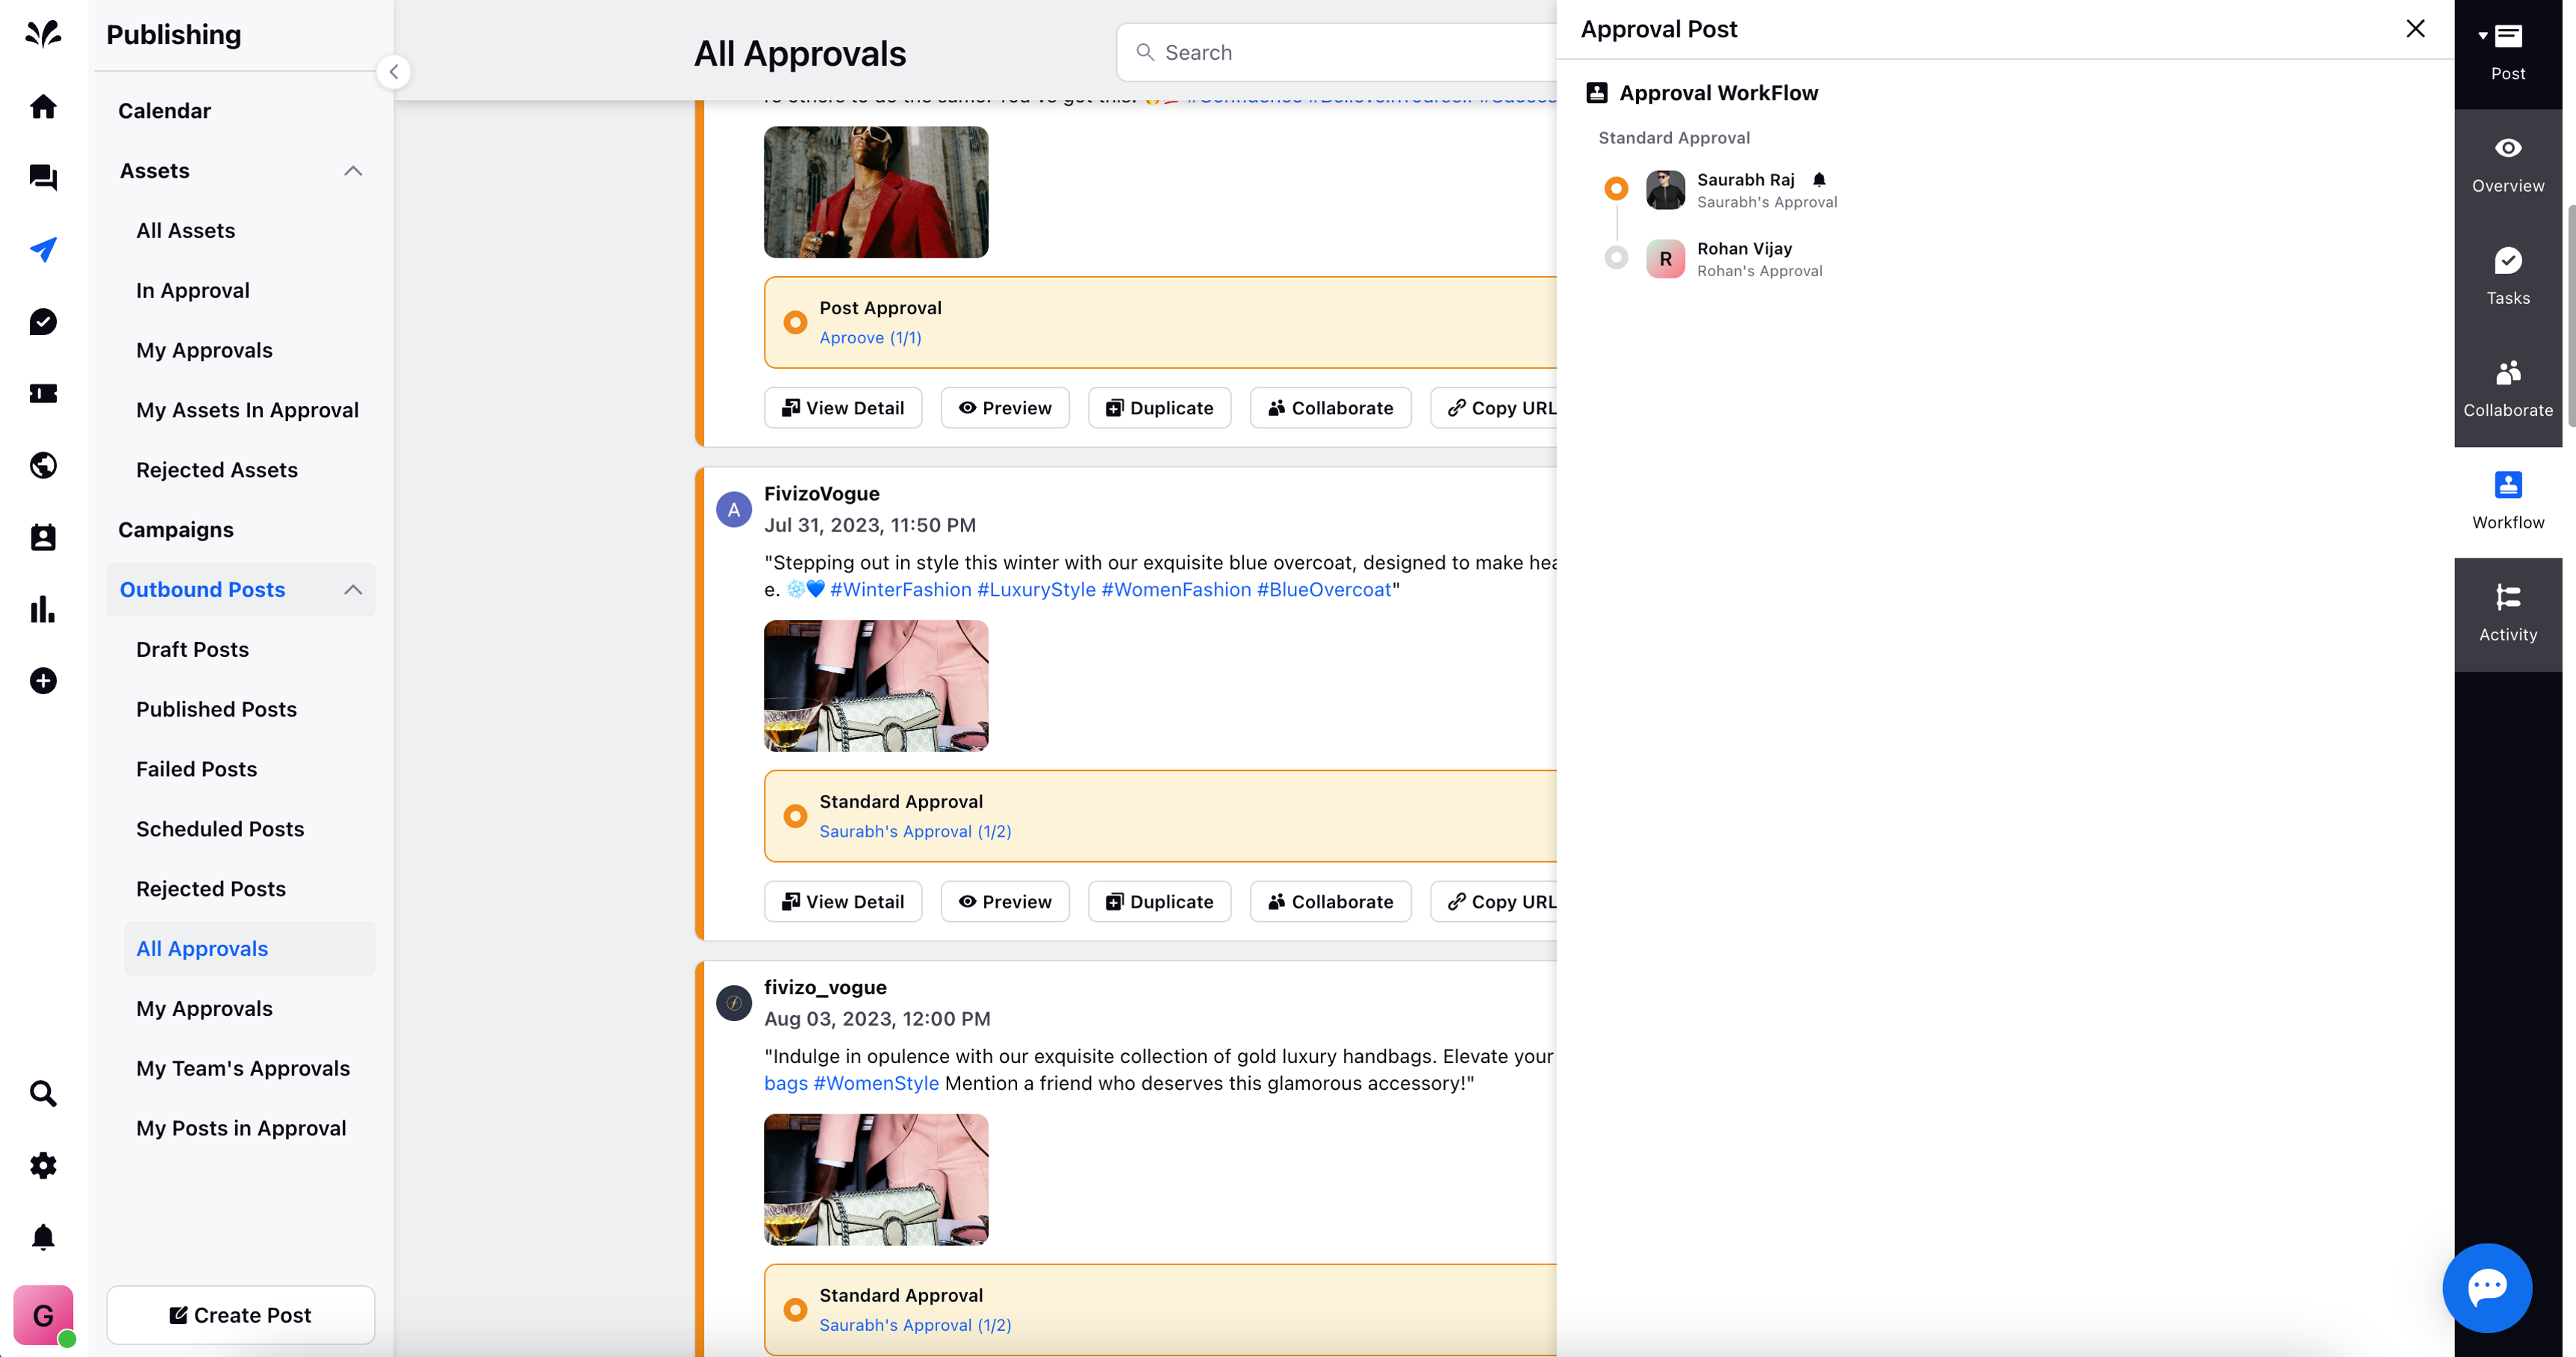
Working with the Workflow: Move to the "Approval Workflow" tab to view the created workflow for the selected post. Here, responsible approver can approve, reject, edit, or reschedule the post as per requirement.
Editing the Post: Refine the post under "Publishing Properties". Adjust Tags, Campaigns, Approval Workflow, and custom fields.
Approving or Rejecting: Deliberate carefully on factors like content quality, grammar, media relevance, and accuracy before approving or rejecting a post.
Rescheduling: If a post is rejected, reschedule it for a future date while addressing the identified issues.
Additional Options: By clicking the three dots icon at the post's top right:
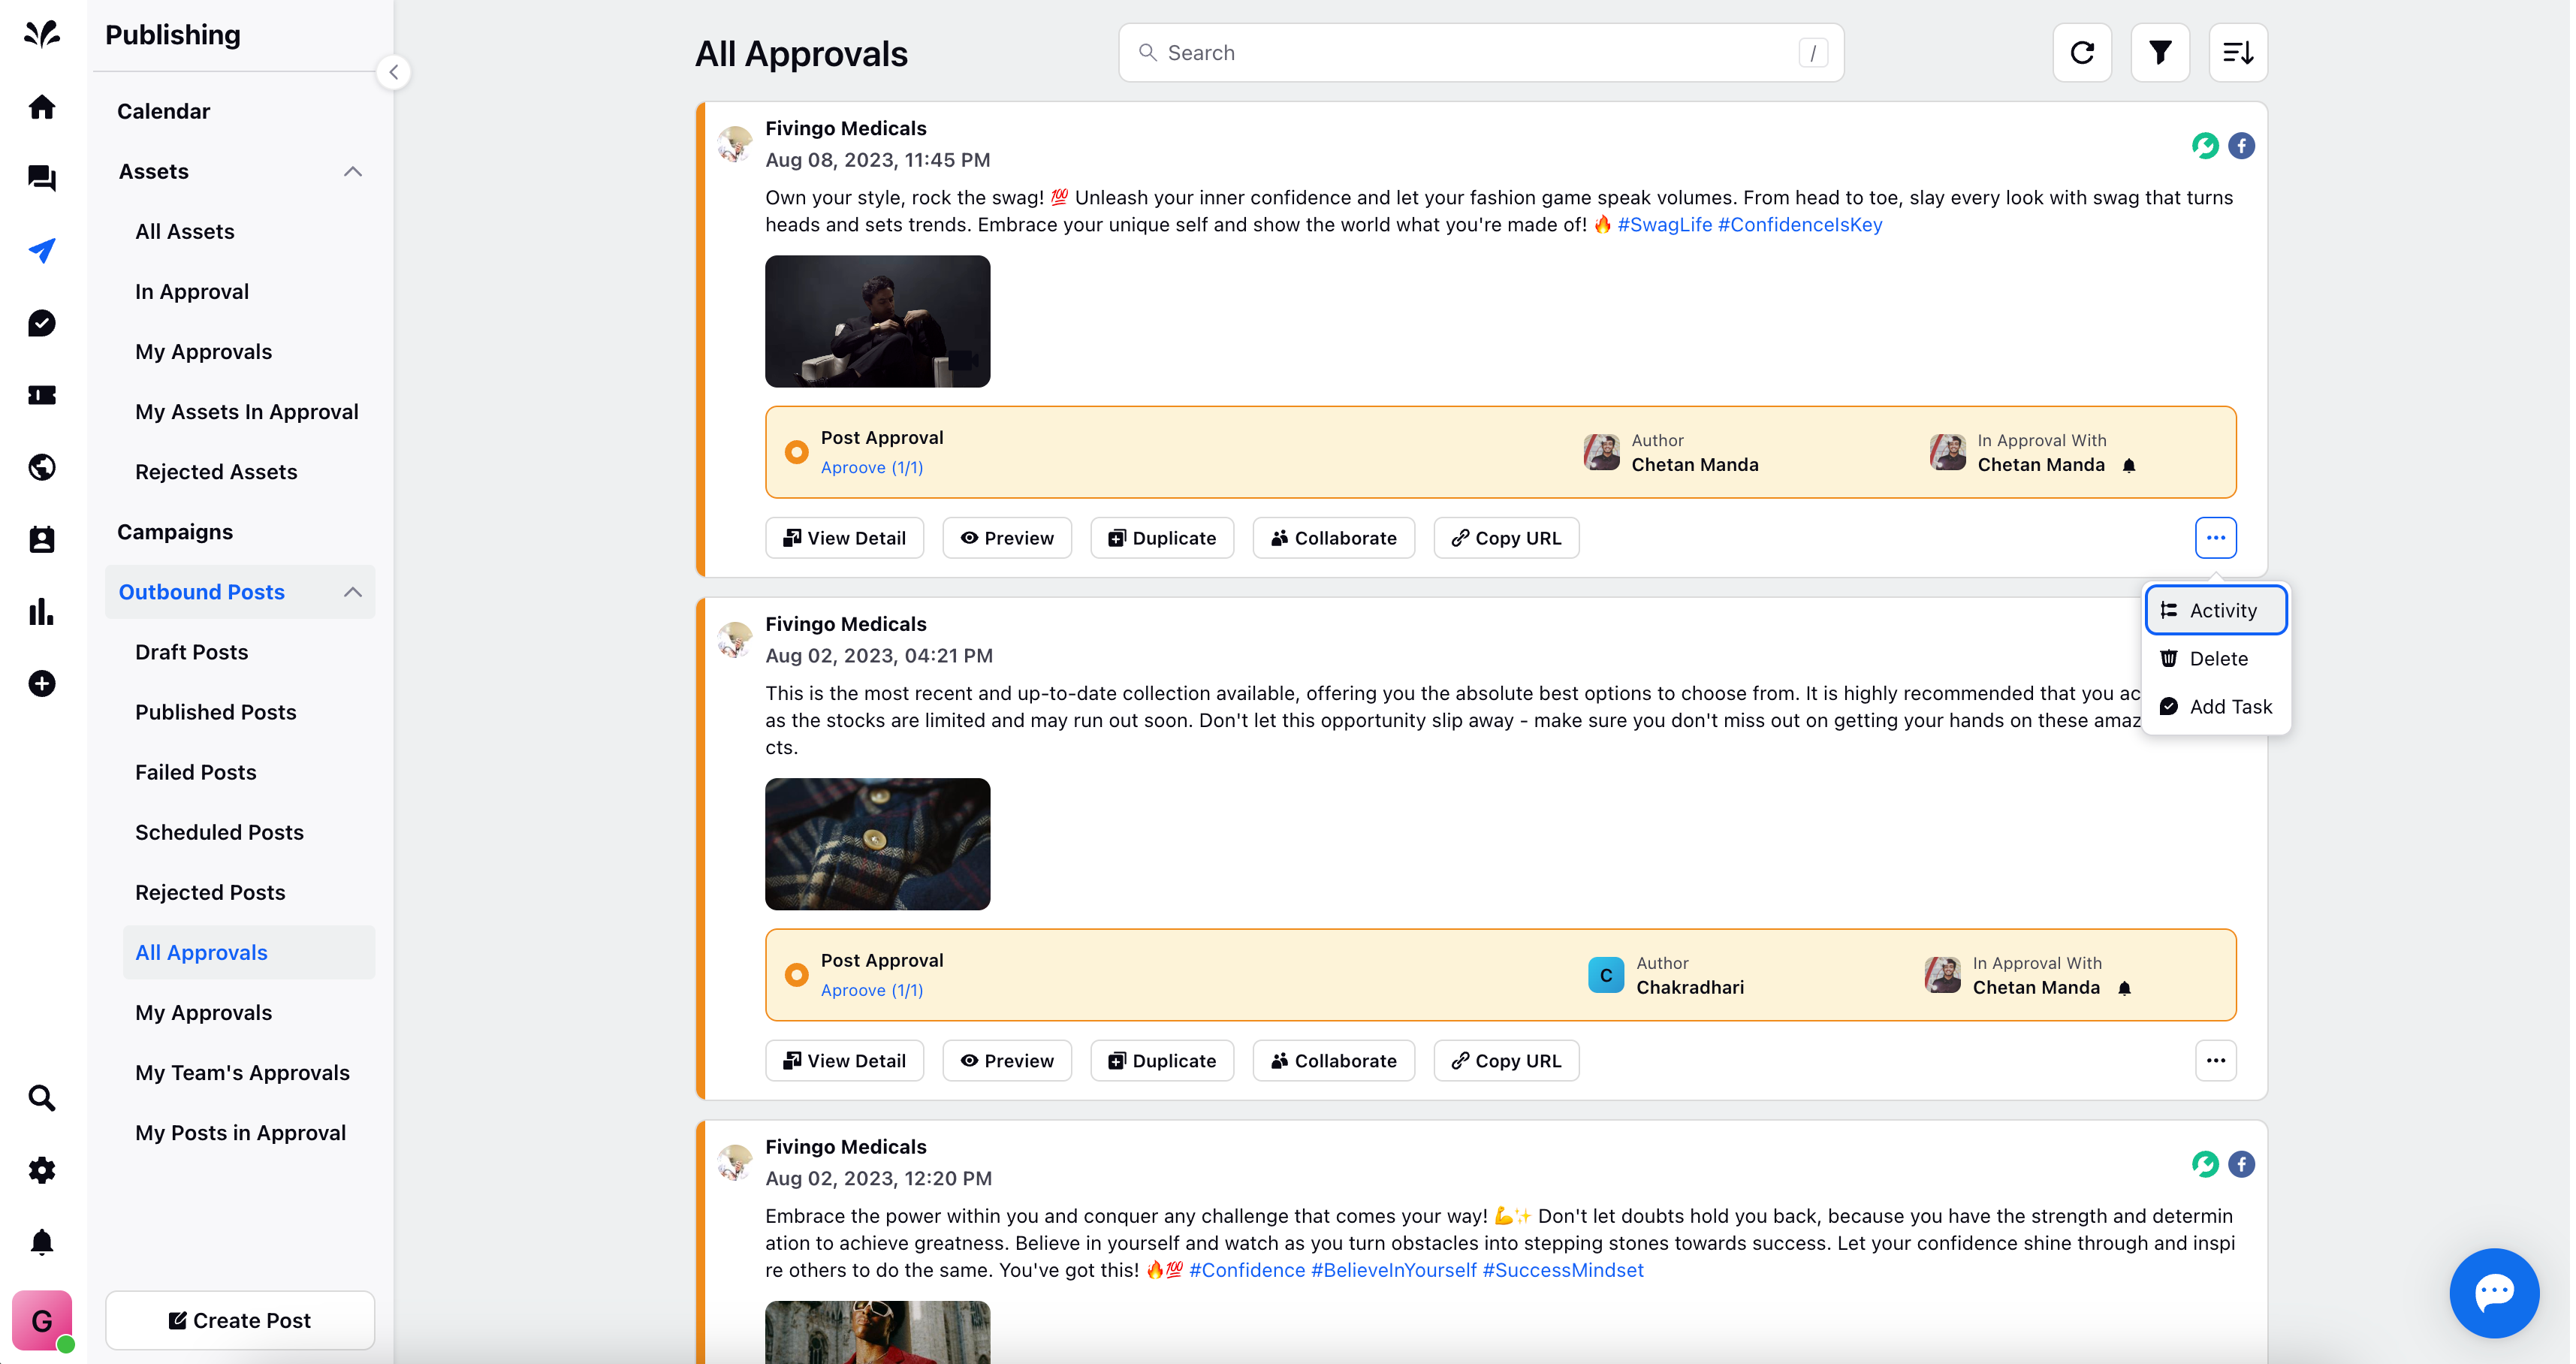
Duplicate: Create a similar post with specific details via "Omni-Channel Publisher"
Collaborate: Add relevant notes to the post for reference.
Copy URL: Duplicate the post's URL, if necessary.
Activity: Track the post's activity over a given time frame.
Boost: Enhance post visibility by specifying budget, target audience, campaign, and ad account.
Delete: Remove the post from consideration, if required.
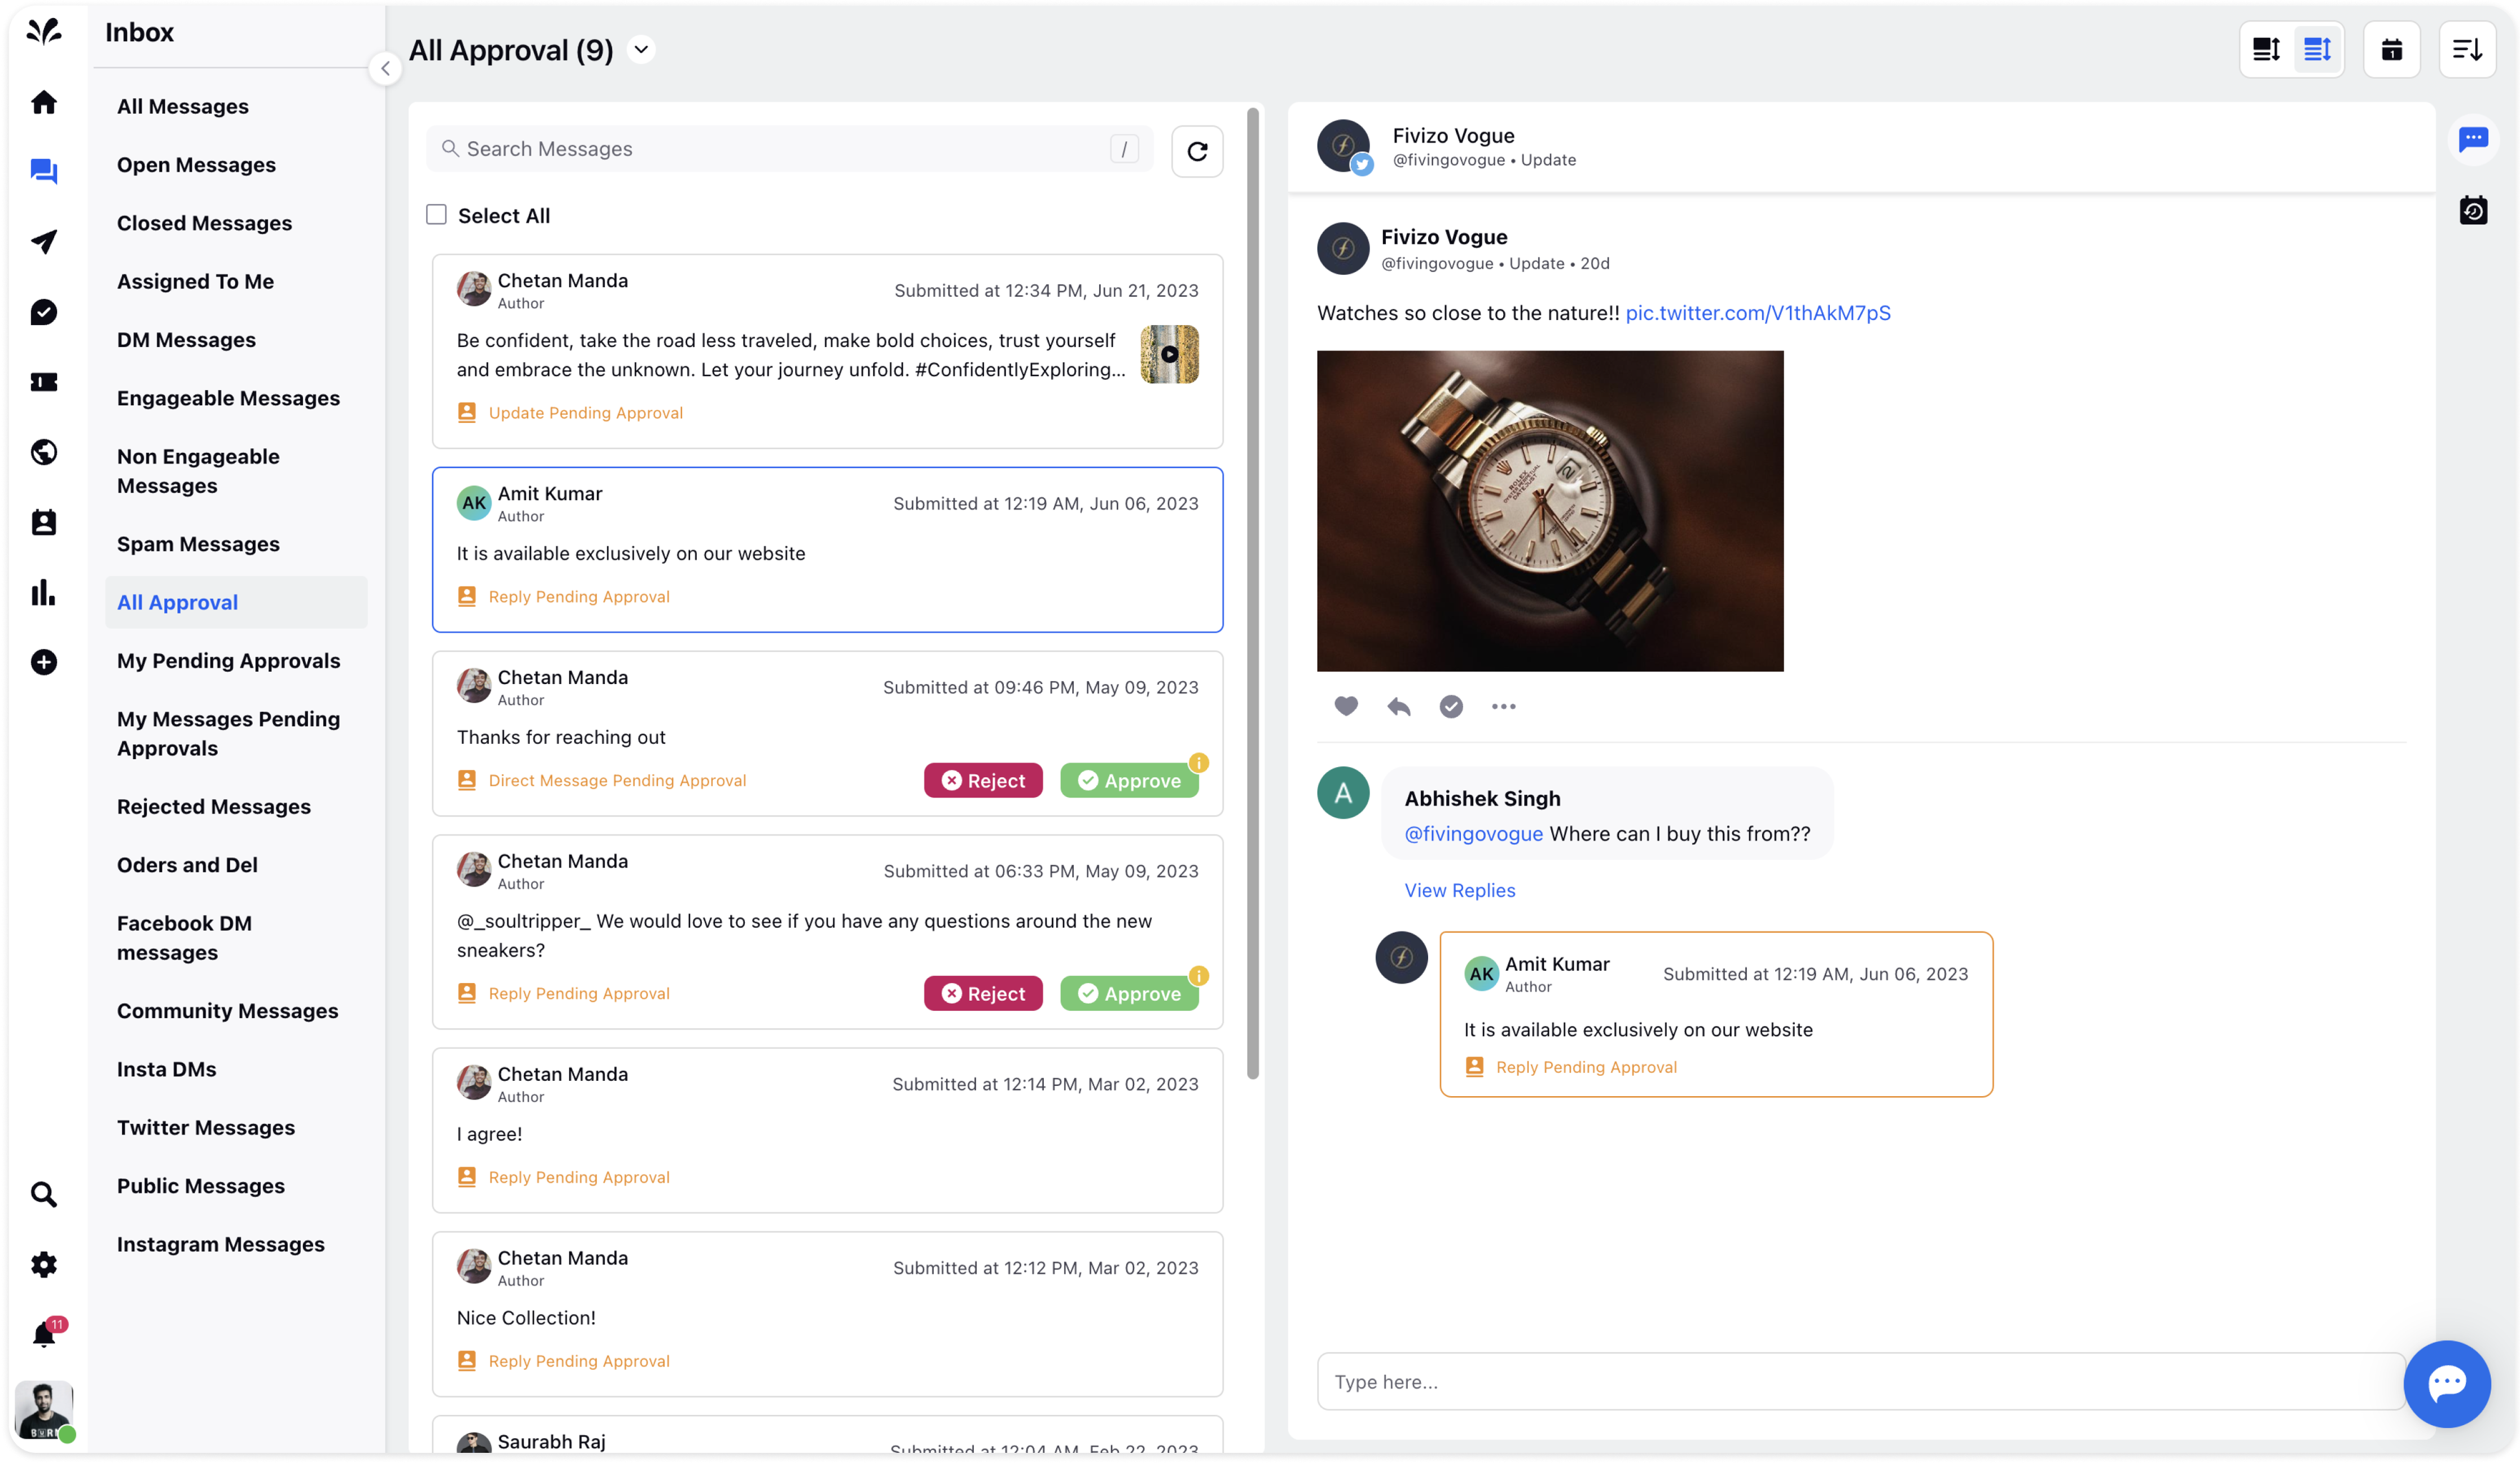
Message Approval Views in Inbox
Initiate the process by navigating to Inbox Module (represented by Conversation or Messaging Icon) via the left pane of Sprinklr platform.
Select any message from the left message stream. The message details will appear. Now, reply to the Retweet message in the Reply box and select the Workflow you have created from the dropdown. Click Send for Approval.
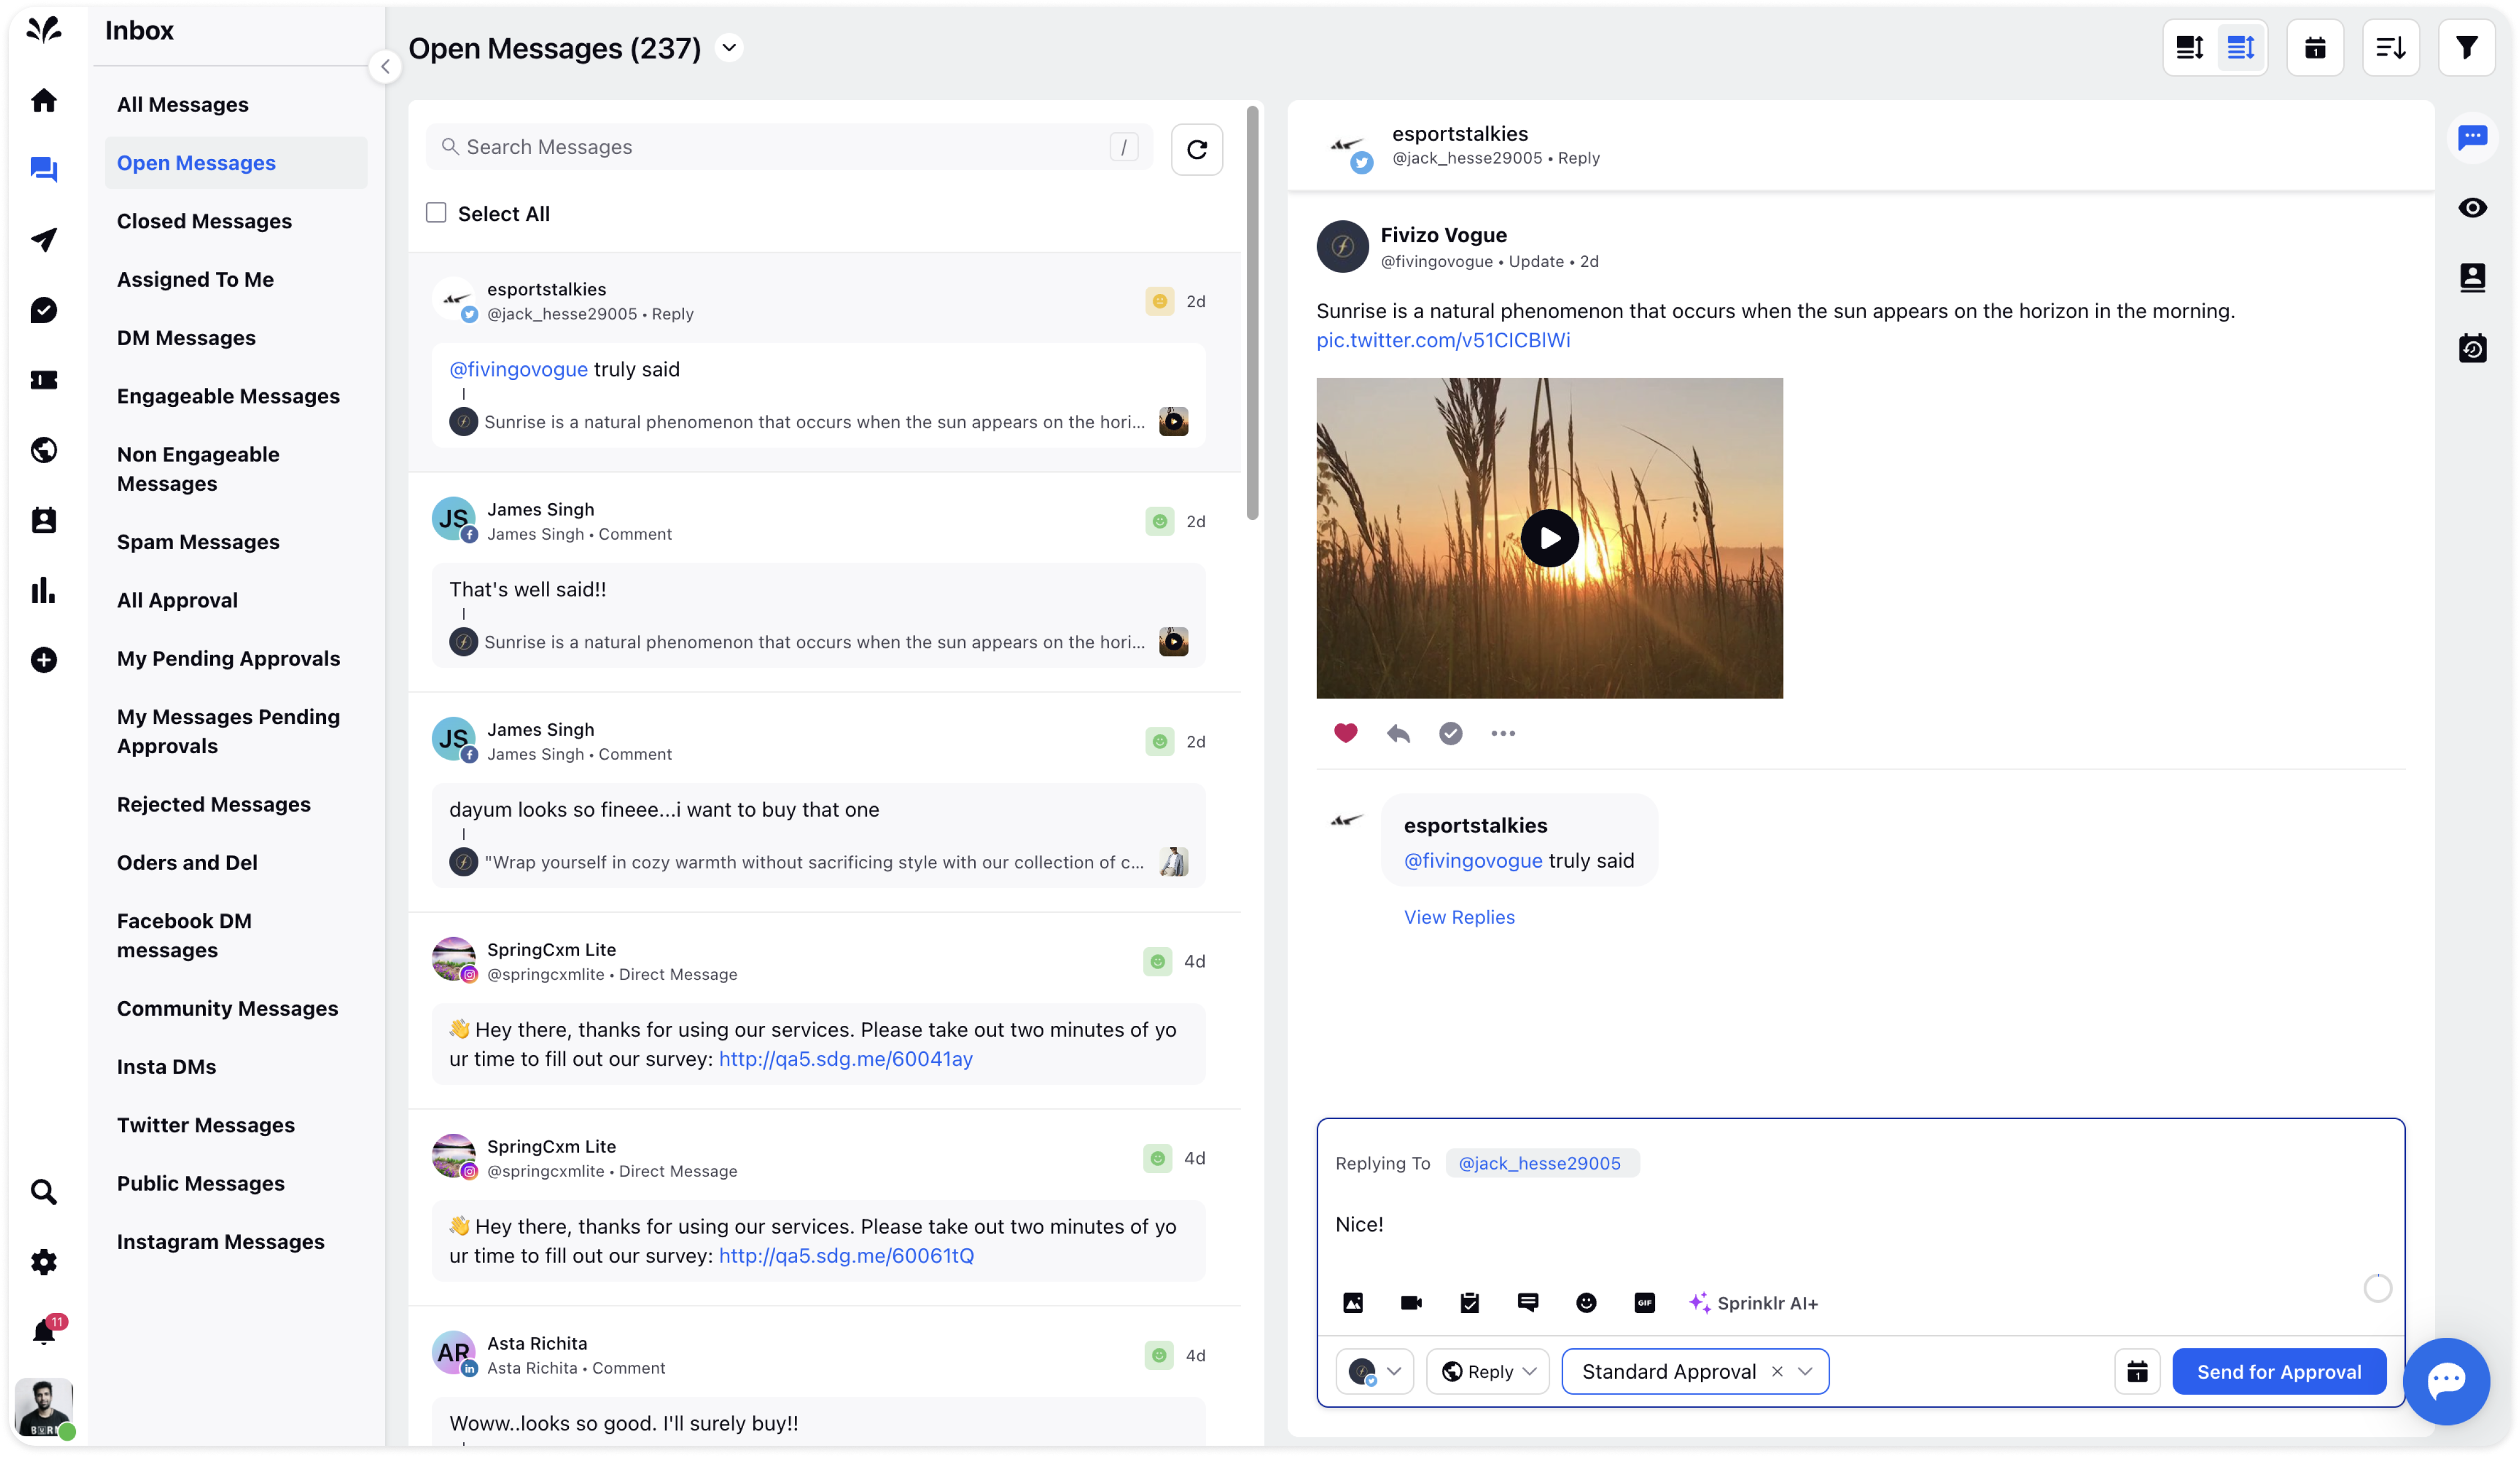
The message will be sent for approval. This is how pending message approval will look on the right.

4. You can also check your pending message approvals in the My Messages Pending Approvals view or All Approvals on the left.