
Learn Creating, Managing & Leveraging Account Groups
Updated
Are you tired of juggling multiple social channels? Account groups are here to rescue you! Imagine having all your social platforms organised in one neat package. This amazing feature simplifies sharing your content. No more clicking around to select each account separately – one click, and you're set!
However, that's not all – account groups are like a super-tool for your social media strategy. Got a cool post that needs to go out on multiple social channels at the same time? Account groups have got your back! They make it a breeze to post on different platforms all at once. And guess what? Every company is unique, and so are its needs. They can be created for different groups and teams for different purposes. Need one for your big announcements? Done. How about another for your behind-the-scenes stuff? No problem!
Say goodbye to the hassle and hello to streamlined content distribution. It's time to take charge of your social presence like a pro! Let's delve into the art of creating, managing, and harnessing the potential of account groups:
Creating an Account Group
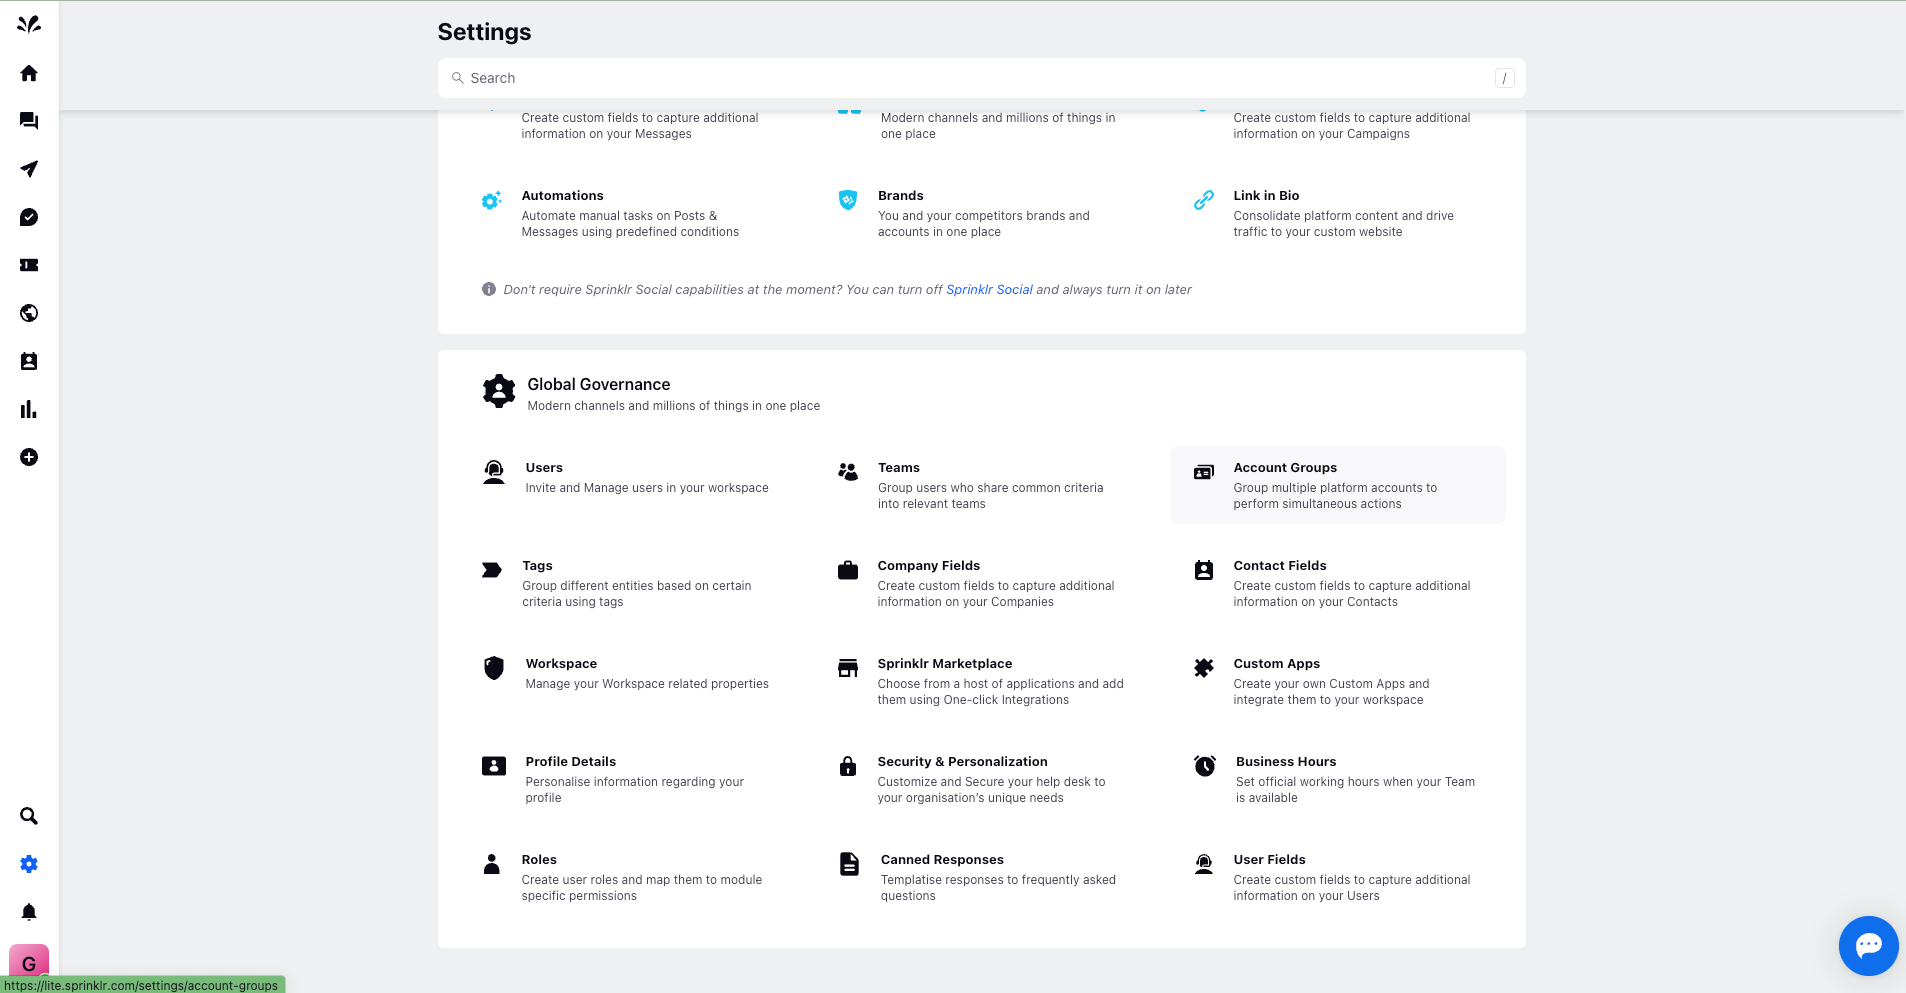
Initiating Account Group Creation: Start the process by navigating to the "Account Groups" section within the "Global Governance" settings of the Sprinklr platform.
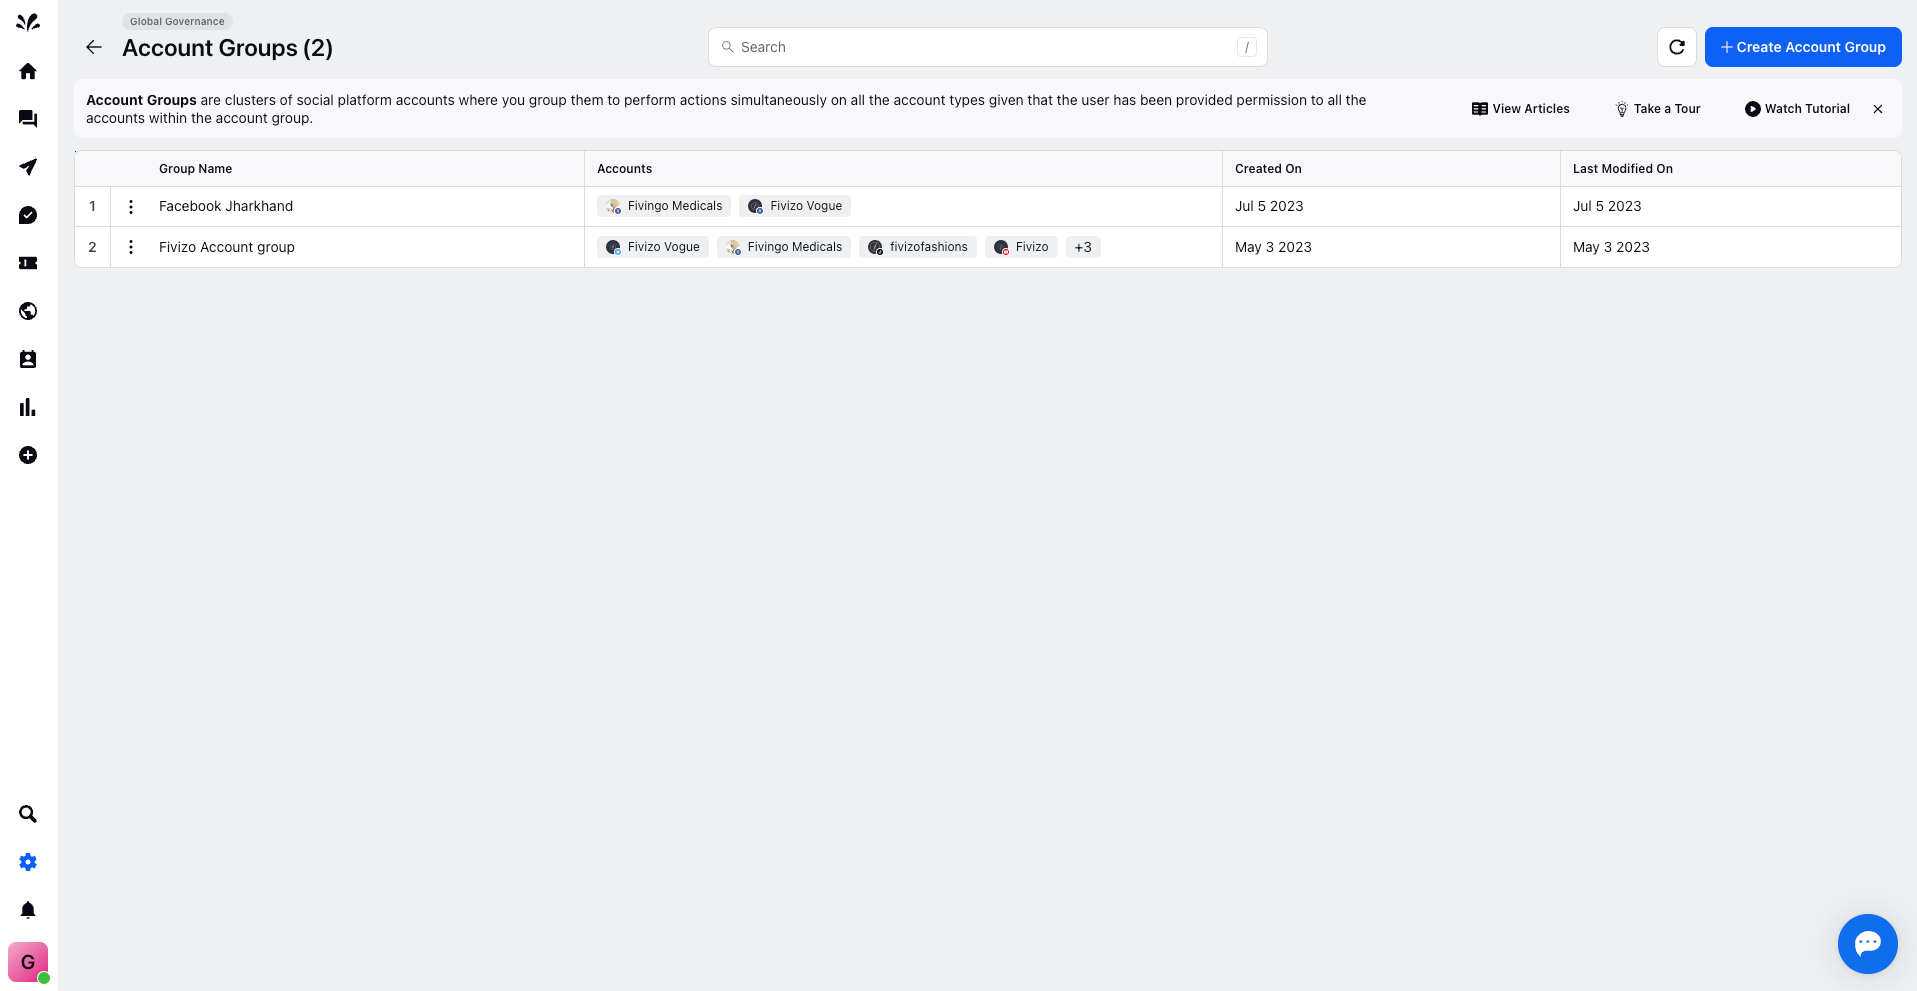
Creating an Account Group: Click on "Create Account Group" located in the top right corner.
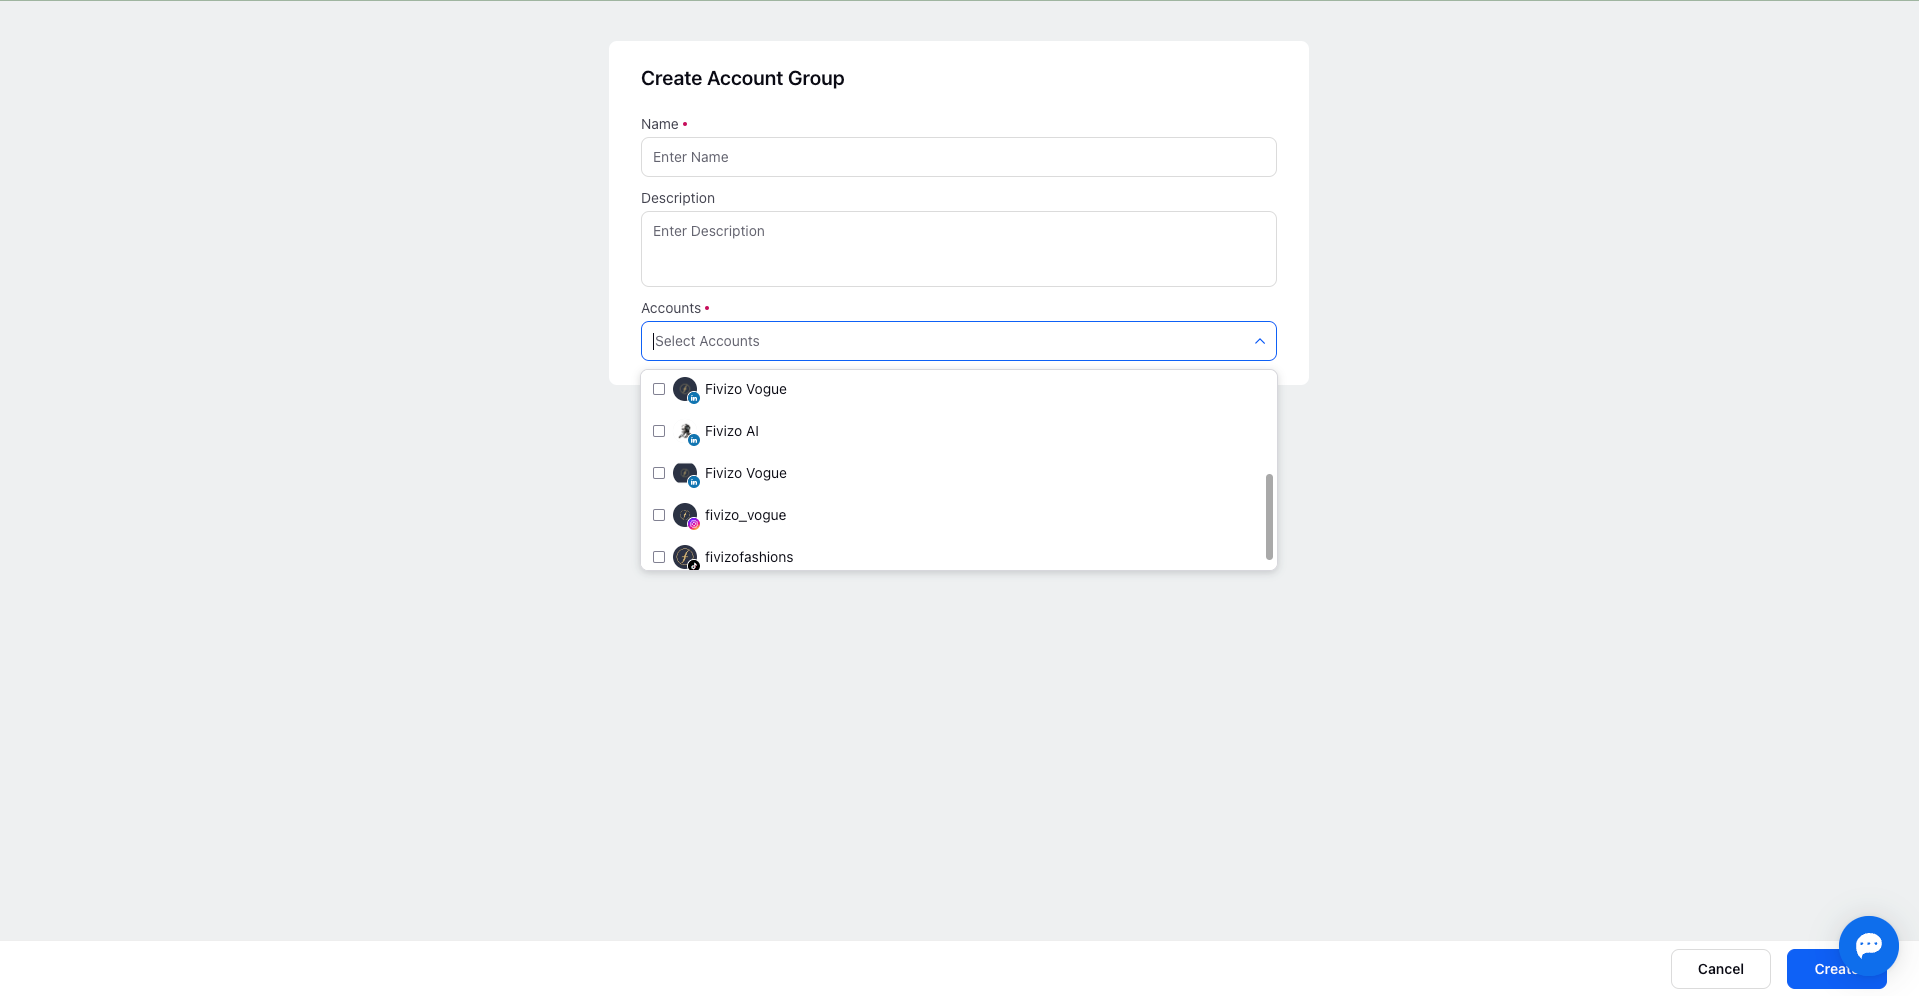
Configuring an Account Group: Provide essential details during account group creation:
- Name: Assign a distinctive name to the account group, reflecting its purpose or context.
- Description: Optionally, a brief description for clarity can be added.
- Account Selection: Choose and add specific social accounts to be included within this account group.
Creating the Account Group: Finalise the creation by clicking the "Create" icon at the bottom right. Once created, you can enhance the account group's capabilities through subsequent actions. Let's learn them right away:
Managing an Account Group
By clicking the "three-dots" menu (more options), you can access a range of actions for each account group on the record manager page. The following actions provide flexibility to:
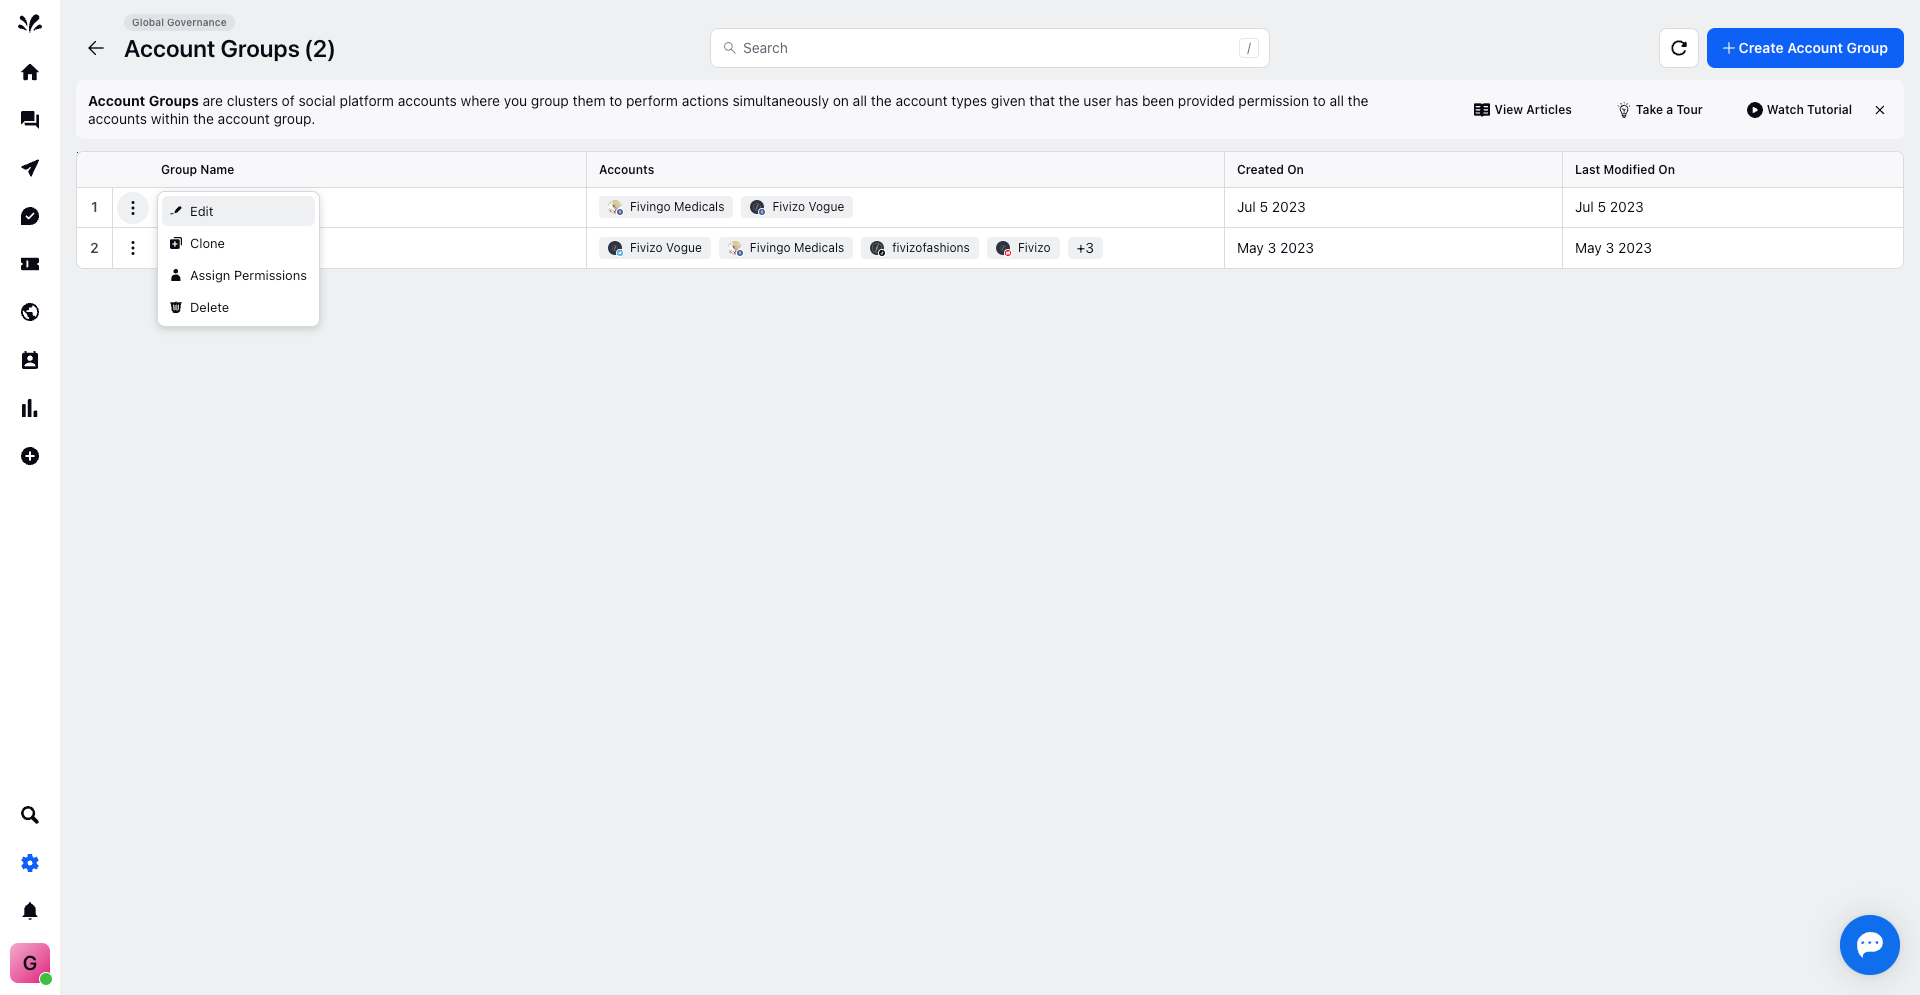
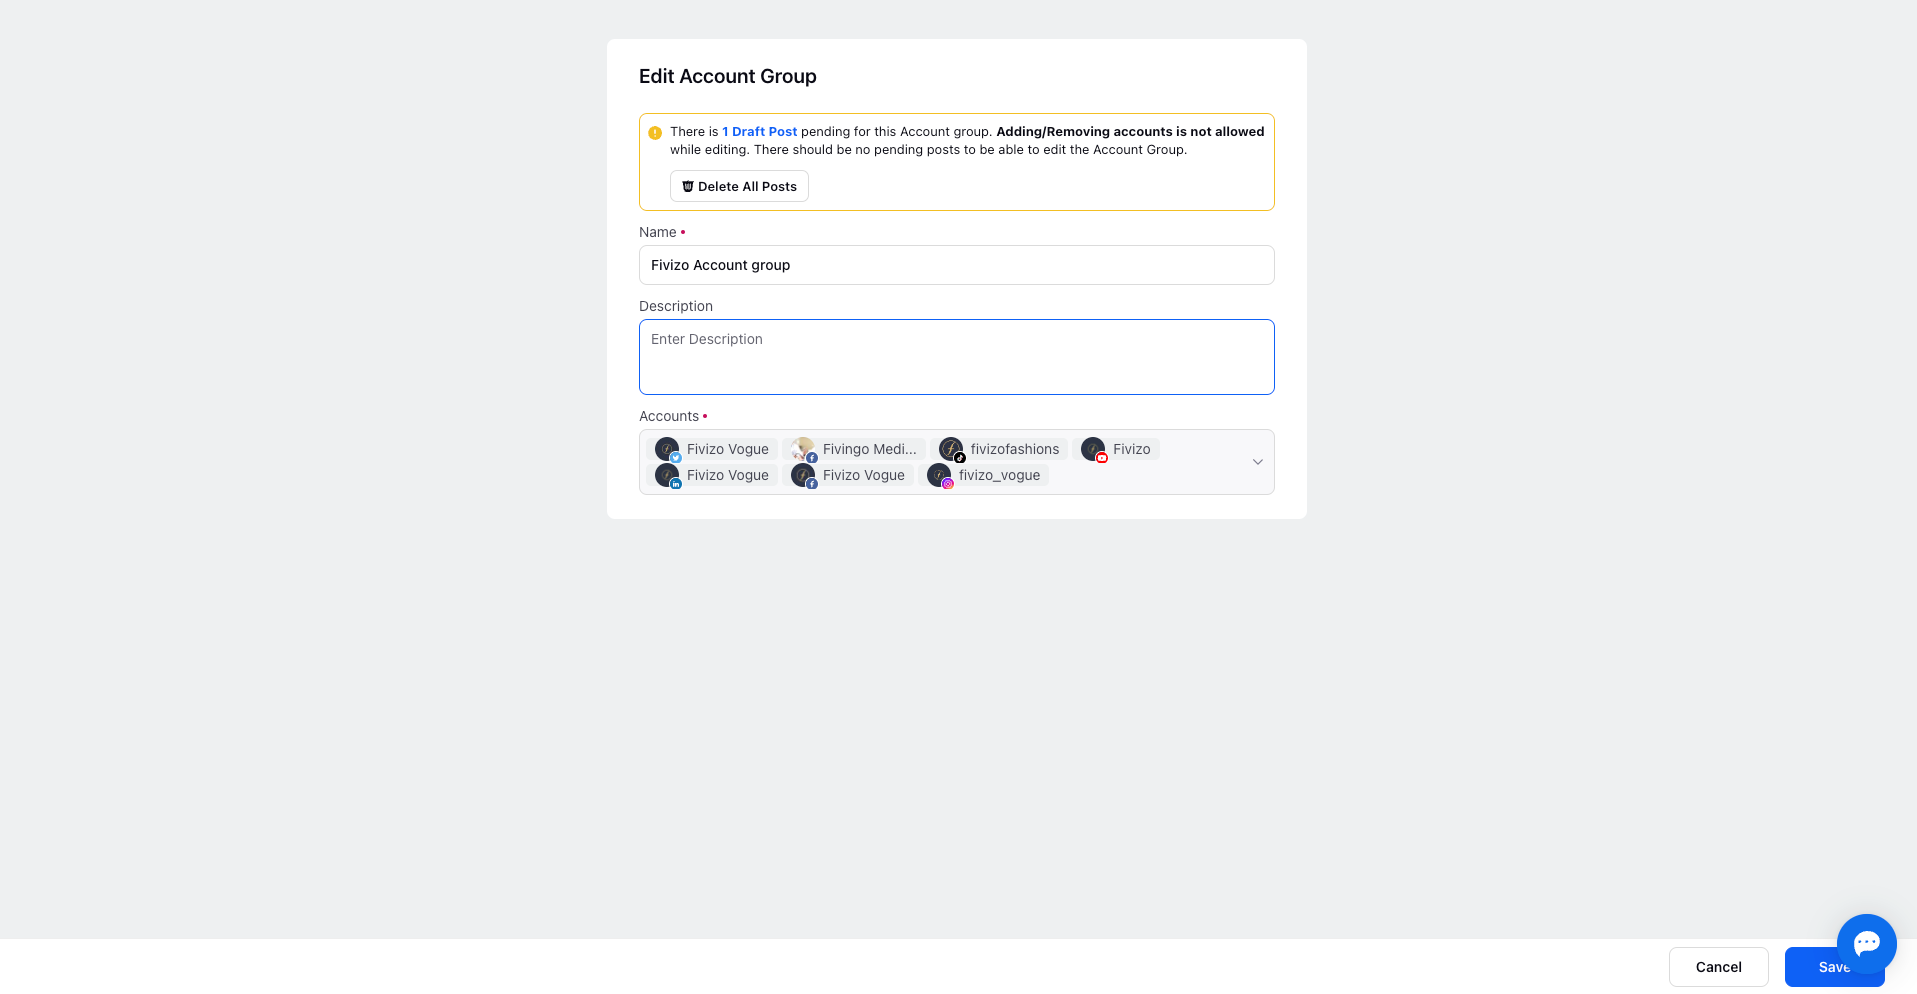
Edit: Refine and customize your account groups effortlessly with the Edit action.
Clone: Create duplicates of existing account groups for streamlined configurations.
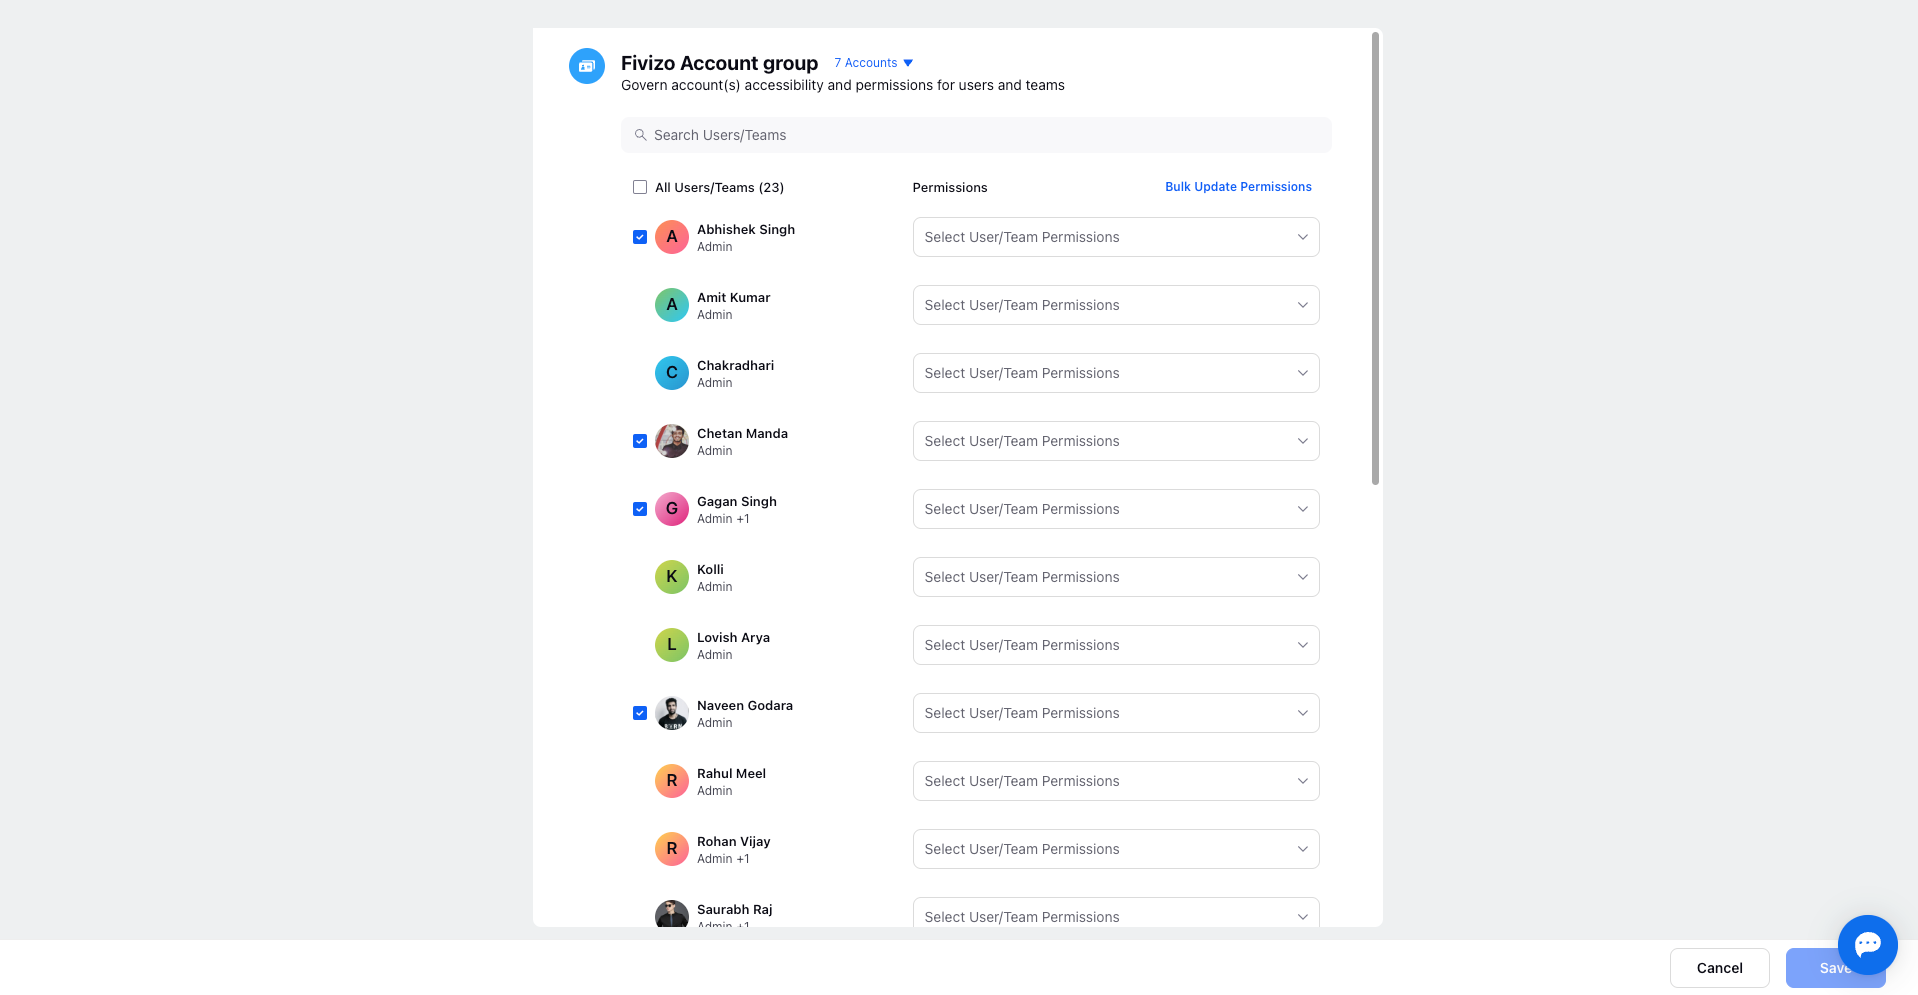
Set Permissions: Govern account accessibility and permissions across users and teams:
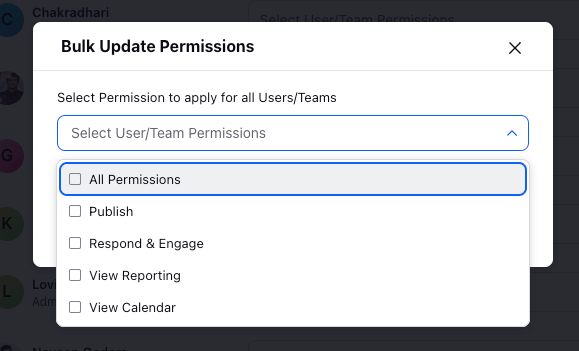
A new window displays a list of platform users. Simply, assign specific permissions such as Publish, Respond & Engage, View Reporting, and more, individually or collectively.
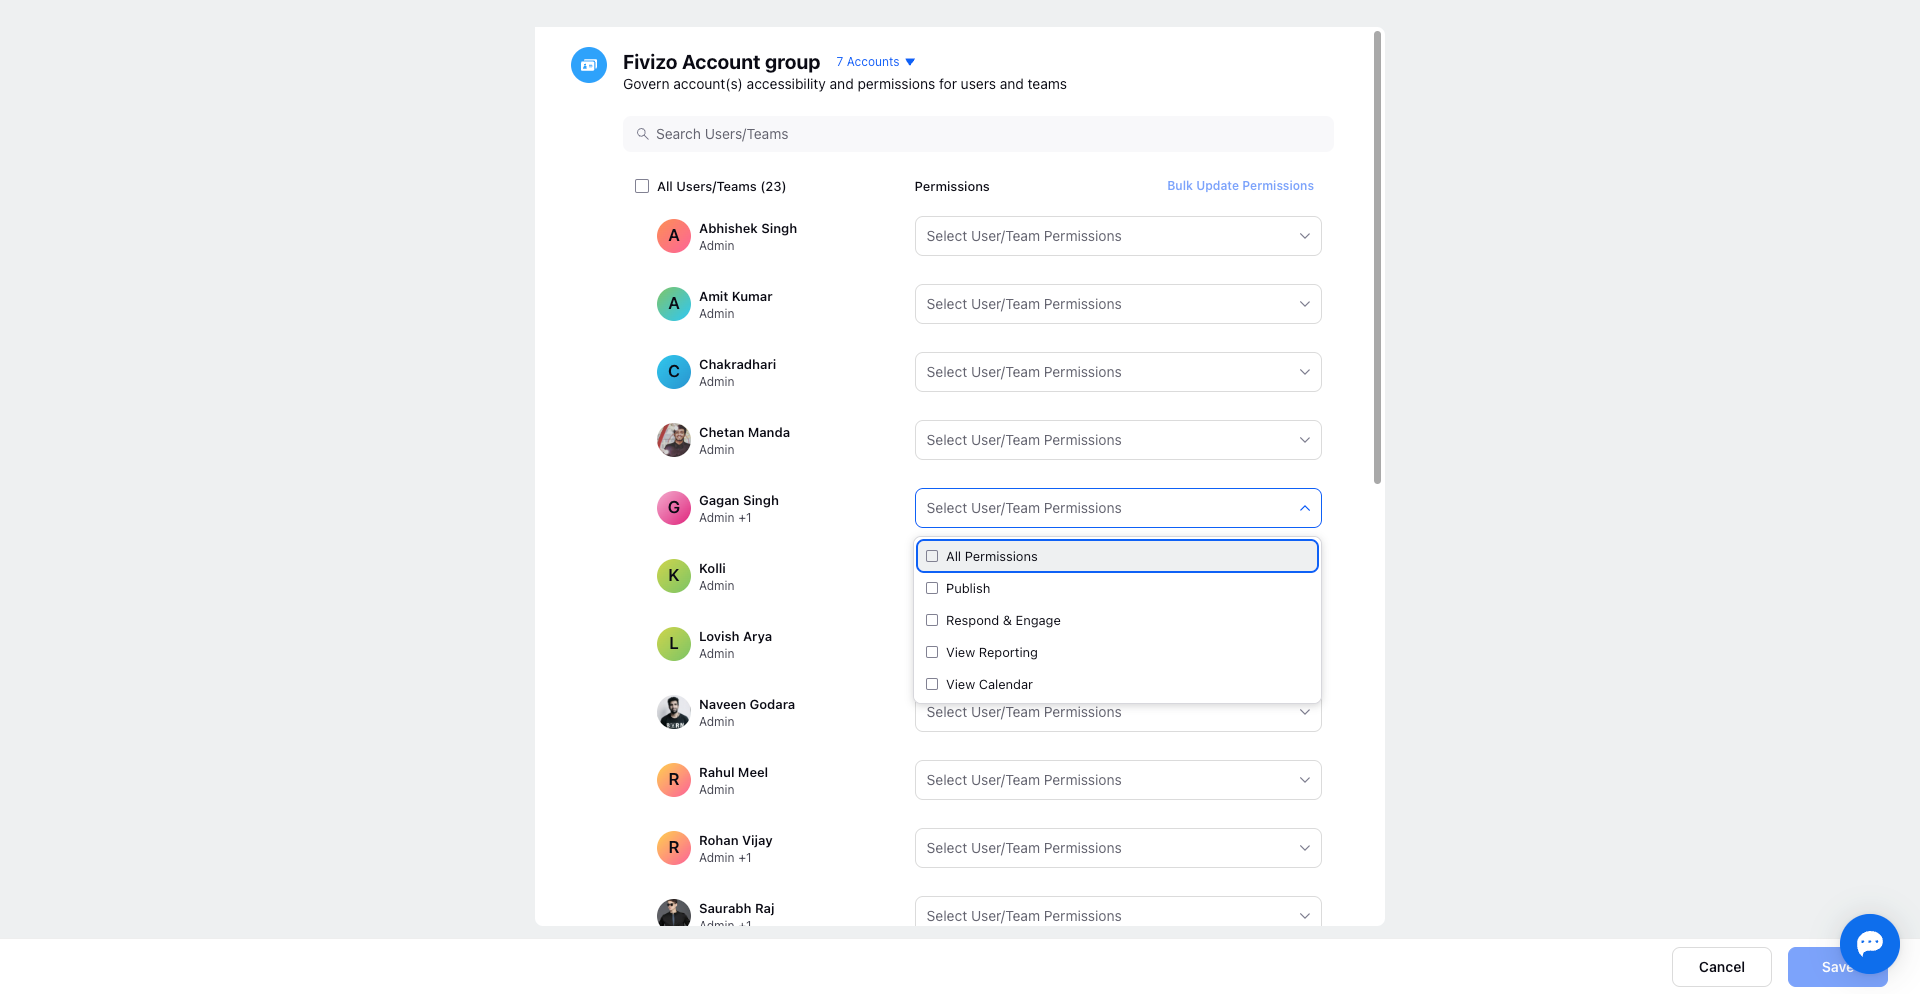
Bulk updates are also possible through the option at the top right corner.
After adjustments, save the settings by clicking "Save" at the bottom right.
Delete: Eliminate redundant or obsolete account groups as per requirement.

Leveraging Account Groups in Operations
Discover how account groups can revolutionise your platform activities:
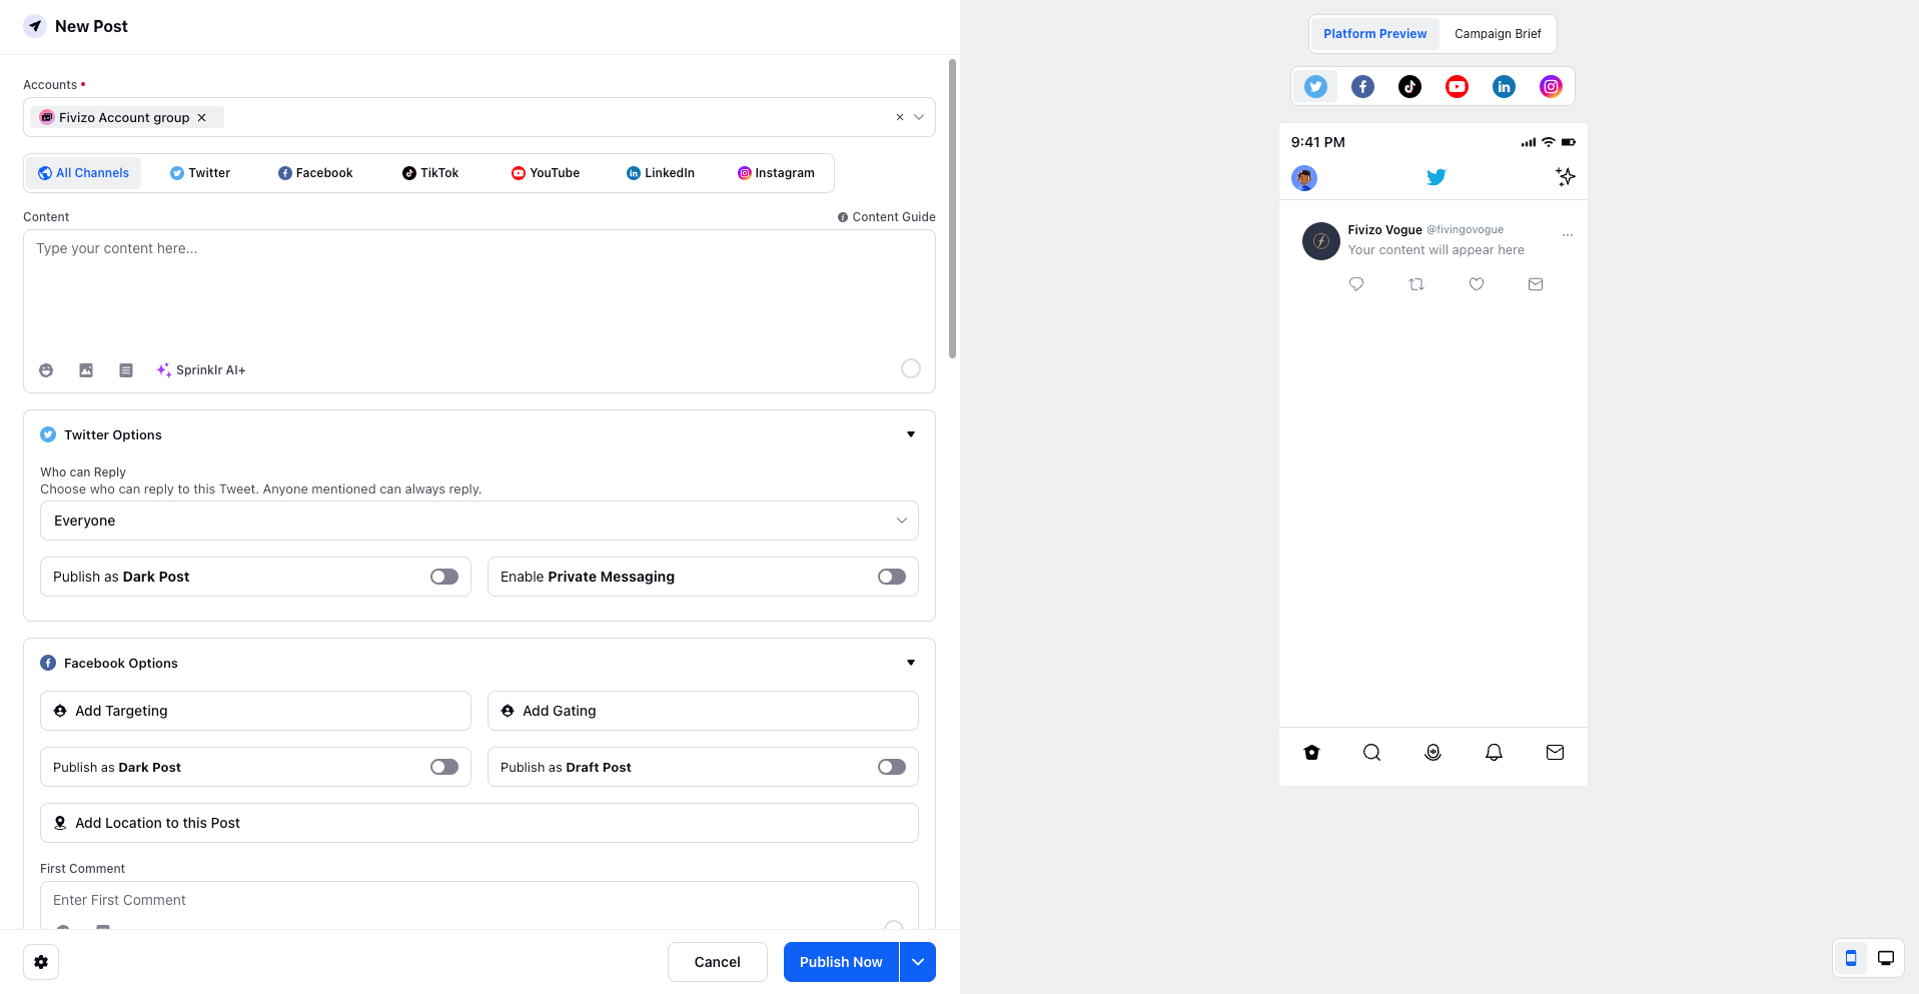
Omni-Channel Publisher: During post creation via the omni-channel publisher, select and include account groups directly from the Account dropdown.
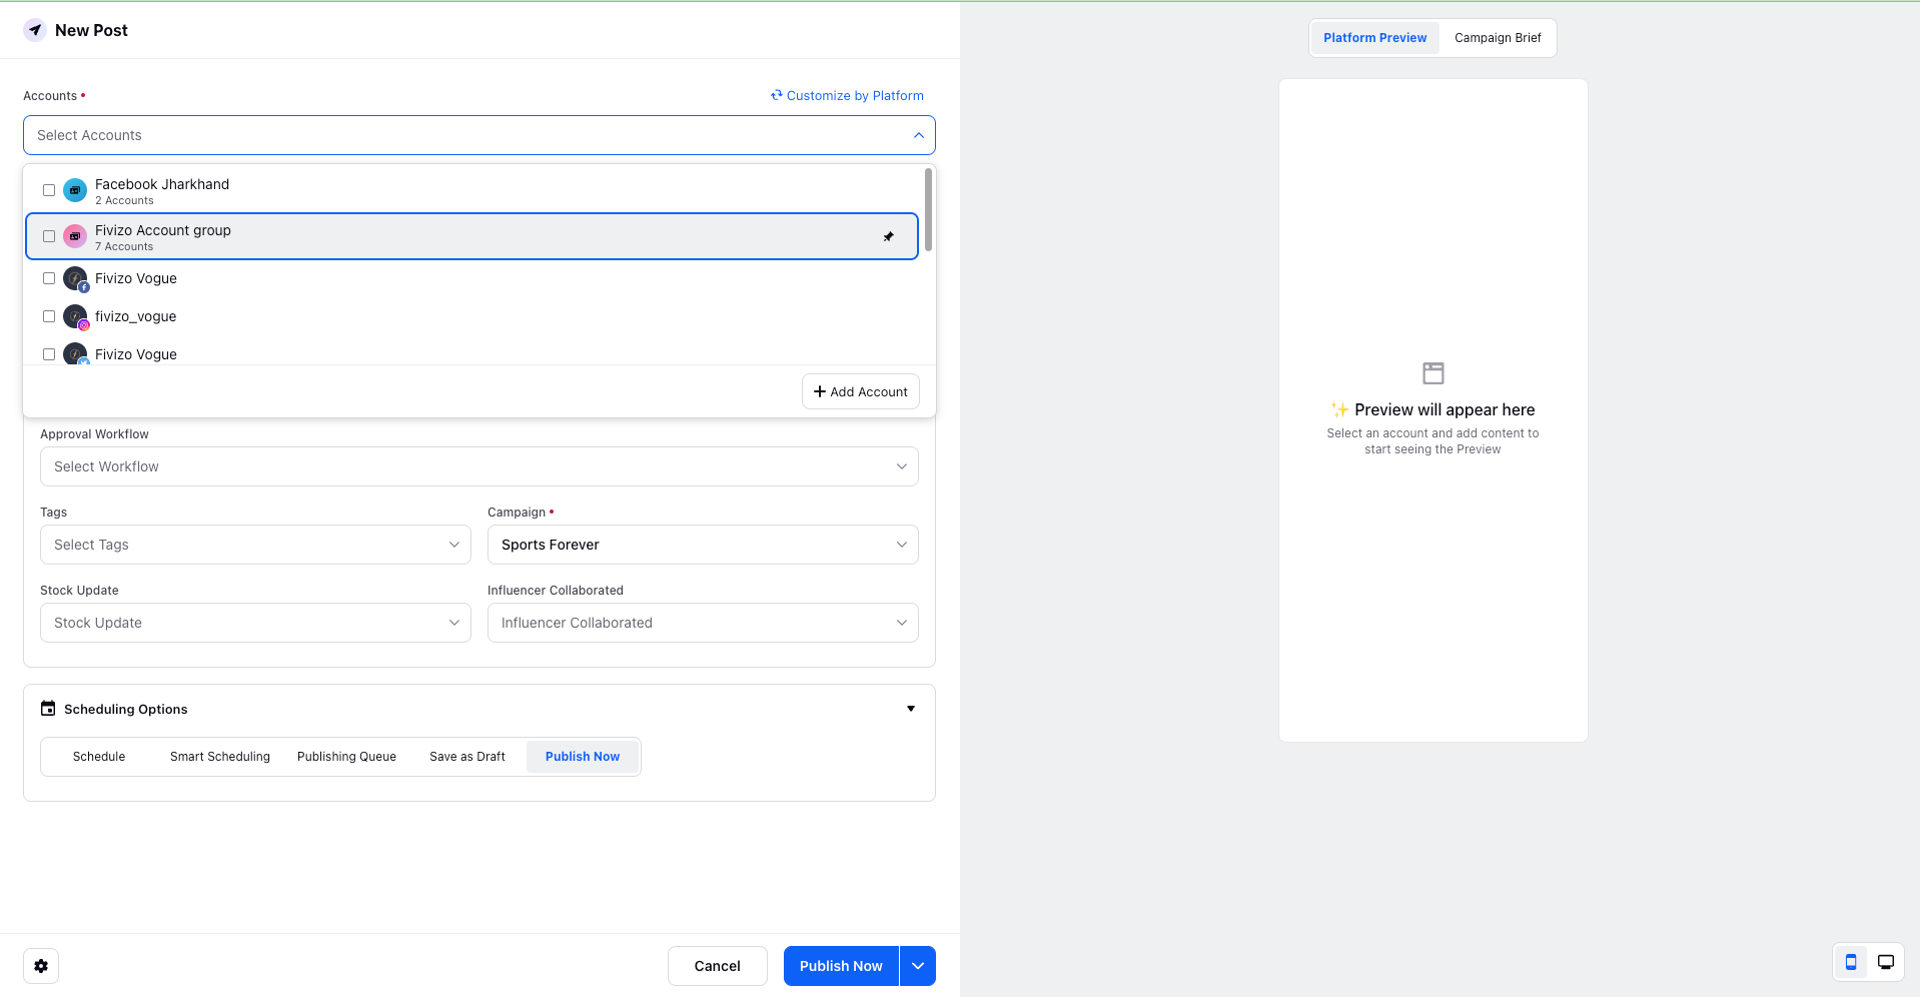
Streamlined Previews: Chosen account groups populate with their respective social accounts, offering a comprehensive preview.
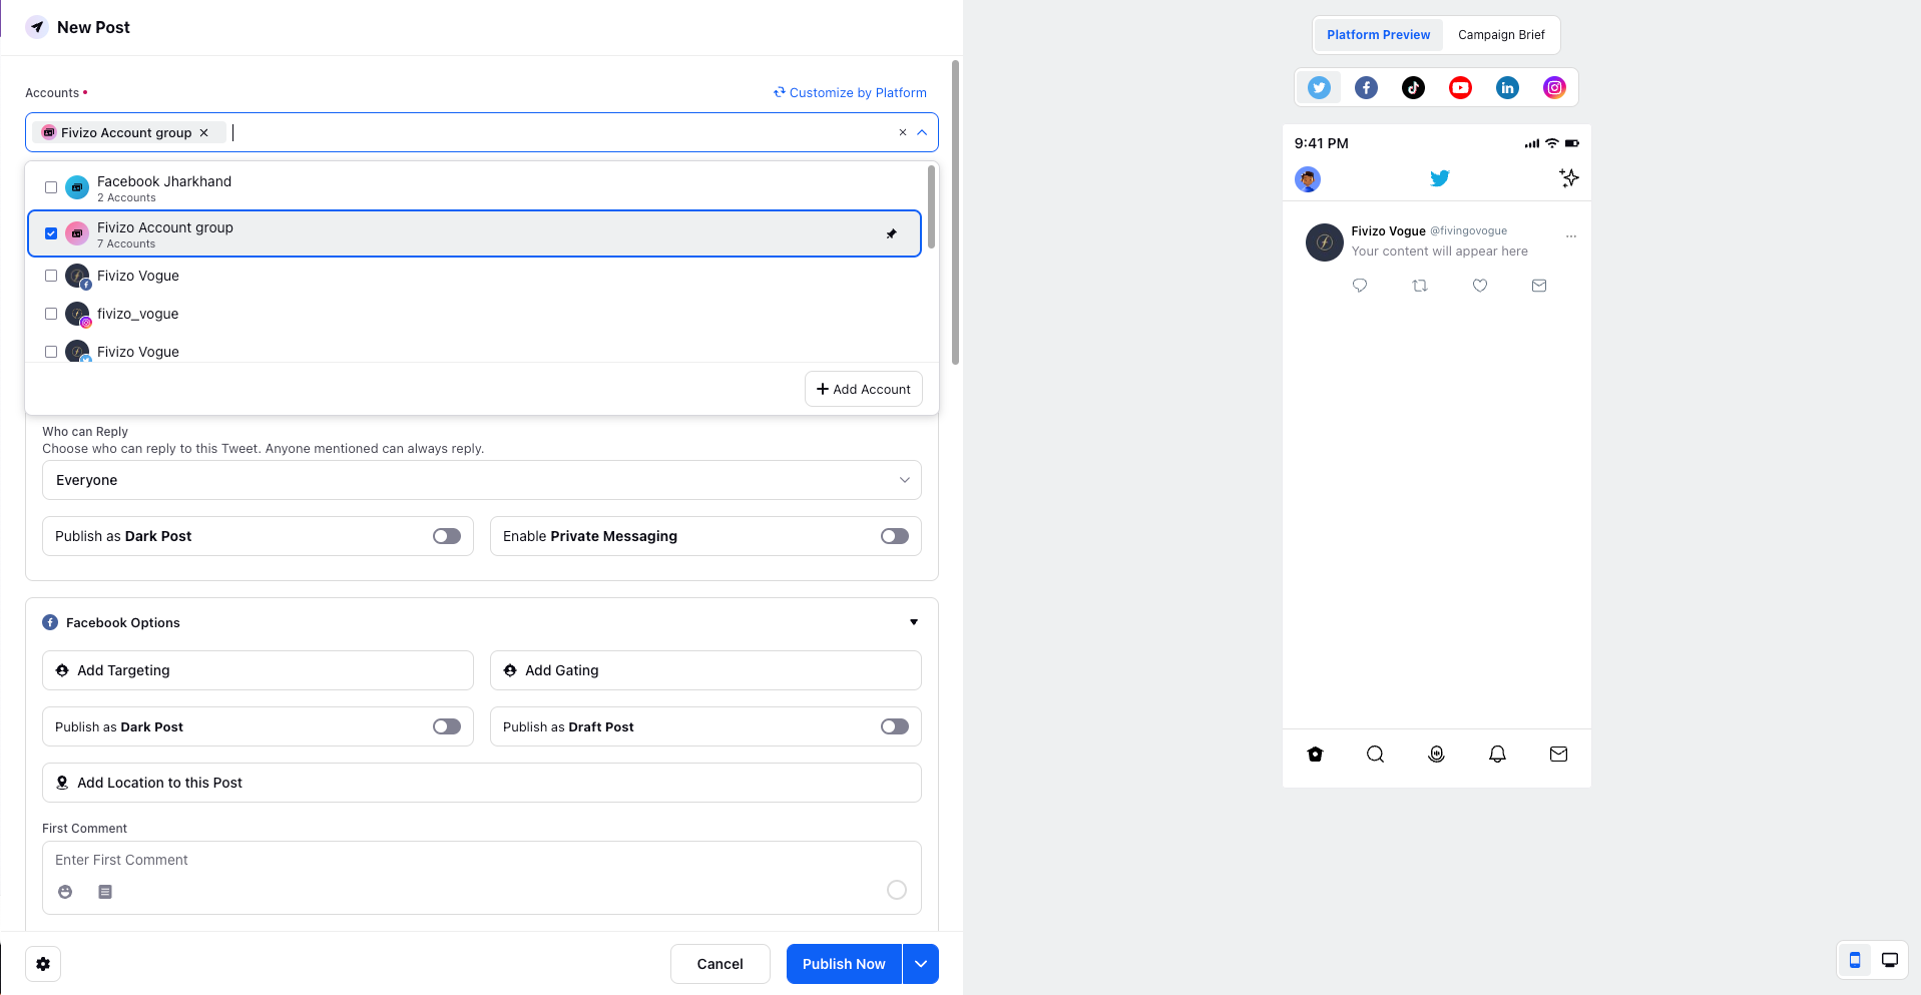
Custom Publishing: Utilise the "Customize My Platform" option to tailor content and publishing strategies for each account within the selected group.
Harnessing Account Groups in Calendar View
Make the most of account groups in calendar views:
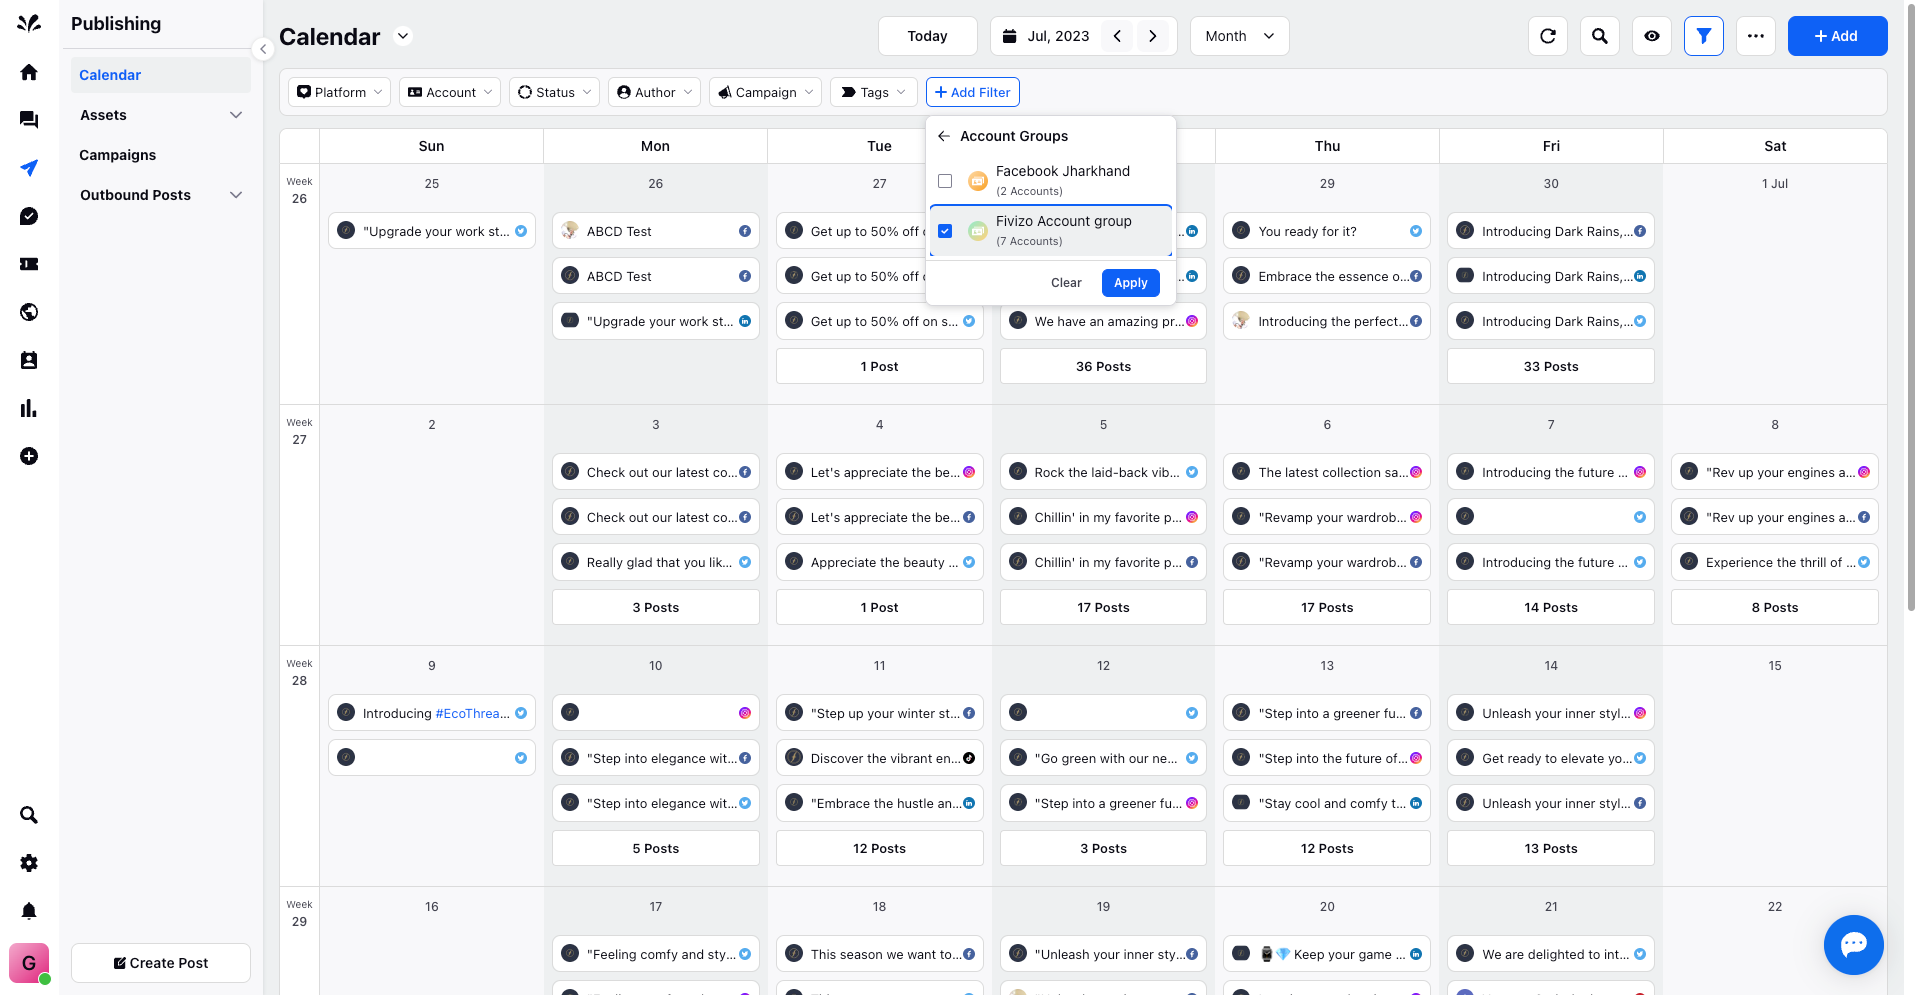
Filtering by Account Groups: Access the Filter icon (represented by wine glass / funnel) and choose "Add filter." Select "Account Groups", pick the relevant account group and the the calendar view shall be curated accordingly.
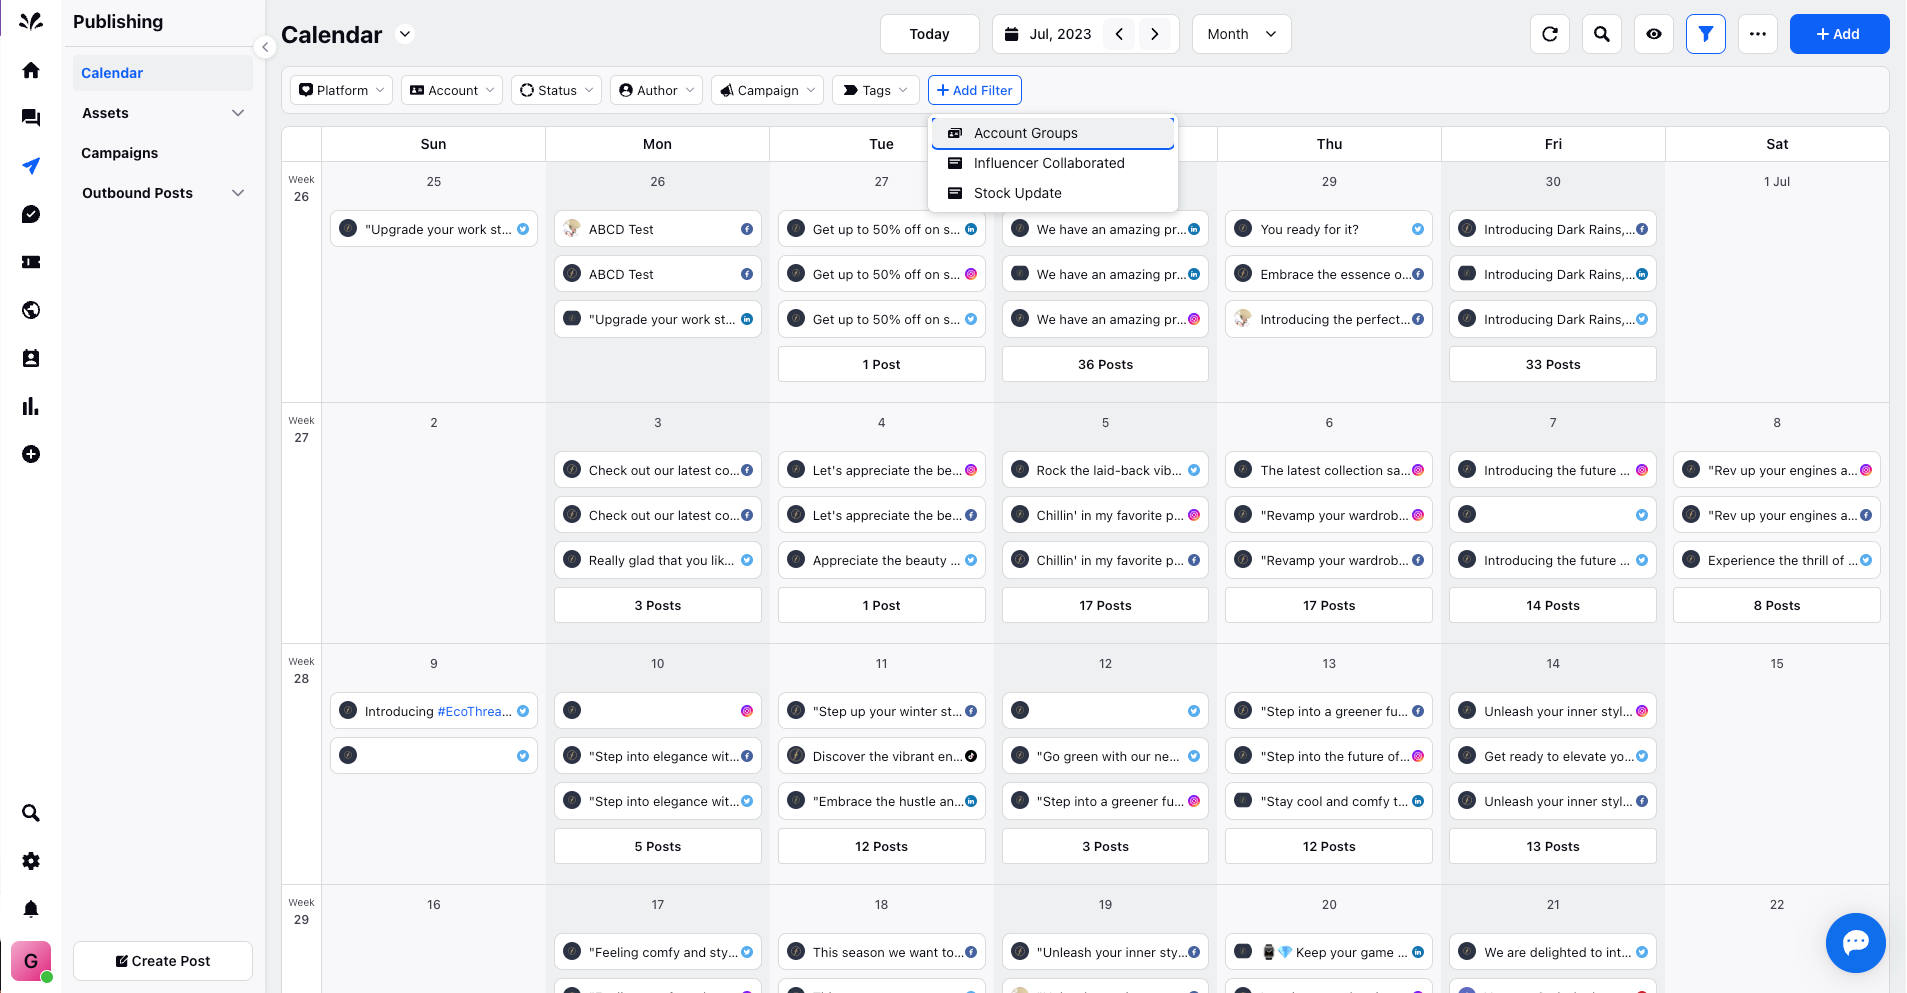
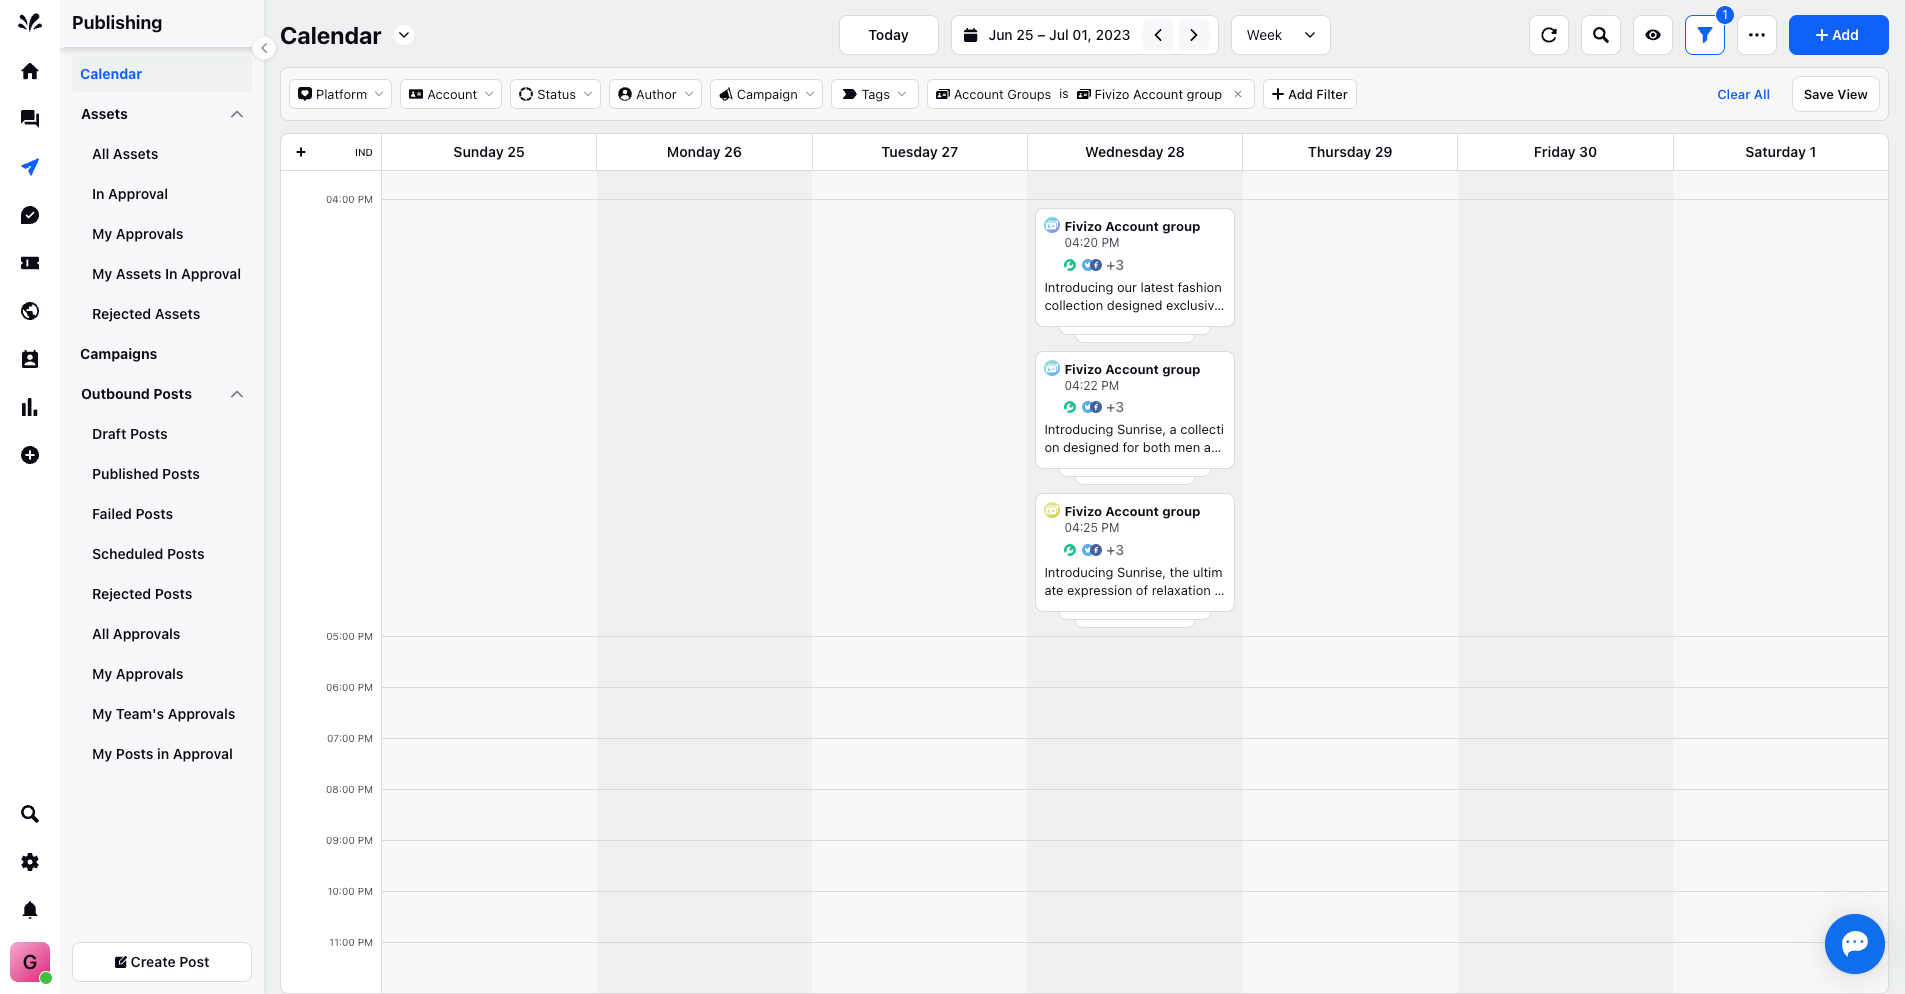
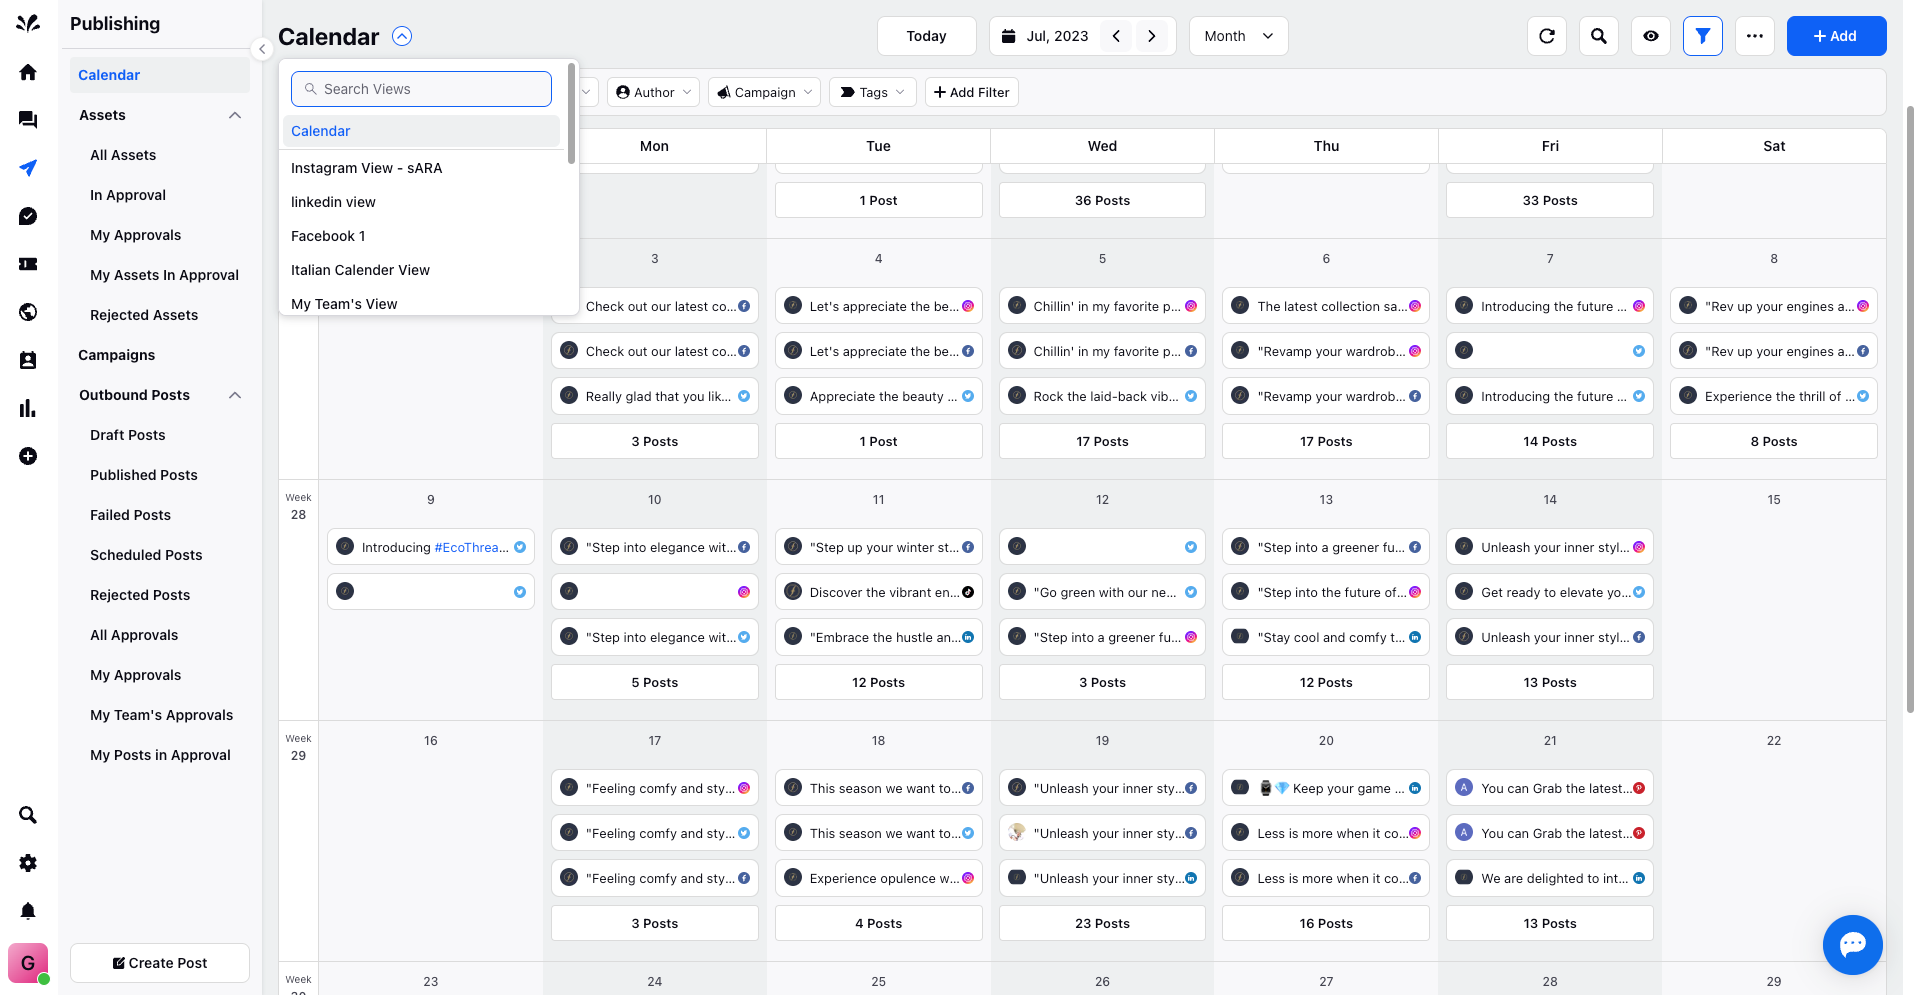
Save Custom Views: Save tailored views using the "Save View" option, accessible from the Filter Options toolbar. The saved view can be retrieved from the dropdown menu against the Calendar (Title) or the "Currently Opened View" icon, offering seamless access to personalised calendar displays.
Unlock the power of account groups to elevate your social channel management and publishing endeavours. Simplify your workflows, enhance collaboration, and maximise your online presence by harnessing the potential of account groups within the Sprinklr platform.