
Set up Sprinklr Link in Bio
Updated
How you can leverage Link in Bio from Sprinklr Social Self-serve to grow website traffic and enhance likes, comments, and views on social accounts.
Link in Bio refers to the clickable URL that you can add to your profile section. Most social media platforms give you the option to add a link in your bio to take followers to your website, product page, content or some other important page.
Sprinklr Social Self-serve has released a new capability where you can set up Link in Bio feature on Instagram and Tiktok profiles.
To set up Link in Bio on Instagram and Tiktok profiles
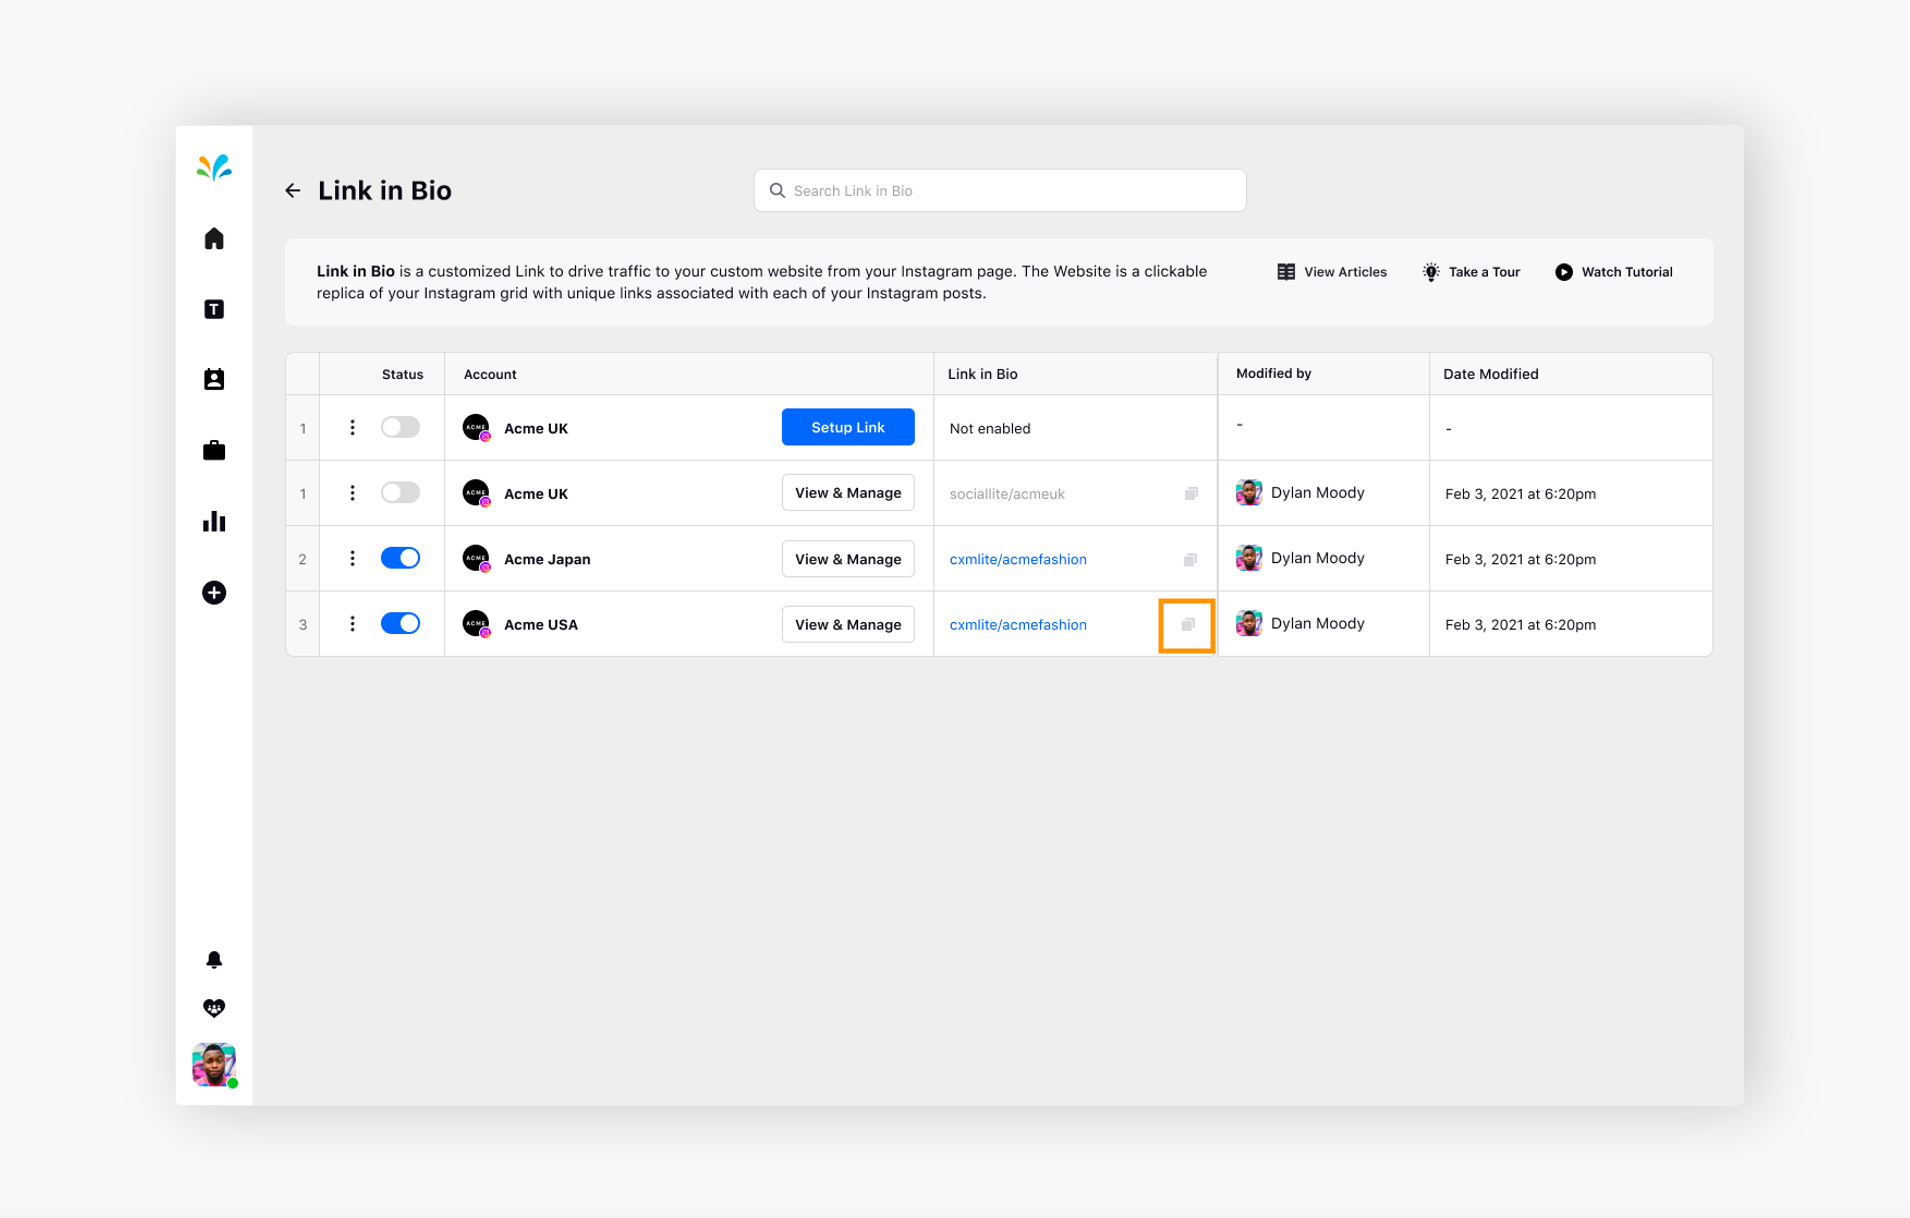
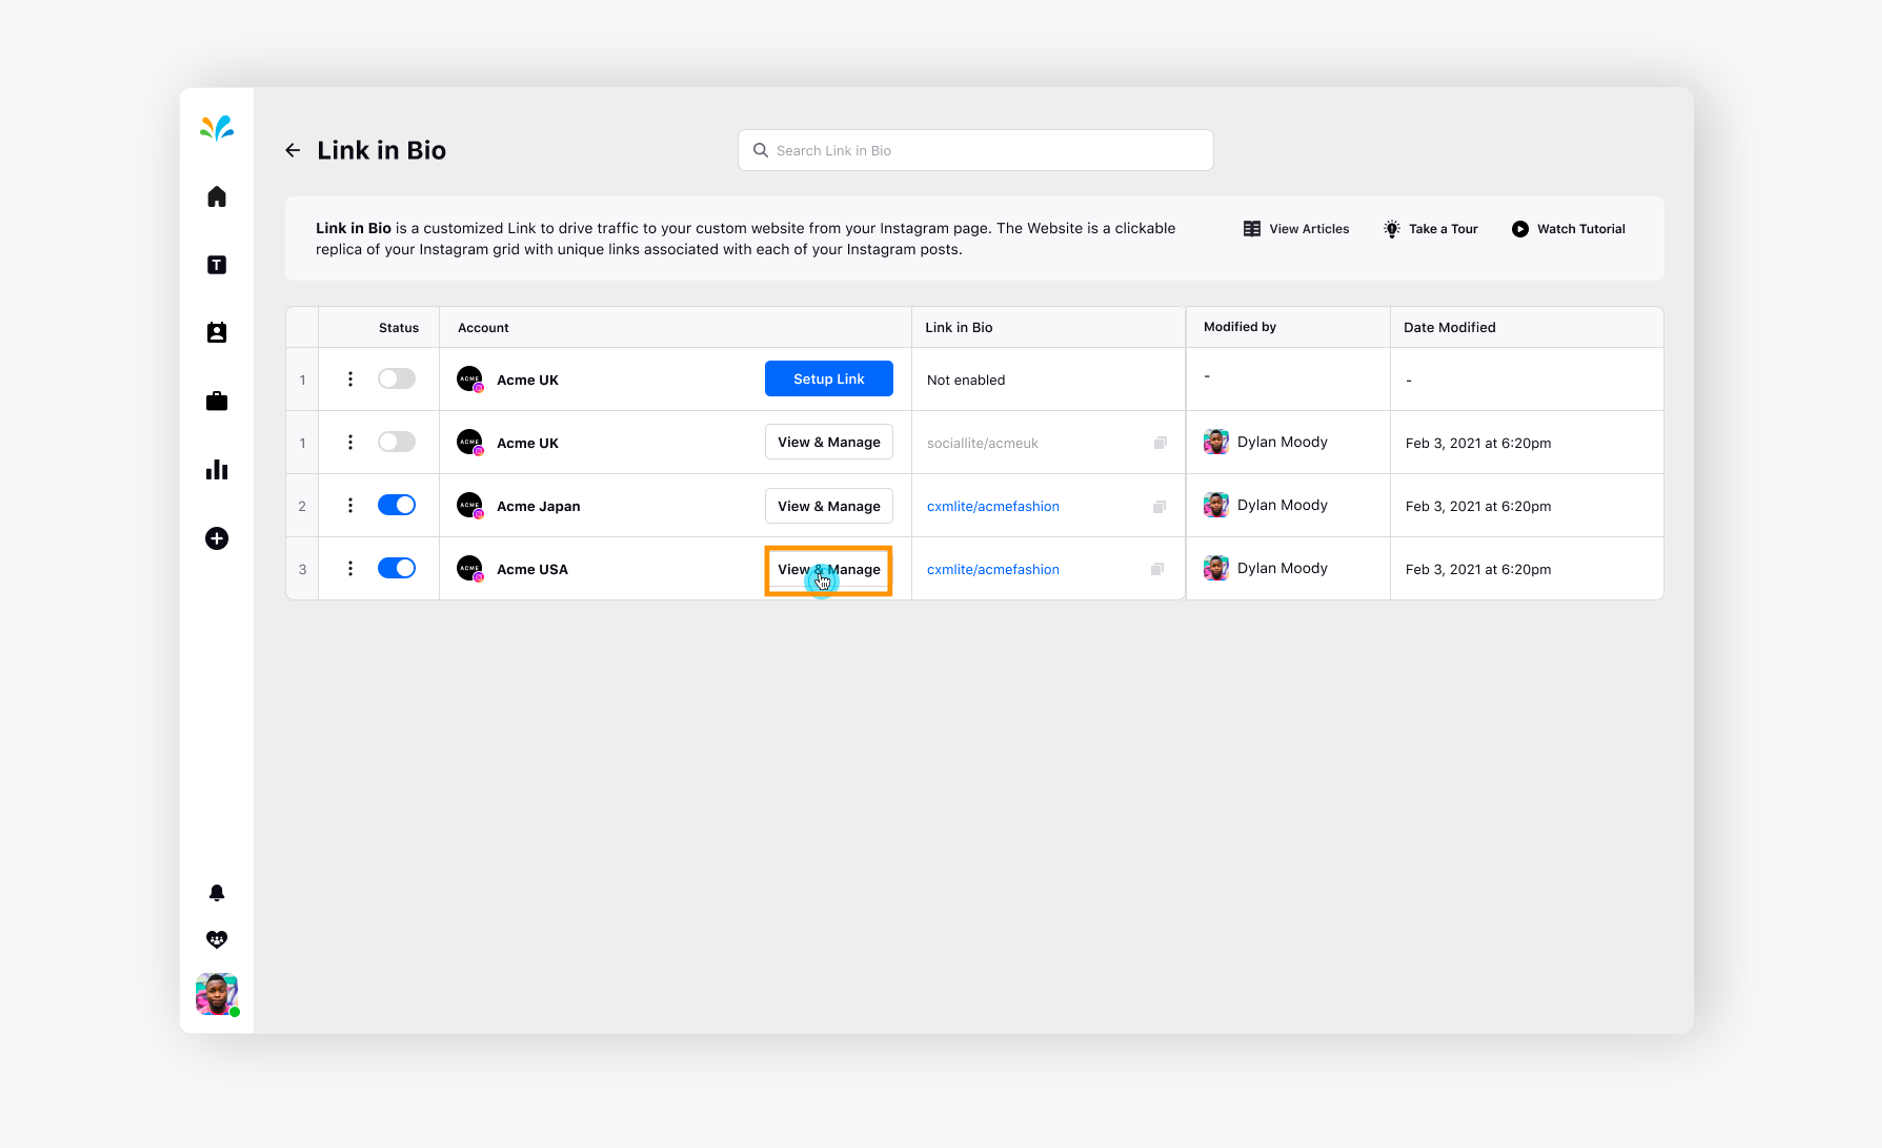
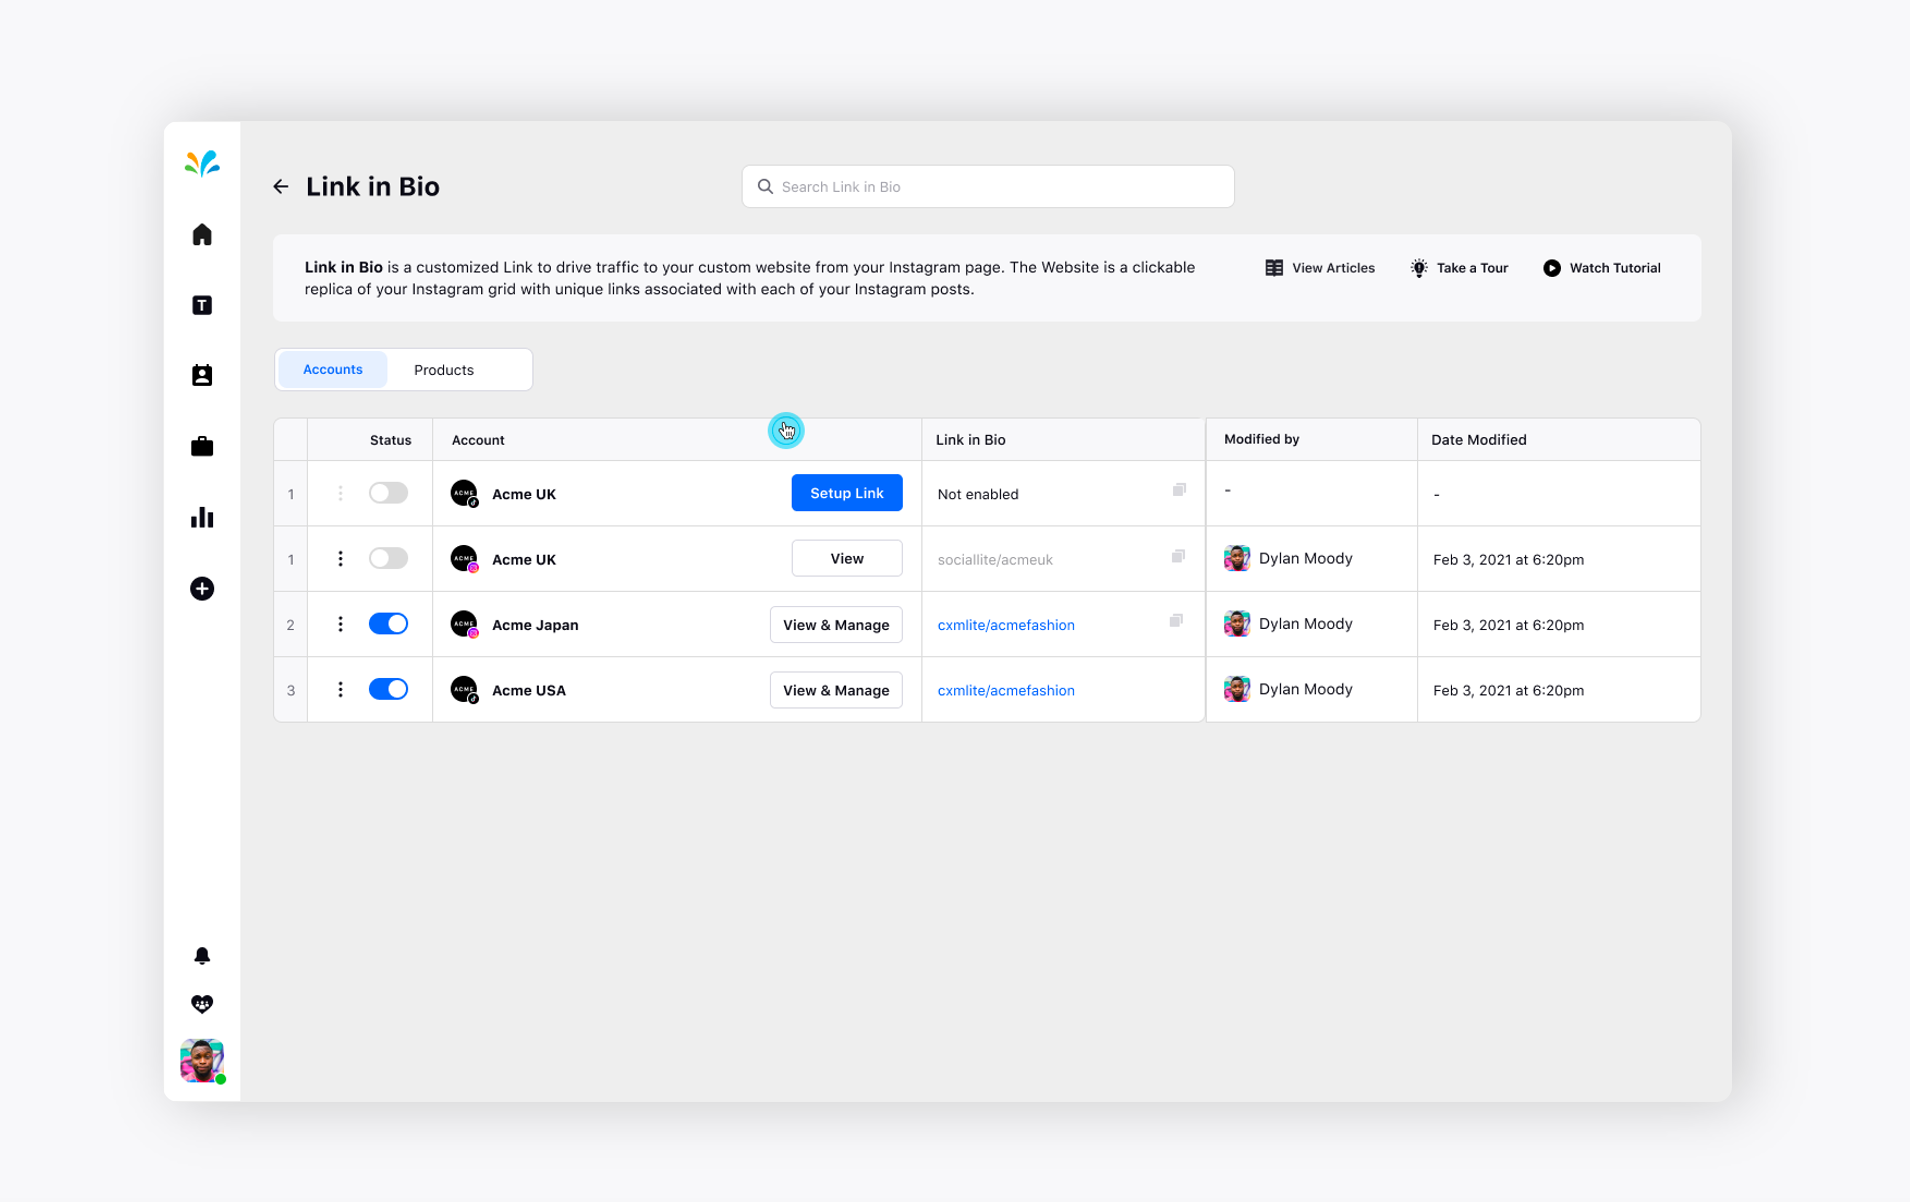
Navigate to Settings from the left pane of Sprinklr Social Self-serve and search for Link in Bio in the search bar.
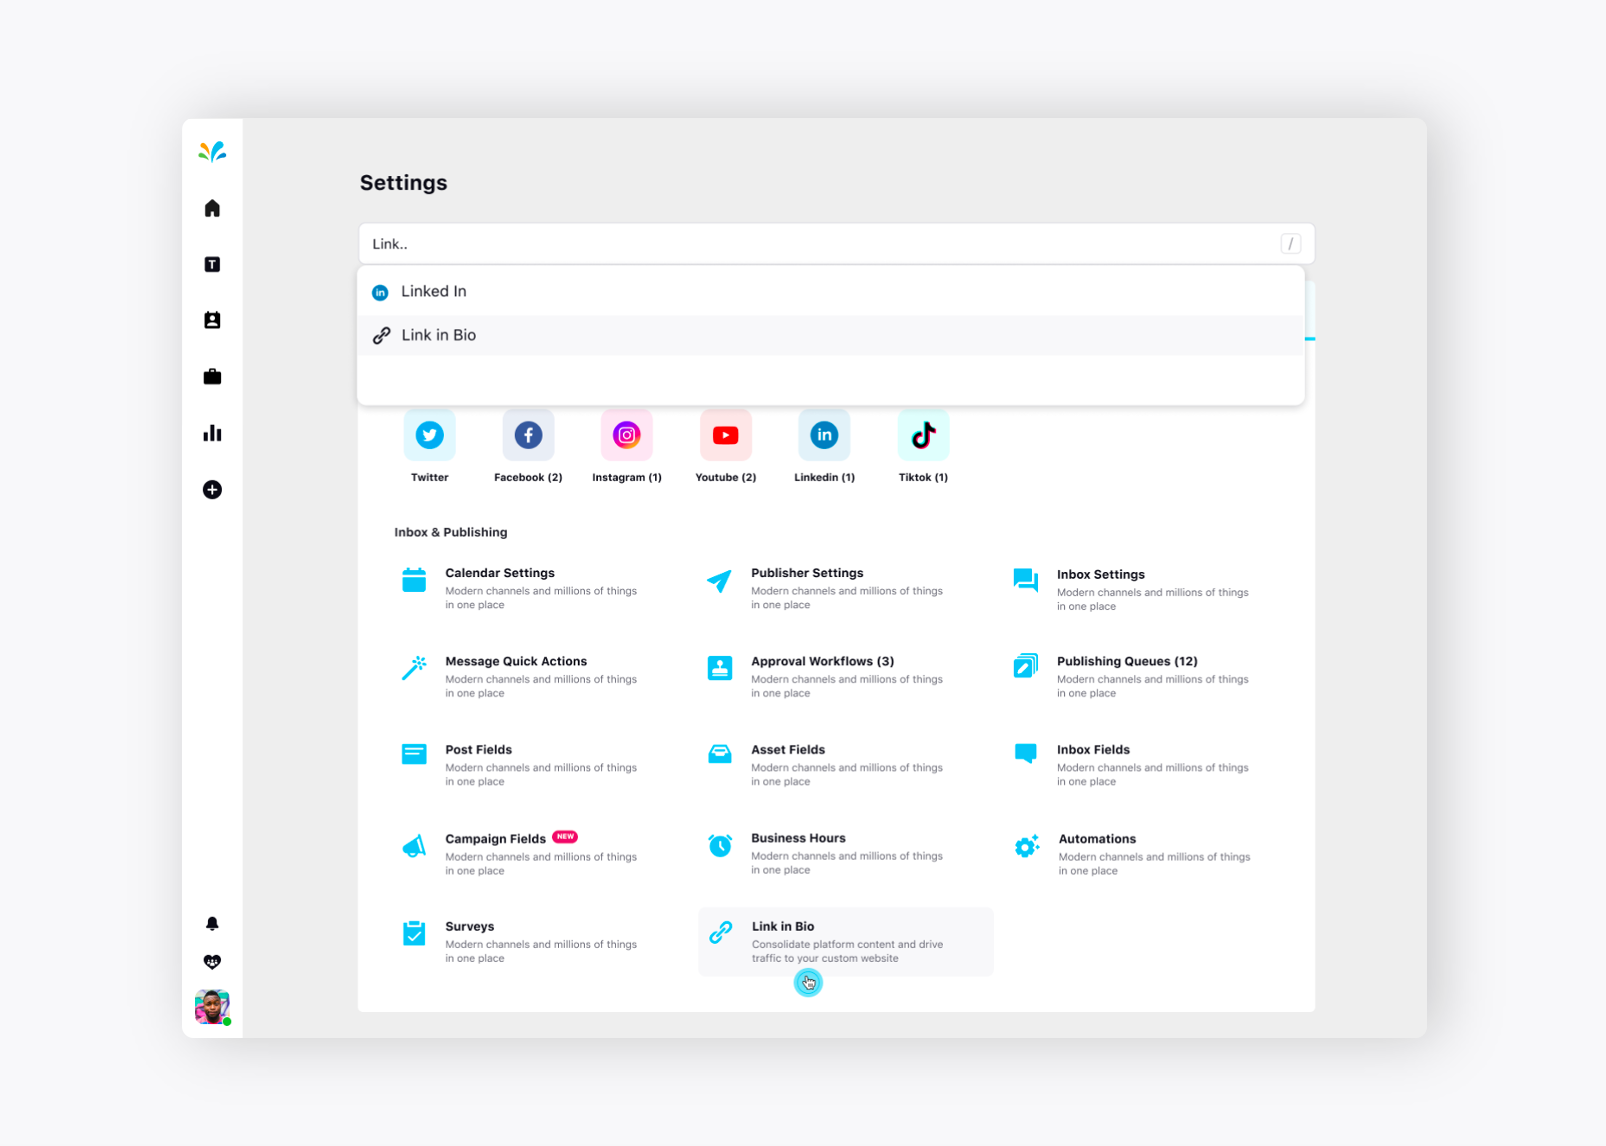
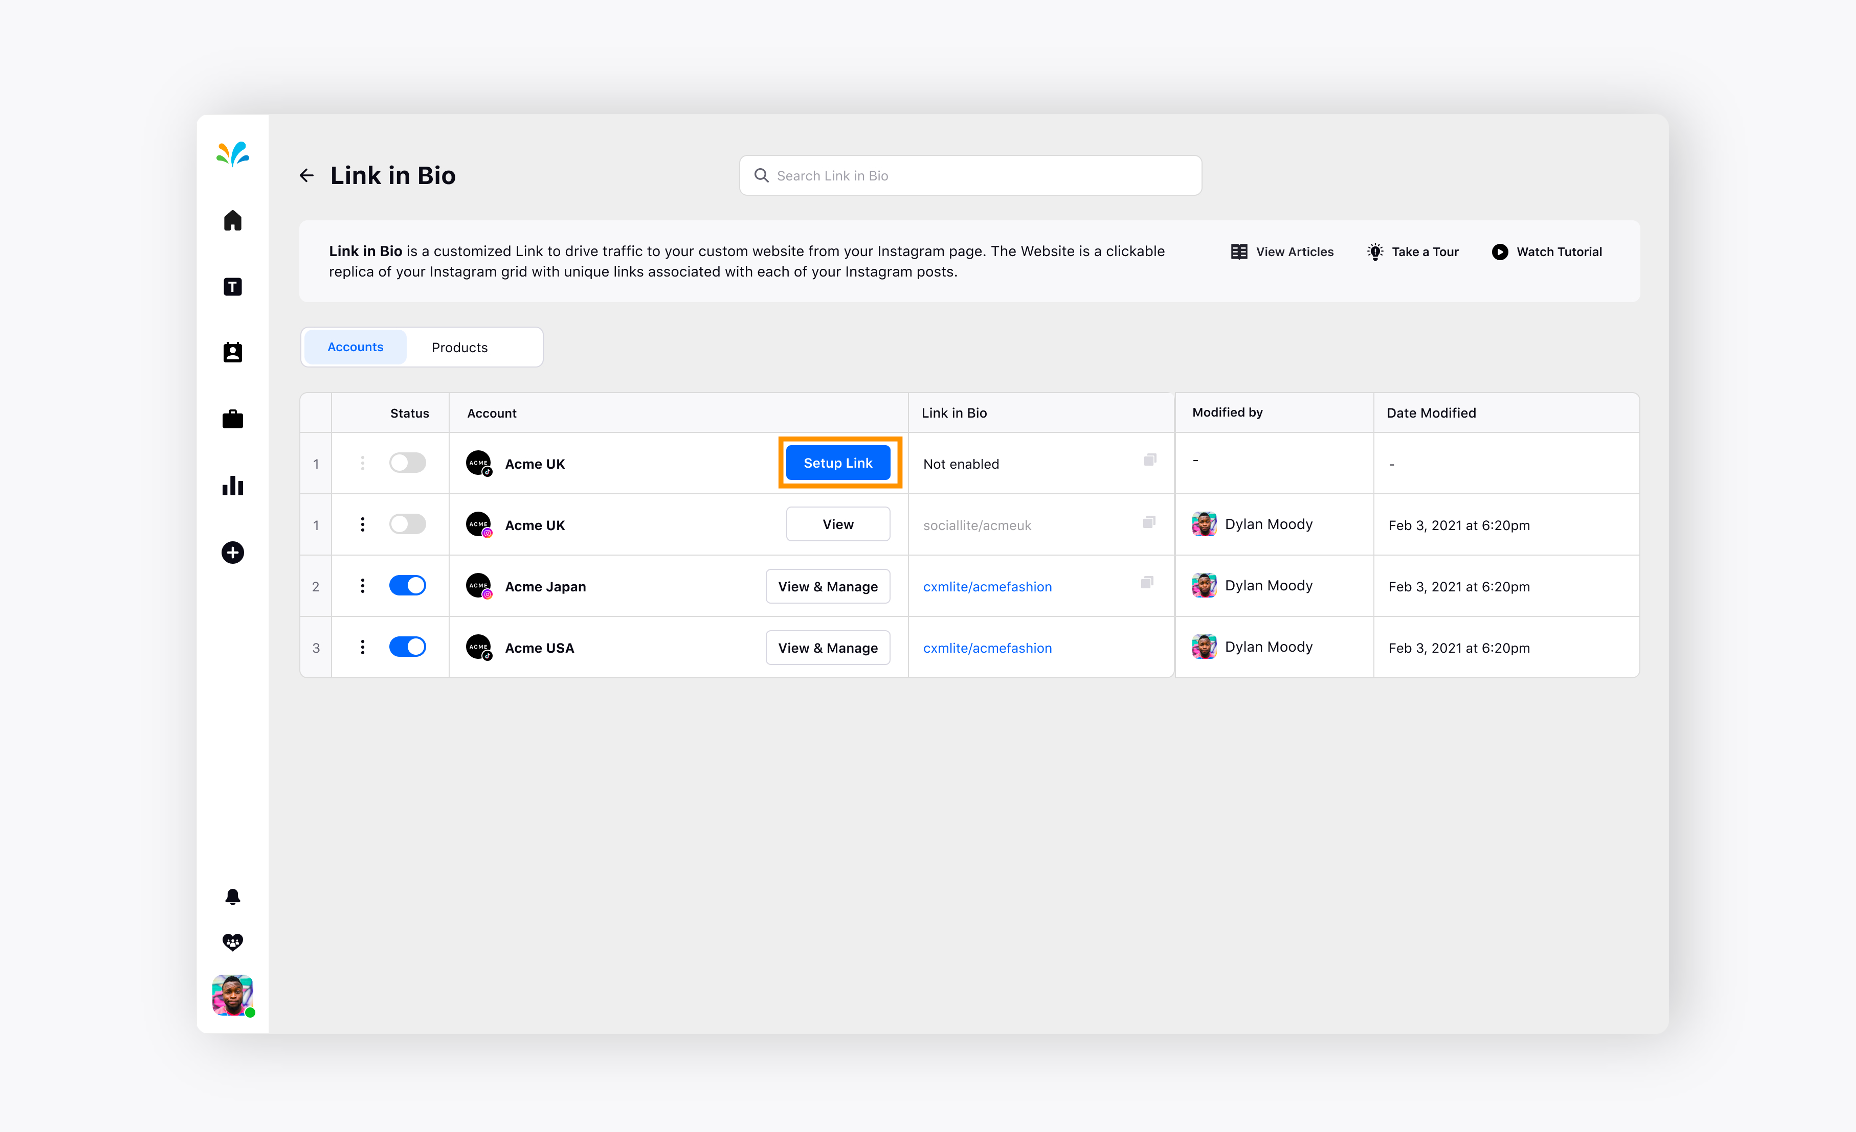
You’ll find the list of all the Instagram accounts that have been added in the platform. Now, set up a Link in Bio for one of the Instagram accounts. Click on the Setup Link next to the Instagram account.
The configuration screen appears.
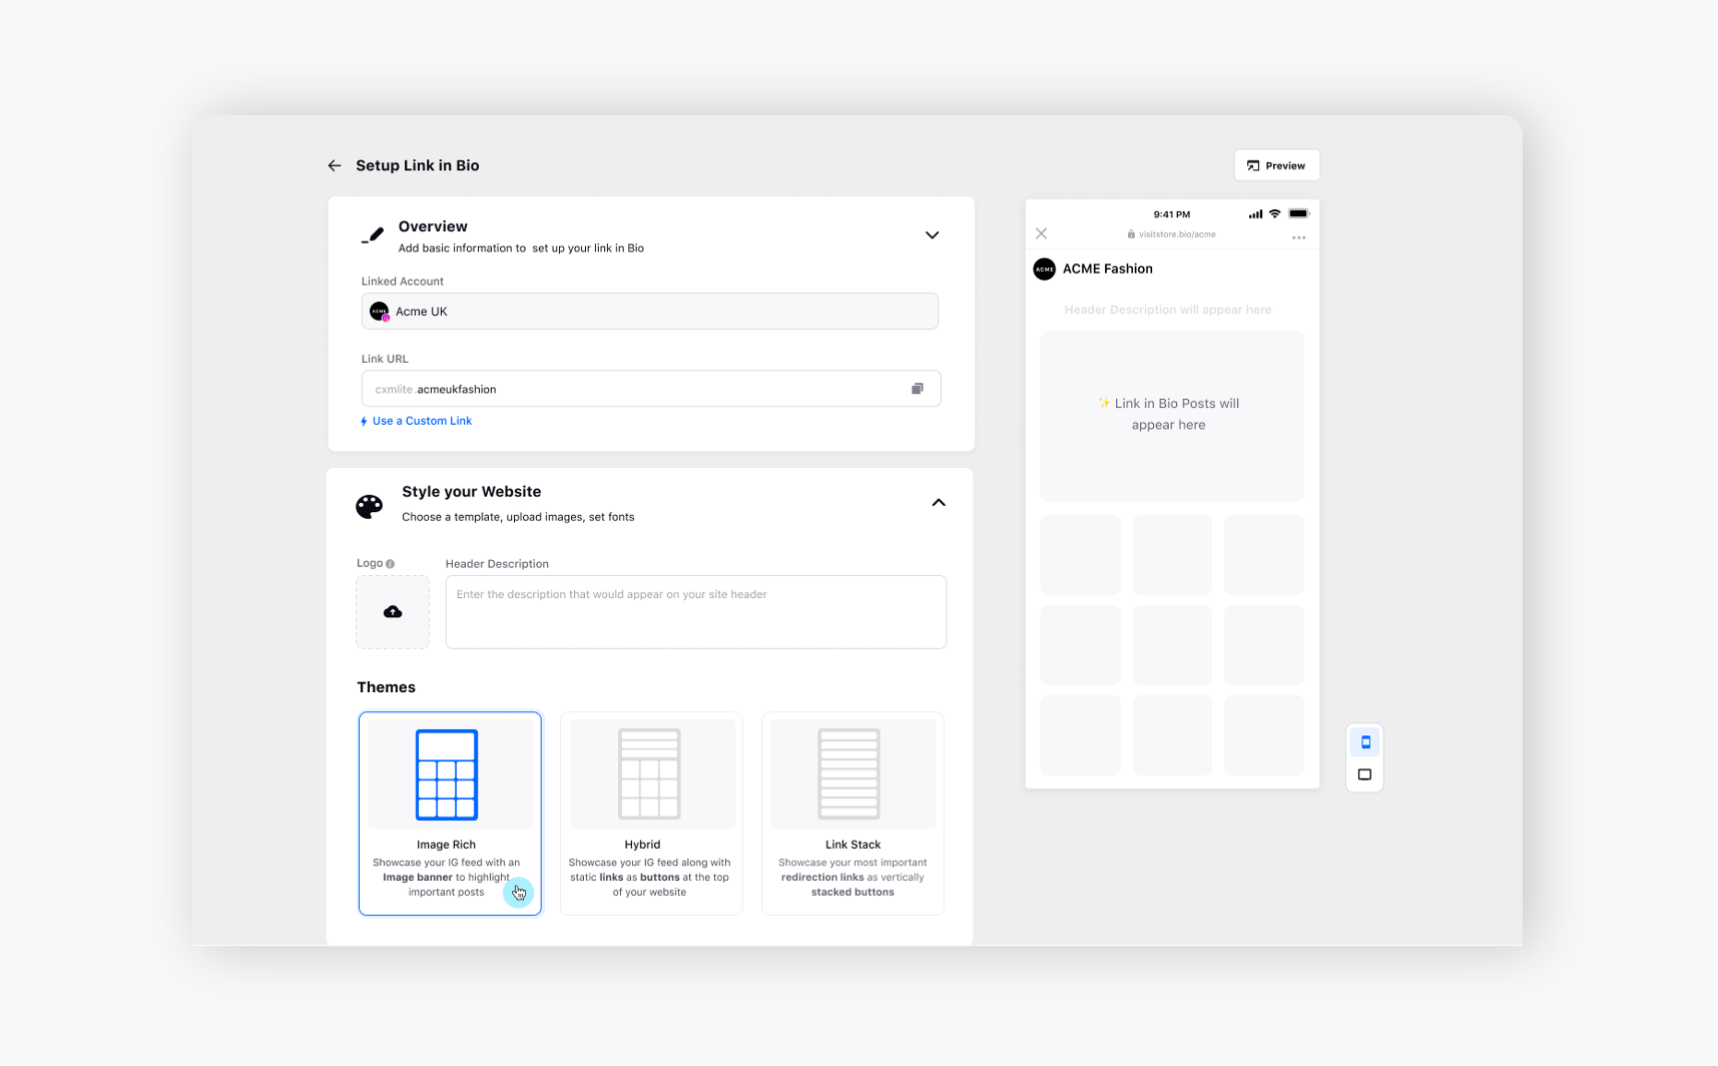
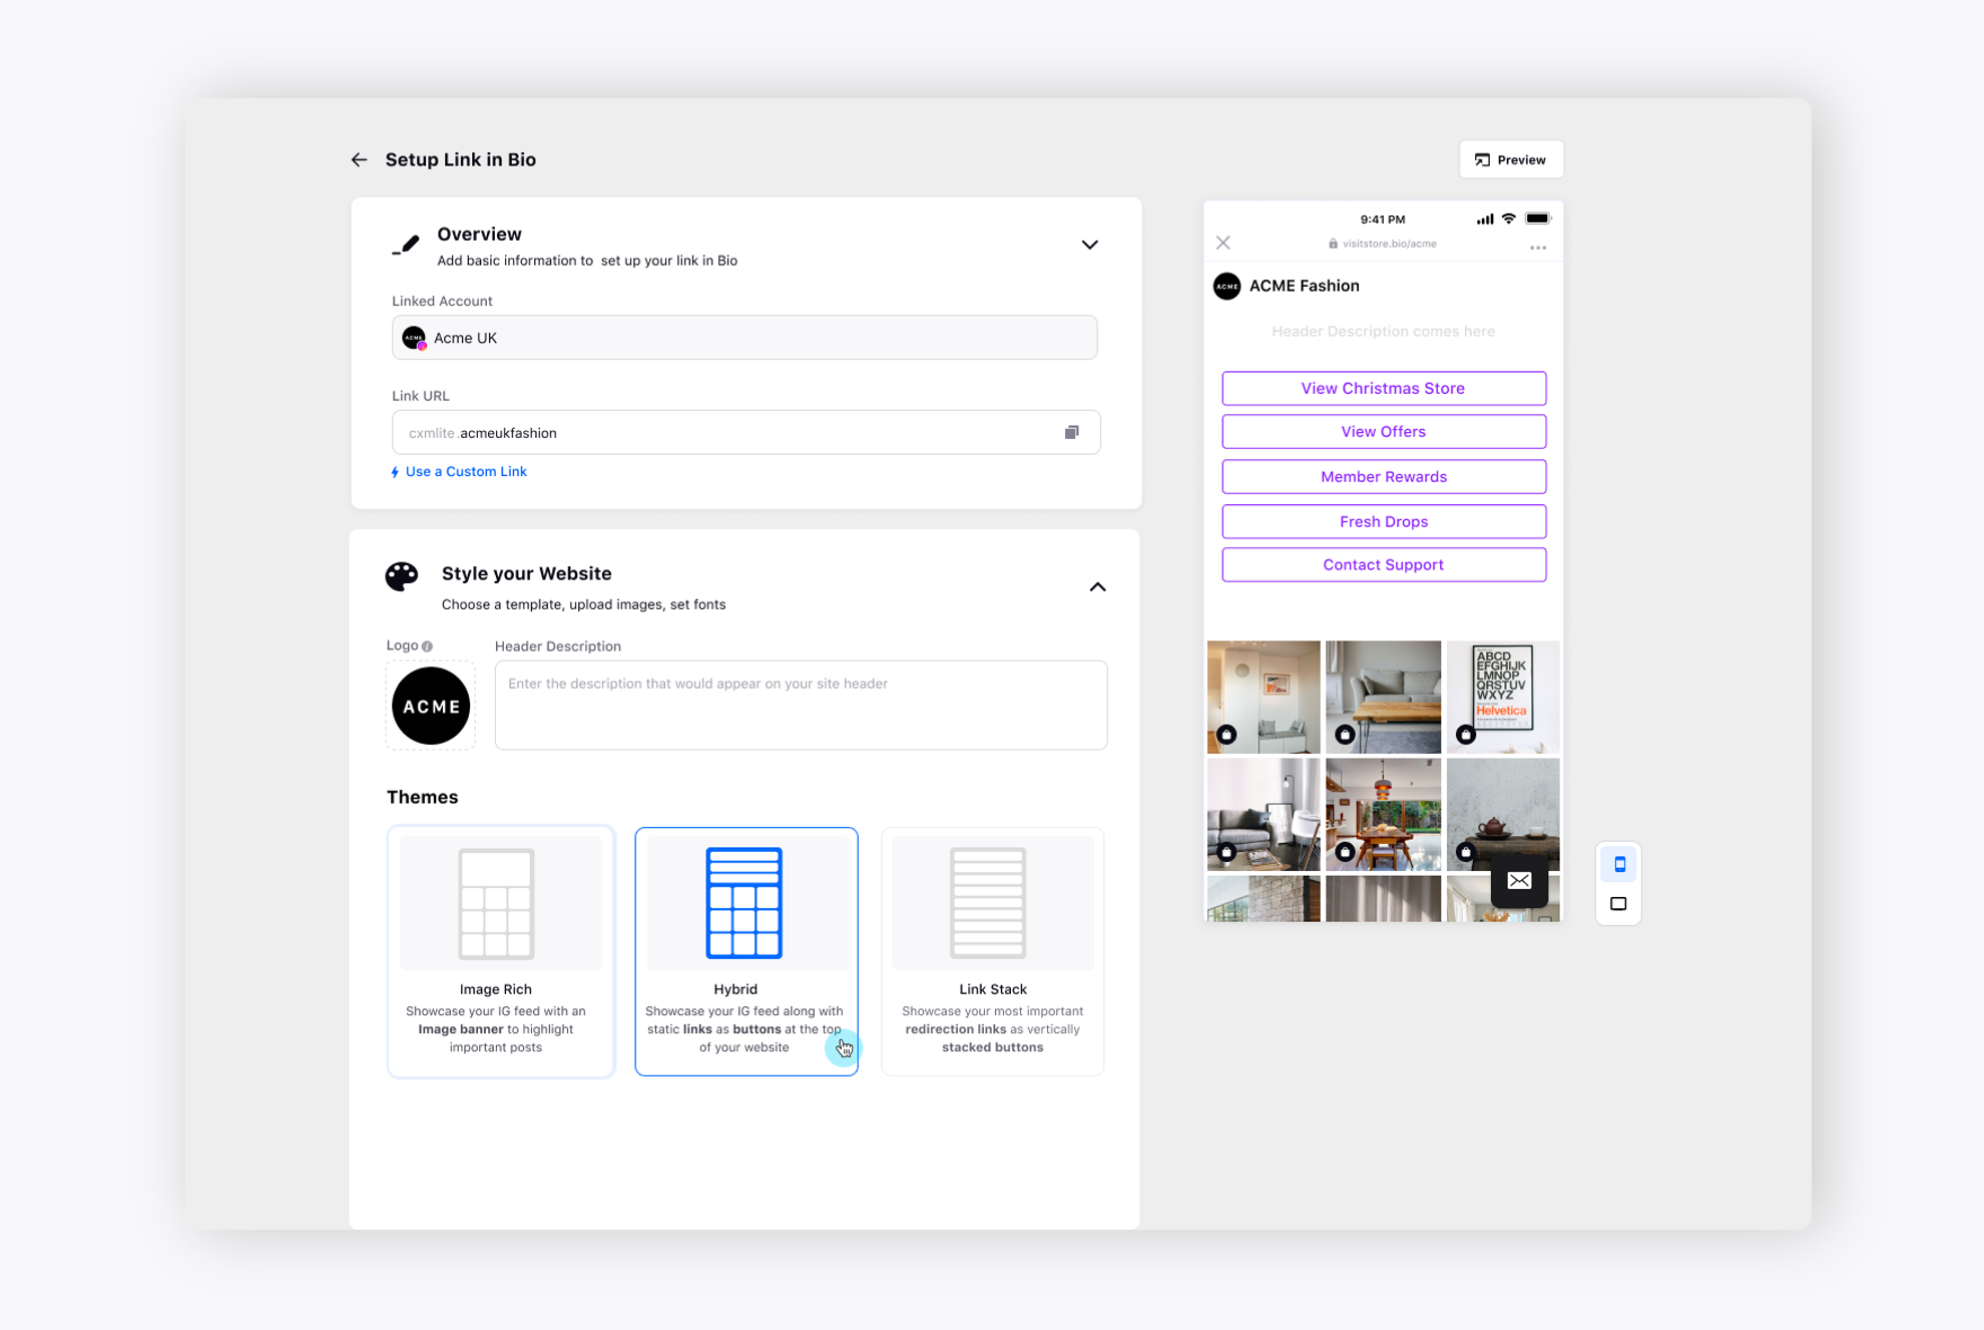
You need to first define the URL of the Instagram account under the Link URL section for the Overview part.
The next section is where you can style your website. You will get multiple options:
Logo: You can upload your own logo from the system or from the Asset Library.
Next, you can provide a relevant header description. You can see the preview in real-time on the right section simultaneously.
Now, you can choose 3 types of themes:
Image Rich: It's a theme where you can showcase your Instagram Feed with an image banner to highlight important posts.
Hybrid: A theme where you can showcase your Instagram Feed along with the static links as buttons at the top of your website.
Link Stack: It showcases your most important redirection links as vertically stacked buttons.
Let’s explain each of them:
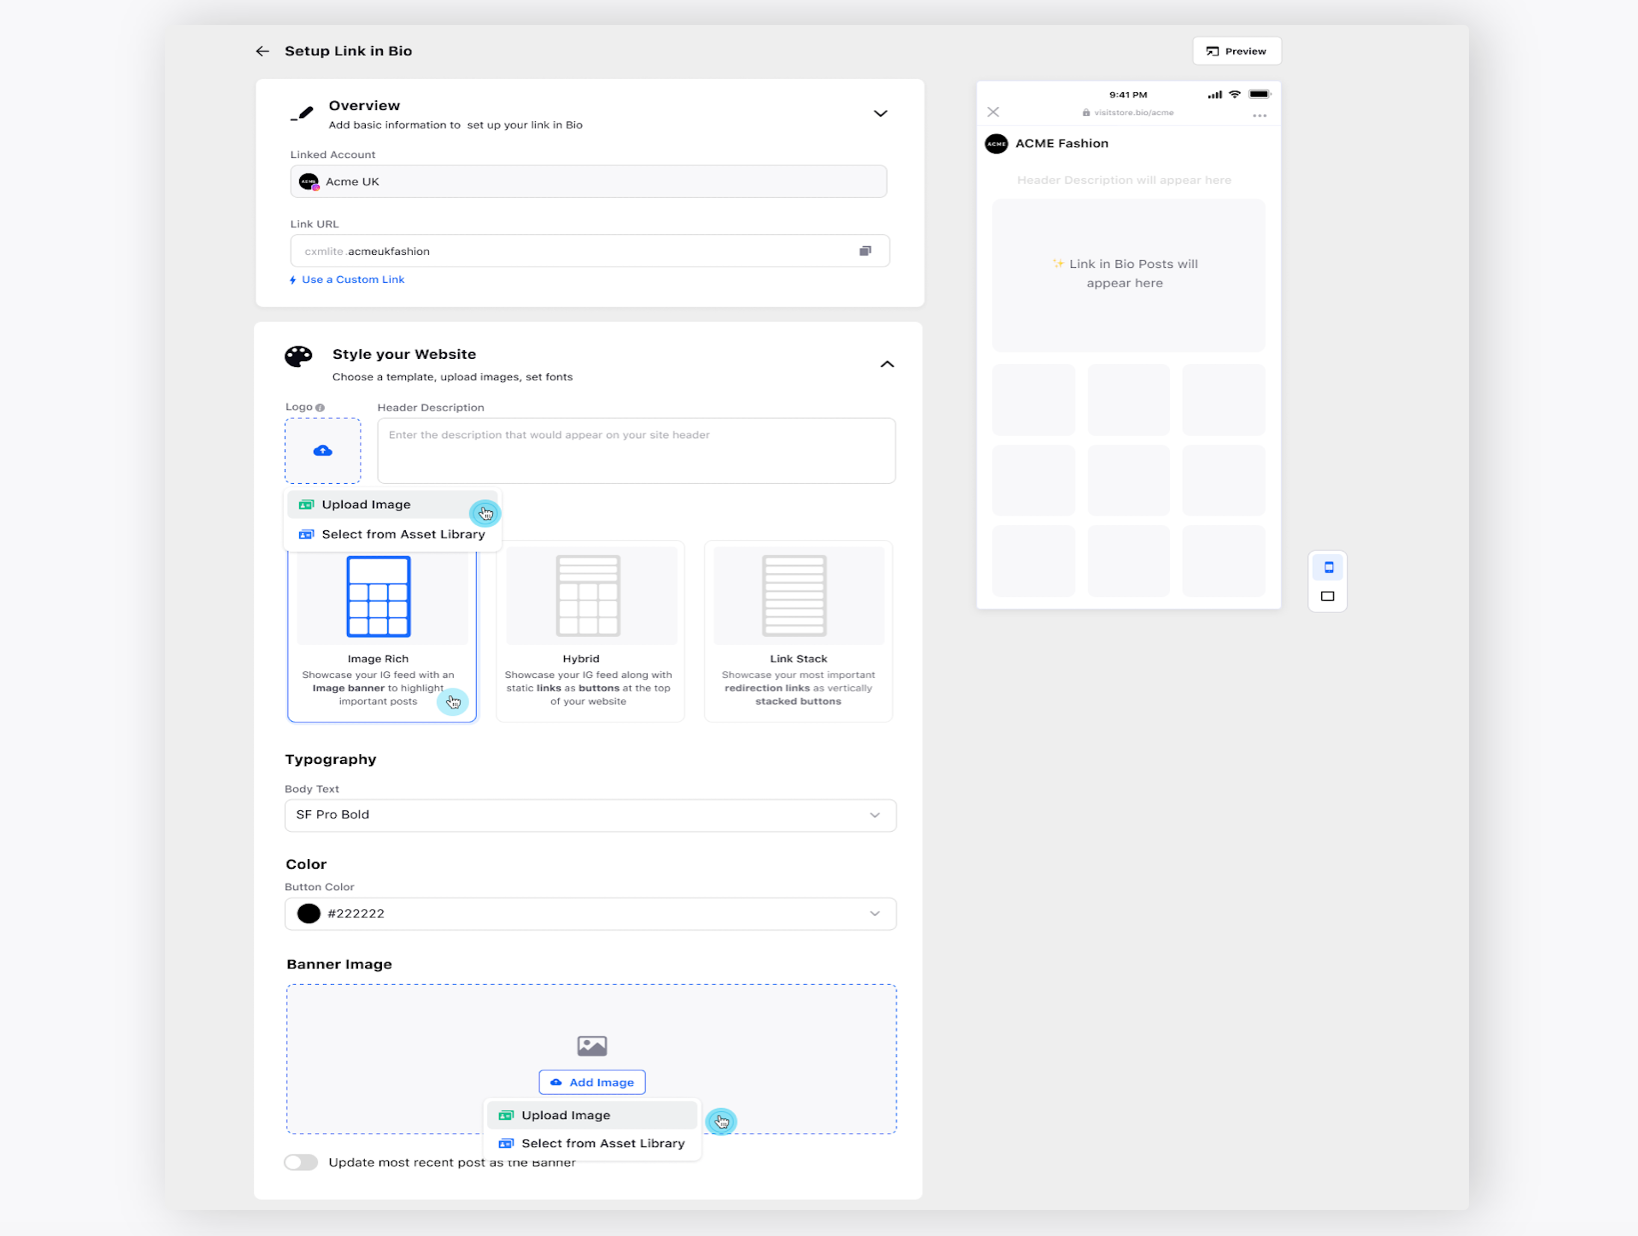
Image Rich: As per this theme, you can upload a banner image from the system or from the Asset Library. Once you upload an image for the banner, you can preview the same in real time as well. You can also choose to Toggle On to update the most recent photo as the Banner.
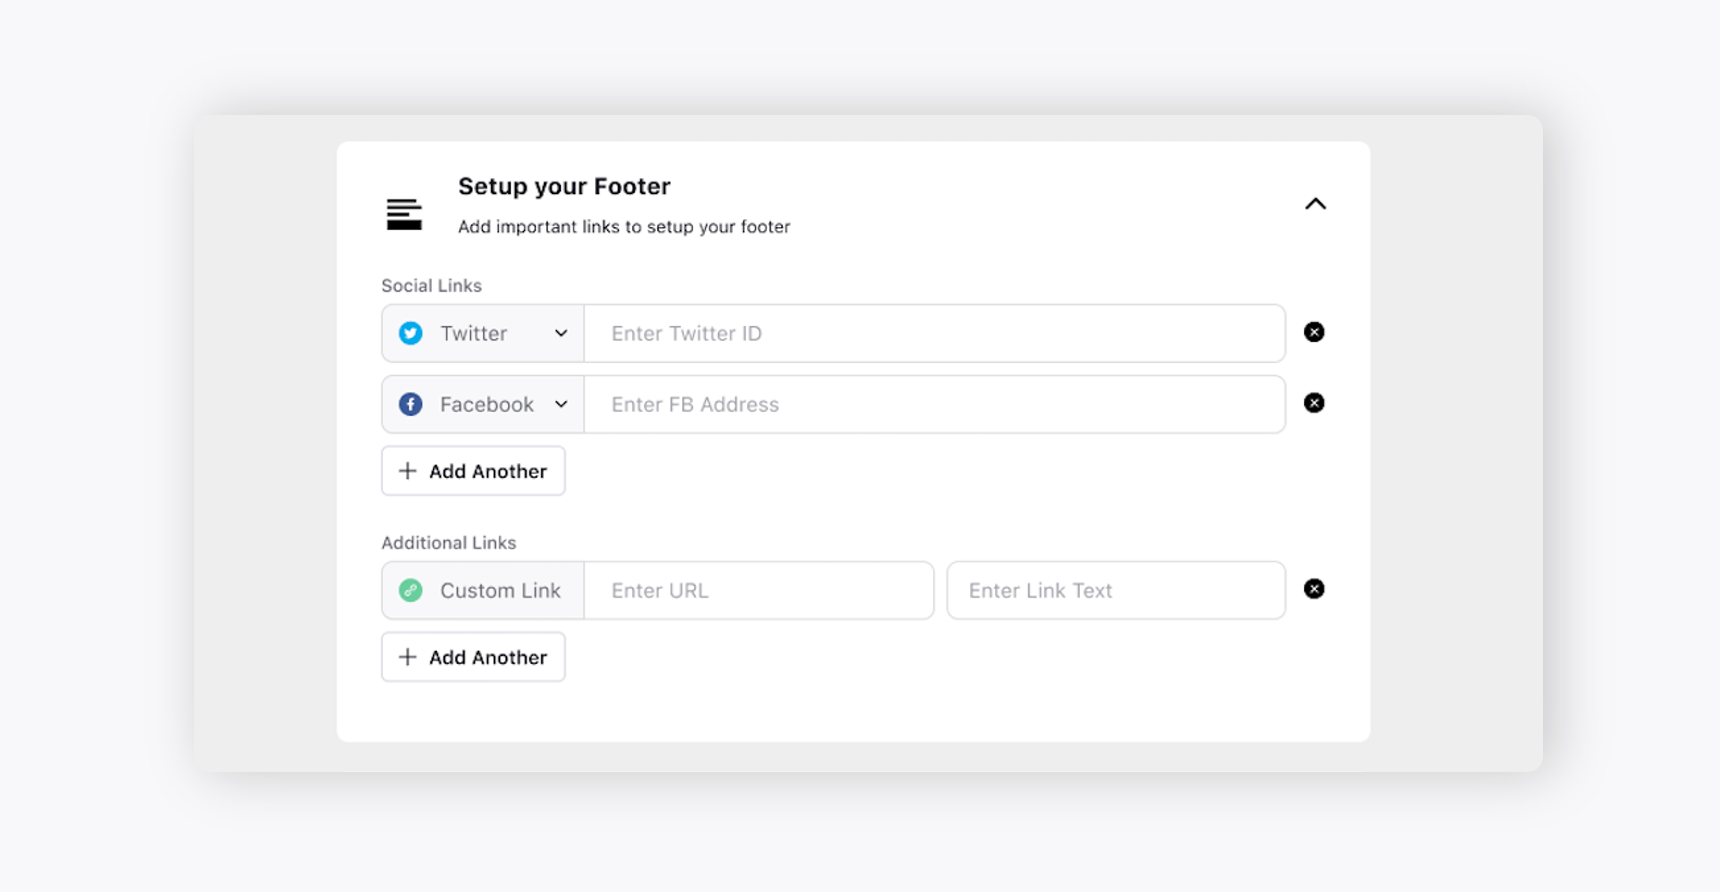
The next section is Setup your Footer where you can add multiple social links by clicking on the + icon. You can preview the same in the footer on the right section. Besides that, you can add customised links as well. For example, if you want to add the terms and conditions page and the link to your Signup page, you can do the same by clicking Additional Links.
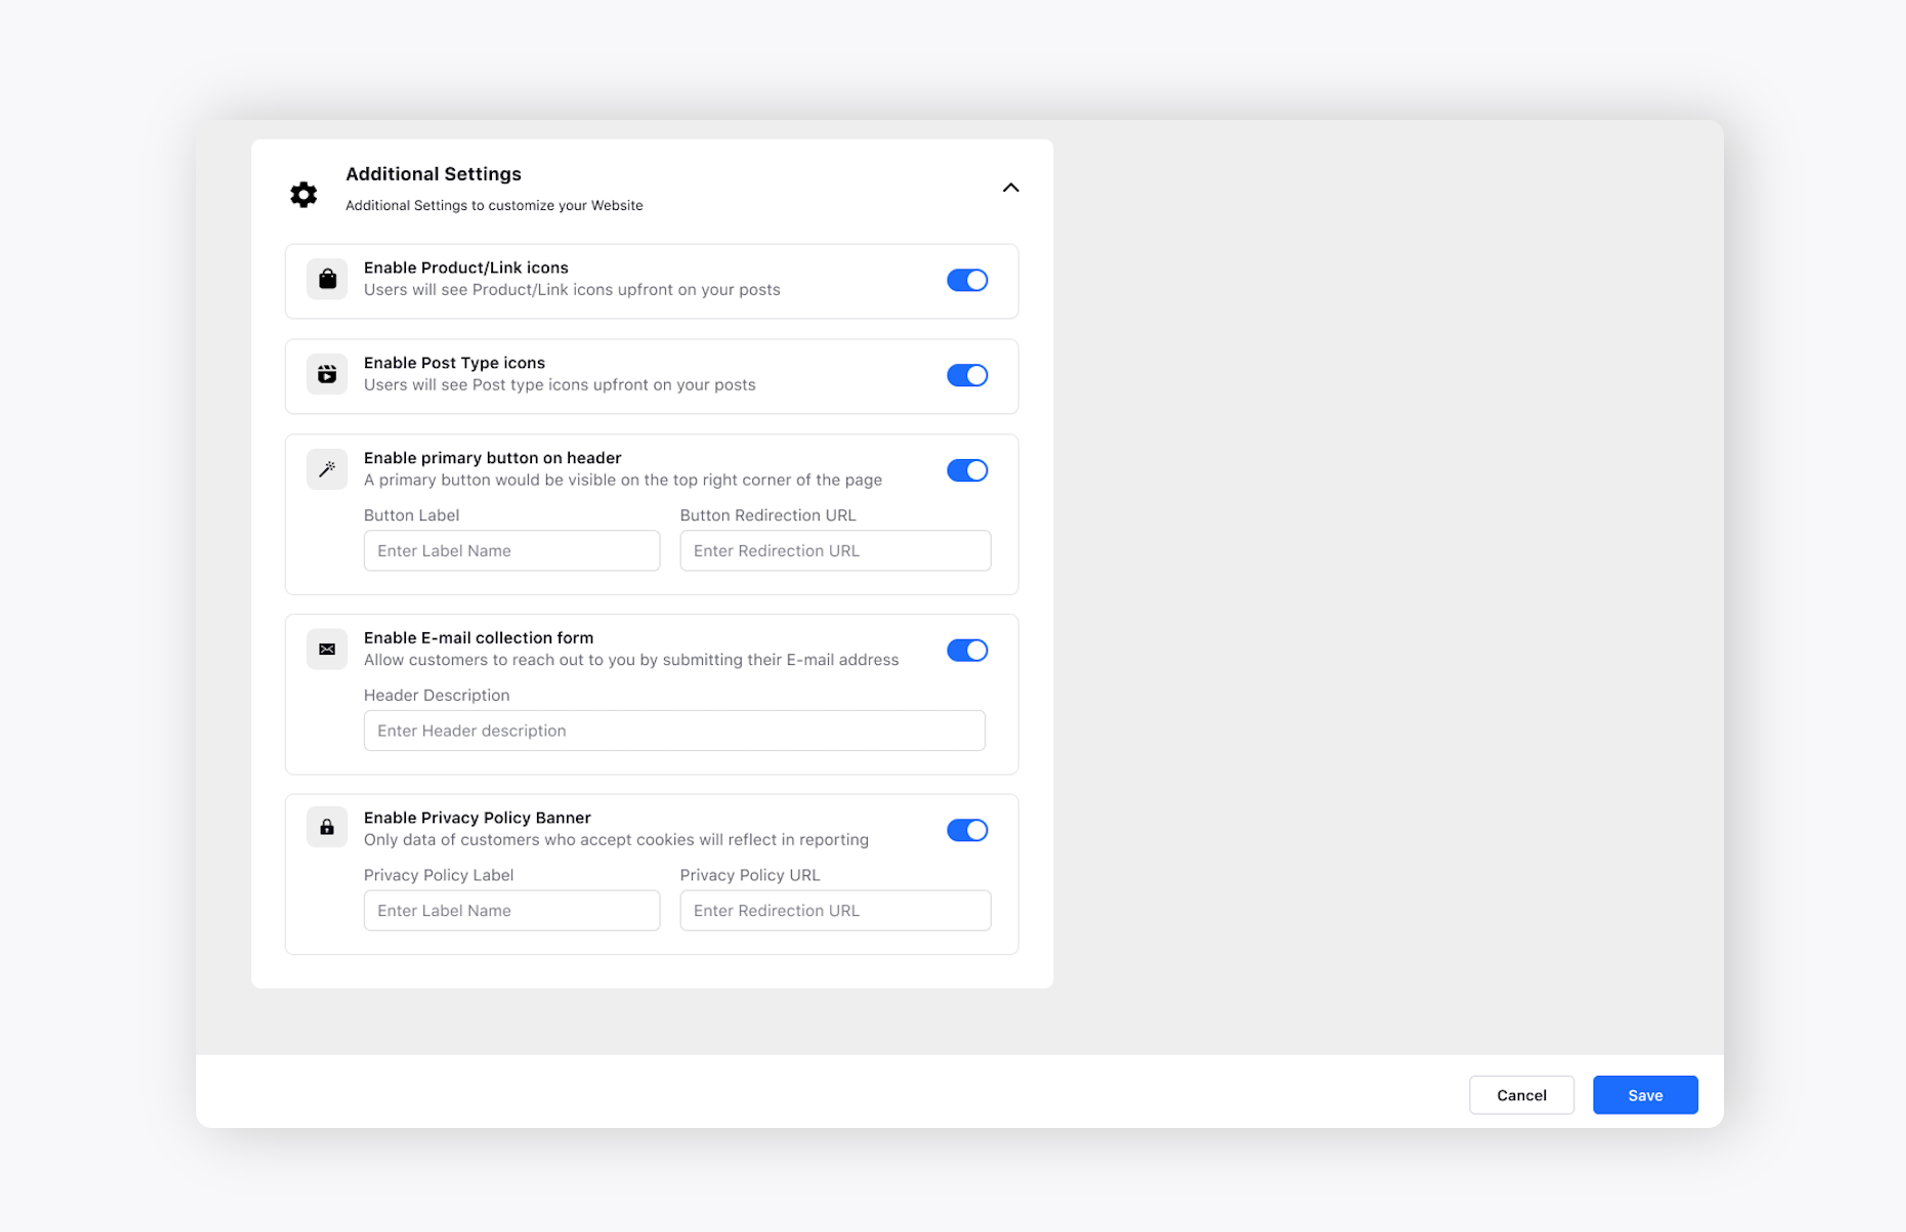
Under Additional Settings, you can define more options to customise your website. As and when you’ll toggle on, you can preview the options in real-time on the right.
Enable Product/Link icons: Users will be able to see Product/Link icons upfront on your posts.
Enable Post Type Icons: Users will be able to see post type icons upfront on your posts.
Enable primary button on header: A primary button would be visible on the top right corner of the page. You need to provide Button Label and Button Redirection URL.
Enable E-mail collection form: Allow customers to reach out to you by submitting their E-mail address. You need to provide the header description of the E-mail as well.
Enable Privacy Policy Banner: Only data of customers who accept cookies will reflect in reporting. You need to provide the privacy policy label and privacy policy URL.
So, you can completely customise your website and change the look and feel of it.
You can choose other themes as well:
Hybrid: This is a theme where you can style your website with images and links.
Under the hybrid theme, you can choose various Typography options as per your requirement such as Button Font and Button Color. Under the Buttons option, you need to provide the Redirection link and the Label. You can preview the changes in real-time in the top right. Setup your Footer section remain the same for Hybrid template as well.
Let's move to the third template, Link Stack template. Under this template, the Typography options remains the same such as Button Font, Button Color, and multiple Buttons. You can preview the changes in real-time in the top right.

For now, you can select any one of the templates such as Image Rich, and click Save in the bottom right.
As soon as you click on Save, Link on Bio will be enabled and you can view the Link in Bio link. Click the Copy icon next to Link in Bio and enable it on your Instagram page. You can also view the Modified Date and Modified By details as well.
The next step is to set up a post and product list. Click on View and Manage next to the Instagram account.
It will give you a list of products under the Instagram Feed available for this channel. As you can see, there are multiple post which are already used from this particular Instagram channel. You can view the Instagram Feed preview on the right simultaneously.
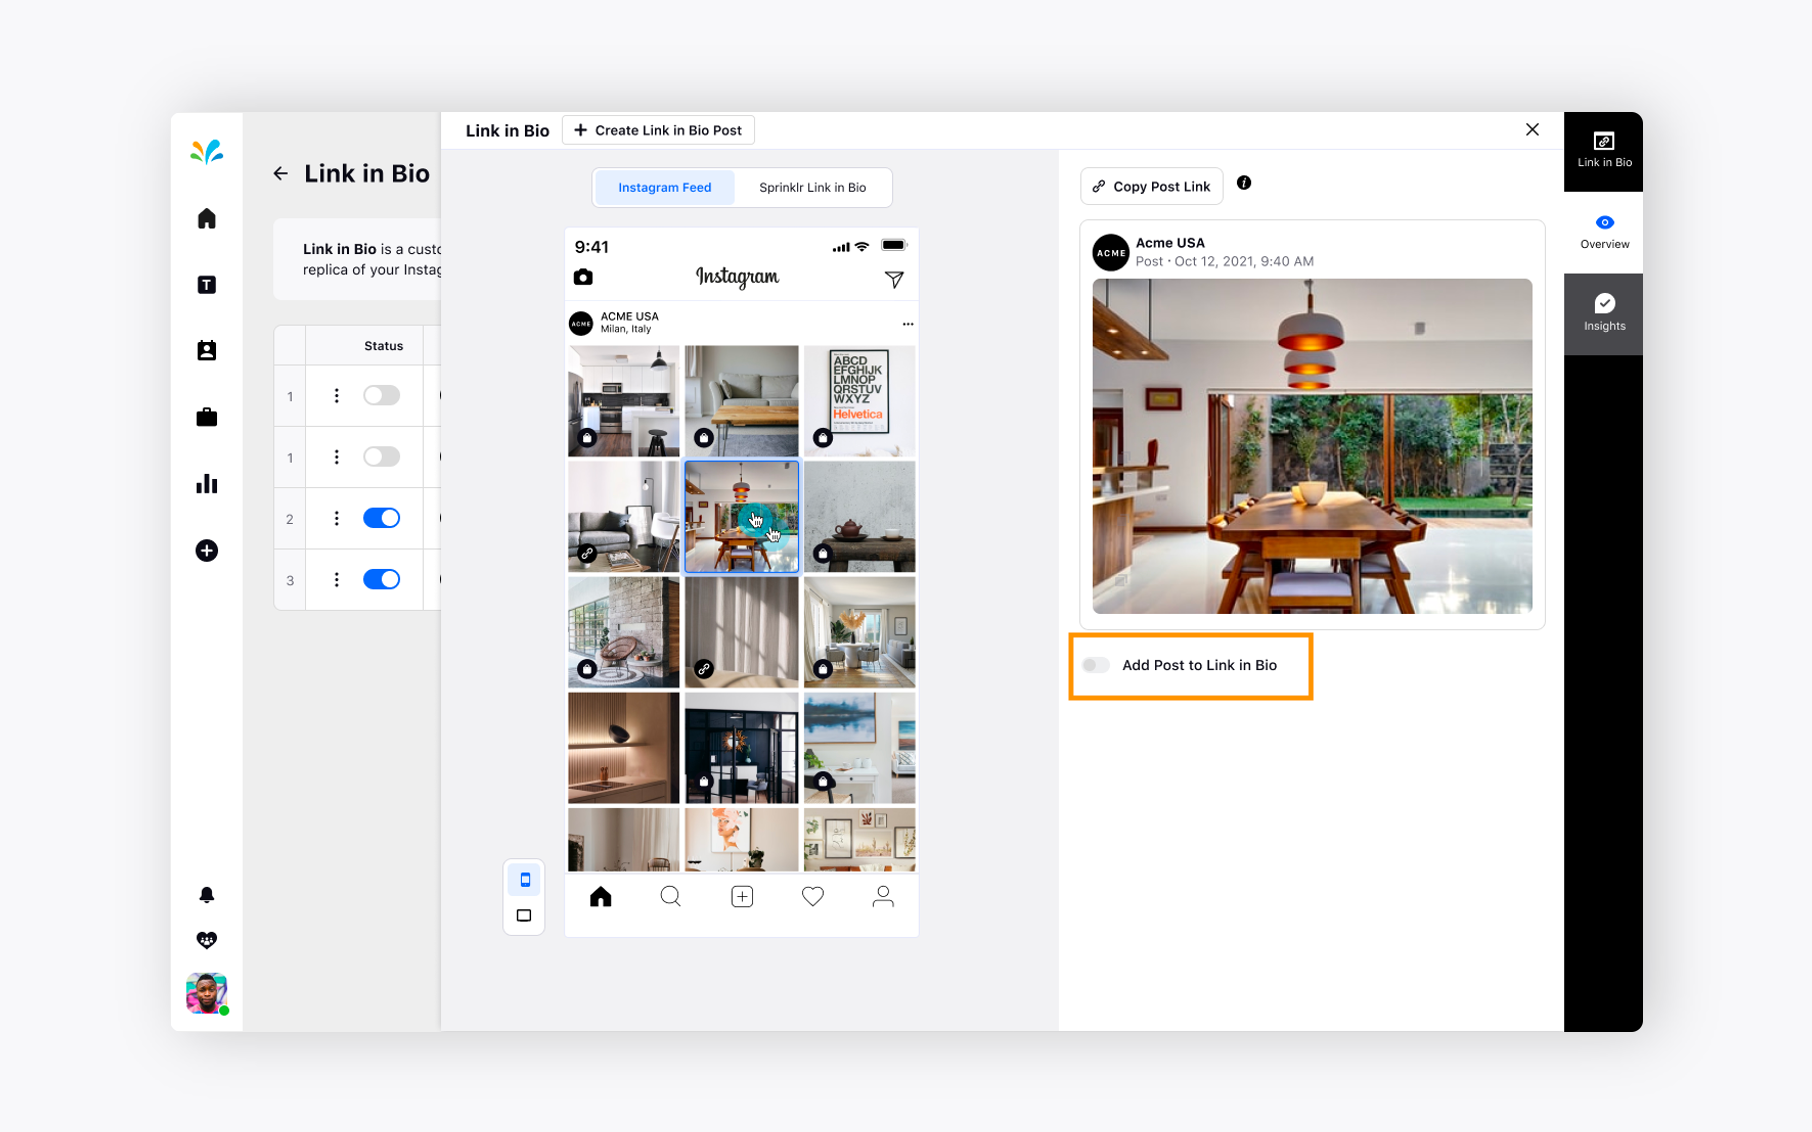
If you will click on Sprinklr Link in Bio, you will be able to see selected product's Link in Bio preview.
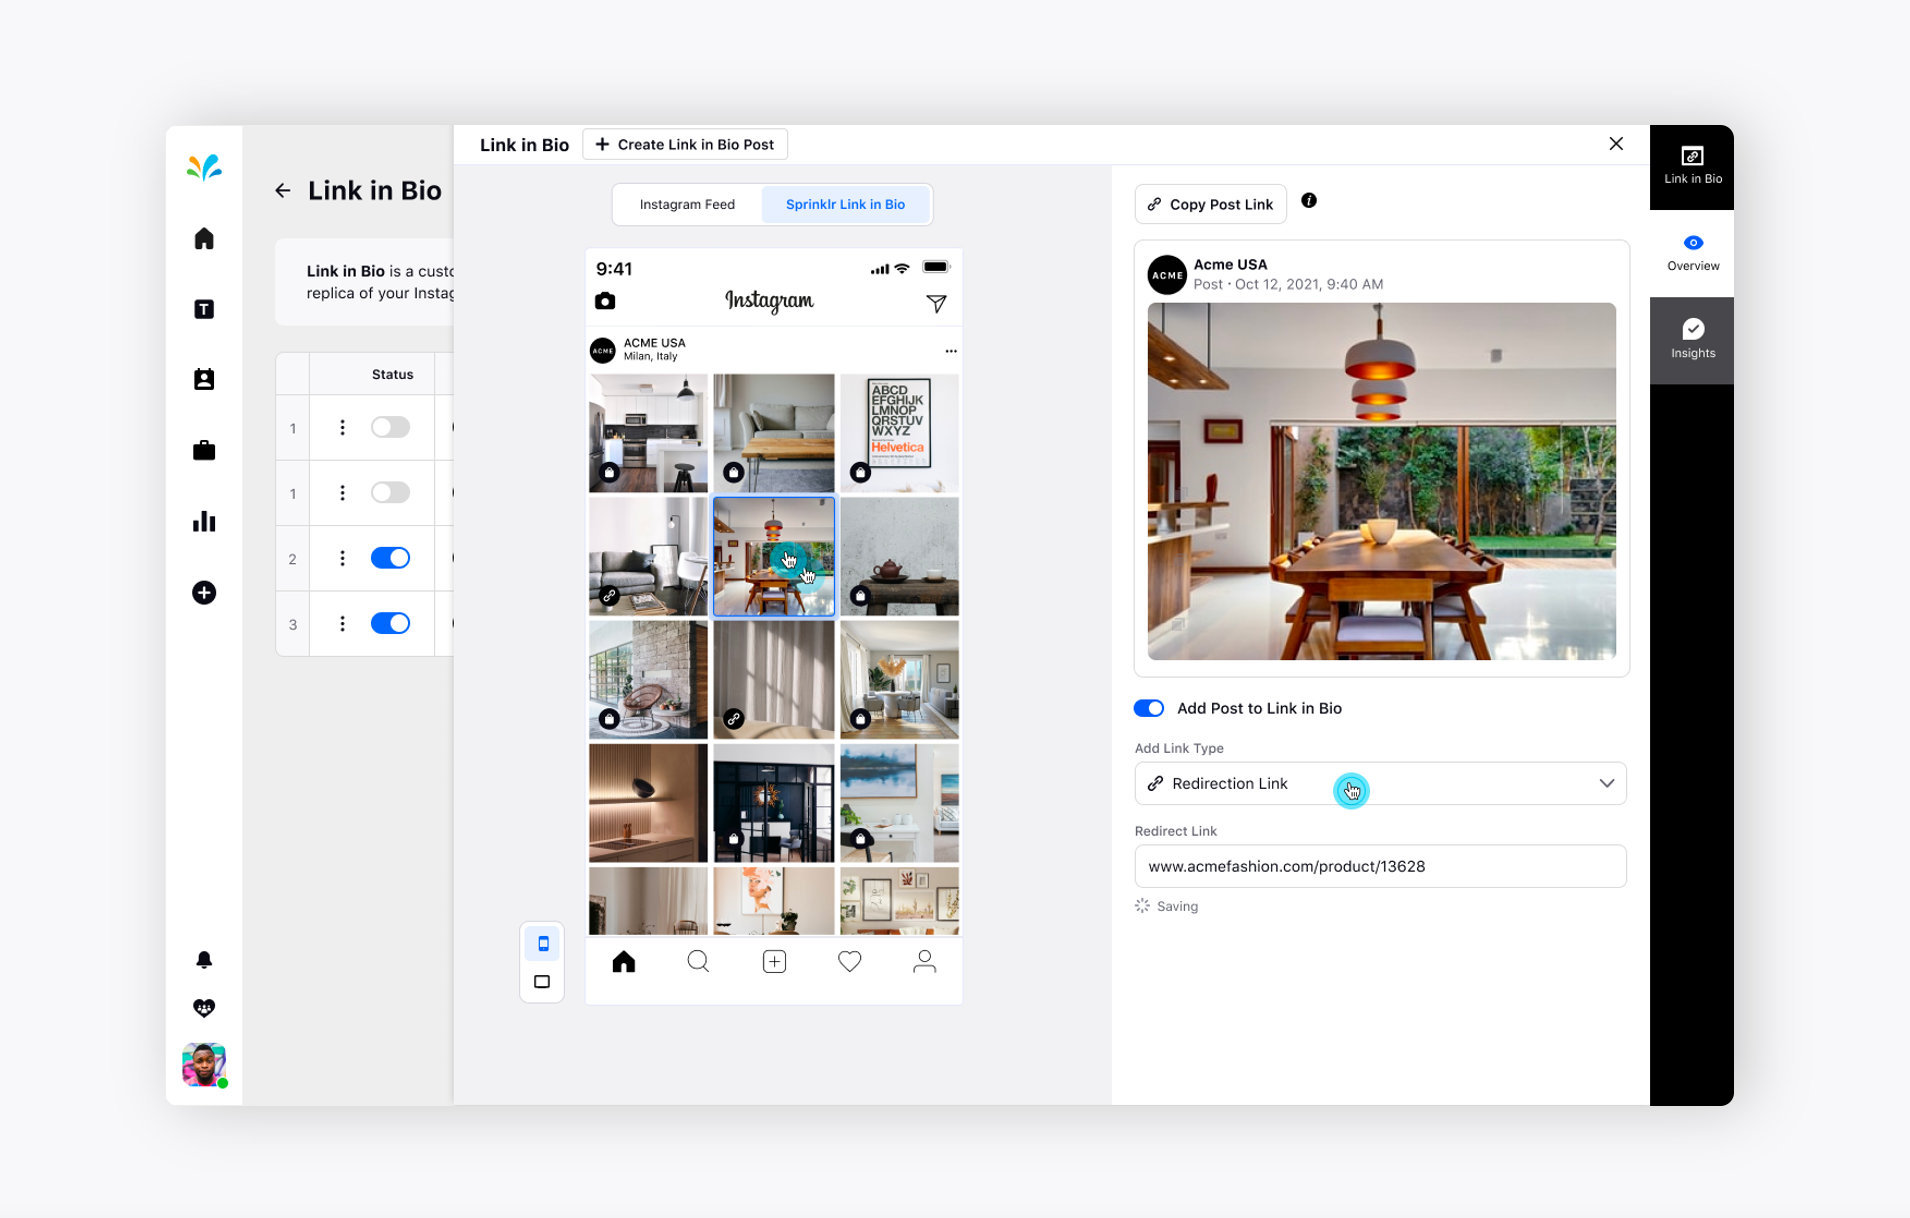
Now, Toggle On Add Post to Link in Bio on the right. It will ask for Add Link Type and Redirection Link. Click on Save in the bottom right corner after providing the same.
Please note you can tag multiple post at the same time under Link in Bio. For all the posts you are tagging, you need to select the desired option from Add Link Type dropdown.
In case, you want to tag a product, you can choose Tag Product option from the dropdown of Add Link Type.
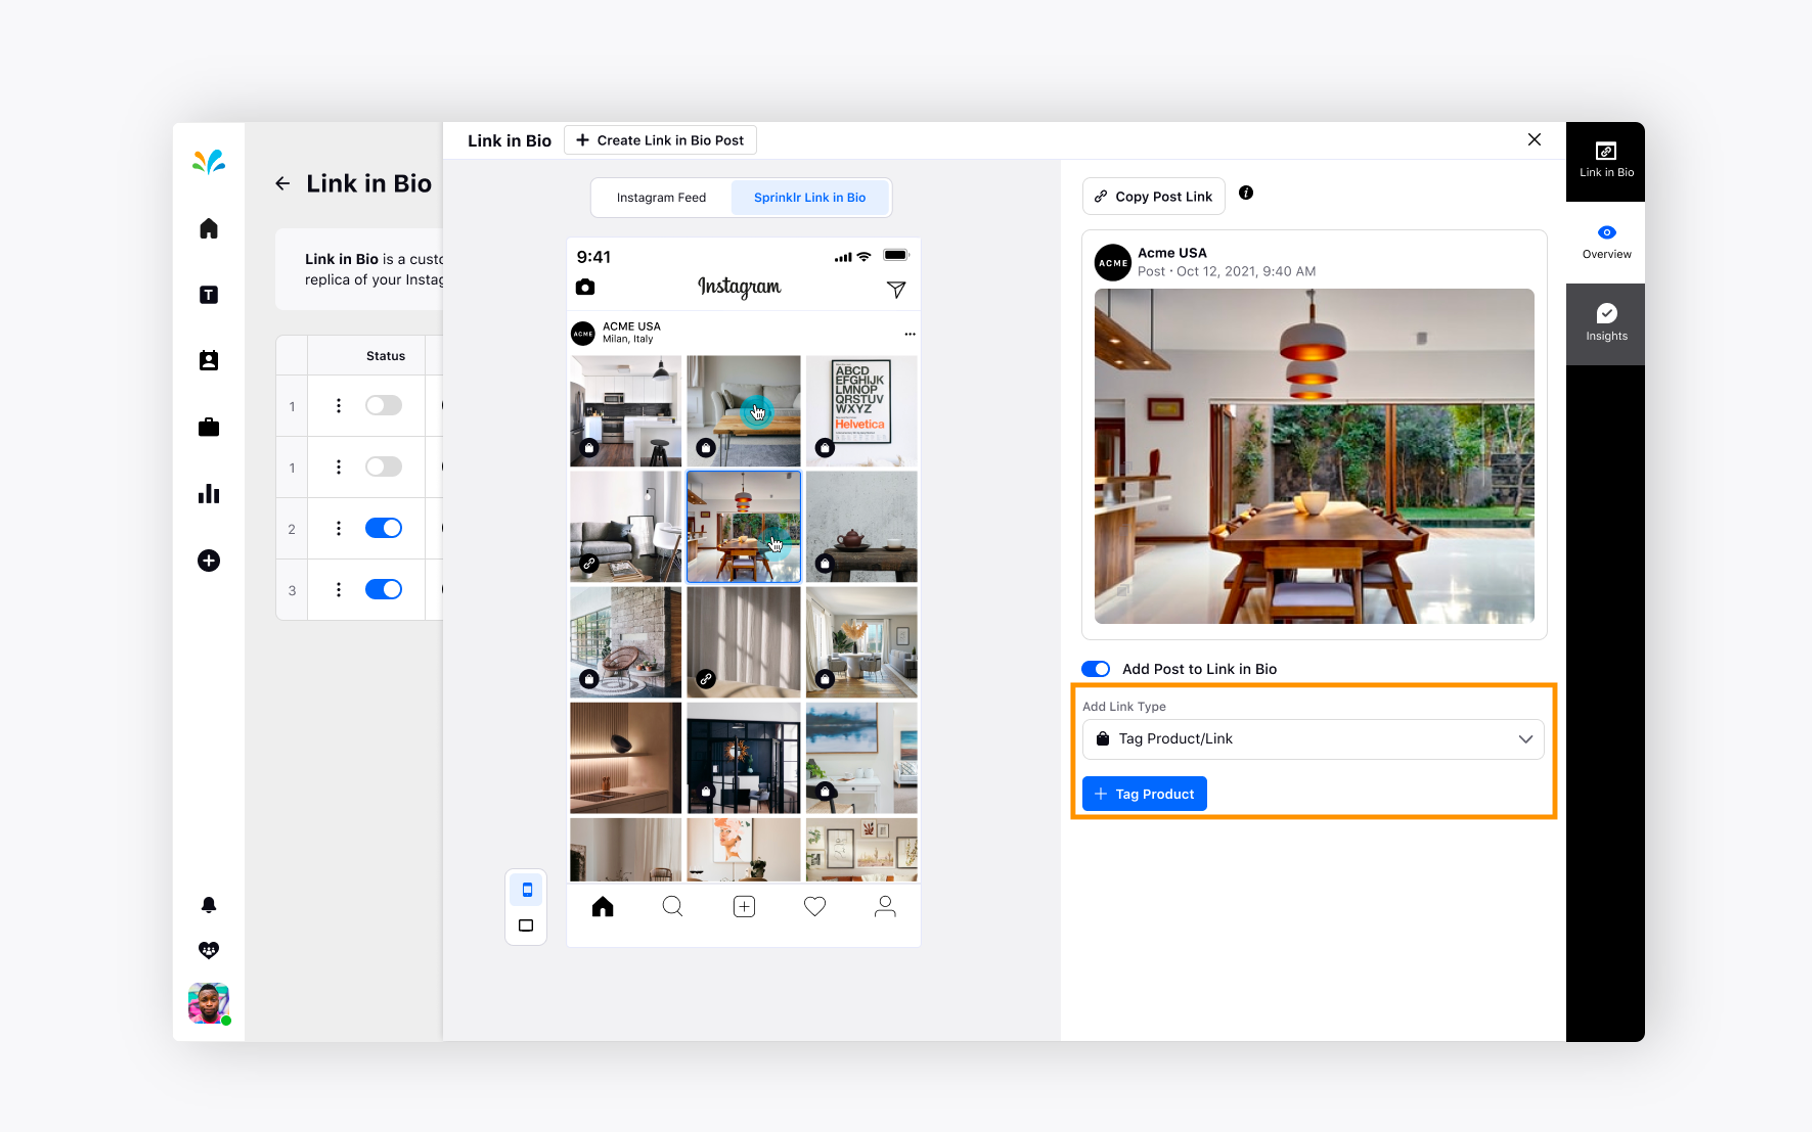
Select any post from under Sprinklr Link in Bio and choose Tag Product option from Add Link Type dropdown. It will ask you to add the product now. Click on the + icon to add the product and decide where you want to tag the product in the picture.
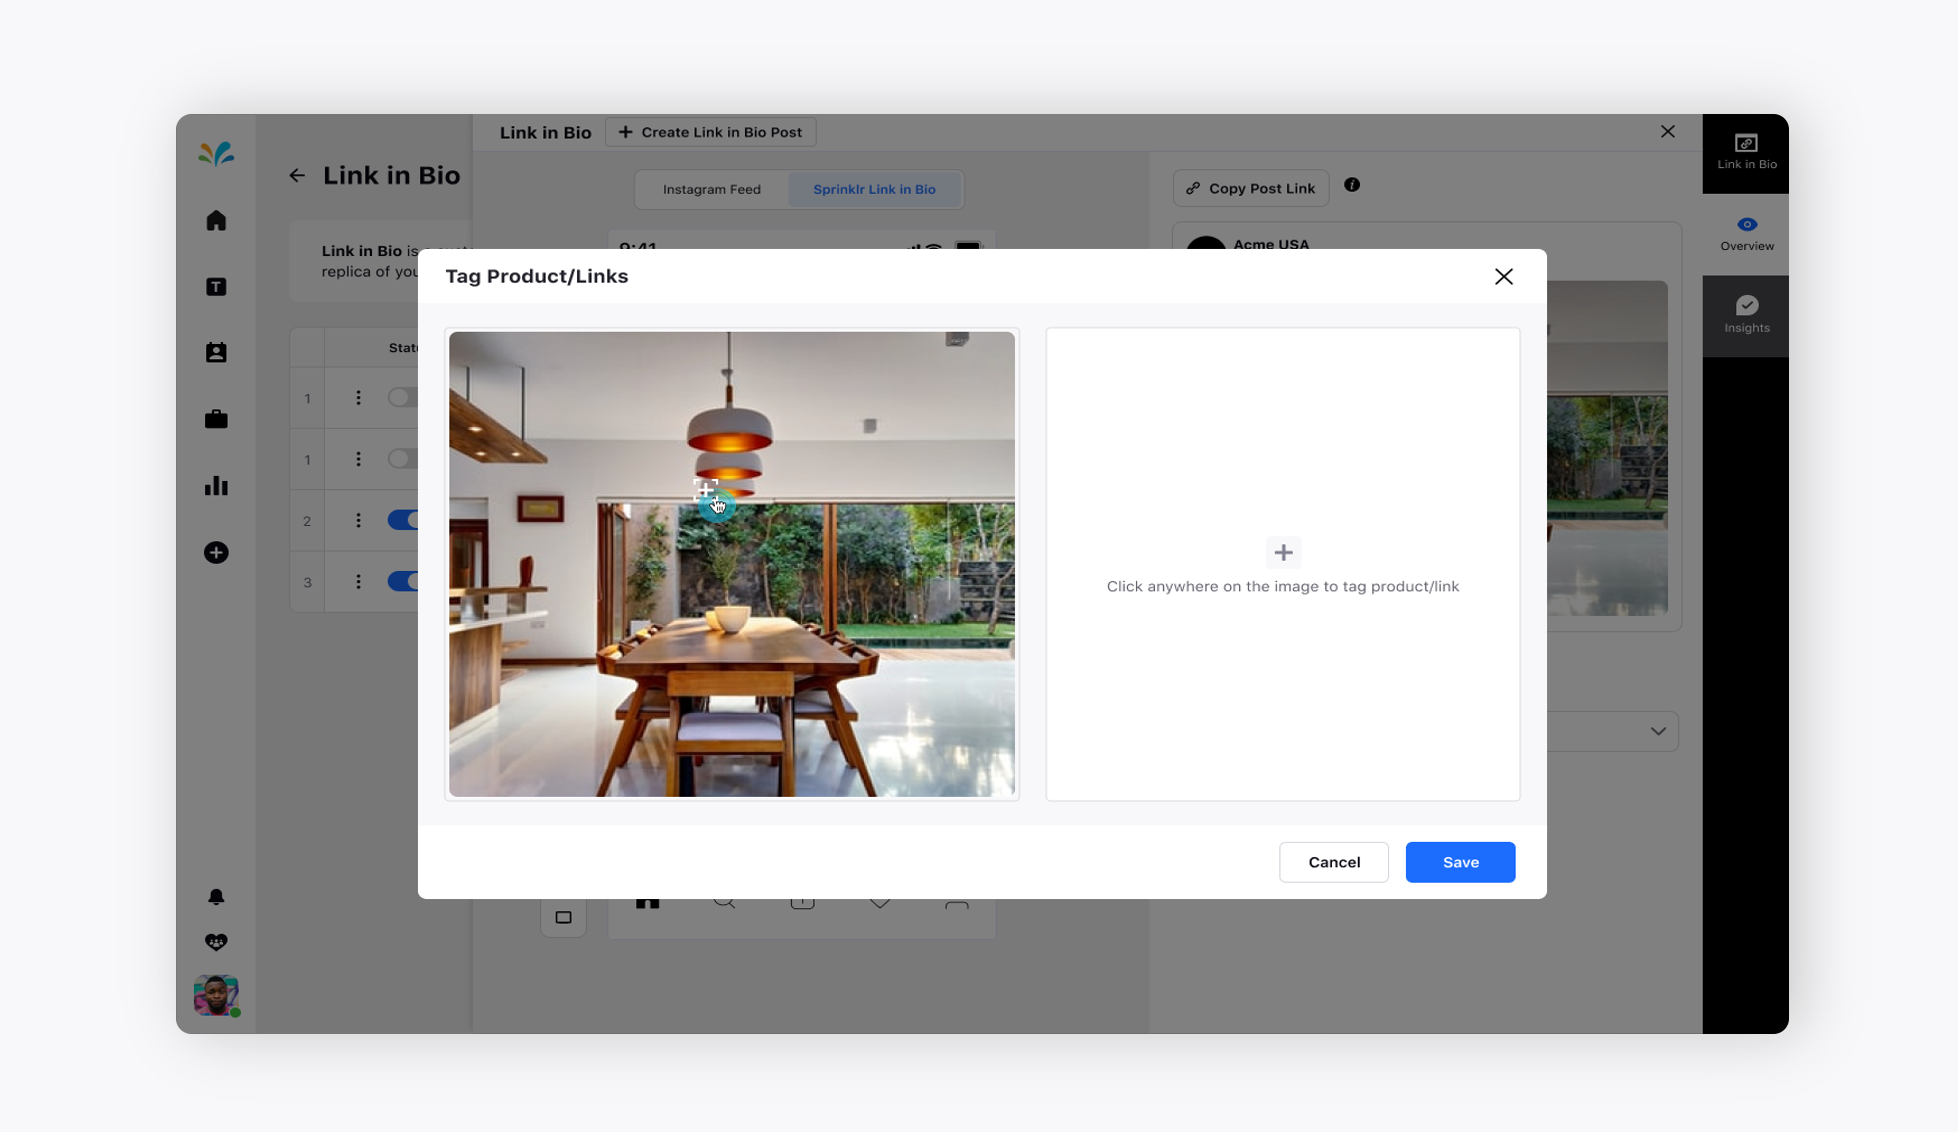
Now, tag the product at your preferred location anywhere in the picture.
Once you tag the product anywhere on the picture, you will get a list of products to choose from.
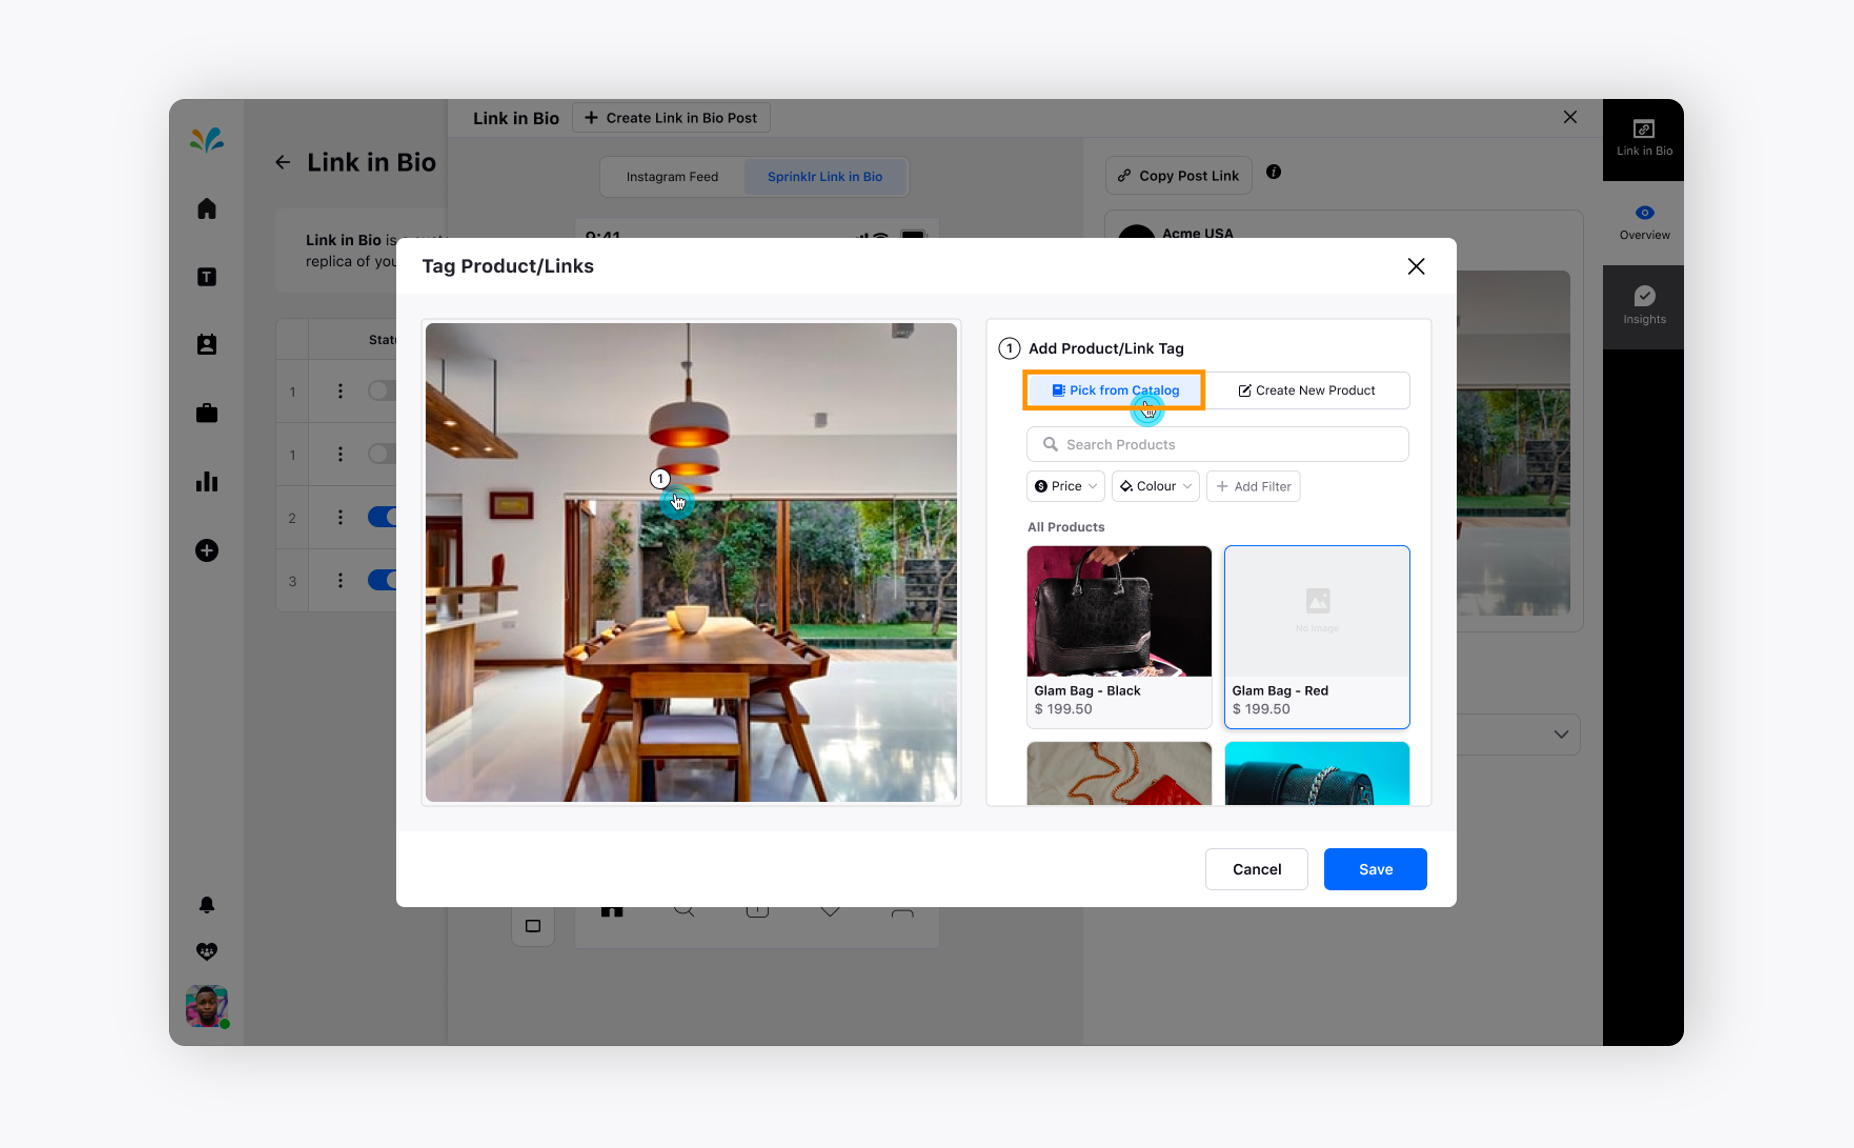
For now, you can select the existing product from the catalogue and click Save in the bottom right.
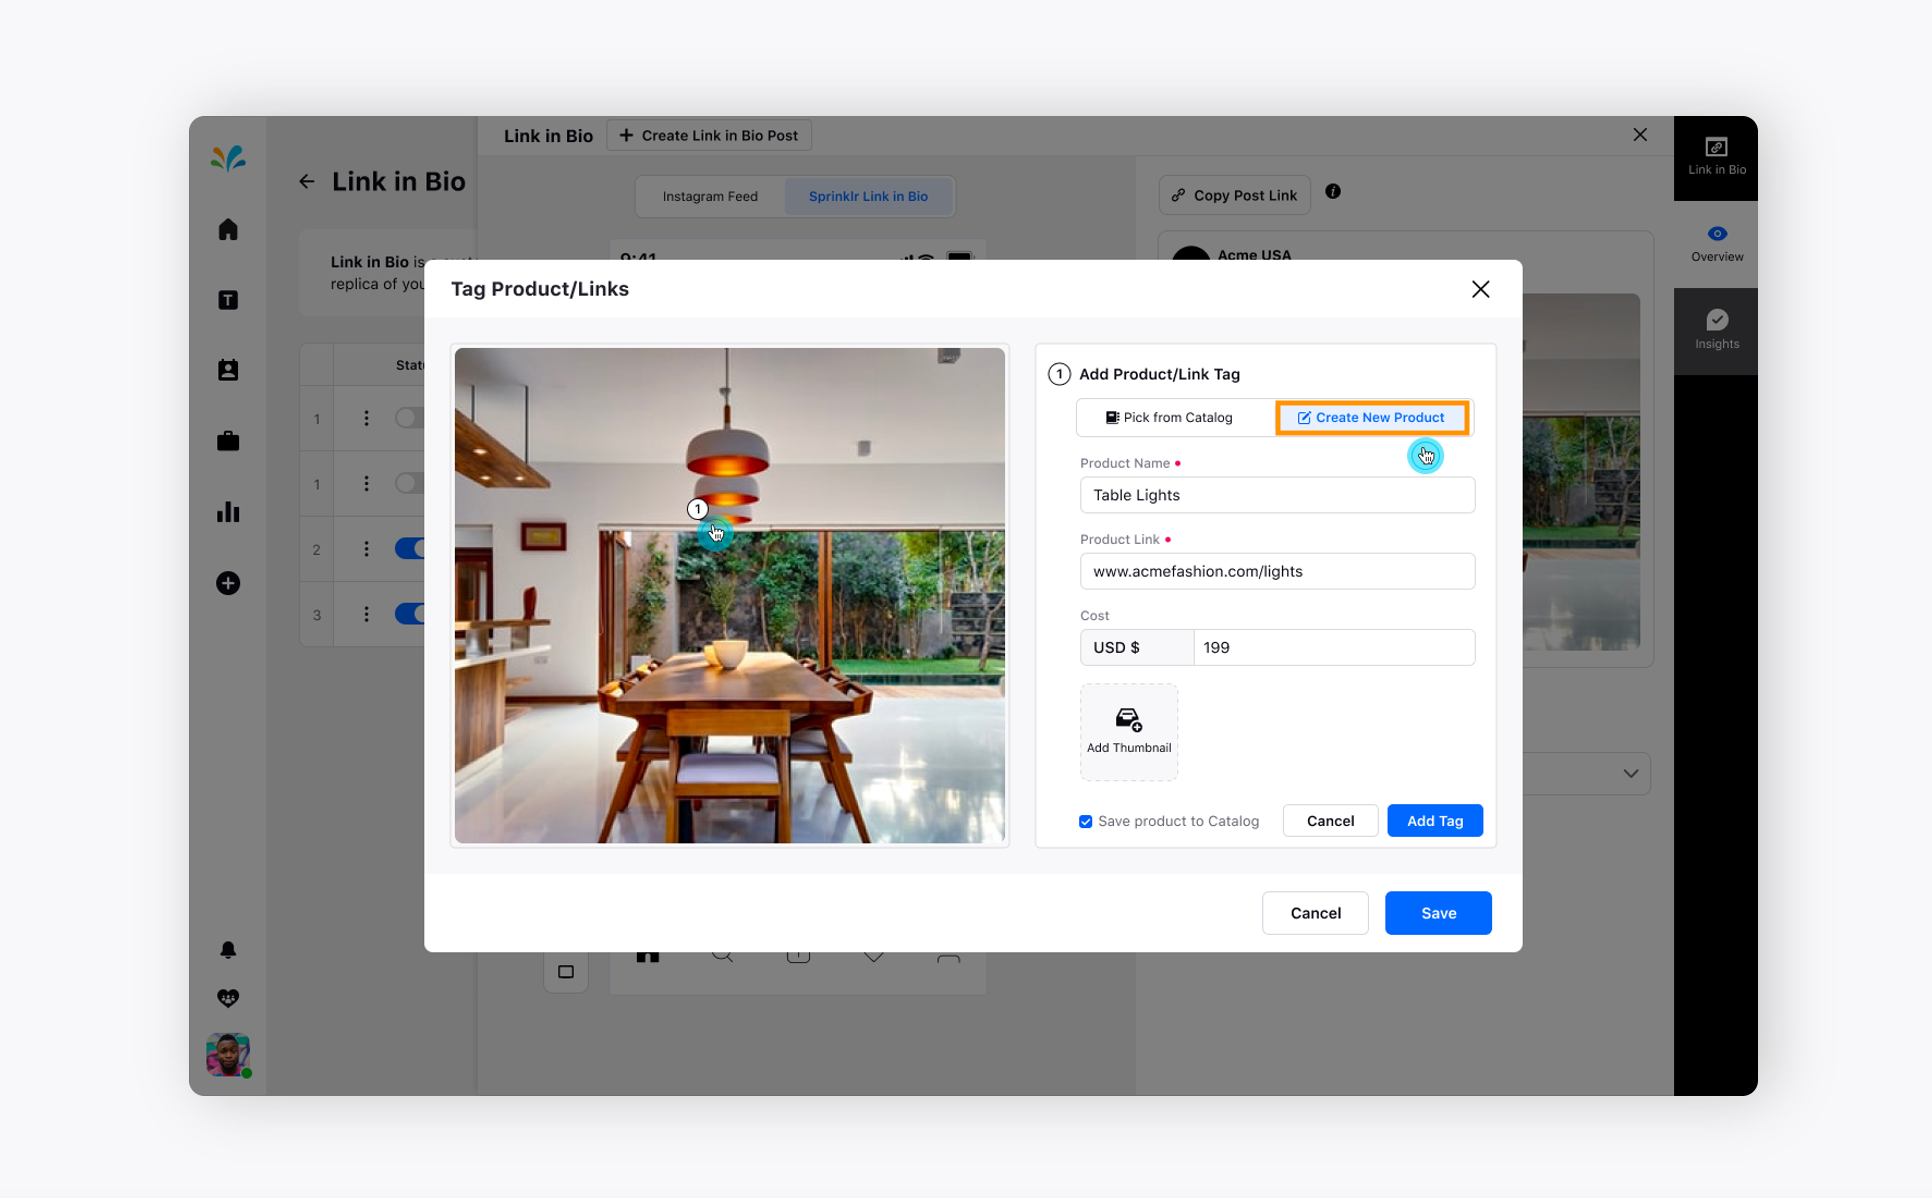
To create New Product under Link in Bio
You can also create a new product by moving to Create New Product tab. While creating a new product, you can provide a Product name, Product link, Cost, or add a Thumbnail.
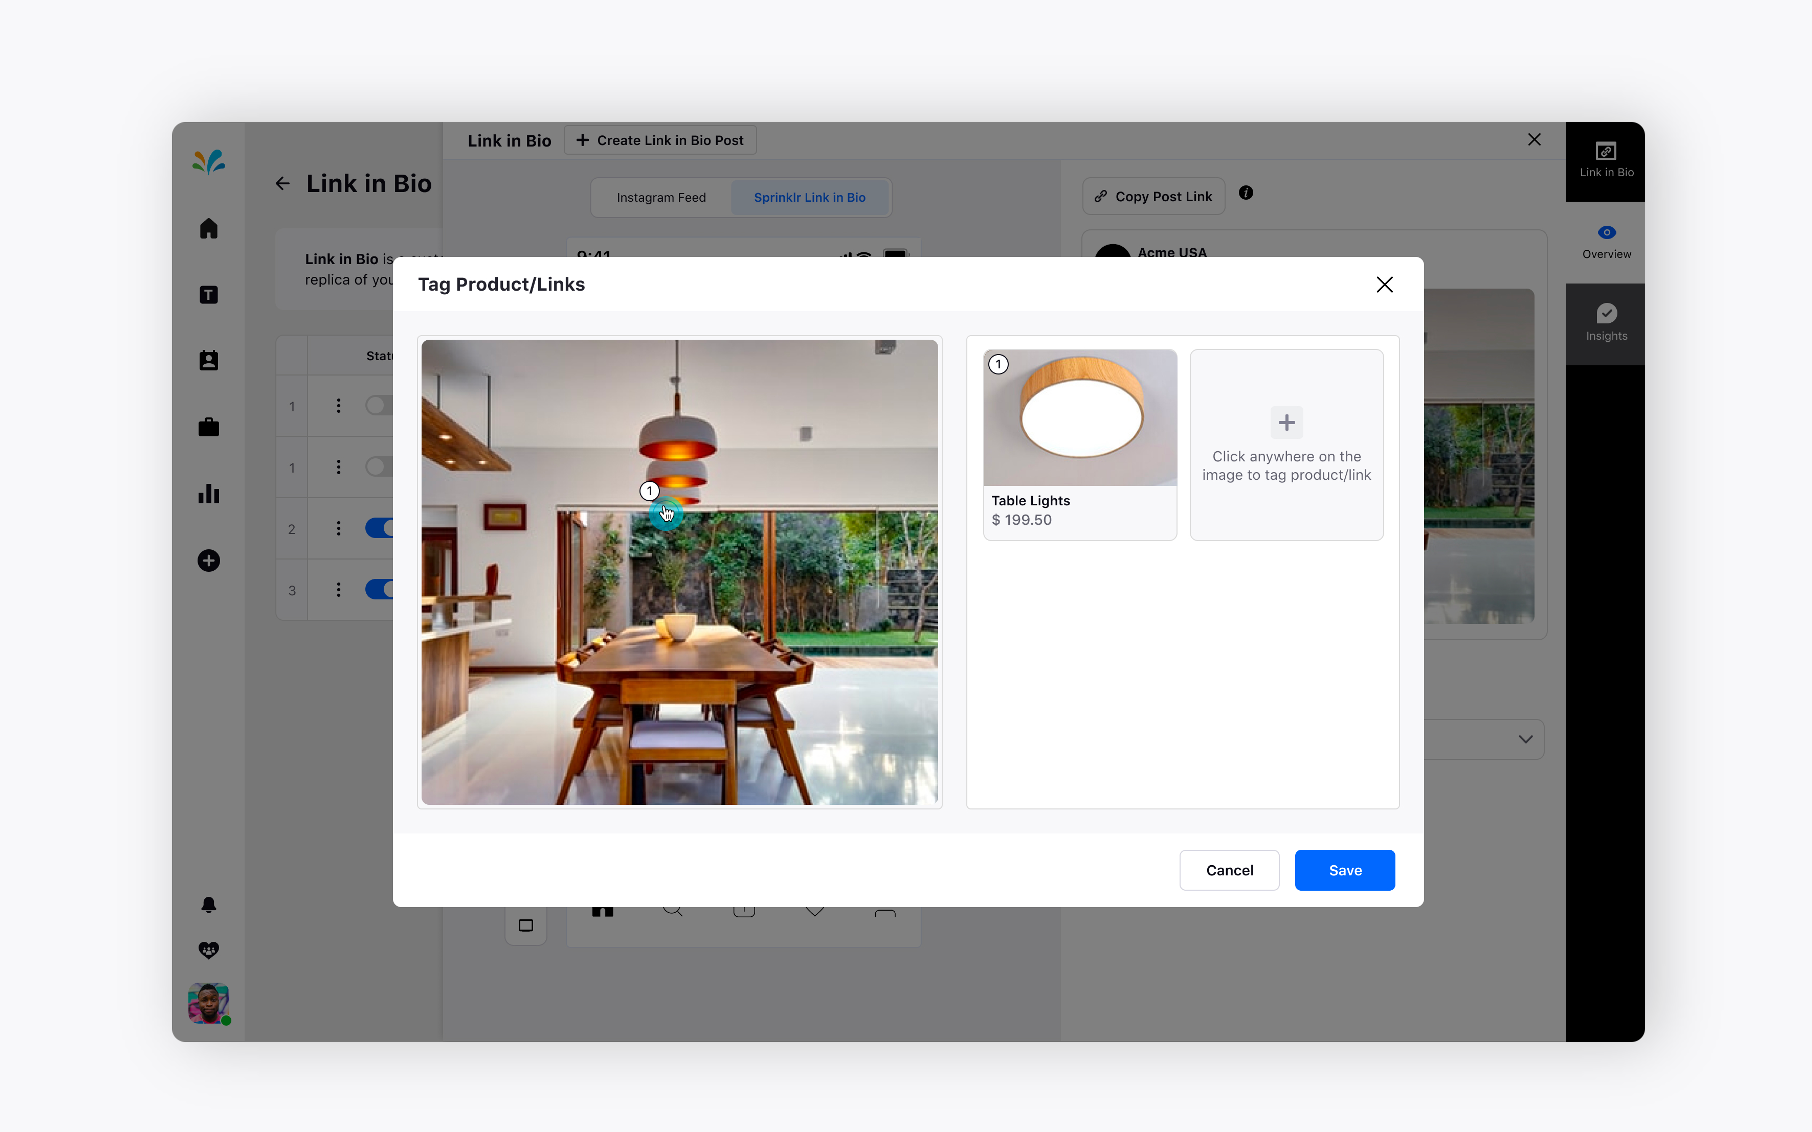
As you can see, the chosen product has been added.
Now, if you move to Sprinklr Link in Bio tab, you can view all the details of the product which are available in Link in Bio.
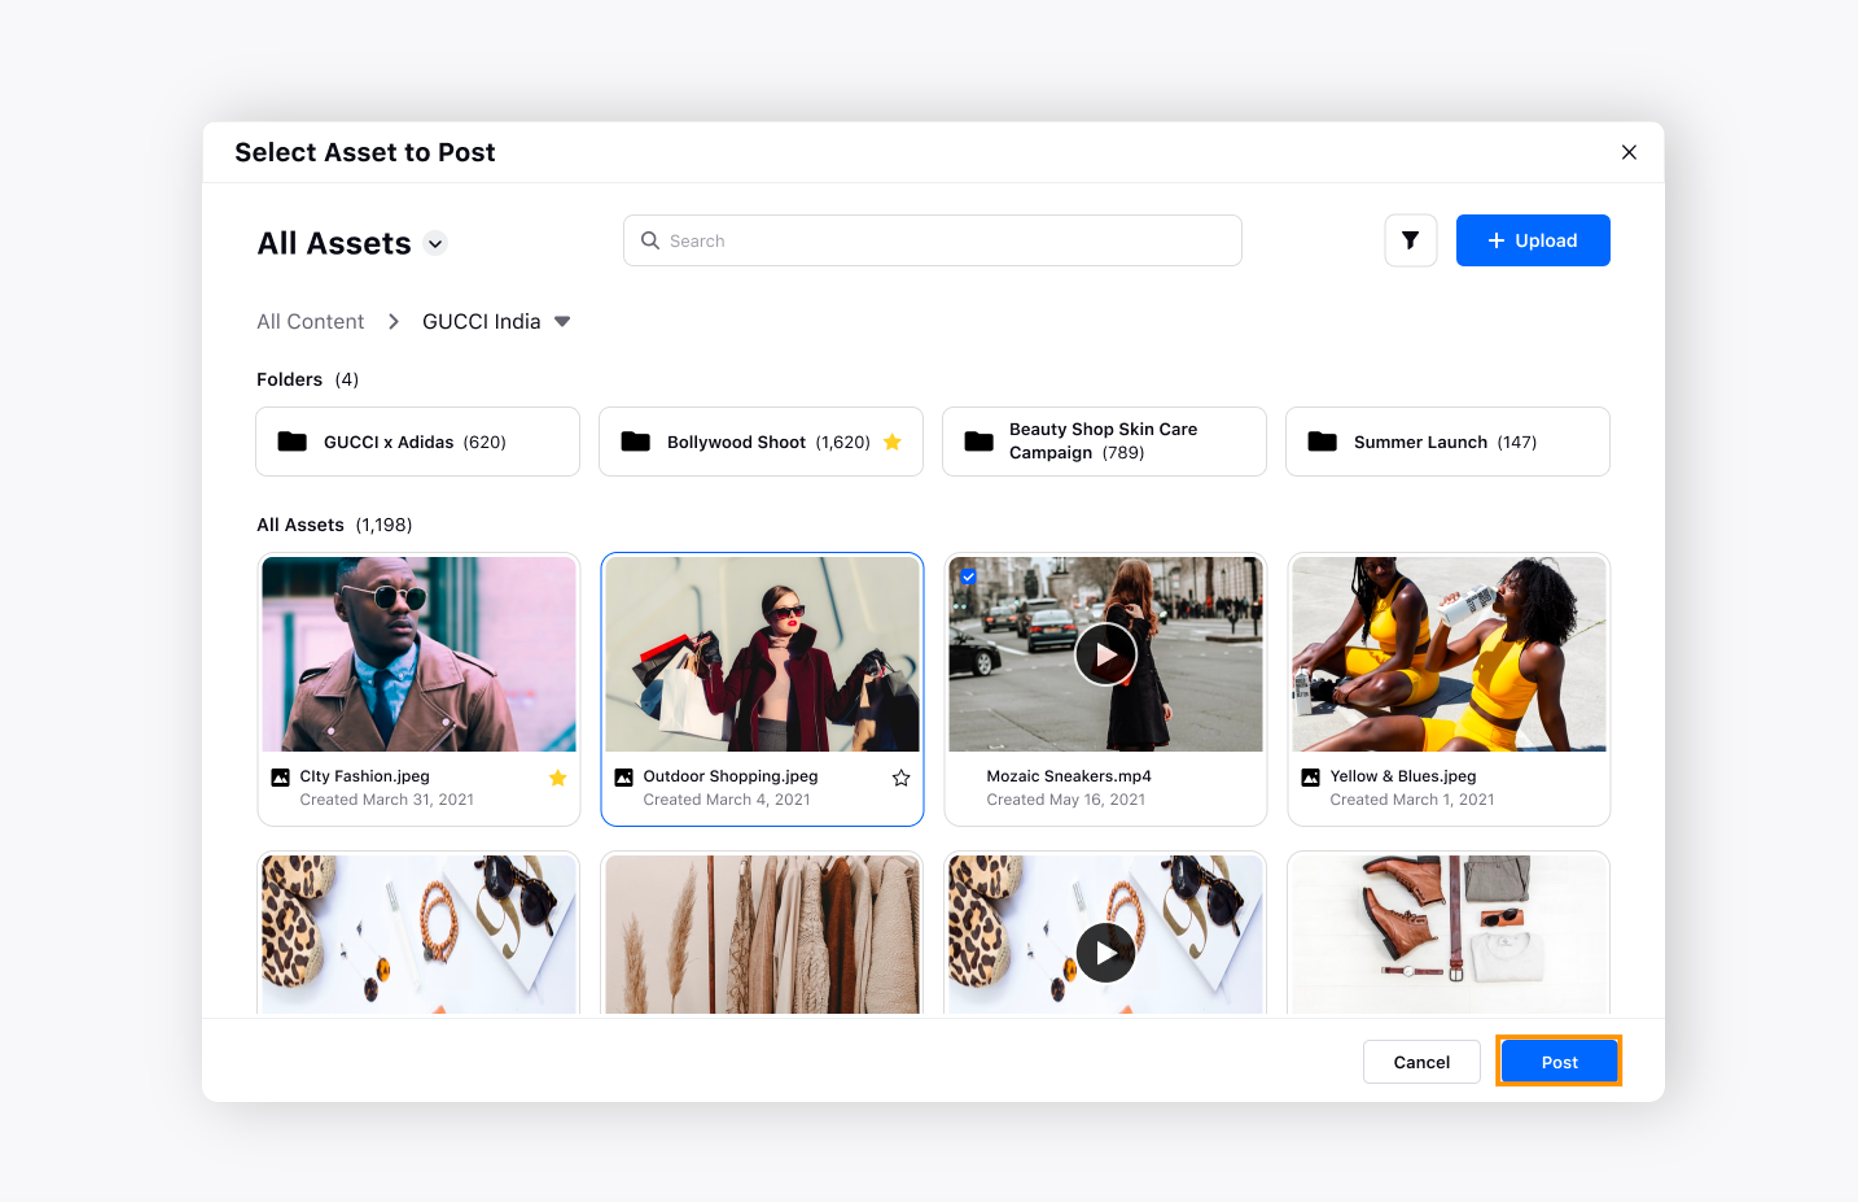
You can also create a Link in Bio Post by clicking the + icon at the top of the Instagram Feed.
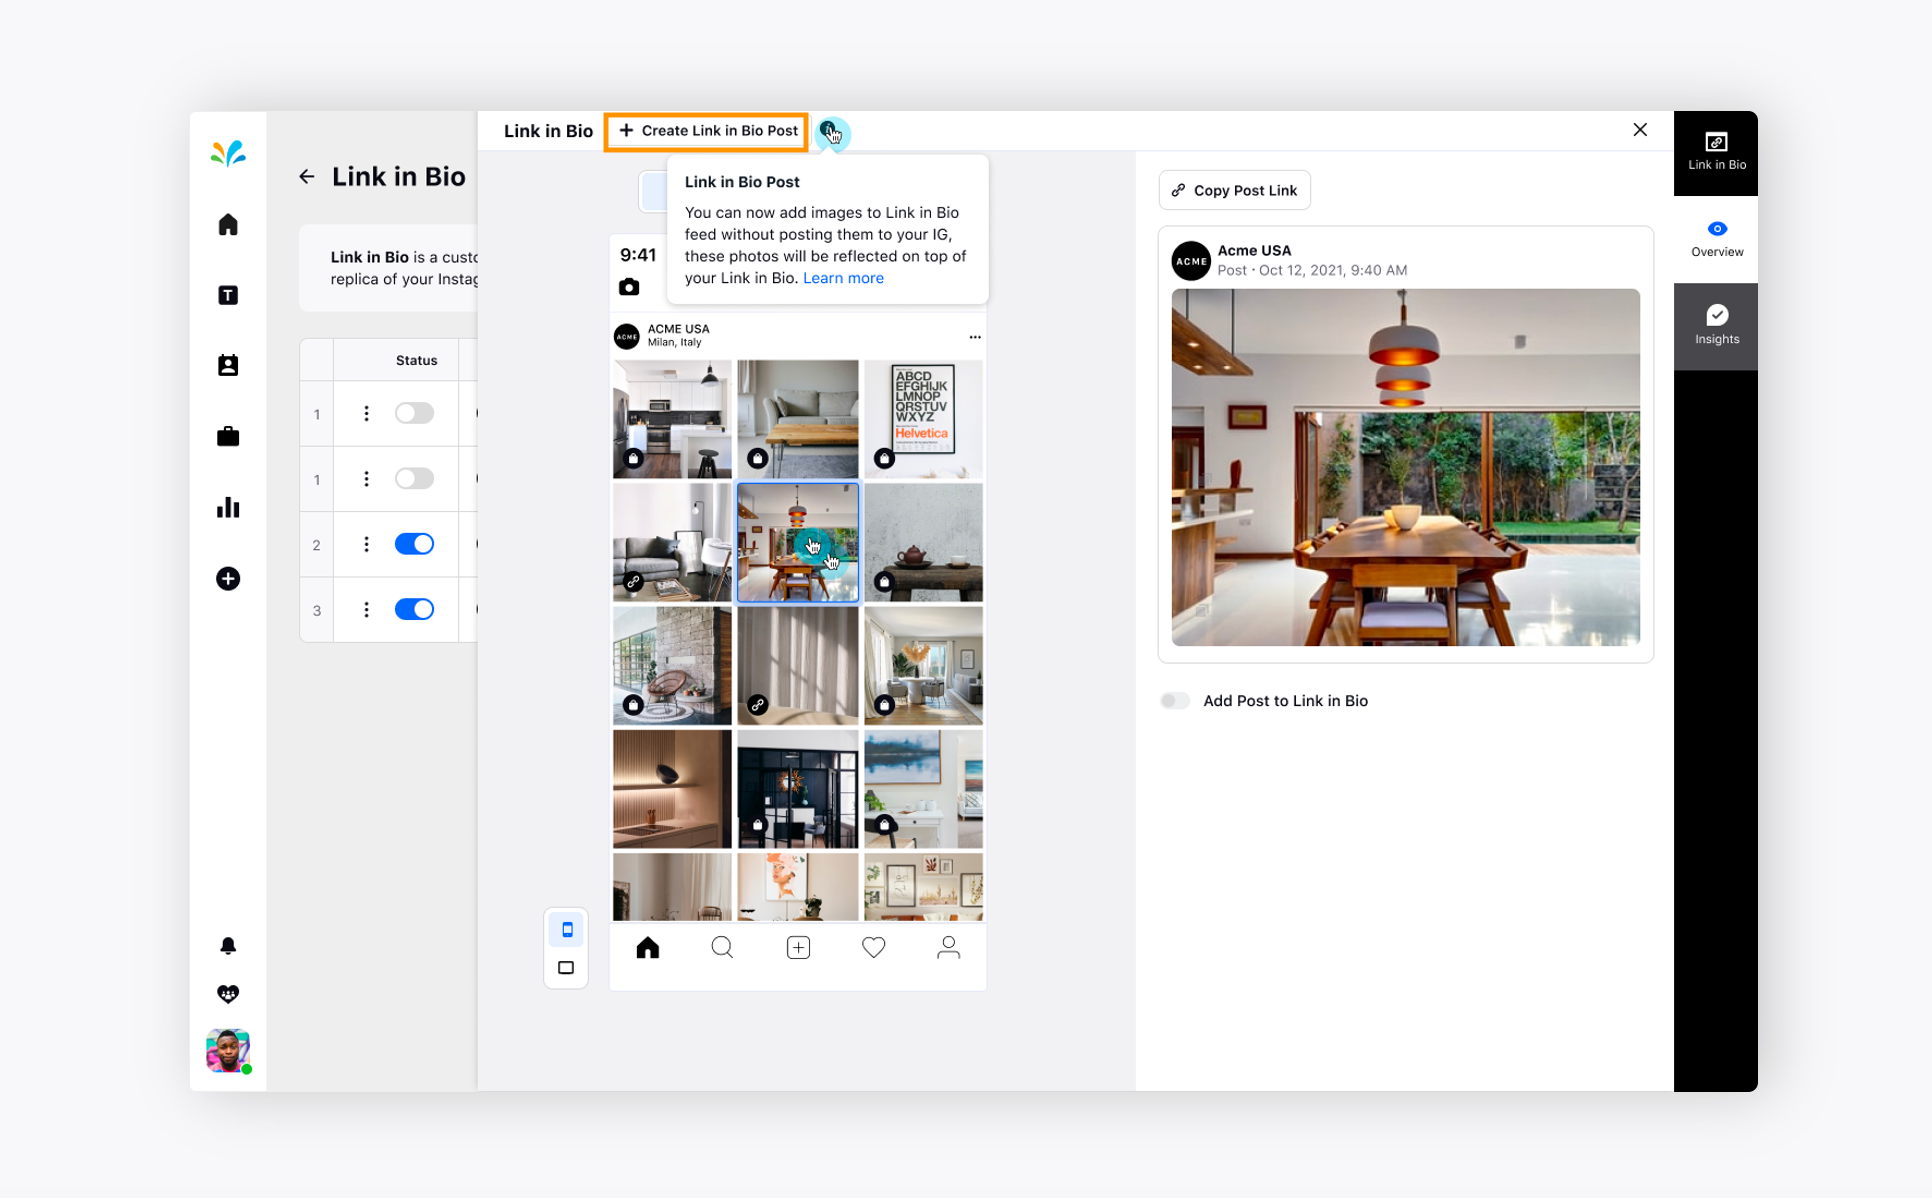
The list of assets will appear. You can choose any one of them and click Post in the bottom right.
Now, if you you want to add a product, you need to click Add Product with the plus icon. You can refer the steps 17 to 21 above to understand the process better.
Tag anywhere on the product and go to the tab Create New Product.
Now, provide details such as Product Name, Product link, Cost, add a Thumbnail by uploading an image from your system or Asset Library. Checkmark Save product to Catalog and click Add Tag in the bottom right.
Click Save after that.
So, this post has also been added in your Link in Bio section. Click Save in the bottom right corner.
So, you have completely set up Link in Bio right from the Sprinklr platform for your Instagram Store. You can preview the same by clicking on Link in Bio link next to the Instagram account.
It will give you the real-time preview of your Instagram Link in Bio page. It will exhibit the following details such as:
Banner image
Instagram Feed images
Privacy Policy banner
Enter Email button
Brand homage page button
Social links
Custom links
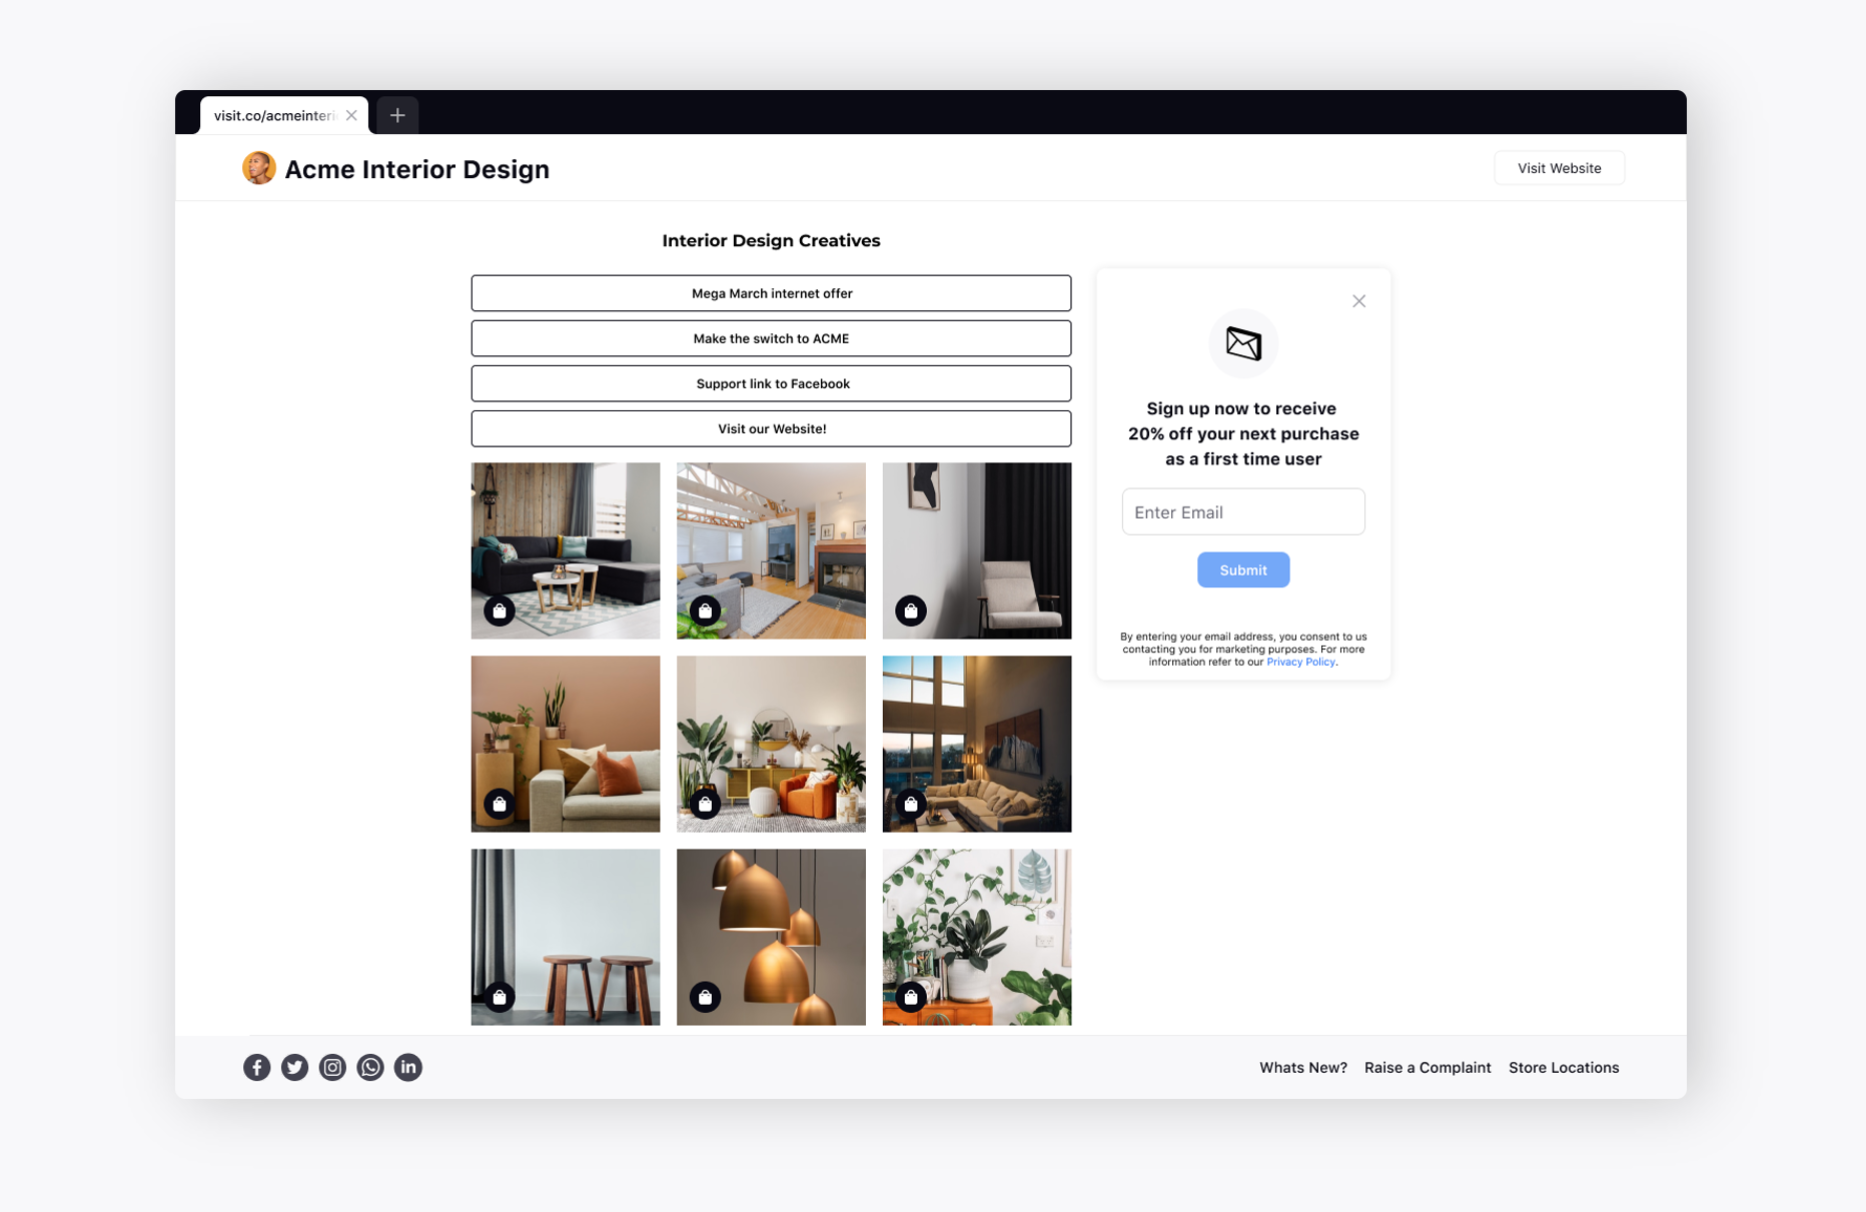
Now, go back and copy the Link in Bio link and post it in your Instagram profile from your Instagram app or website. You are ready to go, then.
Similarly, you can set up Link in Bio for your TikTok profiles as well.
Click on Setup Link next to the TikTok account. Please refer step 3 to 21 above to understand the process better.
The Configuration screen appears where you need to provide the Overview details such as Link URL, style your website by choosing any of the 3 templates, set up your footer, and select additional settings as per your requirement.