Salesforce integration in Sprinklr
Updated
How you can integrate Salesforce into Sprinklr and have a full context of who you are interacting with by viewing in-depth Salesforce data alongside Sprinklr conversations.
Sprinklr provides the functionality to add your Salesforce account to the platform and link Salesforce details to a Sprinklr ticket. It provides the following major functionalities:
Sync Contacts and Leads data in any direction as per your business requirement.
Keep your CRM up-to-date by automatically creating new Leads in Salesforce when they're captured in Sprinklr, and sync data and conversations.
Sync Sprinklr Company and Salesforce Account(s) details and the option to create a new Account(s) in Salesforce from Sprinklr.
Reduce tab switching by viewing information from Salesforce on Leads and customers inside the Sprinklr Inbox, view the status of Leads, their owner, Key Account(s), and Contact details.
Create a case in Salesforce without leaving Sprinklr.
Sync Sprinklr ticket notes with Salesforce case comments.
To configure Salesforce in Sprinklr
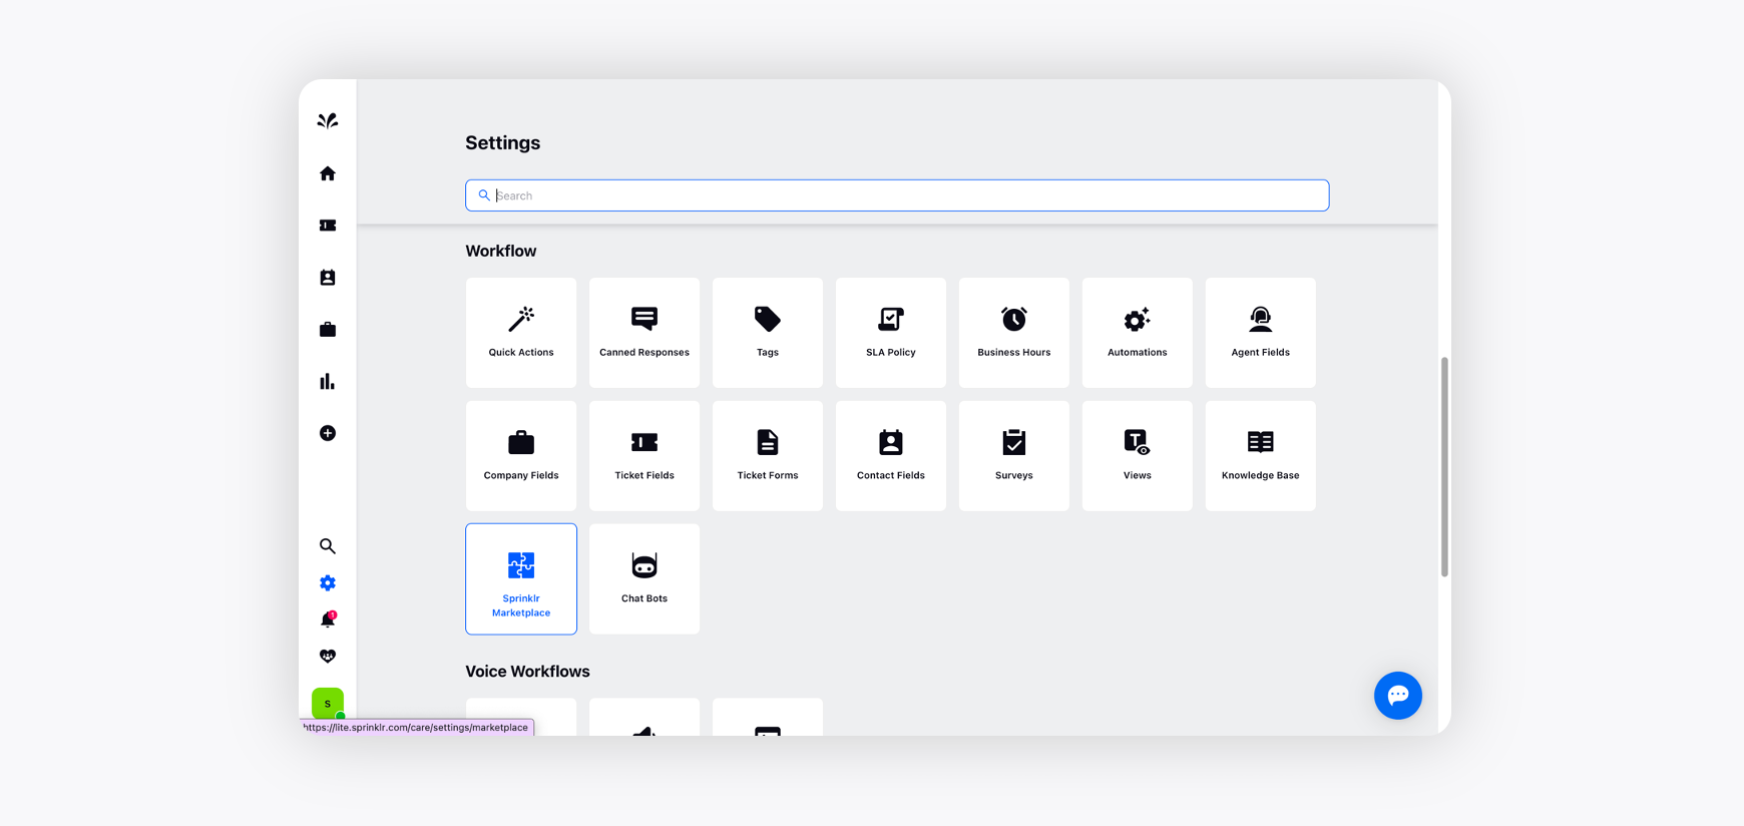
Log in to Care Console. On the Sprinklr window, click the Settings icon on the left-hand side. Under Workflow, click Sprinklr Marketplace.
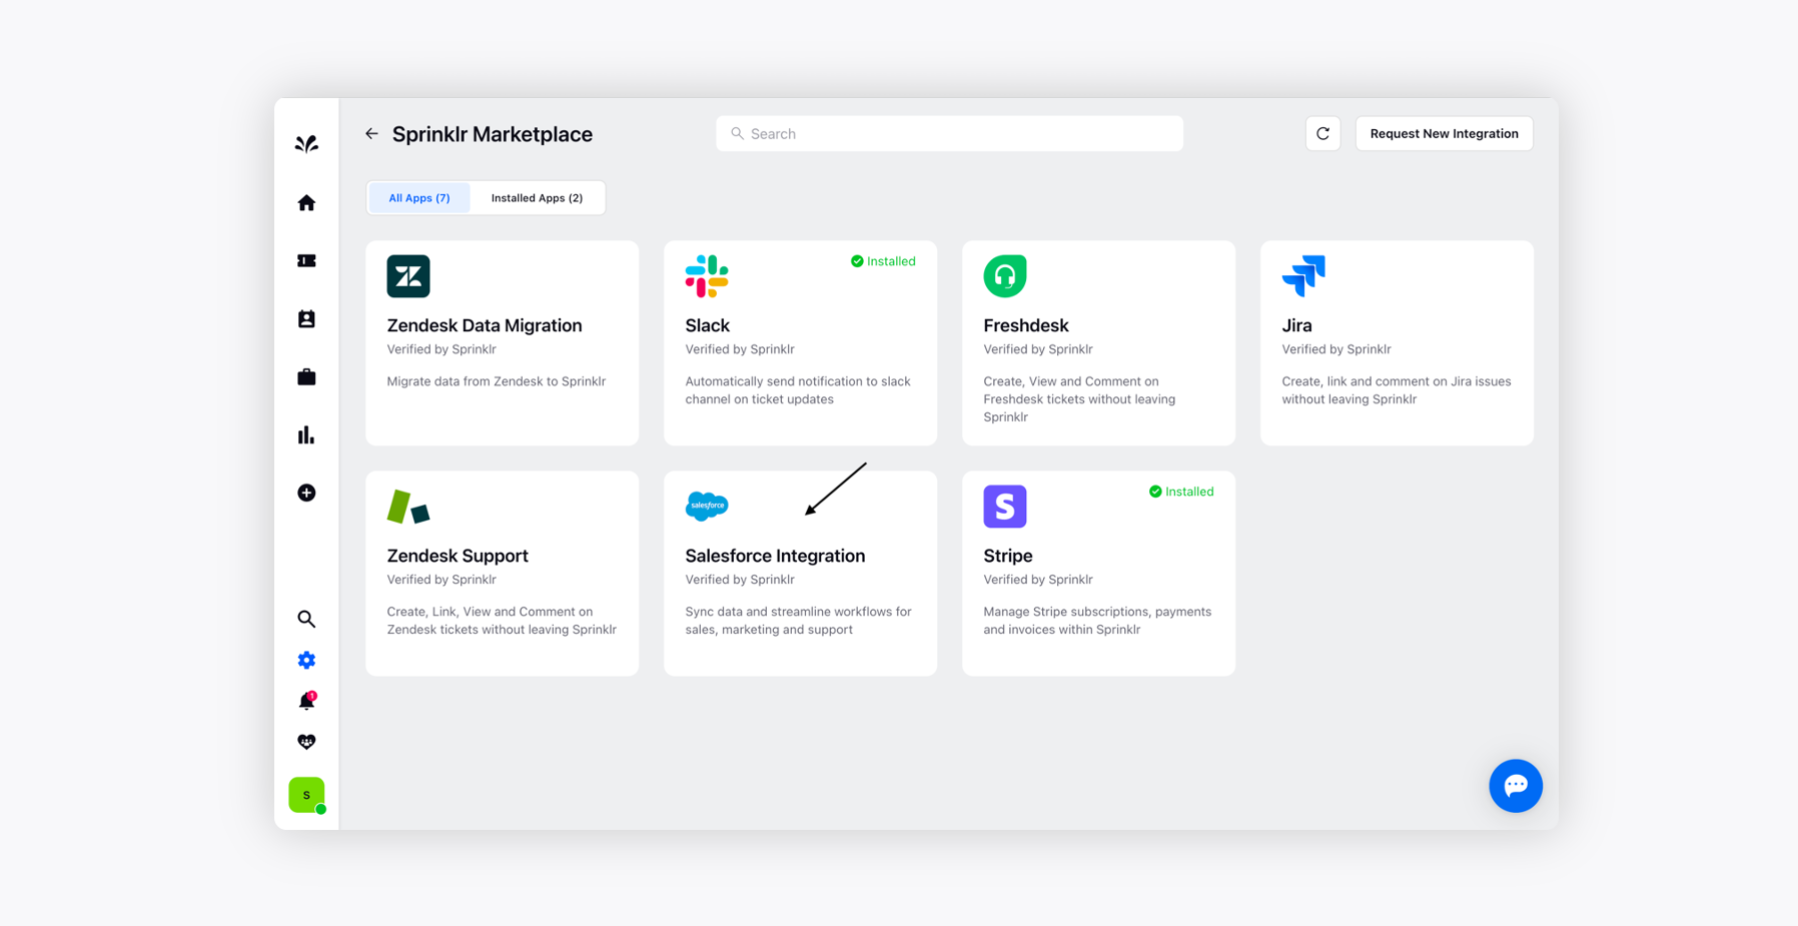
Select Salesforce from the list of apps in the Sprinklr Marketplace.
Now, click the Install App in the top right corner.
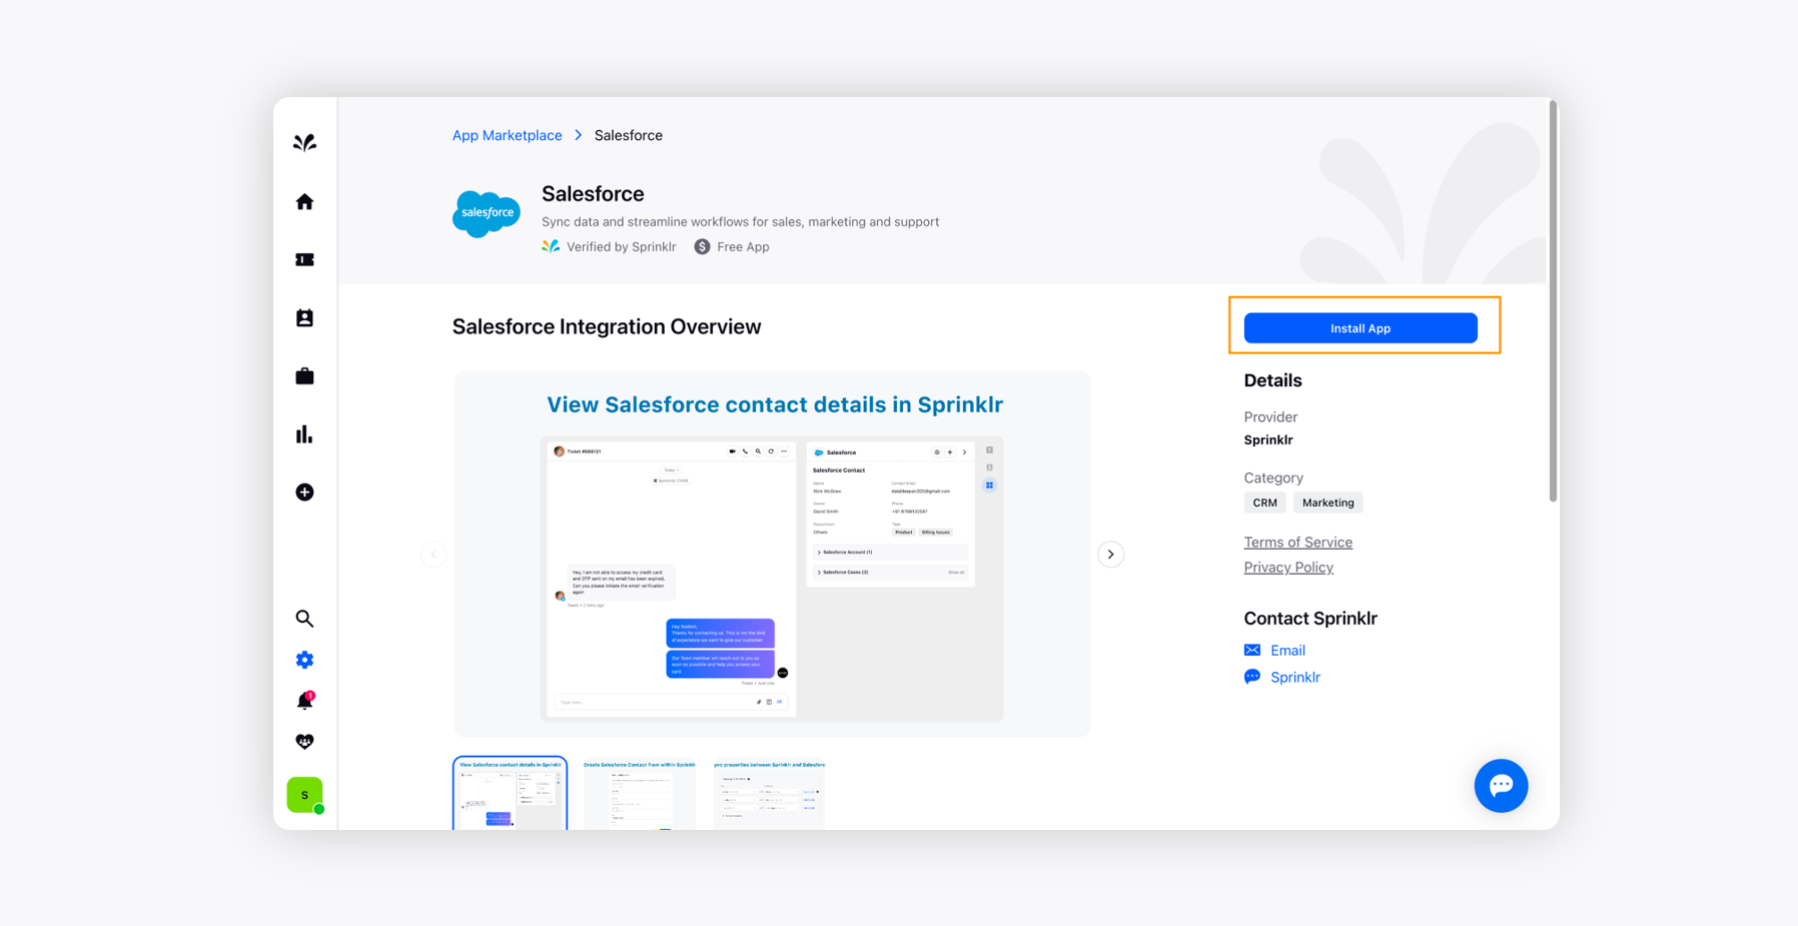
Now, click Install App at the top right and click Salesforce Production followed by Connect. Here you would be redirected to an OAuth window where you need to provide your Salesforce Credentials, after which your login would be completed.

This will prompt you to the configuration page where you can select the conditions for the creation of Leads/Contacts and Cases.
Enable creation and synching of contacts and leads data under Sync Settings for Contacts and Accounts to create Salesforce contacts from Sprinklr.

Enable syncing of ticket data from Sprinklr to Salesforce under Sync Settings for Tickets.
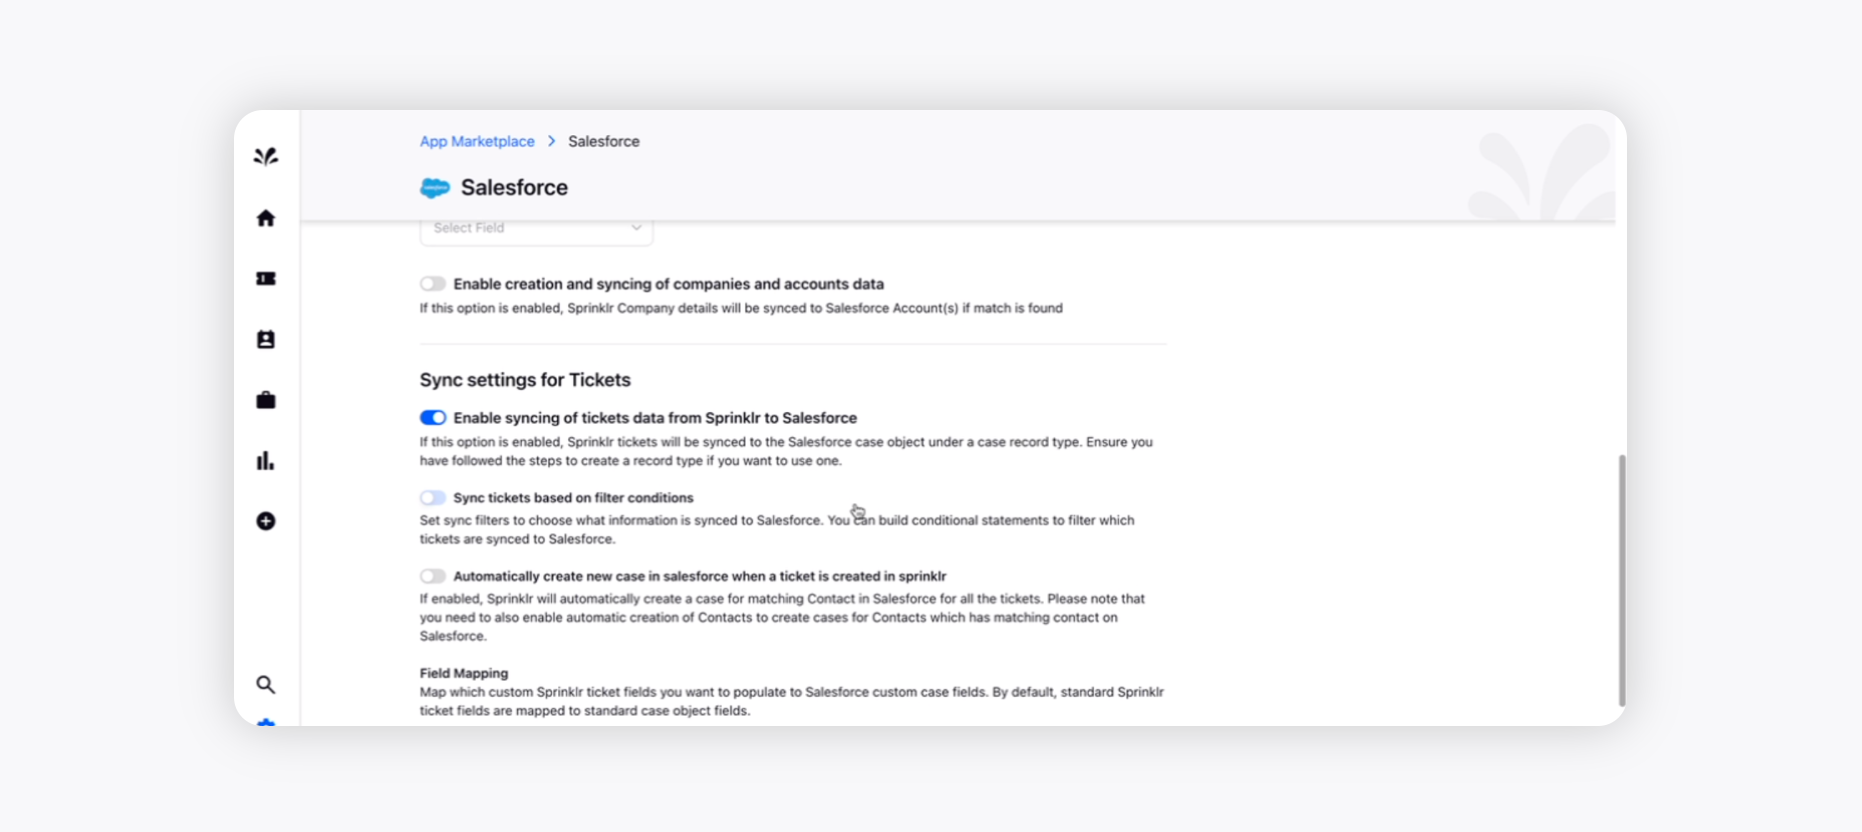
Click Save Settings at the bottom right. This way, you will complete the Salesforce configuration in the Sprinklr.
Working with Salesforce in Sprinklr
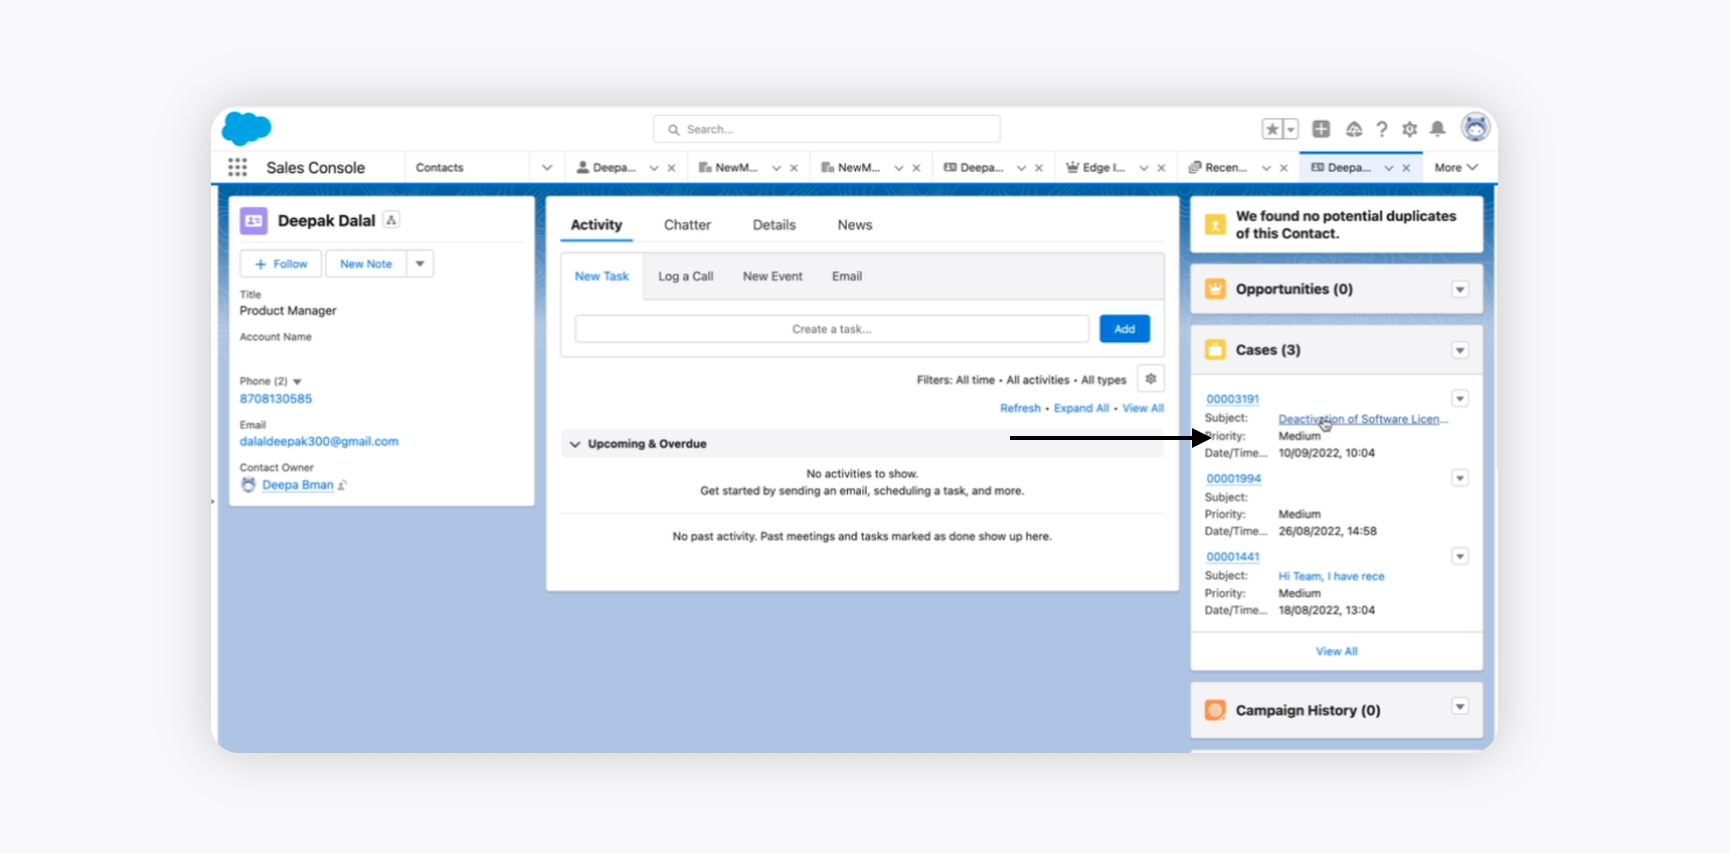
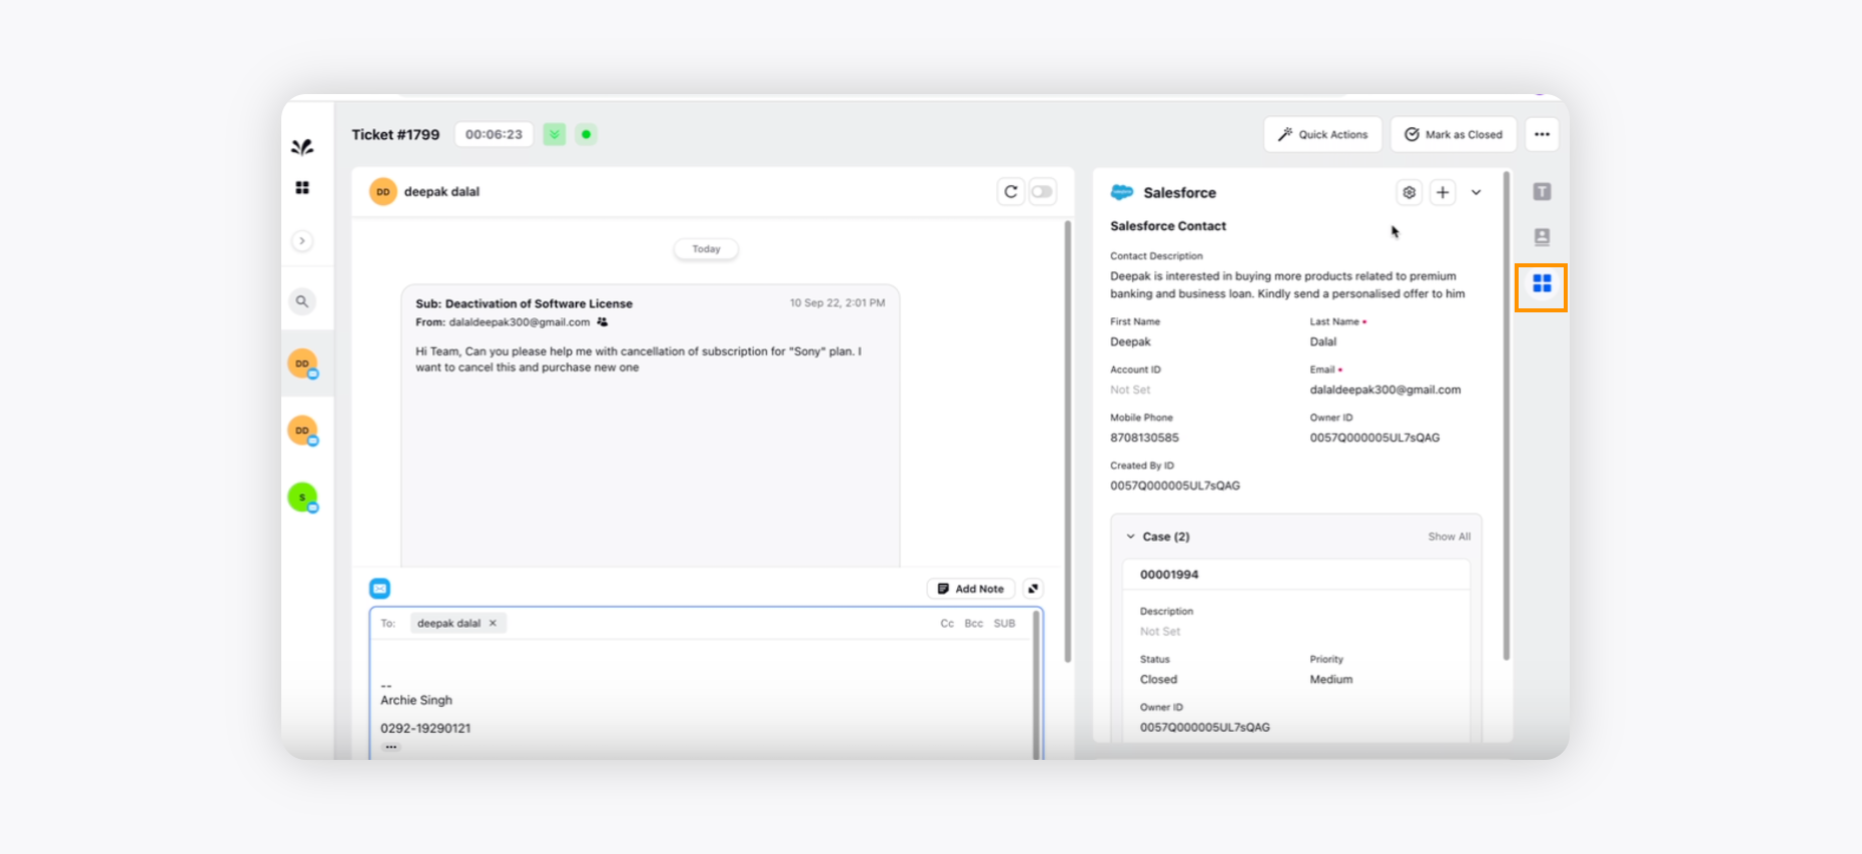
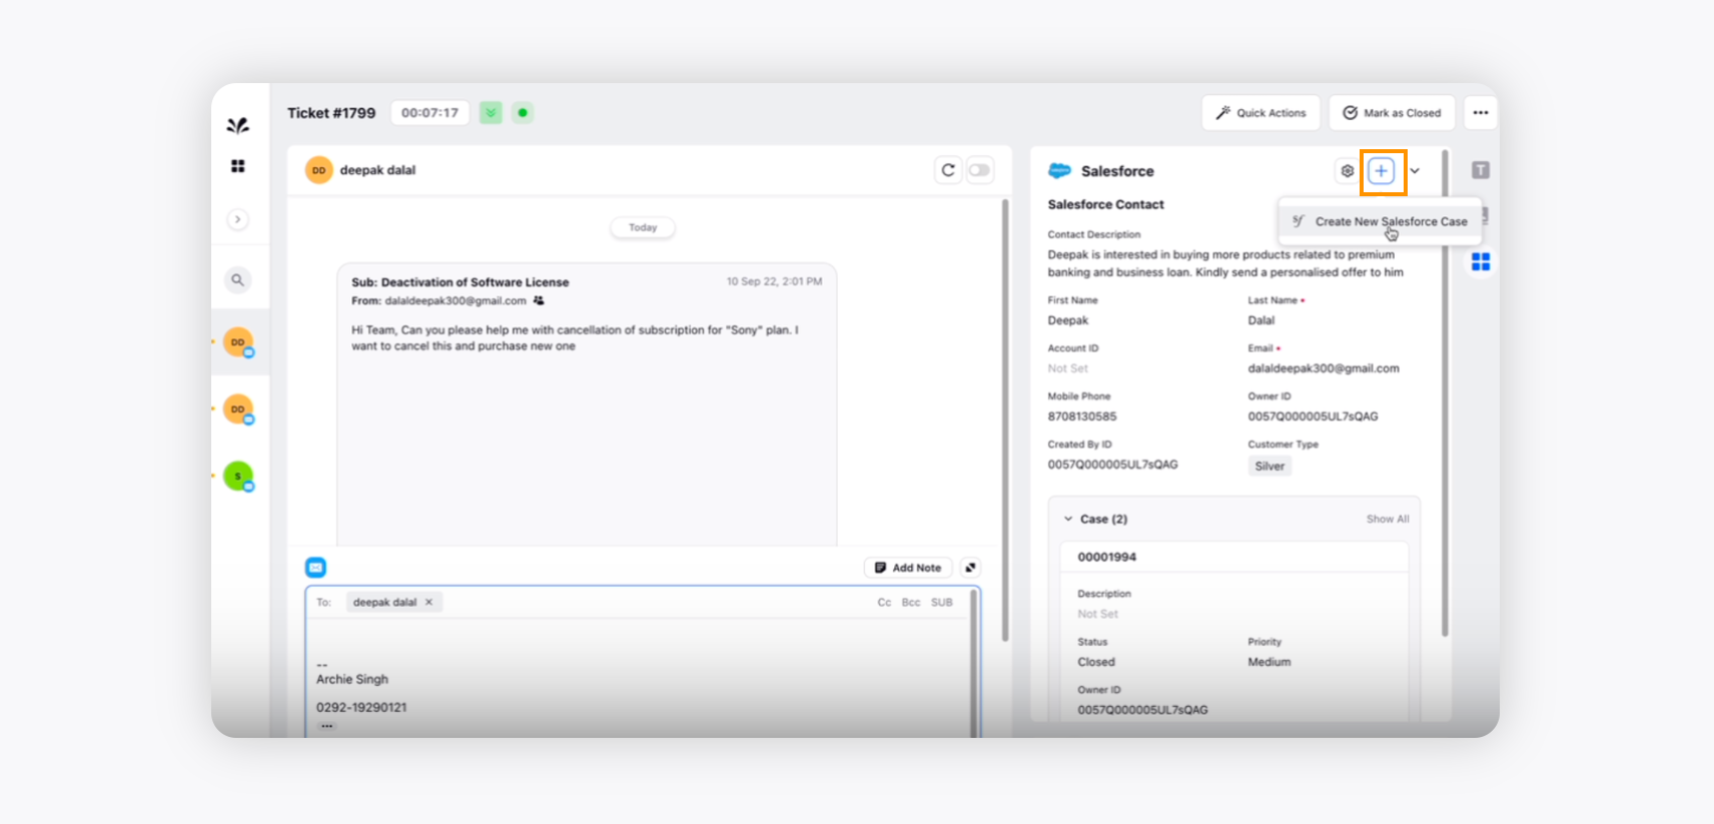
After the configuration of Salesforce in Sprinklr, you will view the Salesforce details of a ticket such as a Contact's First Name, Last Name, Email, and Mobile Phone in the Marketplace tab on the right-hand side of a ticket.
To configure Contact fields
You can configure the Contact details on the right by clicking Configure Fields at the top.
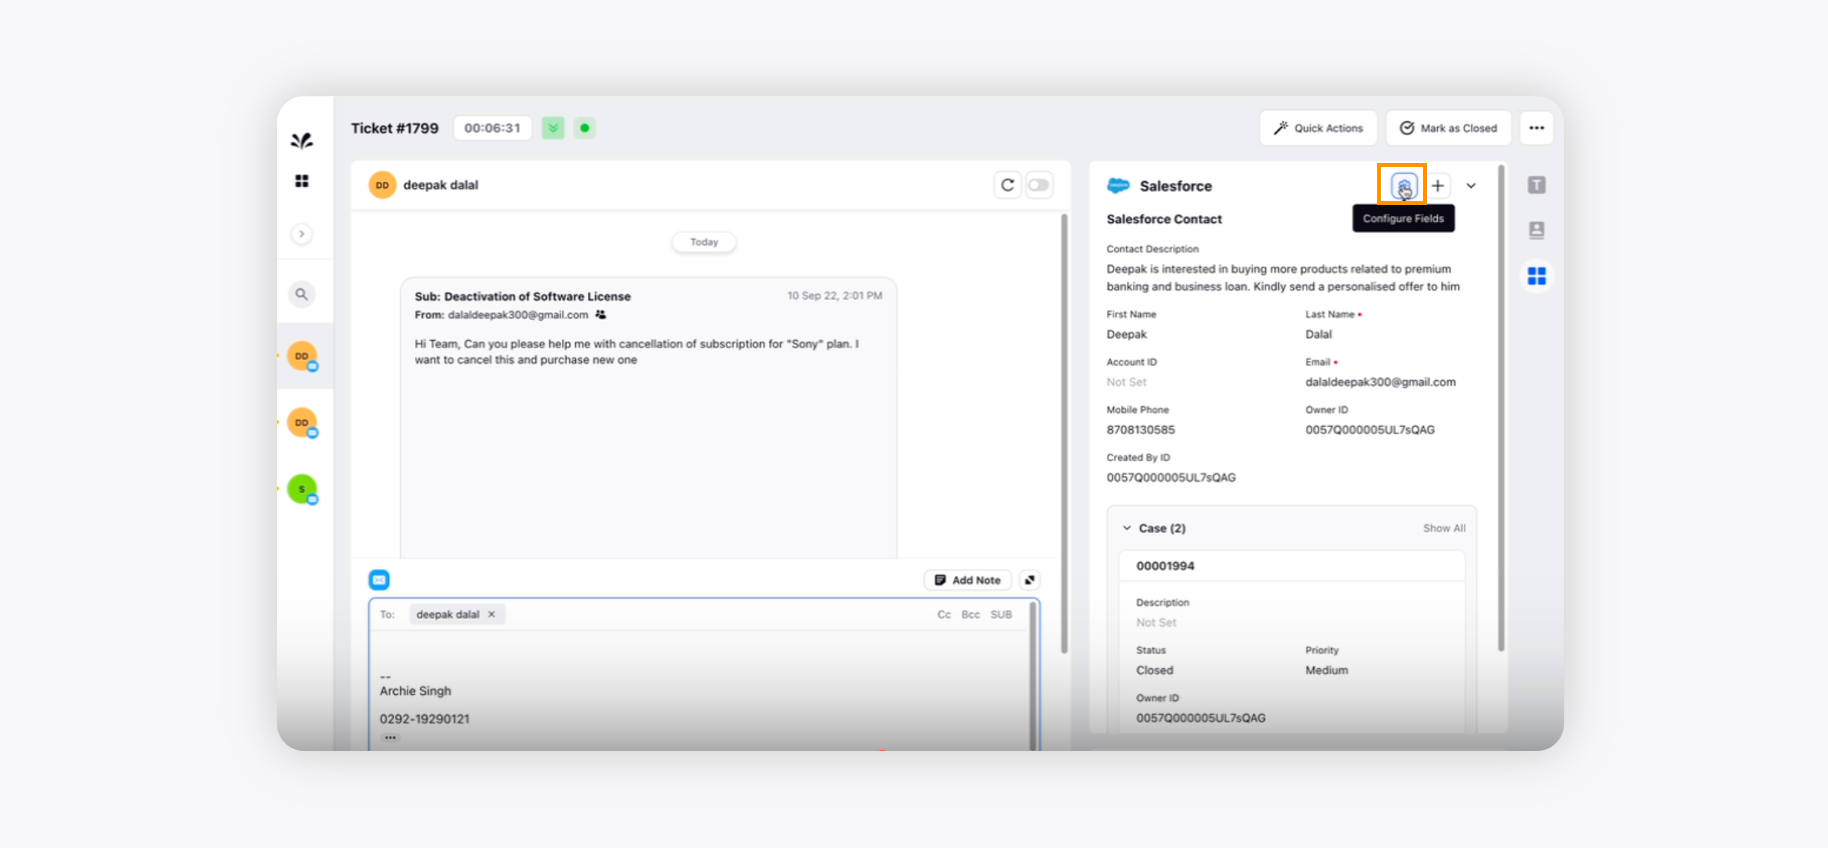
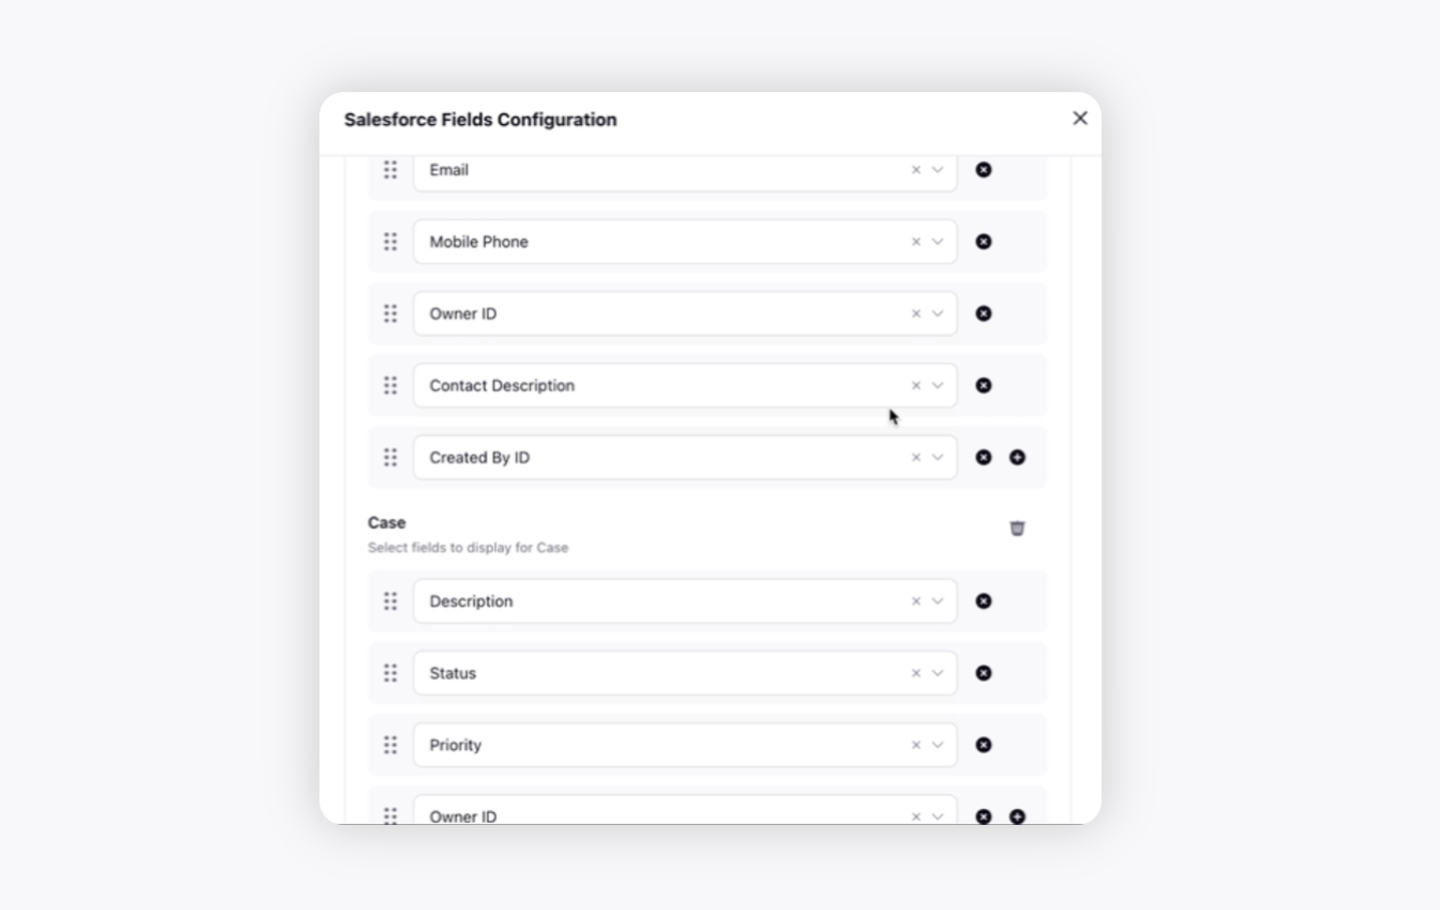
The Salesforce Fields Configuration window will appear where you can configure the Contact and Lead fields.
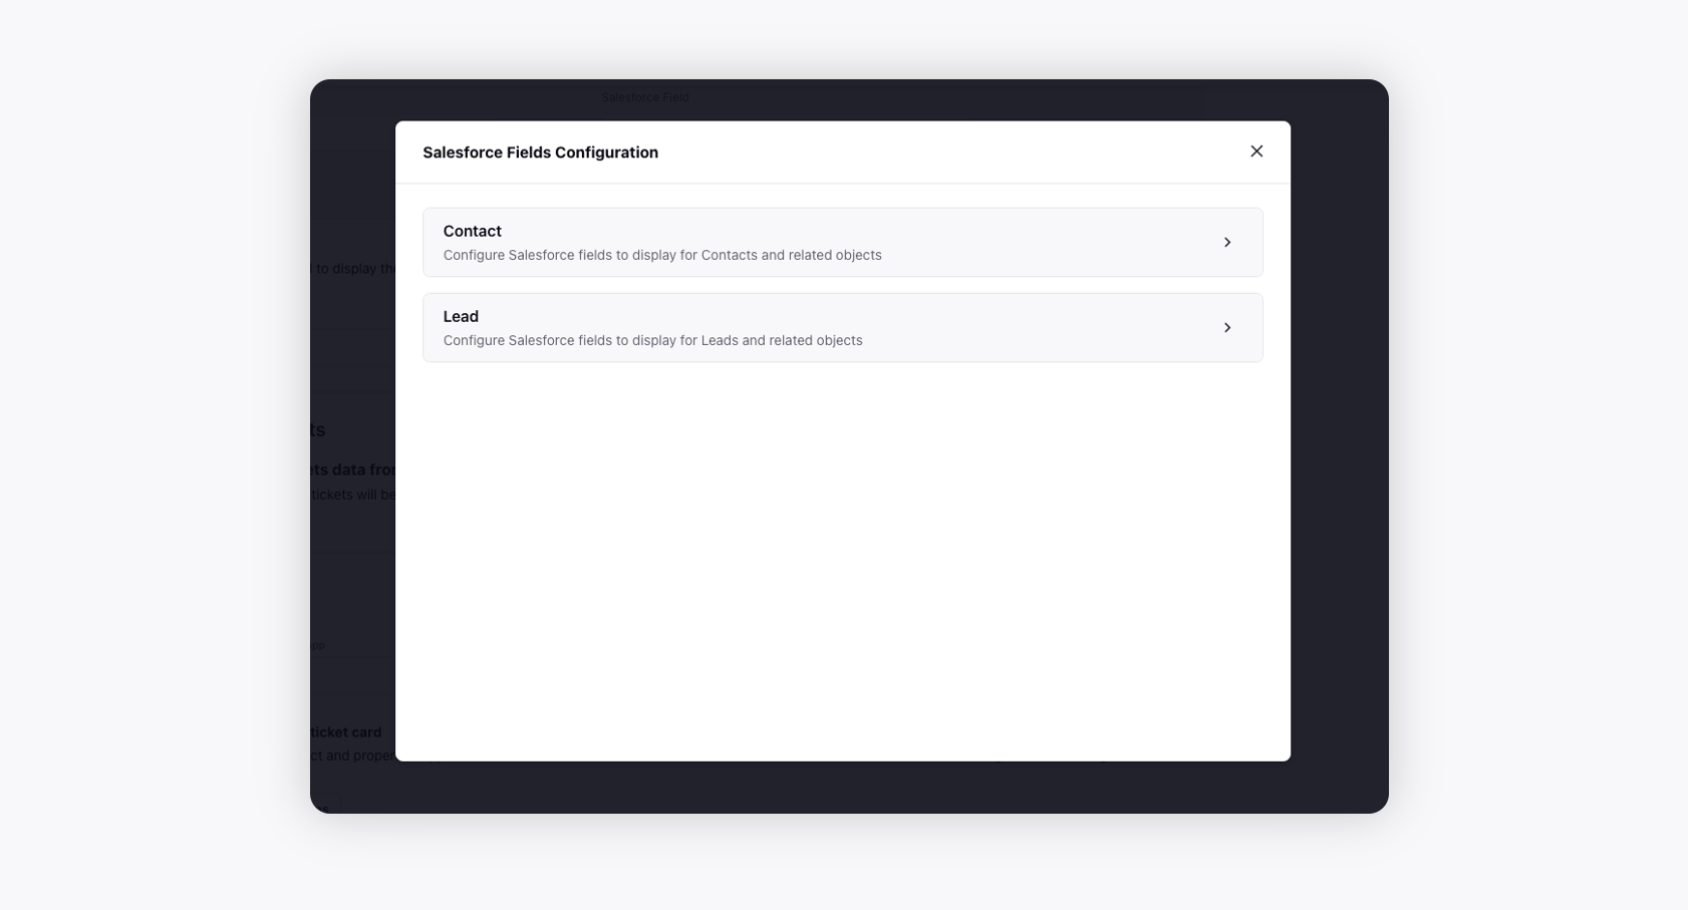
Under the Contact dropdown, you can configure fields such as Contact, Case, Account, etc.
To create a Case in Salesforce
Create + icon next to Configure Fields to create a New Salesforce Case.
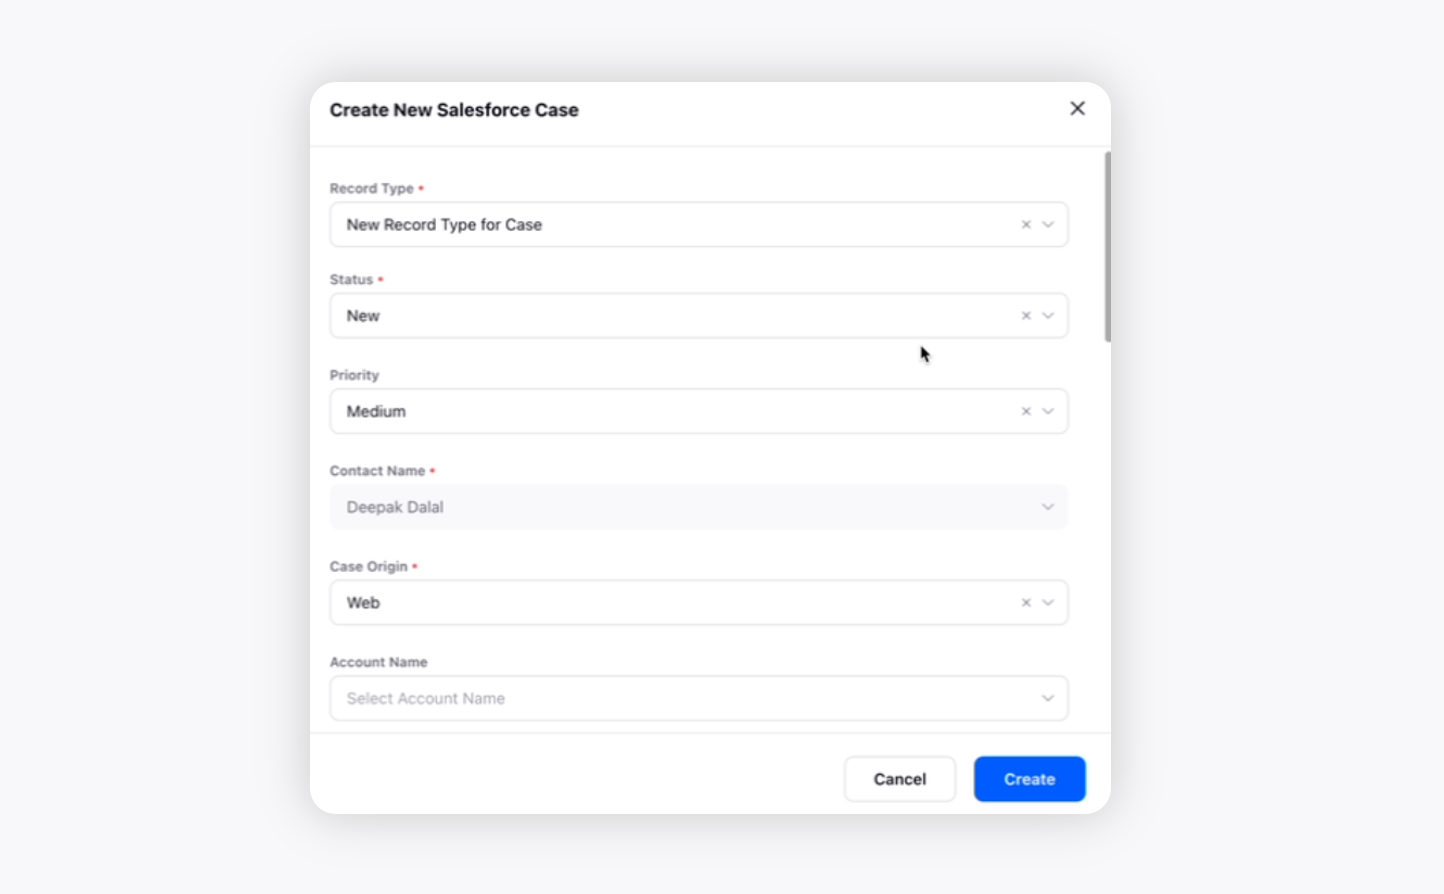
The Create New Salesforce Case window will appear. You can provide details such as Record Type, Status, Priority, Contact Name, Case Origin, etc., and other details. Click Create at the bottom right.
The data provided will now be synced into Sprinklr. So now if you head over to Sprinklr, you can view the new case details under the Salesforce section on the extreme right side.

Once the new Salesforce case is created, you can view it in the Salesforce dashboard on the extreme right by refreshing the dashboard. This is how you can create a case in Salesforce automatically.