
Understanding Ticket Queue
Updated
Understand everything about Ticket Queues and how it helps agents to receive the relevant tickets at the right time based on pre-defined conditions.
A Ticket Queue is an ordered collection of tickets that get assigned to agents based on predefined conditions. Queues ensure that the right tickets reach the right agents at the right time. With Ticket Queue, you can define queue conditions for tickets received on Digital Channels and Voice Channels separately. A Voice Channel is defined when a customer reaches out to the support via a call whereas channels like Messenger, WhatsApp, Instagram, Livechat, etc. are called Digital Channels.
All the received tickets can be stored into different groups based on various predefined conditions. These conditions can be set based on the business hours you define ensuring that all your tickets reach the right agents/teams and are resolved at the right time.
For example, if you create a Ticket Queue A with the keyword “Refund”, all the tickets with the keyword Refund will fall into the Ticket Queue A.
Ticket queues also let you define actions that you want to trigger when you are not available since you are Out of business hours. It helps you automatically trigger the required actions with a personalised message.
For example, if you receive a ticket in your queue while your team is out, you can reply to your customer with an auto-response ensuring that the team is unavailable and will get back soon.
Refer to the following video to better understand the ticket queue:
You can further read the below article to see the steps of creating a ticket queue:
Types of Ticket Queues
You can create 3 different types of Ticket Queues:
Digital Only - For digital channels like Messenger, Instagram, WhatsApp, LiveChat, etc.
Voice Only - For customers reaching out to support through Voice calls.
Digital & Voice- For defining combined conditions for Digital & Voice channels.
To create a Digital Only Ticket Queue
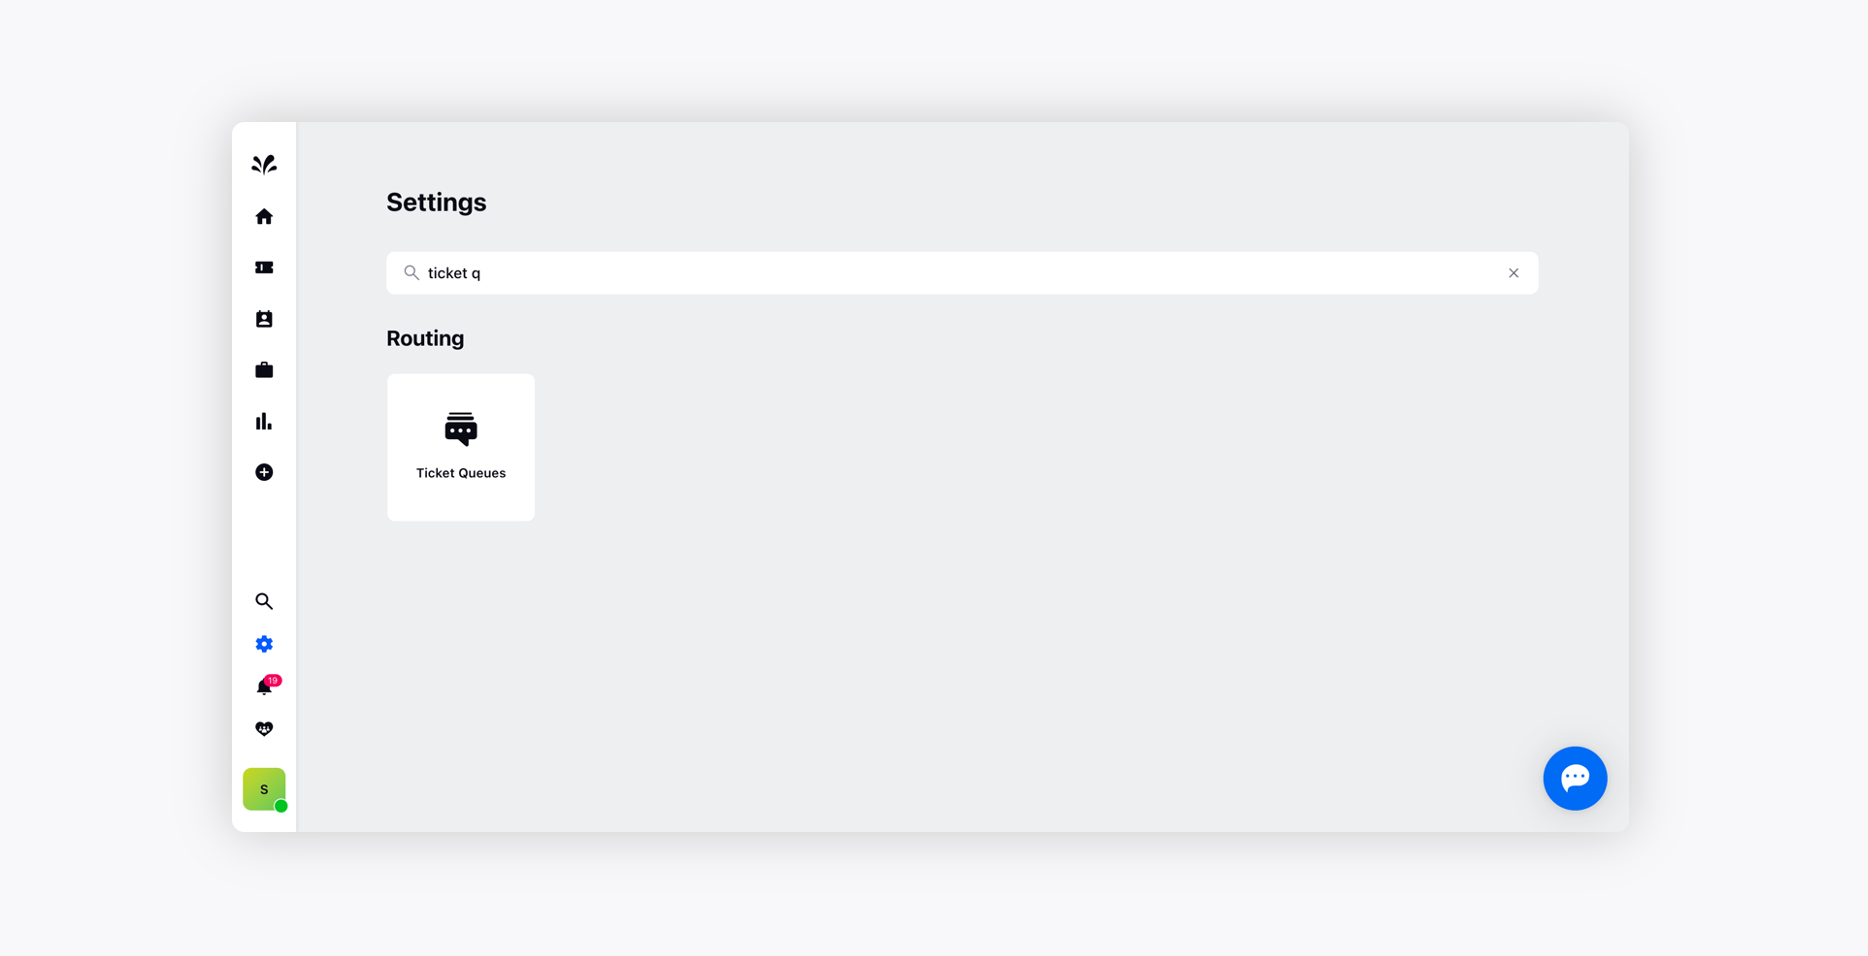
Log into Sprinklr Advanced. Click the Settings icon on the left navigation bar and under Routing, click Ticket Queues.
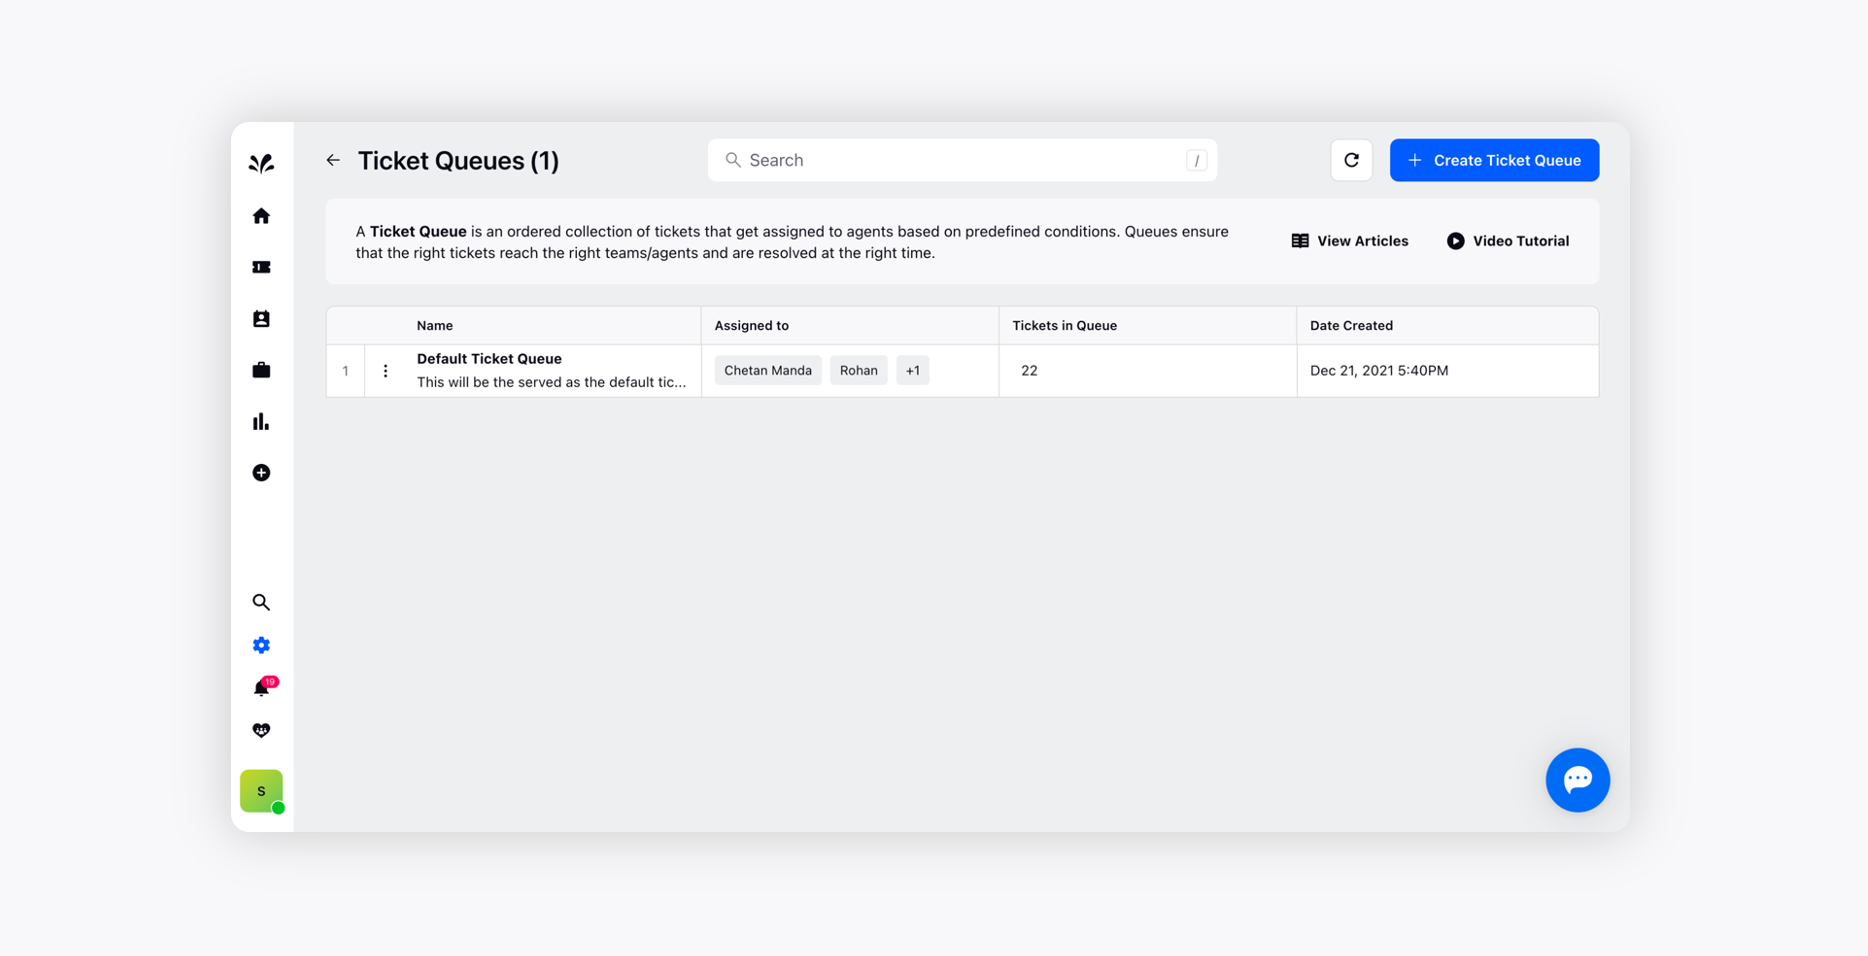
To create a new ticket queue, click Create Ticket Queue in the top right corner of the Ticket Queue window.
On the Create Ticket Queue window, enter a Name and an optional Description for your ticket queue.
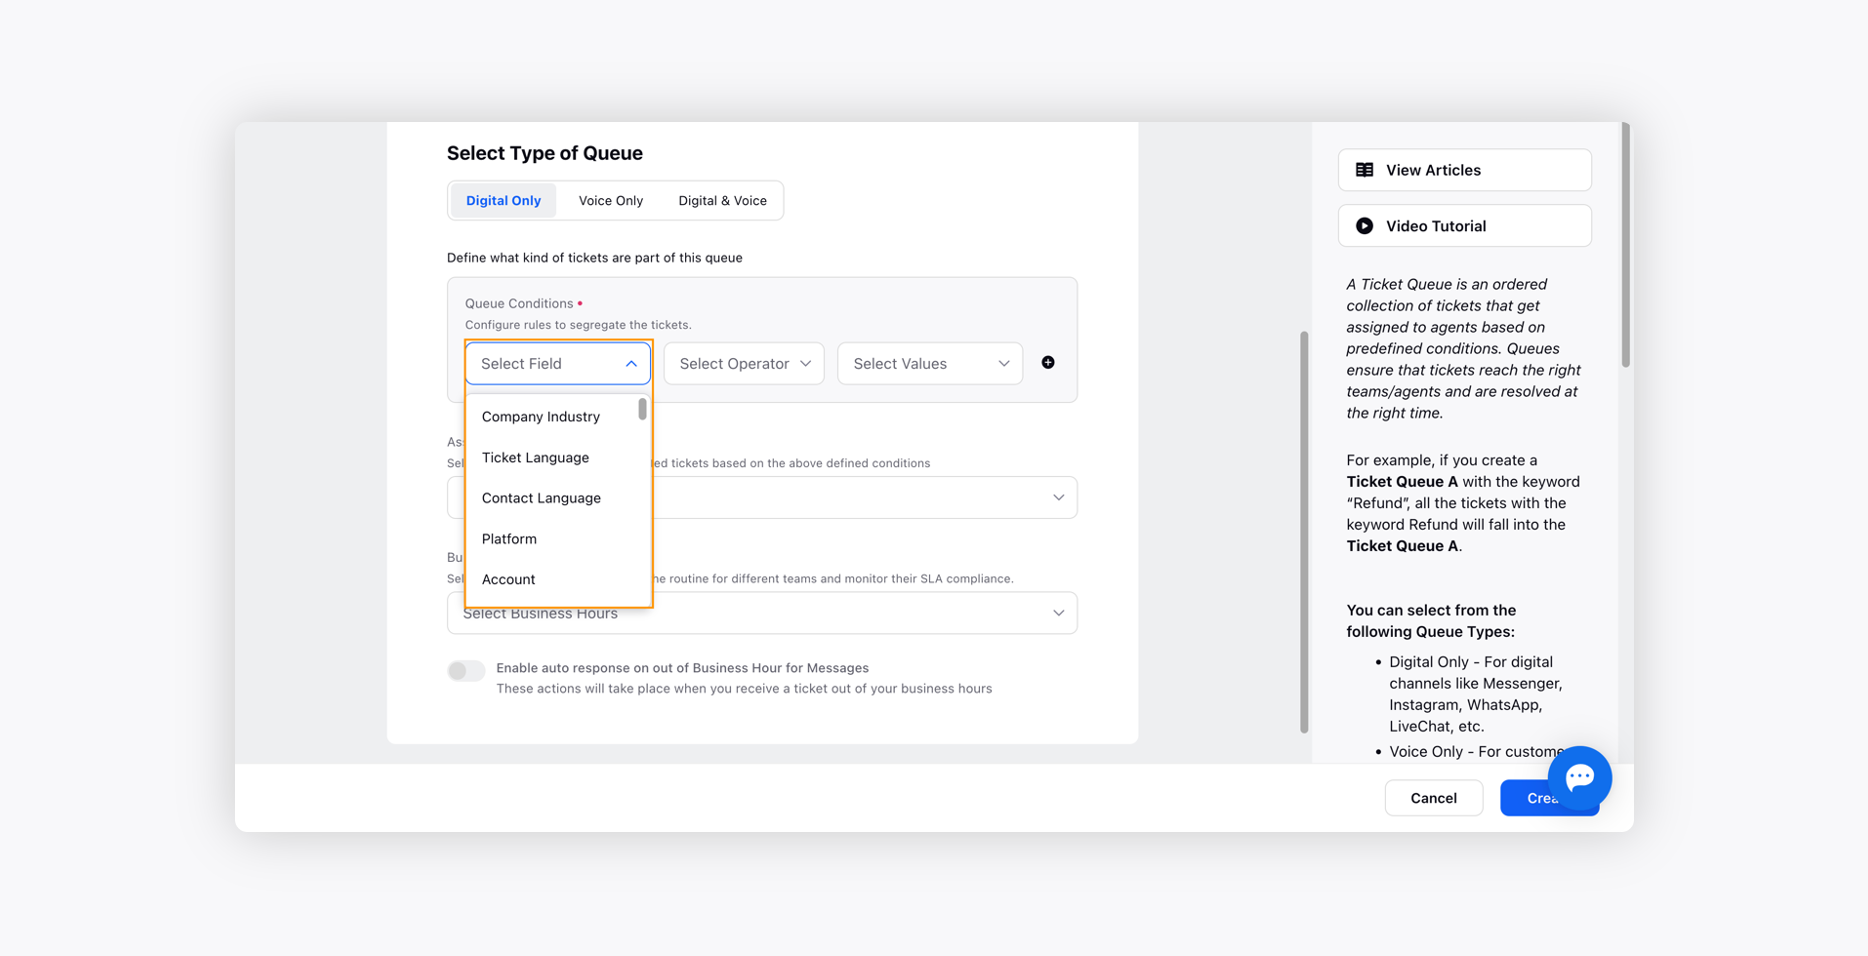
Select Digital Only within the Select Type of Queue section to create a Digital Only ticket queue.
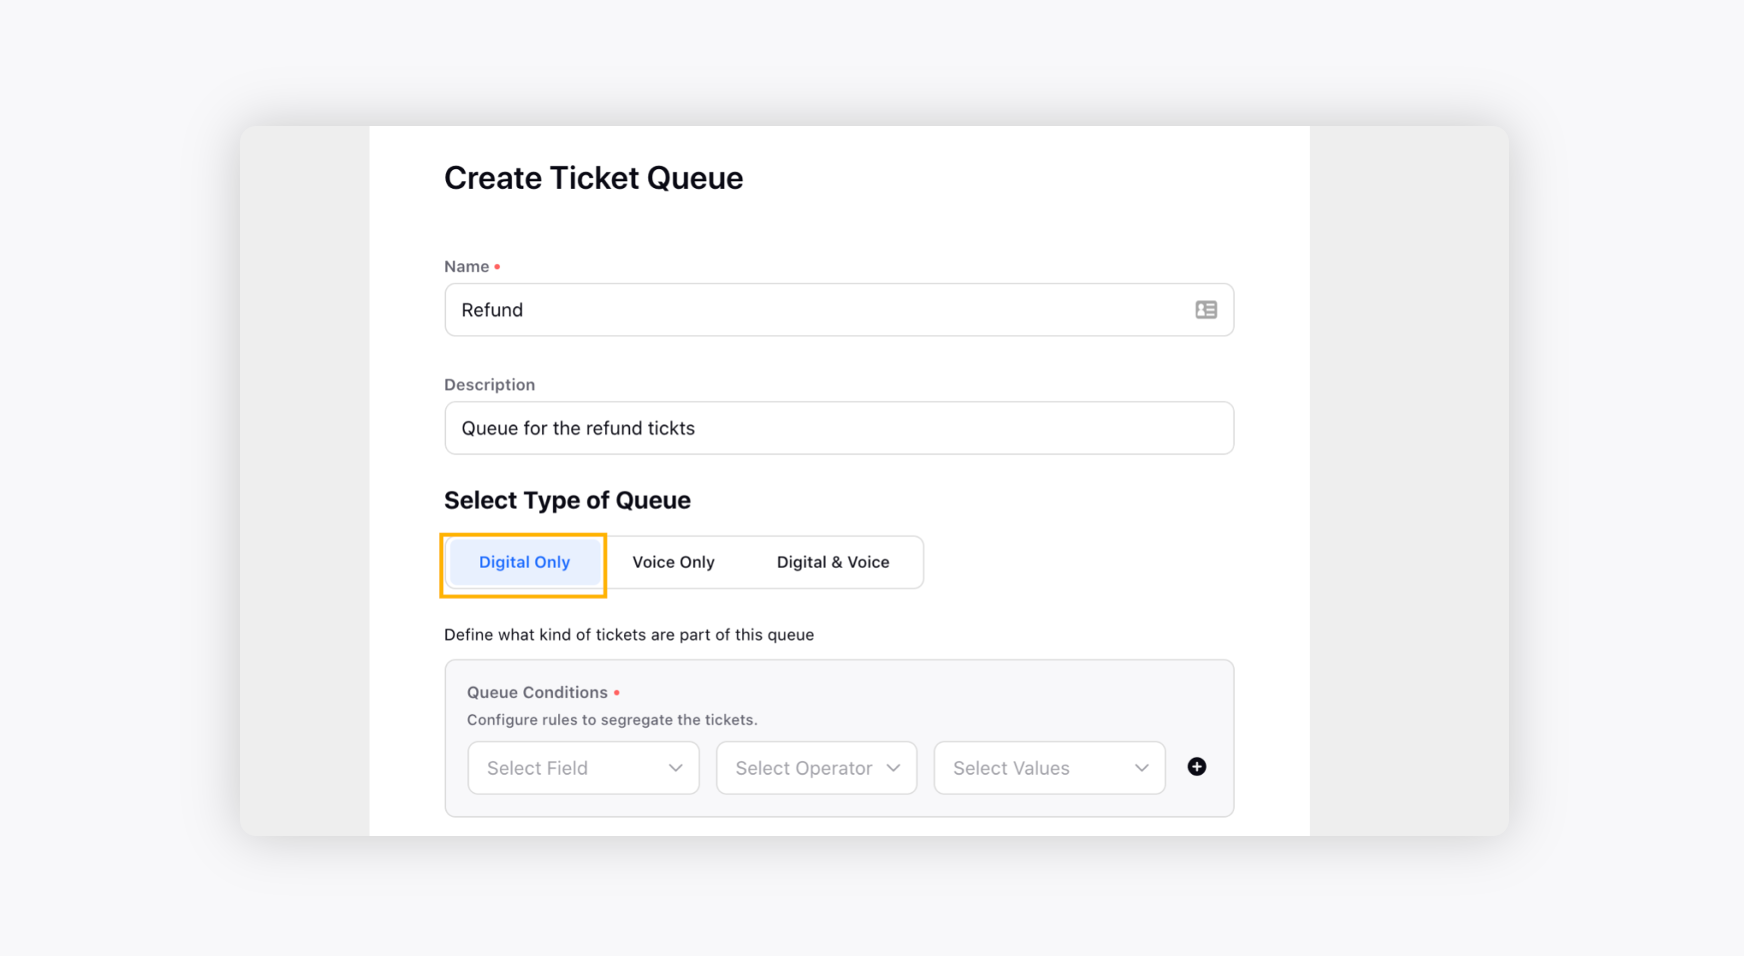
You can further add Queue Conditions to distribute tickets with specific properties so that tickets can be routed accordingly. You can use conditions like “Platform Containing Twitter” to segregate tickets and assign them to the relevant teams/agents. Click the Addition icon alongside the condition field to add multiple conditions to your queue.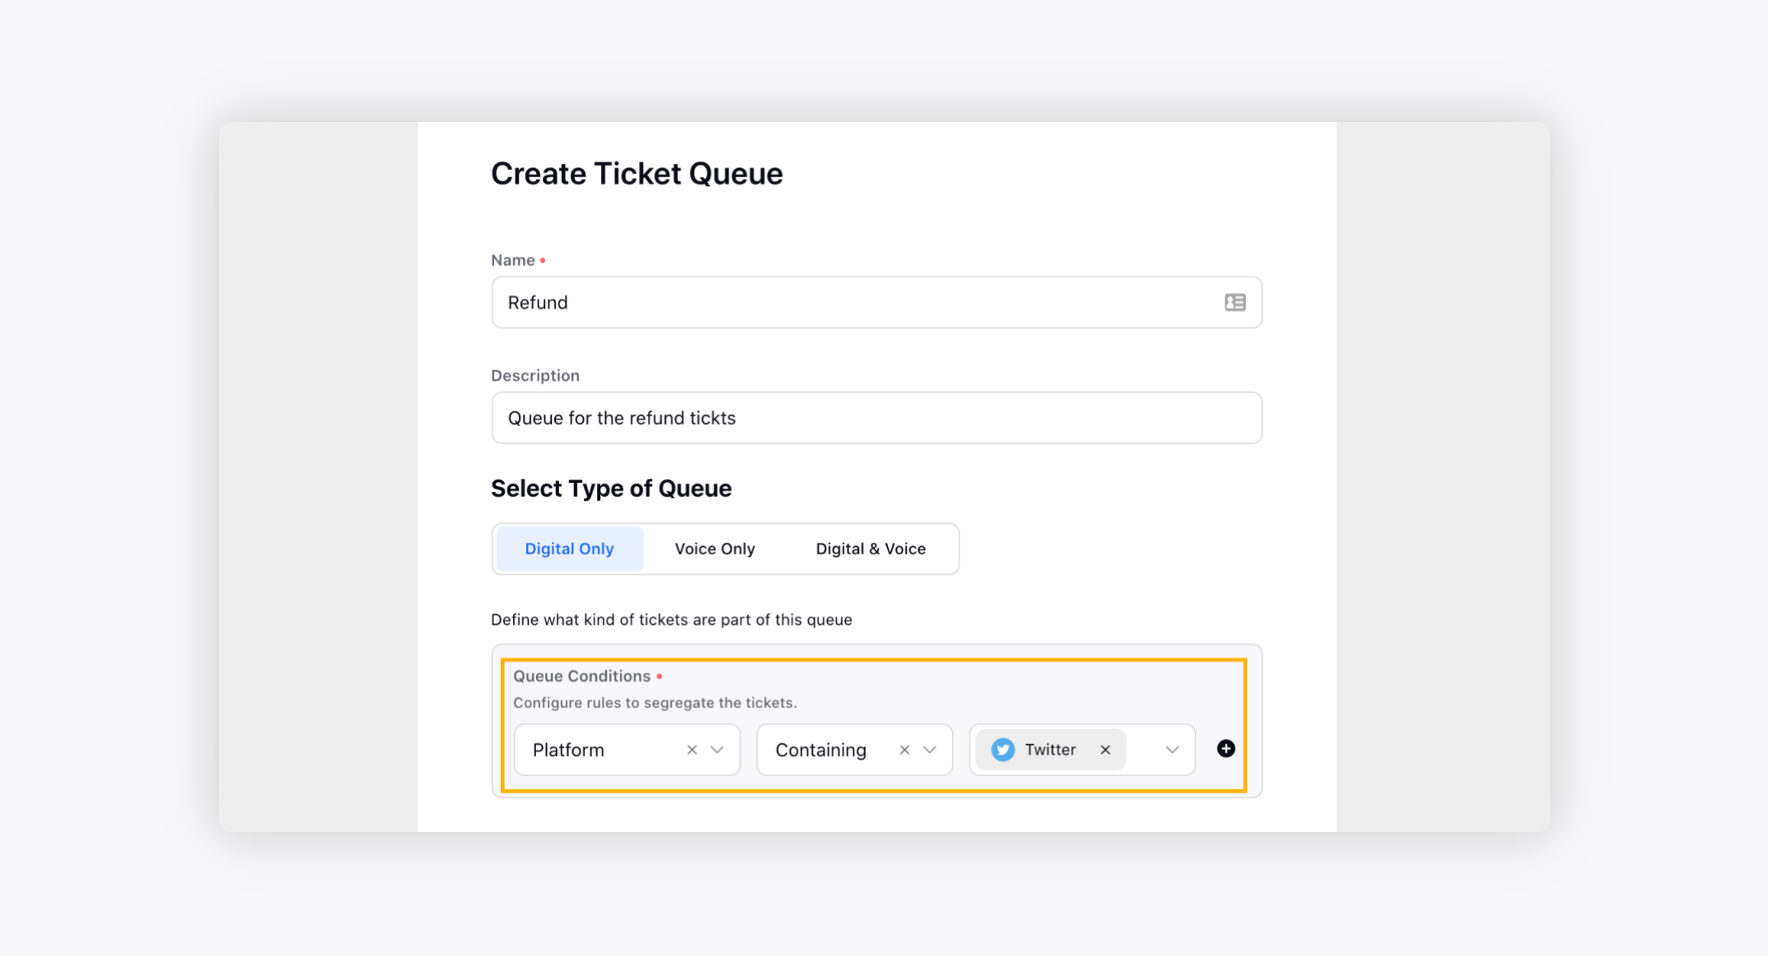
There are multiple Queue Conditions under Ticket Queue listed below:
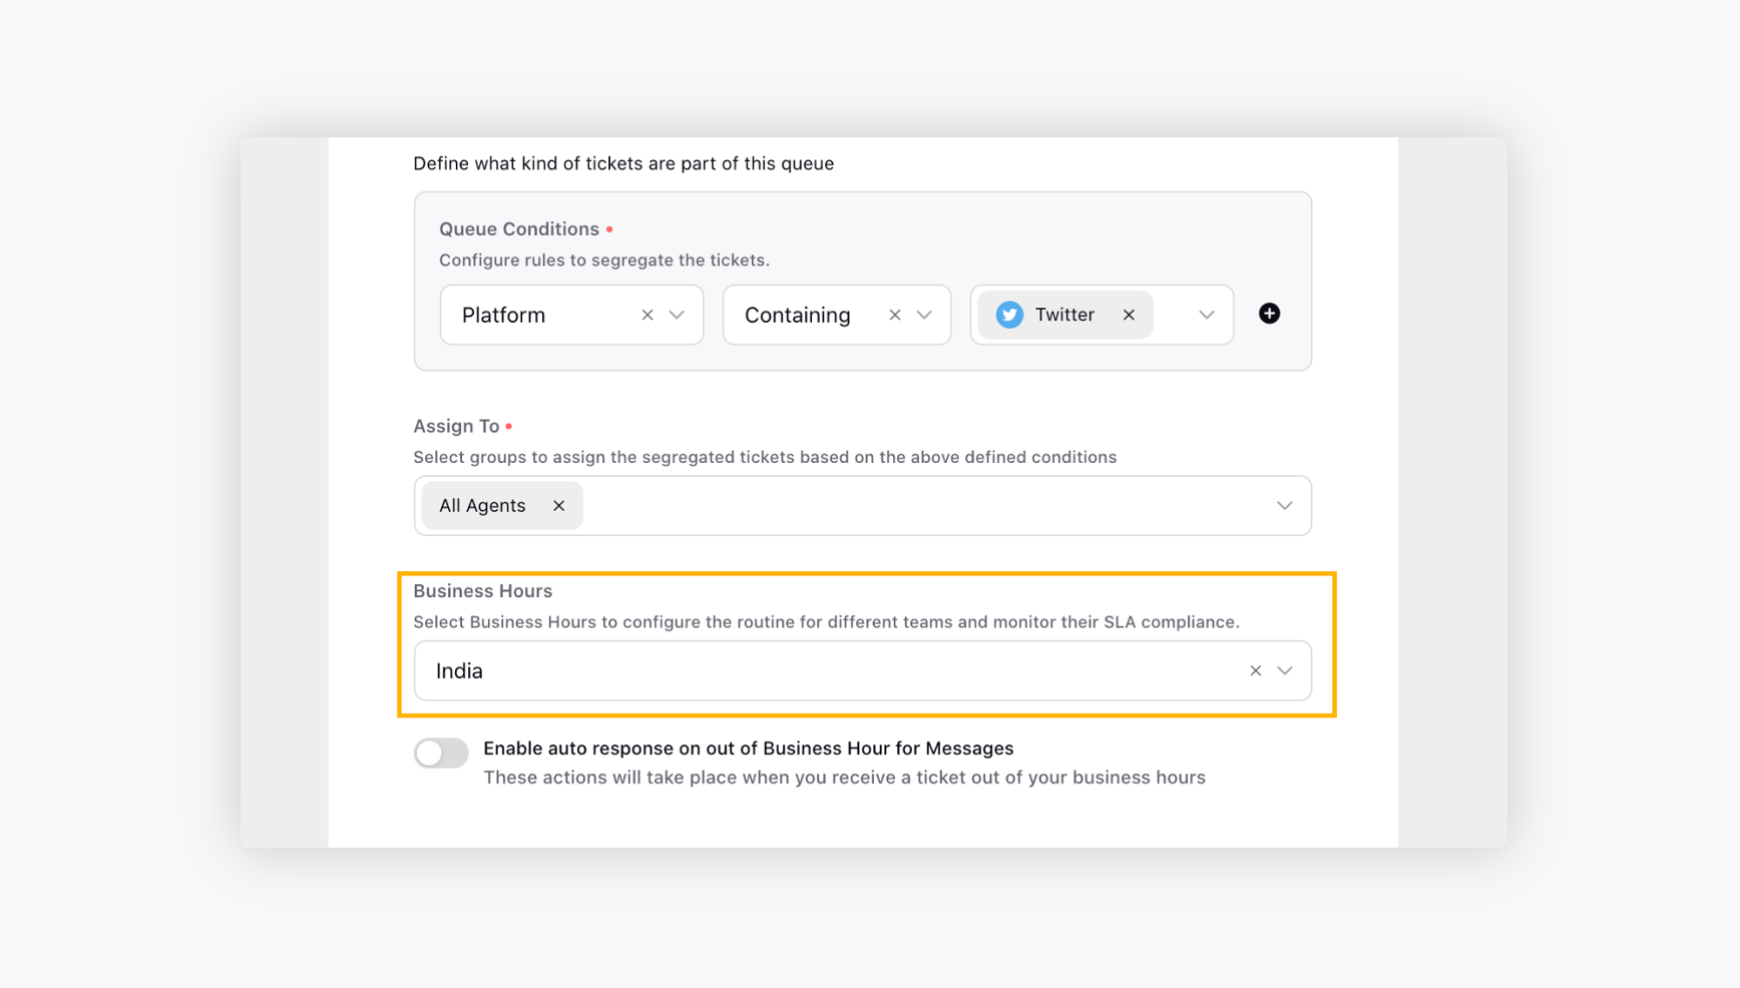
Select the desired Agent(s) and/or Team(s) from the Assign To drop-down menu to assign the tickets from the ticket queue you are creating.
Select the desired business hour from the Business Hour drop-down menu and define the hours of availability for this queue for accurate SLA monitoring. To learn more about Business Hour, see Business Hour.
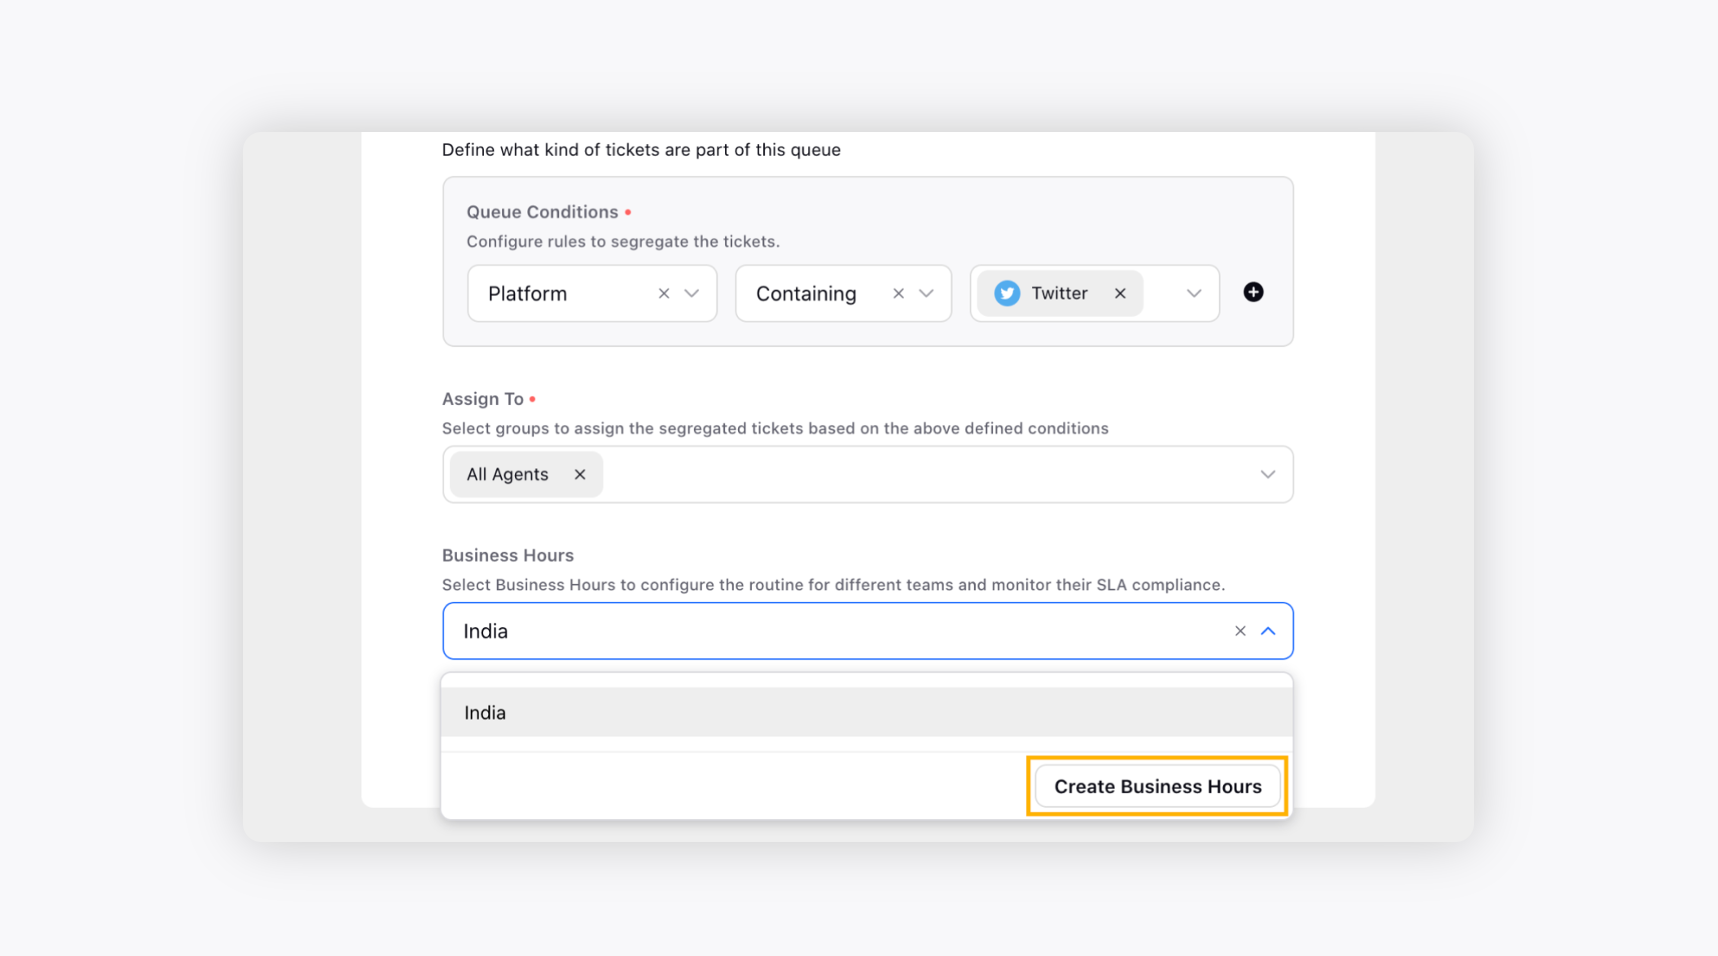
Click Create Business Hours under the Business Hours drop-down menu to create a business hour upfront if you don't have any existing business hours.
Toggle on to Enable auto-response on out of Business Hour for Messages. This will enable you to set up actions that will trigger when you receive a ticket out of your business hours.
For example, if you set an action to Send a Canned Response, every time you receive a ticket out of the business hour, an automated response will be sent to the customer.
Click Create once done.
To create a Voice Only Ticket Queue
Log into Sprinklr Advanced. Click the Settings icon on the left navigation bar and under Routing, click Ticket Queues.
To create a new ticket queue, click Create Ticket Queue in the top right corner of the Ticket Queue window.
On the Create Ticket Queue window, enter a Name and an optional Description for your ticket queue.
Select Voice Only within the Select Type of Queue section to create a Voice Only ticket queue.
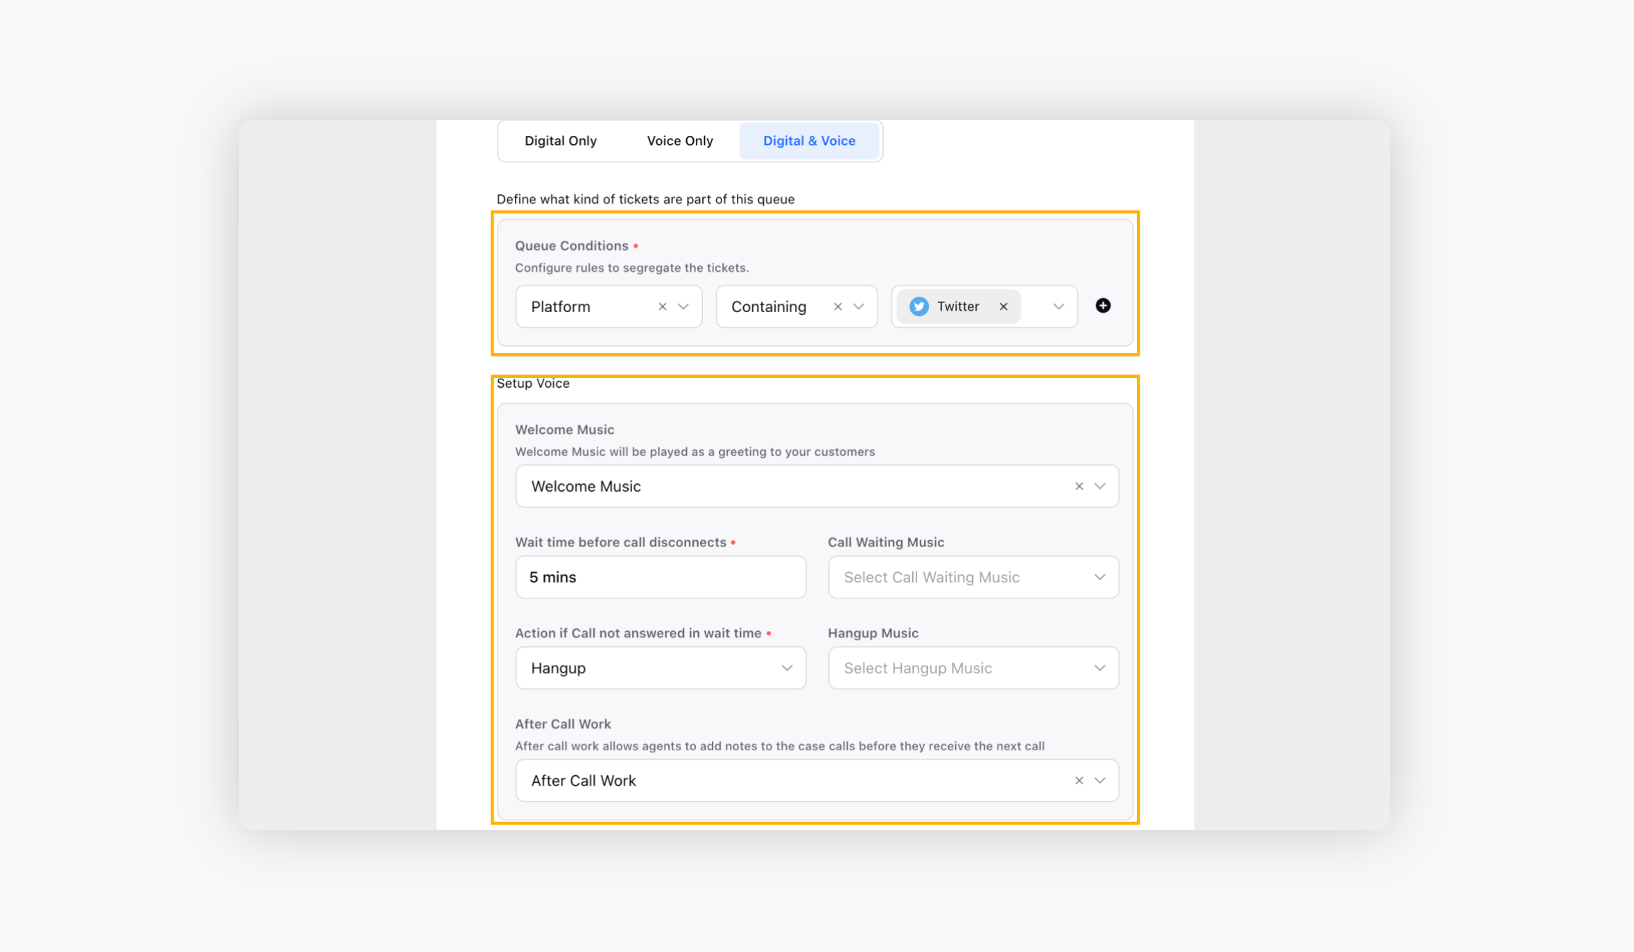
Under the Setup Voice section, provide the required information. For more information, see Setup Voice Field — Description.
Select the desired Agent(s) and/or Team(s) from the Assign To drop-down menu to assign the tickets from the ticket queue you are creating.
Select the desired business hour from the Business Hour drop-down menu and define the hours of availability for this queue for accurate SLA monitoring. To learn more about Business Hour, see Business Hour.
Toggle on to Enable auto-response on out of Business Hour for Voice Calls. This will enable you to set up actions that will trigger when you receive a call out of your business hours.
For example, if you set the action to Hangup, every time you receive a voice call out of the business hour, the call will automatically be disconnected.
Click Create once done.
To create Digital and Voice Ticket Queue
Log into Sprinklr Advanced. Click the Settings icon on the left navigation bar and under Routing, click Ticket Queues.
To create a new ticket queue, click Create Ticket Queue in the top right corner of the Ticket Queue window.
On the Create Ticket Queue window, enter a Name and an optional Description for your ticket queue.
Select Digital and Voice within the Select Type of Queue section to create a combined ticket queue.
You can further add Queue Conditions to distribute tickets with specific properties so that tickets can be routed accordingly. You can use conditions like “Platform Containing Twitter” to segregate tickets and assign them to the relevant teams/agents.Define Queue Conditions for the queue along with the Voice details. For more information, see Setup Voice Field — Description.
To finalise your queue, follow steps 6, 7, and 8 under Create a Digital Only Ticket Queue.
To clone a Ticket Queue
Log into Sprinklr Advanced. Click the Settings icon on the left navigation bar and under Routing, click Ticket Queues.
Hover over the Options icon alongside the desired queue and click Clone.
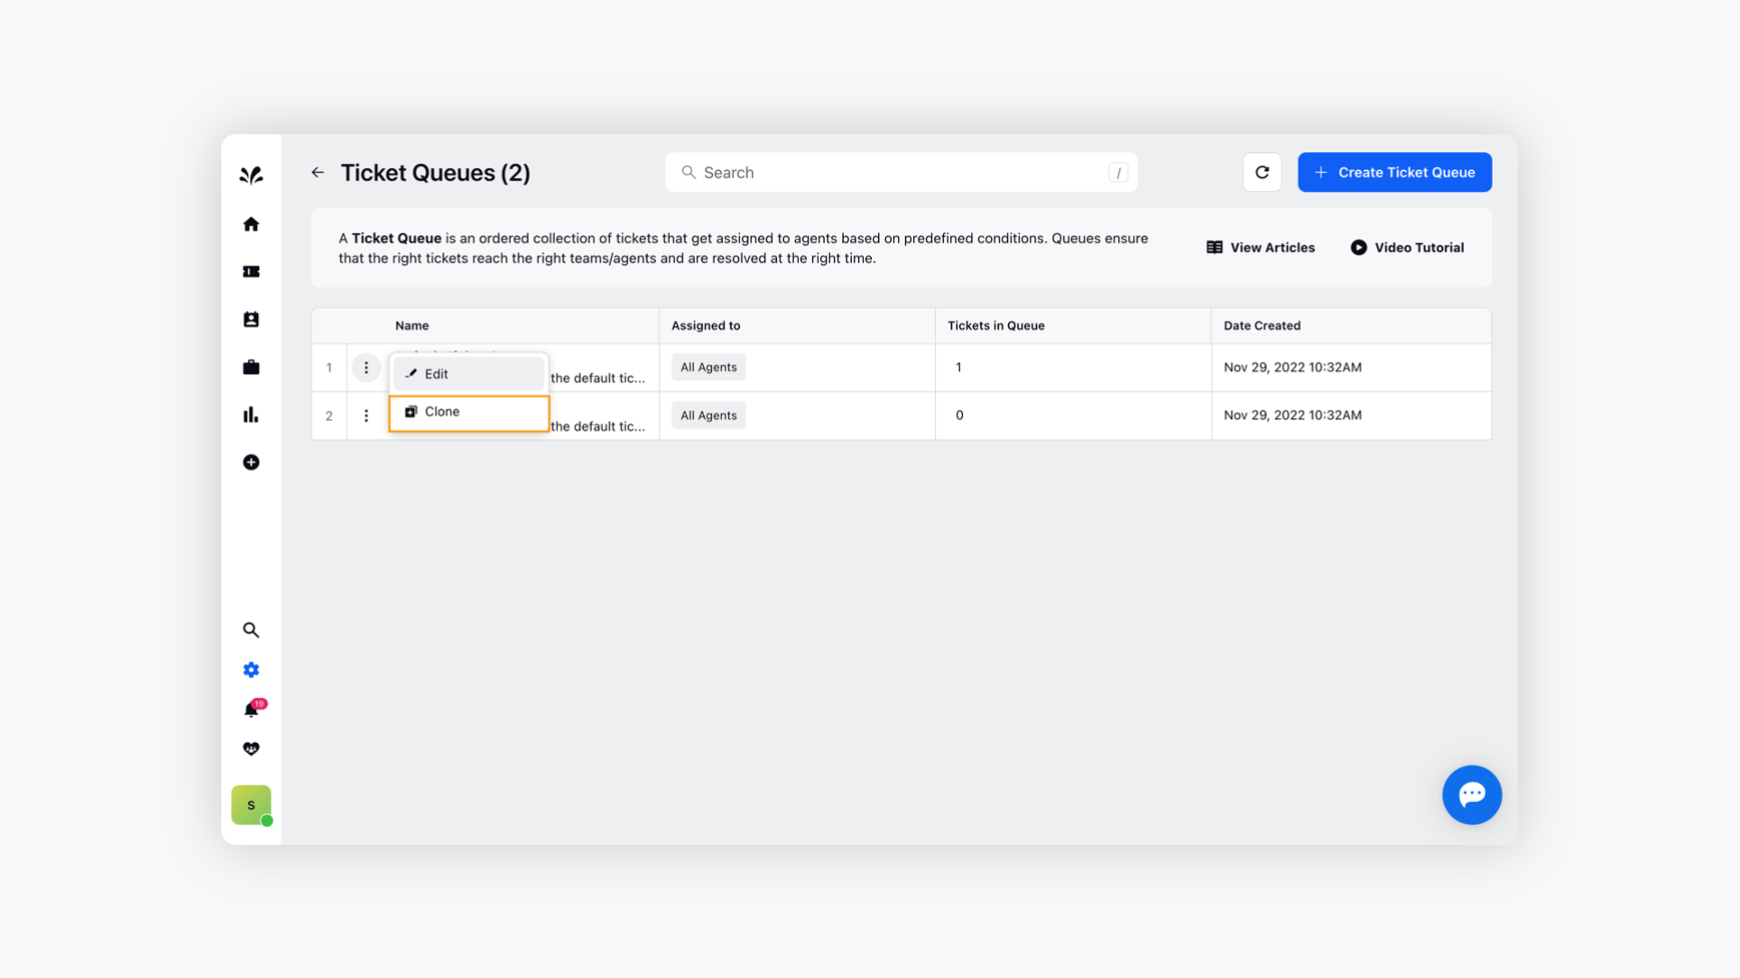
On the Clone Queue pop-up window, click Clone. It will automatically create a new queue. You can further edit and make the desired changes.