
Pinterest Publishing
Updated
Now you can publish Pinterest posts from Sprinklr Social and expose your brand to a wider audience and influence your customers' buying decisions.
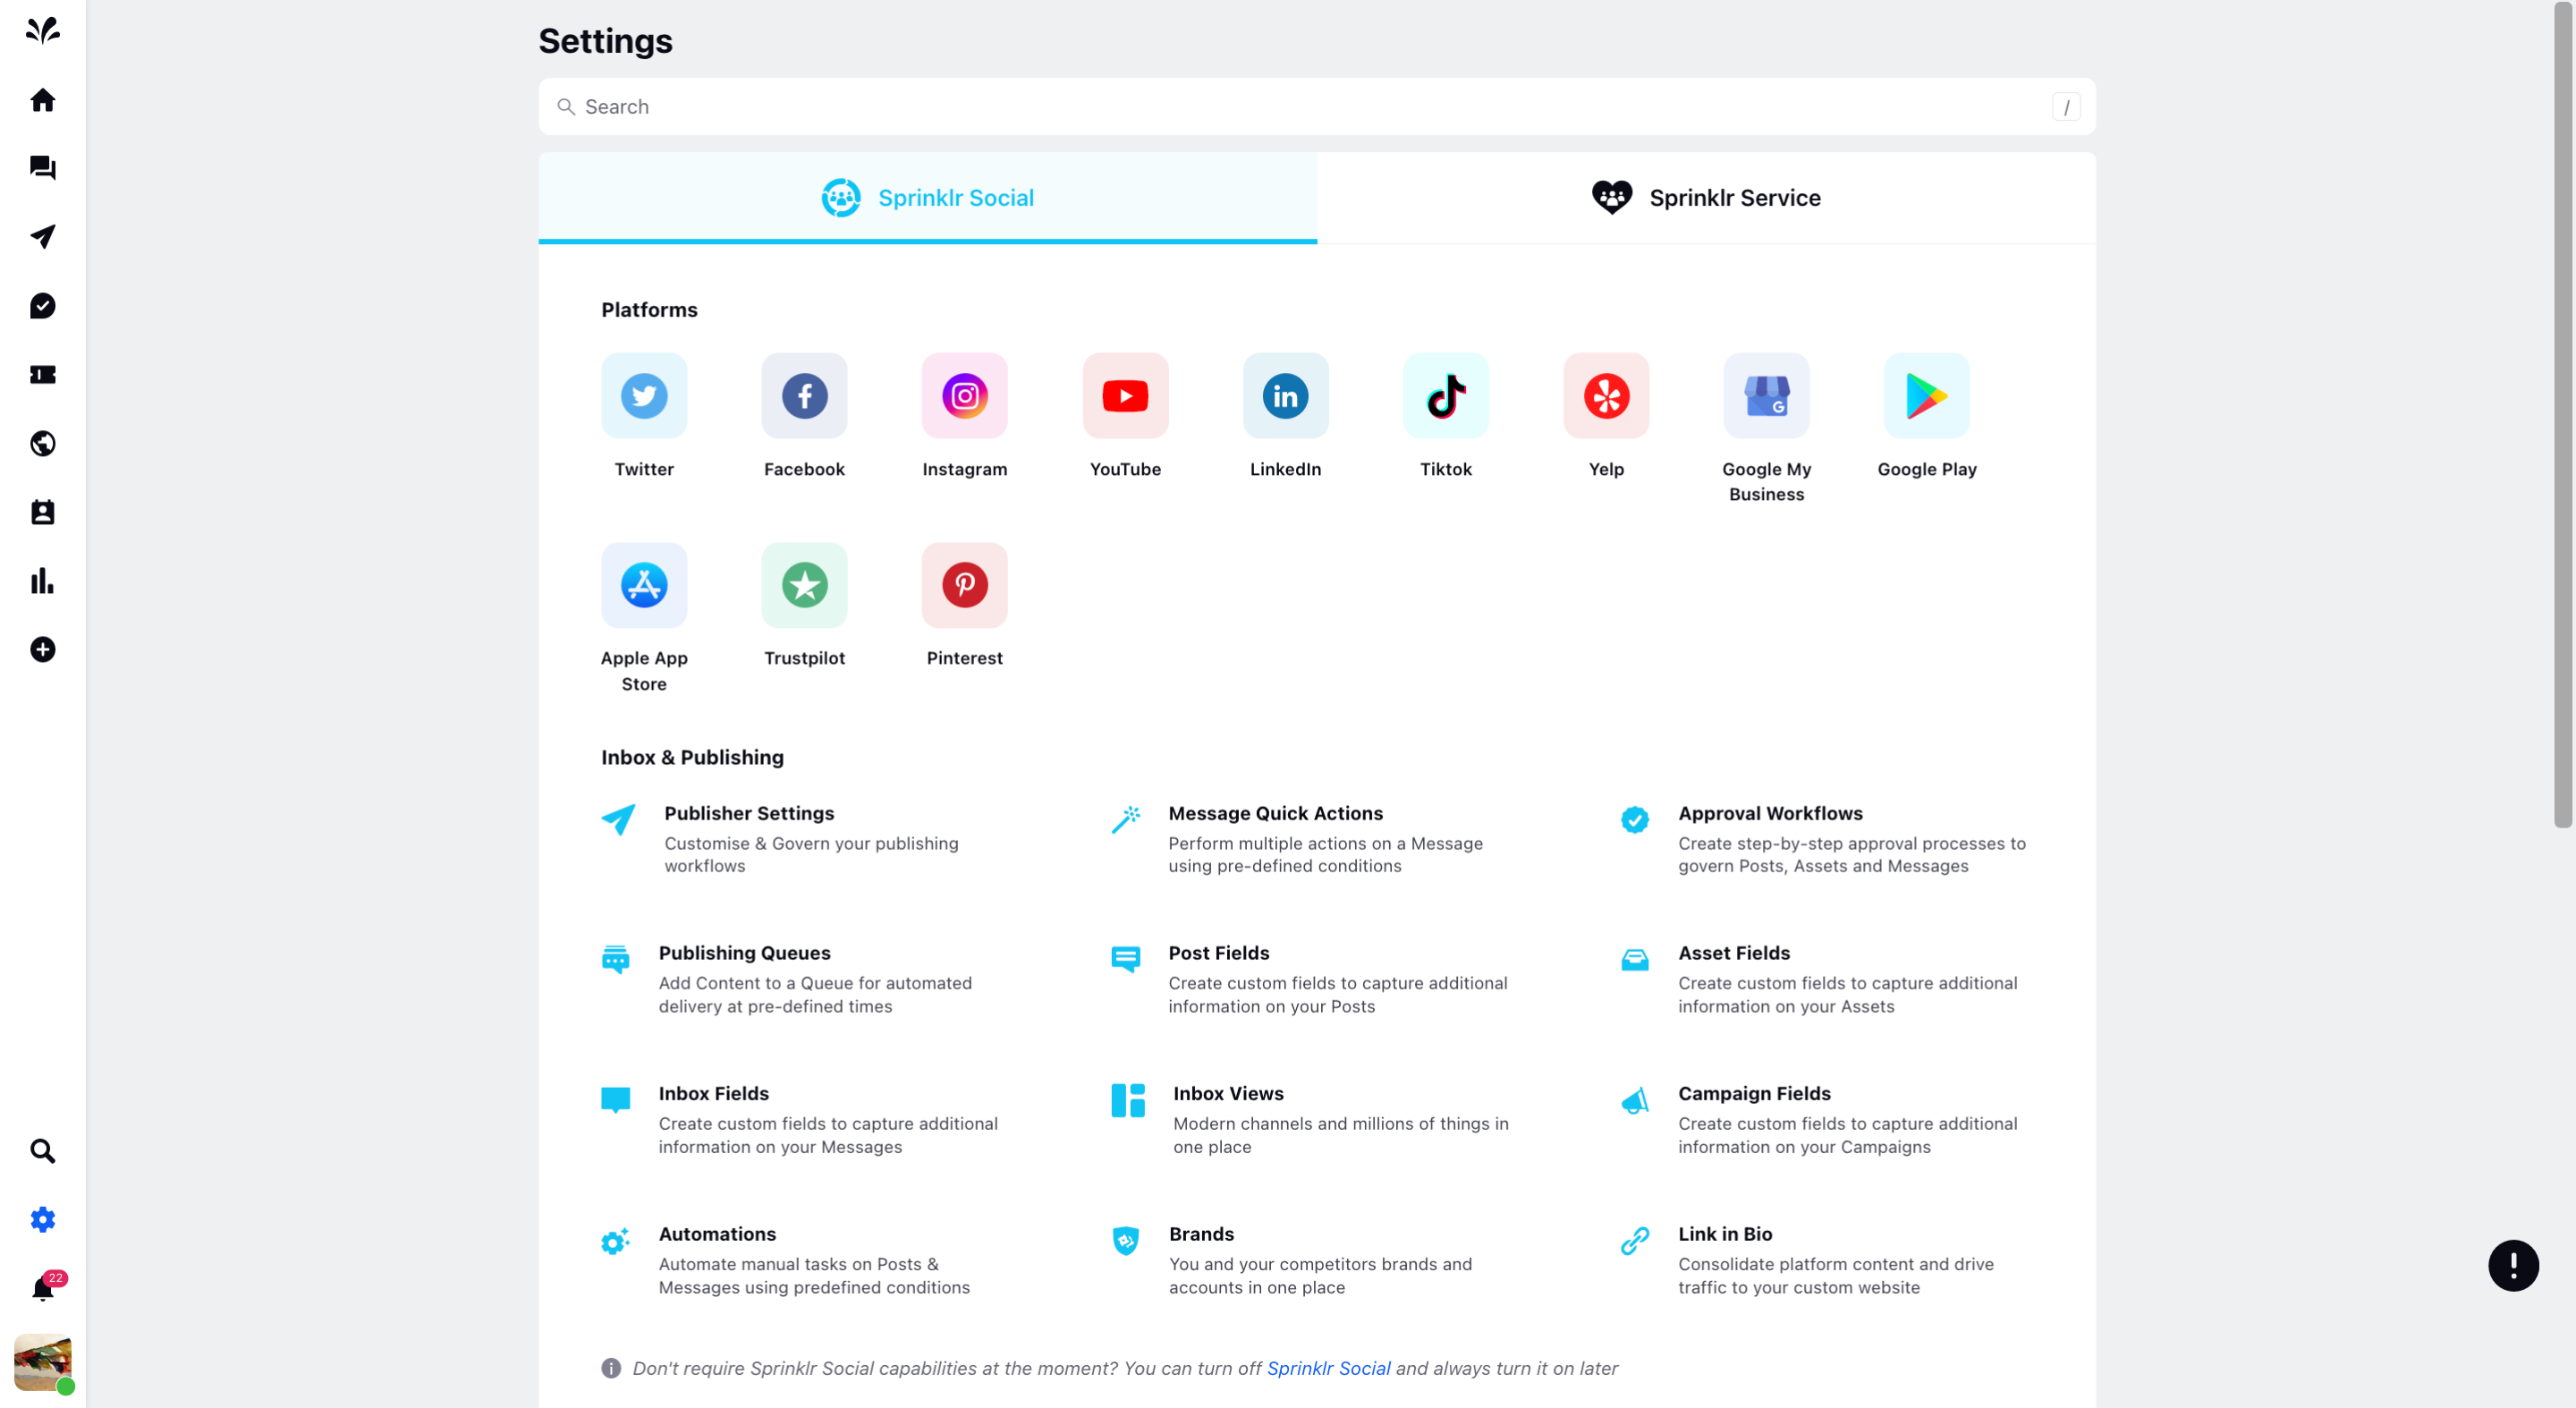
To add Pinterest account to Sprinklr Social
Go to the Settings icon from the left pane of Sprinklr Social and choose the Pinterest account within Sprinklr Social.
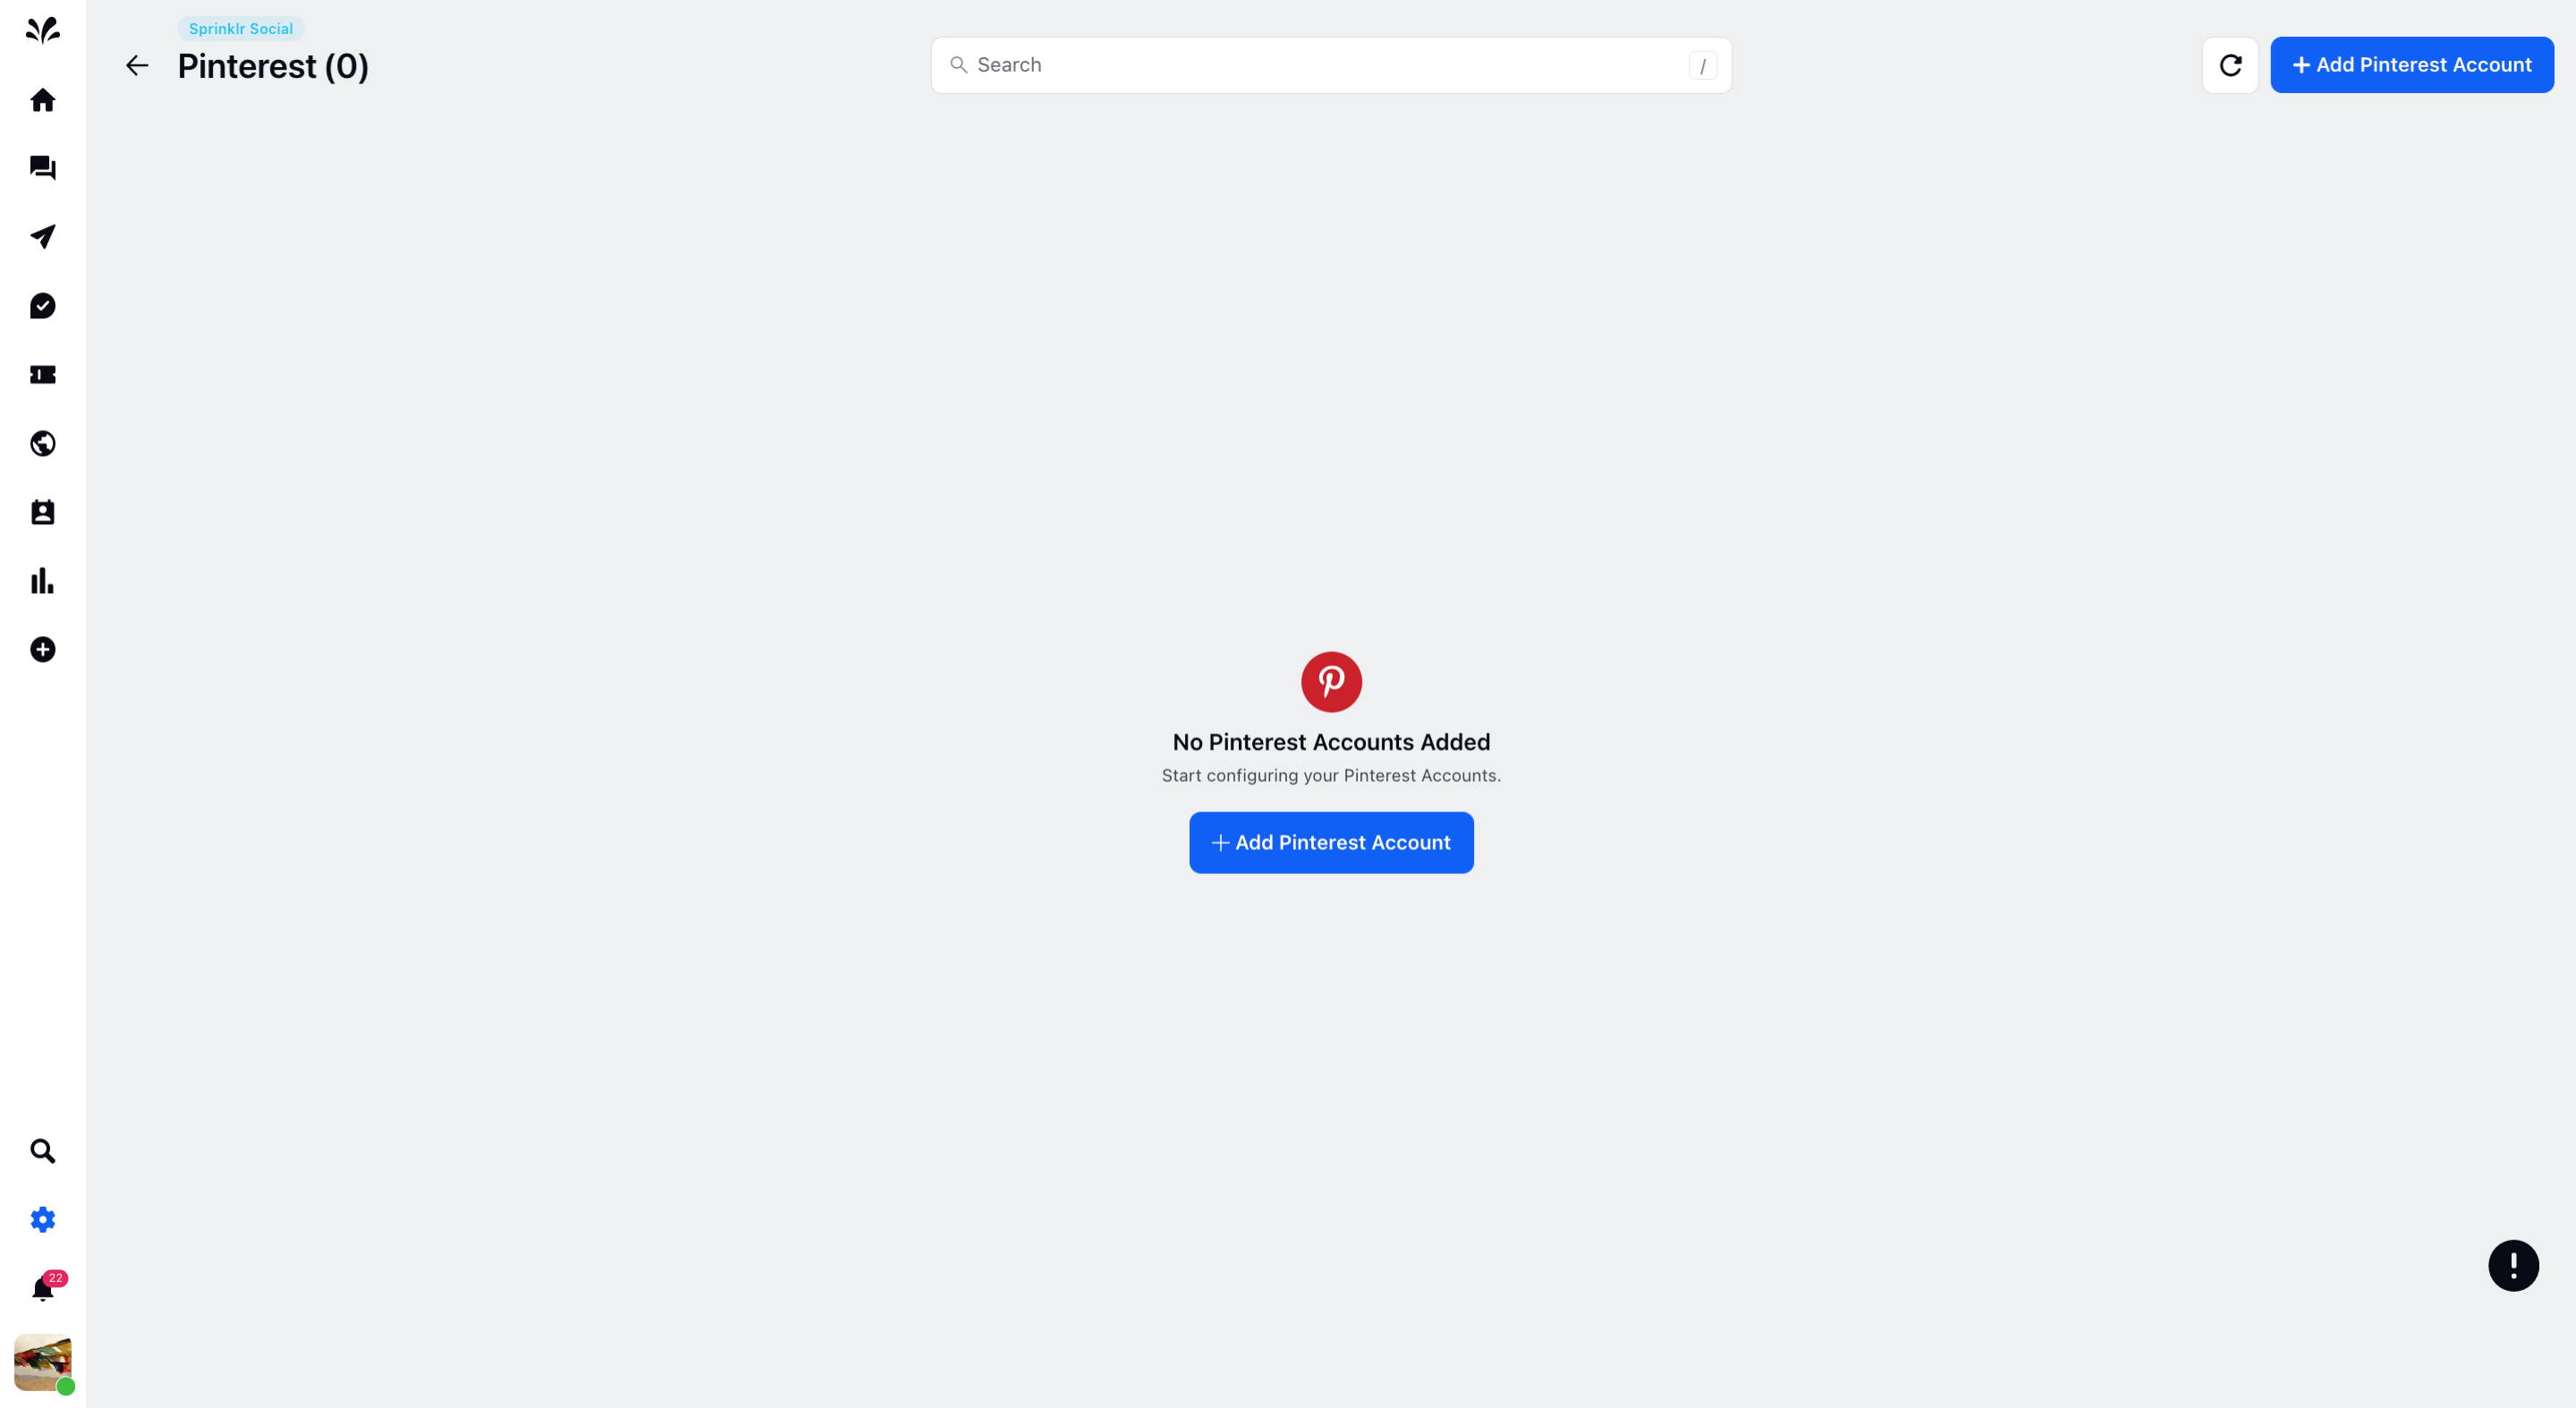
The Pinterest window will appear. Click Add Pinterest Account in the top right corner.
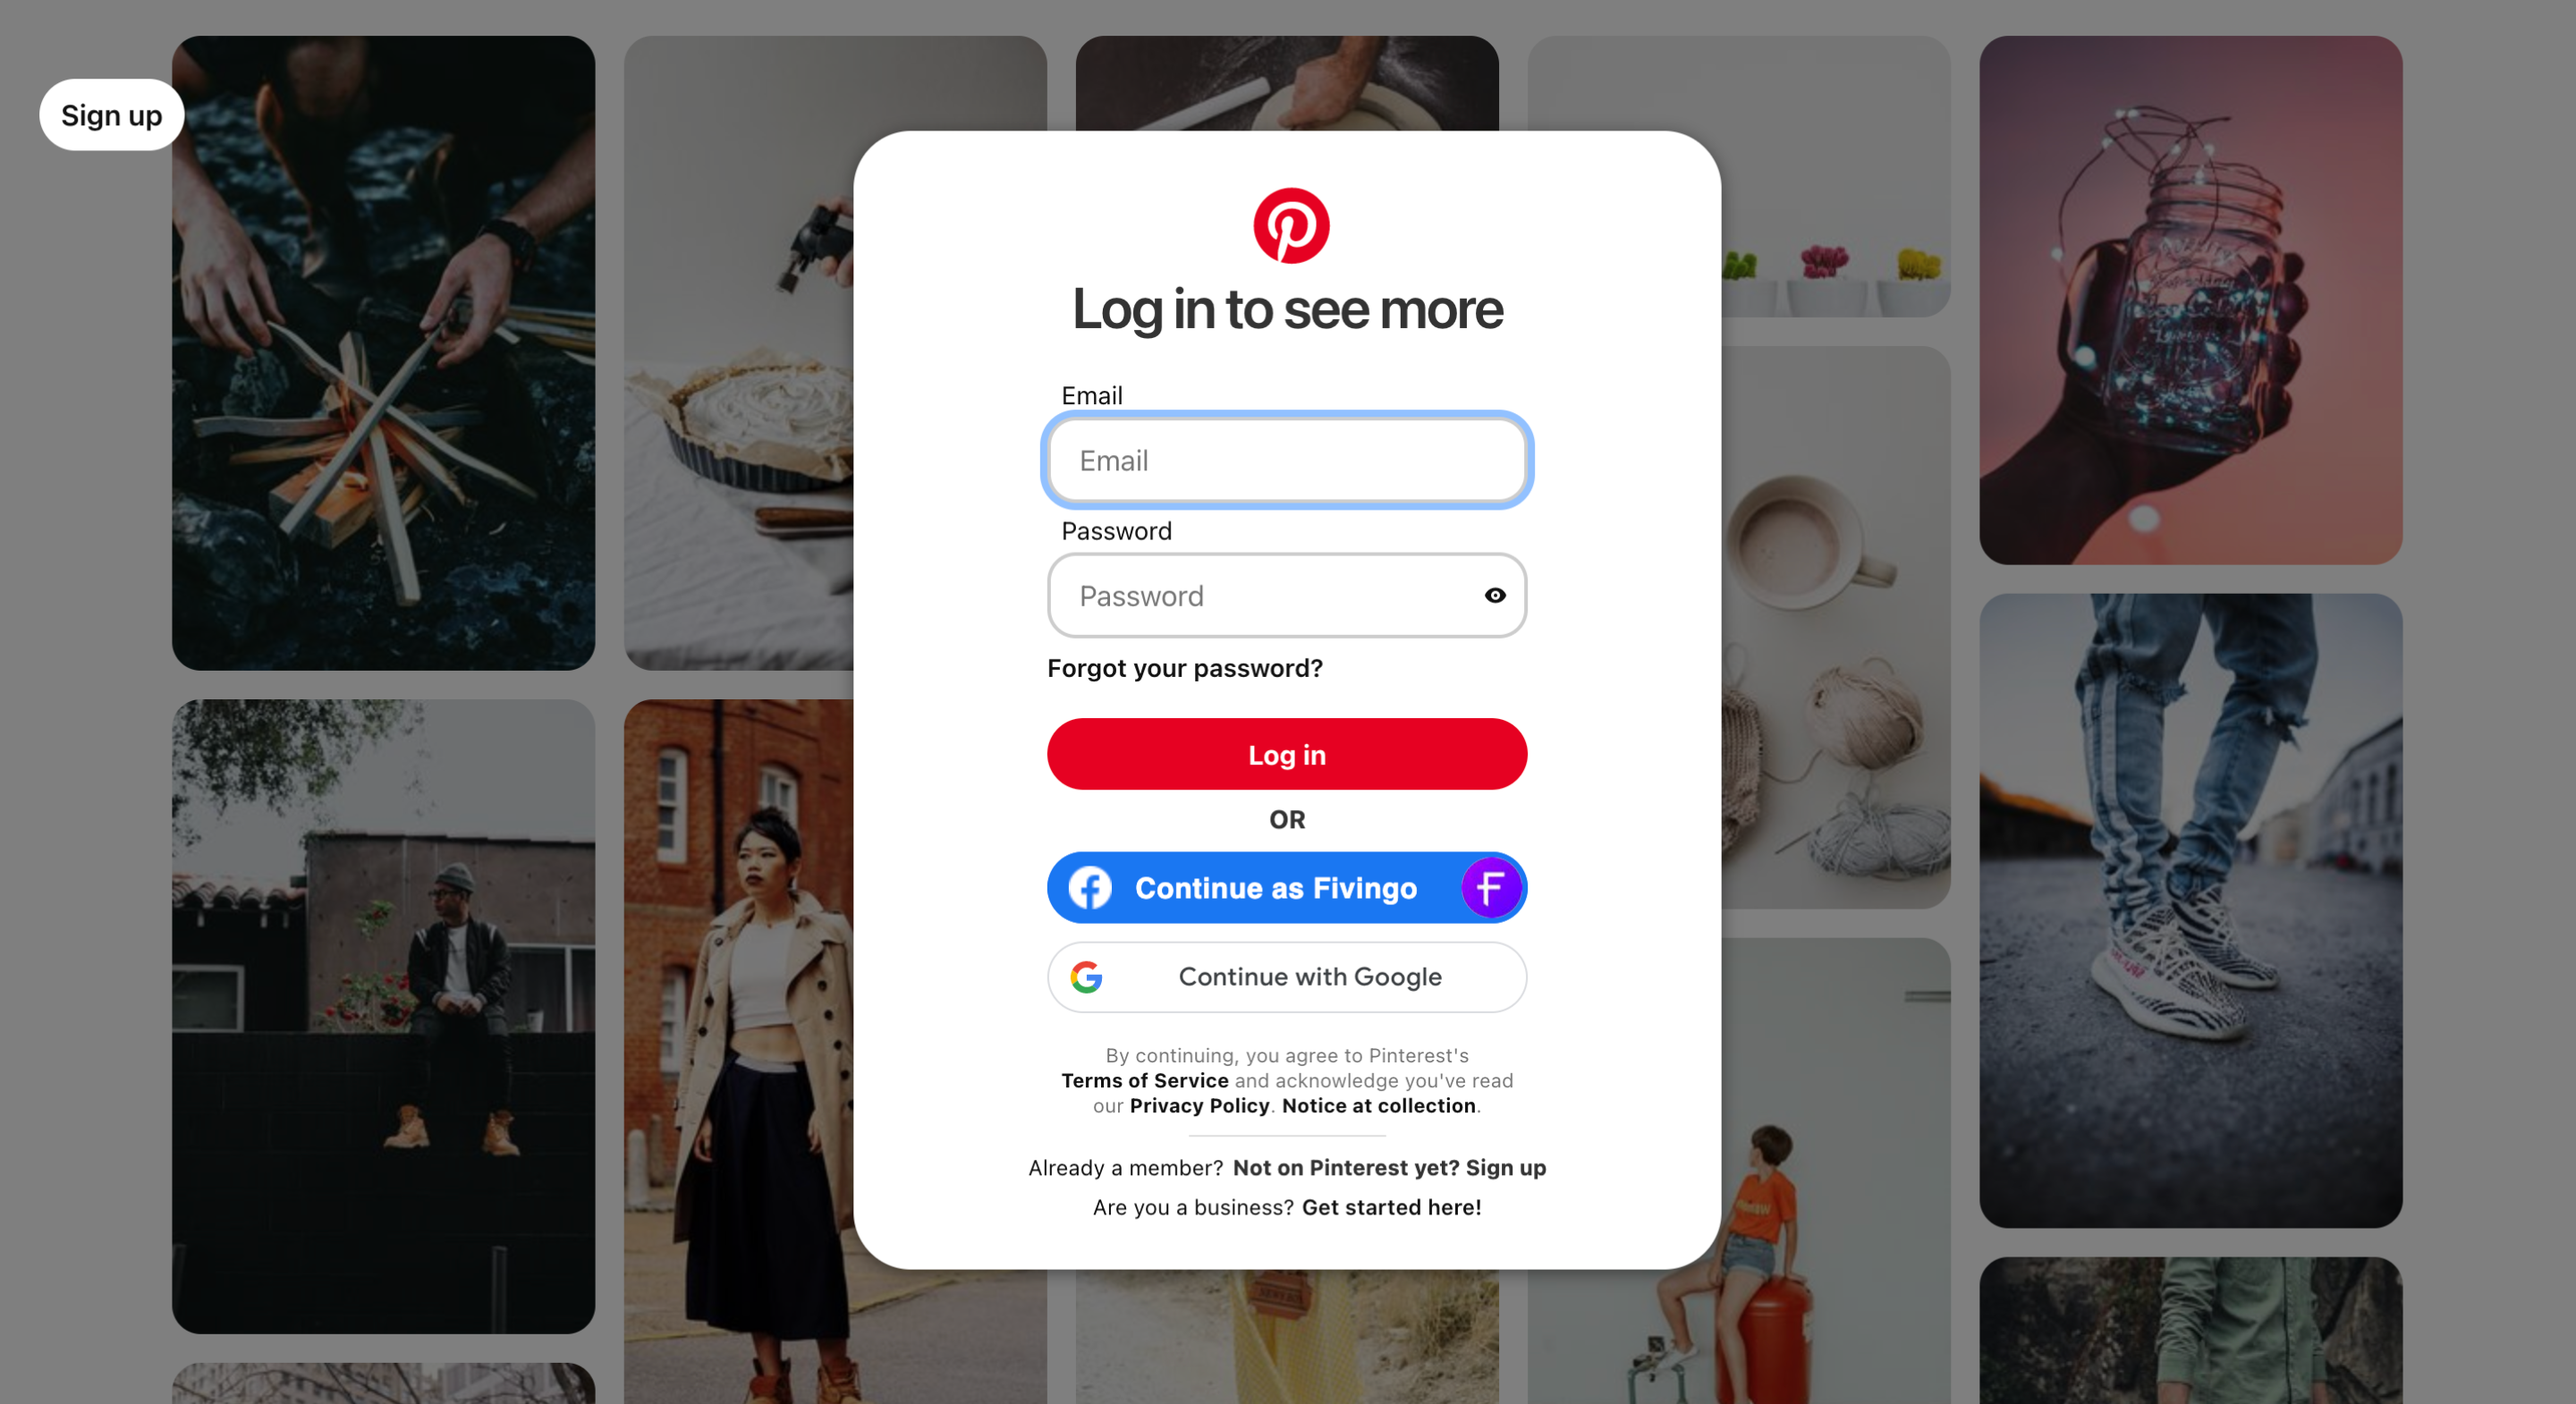
The native page of Pinterest will appear where you need to provide user credentials such as username and password. If your account is already created in Pinterest, you can continue with that account or create a new account.
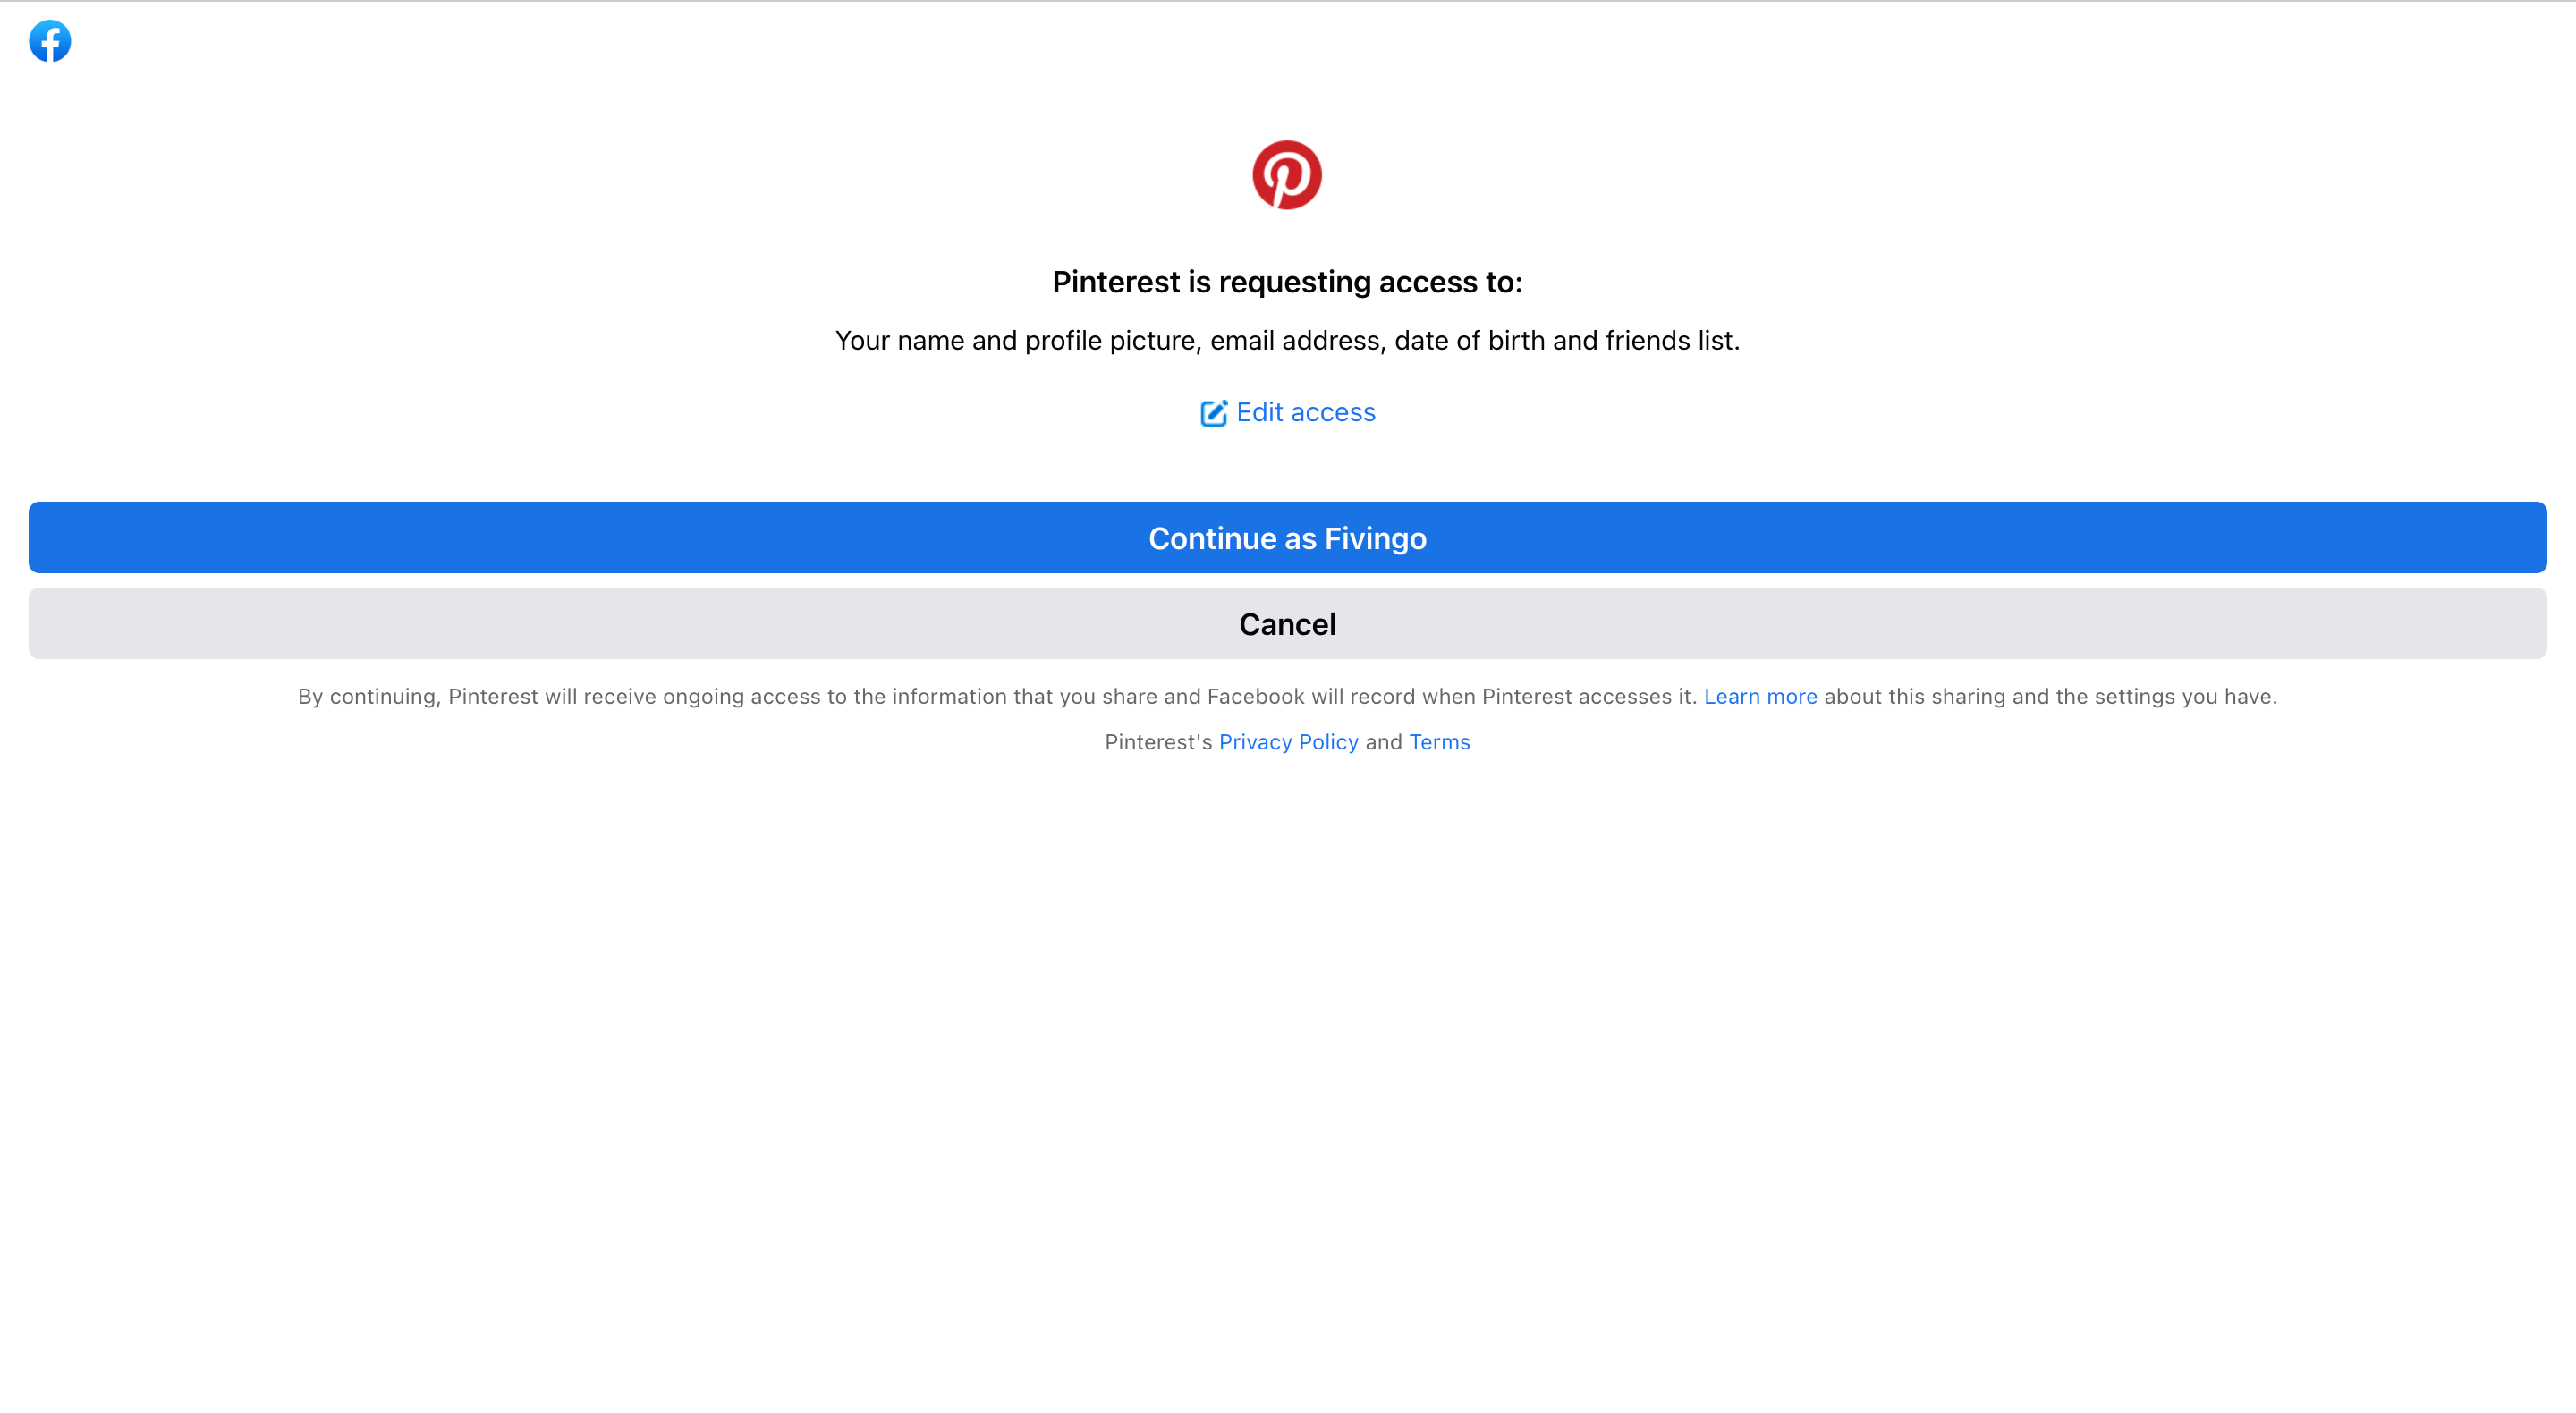
Give permission to the Pinterest account to access your name and profile picture, email address, and other personal details. Click Continue as Fivingo to login to the Pinterest account.
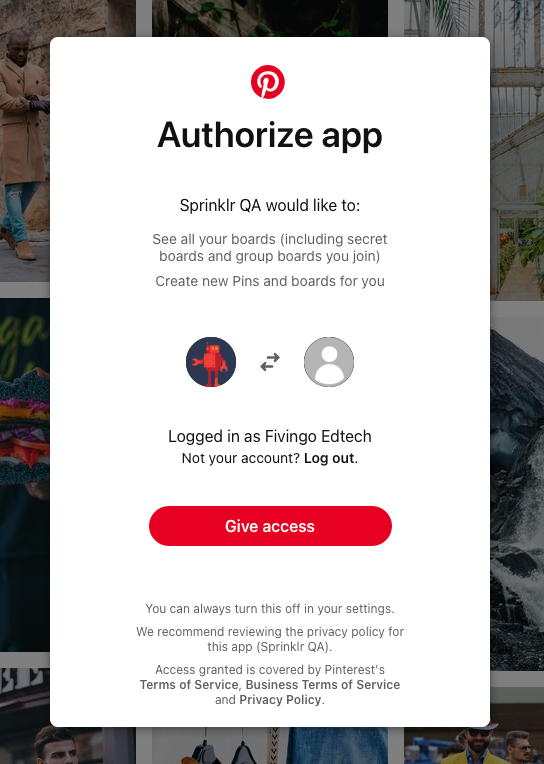
Pinterest Account will now ask you to authorise the app. Click on Give access.
So, the Pinterest account is now added to Sprinklr Social.
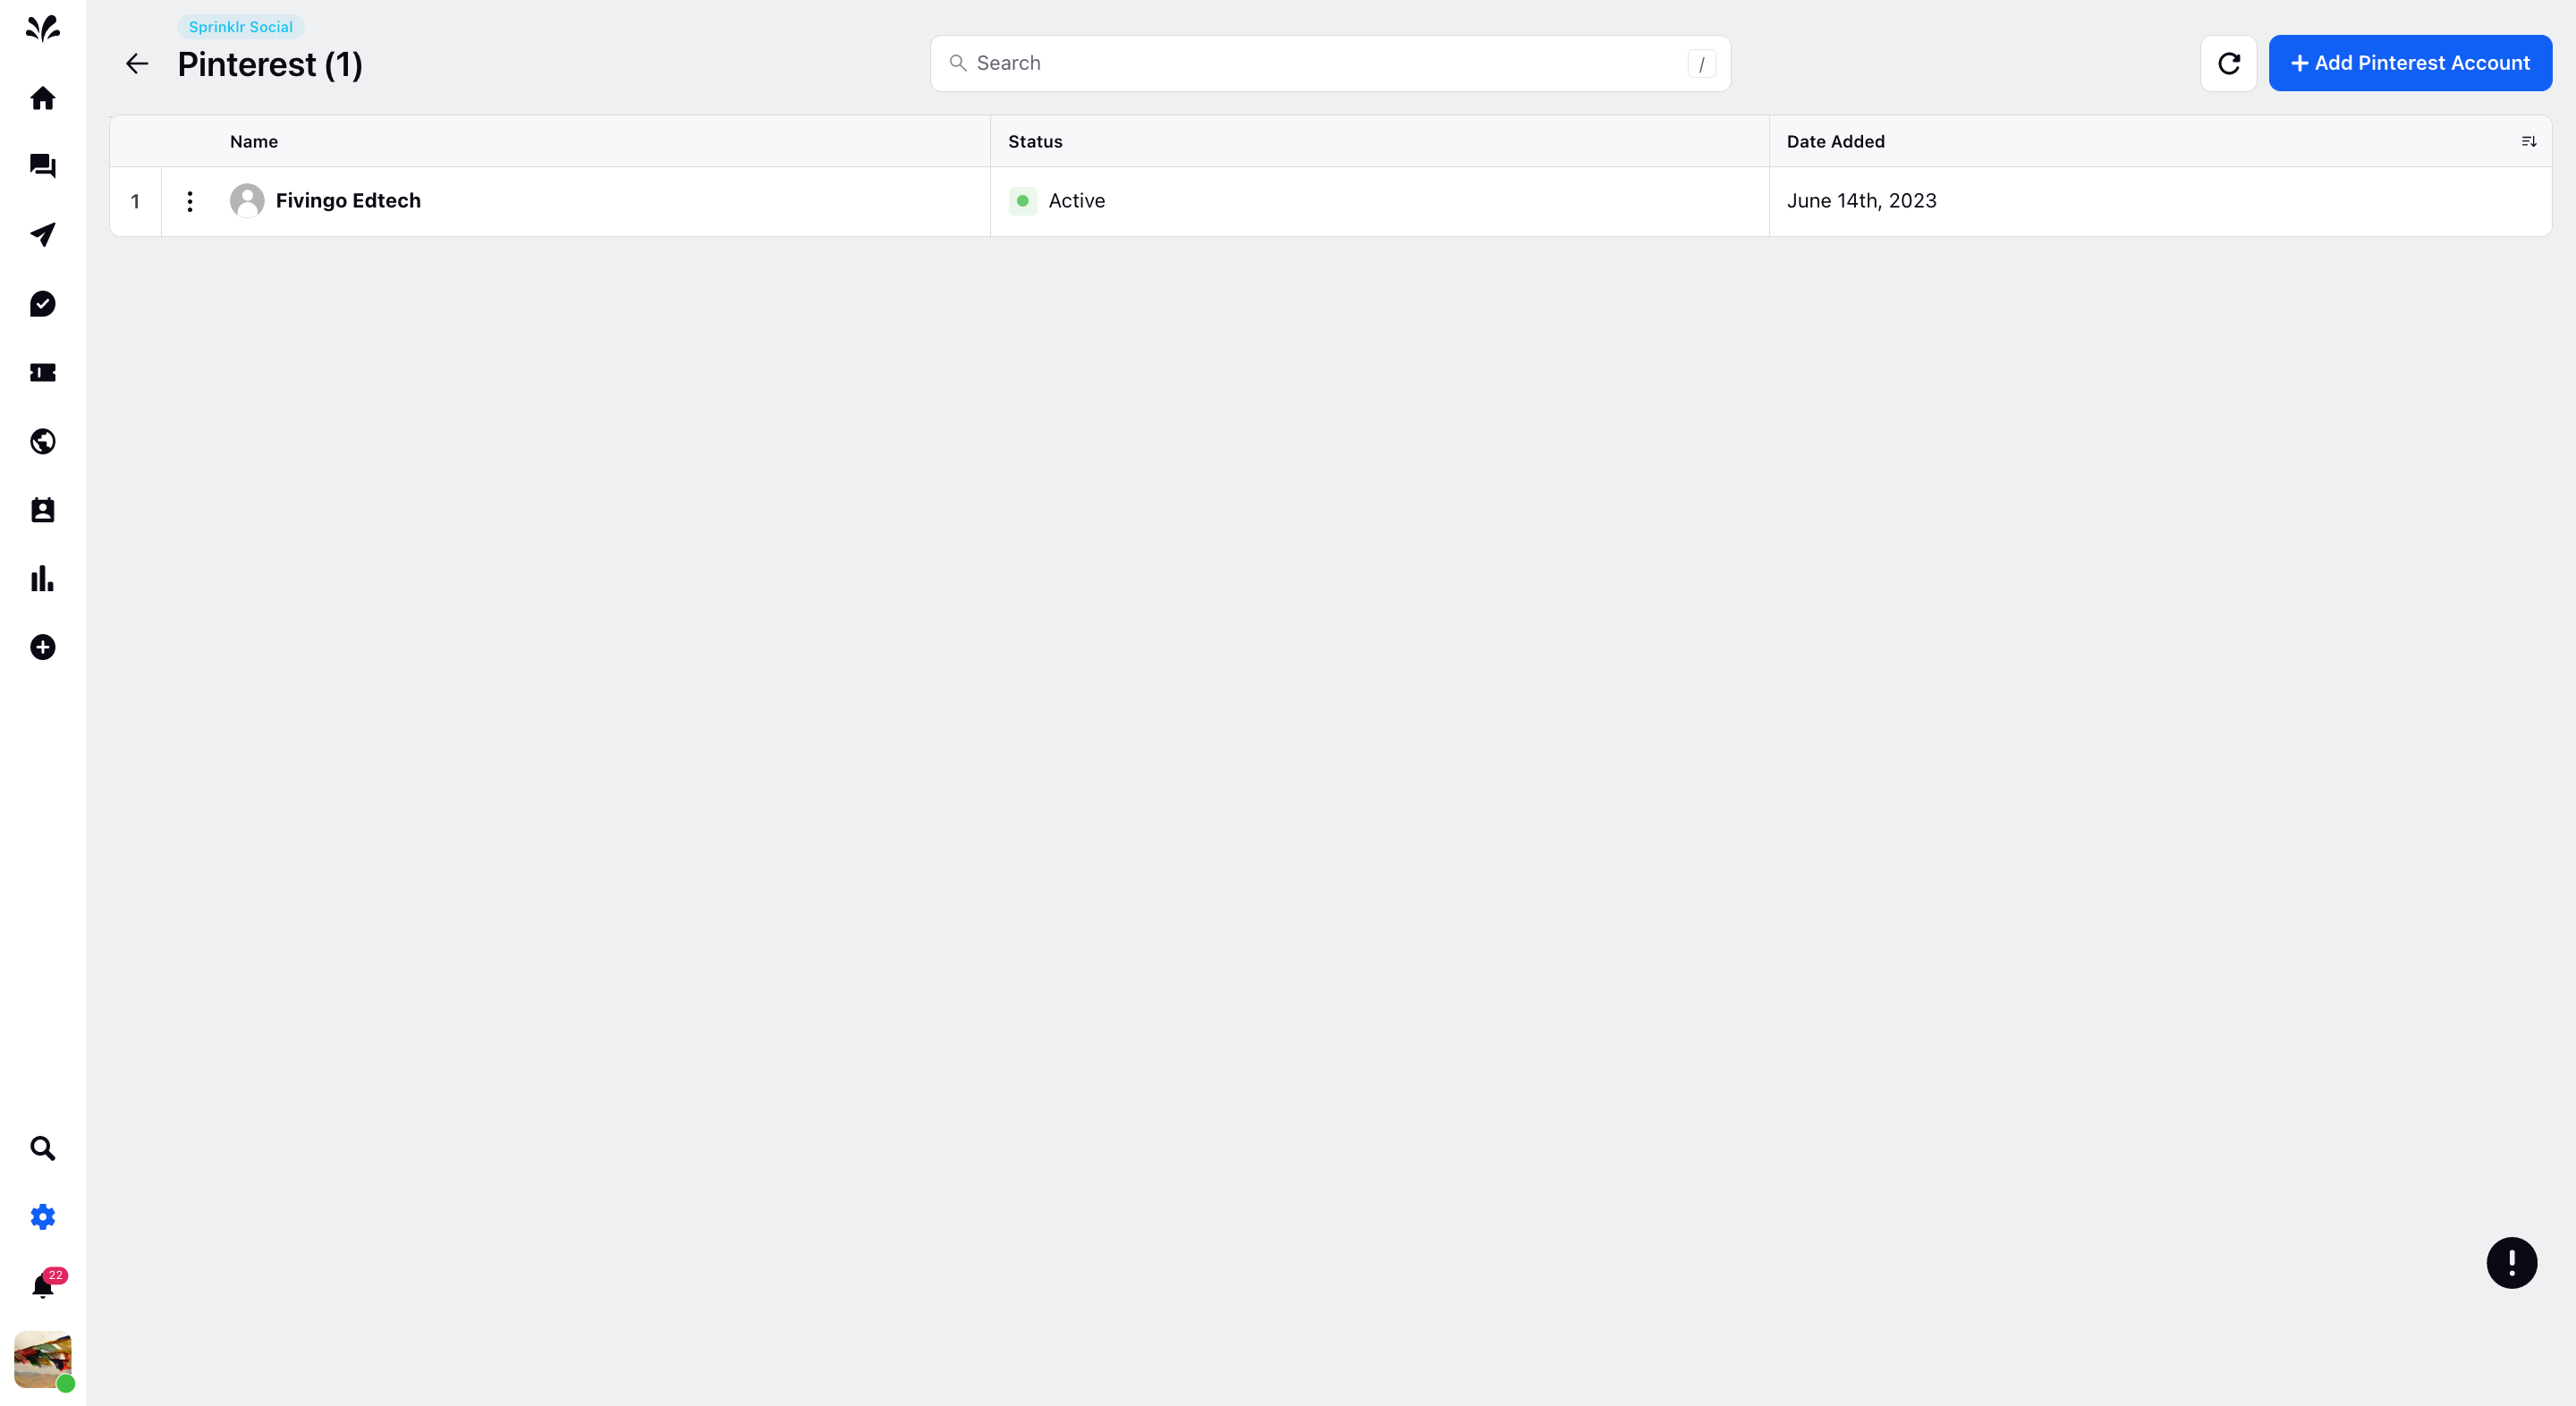
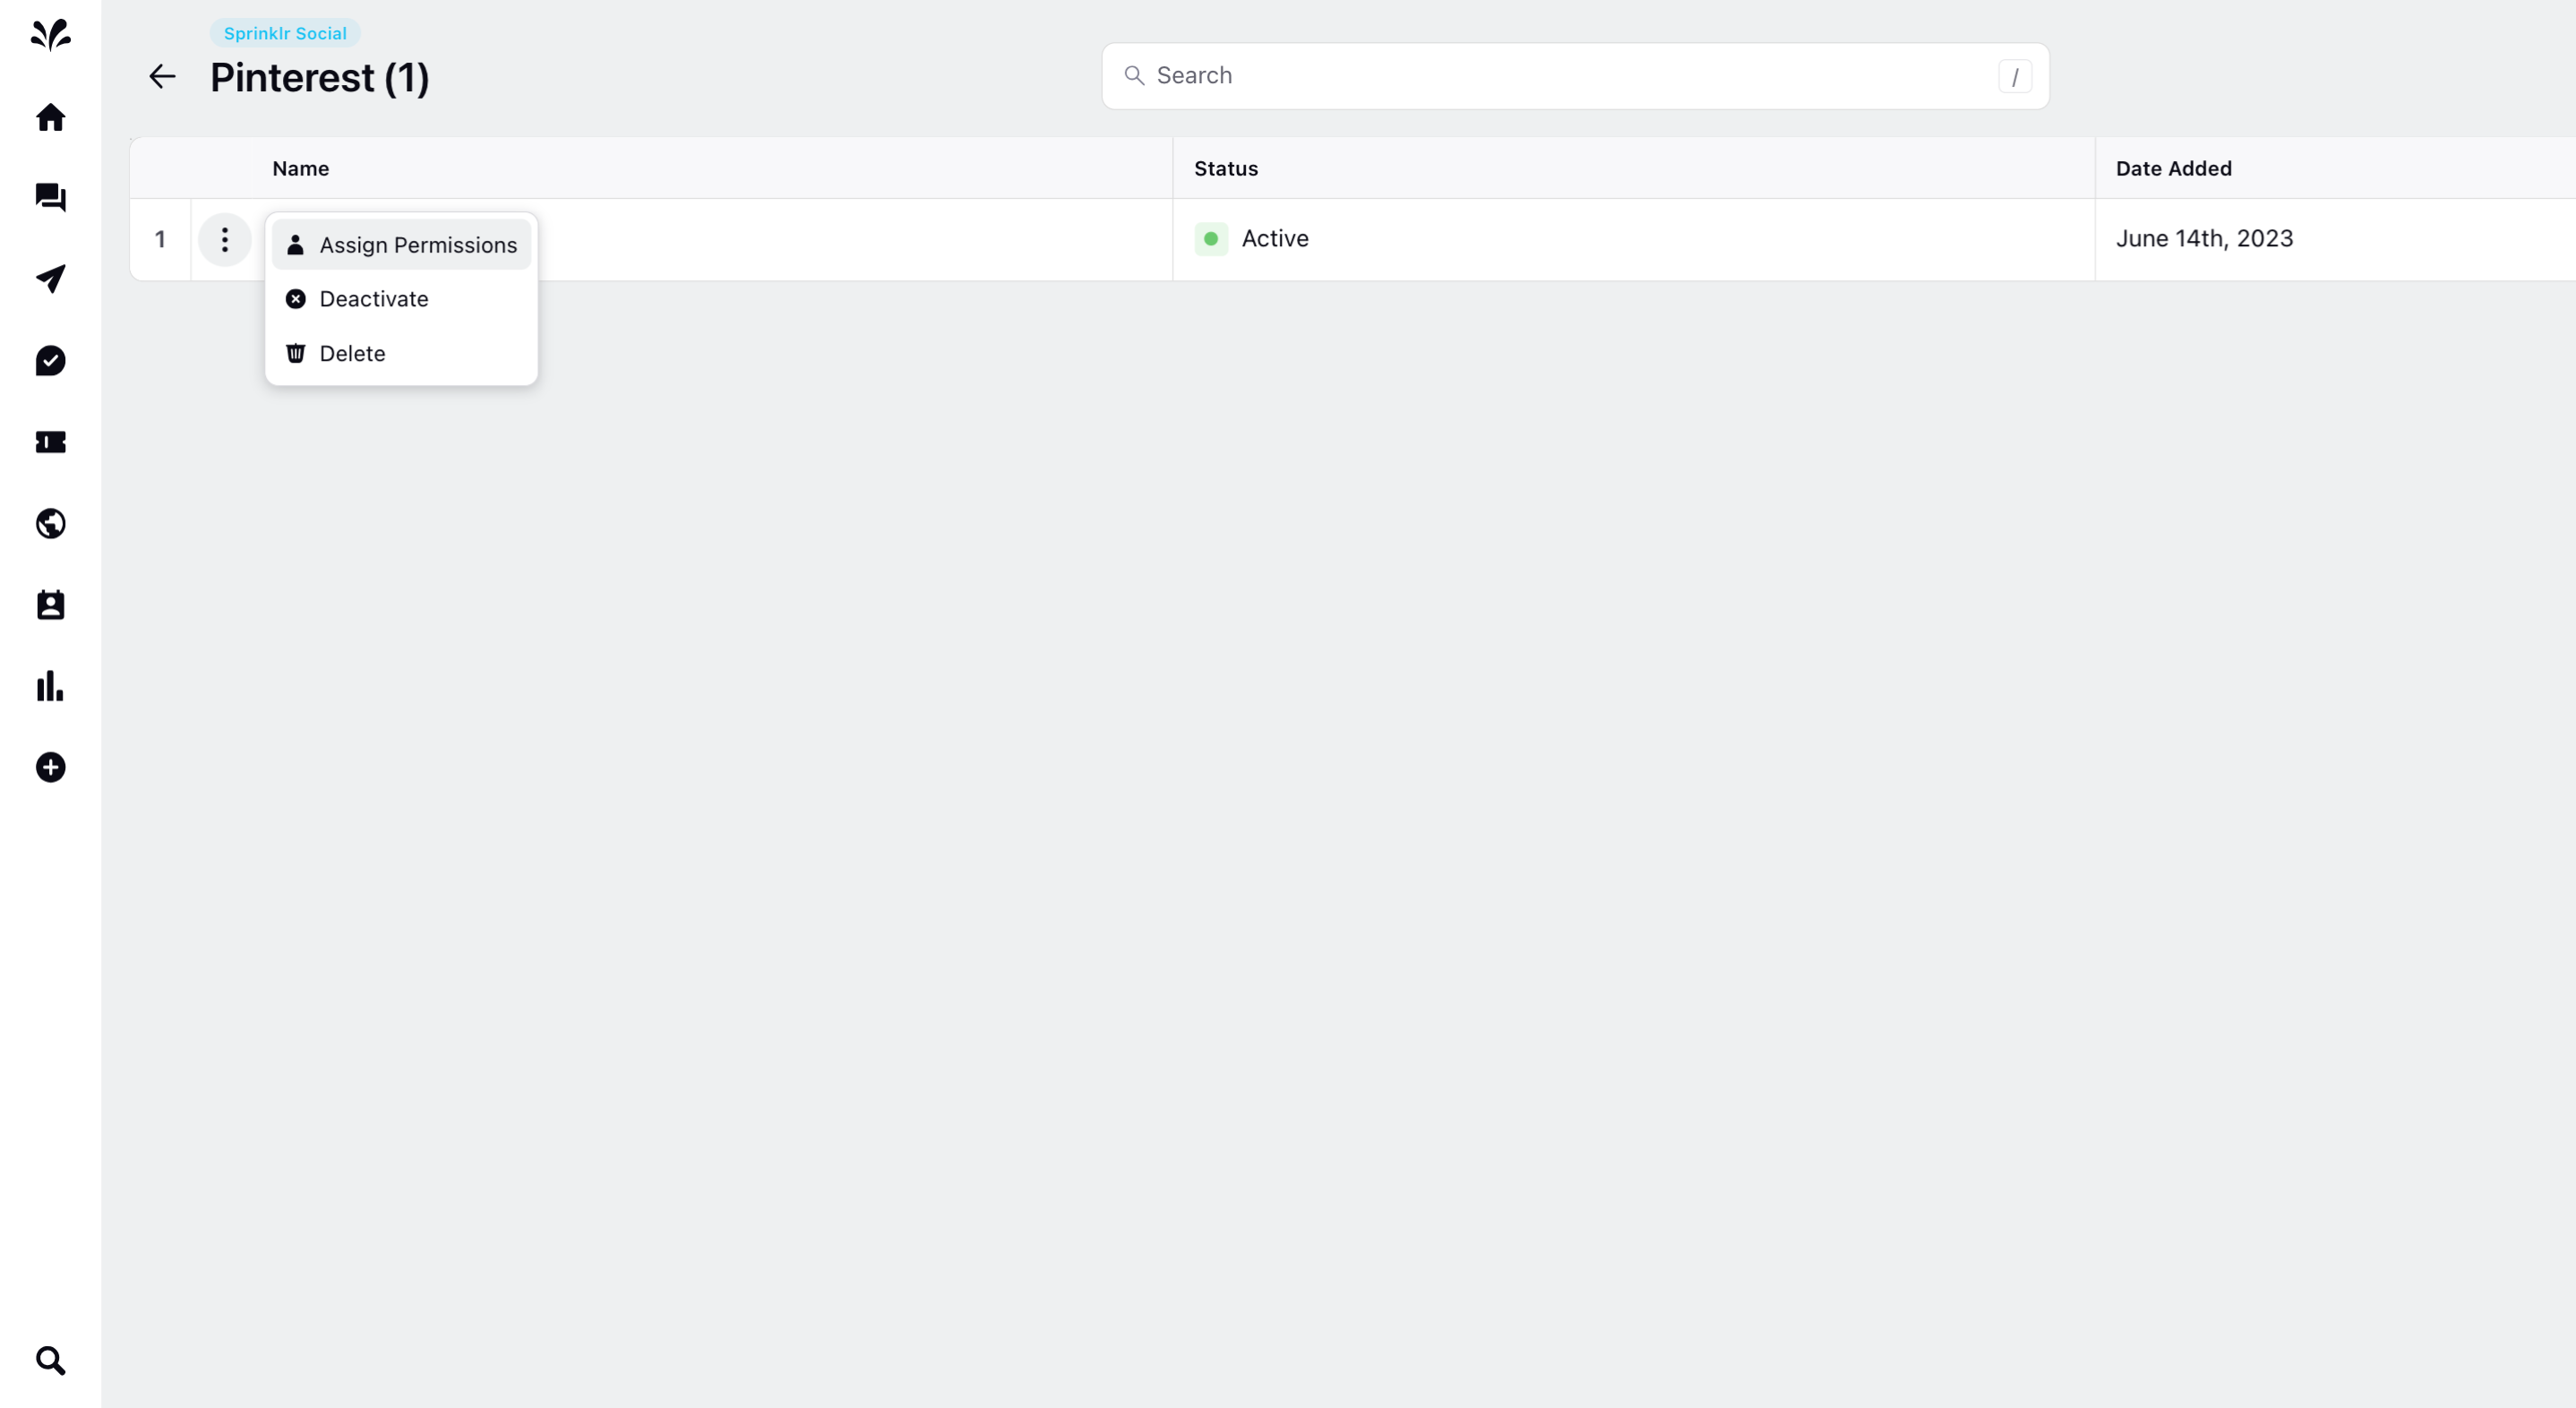
Click on the 3 dots icon against the added account. You can assign permissions to the platform users, deactivate the account, or delete the account. Choose Assign Permissions from the dropdown.
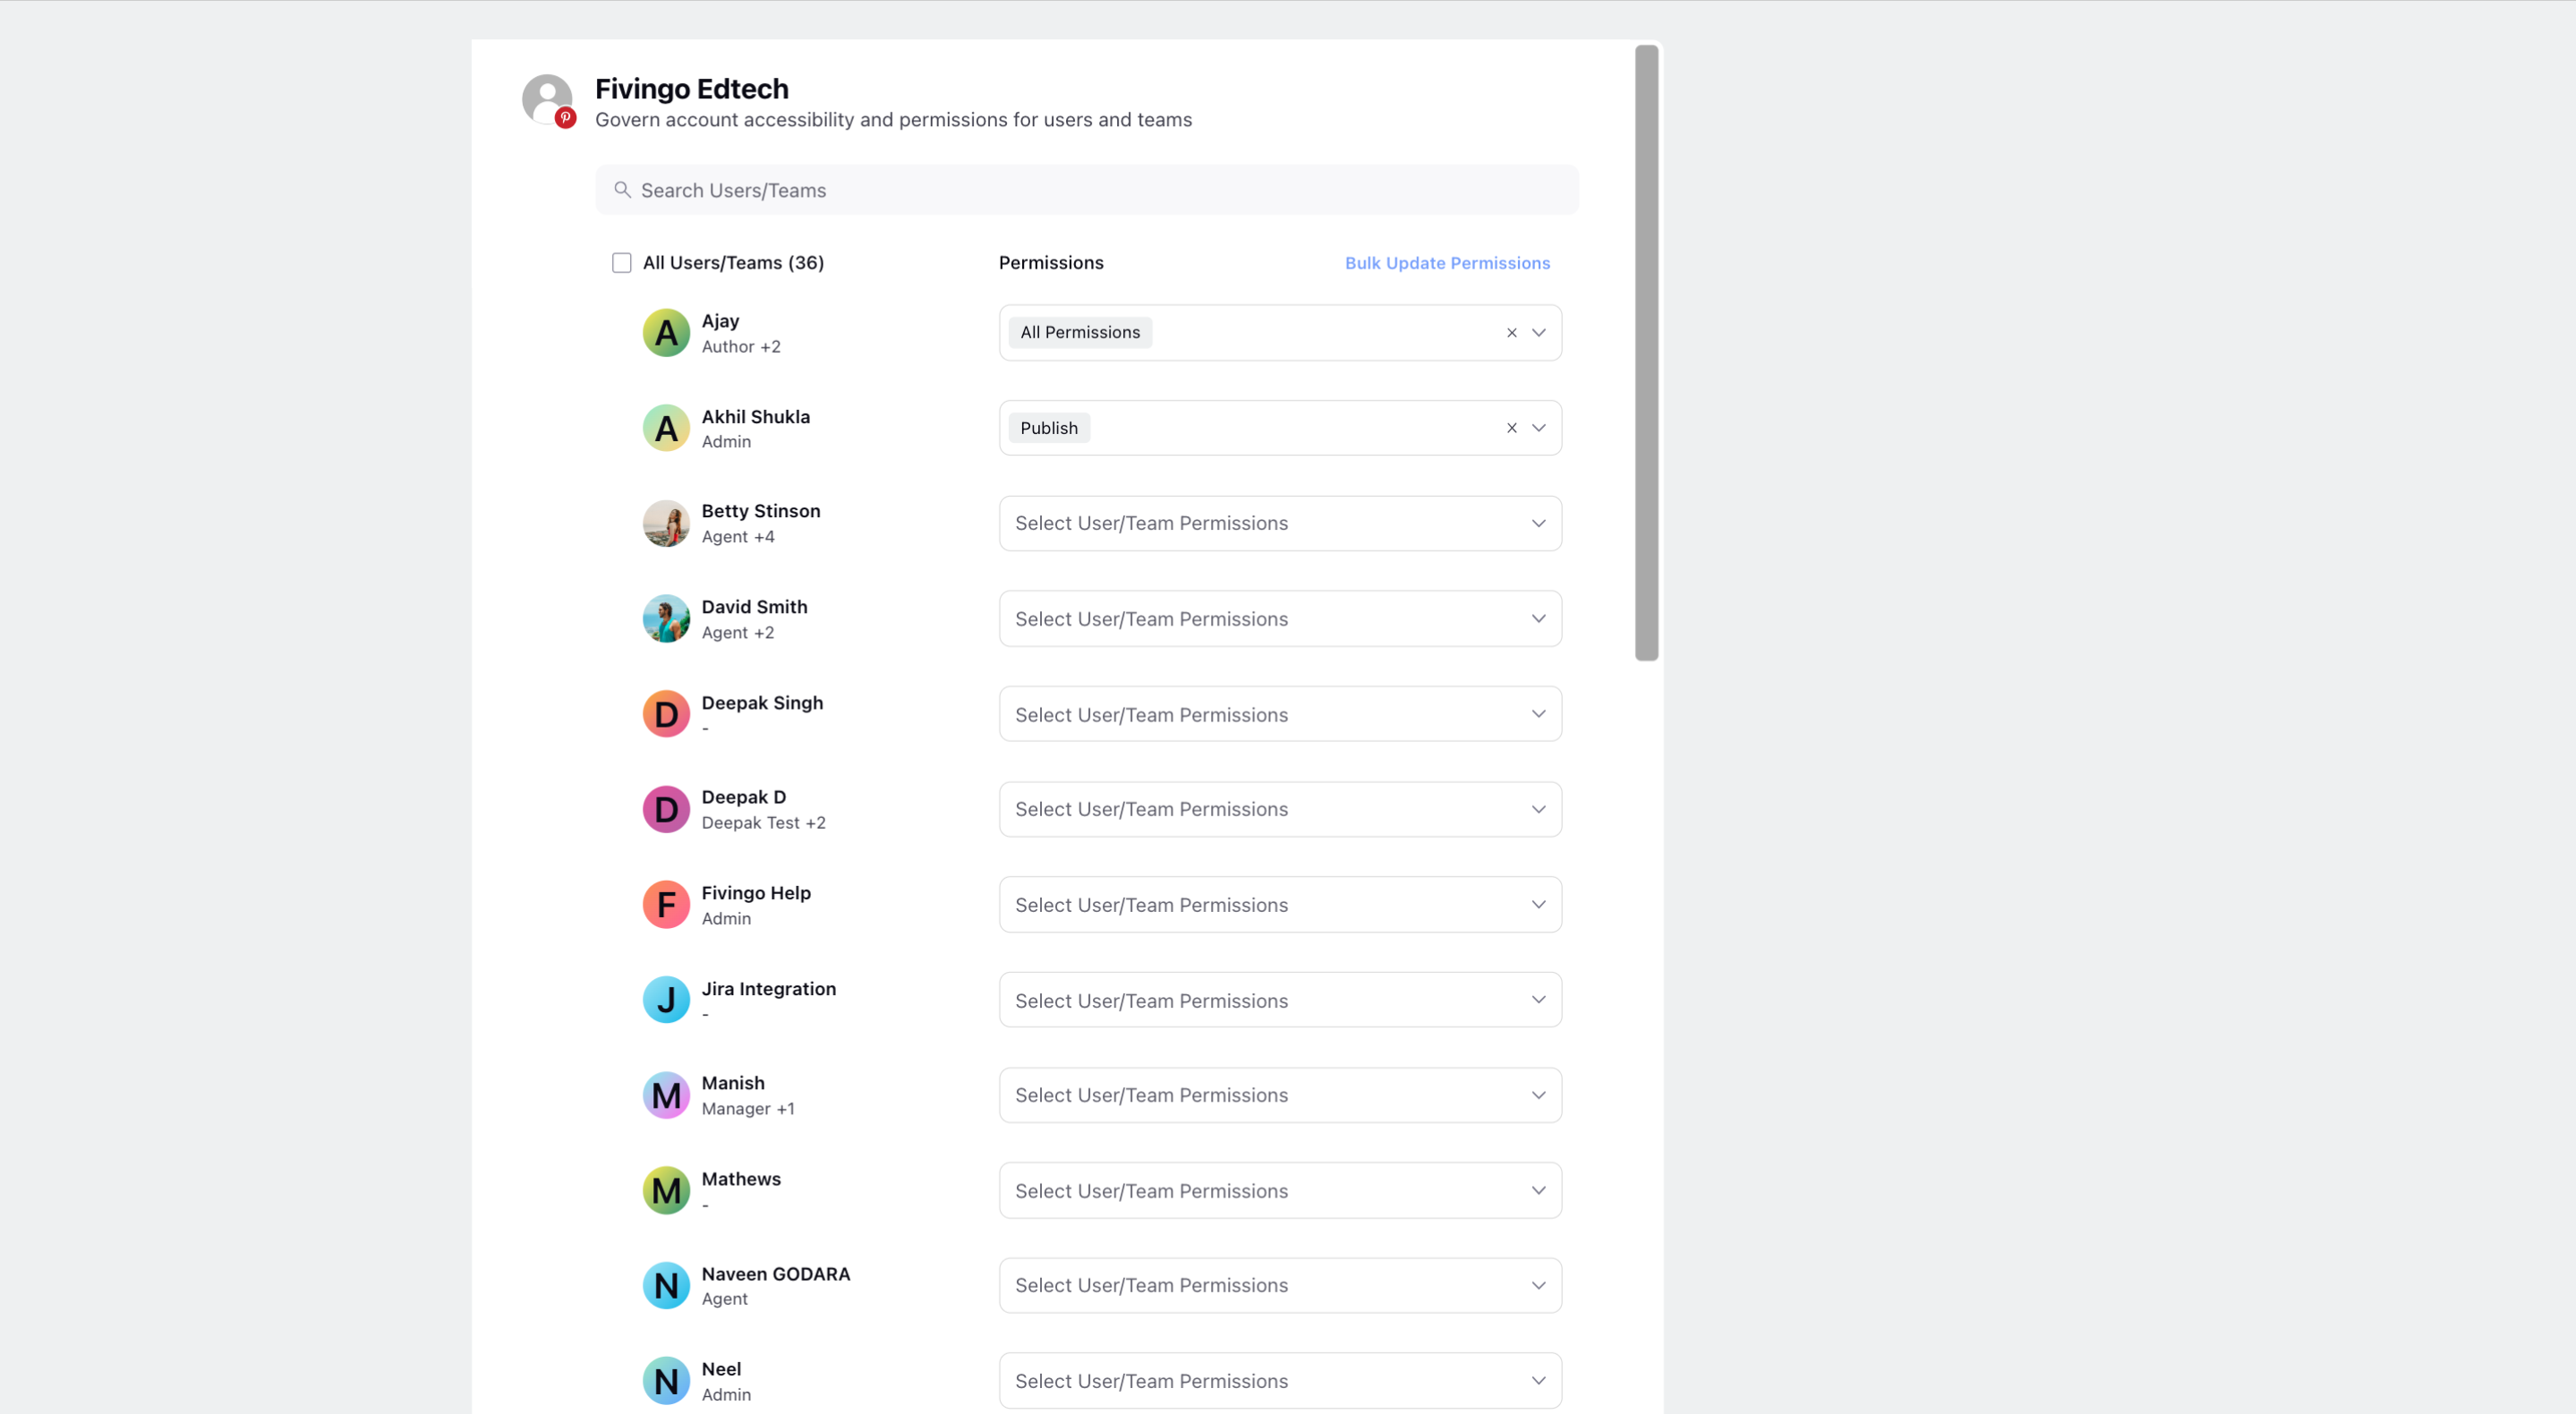
You can grant permissions to the desired platform users by selecting the desired permission from the drop-down.
To publish Pinterest Pin from the Publisher
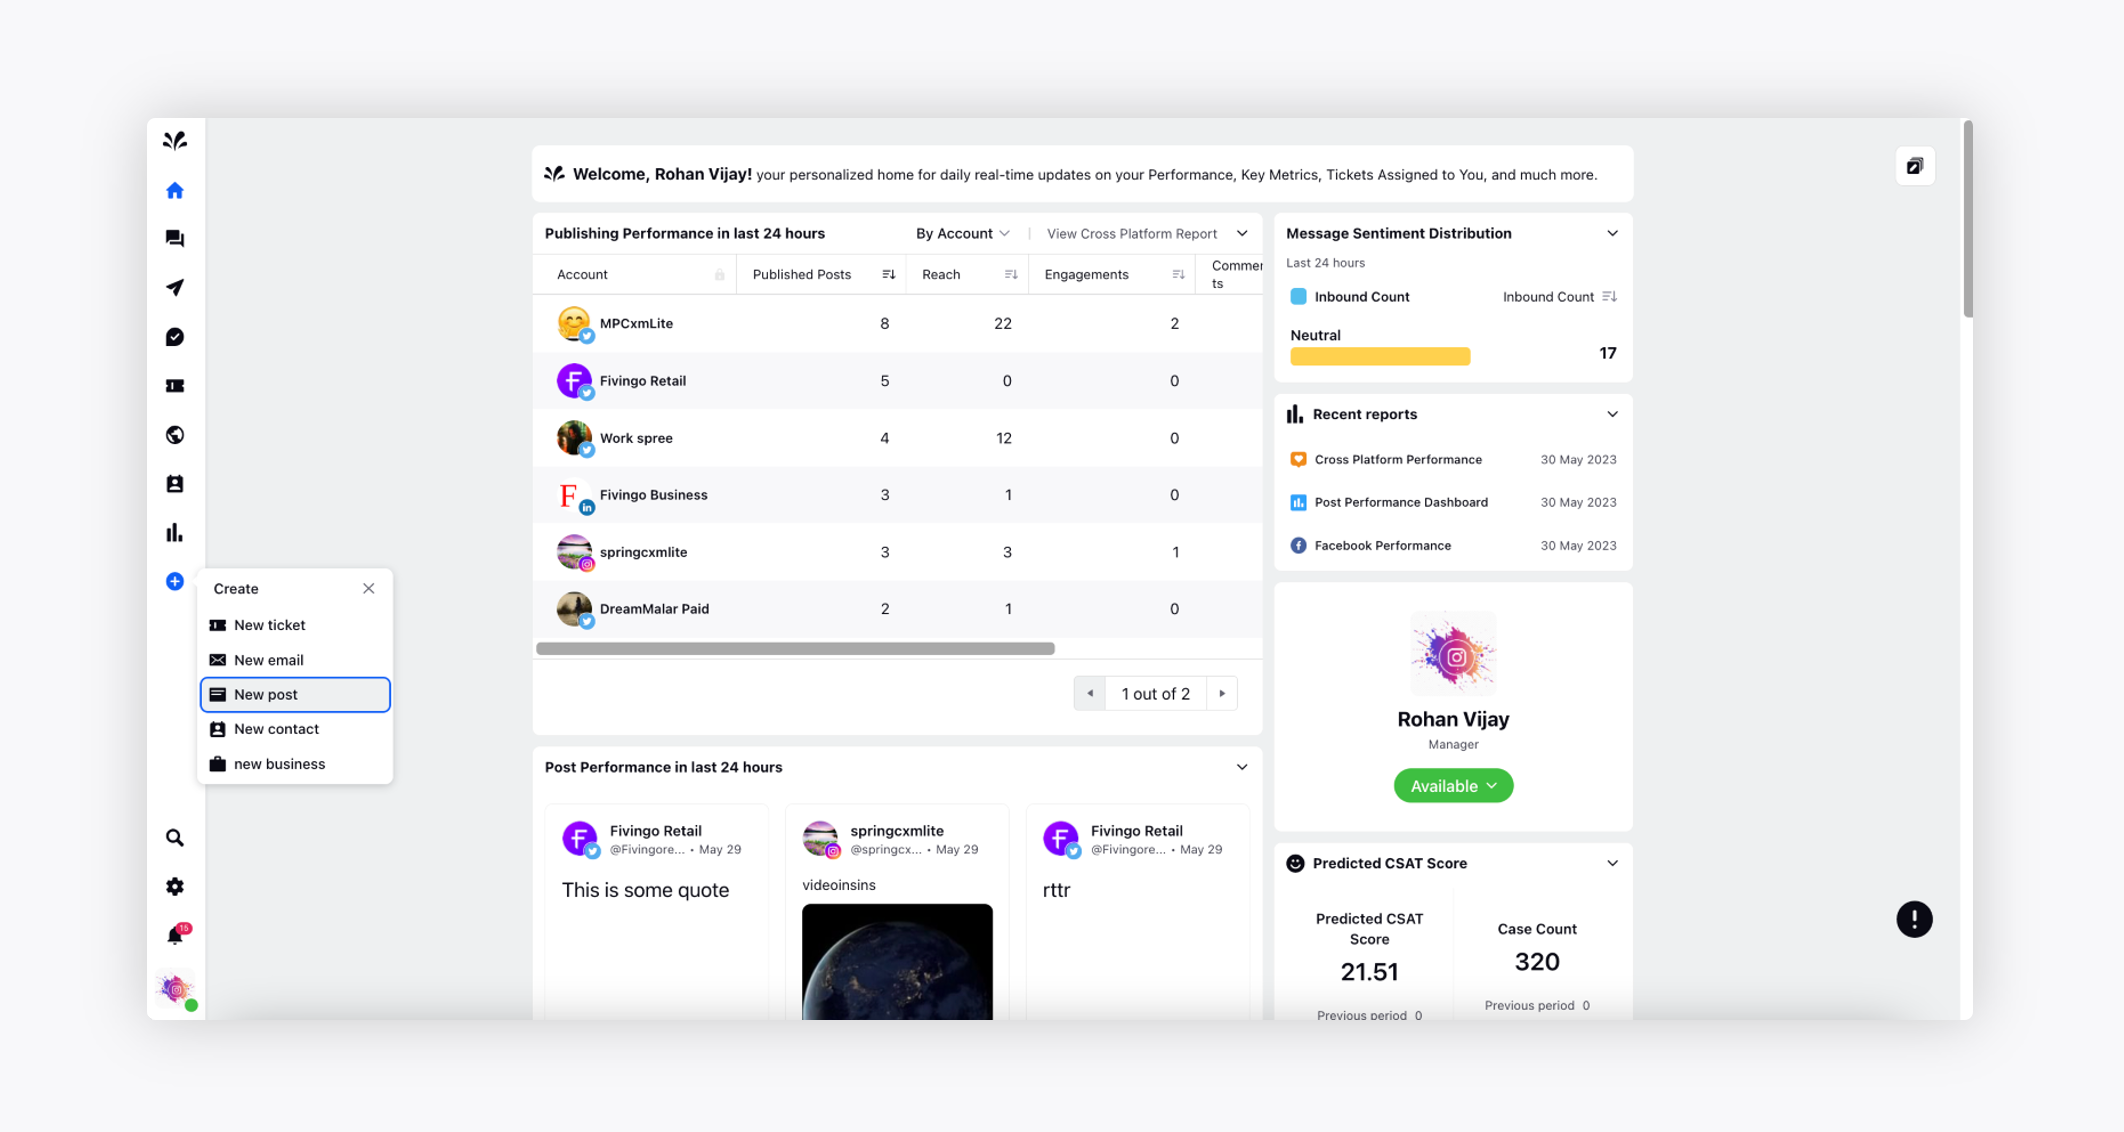
Click on the + icon from the left pane of Sprinklr Social and choose the New Post option from the drop -down. It will take you to the Publisher tool.
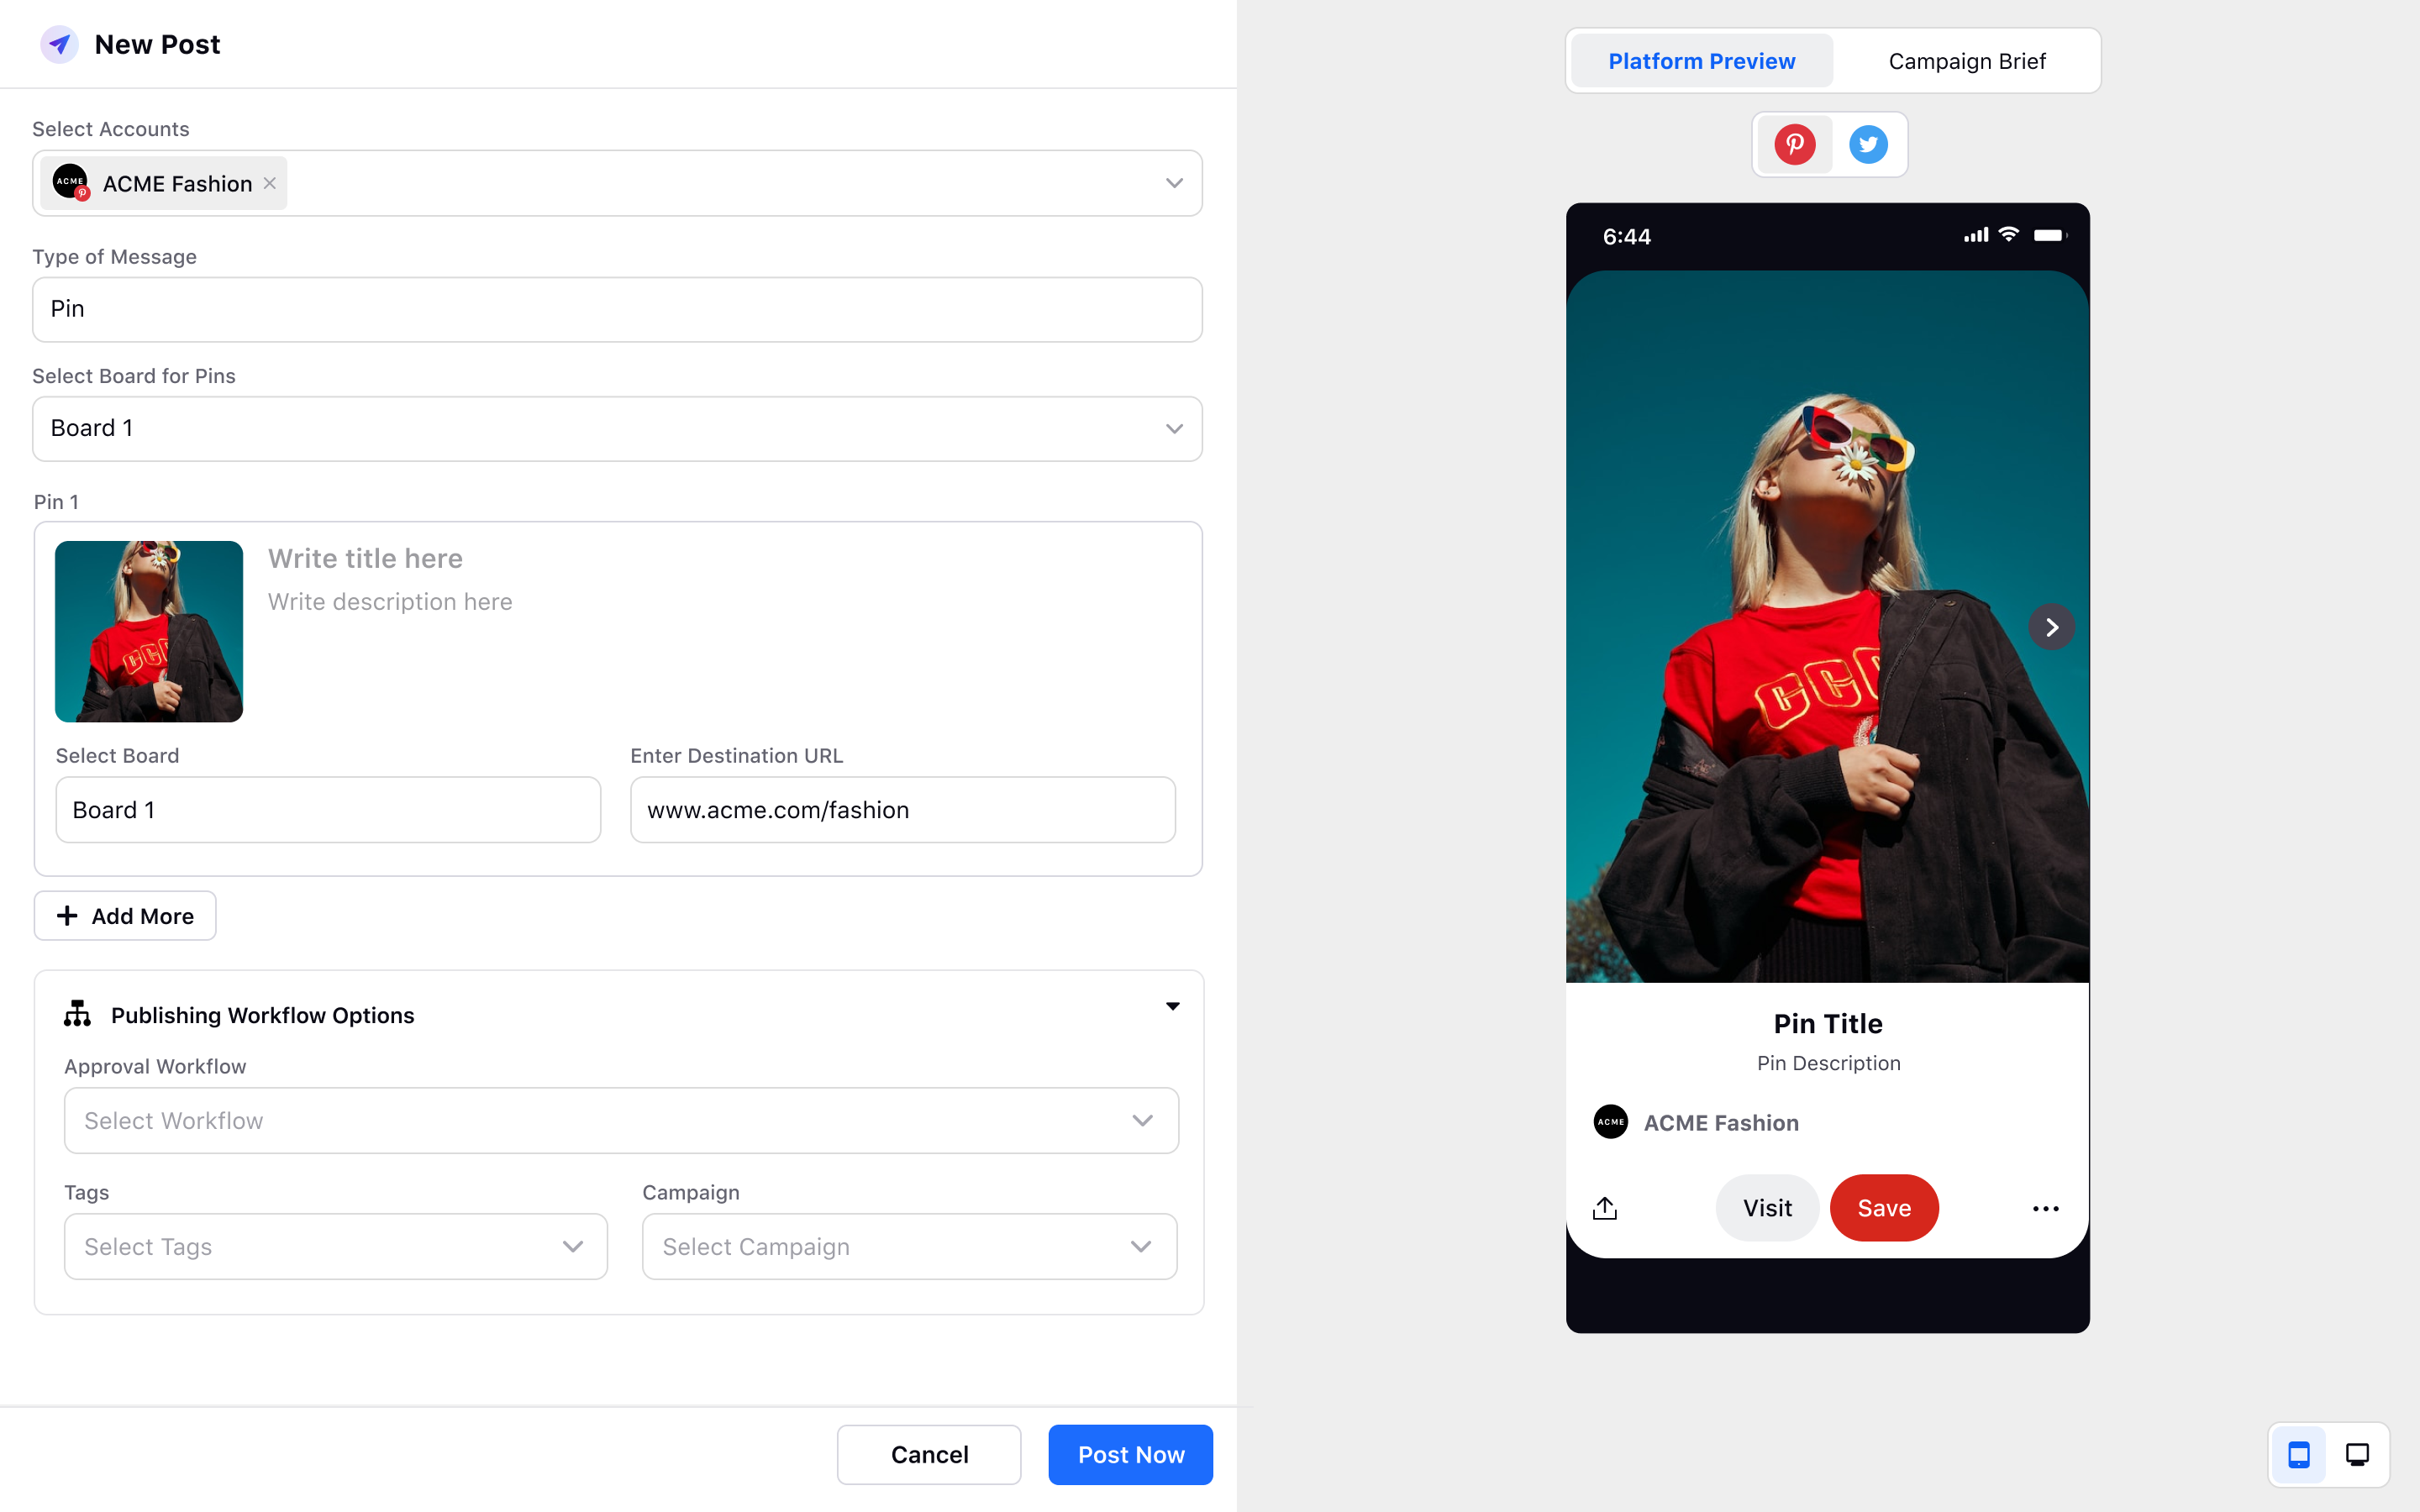
Choose Customise by Platform in the top right corner. Now, choose the social account, select the desired board for the pin, and the type of message as Pin.
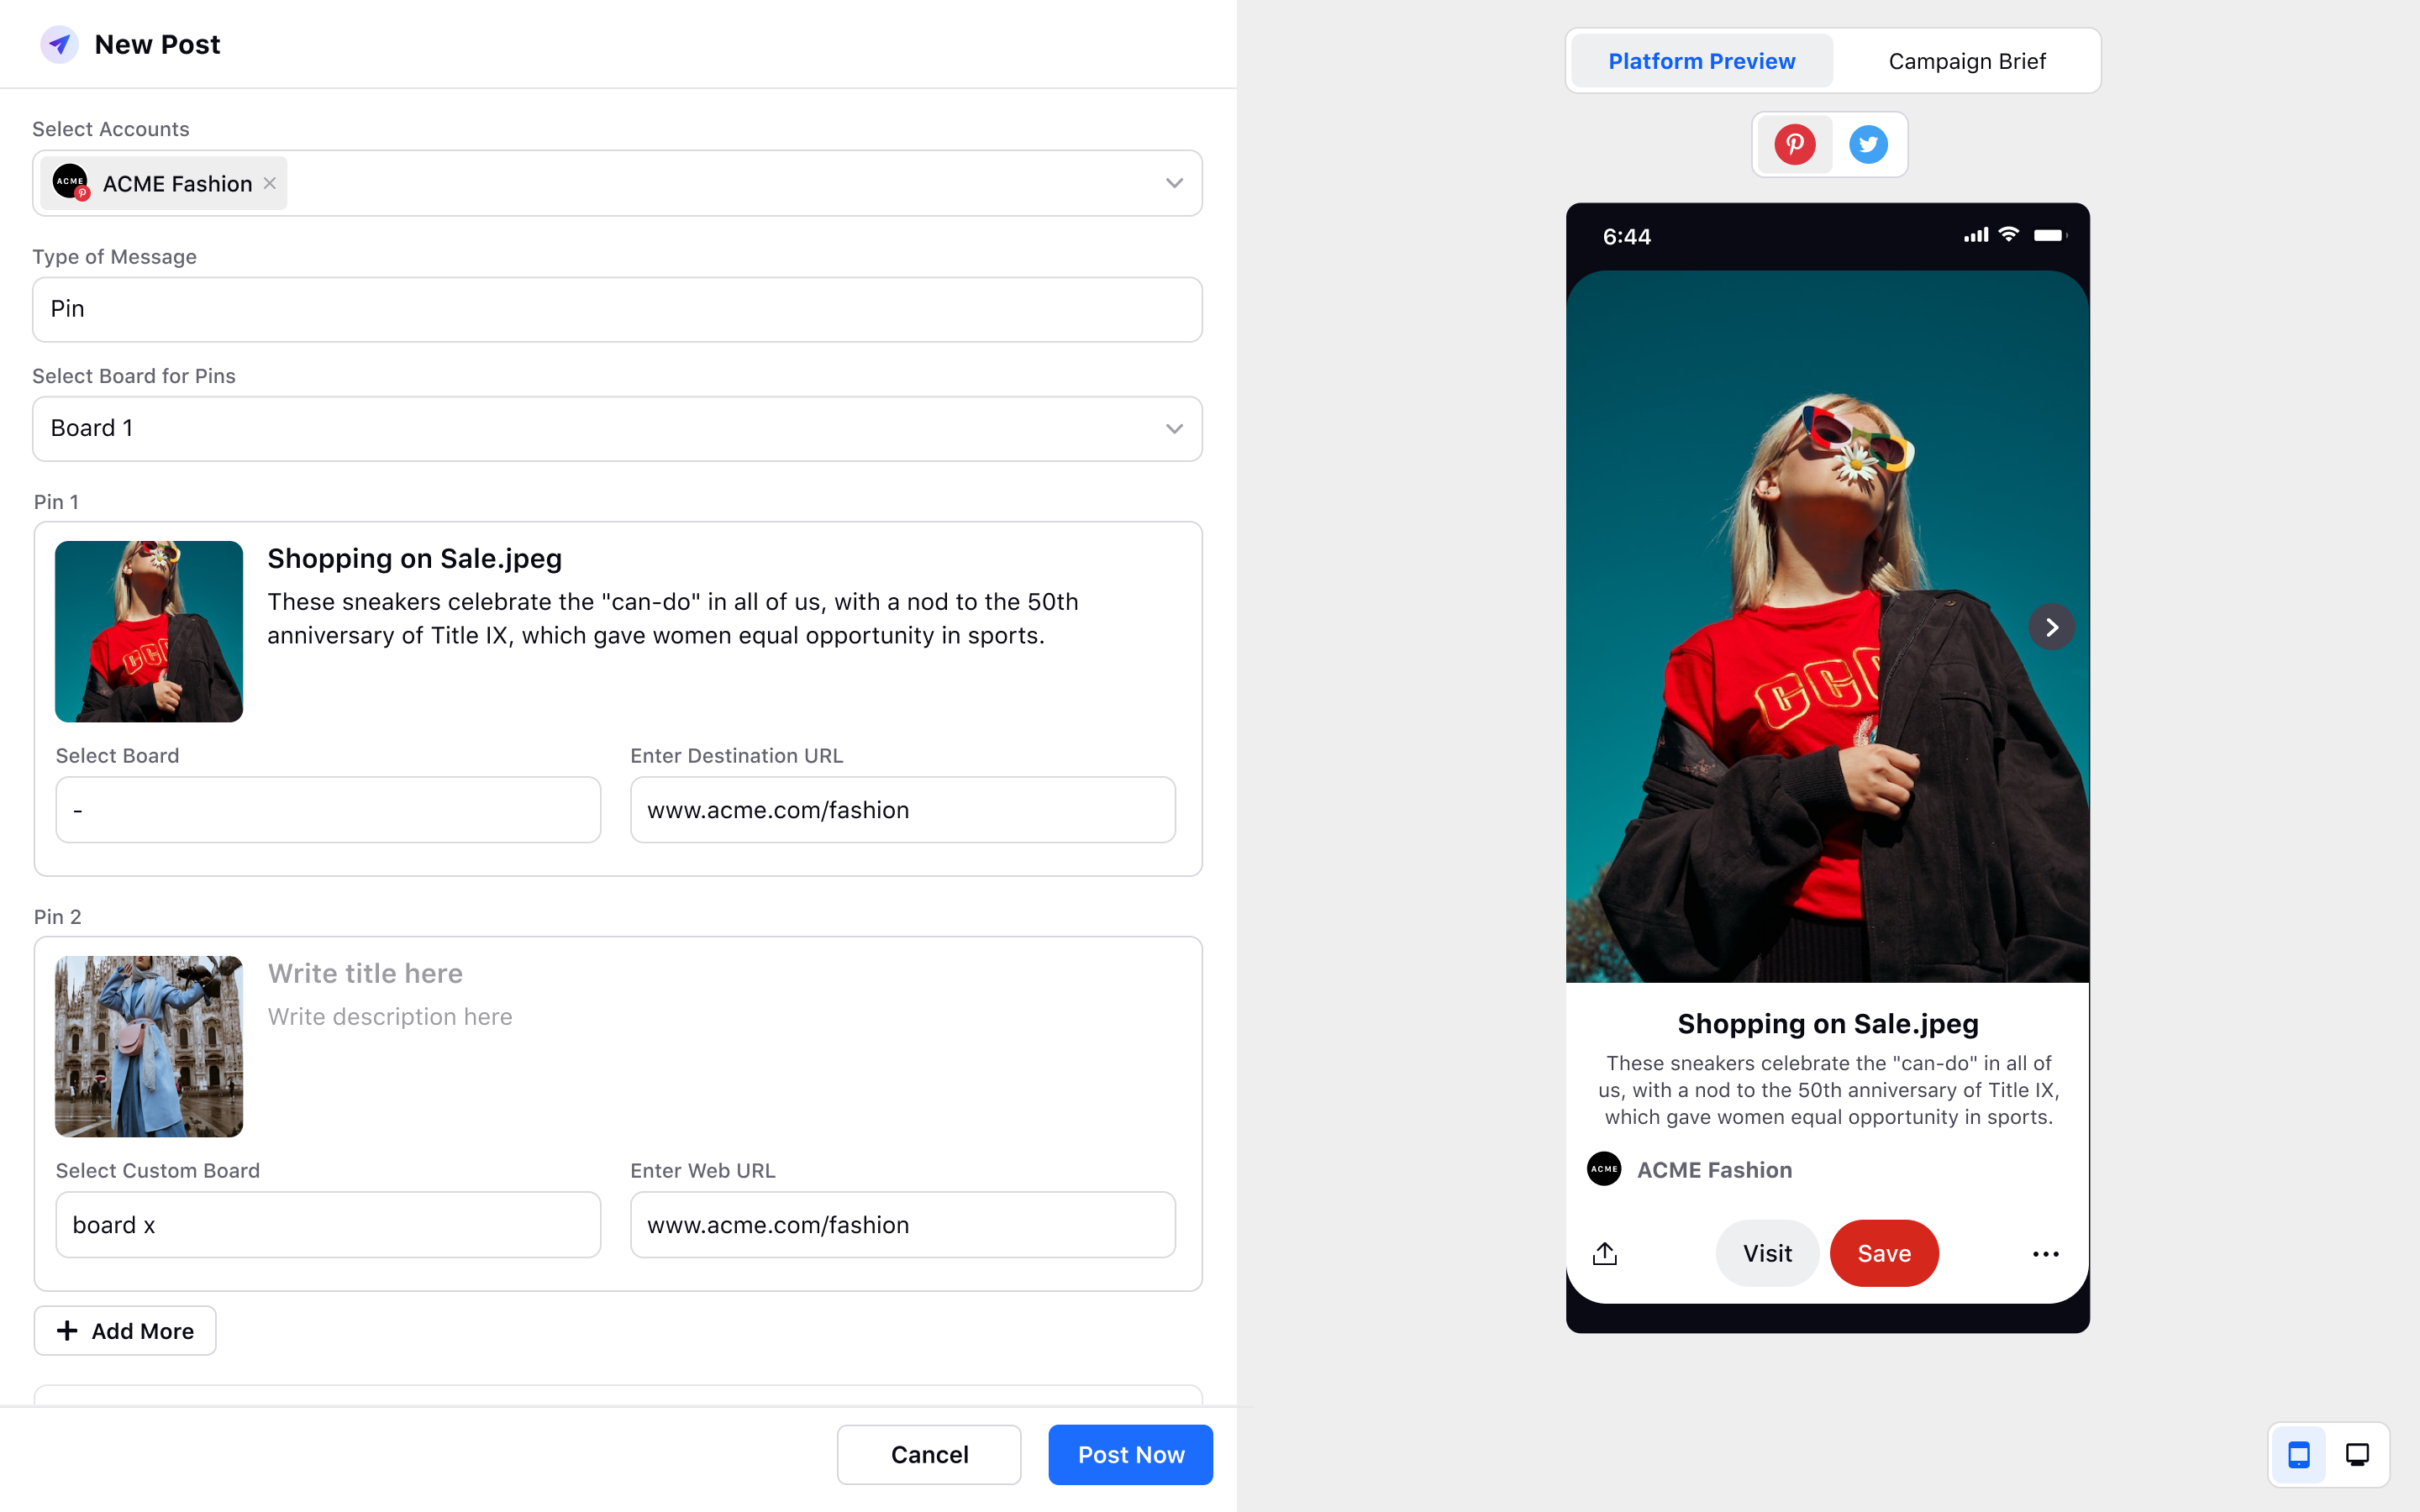
Under the Pin 1 section, add the desired image, provide a suitable title, description, select the desired board and, the destination URL.
You can add more pins and provide the similar details above. Under the Pin 2 section, if no board is selected, you can select the custom board as board x and provide the desired web URL. You can preview the Pinterest post on the right and then click Post Now at the bottom.
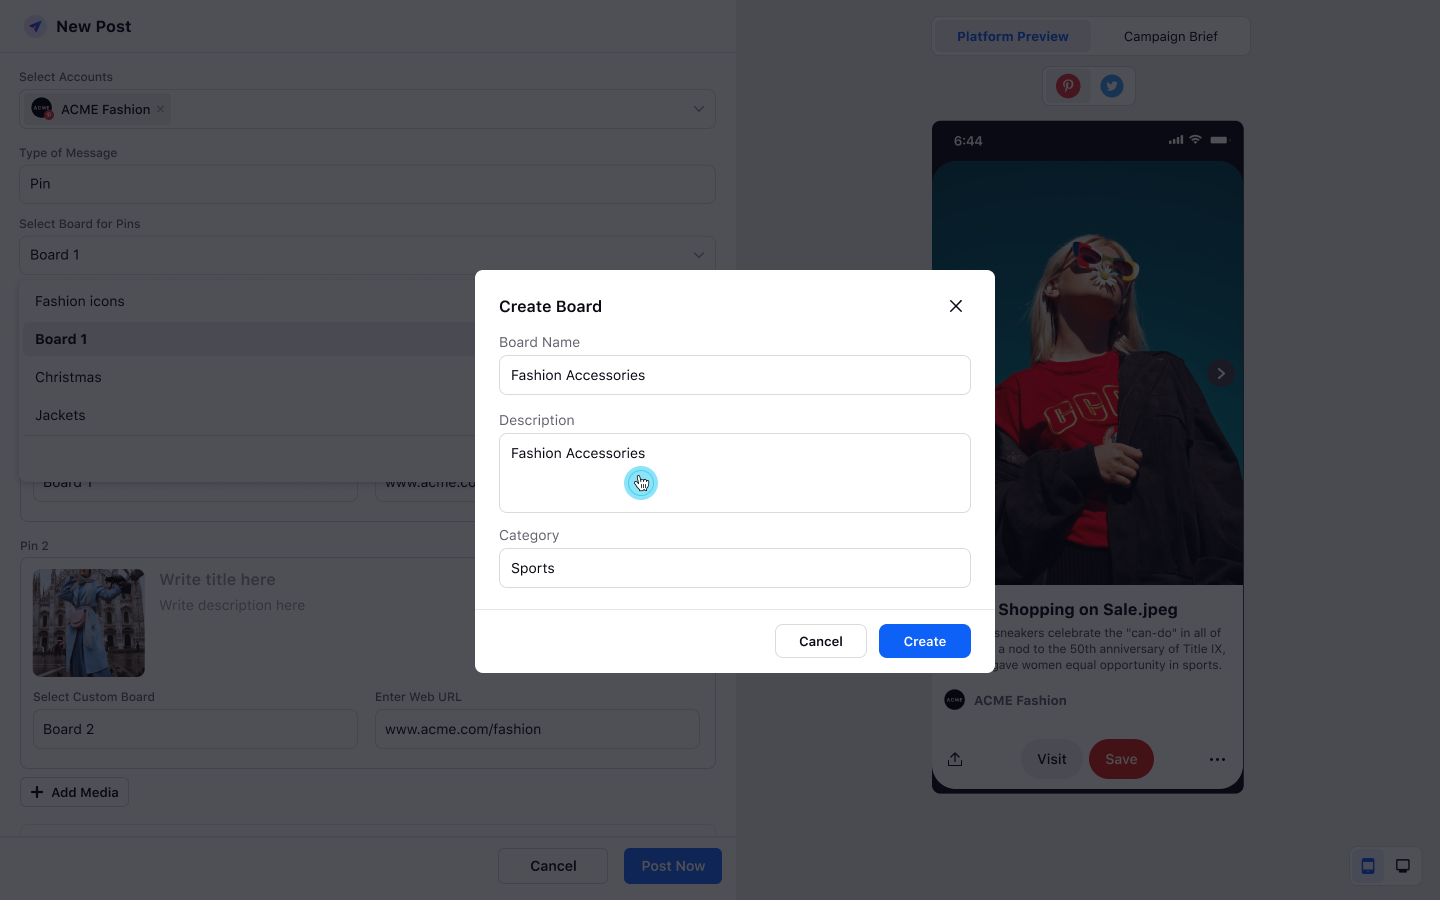
To create Board from the Publisher
Click the + icon from the left pane of Sprinklr Social and the Publisher tool will appear. Keep all the details such as the choice of account, type of message, and board for pins as it is. Now, under the Pin 1 section, click Create new board from the dropdown.
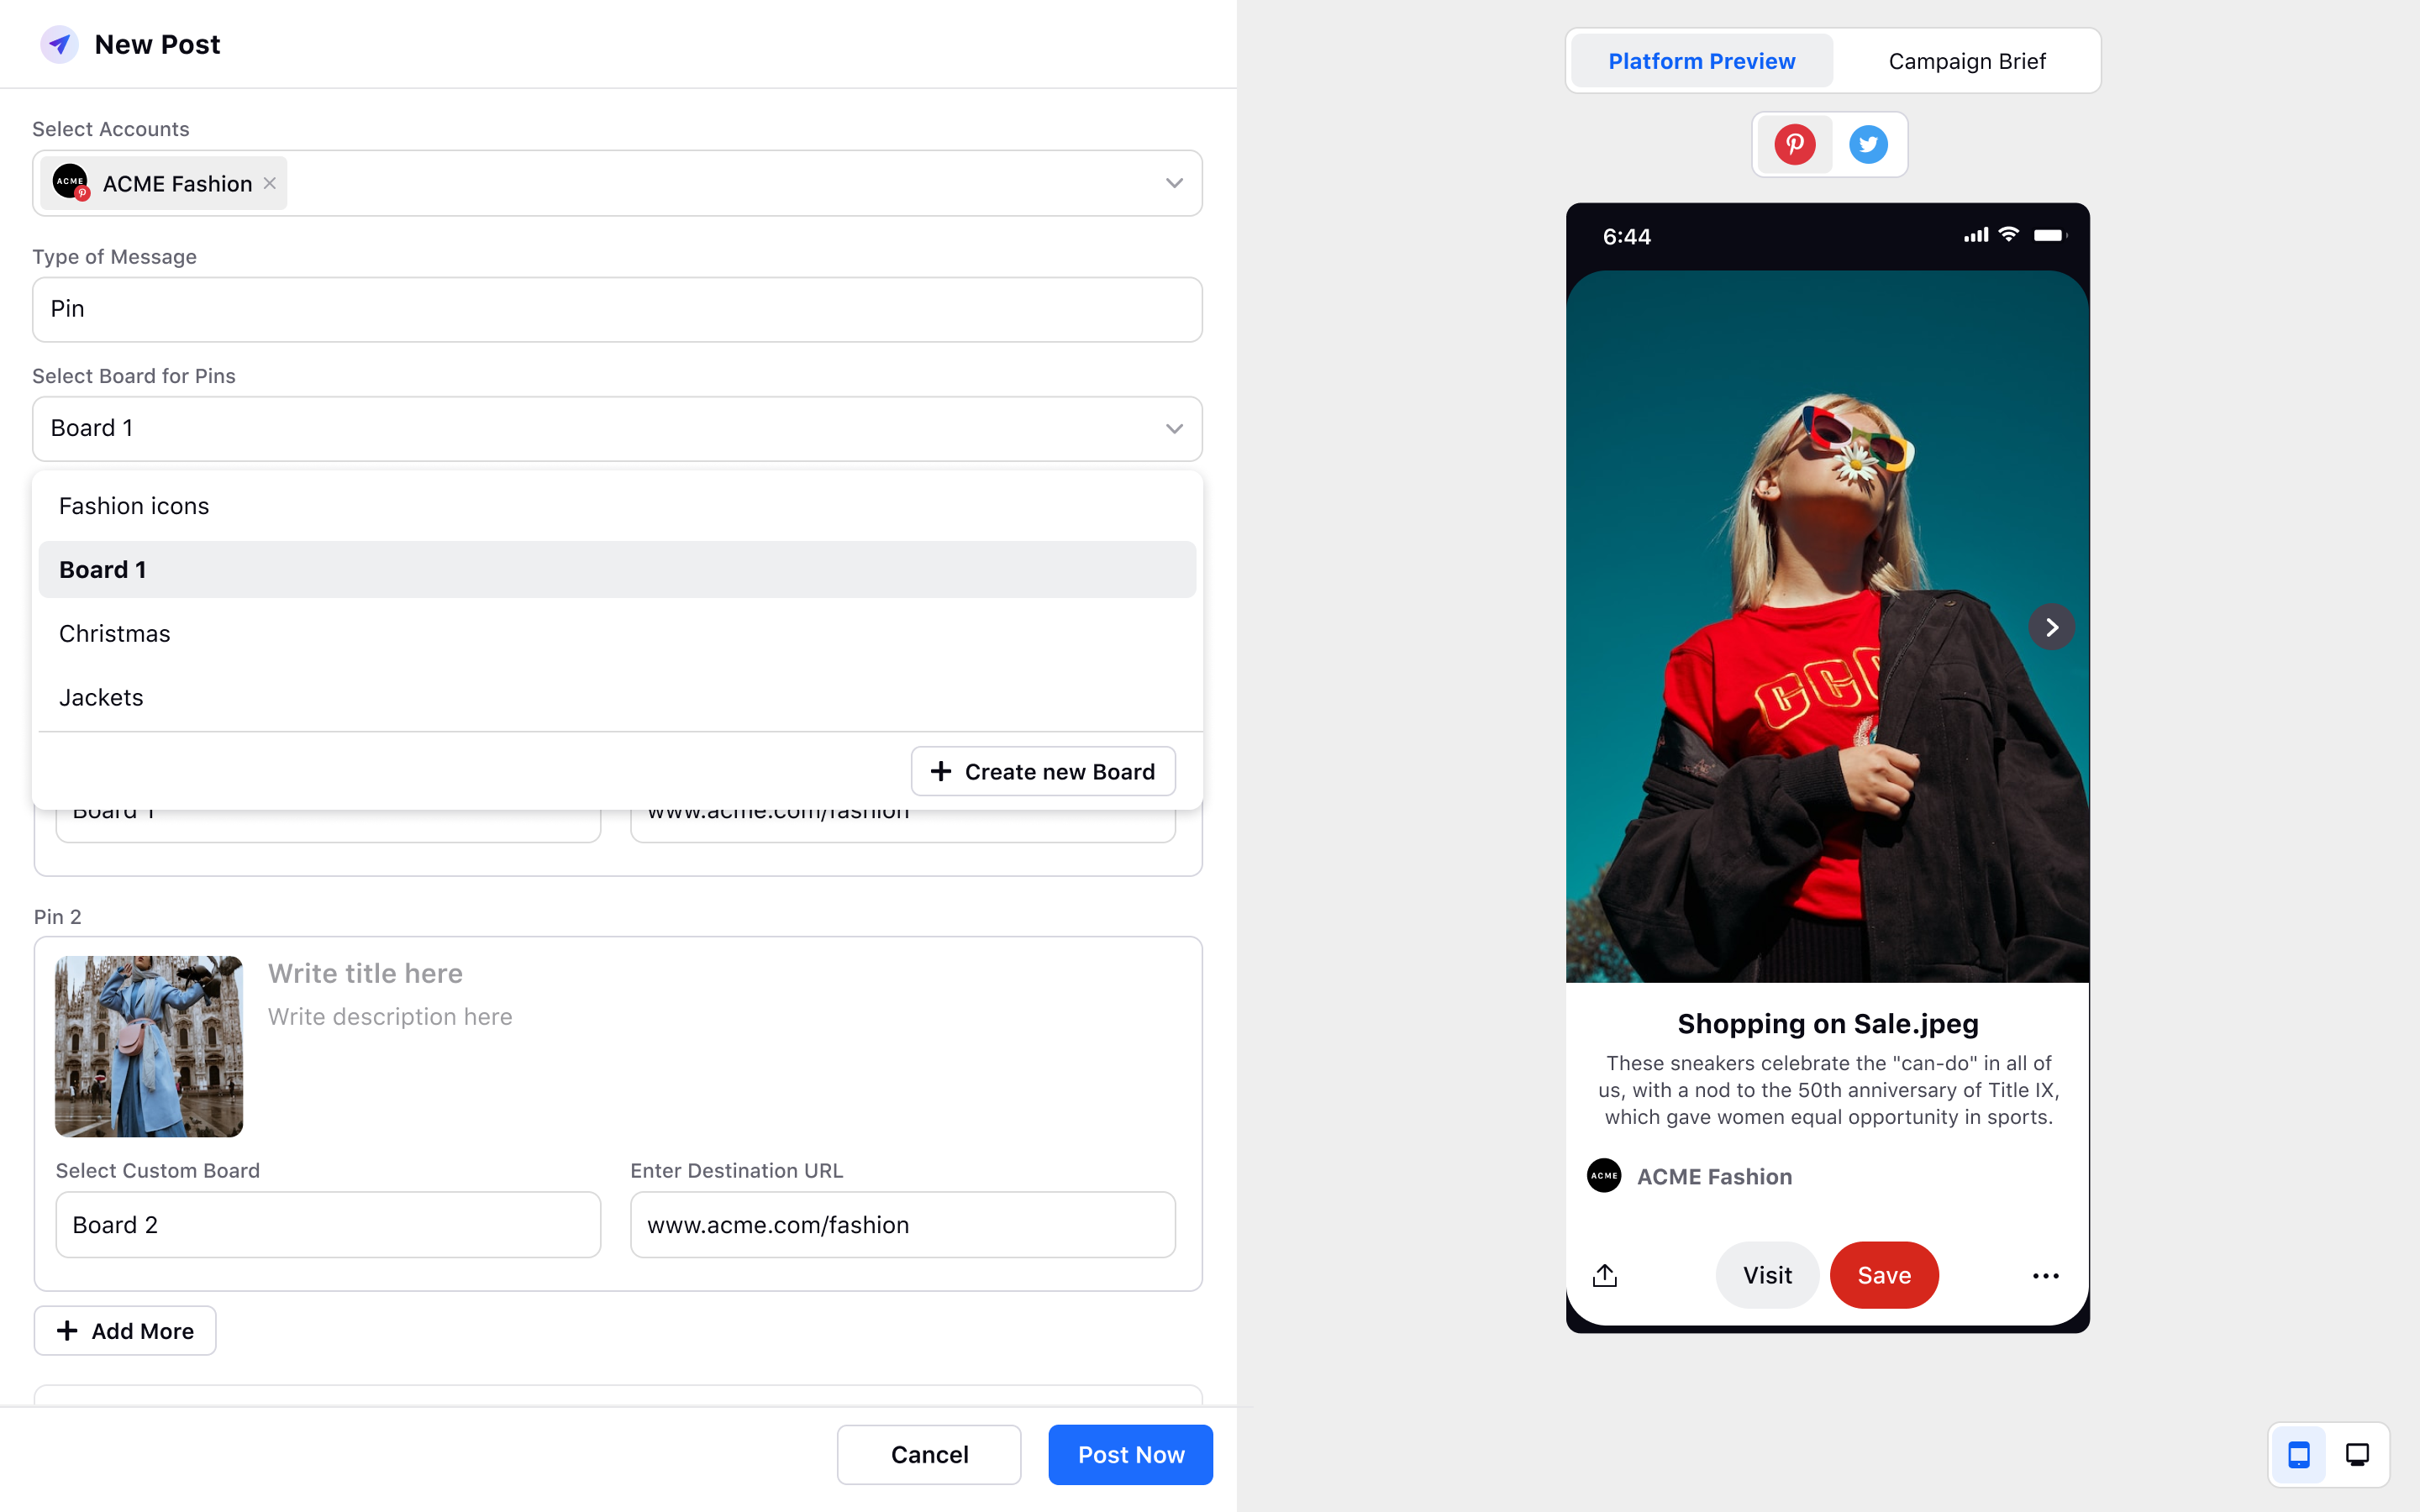
The Create Board window will appear where you need to provide details such as Board Name, Description, and Category. Click Create at the bottom and the new board will be created. As and when you will choose the board from the dropdown in the publisher tool, this new board created will be reflected there.
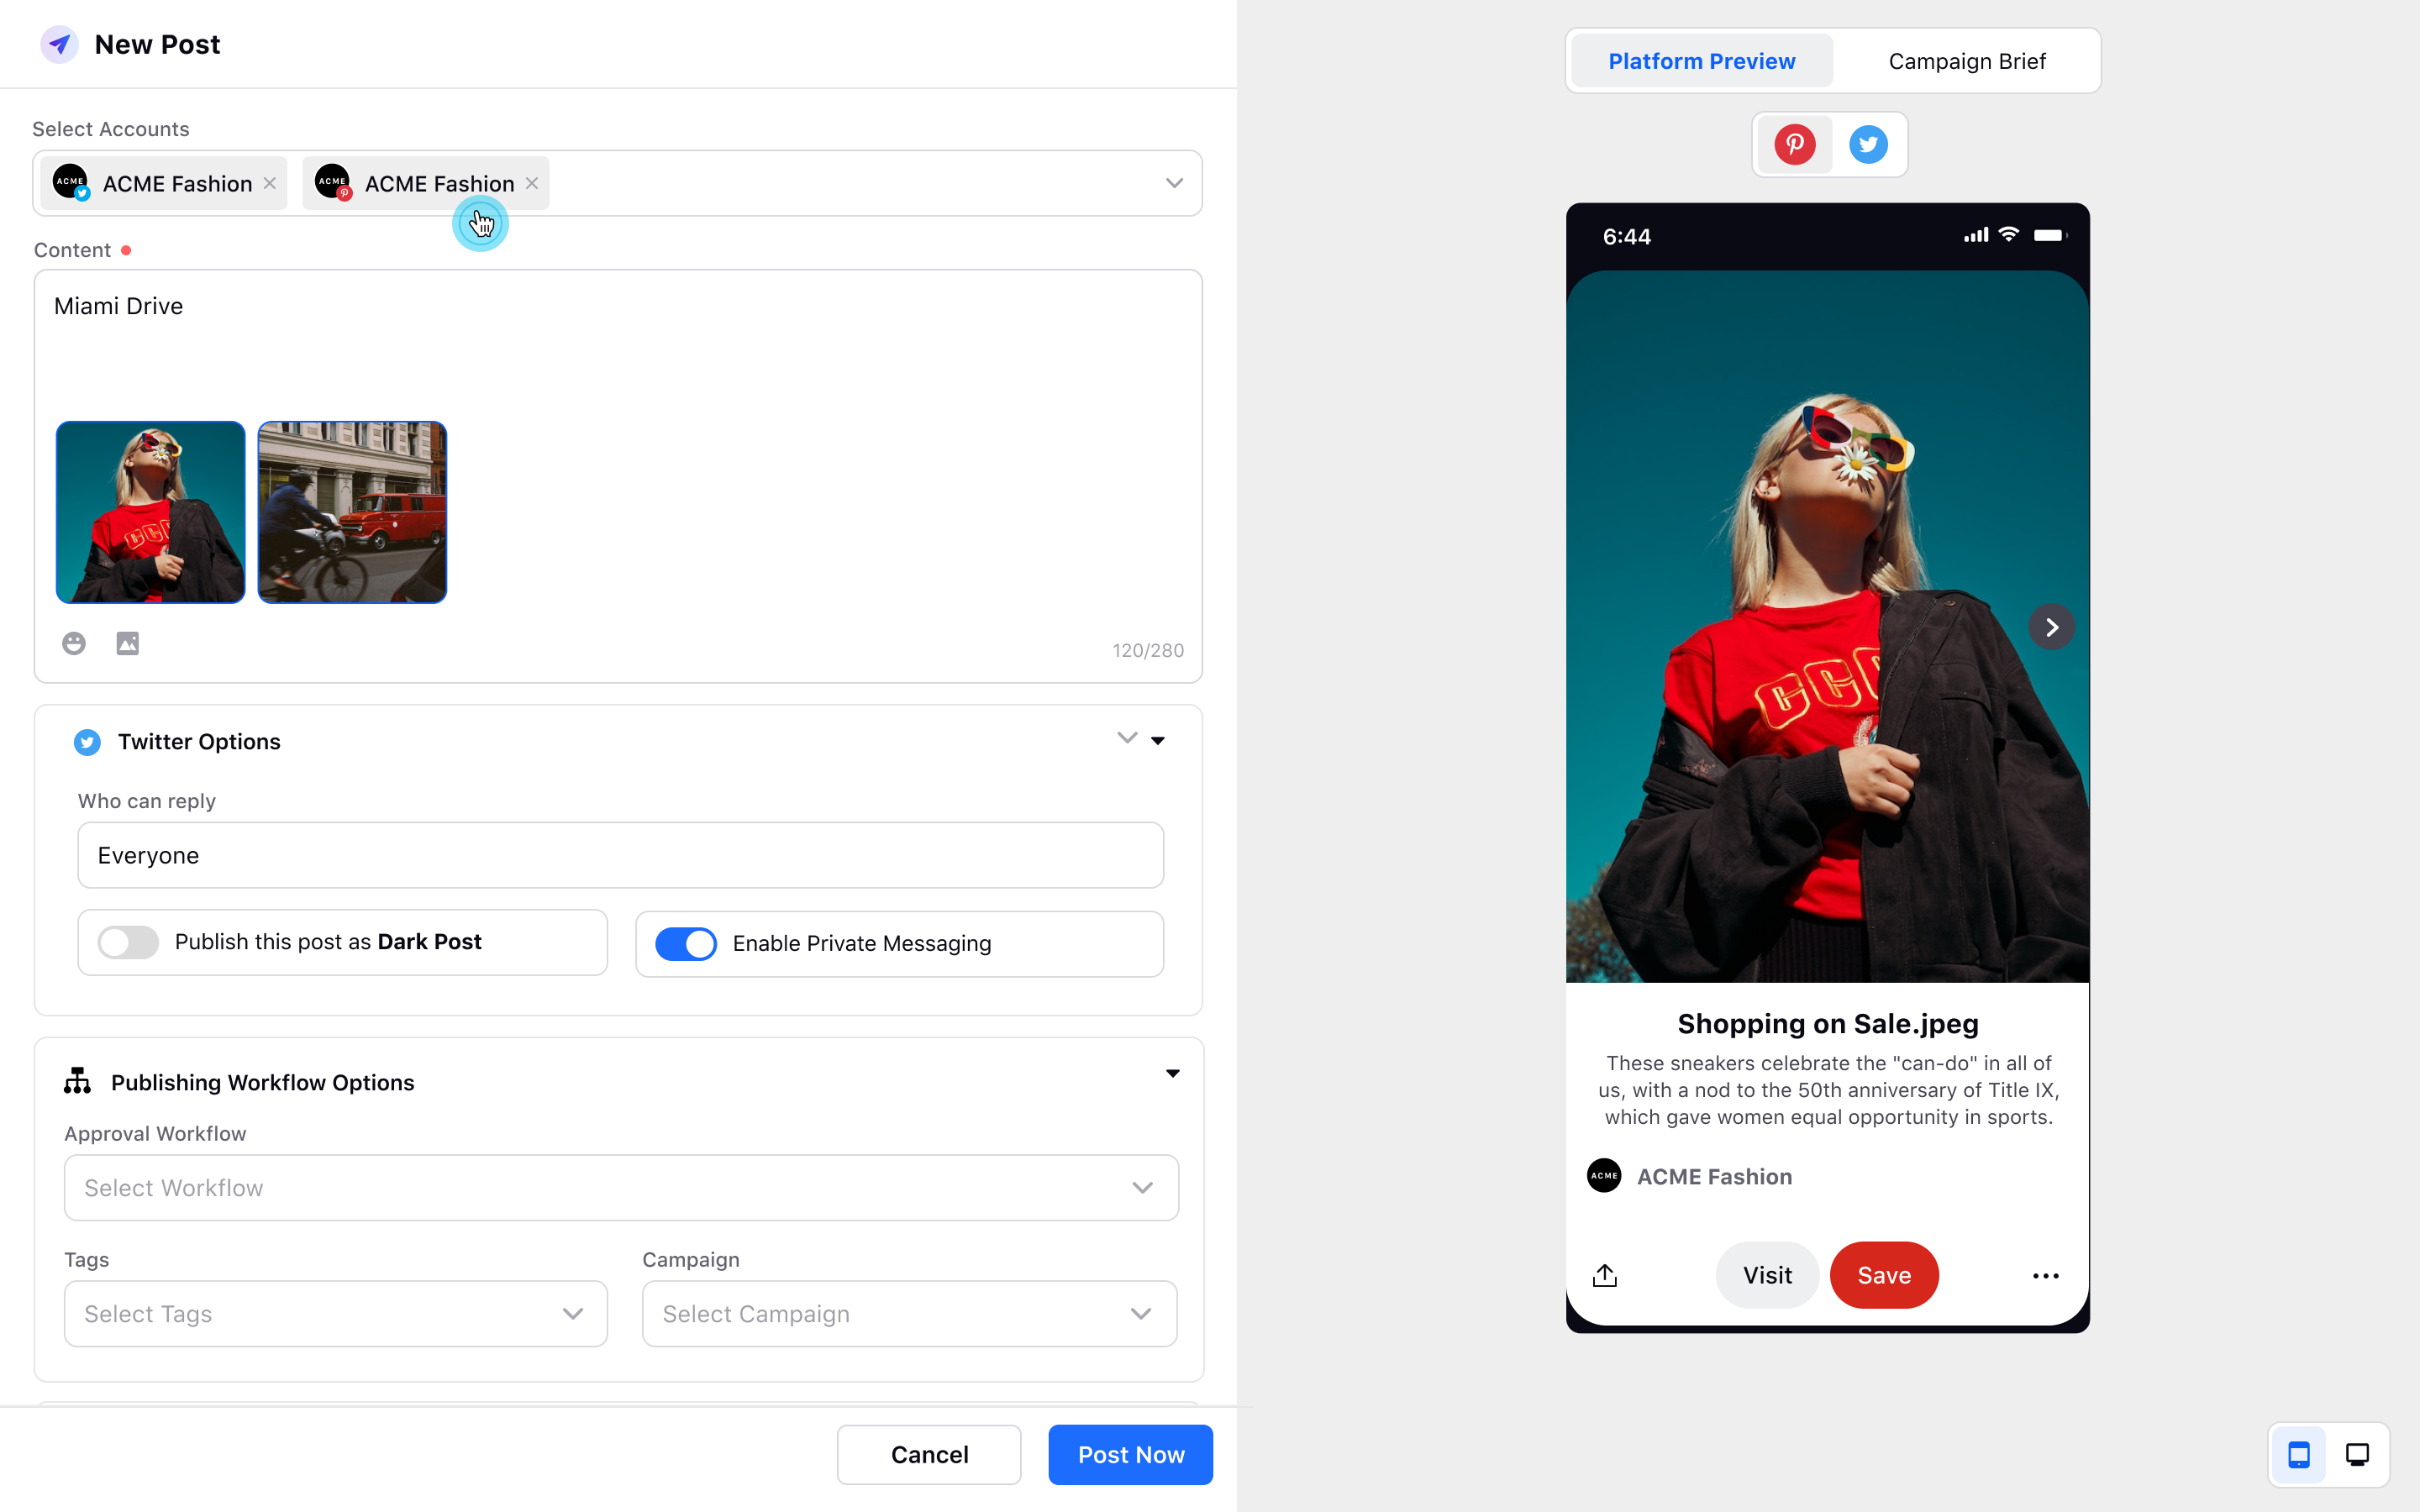
Add Pin from Common Content Editor
Click the + icon from the left pane of Sprinklr Social and the Publisher tool will appear. Choose the choice of account, provide the desired content in the content box. You can add any emoji, media, and text asset to make the content creative and catchy.
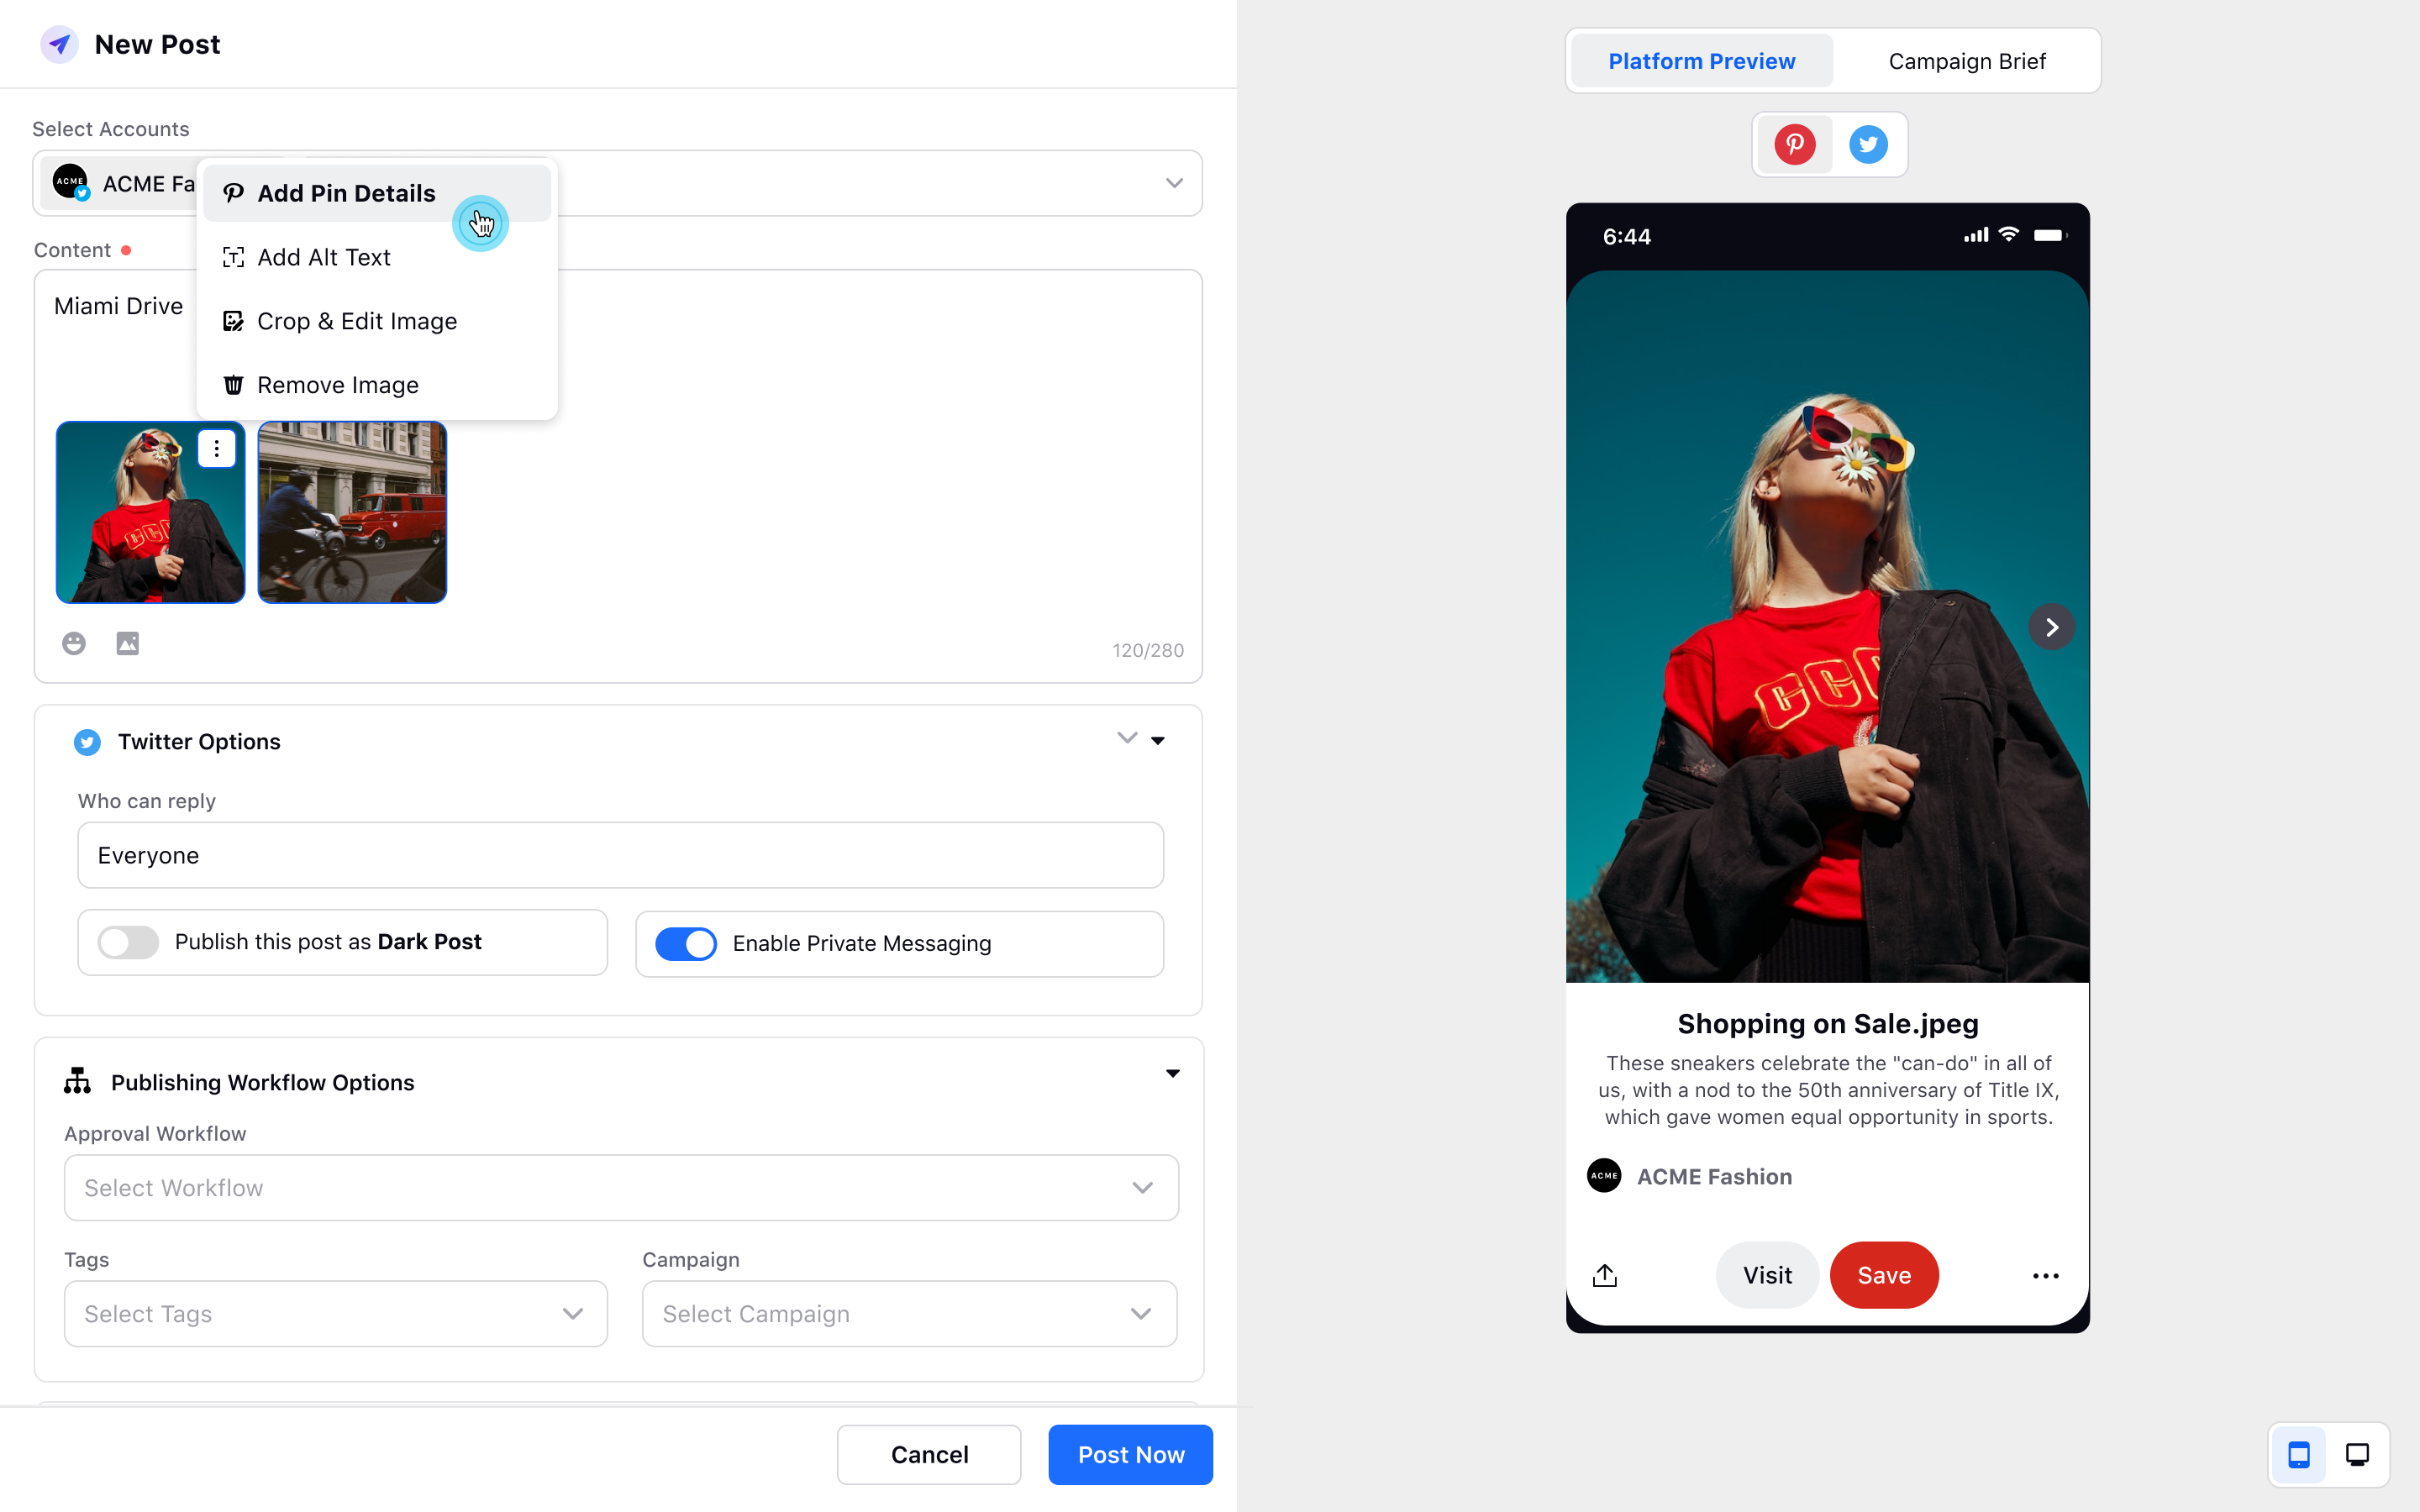
Hover over the selected social account, a drop-down will appear where you need to select Add Pin Details.
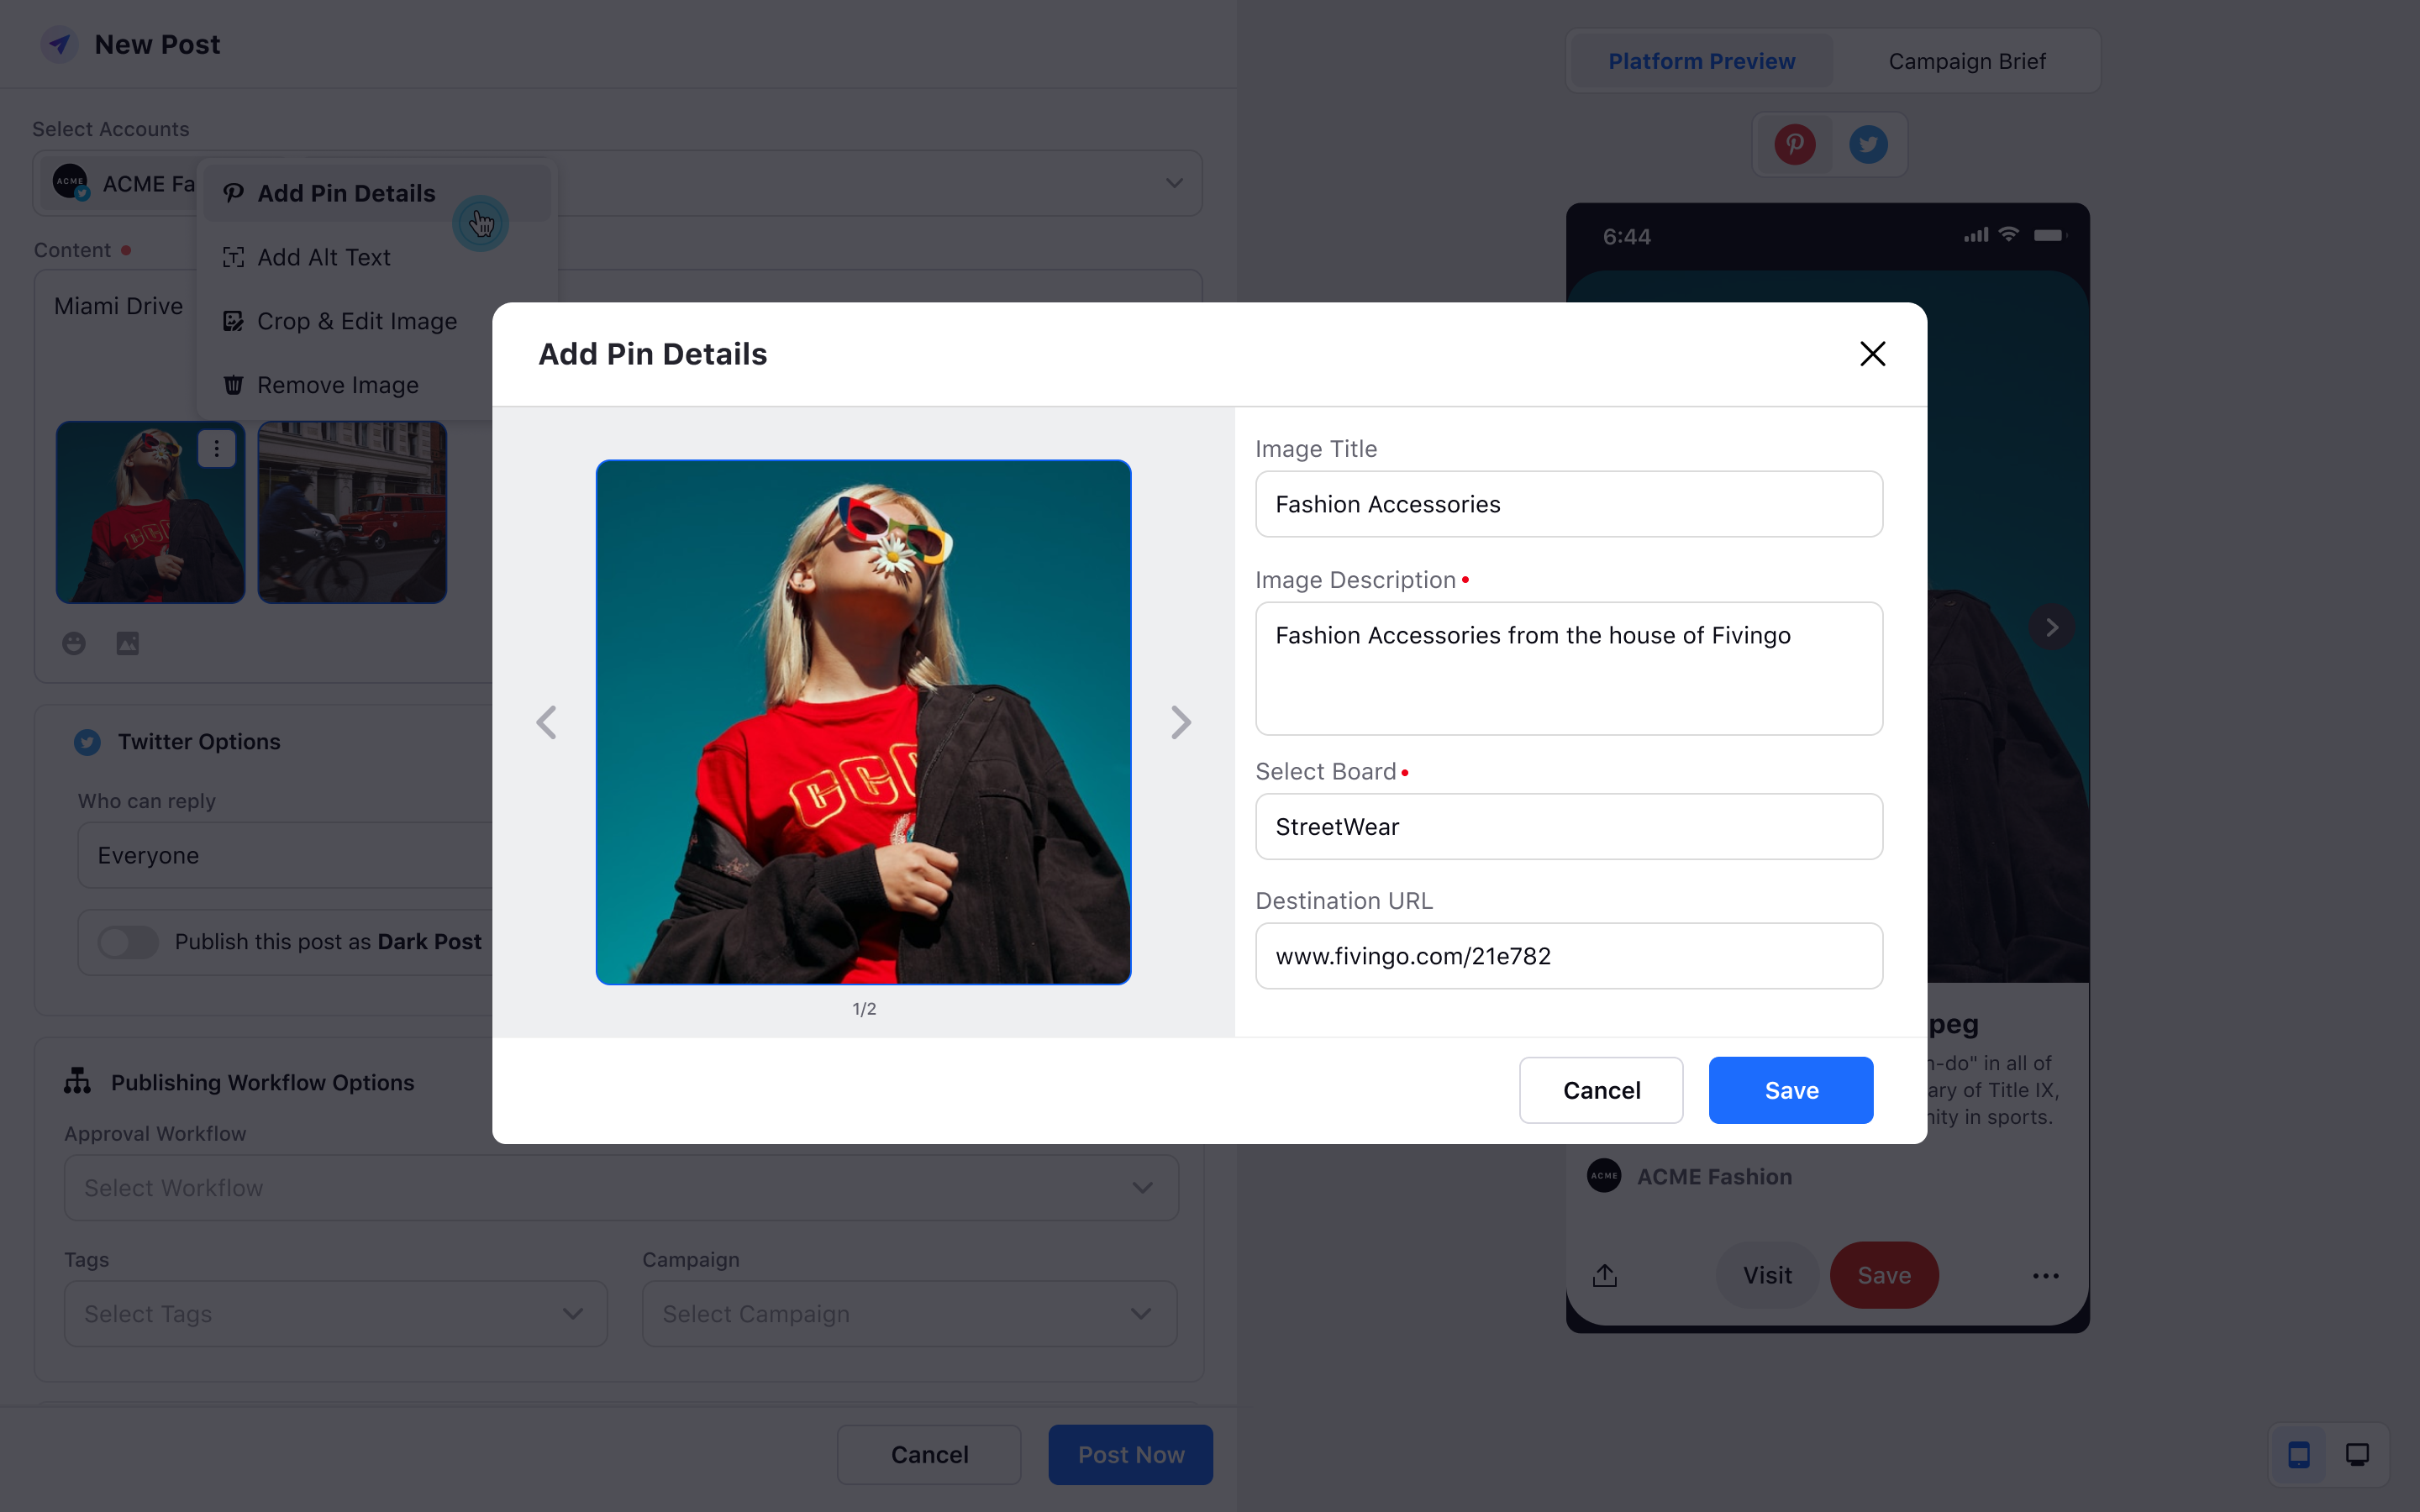
The Add Pin Details window will appear where you need to provide details such as image title, description, board, and the destination URL. Click Save at the bottom after providing all the details.
View Pinterest Post from Calendar in different views
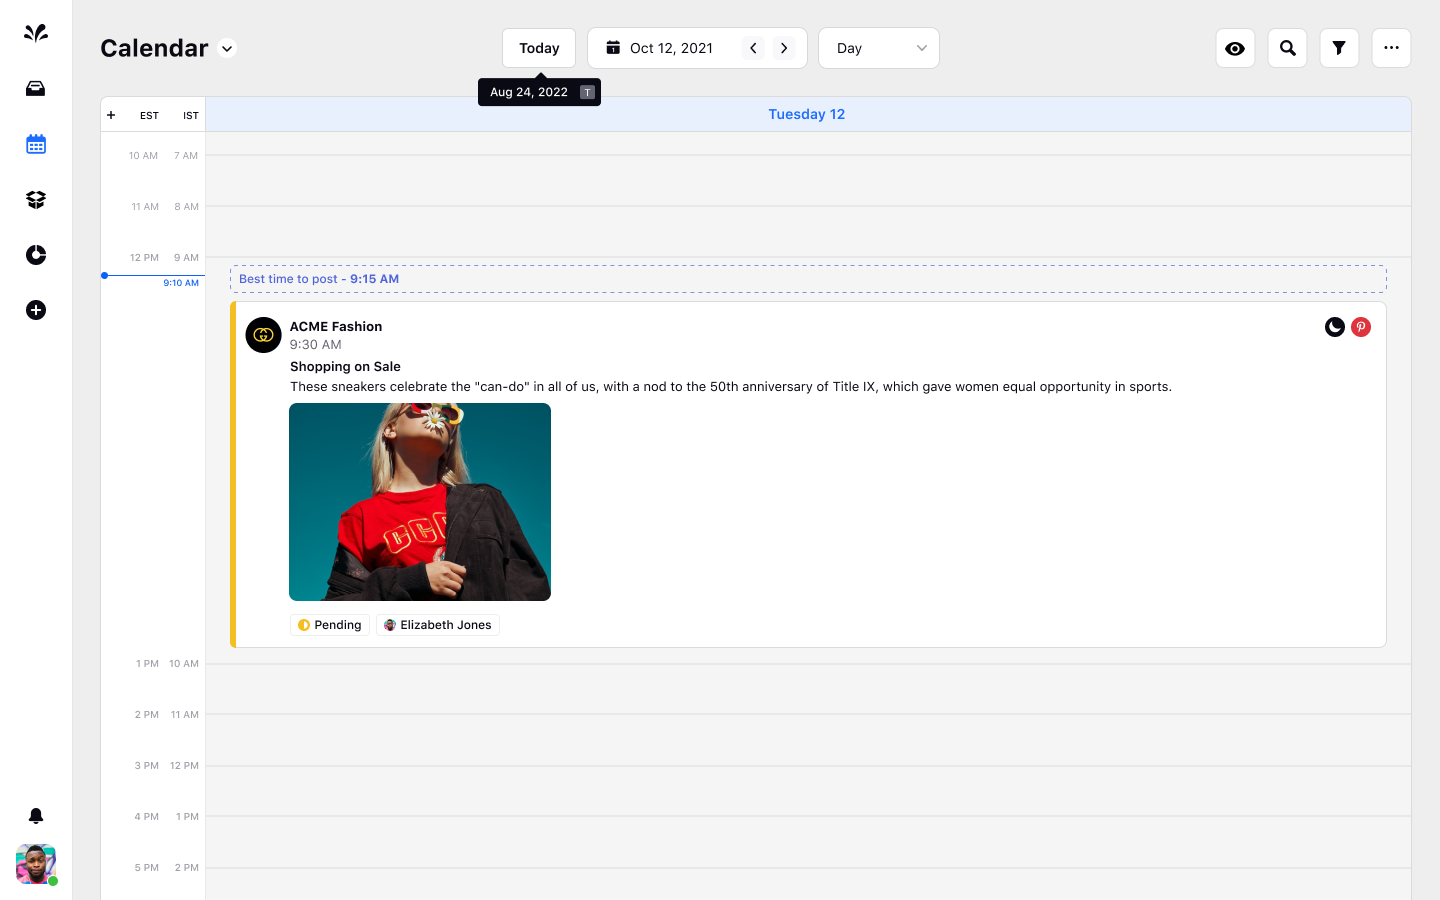
Go to the Publishing icon from the left and select the Calendar option under the Publishing from the left pane. Now, view the Pinterest post for today. Select the date for Today. You can view the Pinterest title, description, and an image.
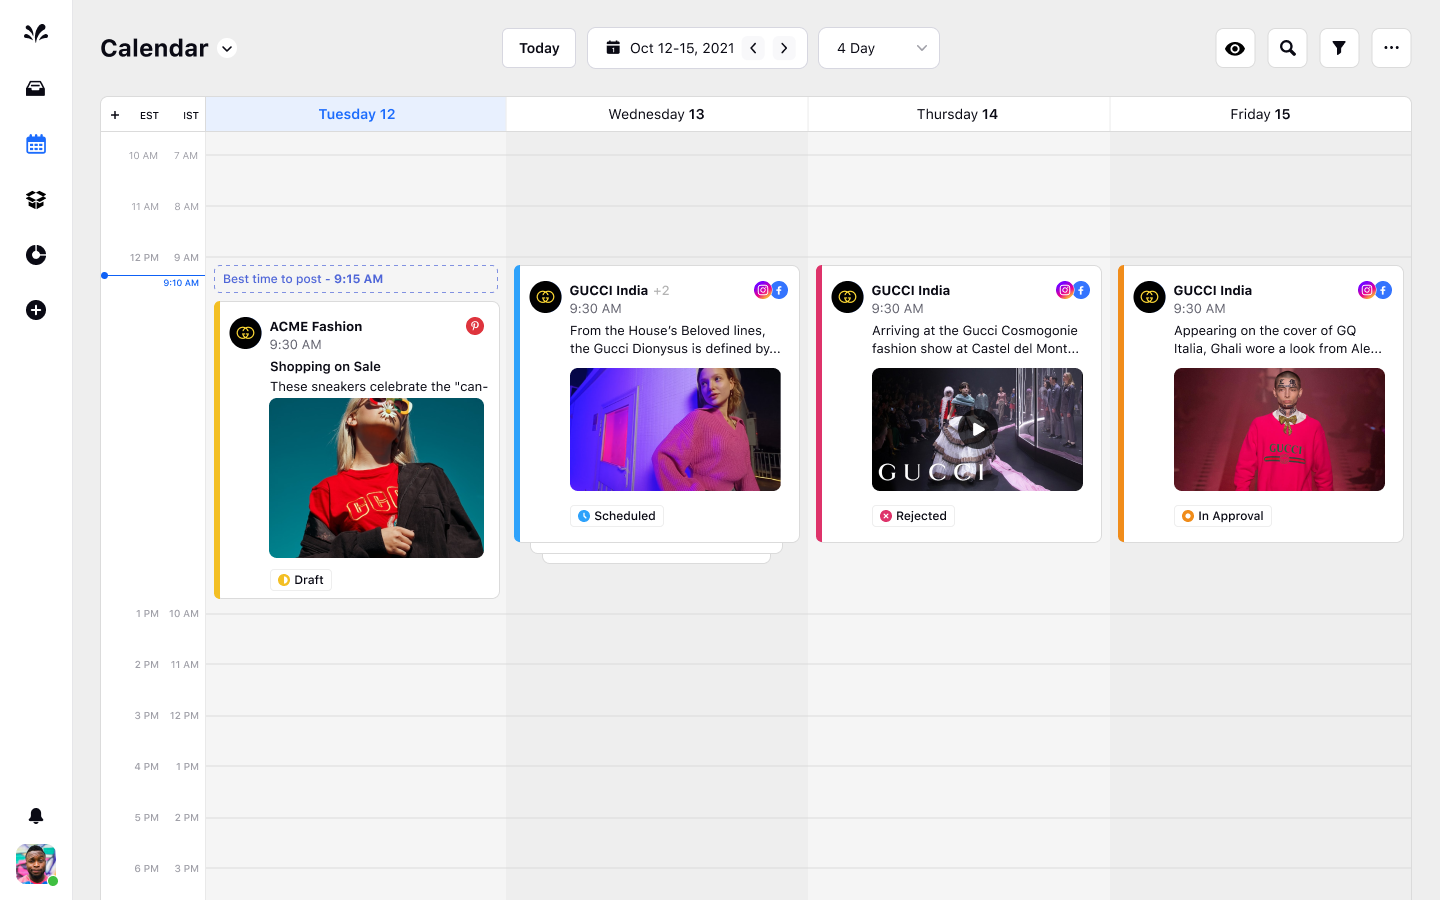
Now change the date of Calendar to a 4-day view. Here, you will view the Pinterest title, description, and an image.
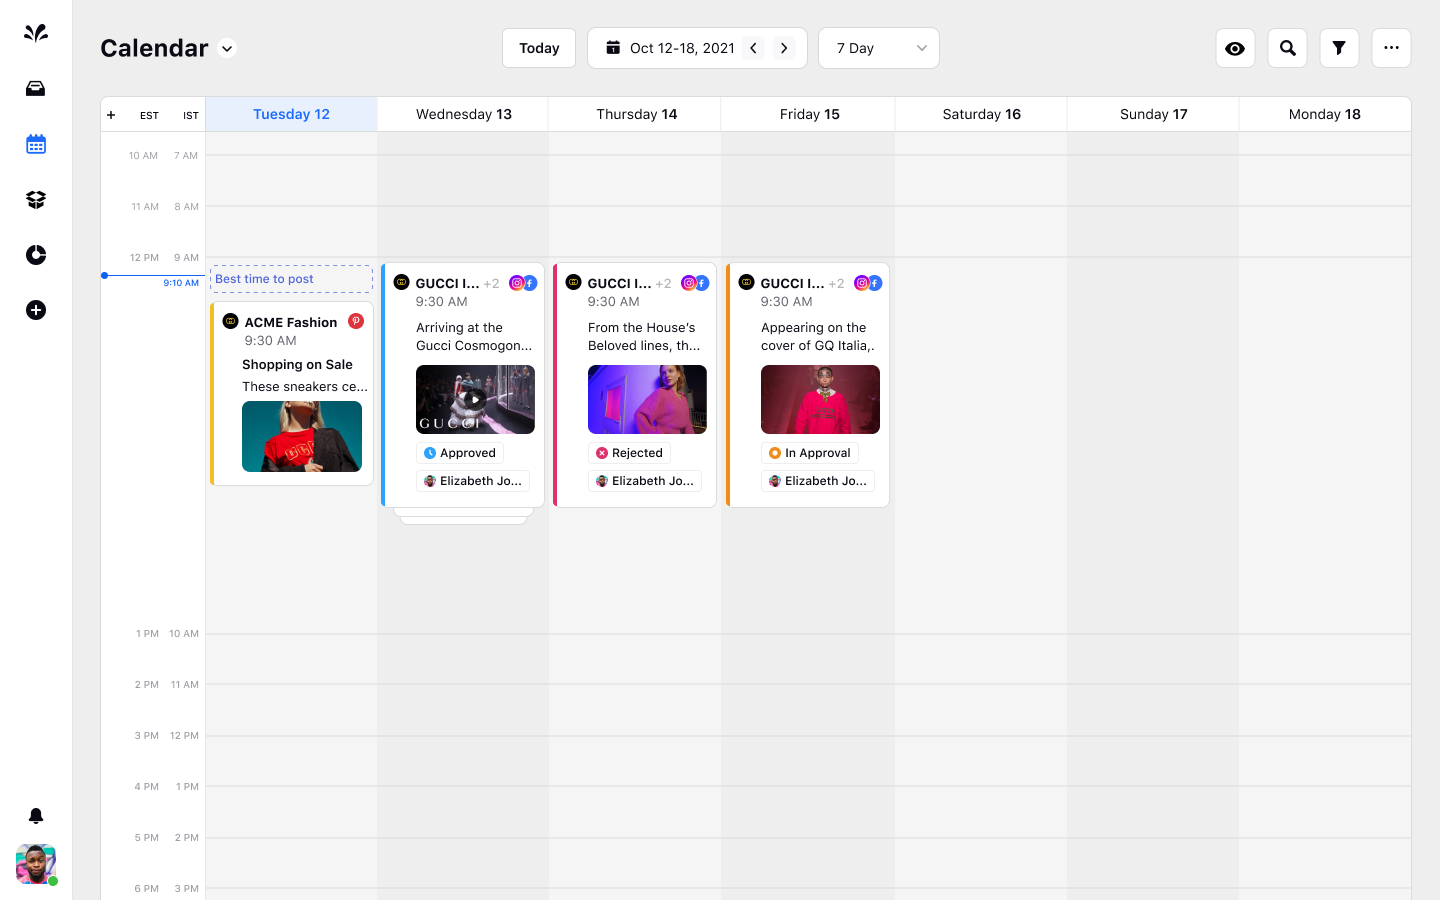
Now change the date of Calendar to a 7-day view. Here, you will view the Pinterest title, description, and an image.
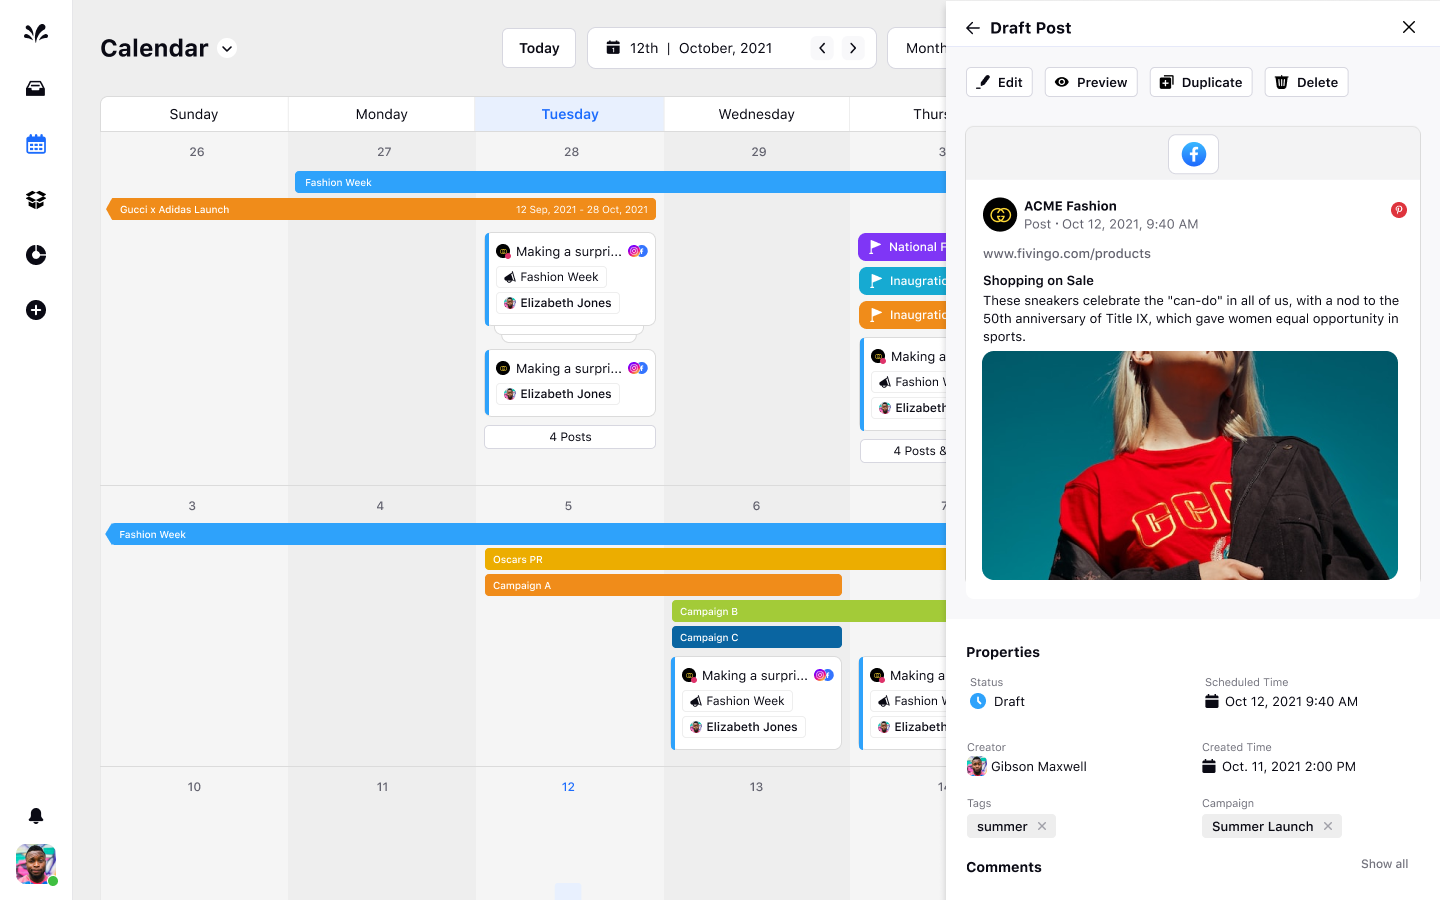
Now change the date of Calendar to a Month view. After clicking the Pinterest post in a month view, the third pane view will open. Here, you will view the Pinterest title, description, destination URL, and an image.
Pinterest: Adding Pin Details and Alt Text
Sprinklr provides a capability to add pin details and Alt text for Pinterest posts - improving the discoverability of your content and making it more likely to appear in relevant searches and recommendations.
Add Pin Details
Click on the Publisher icon from the left pane of Sprinklr Self-serve. The omnichannel publisher will appear where you need to select the Pinterest account.
Provide the required content related to the image. Upload any image from the media. You can preview the image on the right.

Click on the 3 dots icon on the image uploaded and choose Add Pin Details.

Add Pin Details form will appear where you need to provide the Image title, description, board, and destination URL. Click Save at the bottom right. The Pin details will be added to the Pinterest image.

Add Alt Text
Click on the Publisher icon from the left pane of Sprinklr Self-serve. The omnichannel publisher will appear where you need to select the Pinterest account.
Provide the required content related to the image. Upload any image from the media. You can preview the image on the right.
Click on the 3 dots icon on the image uploaded and choose Add Alt Text.
Add Alt Text form will appear where you need to provide the Image description. Click Save at the bottom right. The Alt text details will be added to the Pinterest image.
