
SSO with SAML
Updated
Set up Single Sign-On
Single Sign-On capability replaces standard email/password login to Sprinklr. It will enable login using the customer’s company credentials. This adds convenience for the customer as they have fewer logins that they need to create and remember. Additionally, it increases security as when any individual leaves the company they will lose Sprinklr access as well.
Common SSO Providers
Sprinklr supports any identity provider that is compliant with SAML.
Okta
ADFS (Azure)
Salesforce
How to enable SSO with SAML ?
Navigate to Settings, and search for Security and Personalization under Global Governance.
Here, you'll see three options : IP Whitelisting, Custom Domain, Personalized Login page, and SSO with SAML. Switch On the Toggle for Custom Domain and setup your custom domain.
For more information on Custom Domain, visit: Setting up Custom DomainYou can enable Enable SSO with SAML login once you have setup your Custom Domain.
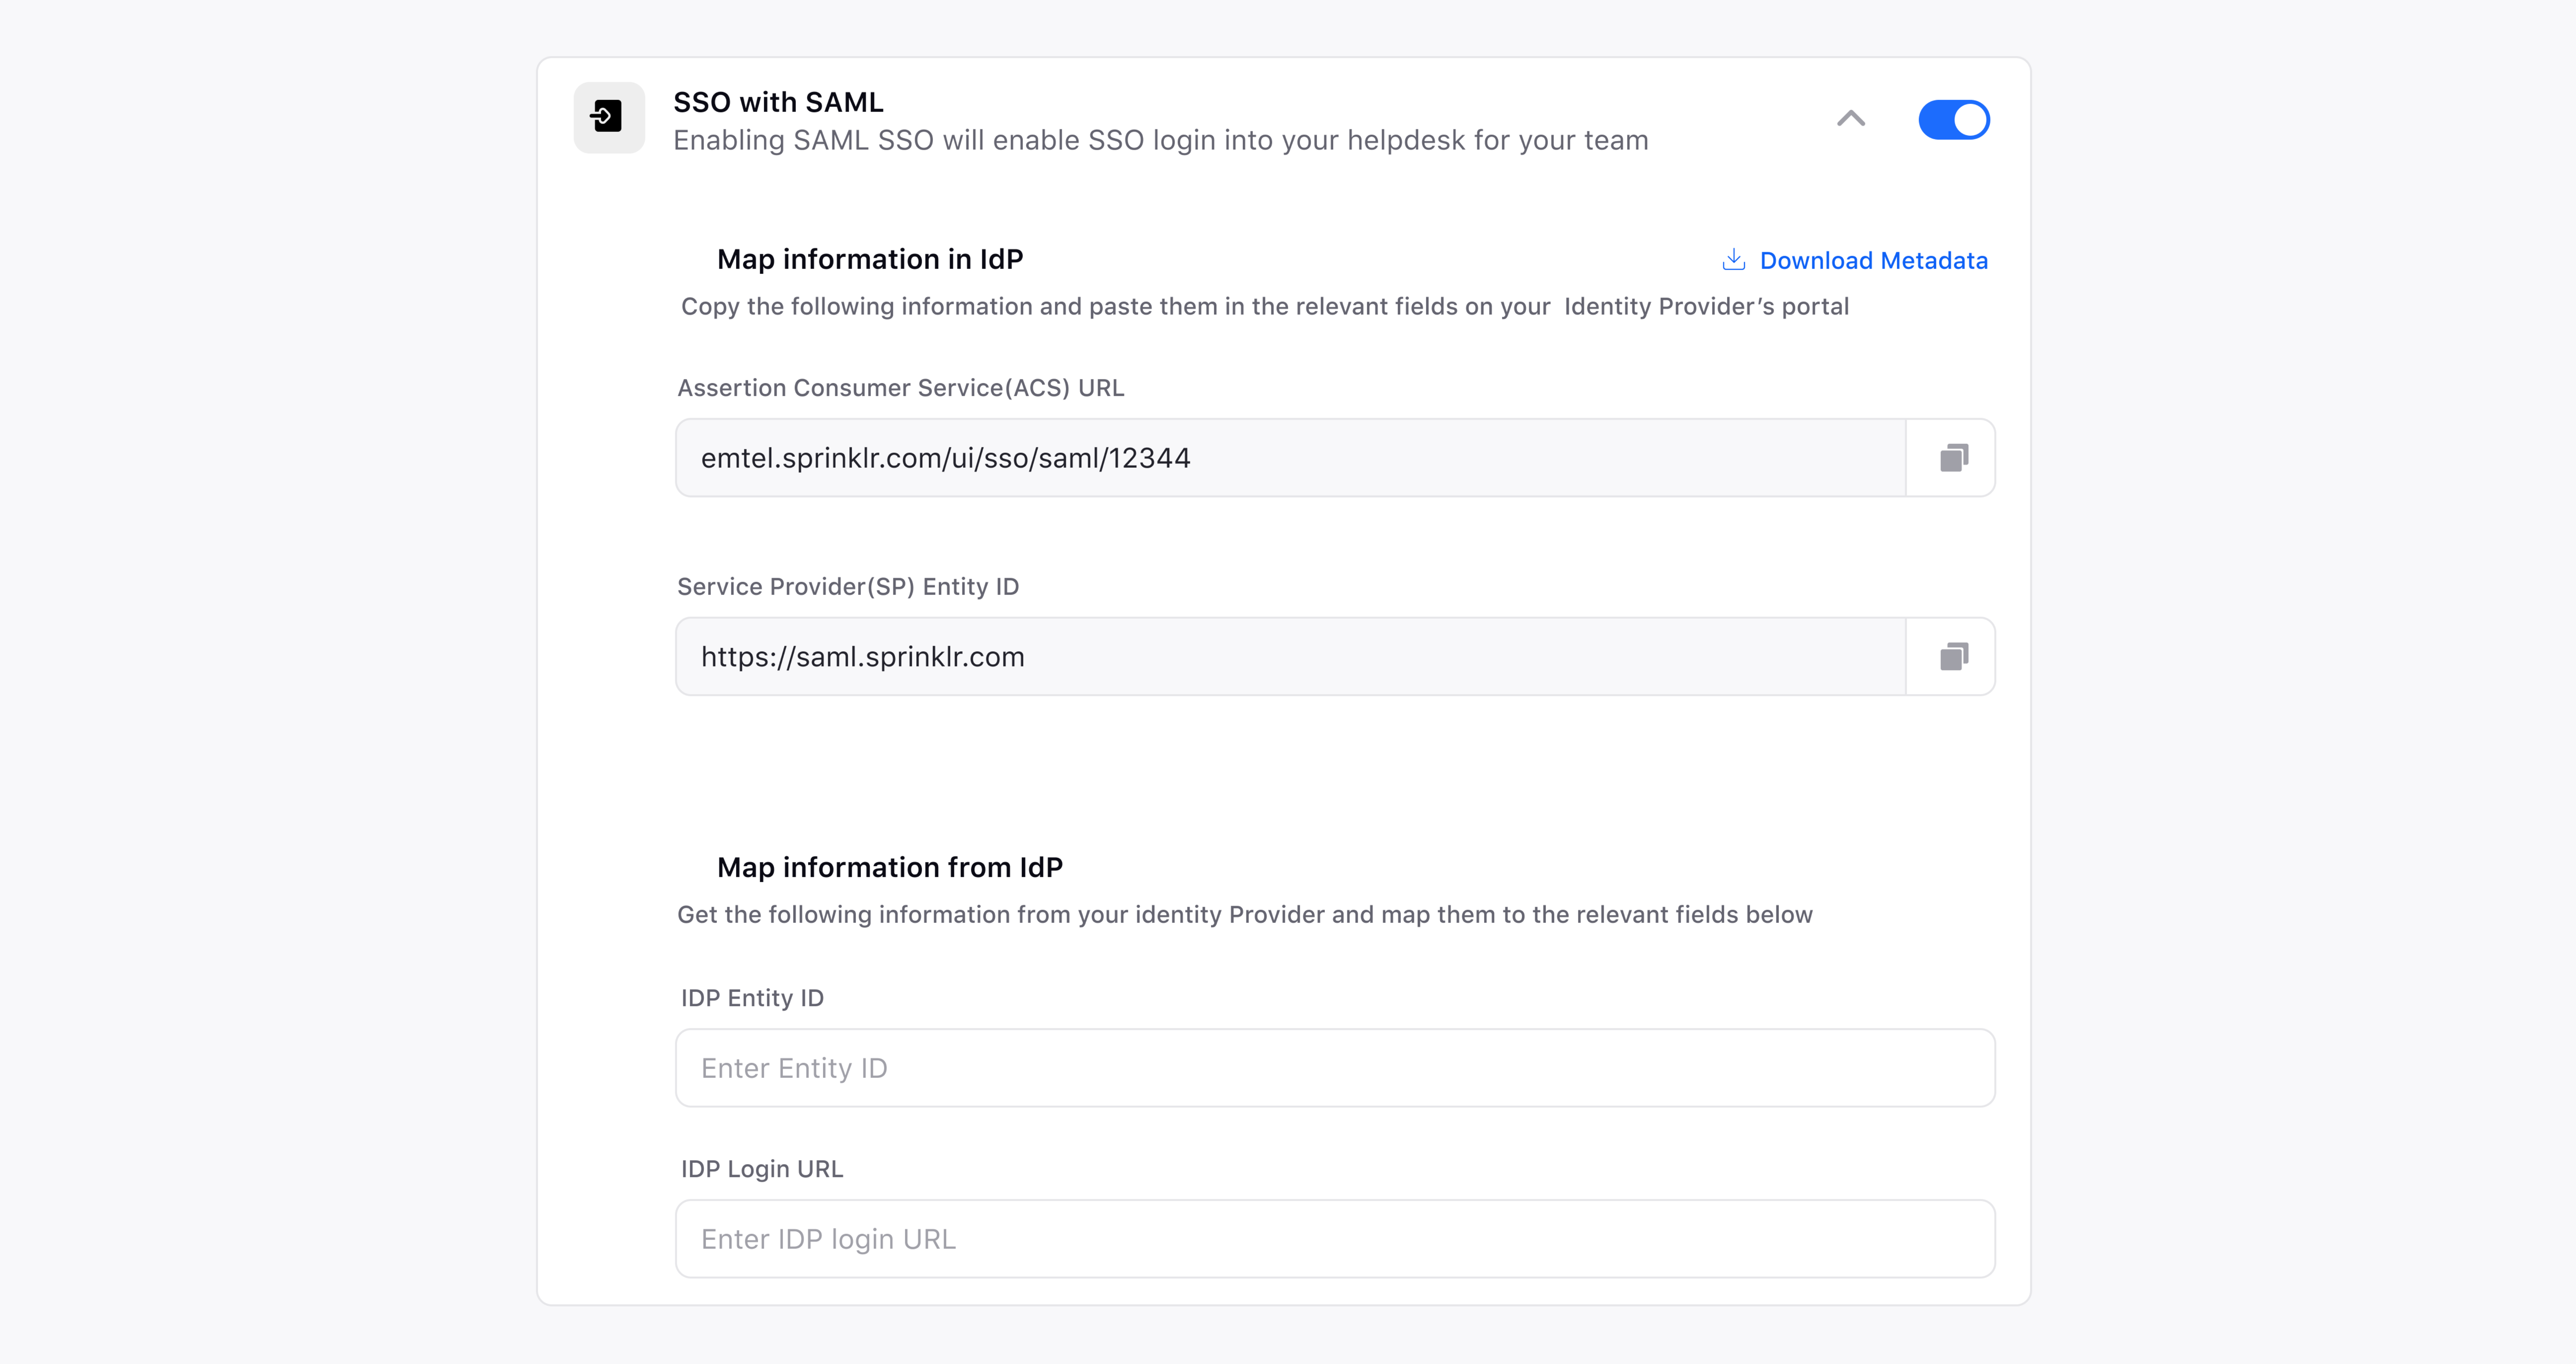
Switch the Toggle On to view options for SSO with SAML login.
Use the pre-configured Map information in IdP in your SAML provider to setup your SSO Login. Copy the given information and paste them in the relevant fields on your Identity Provider’s portal.
Map information from IdP can be fetched from the configuration/settings page of your SAML provider.
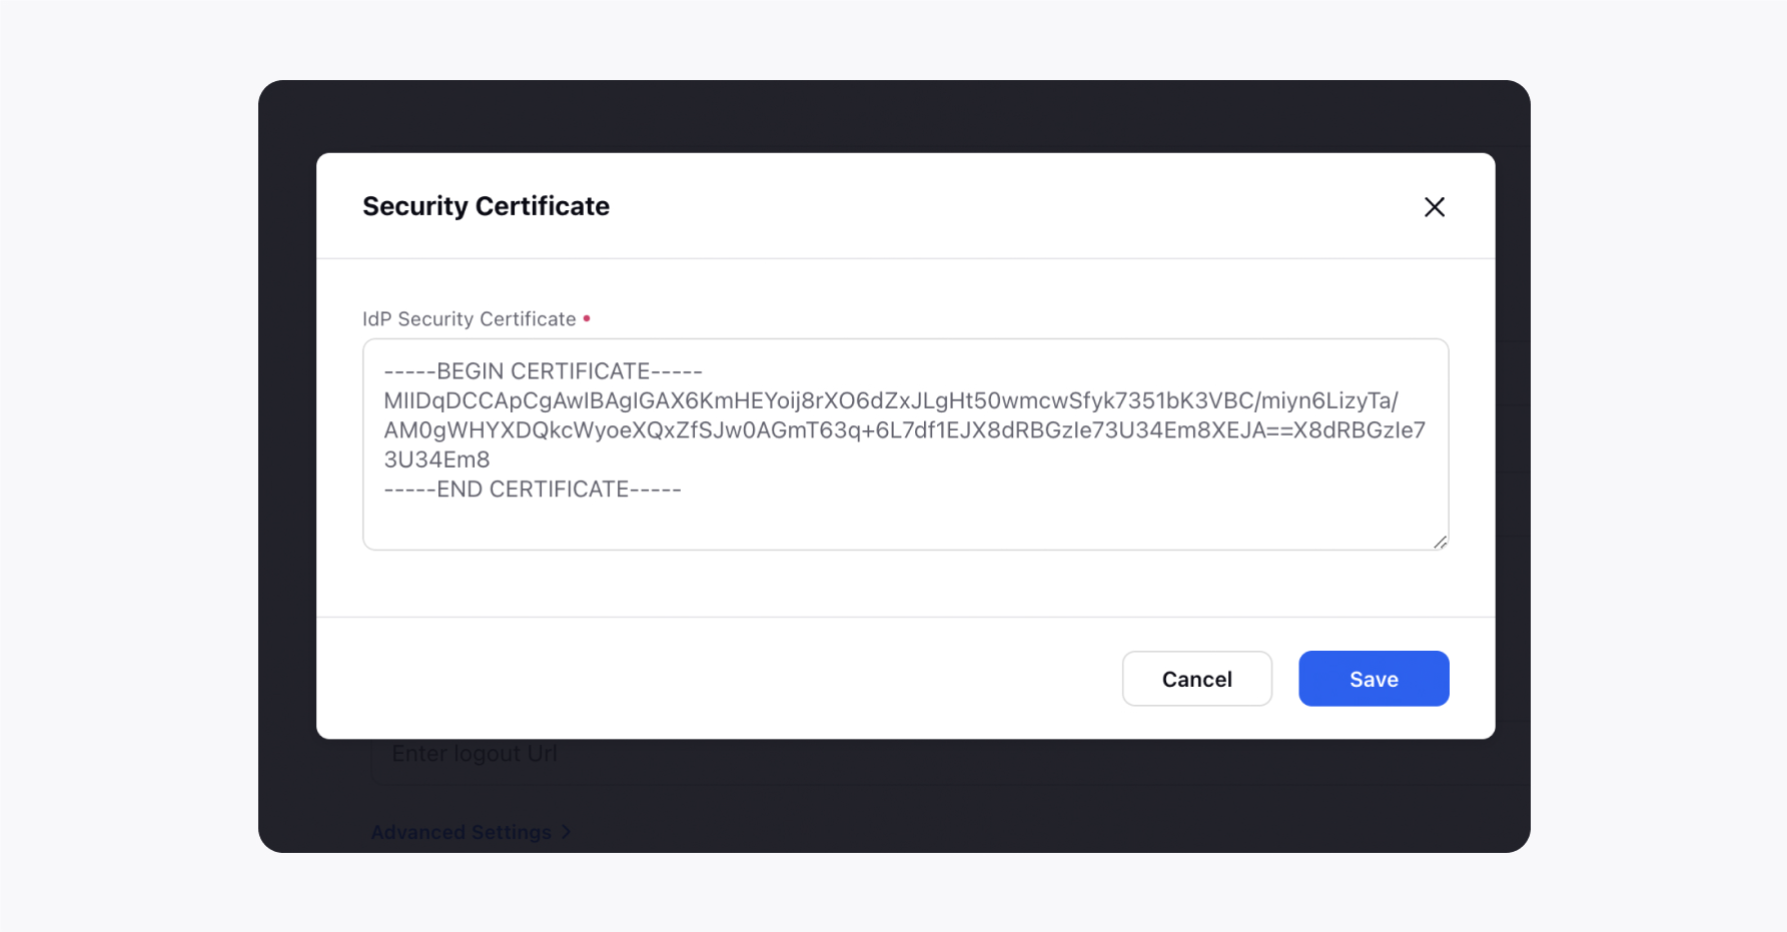
Once, all the details are retrieved from the SAML provider, you will receive a Security Certificate. Download it and copy the details in the Add Certificate section.
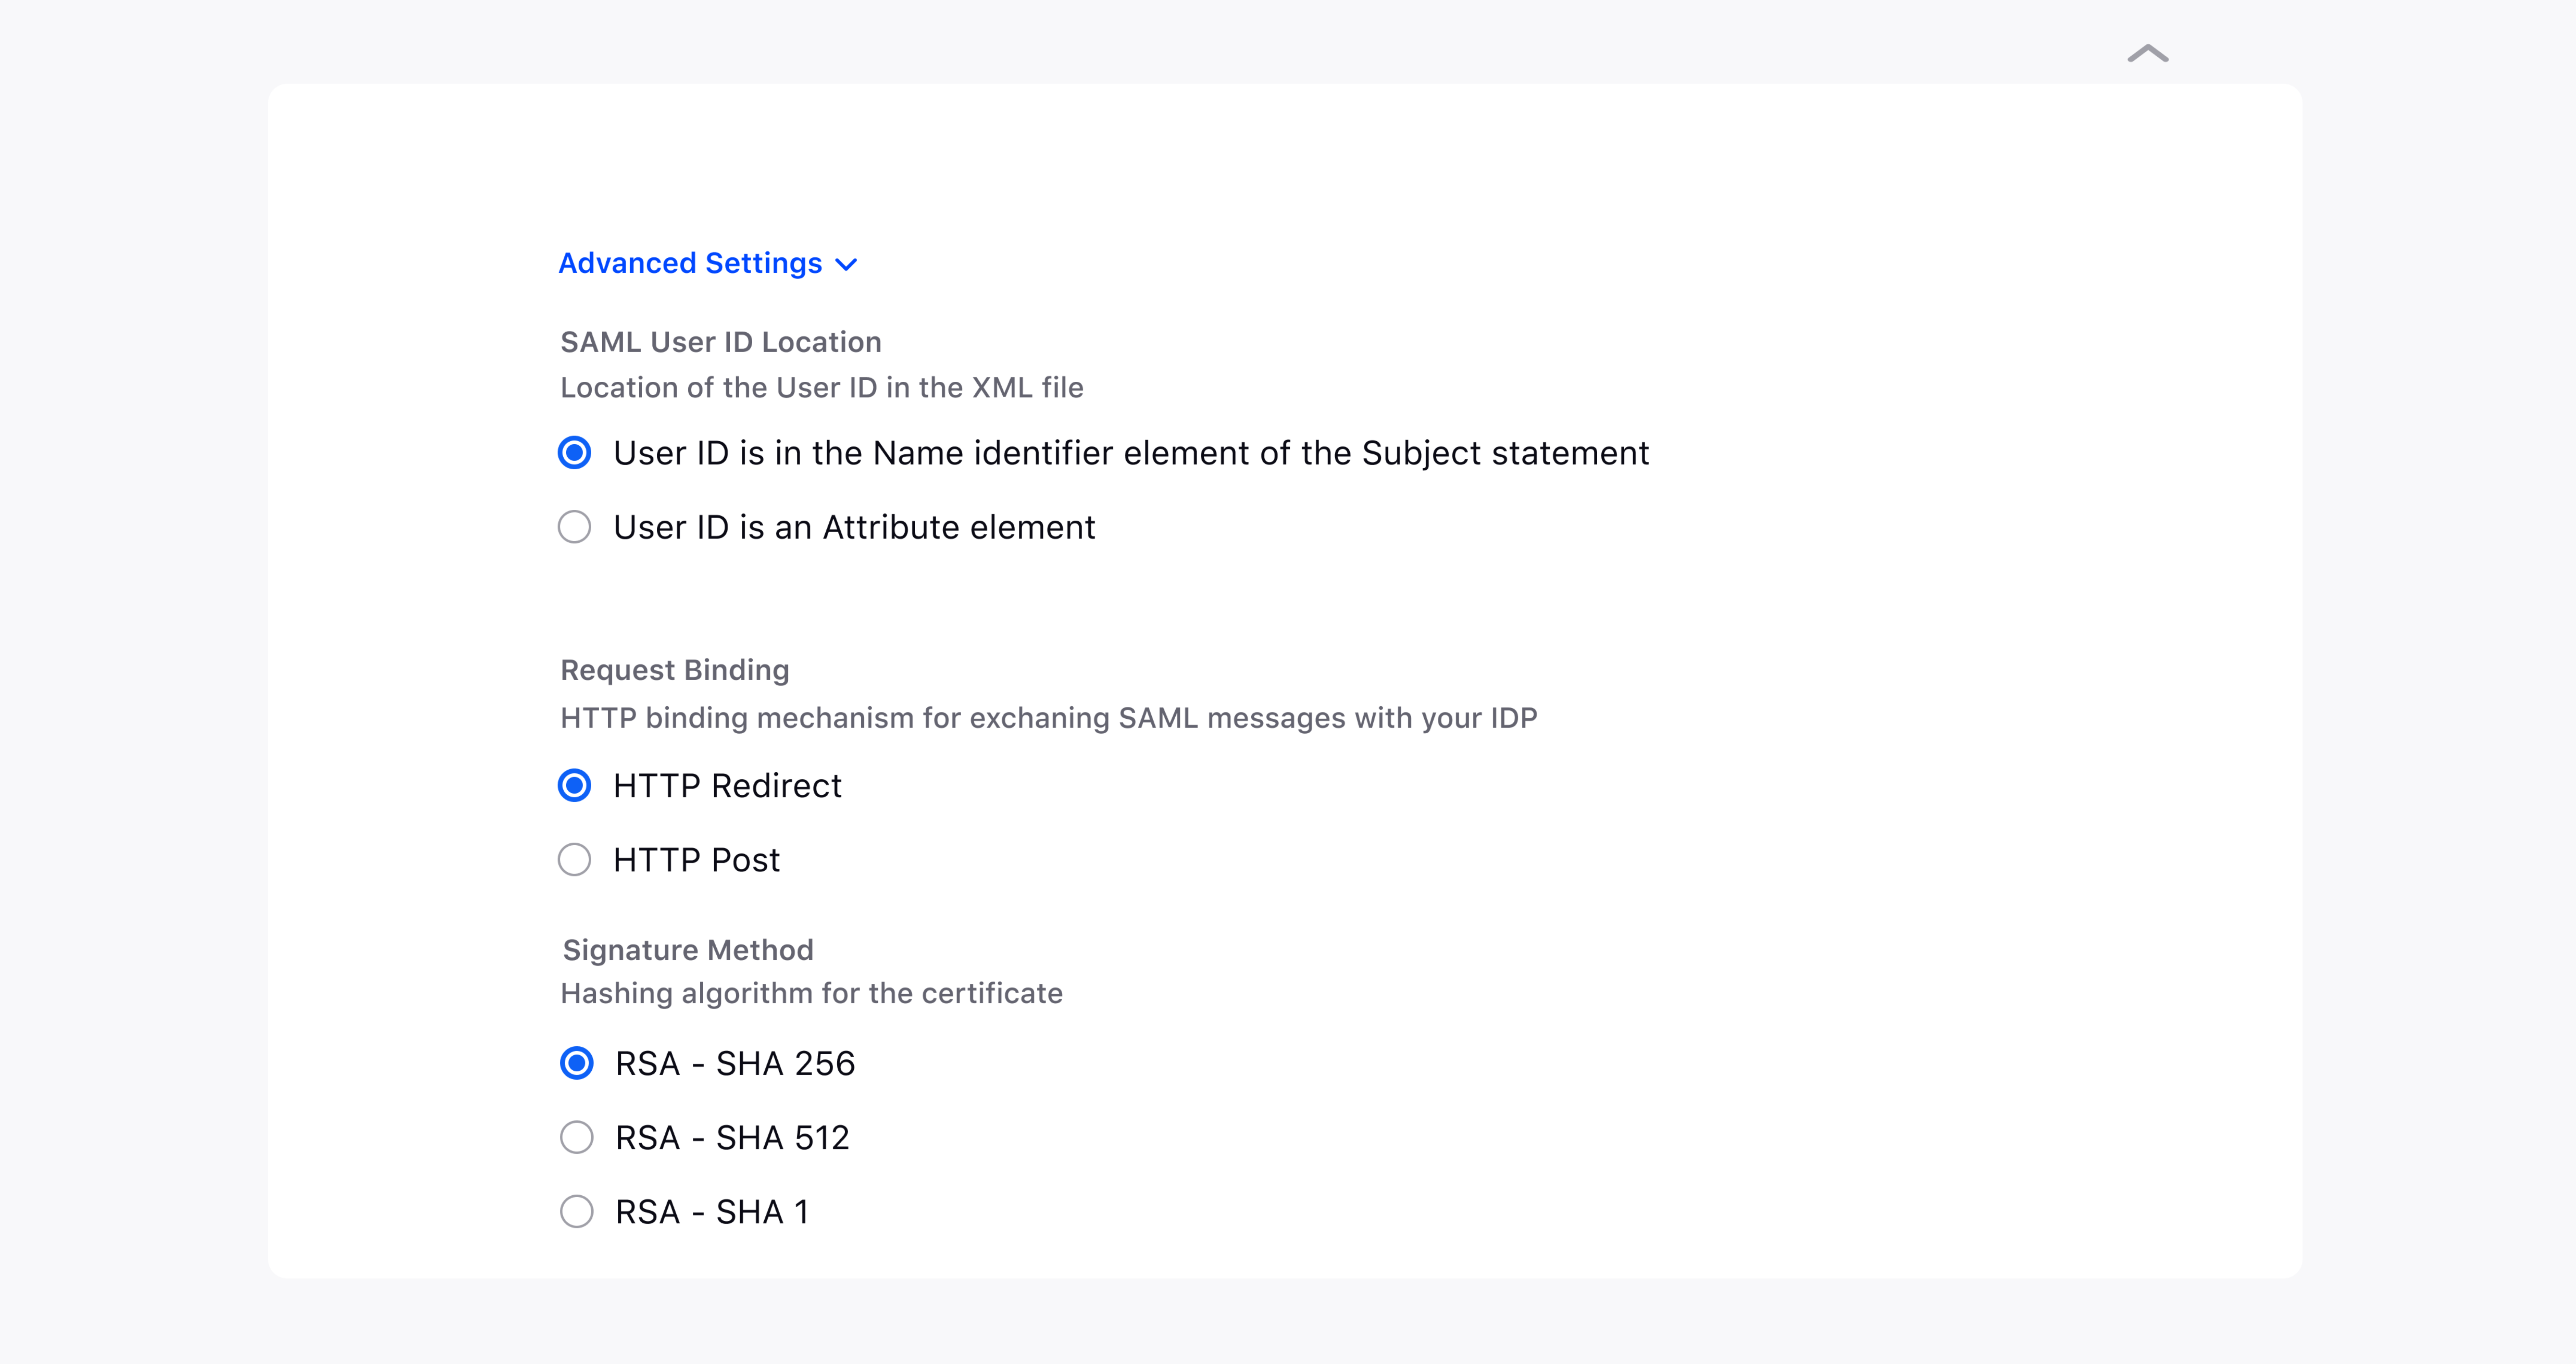
Now, click on Advanced Settings to configure details such as Request Binding, Signature Method, SAML User ID location, and the Button Label as well. If you do not wish to change these , you can use the pre-filled default settings given by Sprinklr.
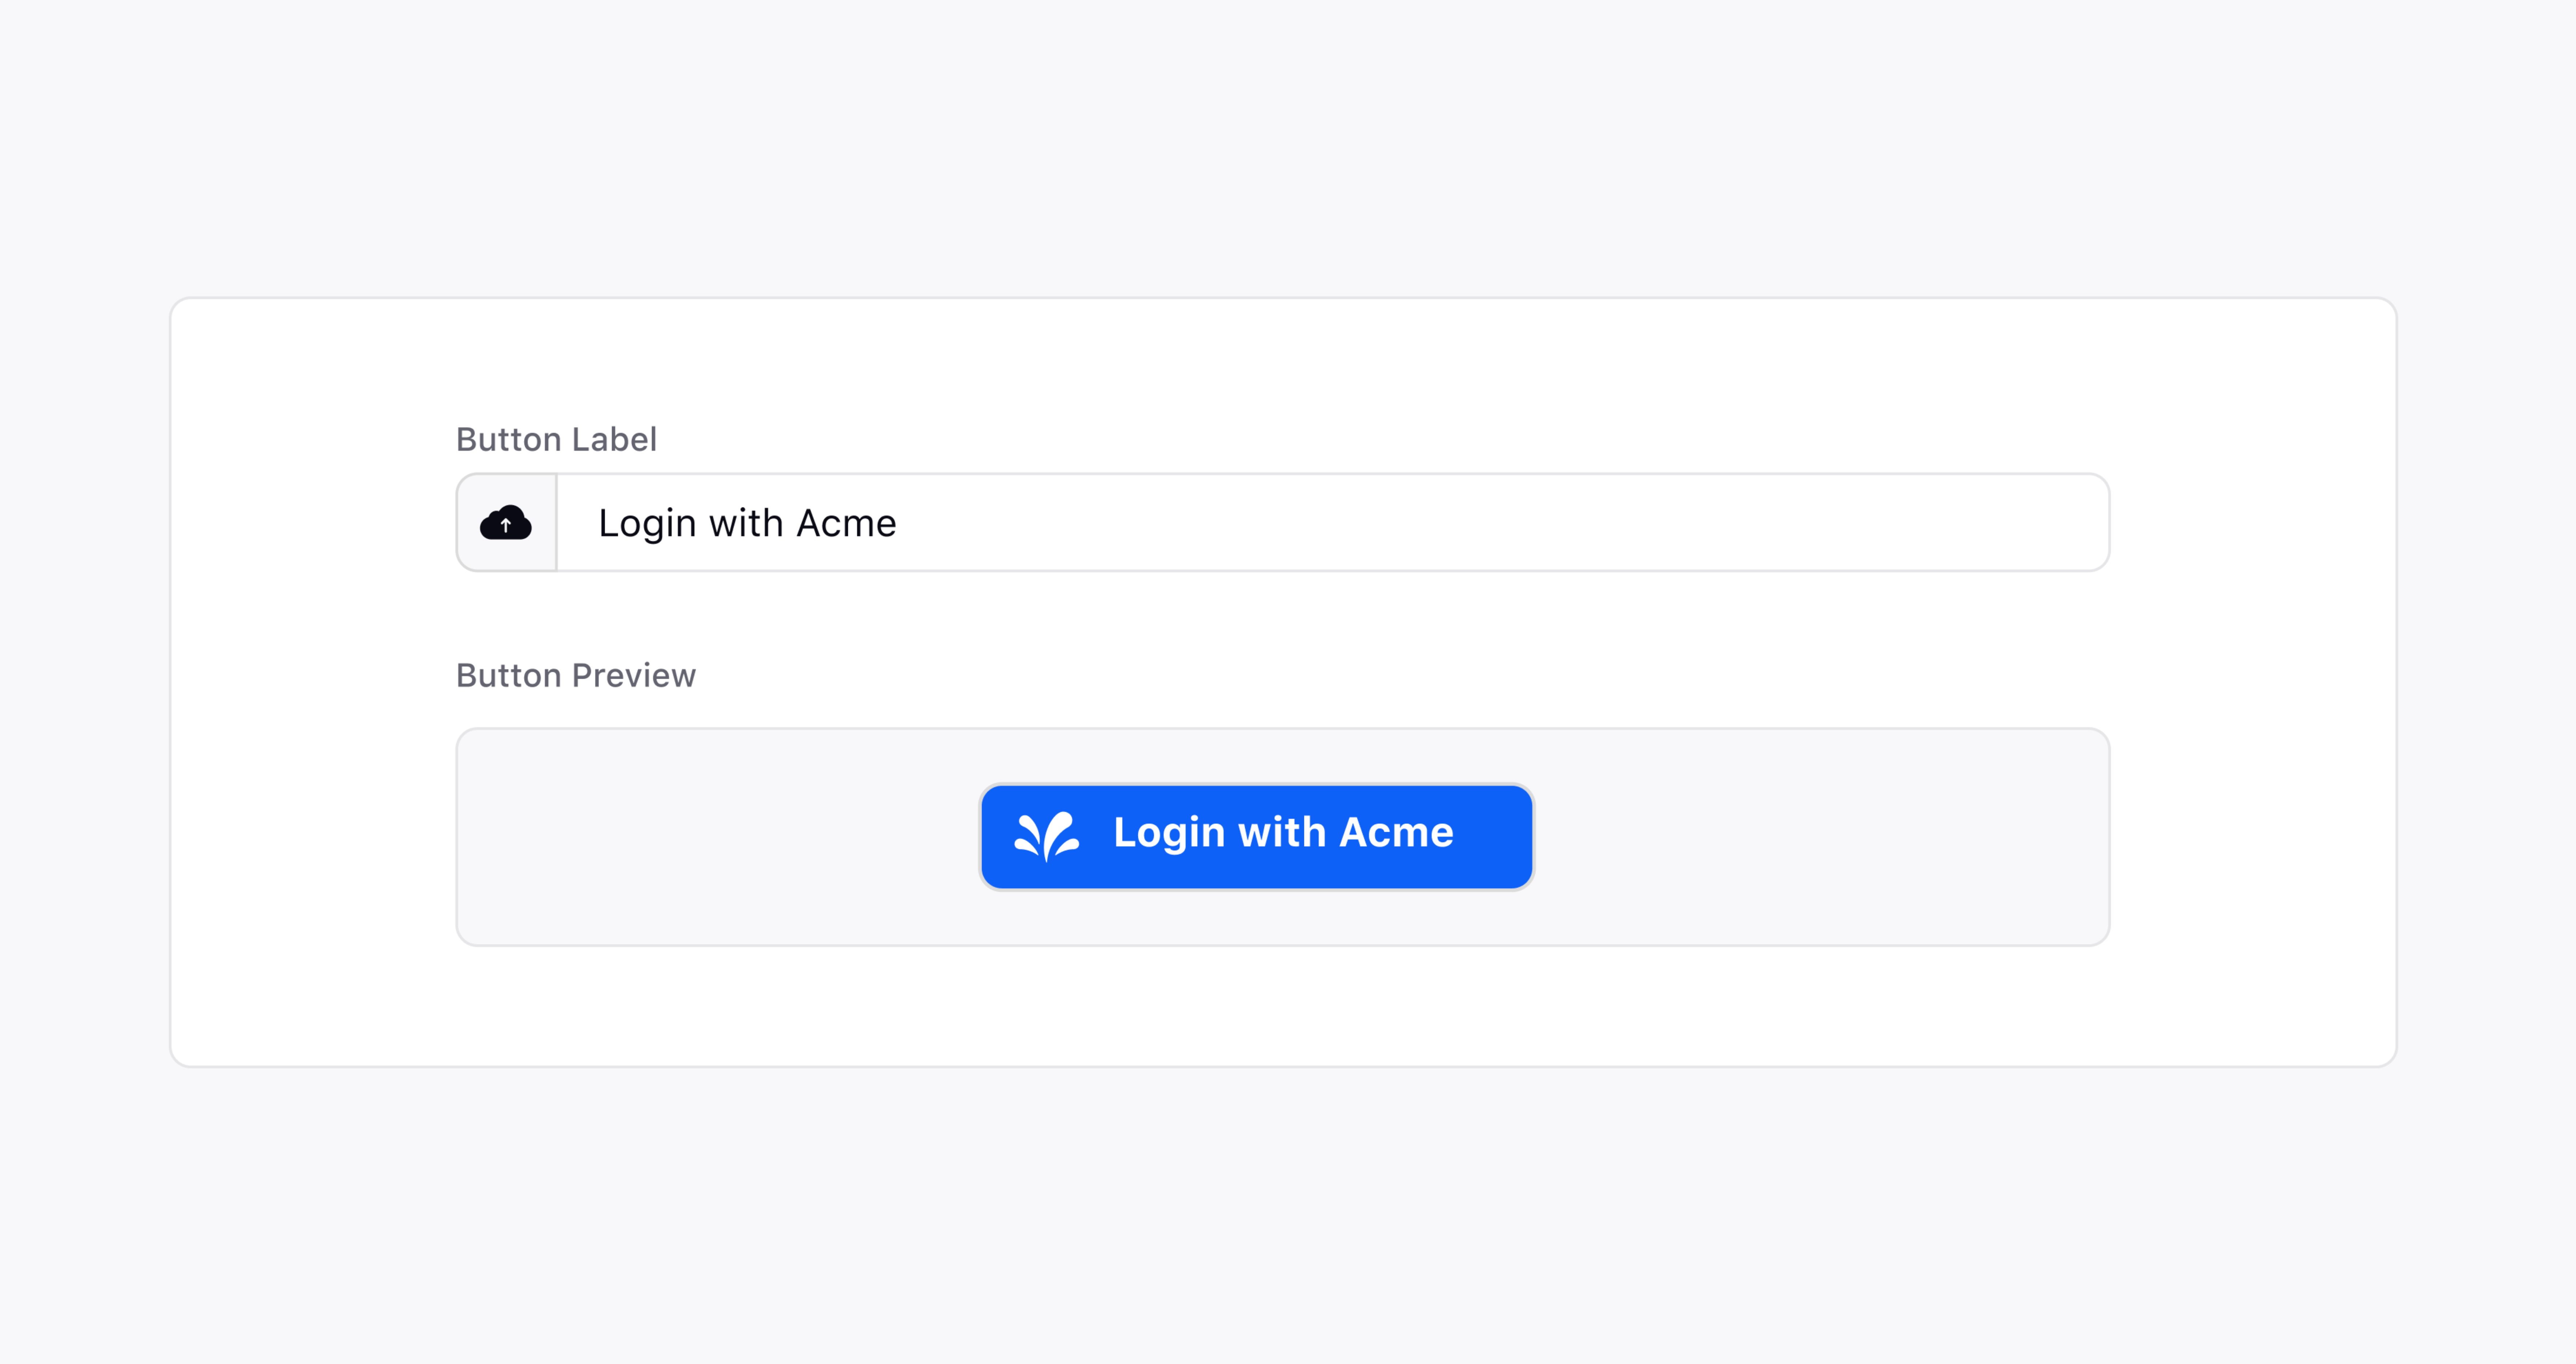
You can also customize the login button by changing the Label.
Now, let's log in to the system using SAML login. Enter your Custom Domain url, it will take you to your personalized login page.
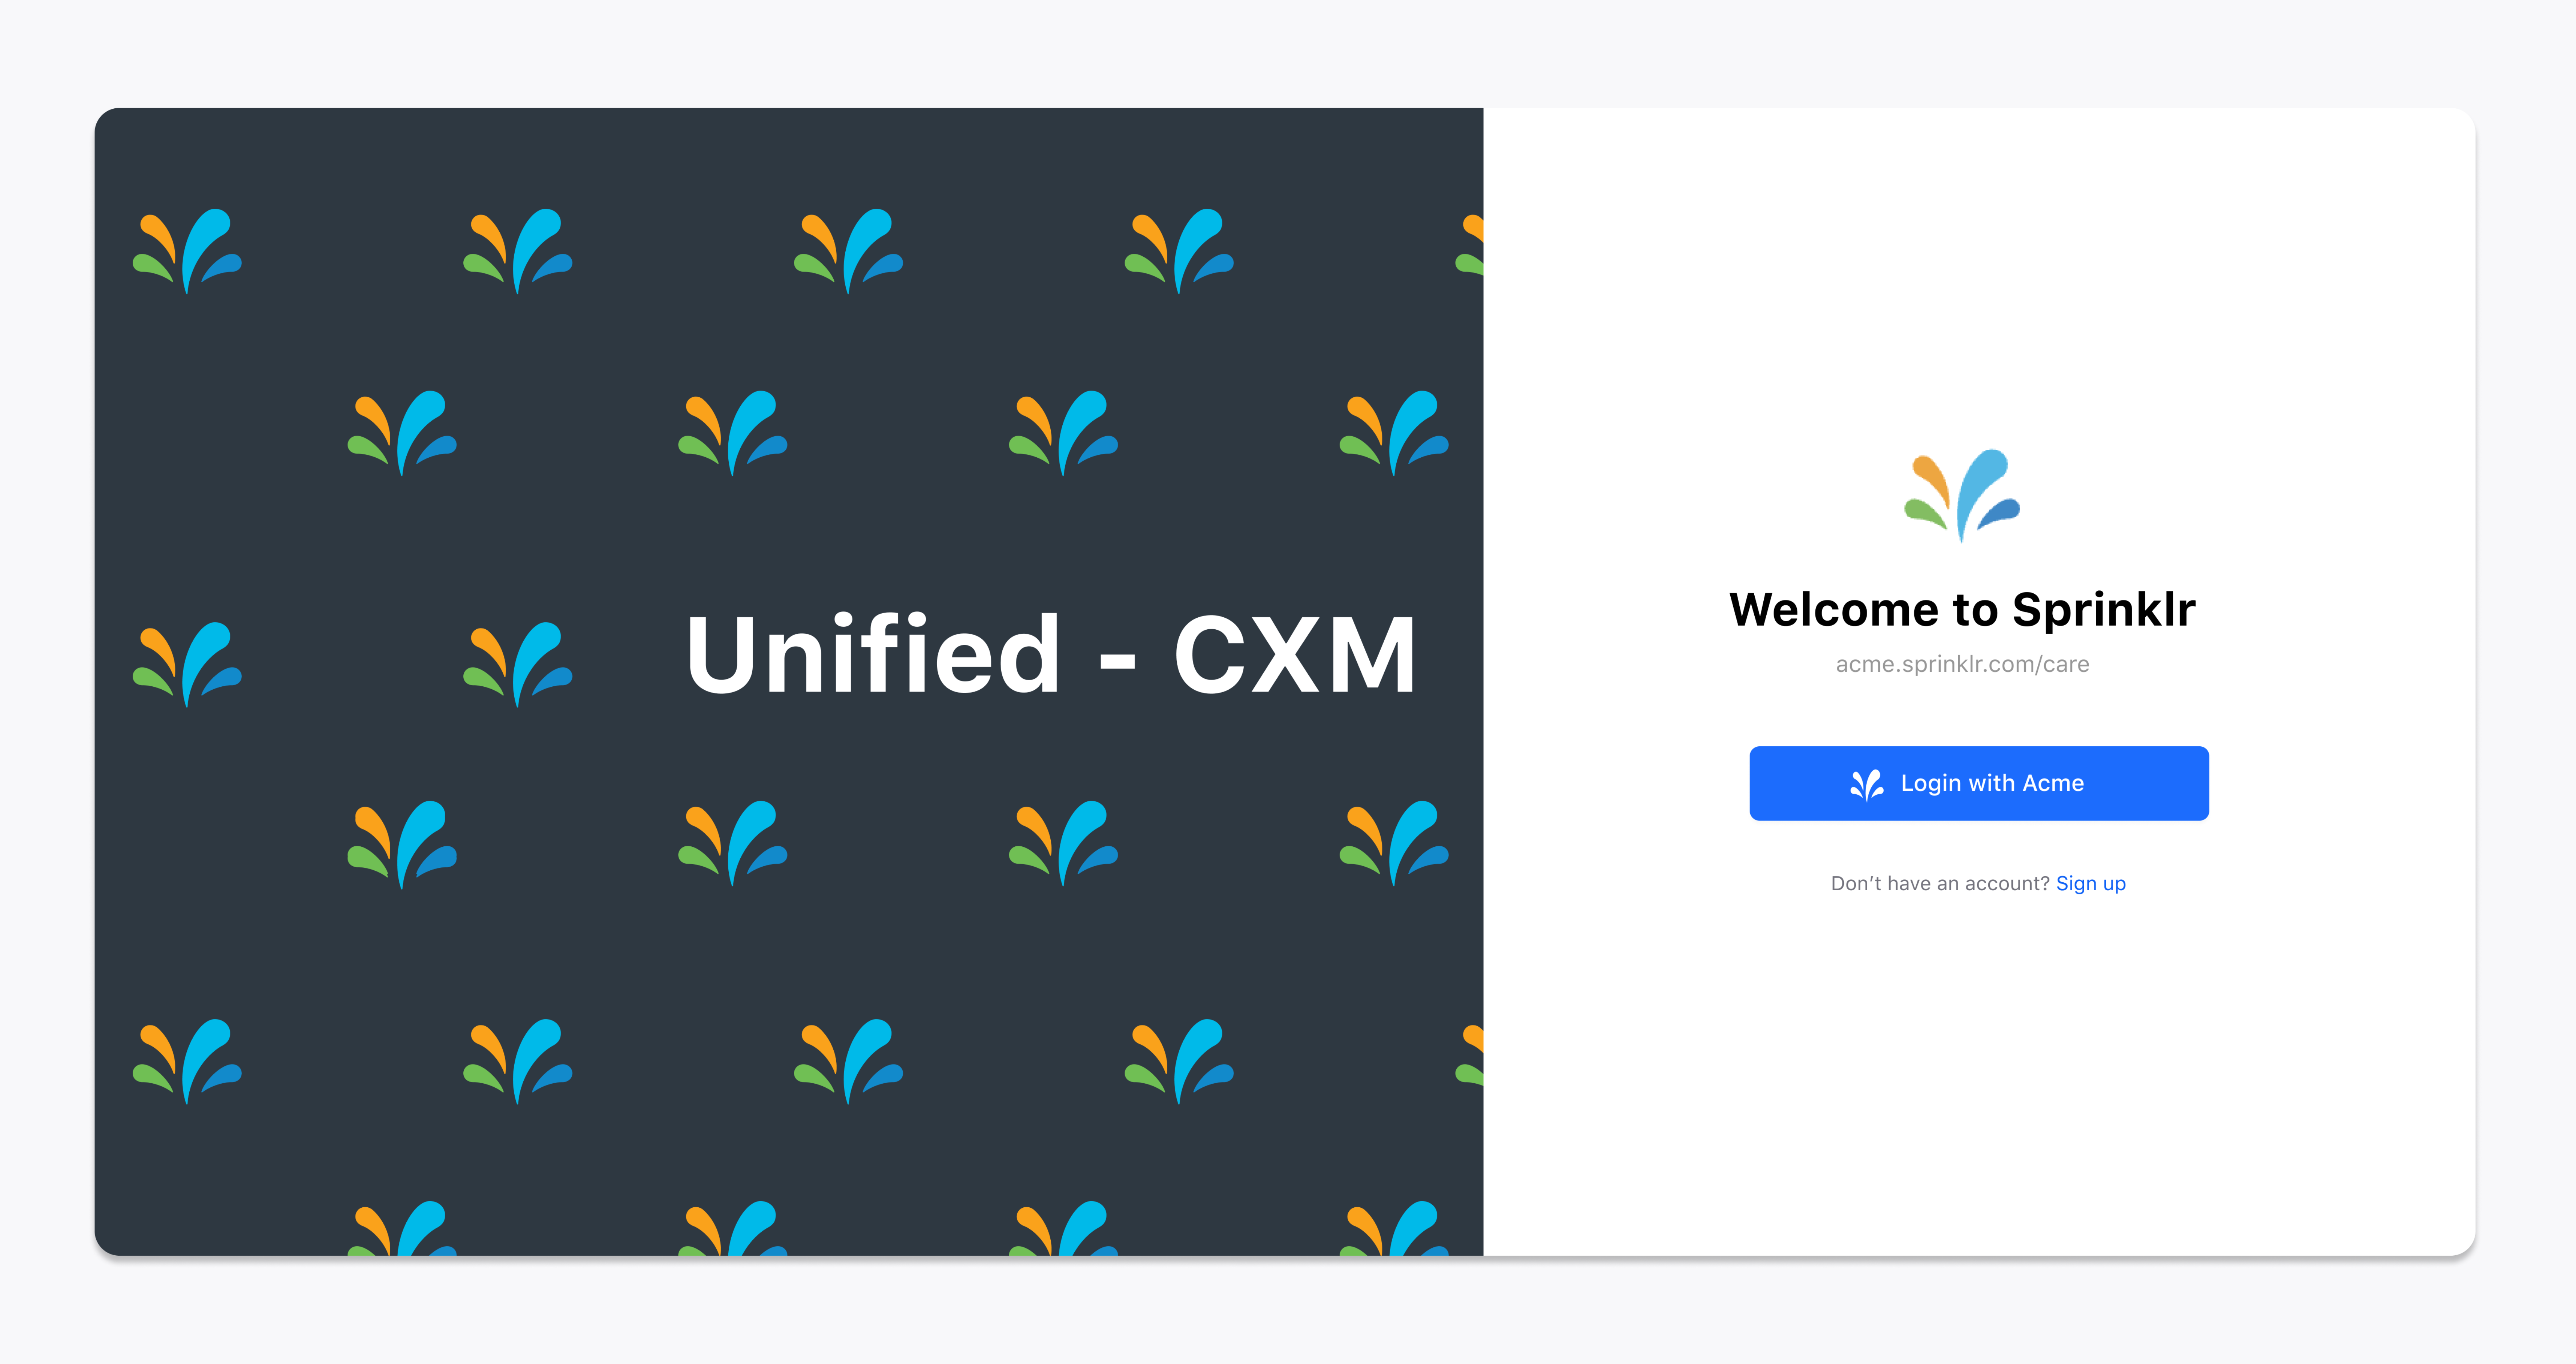
Click "Login with Acme" and it will take you to SAML provider's login page. Once the authentication is approved, you will be logged in to your system.
Steps to Map Information from various SSO Providers
Sprinklr supports leading SAML providers and provided below are the steps to easily retrieve details from each of them:
Okta
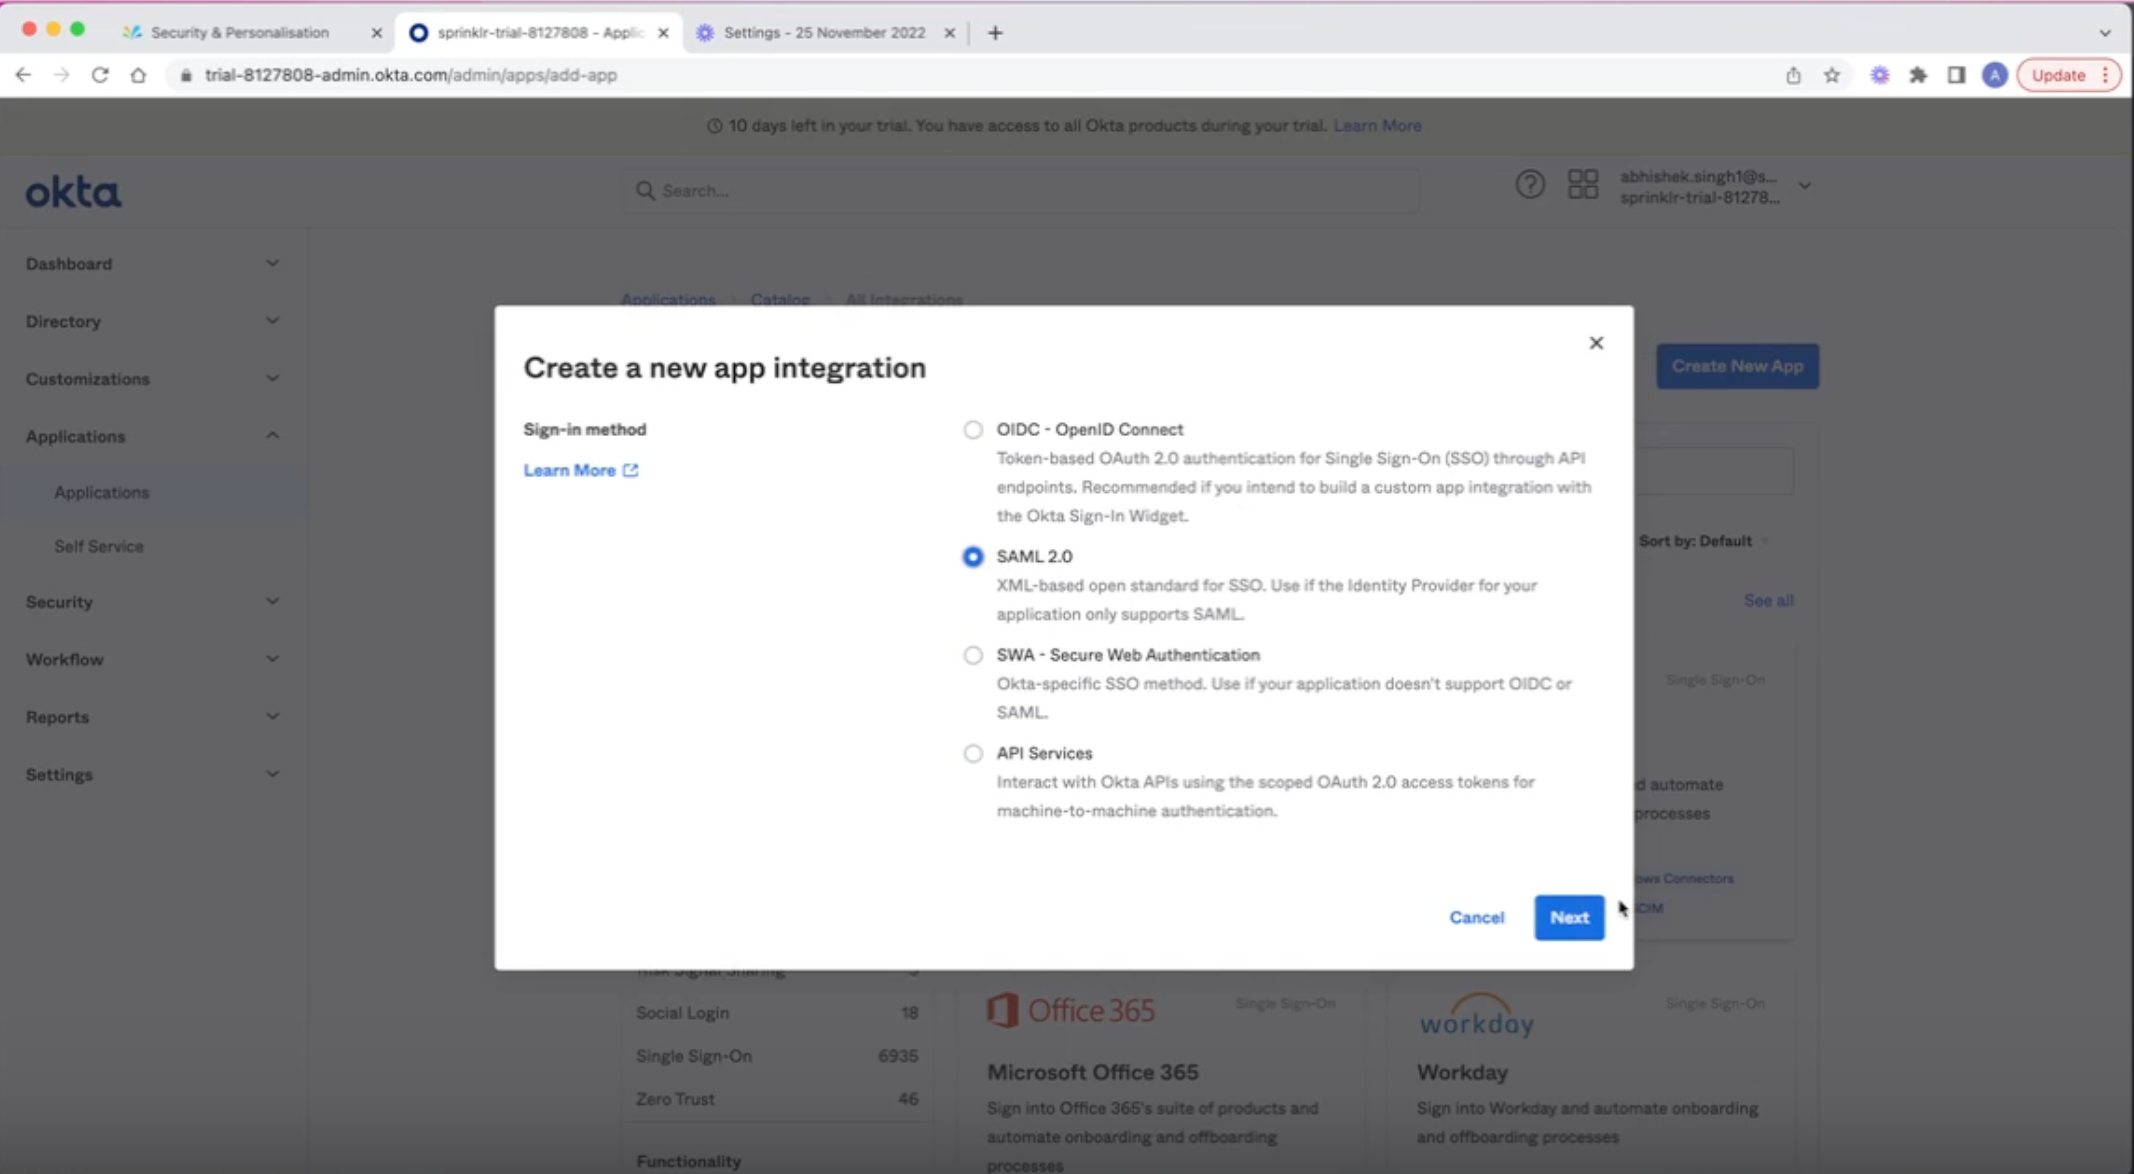
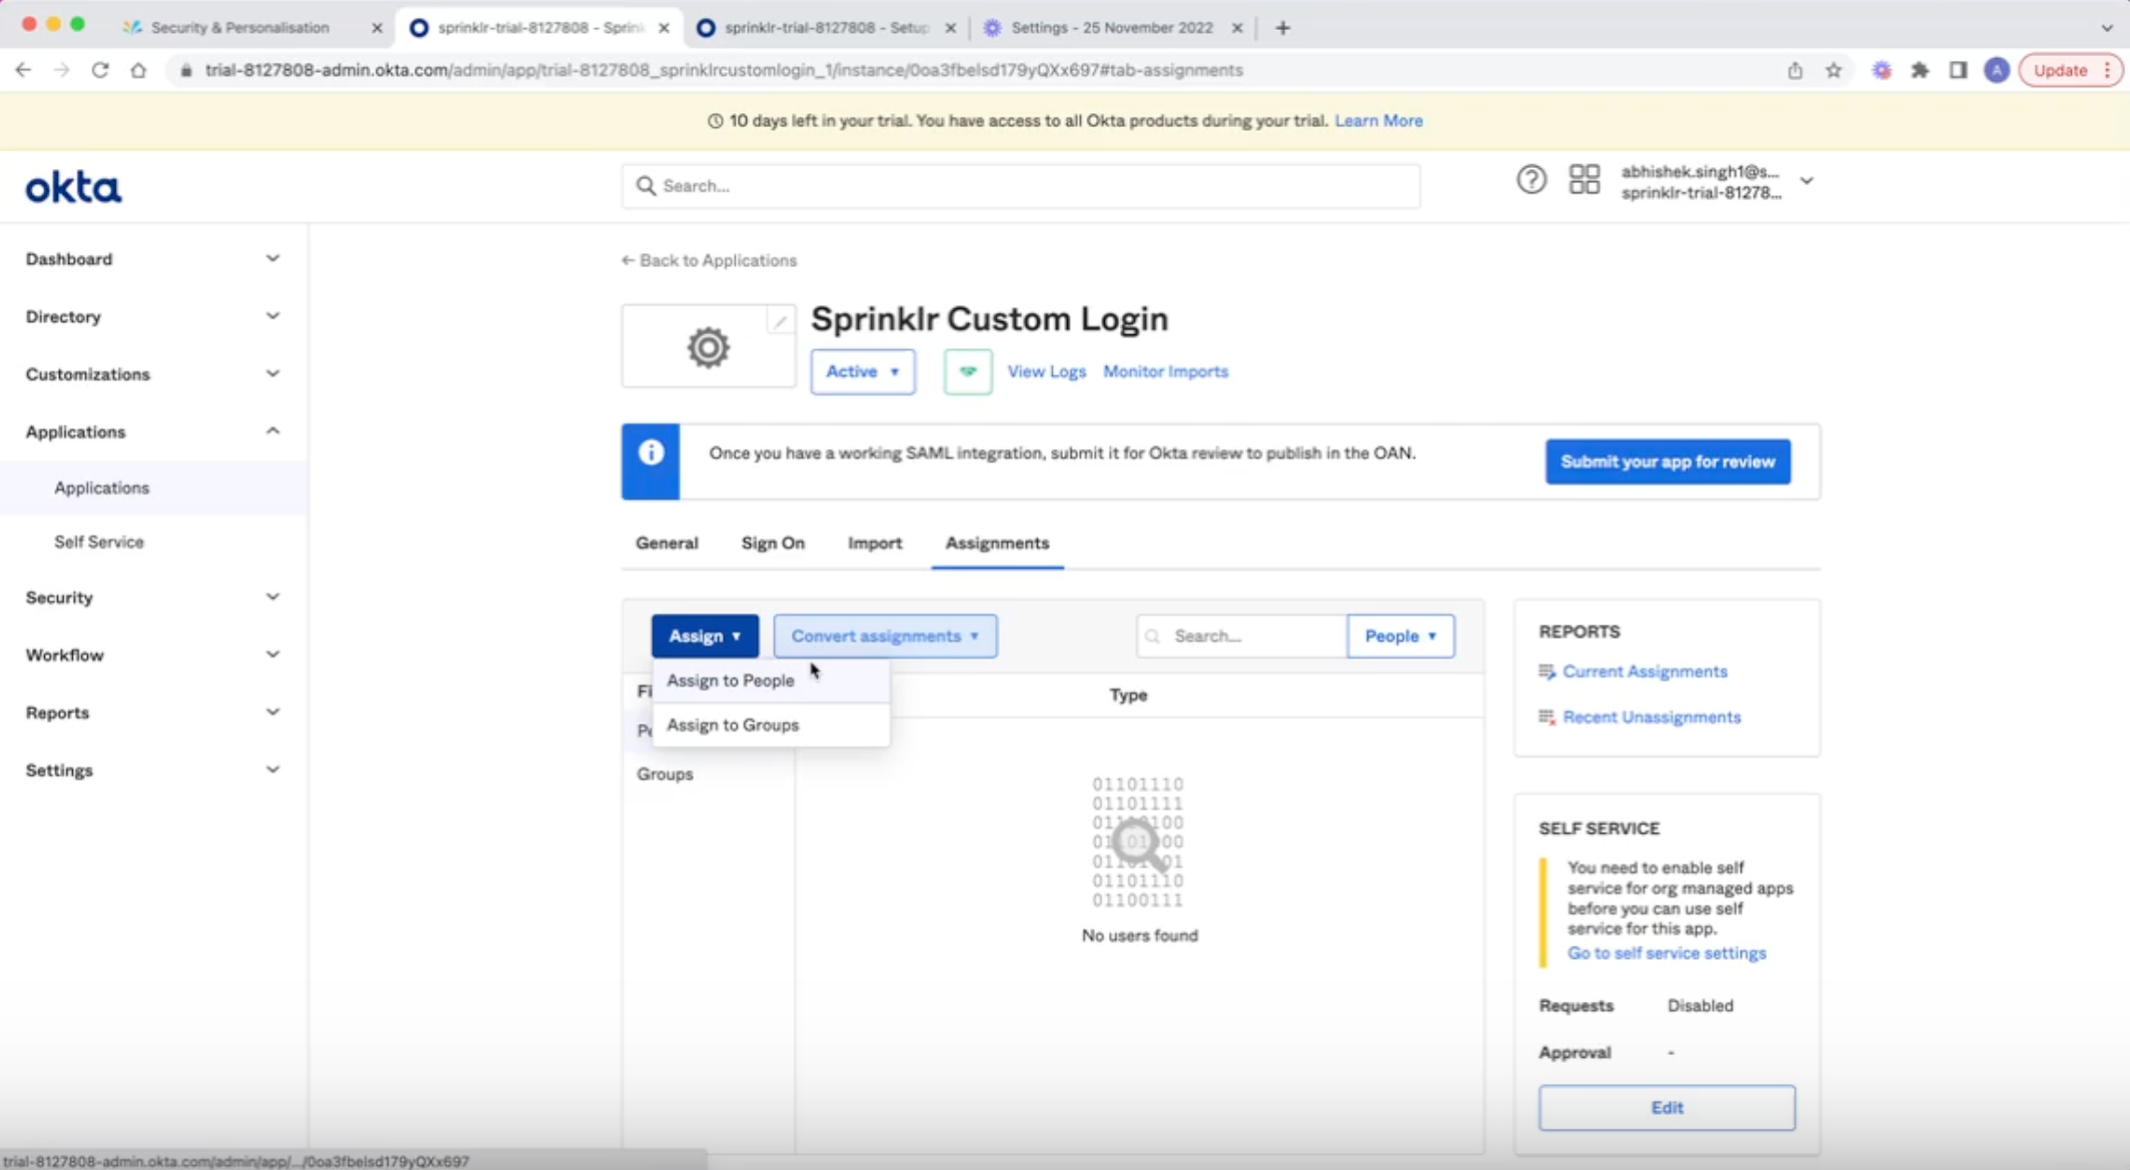
Create a new app integration in Okta - SAML 2.0
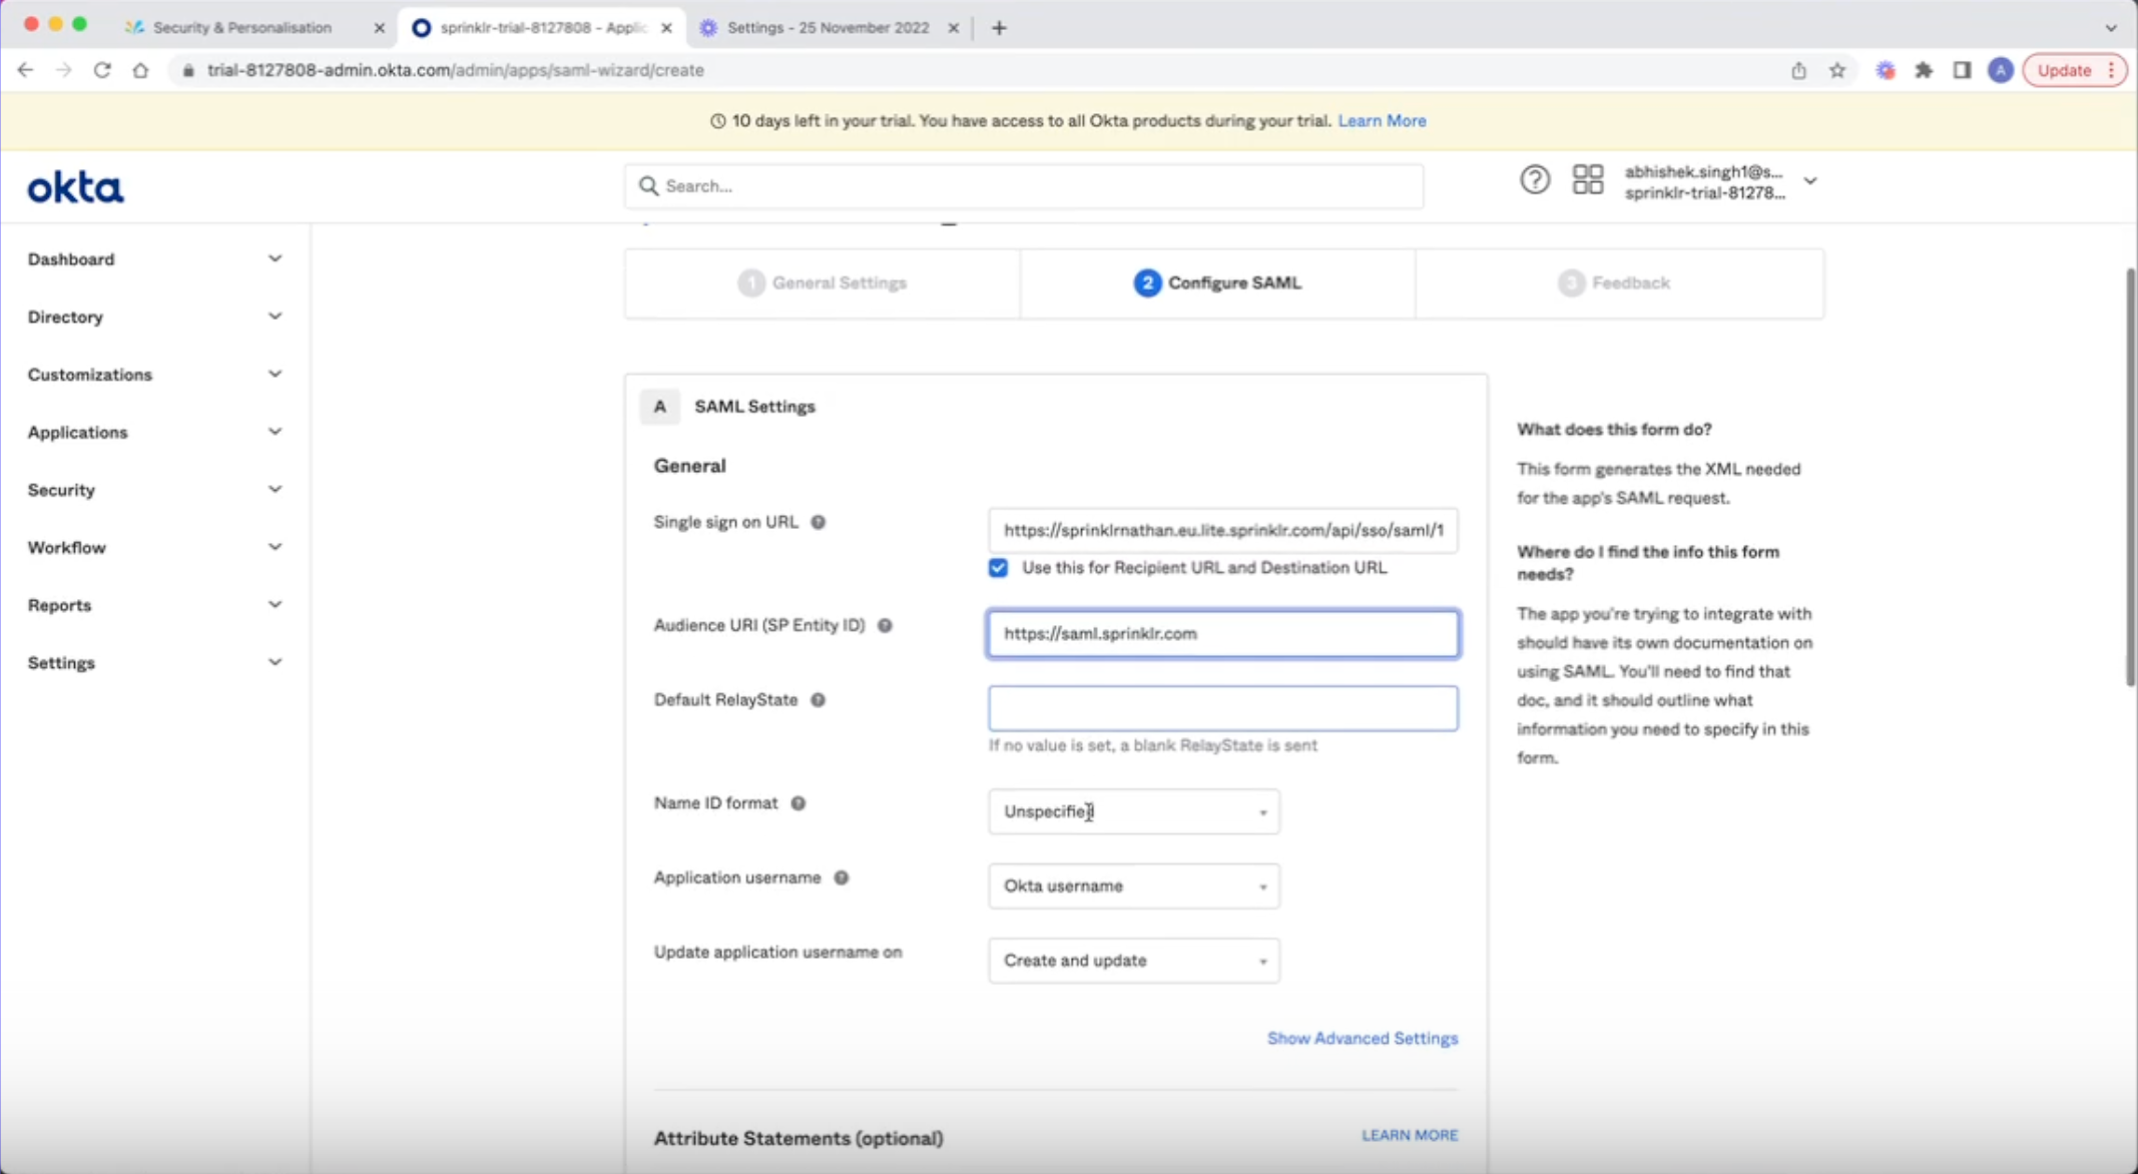
Copy the Assertion Consumer Service(ACS) URL and Service Provider(SP) Entity ID from Sprinklr in Single Sign on URL and SP Entity ID for Okta respectively.
Once the details are added, copy the Security Certificate, IdP Entity ID and IdP Login URL from Okta and add it in Sprinklr, you can also modify the Advanced Settings if required.
Sample IdP details from Okta: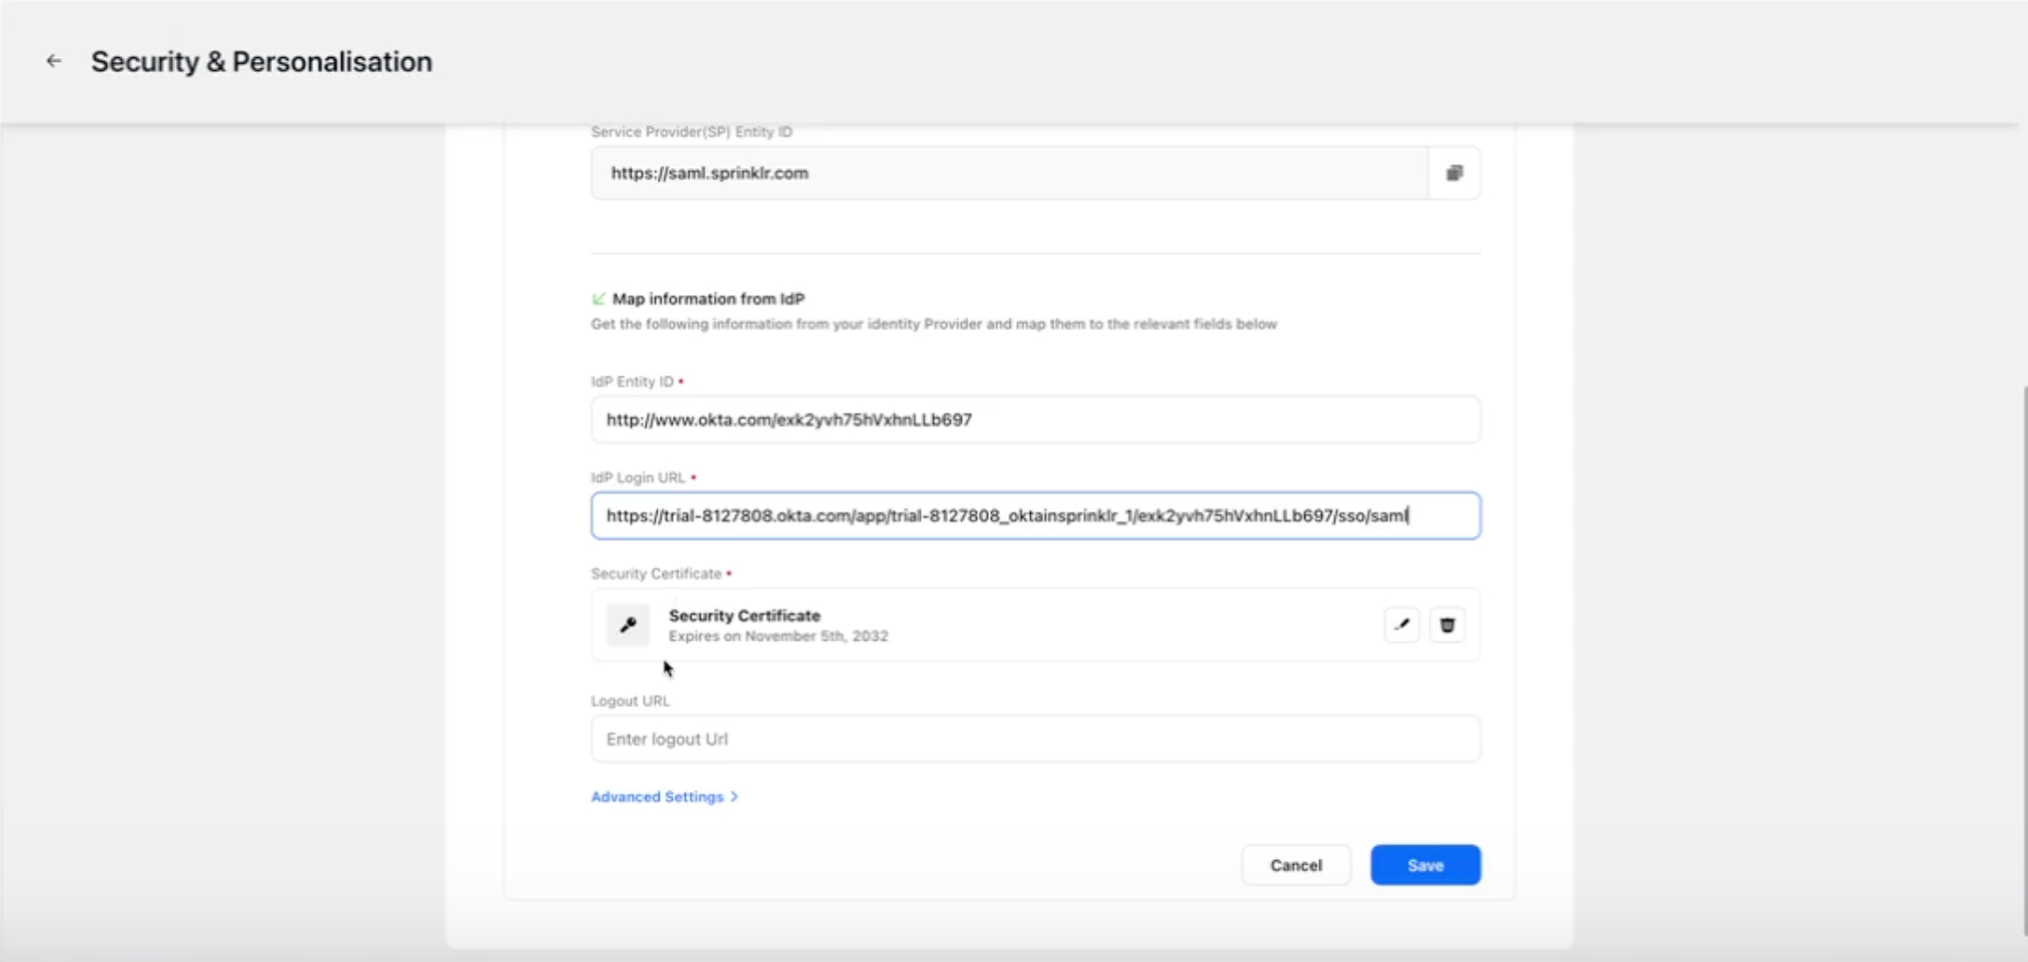
Recommended Advanced Settings for Okta:After completing the setup, it is important to assign the respective users who require access to Sprinklr SSO to the corresponding Sprinklr's user group on Okta.
ADFS (Azure)
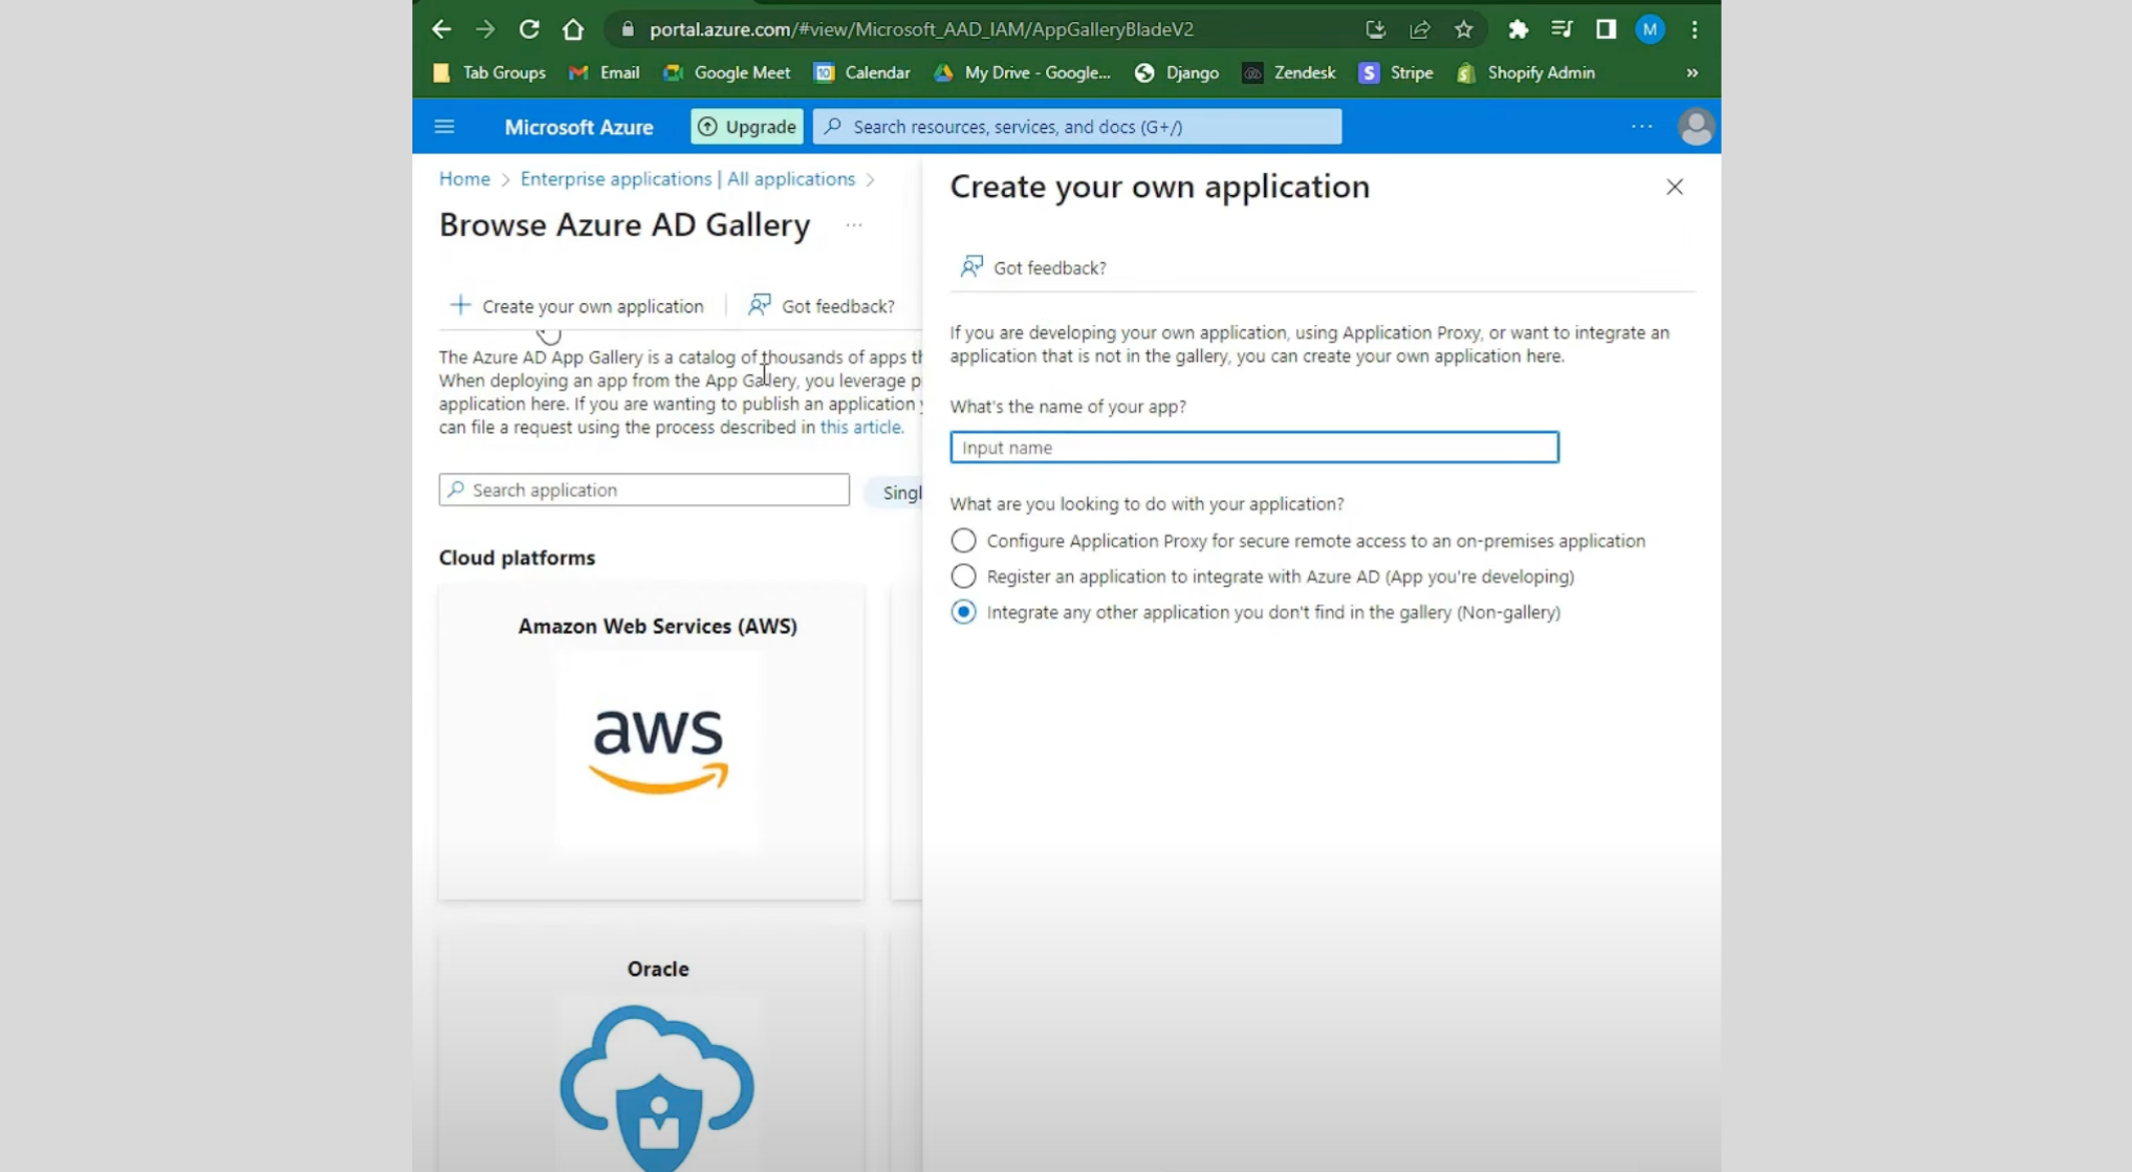
Create a new enterprise application in Azure.
Copy the Assertion Consumer Service(ACS) URL and Service Provider(SP) Entity ID from Sprinklr in the required fields Reply URL (Assertion URL) and Identifier (Entity ID) for Azure respectively.
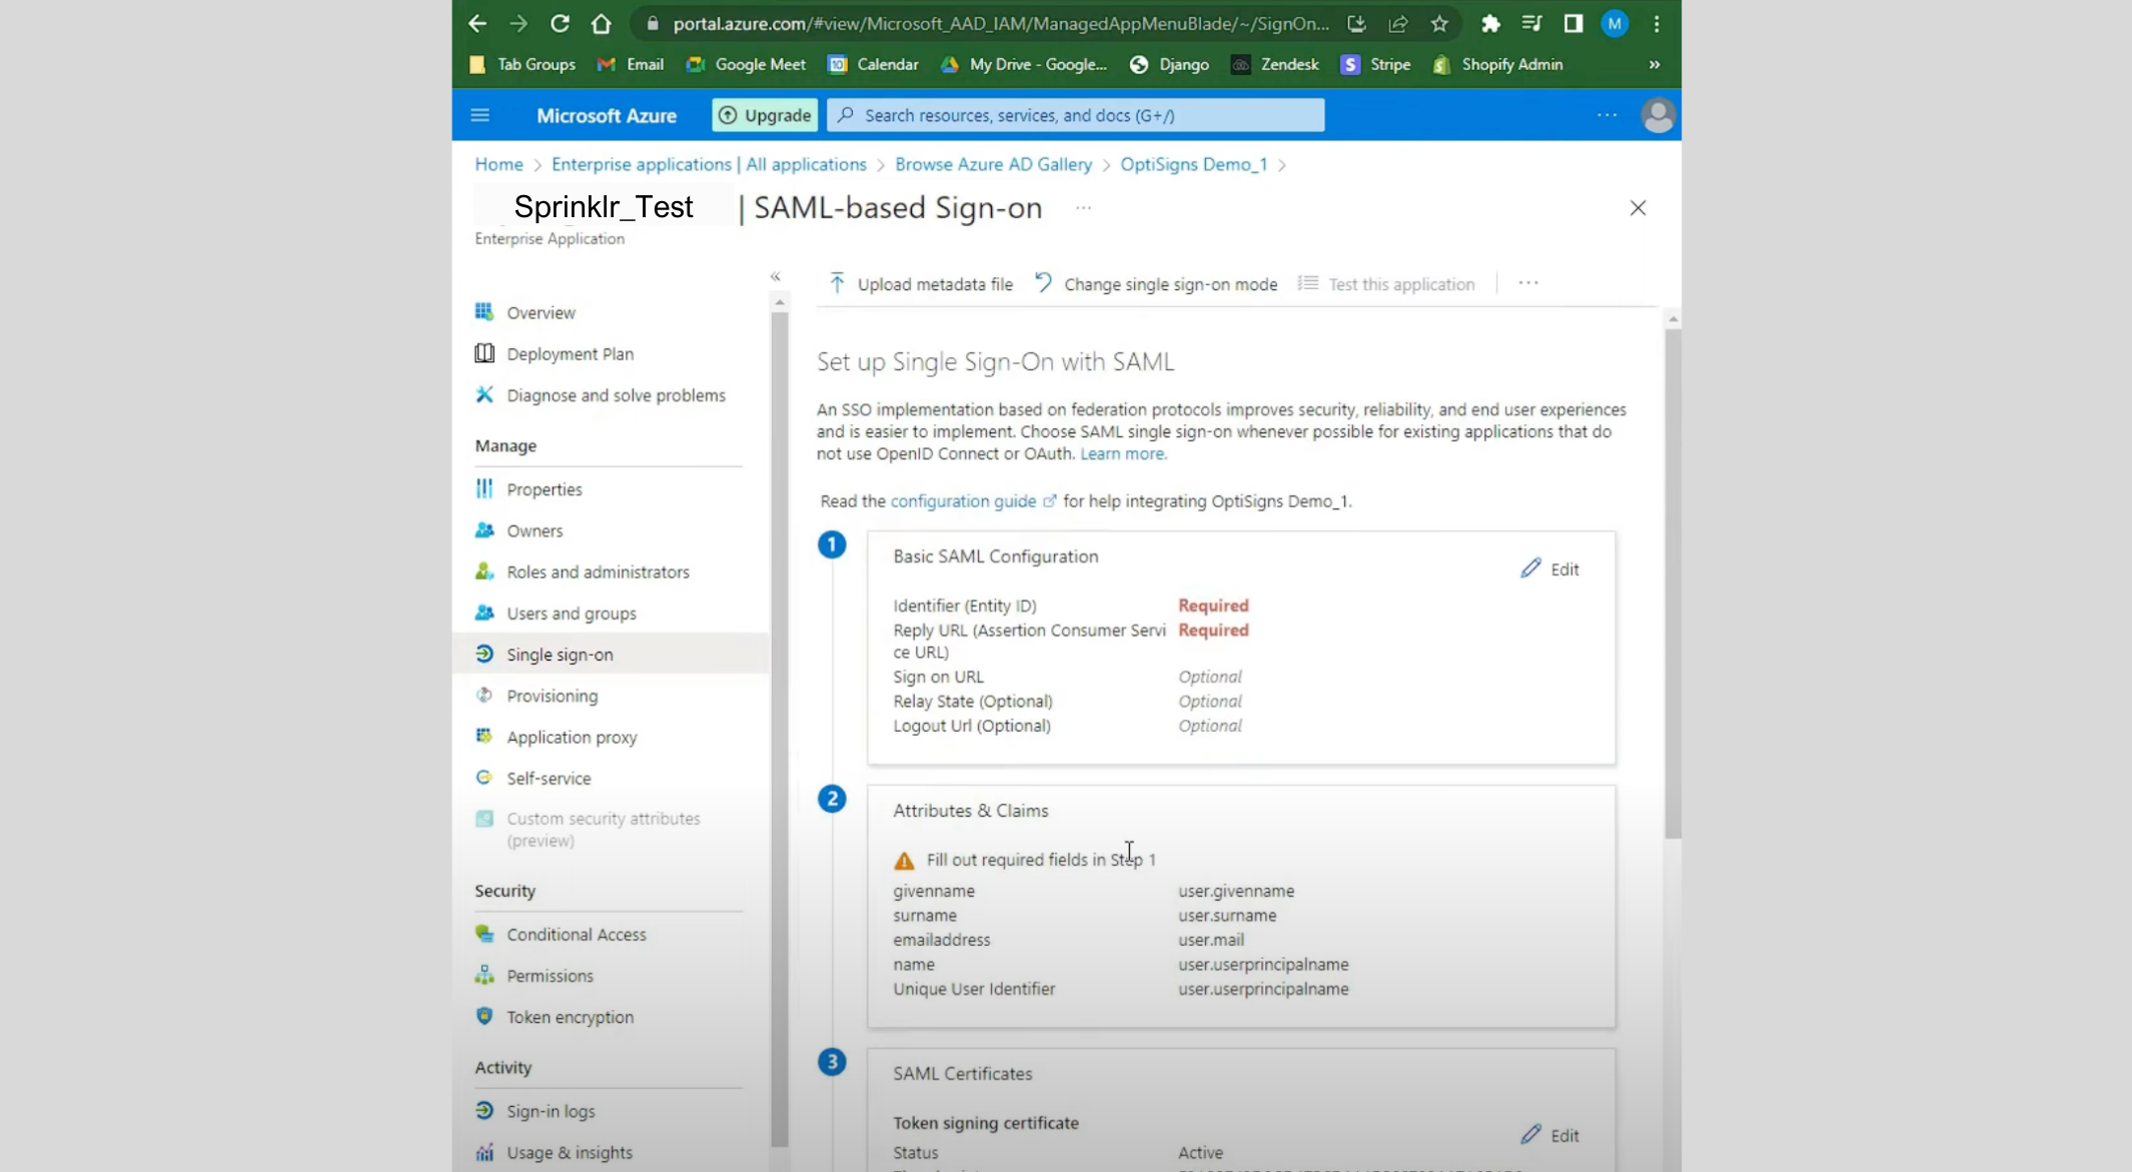
Once the details are added, copy the Security Certificate, IdP Entity ID and IdP Login URL from Azure and add it in Sprinklr, you can also modify the Advanced Settings if required.
Sample IdP details from Azure: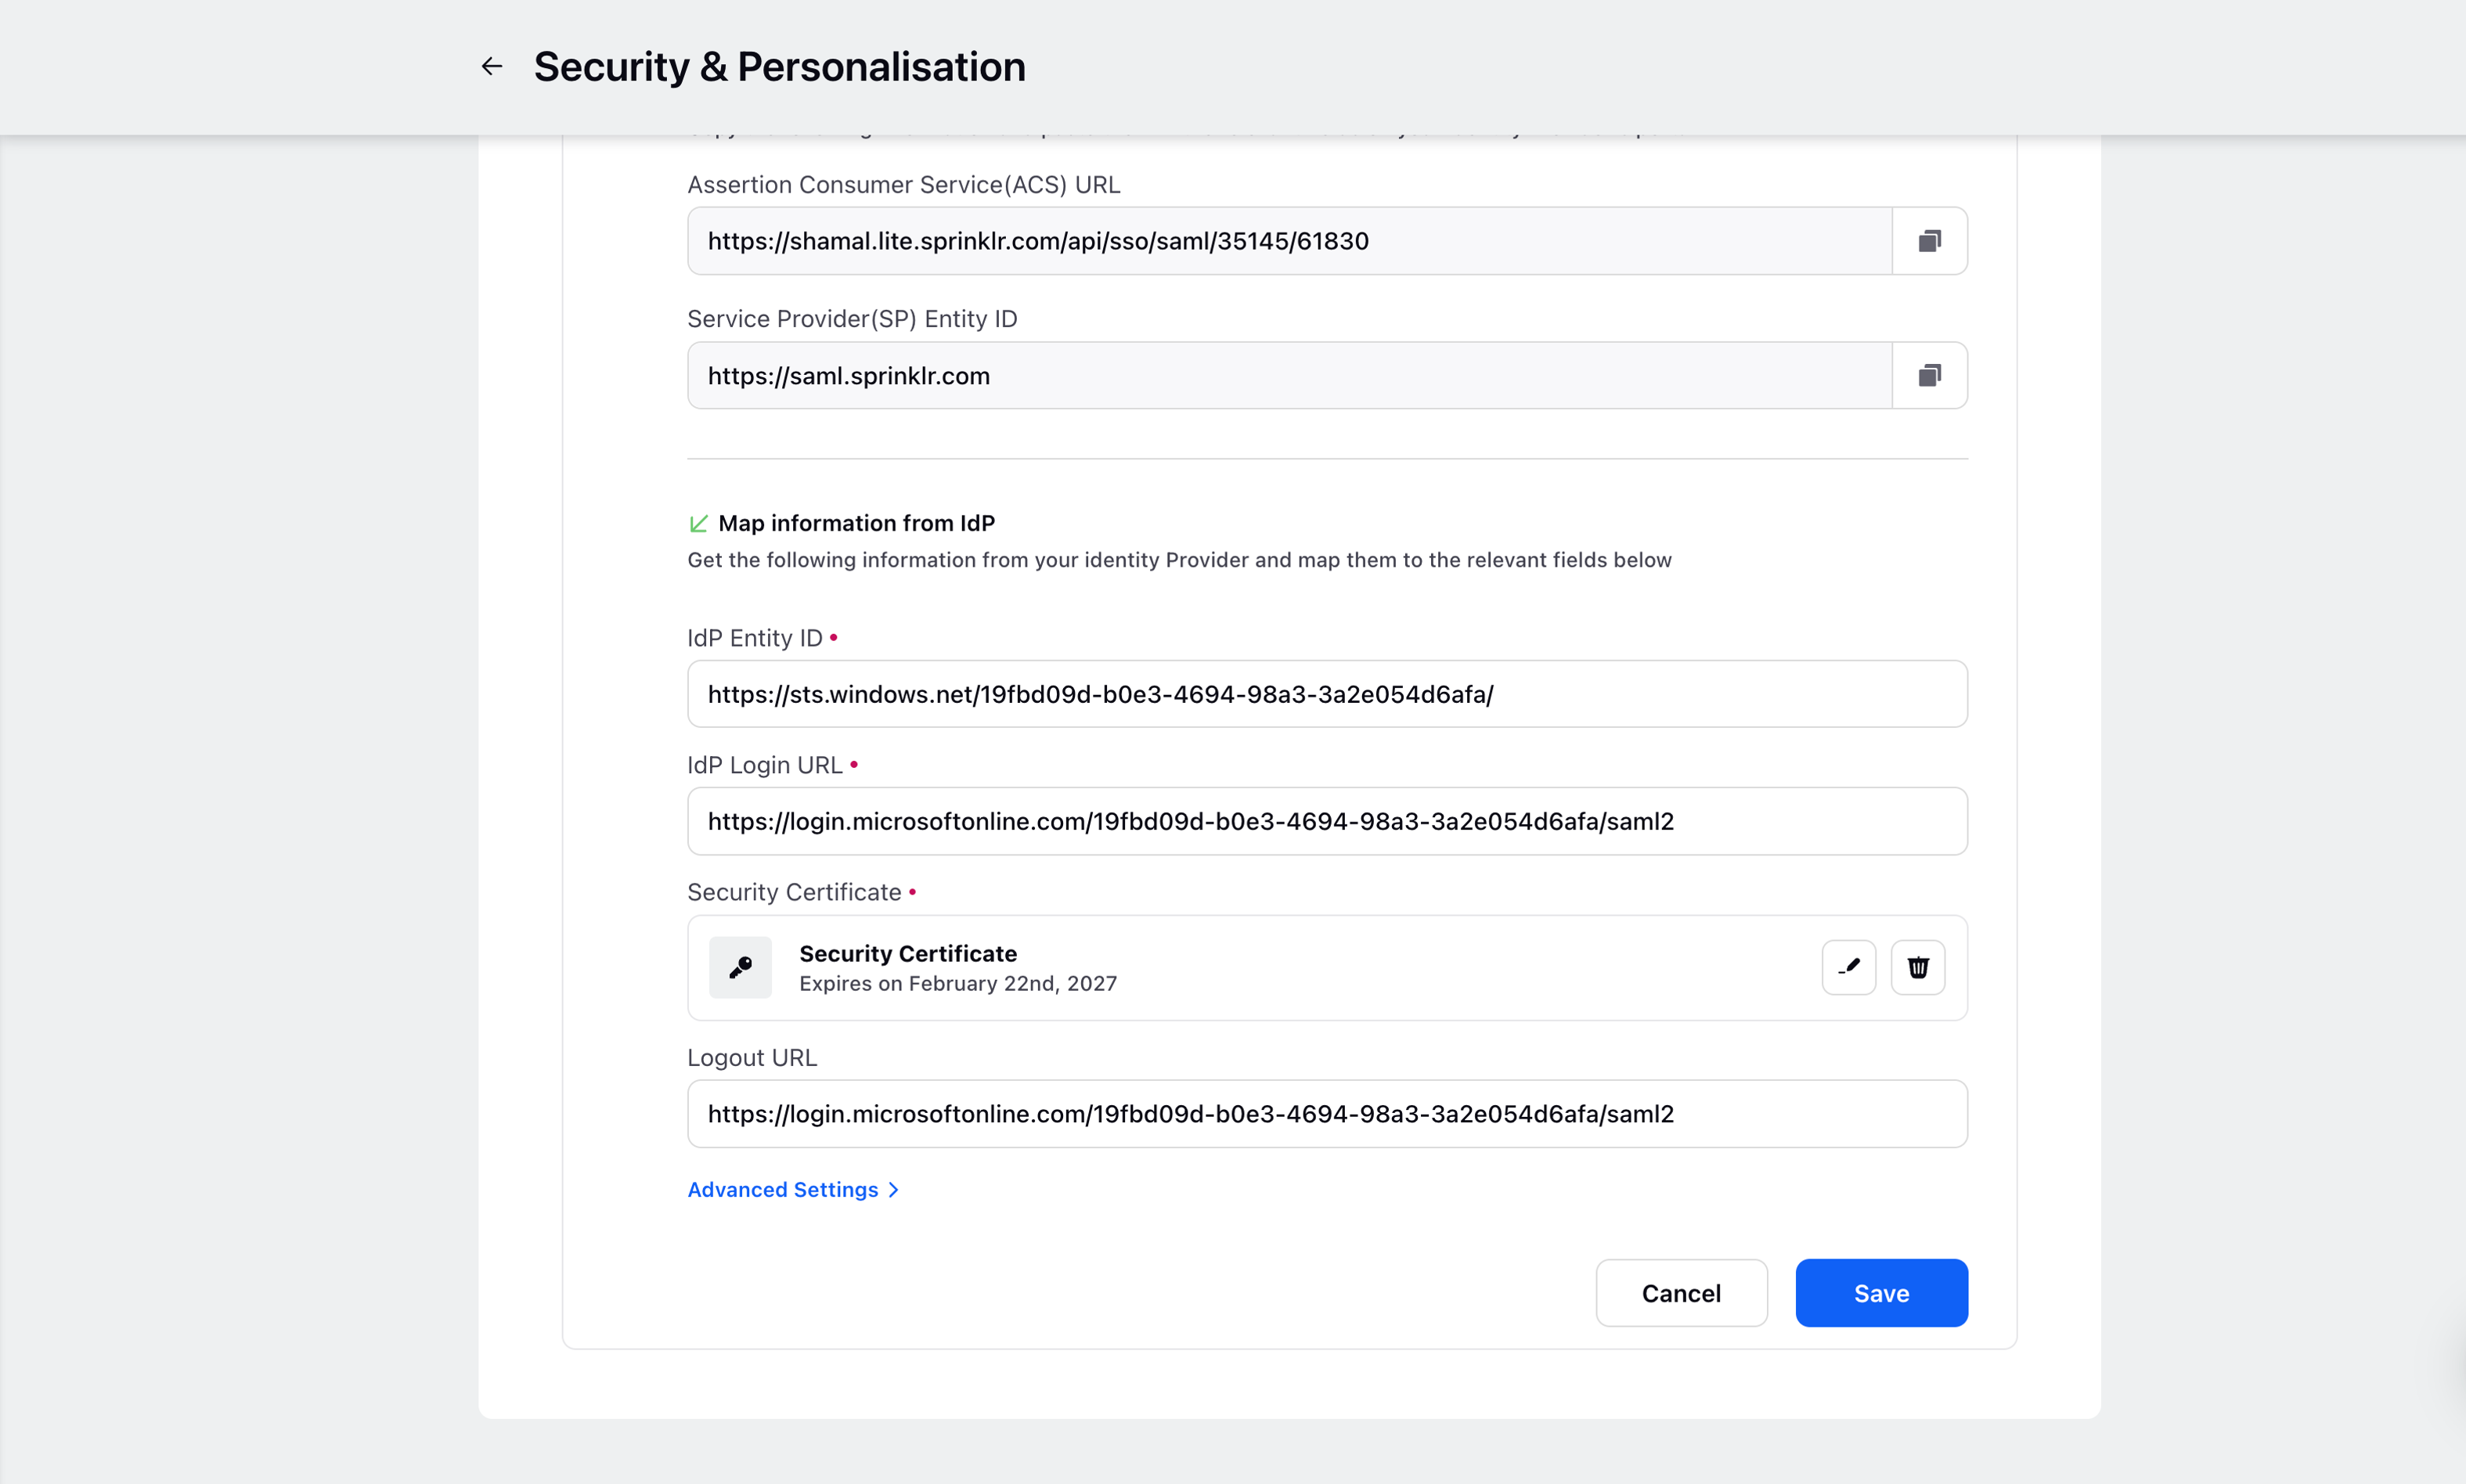
Recommended Advanced Settings for Azure: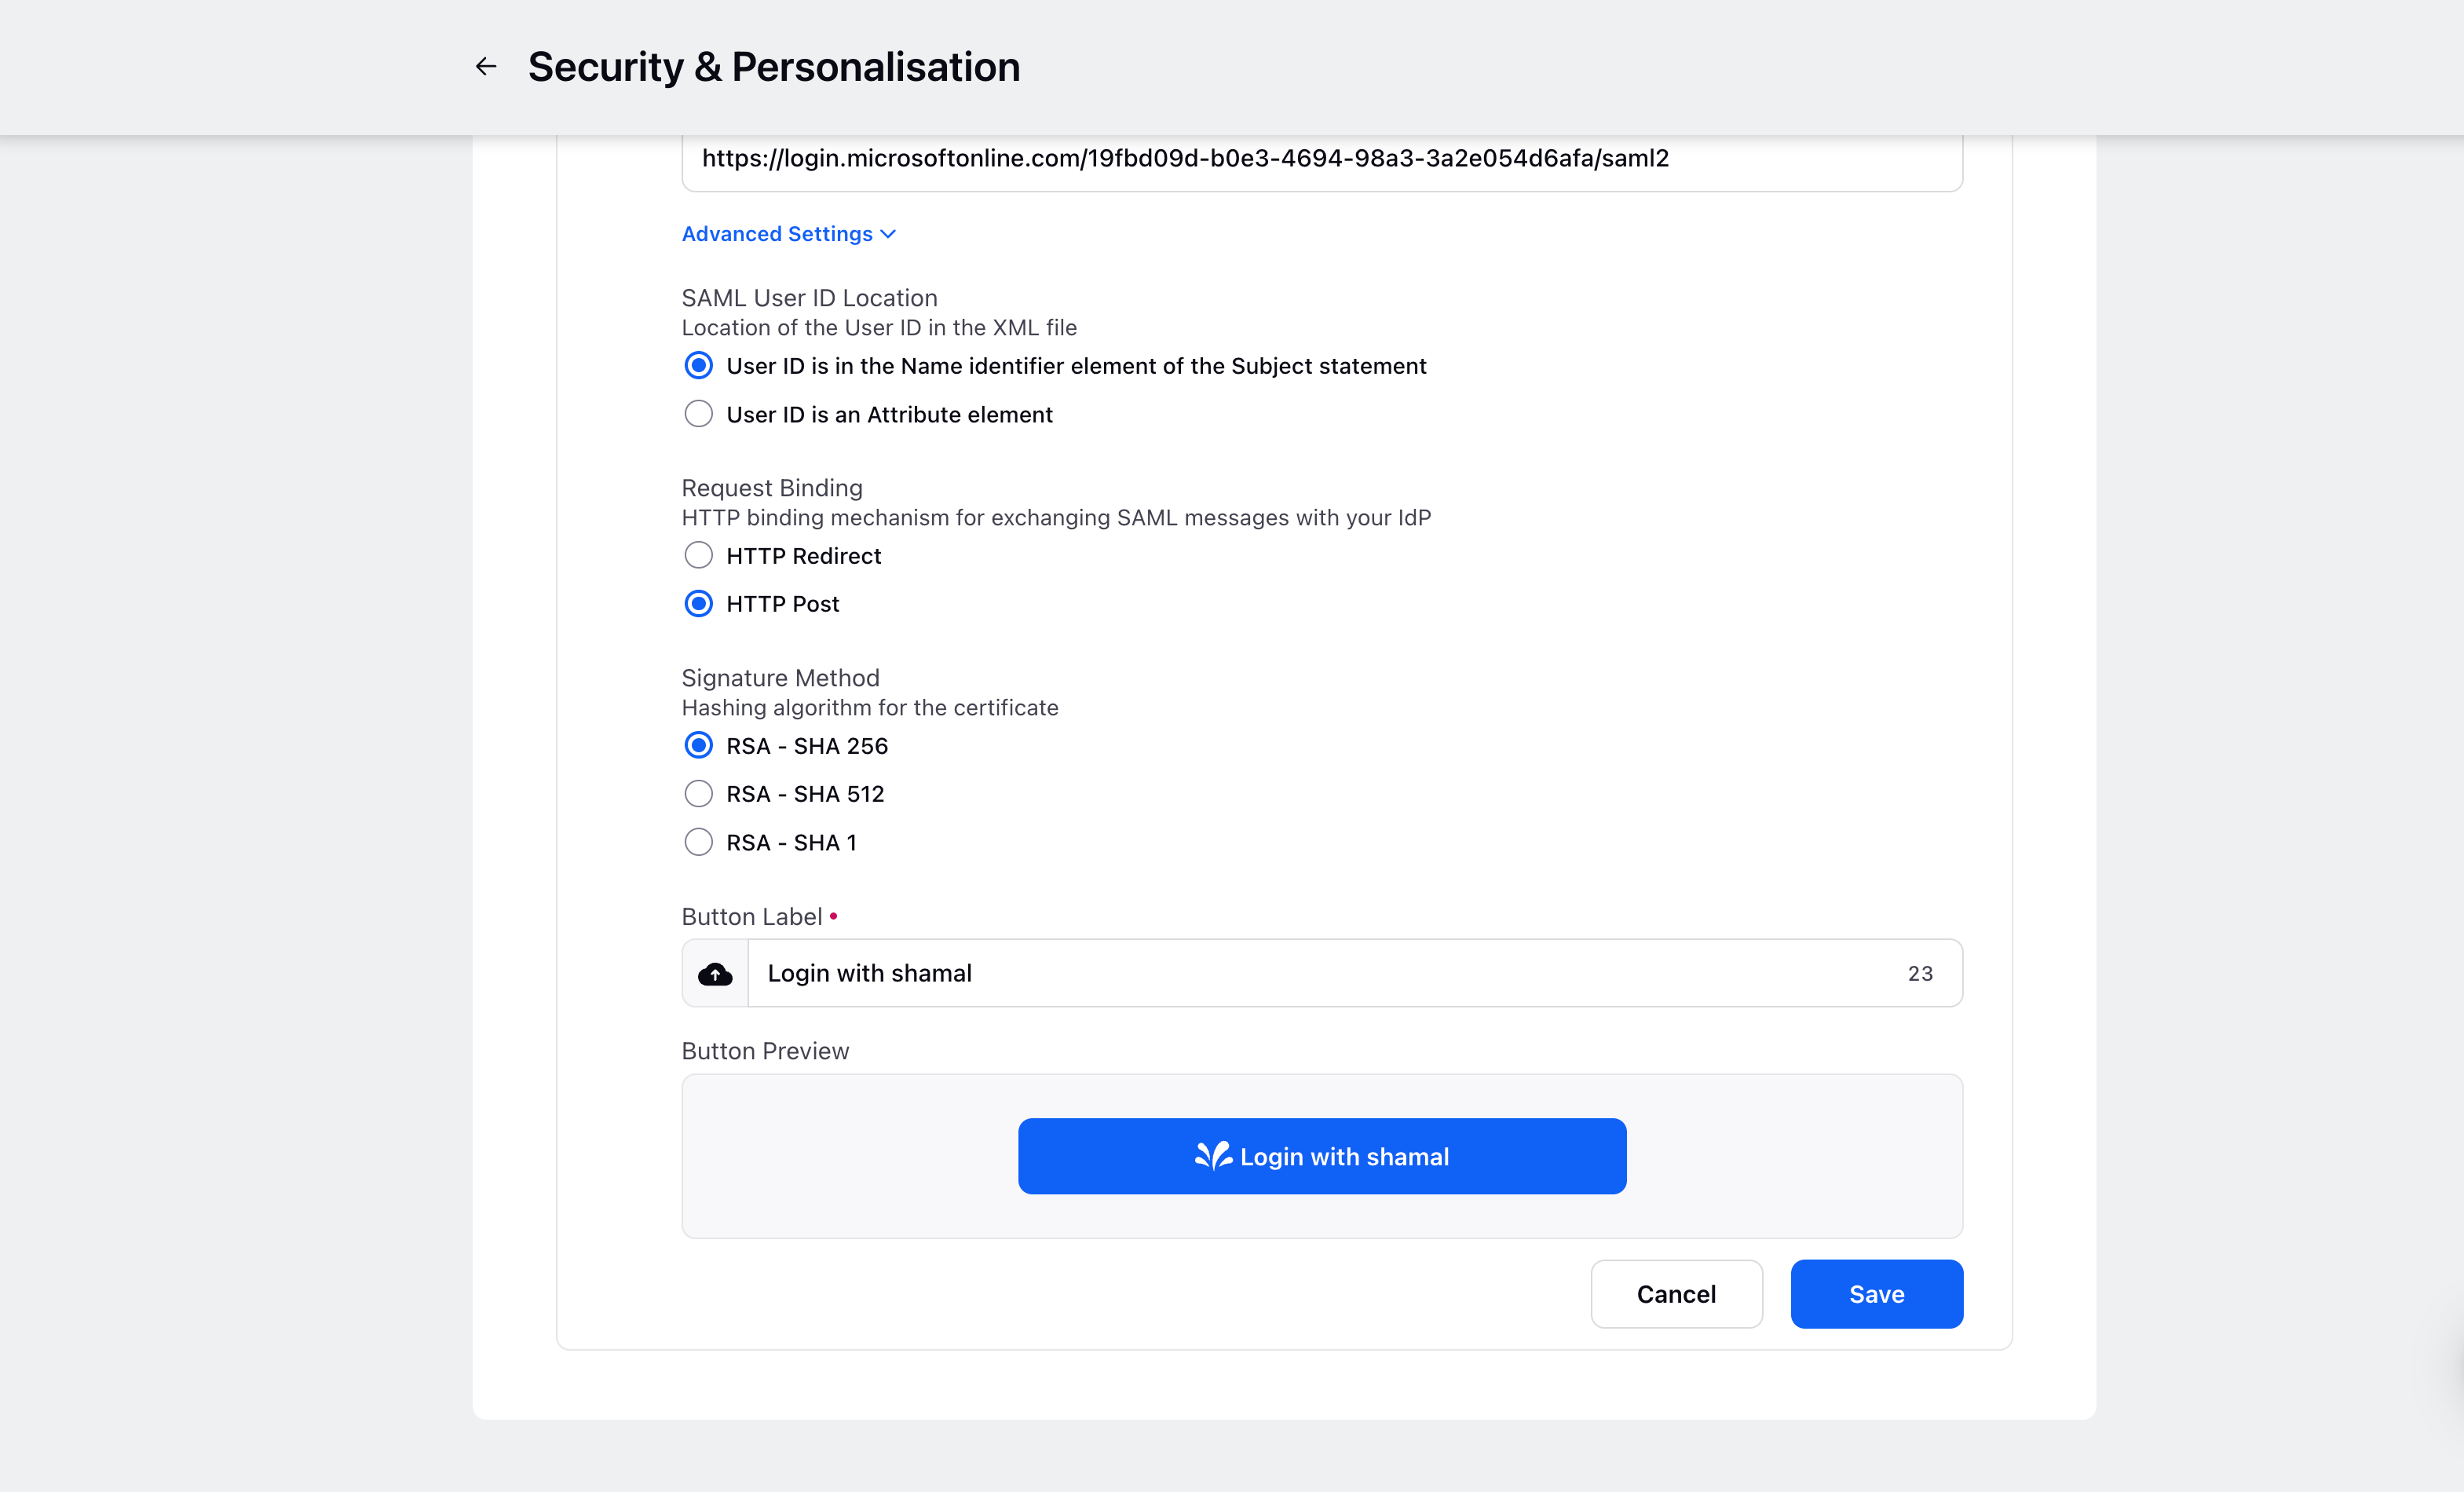
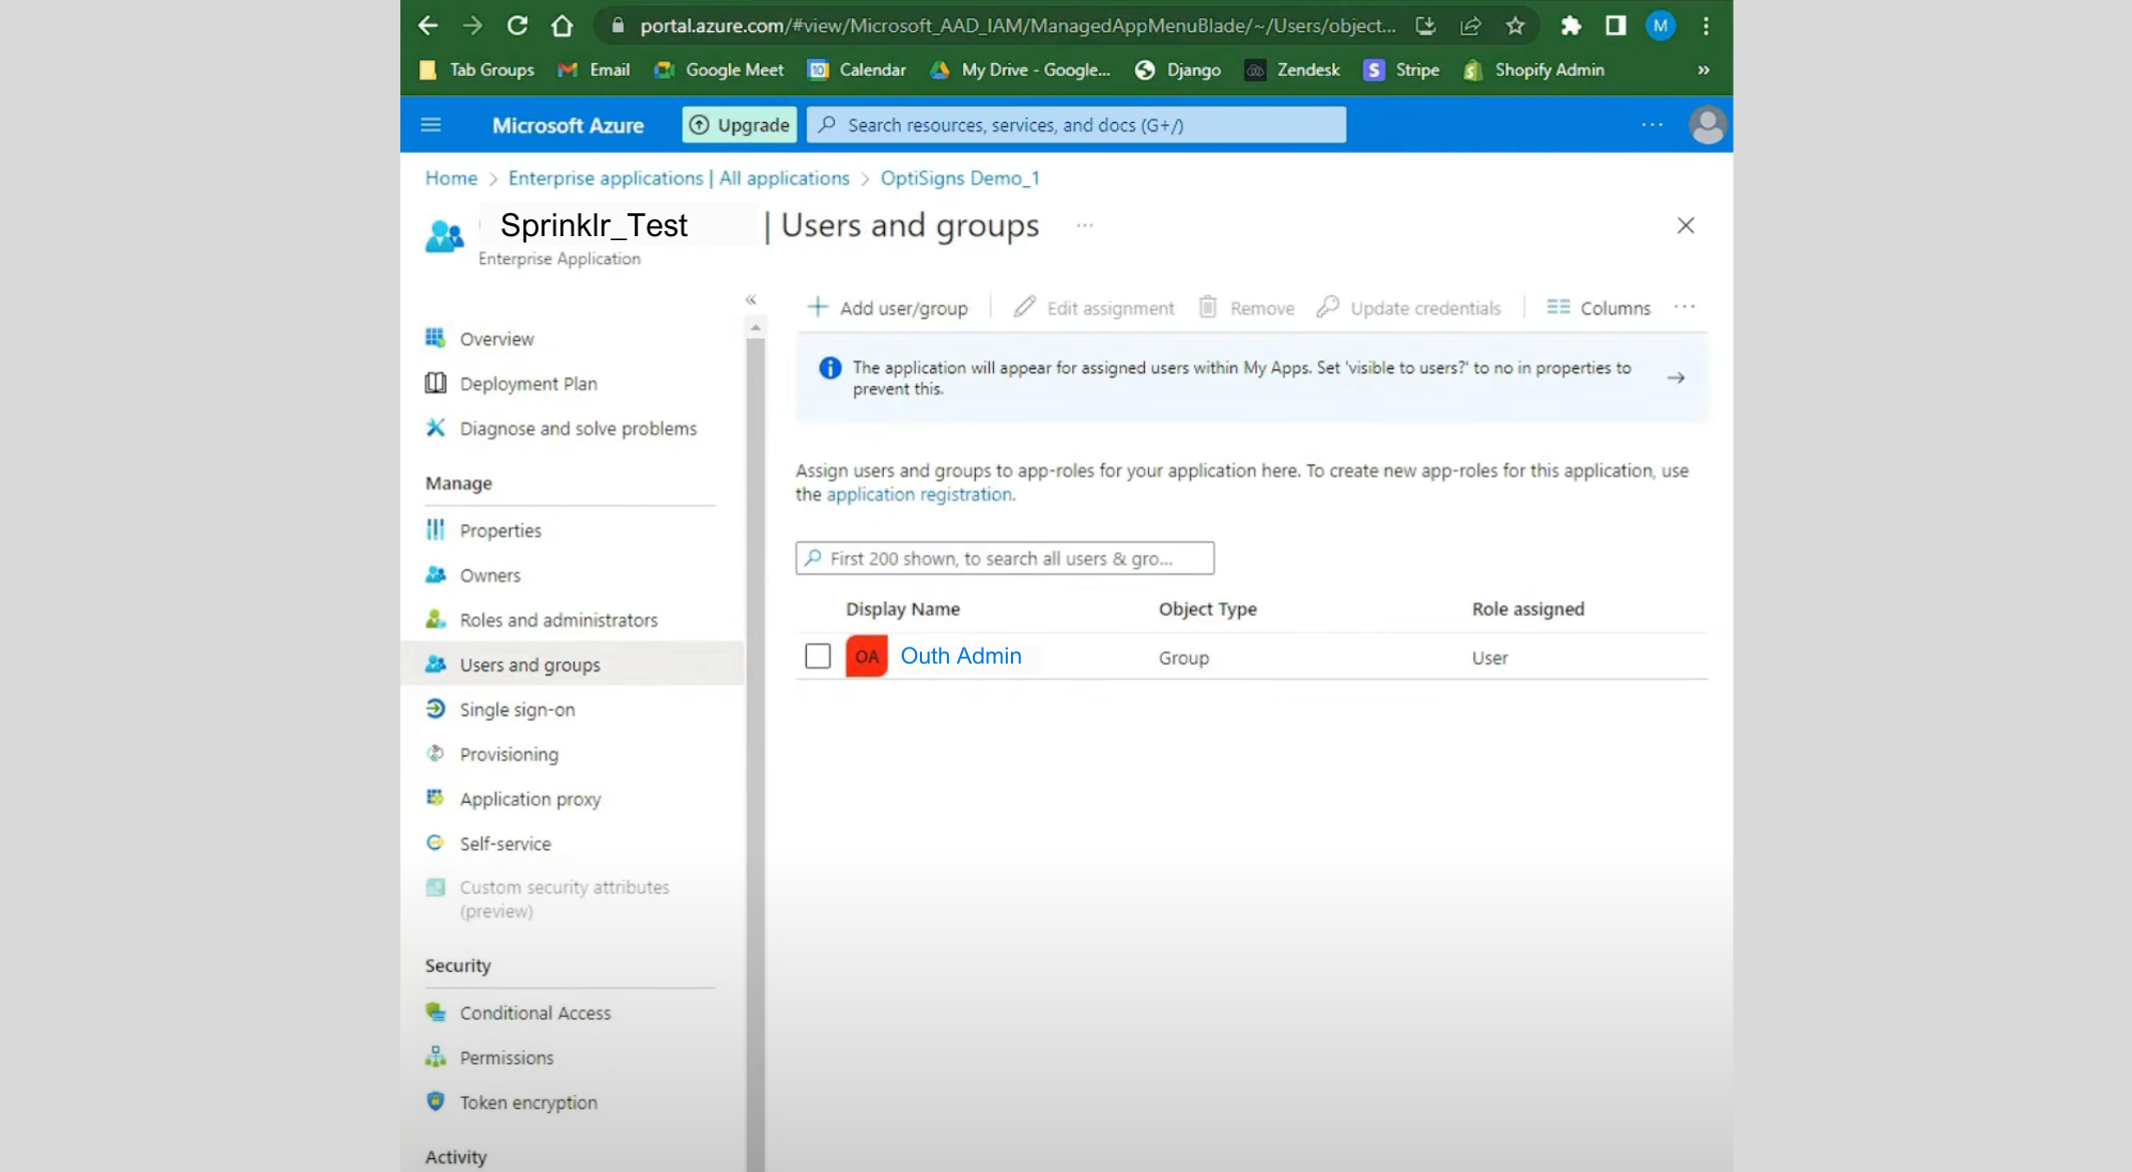
After completing the setup, it is important to assign the respective users who require access to Sprinklr SSO to the corresponding Sprinklr's user group on Azure.
Salesforce
Create a new Single Sign on Settings in Salesforce.
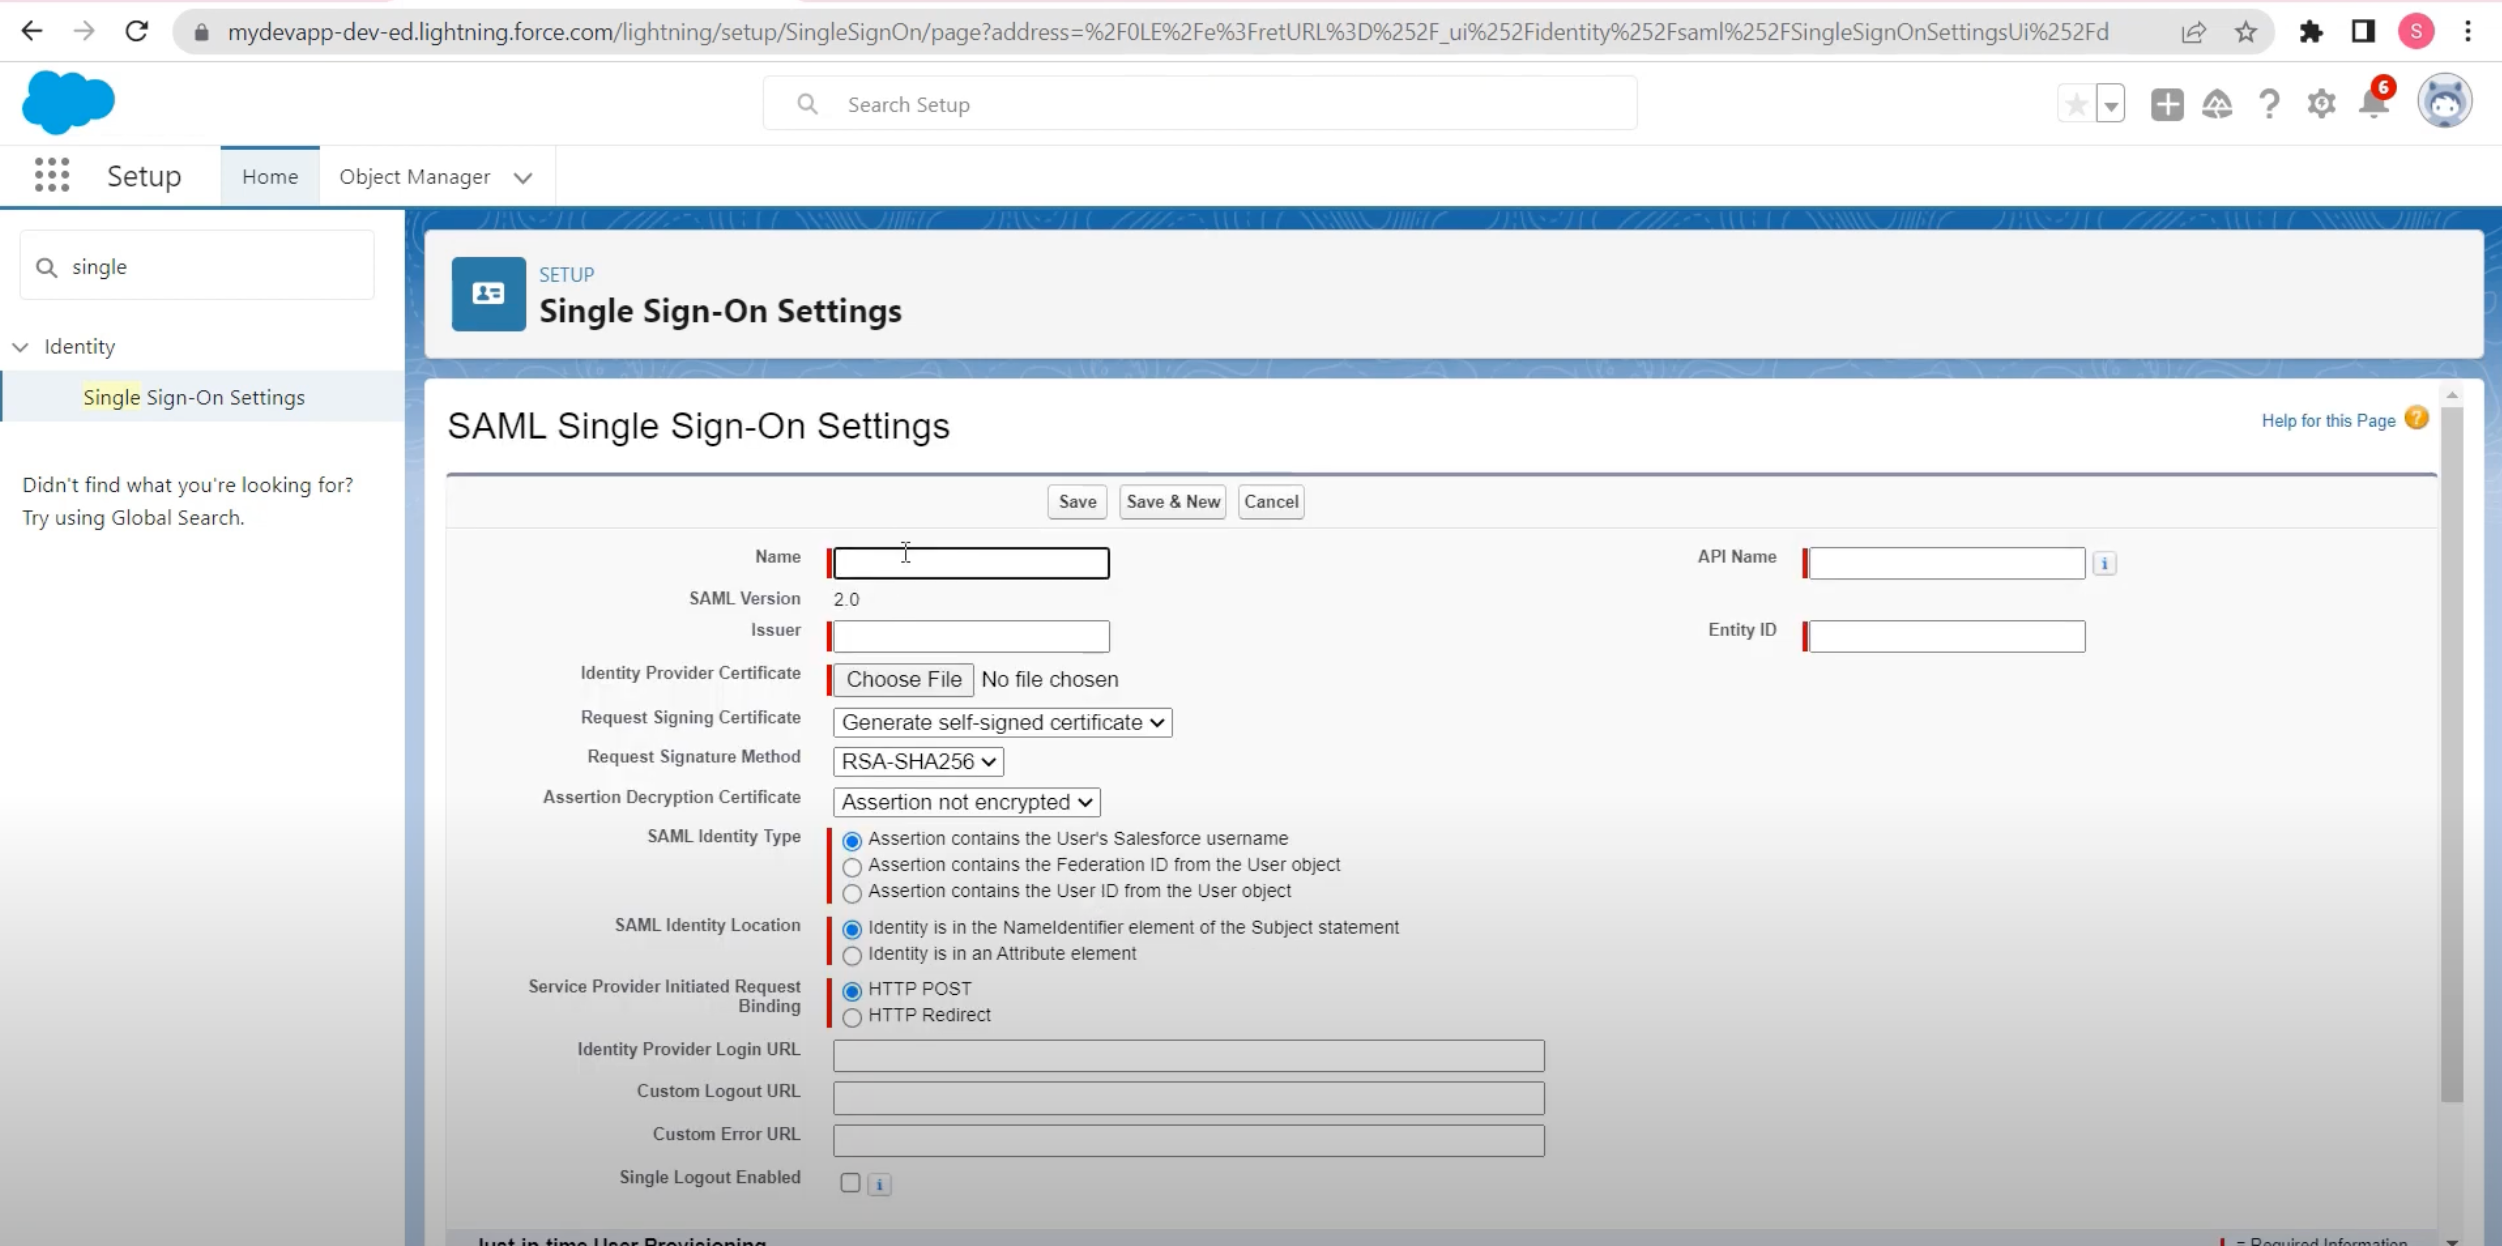
Copy the Assertion Consumer Service(ACS) URL and Service Provider(SP) Entity ID from Sprinklr in the required fields Issuer and Entity ID for Salesforce respectively.
Once the details are added, copy the Security Certificate, IdP Entity ID and IdP Login URL from Salesforce and add it in Sprinklr, you can also modify the Advanced Settings if required.
Sample IdP details from Salesforce: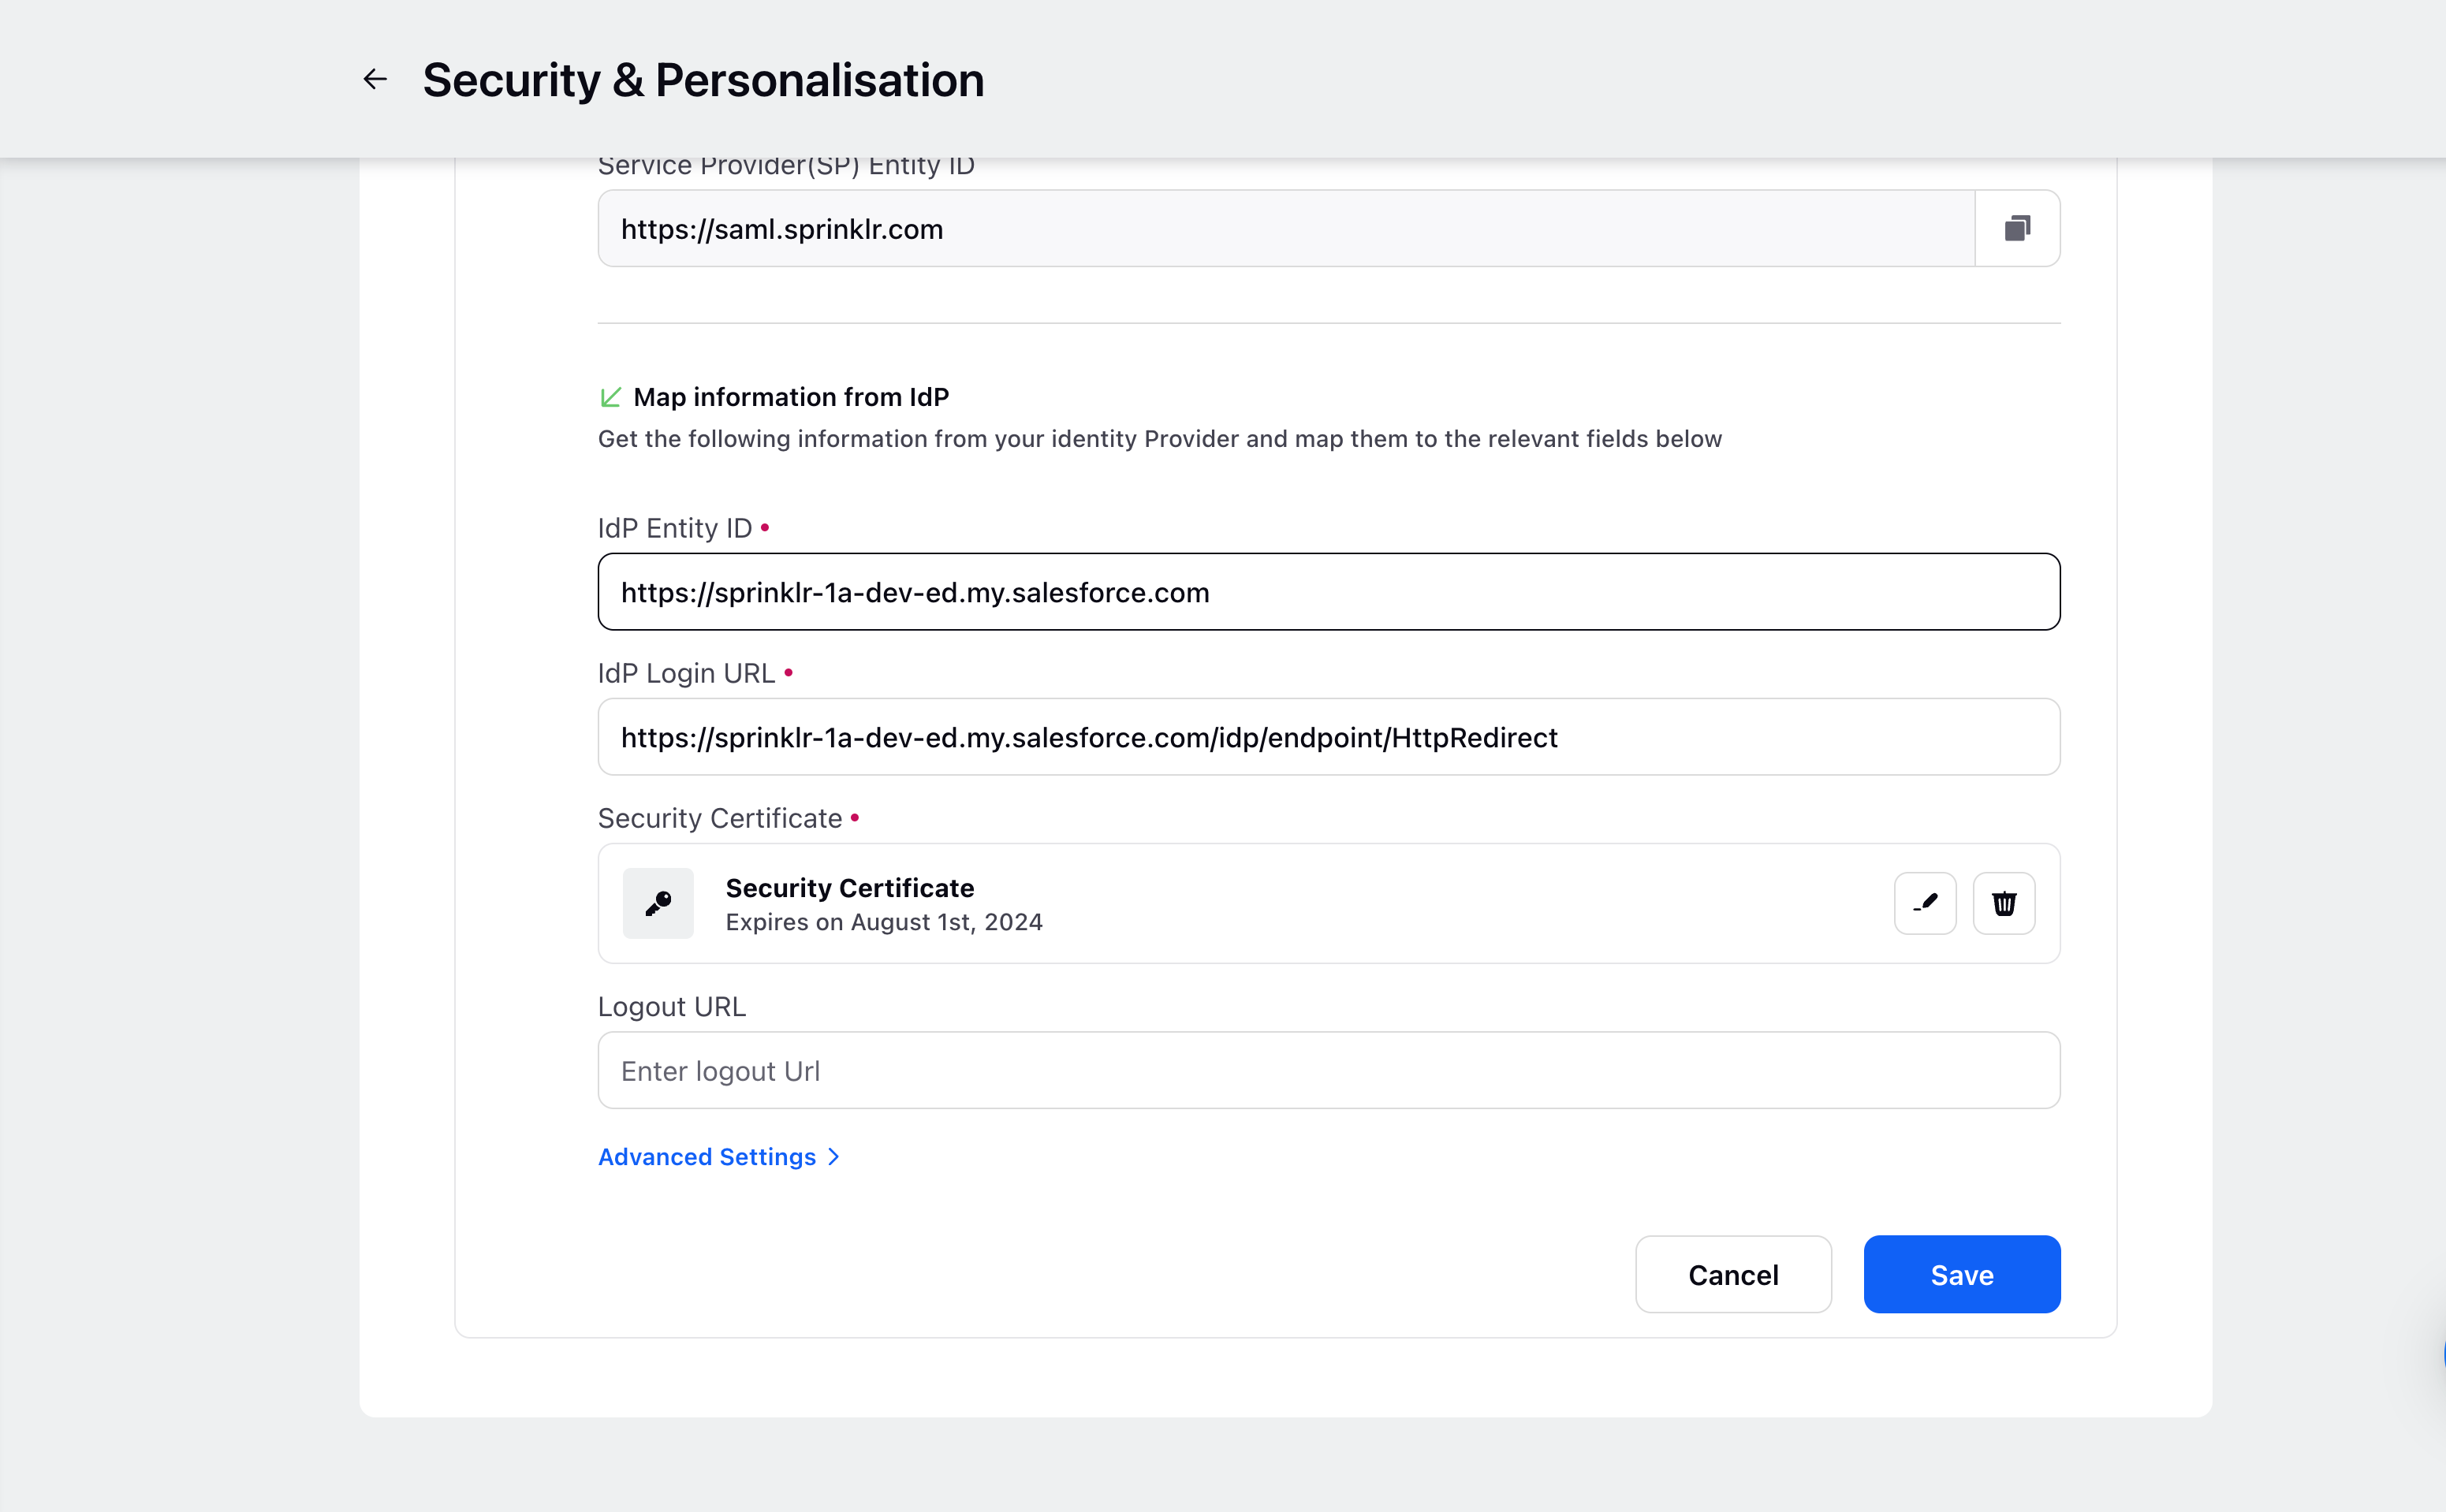
Recommended Advanced Settings for Salesforce: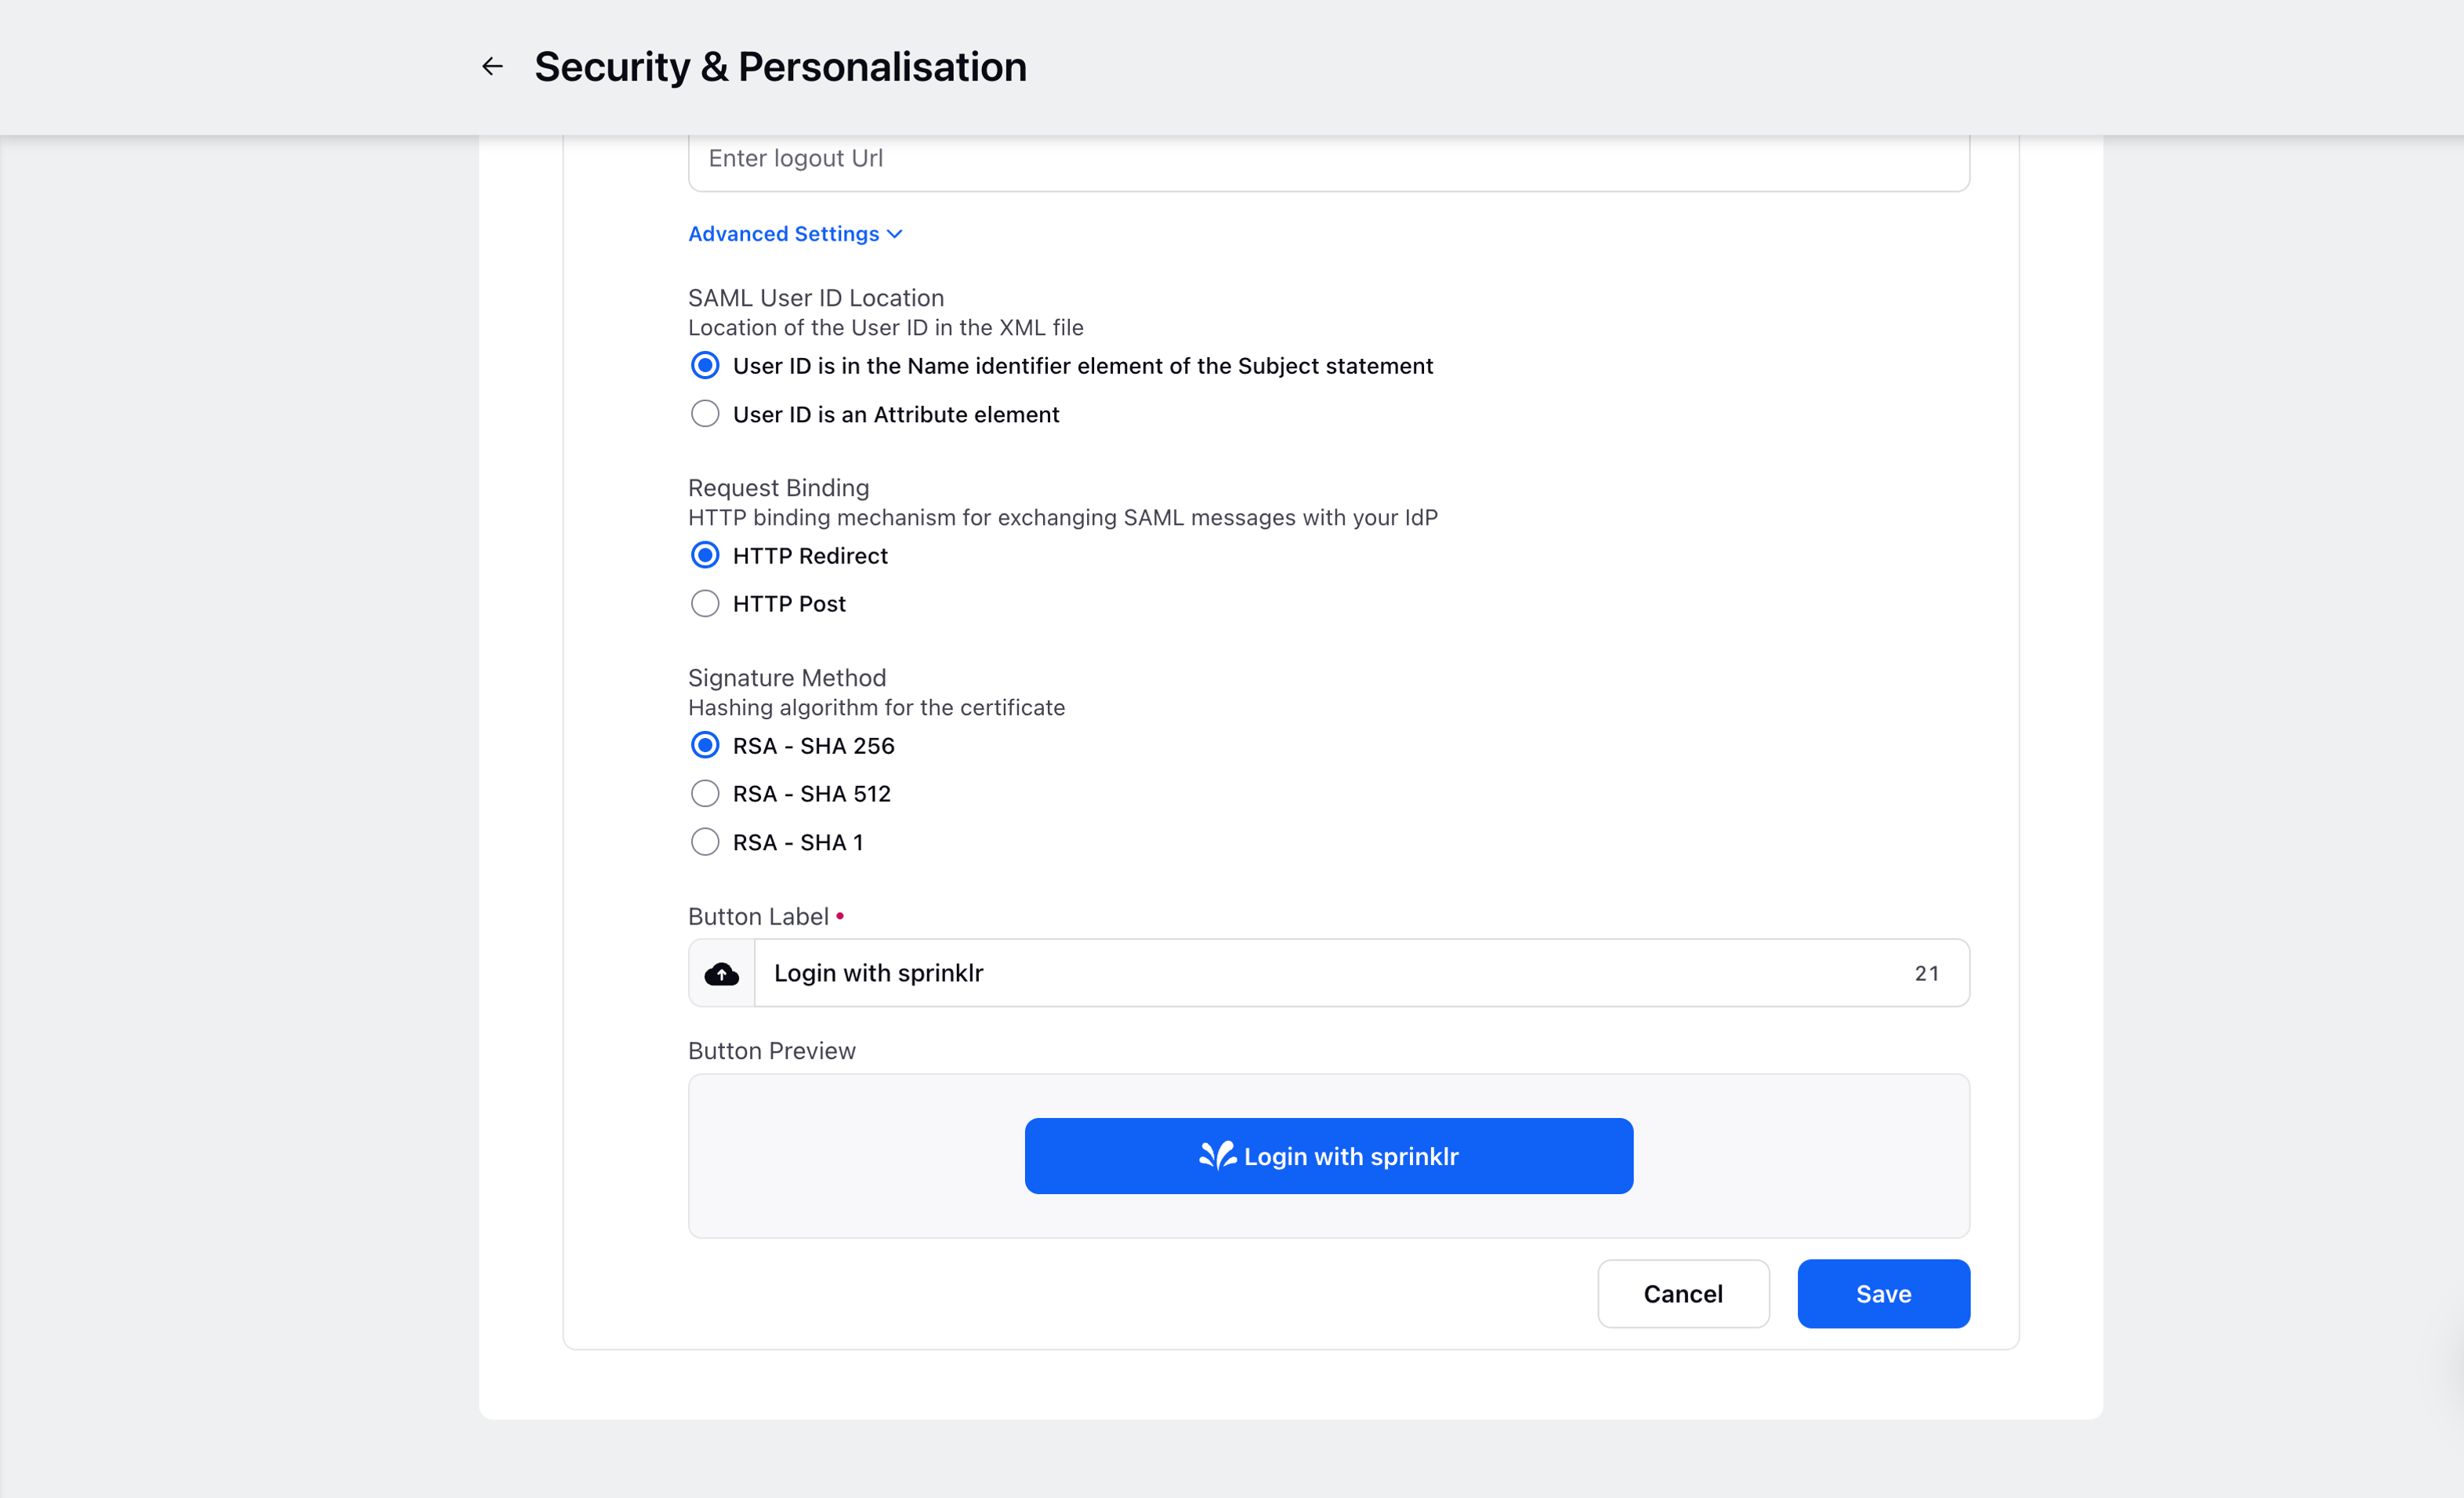
After completing the setup, it is important to assign the respective users who require access to Sprinklr SSO to the corresponding Sprinklr's user group on Salesforce.
Note:
SSO with SAML will only be enabled once you have set up your own Custom Domain.