Configure Gmail email forwarding to manage bulk incoming emails
Updated
How brands can leverage Gmail email forwarding to redirect multiple email addresses to your main email account - saving time by setting up a single point of contact for your clients.
Email forwarding lets you create an extra email address (“email alias”) to receive emails. It helps you route a direct email coming from a certain email address to a different destination. Email forwarding is the easiest way to manage multiple emails coming from multiple addresses to a single place. In this article, you will view the detailed instructions for setting up a Gmail email forwarding.
To add a support email account using the Sprinklr server
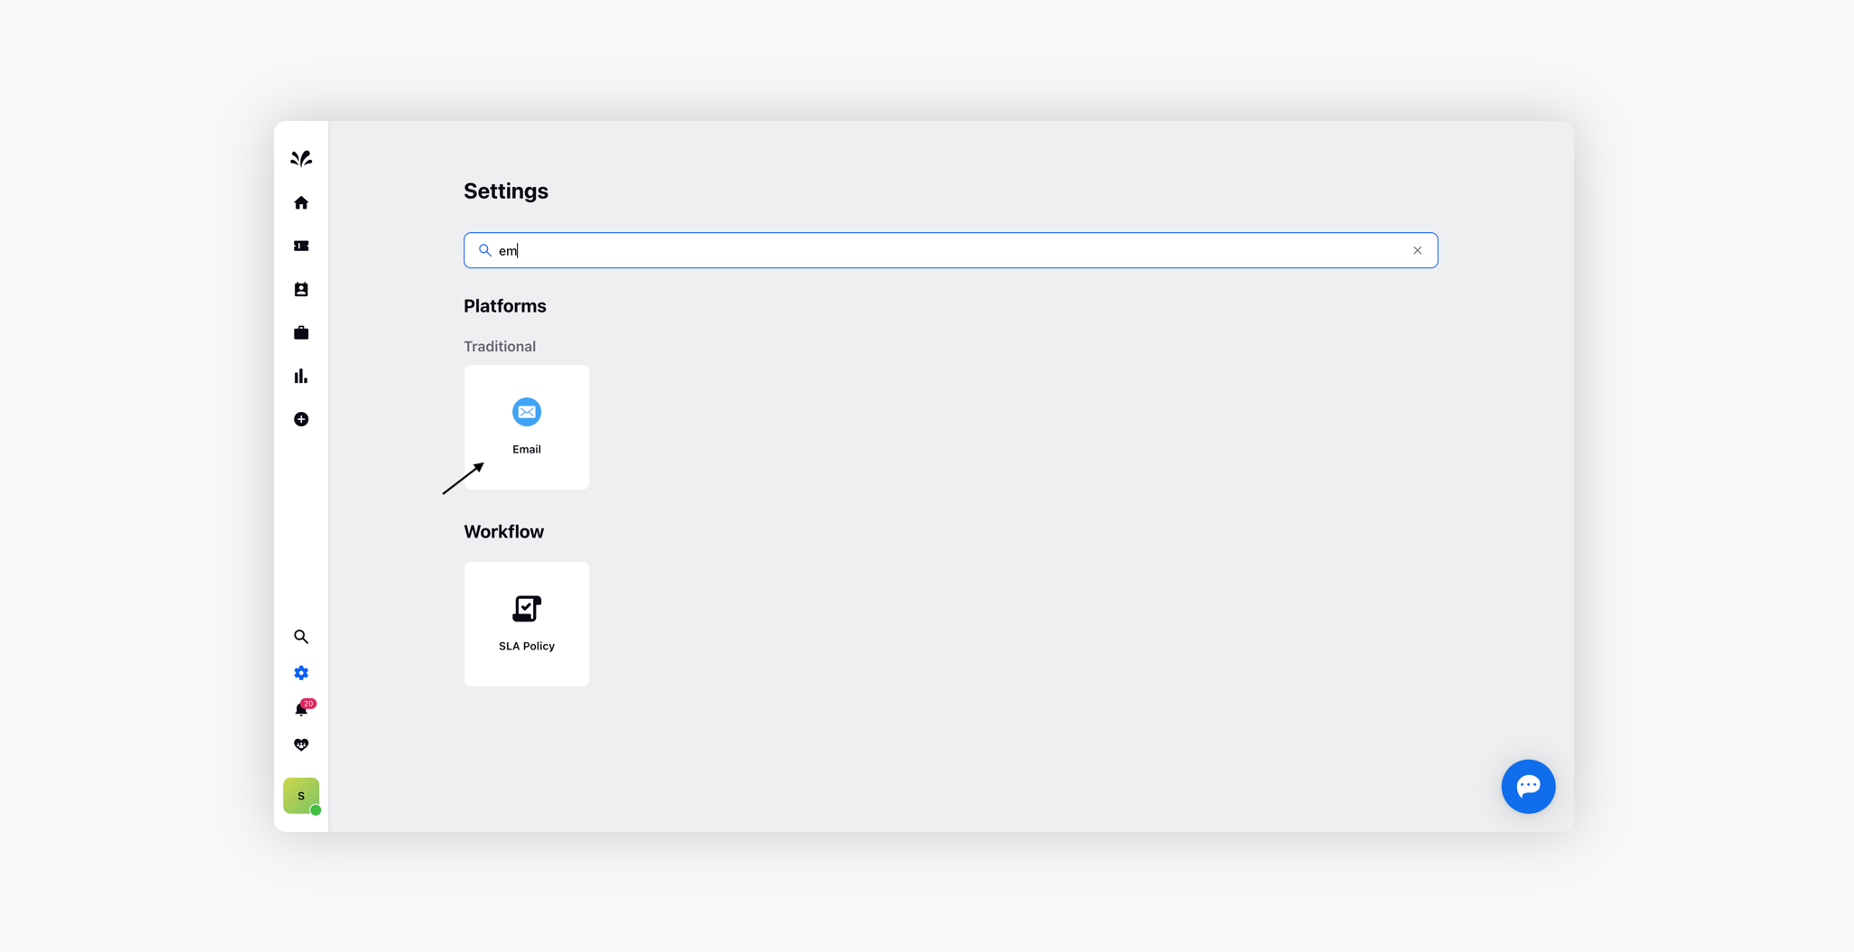
Log into Sprinklr Self-Serve. Click the Settings icon on the left Navigation Bar.
On the Settings window, select Email under Traditional.
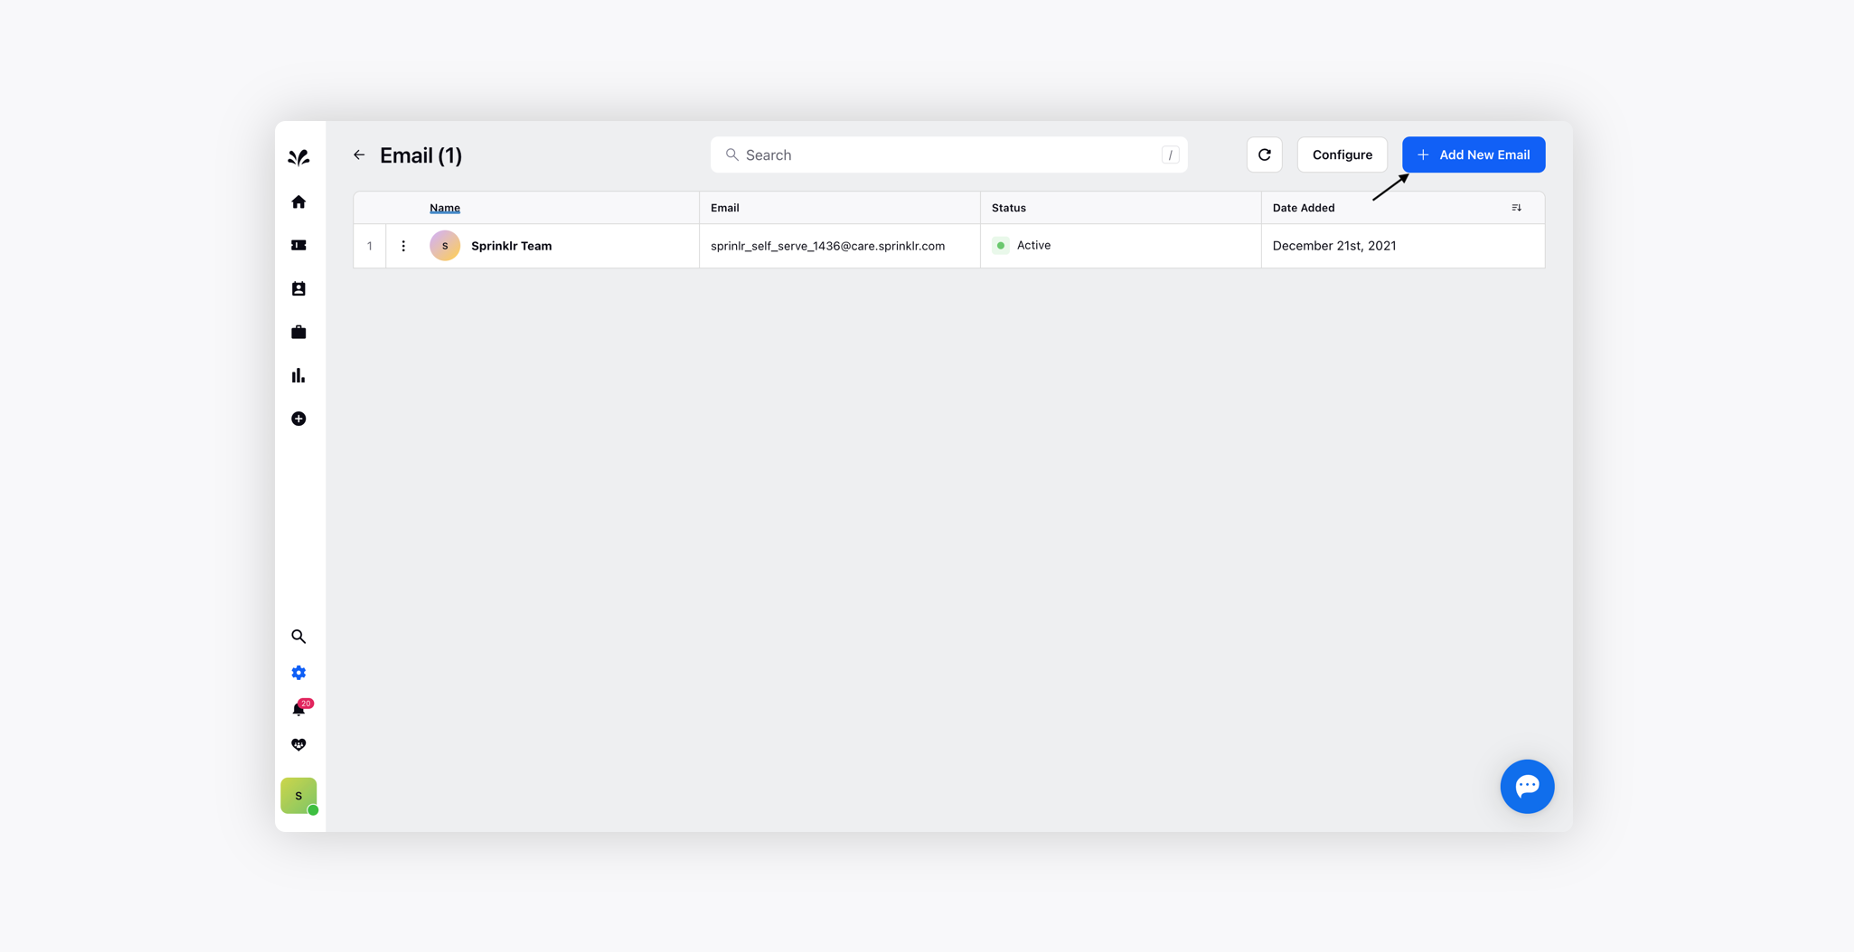
Click Add New Email in the top right corner of the Email window.
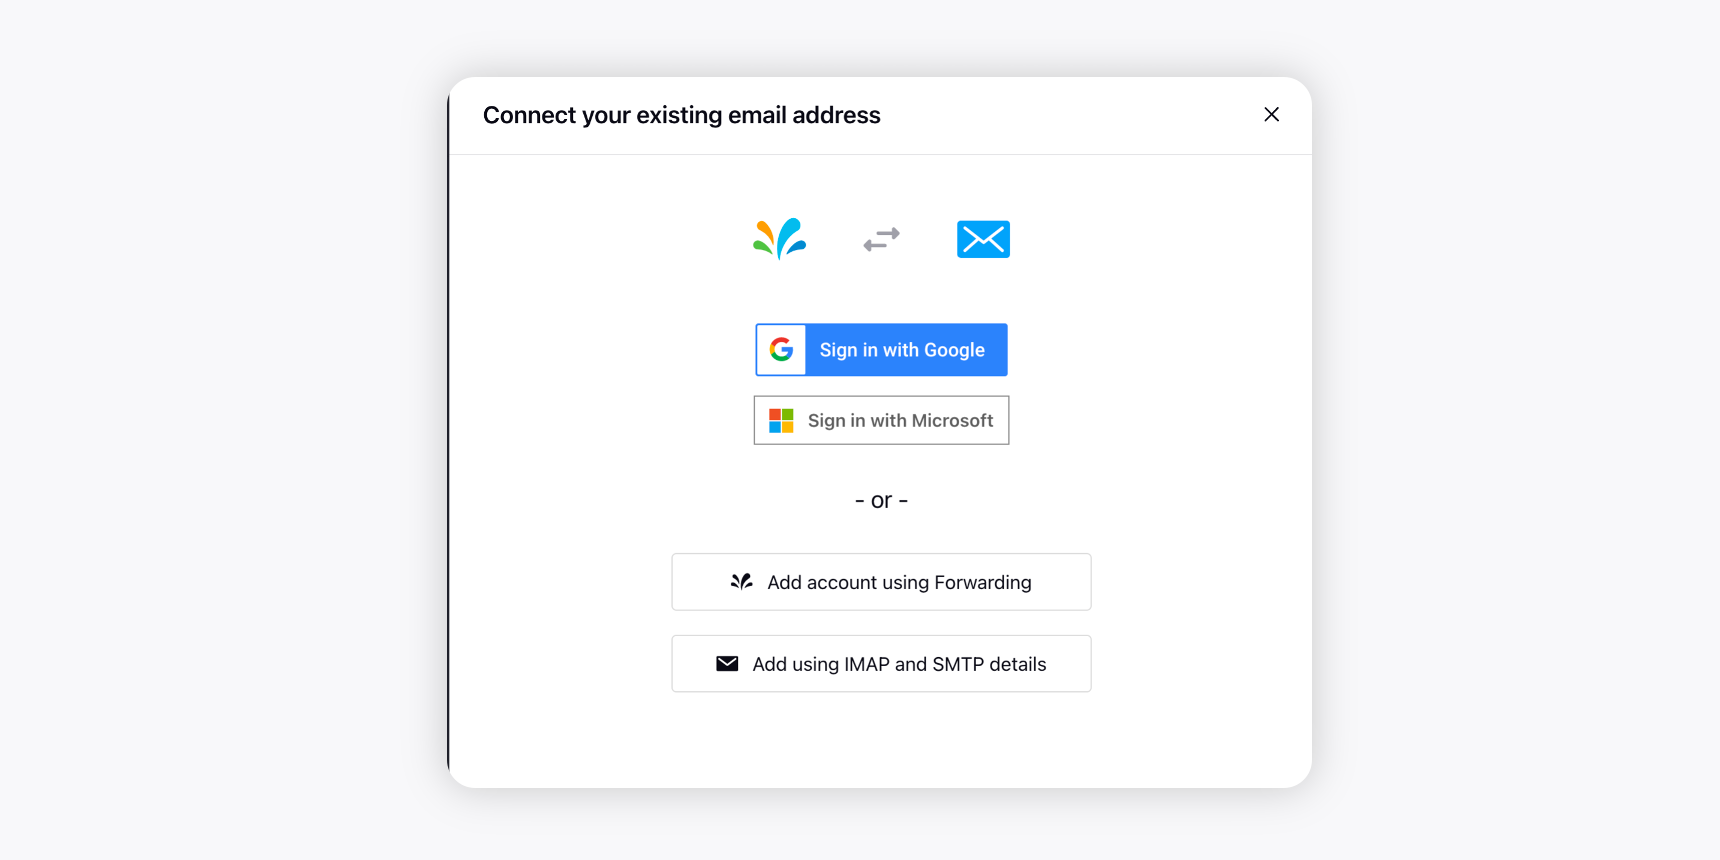
Select Add account using Forwarding on the Connect your existing email address pop-up window.
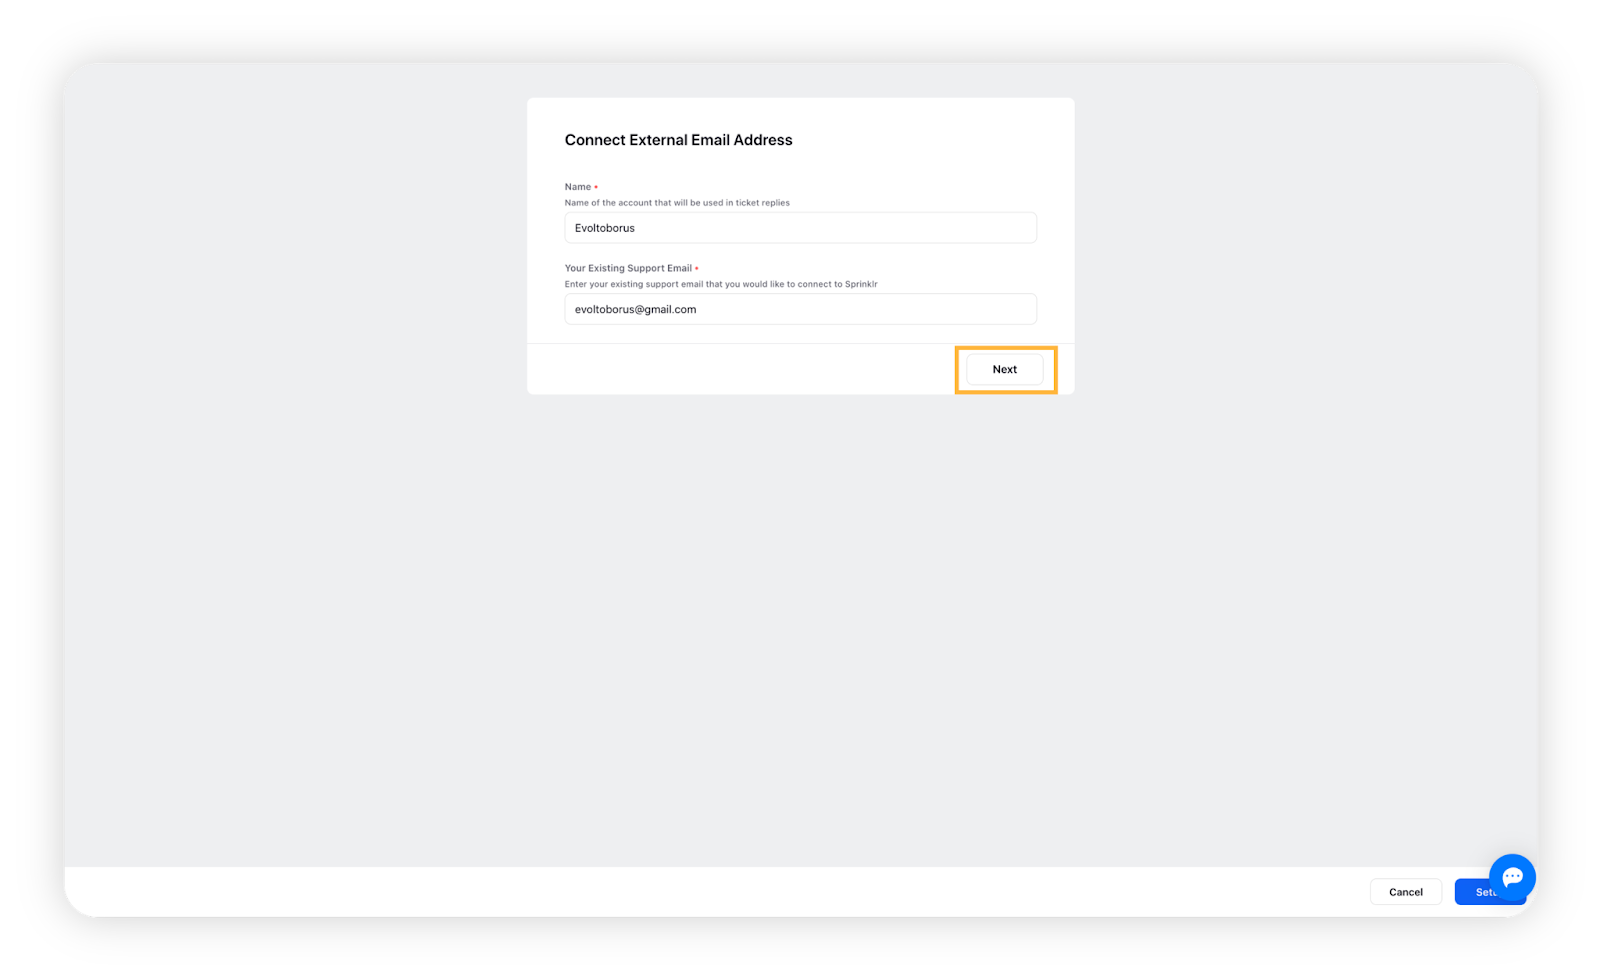
On the Connect External Email Address window, enter the Name of the email that you want to use in ticket replies.
Enter the existing support email you would like to connect to Sprinklr Self-Serve in the Your Existing Support Email field. Click Next.
You can activate your support email right away. To do that, follow the instructions given below.
To activate support Email
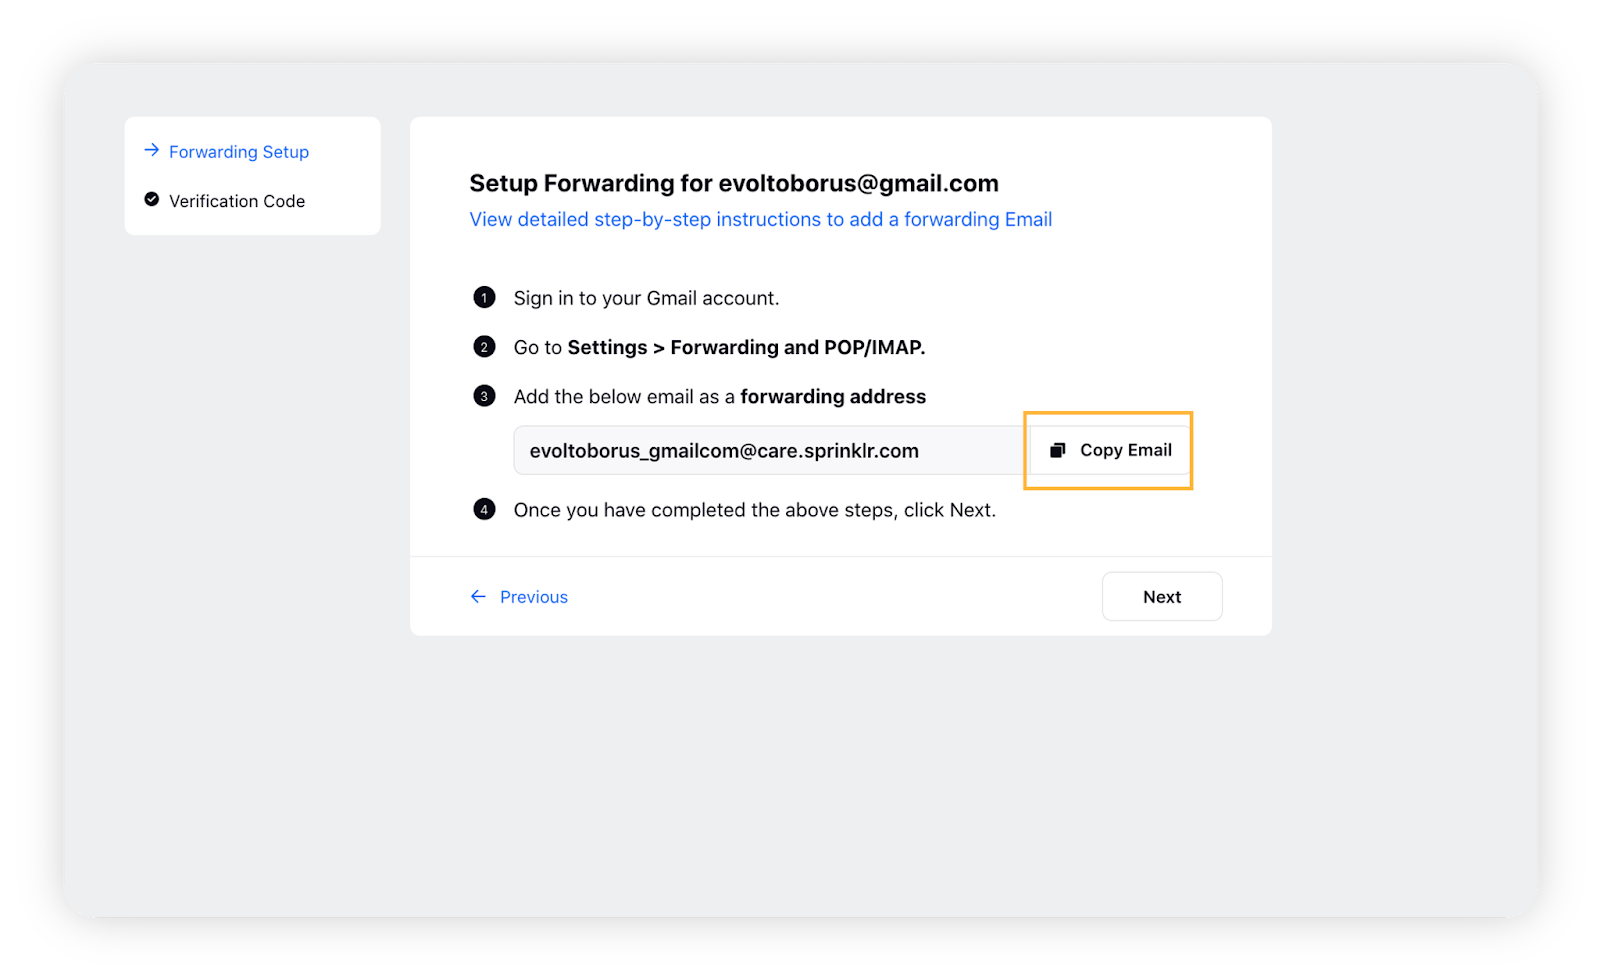
Once you have added a support email address to your account, you will have to verify and set up forwarding rules in your mailbox. Follow the given steps to activate your support email address:
Click Copy Email to copy the Forwarding Address generated for the email under Forwarding Setup.
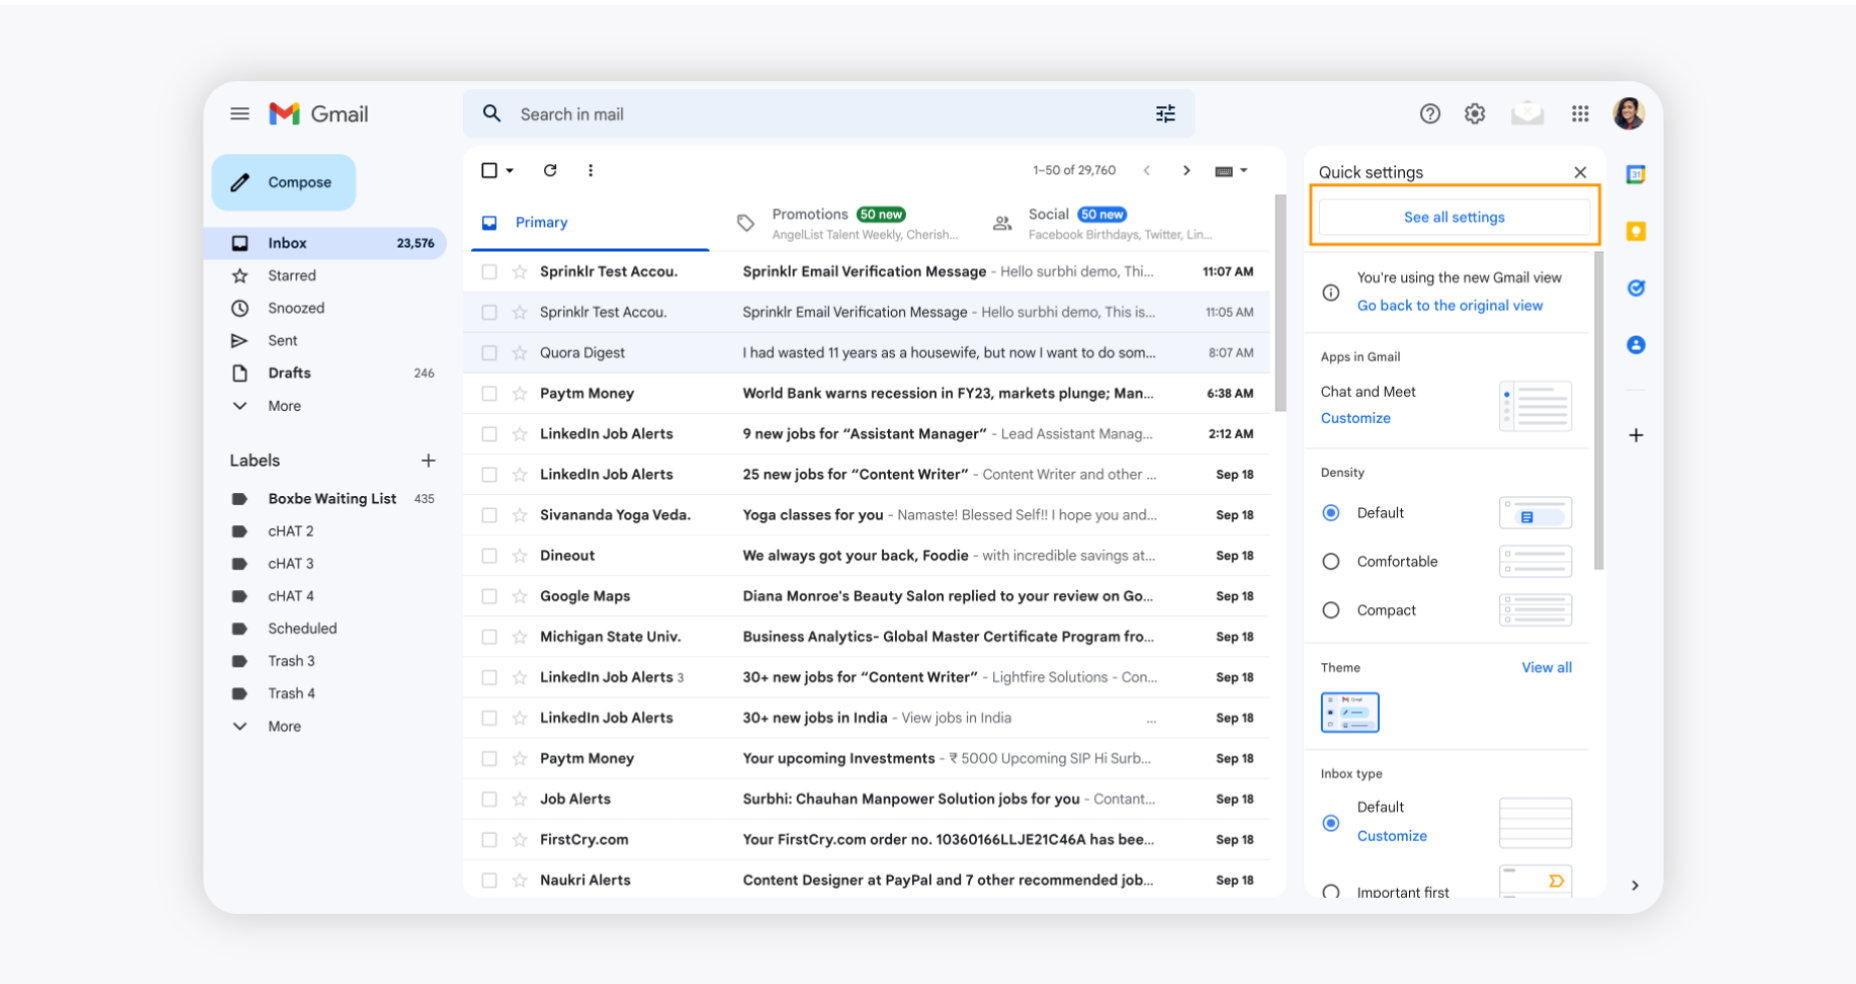
Open a New Tab in your browser and sign in to your Gmail account.
On the Gmail window, go to Settings and click on See all settings in the top right corner of the Gmail account.
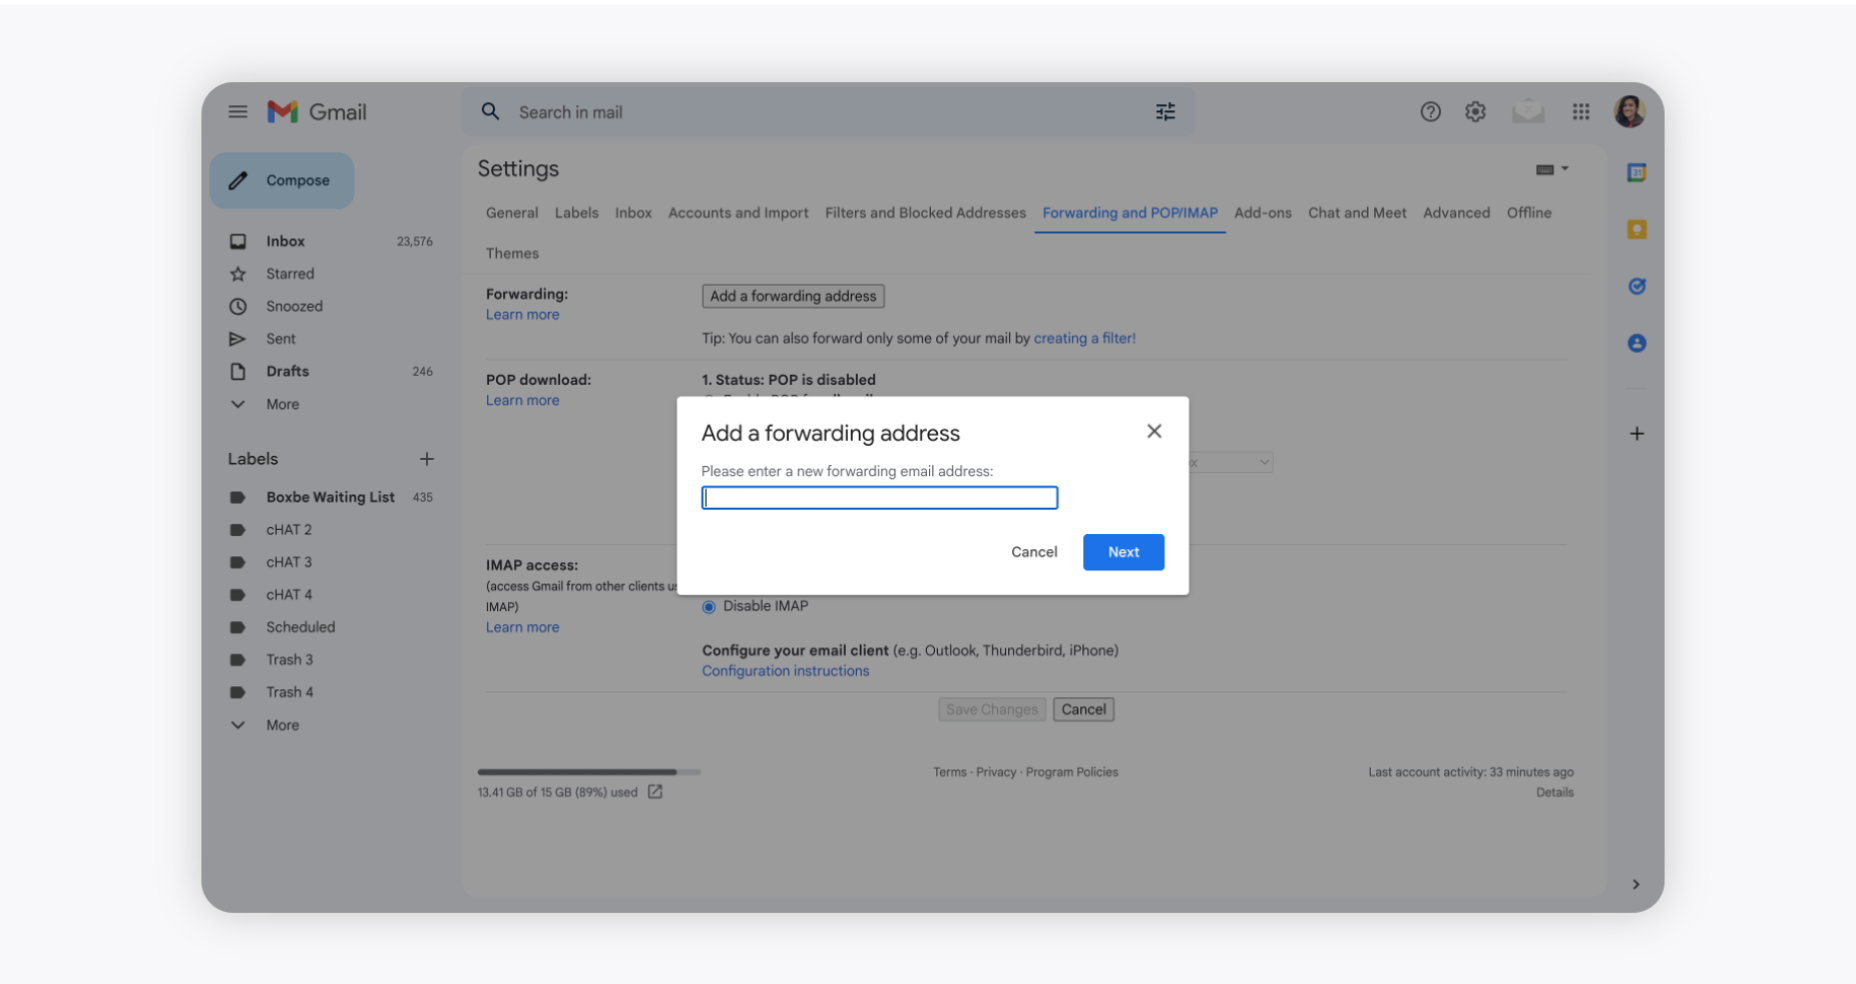
Now, choose Forwarding and POP/IMAP tab at the top of the Gmail account.
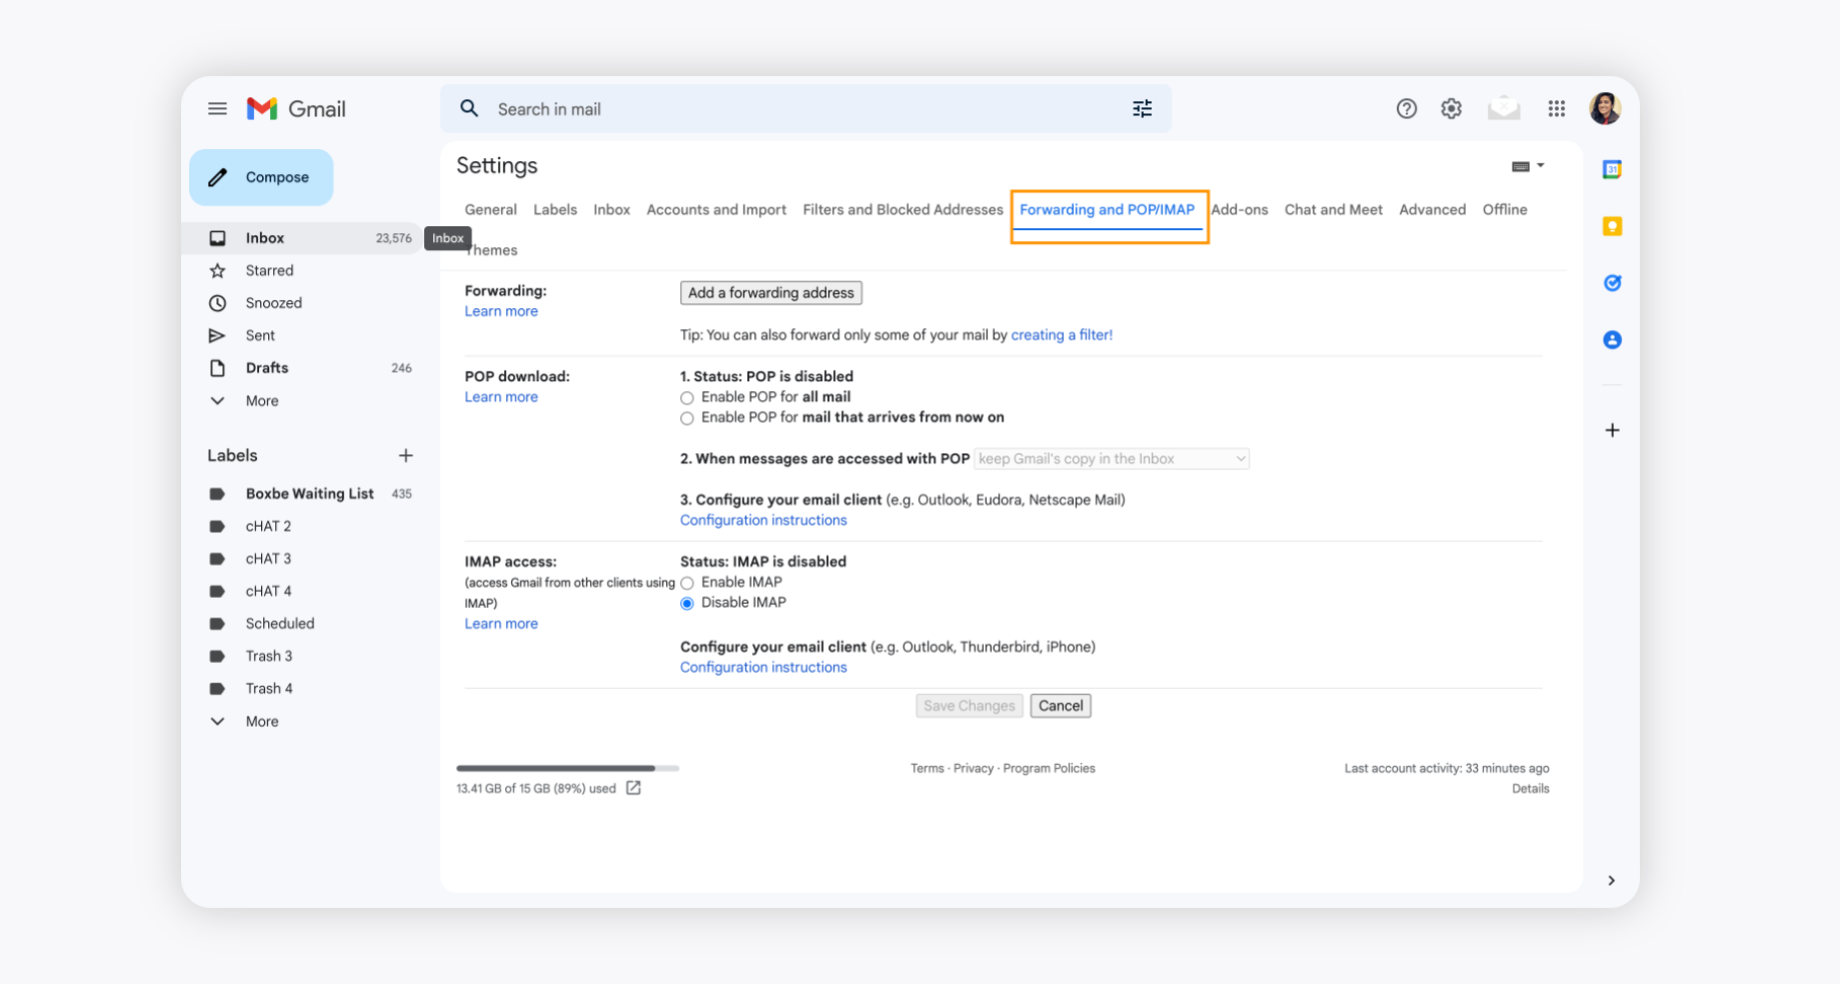
Click Add a forwarding address and add the copied email and click Next. Click Proceed. A confirmation code will be sent to Sprinklr Self-Serve to verify your email forwarding.
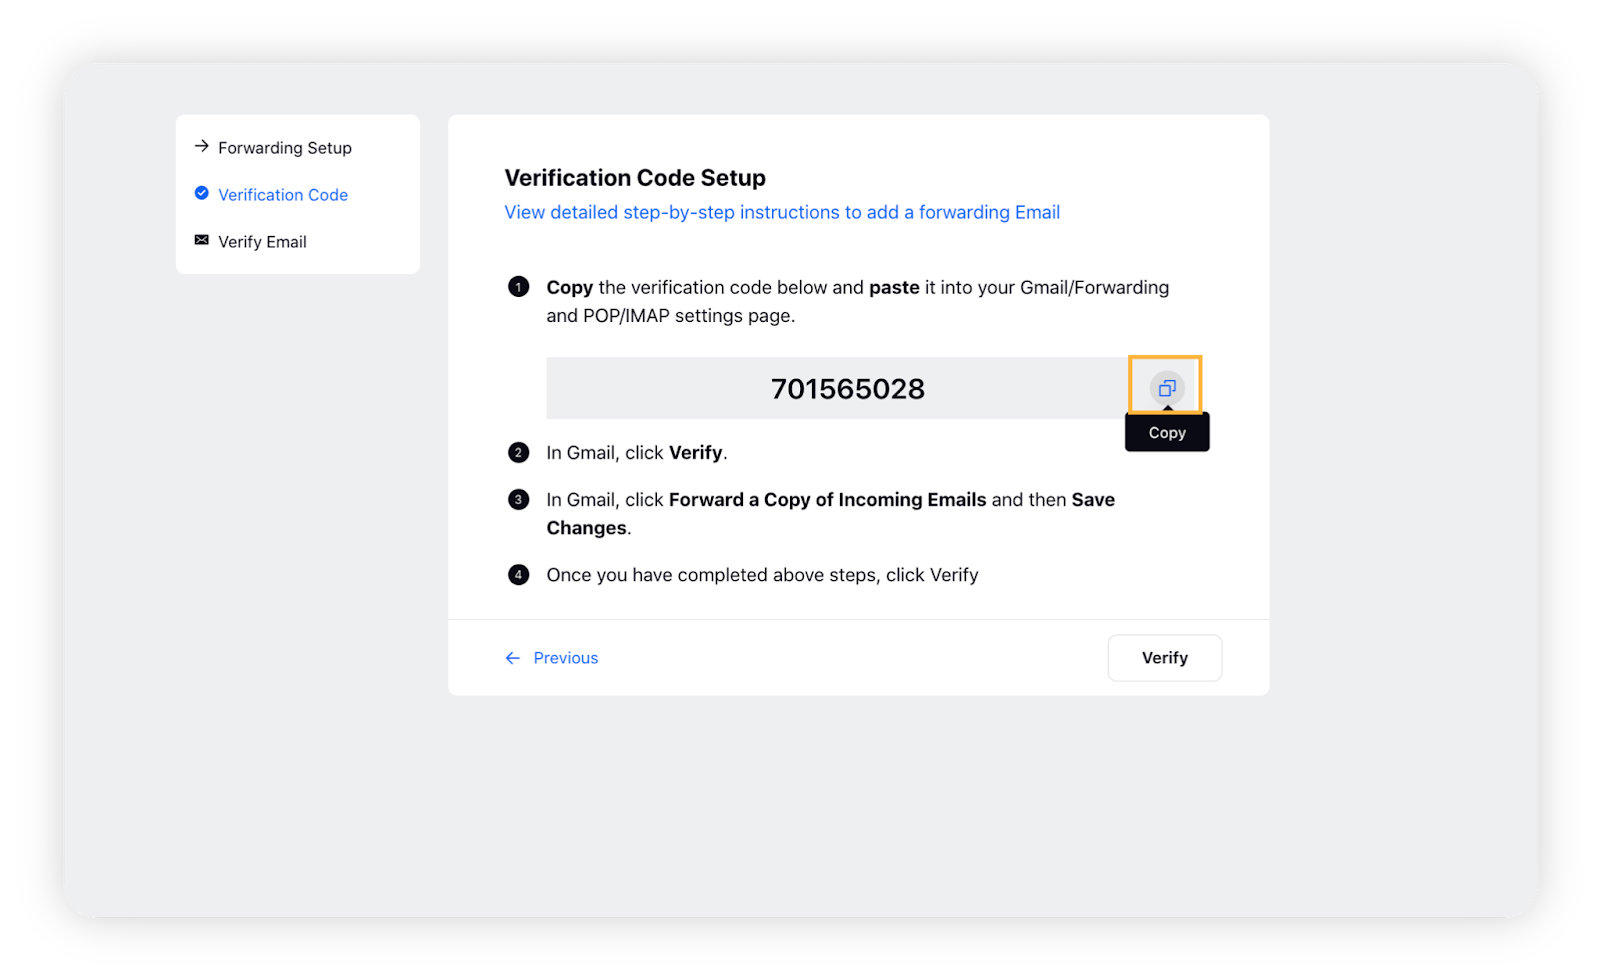
Go back to the Sprinklr Self-Serve window and click Next on the Forwarding Setup window. You will receive a verification code in the next window.

Copy the code and go back to your Email Settings window.
Paste the code and click Verify to confirm your forwarding email and Save Changes.
Again, go back to the Sprinklr Self-Serve window and click Verify to confirm your email forwarding. You will receive a test Sprinklr ticket to your support email address to check if it is working right.
Once done, you will receive a prompt stating Test Successful.
Click Done in the bottom right corner.