
Use DKIM records to verify Email domains
Updated
Learn how to use and verify your DKIM records on Sprinklr.
Domain verification ensures that customers have a clear and direct source of contact regarding their domains. In addition, Sprinklr helps your organisation become DMARC compliant, which means an authentication guarantee is made possible by our email system. With this guarantee, the customers from other ISPs can be certain that the communications from your domain are from your company.
Simply put, DKIM is a type of email authentication which means the source of the email is verified by a third party on behalf of your organisation. External parties can tell if an email claiming to be from your domain comes from a valid source. For example, if you are an IT Support company with Sprinklr as your primary sales enablement platform, DKIM ensures that emails sent to your customers are trustworthy and they are coming from the Sprinklr servers instead of some random third-party servers.
A quick guide to set up DKIM in Sprinklr
Update your e-mail address' DNS records with the domain key provided by Sprinklr so that they can be located and used for verifying signatures. Follow the procedure below:
Log in to your Sprinklr account as an Admin.
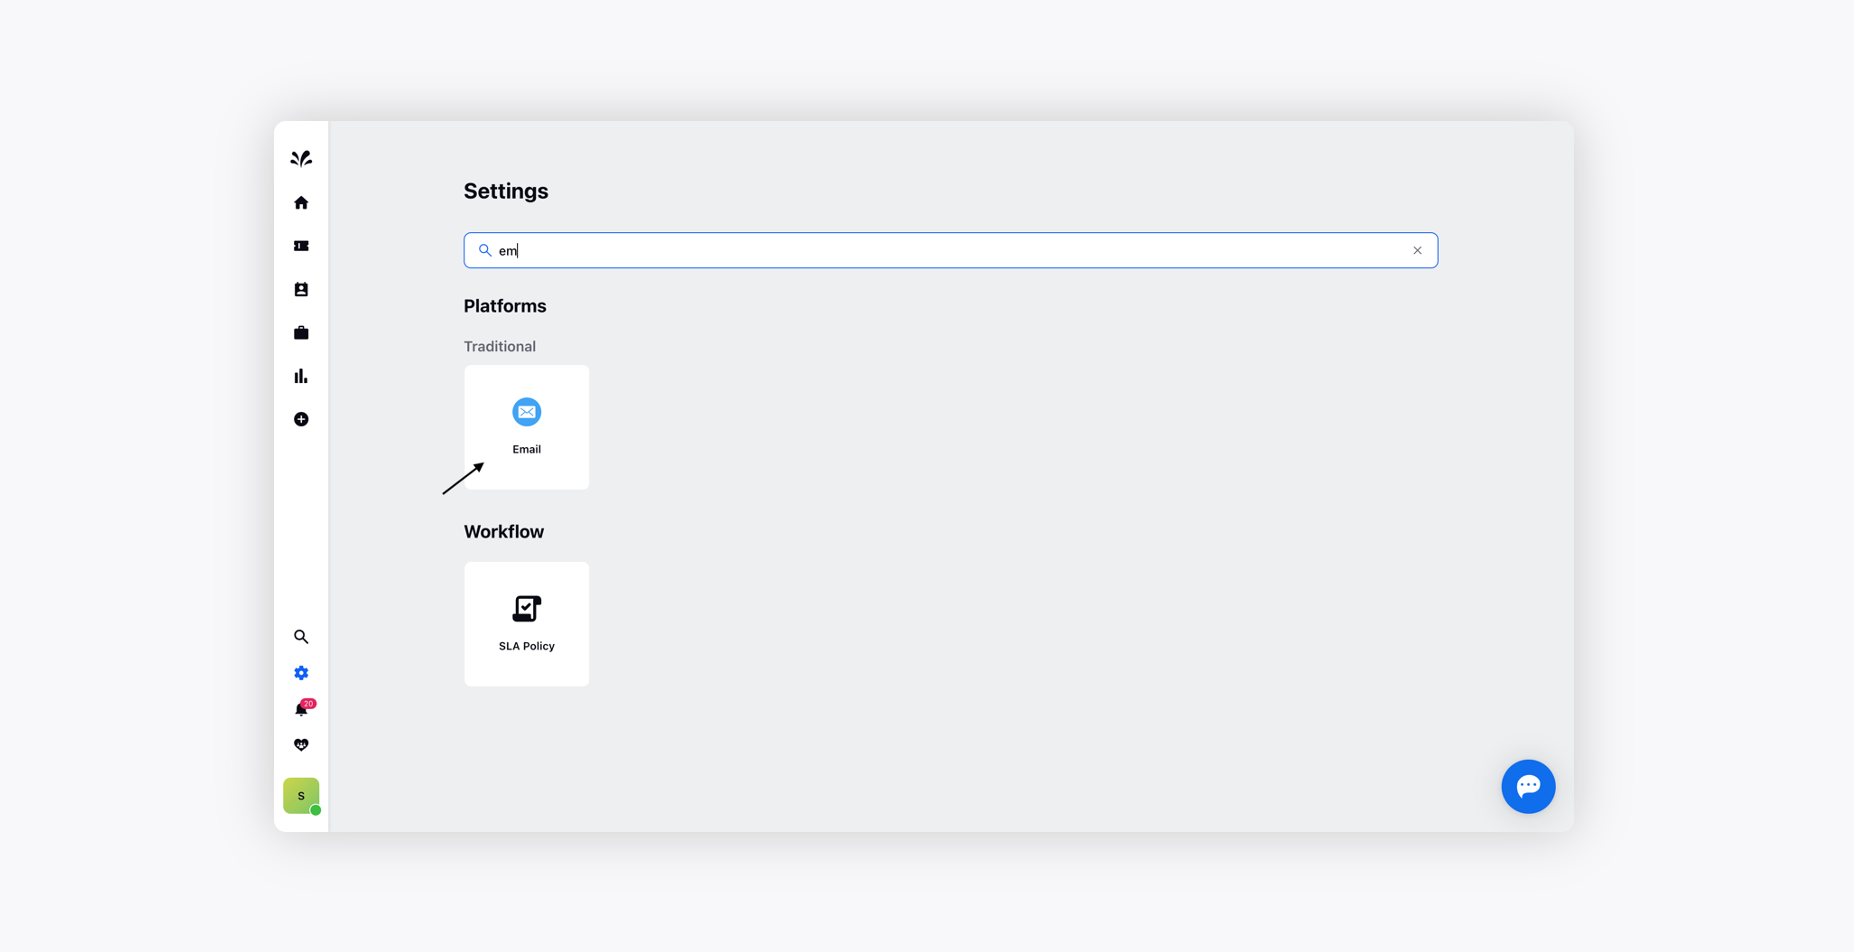
Click the Settings icon on the left Navigation Bar. On the Settings window, select Email under Traditional.
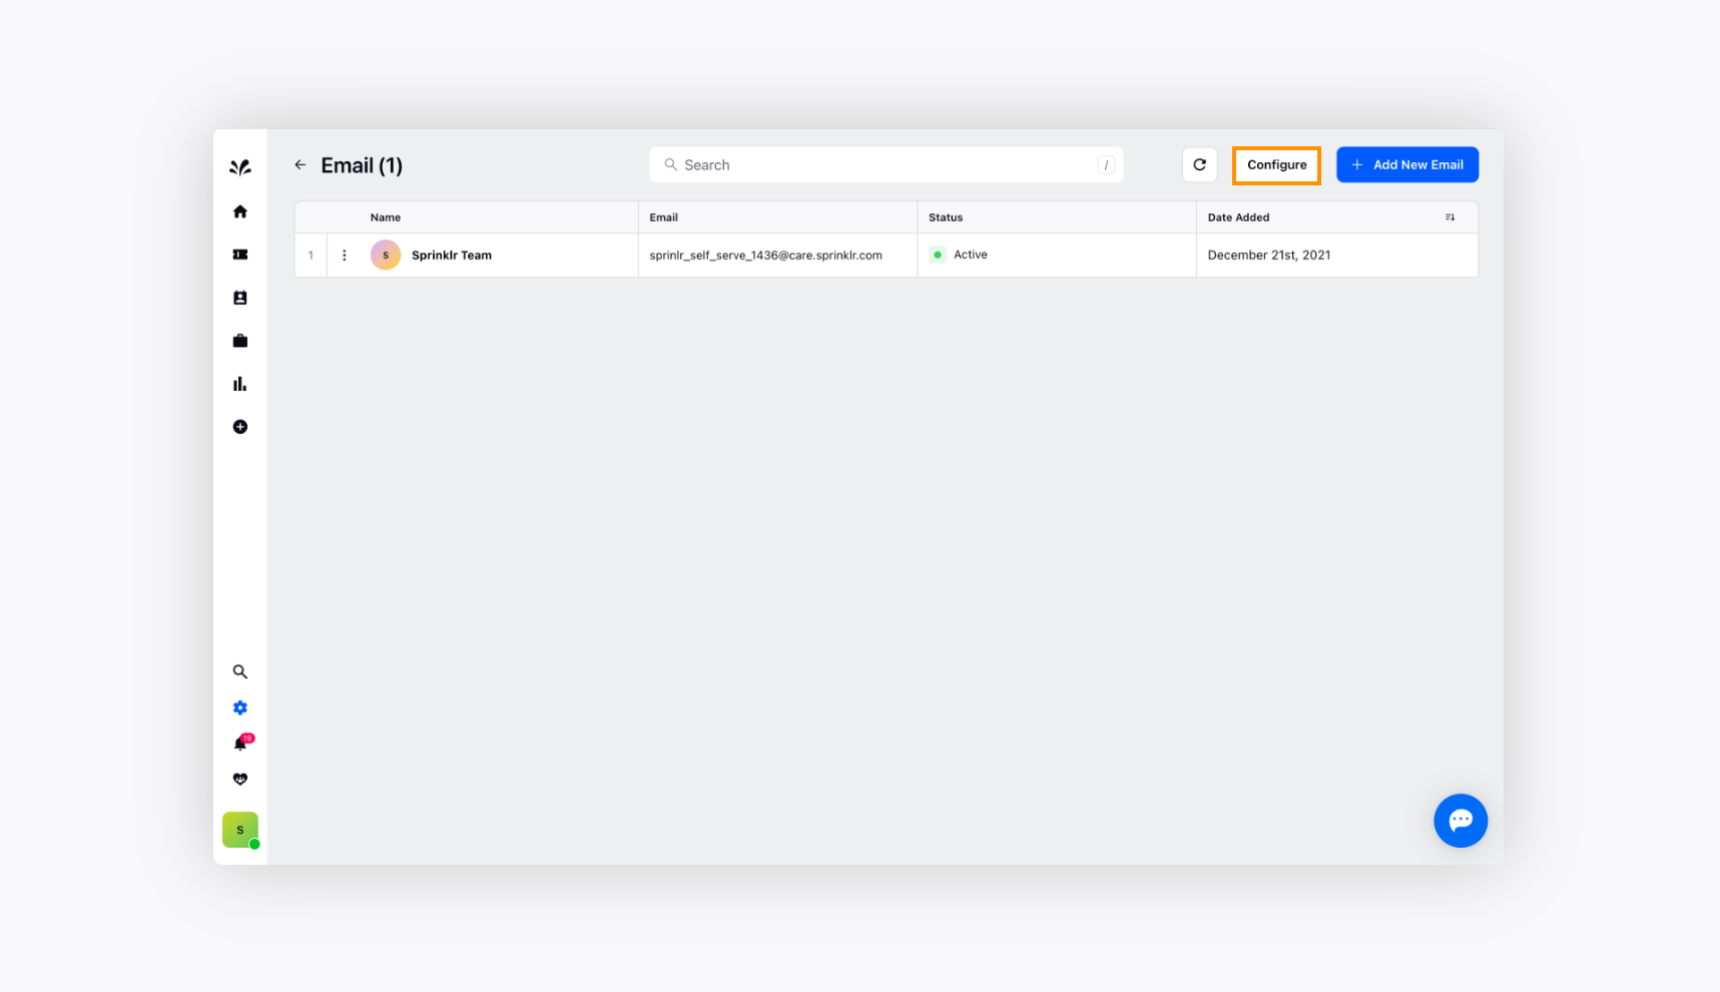
On the Email window, click Configure in the top right corner.
On the Email Configuration window, click Configure alongside Configure DKIM.
Now, copy the system-generated settings (4 CNAME records) to publish your DNS server/domain provider’s account. This step is a one-time configuration process for each domain name.
To update your DNS records with the Sprinklr domain key (In your domain registrar):
Use the credentials to register your domain name and log in to your domain registrar’s control panel.
To change the DNS records, locate and click the option Manage DNS, Name Server Management, DNS Management, or Settings.
Look for an option to create a CNAME record.
Add the values copied from your portal into the new CNAME record.
In the case of multiple domains, you need to repeat the above steps individually for each domain. For example, support@evoltobor.com and billing@evoltobor.com will require only a single setup but support@evoltobor.com and billing@sprinklr.com will require a repeat of the setup individually for both emails.
Once you have completed the setup, you need to verify it in Sprinklr. Now, Under Admin, go to Email, select Settings, and choose Configure DKIM. The domain settings will be expanded. Click Verify to ensure that the DNS settings are published correctly.
After verification (In Sprinklr):
Once DKIM is verified for a particular domain, a tick/cross against the DNS settings will indicate the status.
An email is sent to the account admin when the verification is complete in the backend. One email is sent for each domain name you have configured.
To remove your DKIM settings, click on Remove against each domain, which will remove the CNAME records for that domain.
In any case, if you wish to add new records/domains for DKIM, write to us at support@sprinklr.com with your Self-Serve Care URL and plan details.