
Voice Message in Voice Flows on Sprinklr Advanced
Updated
Learn how to add a Voice message on Sprinklr Advanced with Text/Record/Upload options to reach out to potential customers and have a seamless user experience.
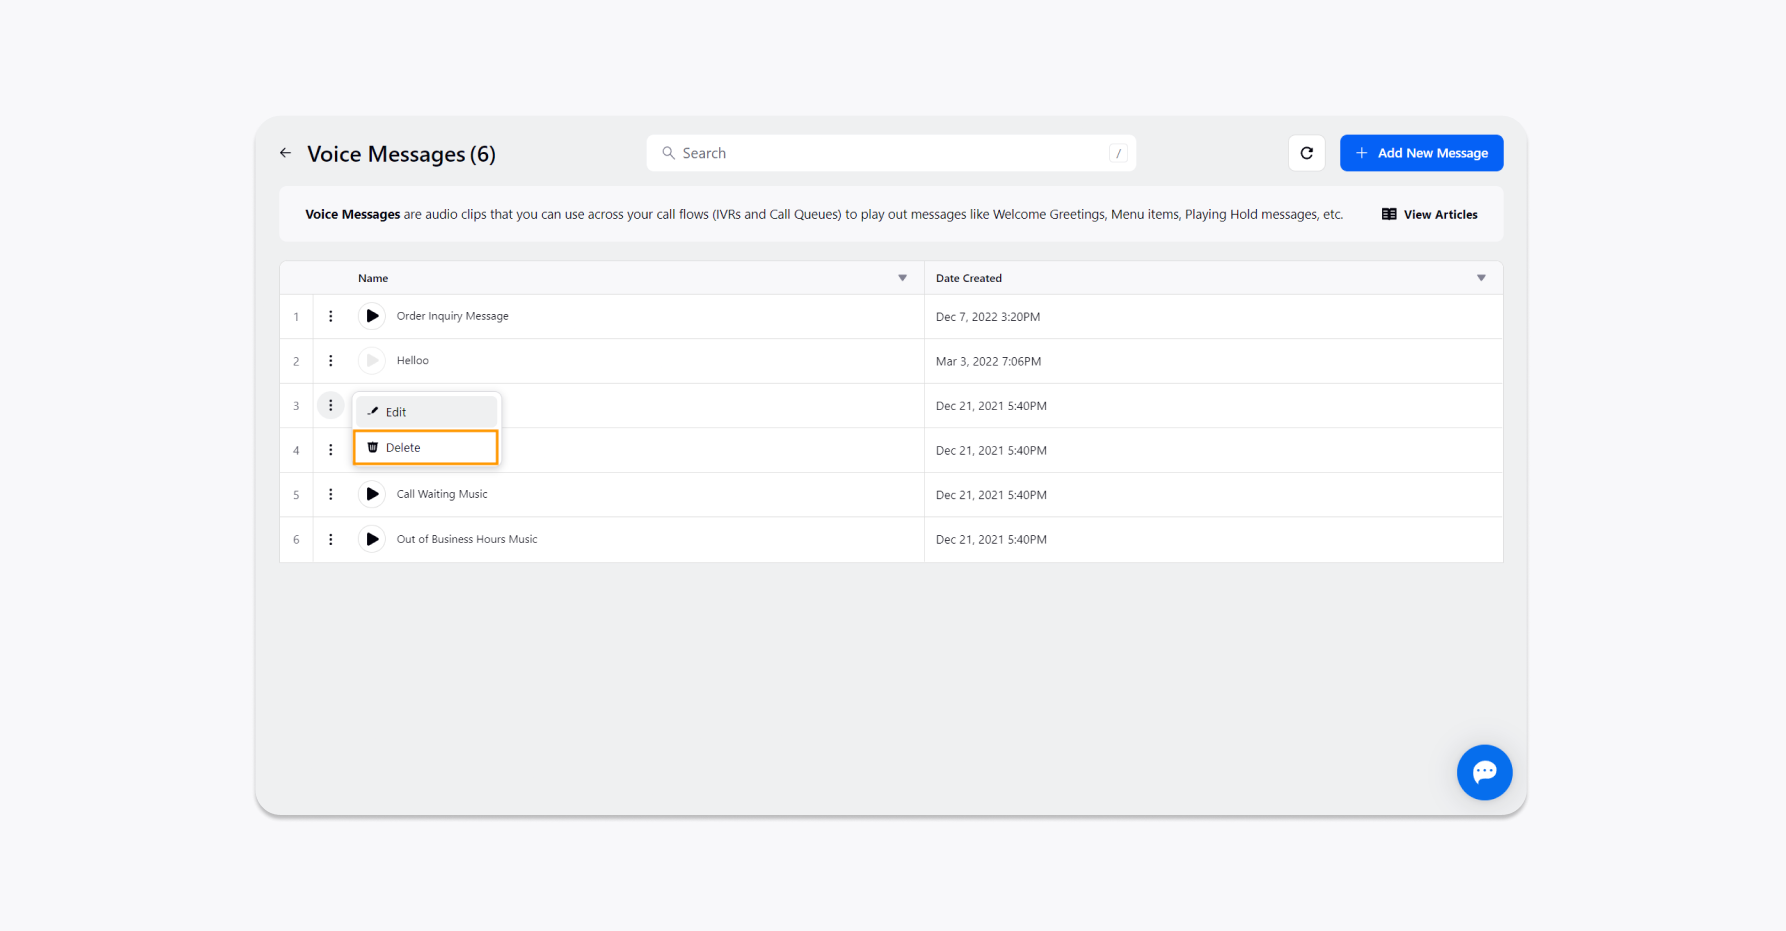
Voice Messages are audio clips that you can use across your call flows (IVRs and Call Queues) to play out messages like welcome greetings, menu items, playing hold messages, etc. They help in providing a superior and more personalised customer experience to your callers when they reach out to you.
For example, you can use voice messages in your IVR flow to give options to your contacts, e.g. Press 1 for Credit cards, Press 2 for Debit cards, etc. You can use the default voice messages or personalise them to fit your business needs.
To add a new Voice message
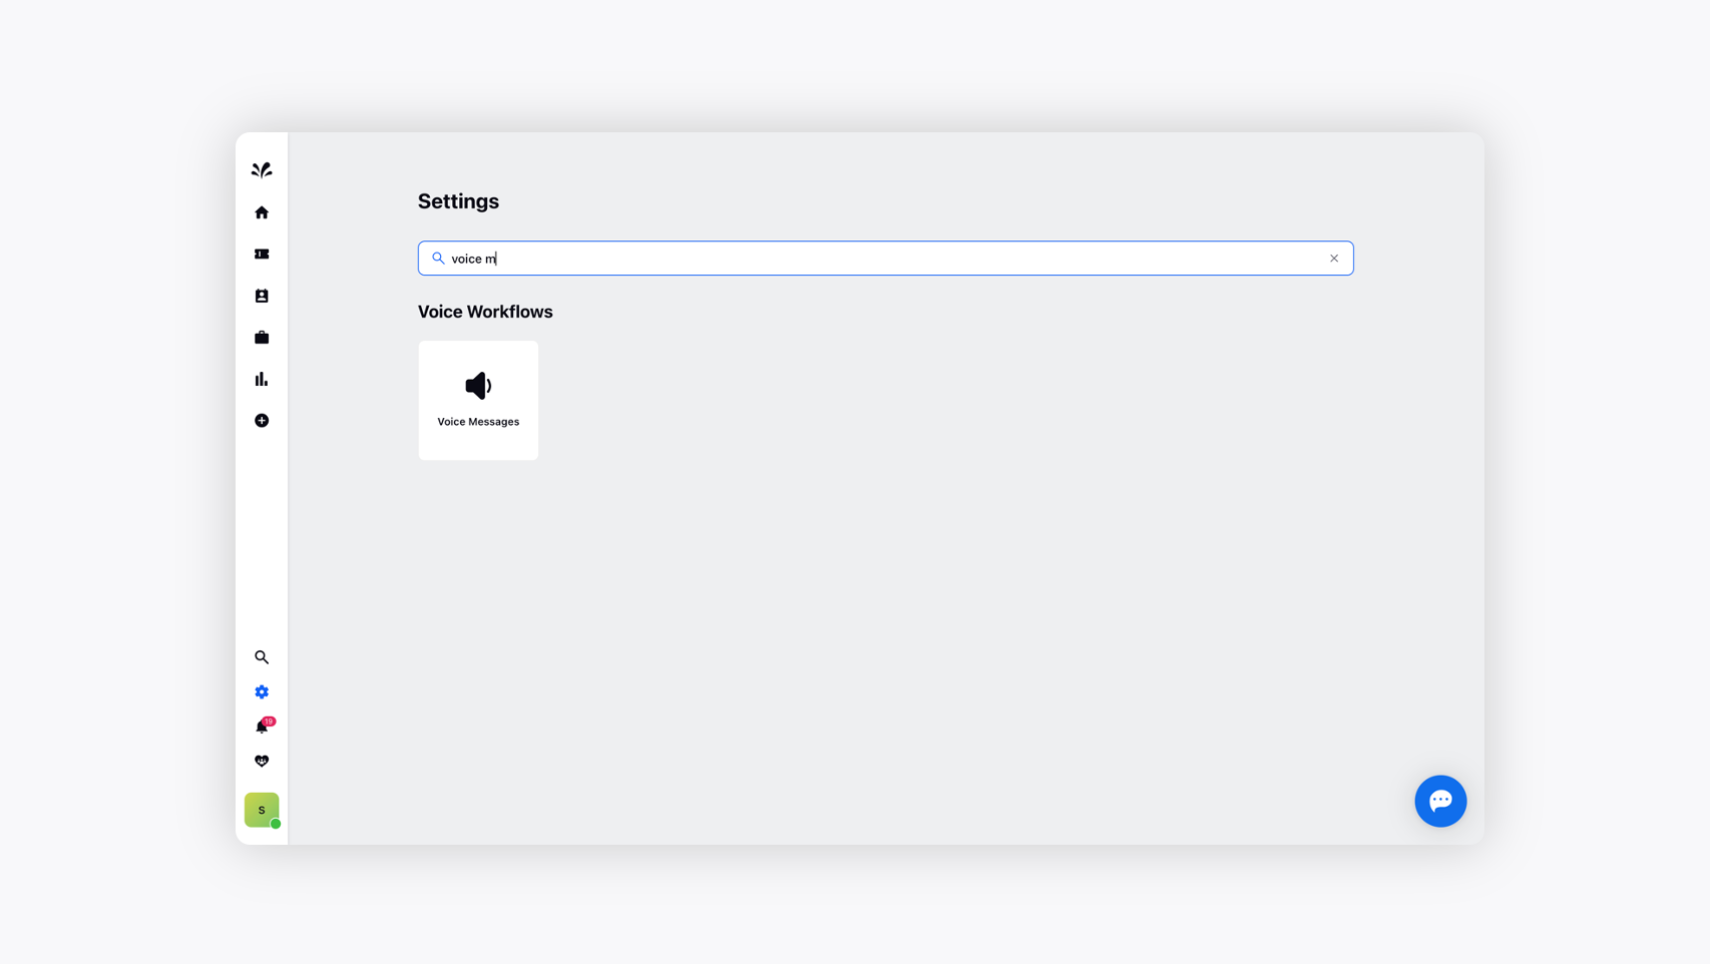
Log into Sprinklr Advanced. Click the Settings icon on the left Navigation Bar. On the Settings window, select Voice Messages under Voice Workflows.
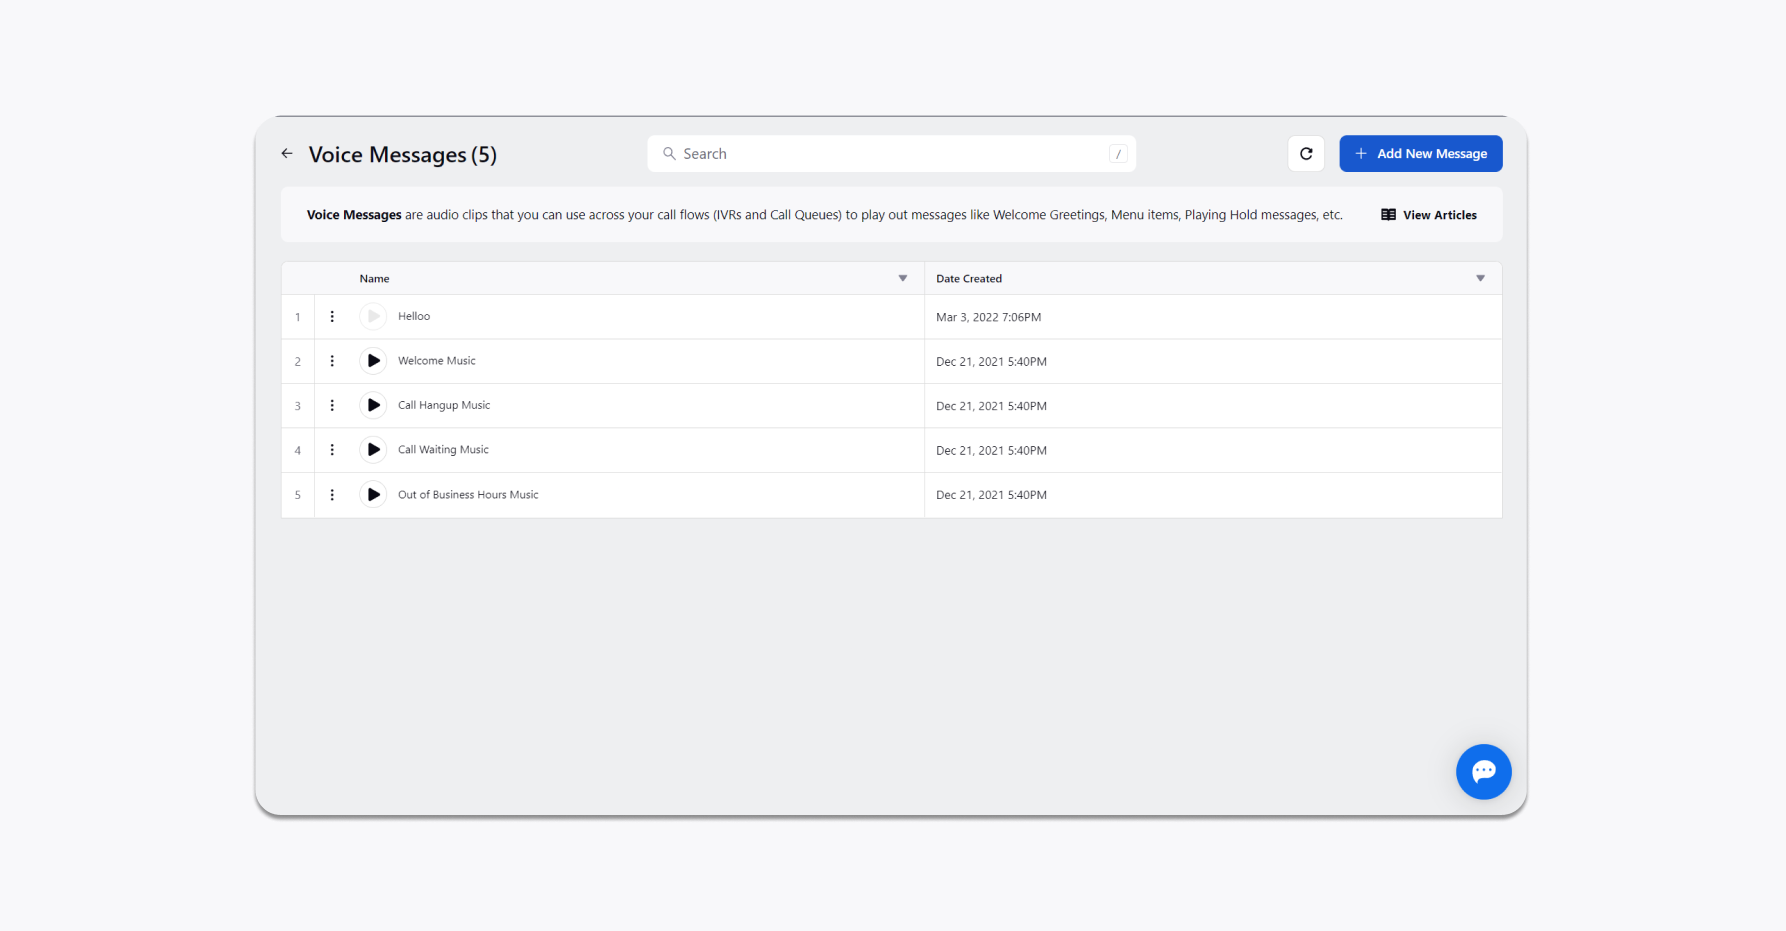
To add a new message, click Add New Message in the top right corner.
On the Add New Message window, enter a Name for your message.
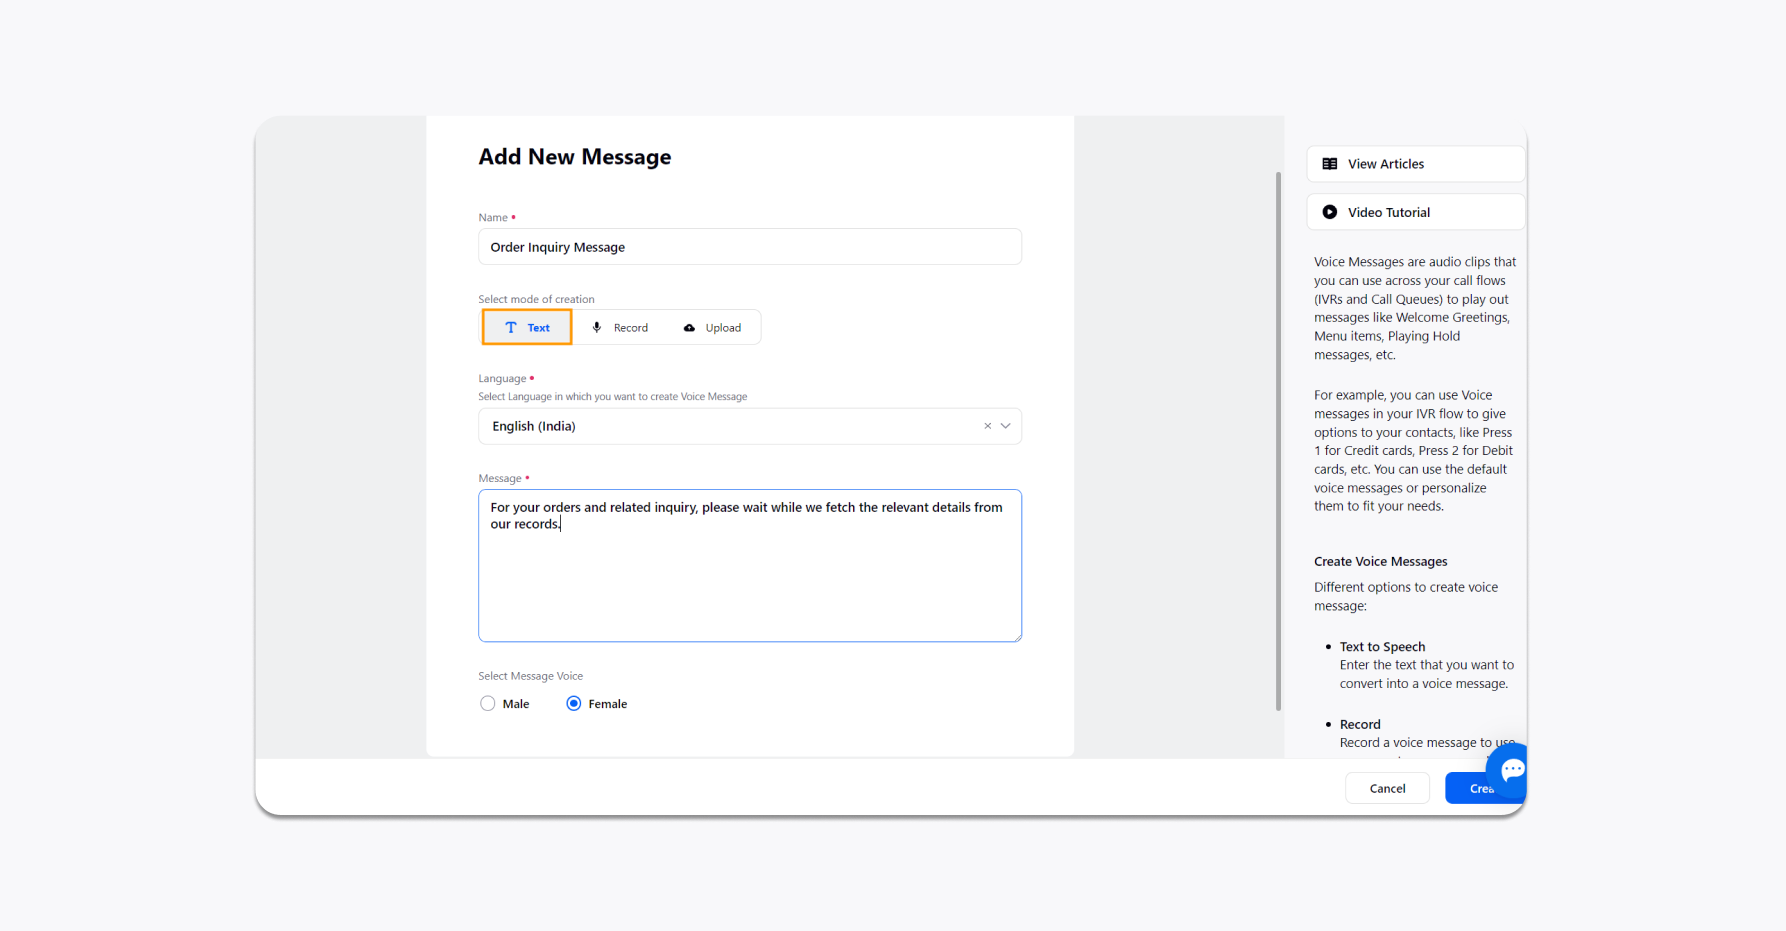
Under the Select mode of creation section, you will have the following options to create your message:
To create new Voice messages from Text
Select the Text tab under the Select mode of creation section.
Select the desired text language from the Language drop-down menu in which you want to create a Voice Message. Selecting the text language helps to understand the text better and provide better translations. Please note only 1 language can be selected at a time. It is advisable to create multiple copies in case the same message is required in multiple languages. Example: Welcome_English, Welcome_Spanish
Type your message under the Message box.
Select the Message Voice from the given options. Your customers will hear your message in the selected voice.
Click Create in the bottom right corner to start using the voice message in your IVR flows.
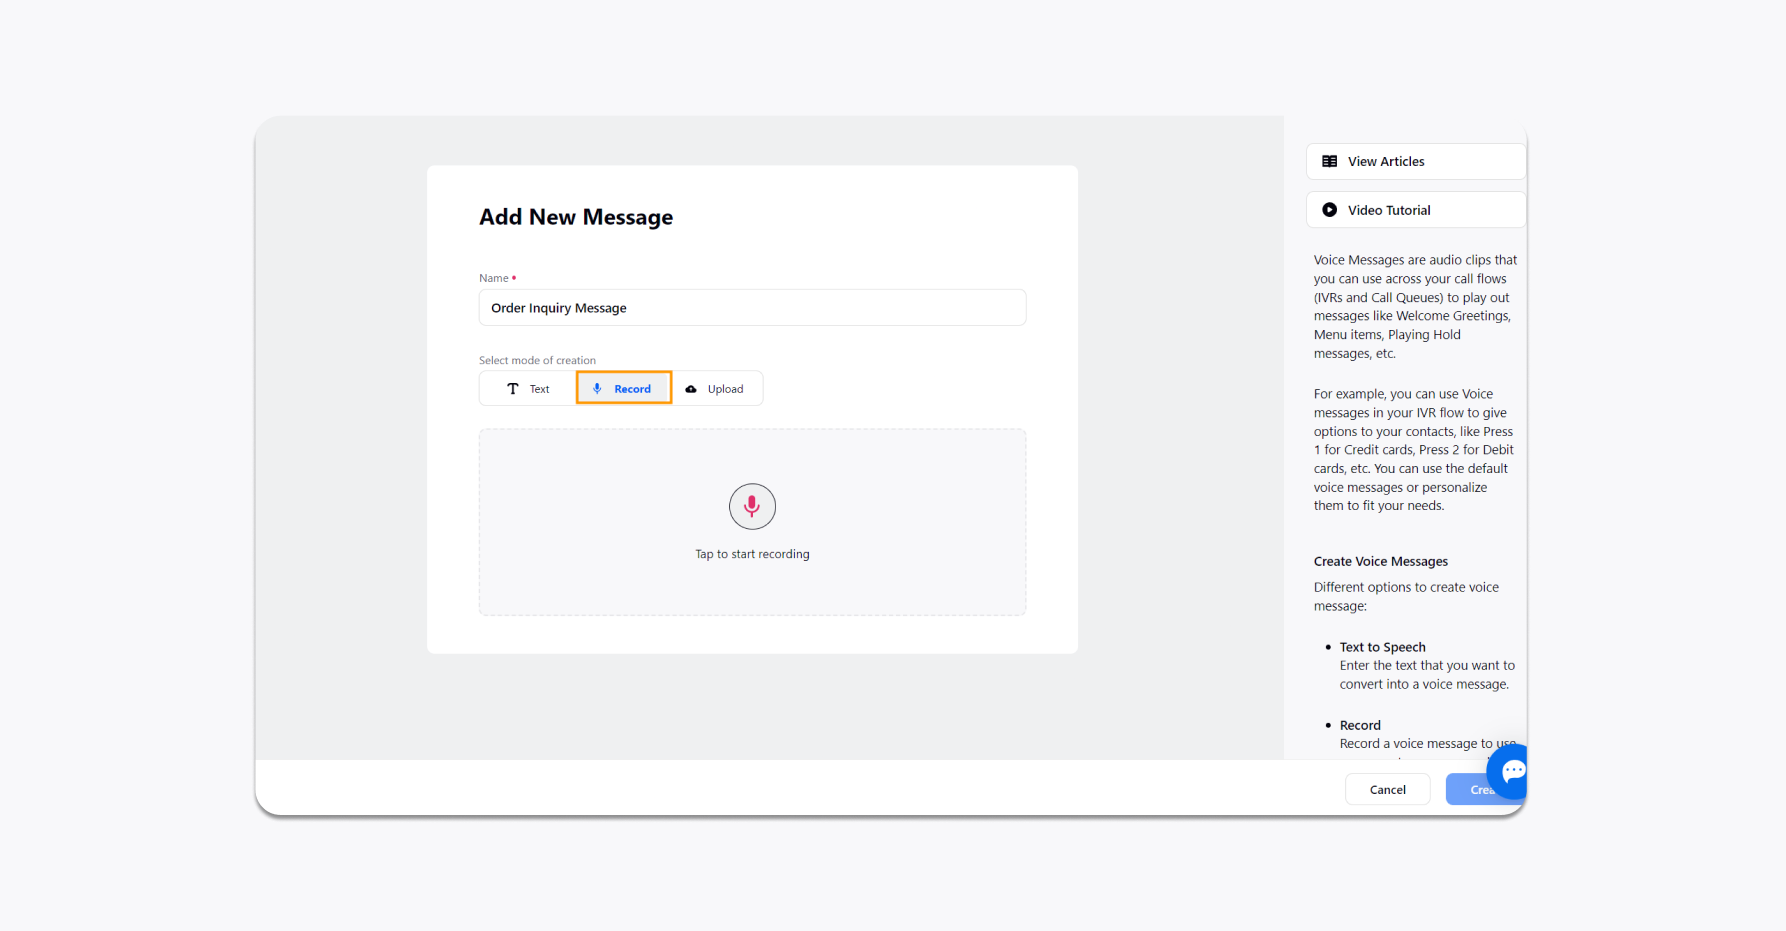
To create new Voice messages from Record
Select the Record tab under the Select mode of creation section.
Click Start Recording and allow microphone permissions from your system to record your message.
Click Stop Recording once you are finished. Make sure the message is correct by previewing it using the Play icon.
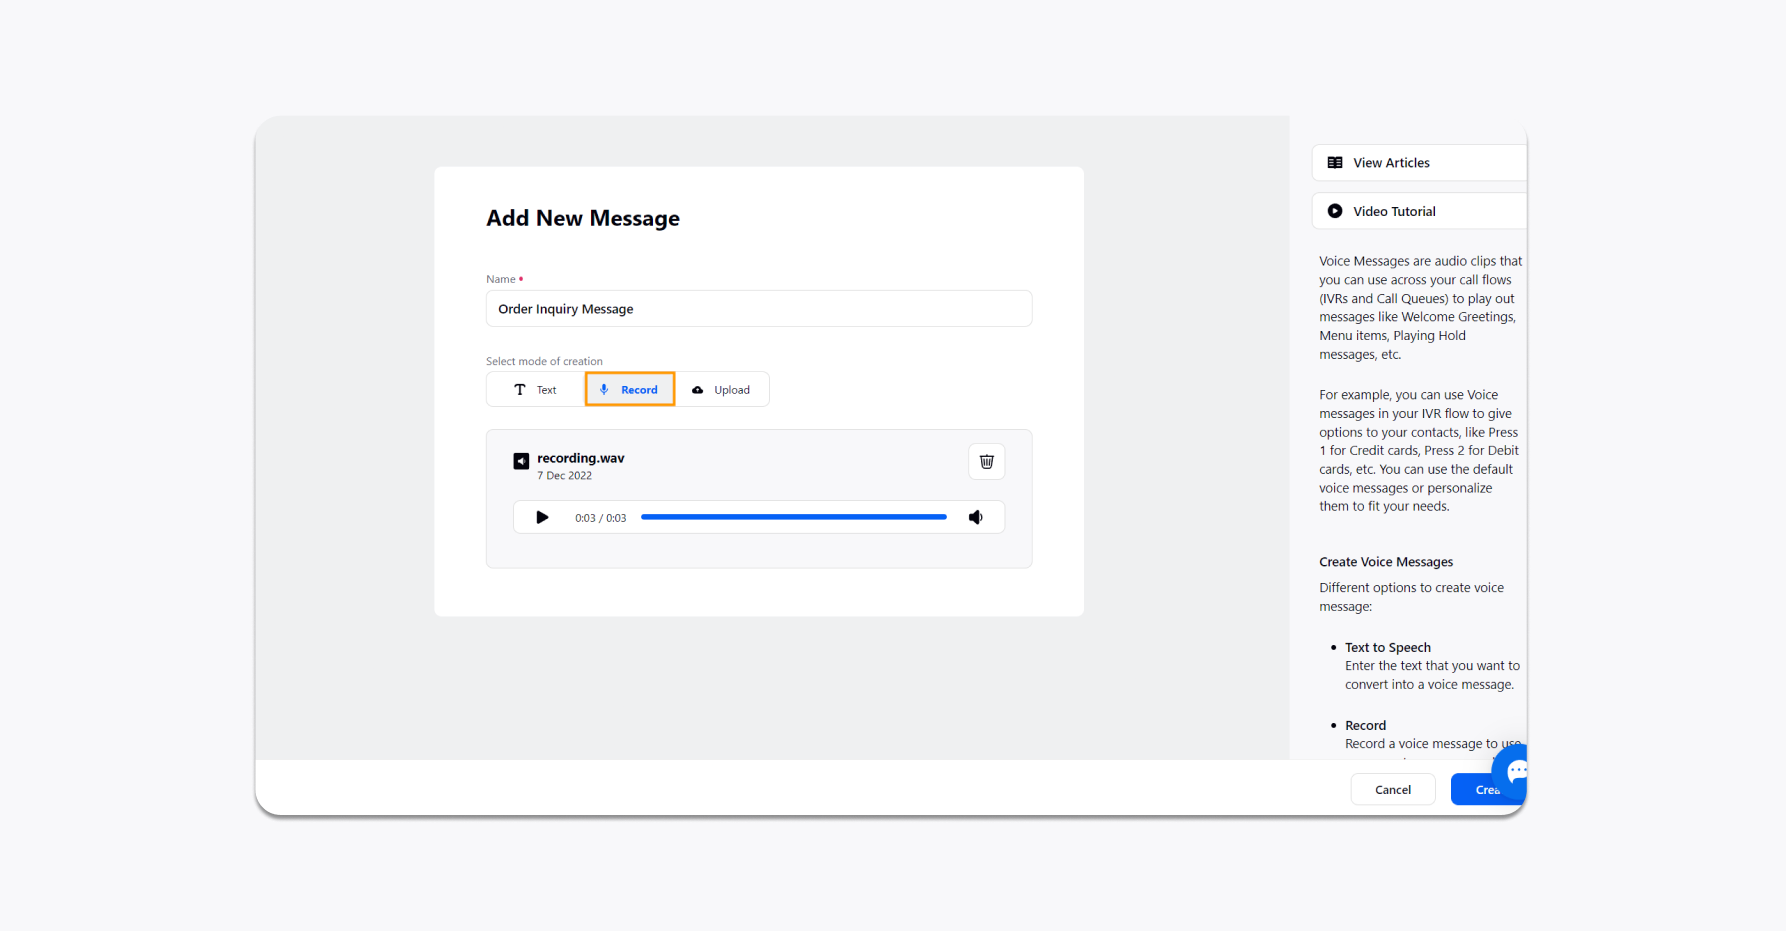
Click Create, and you are ready to use your message.
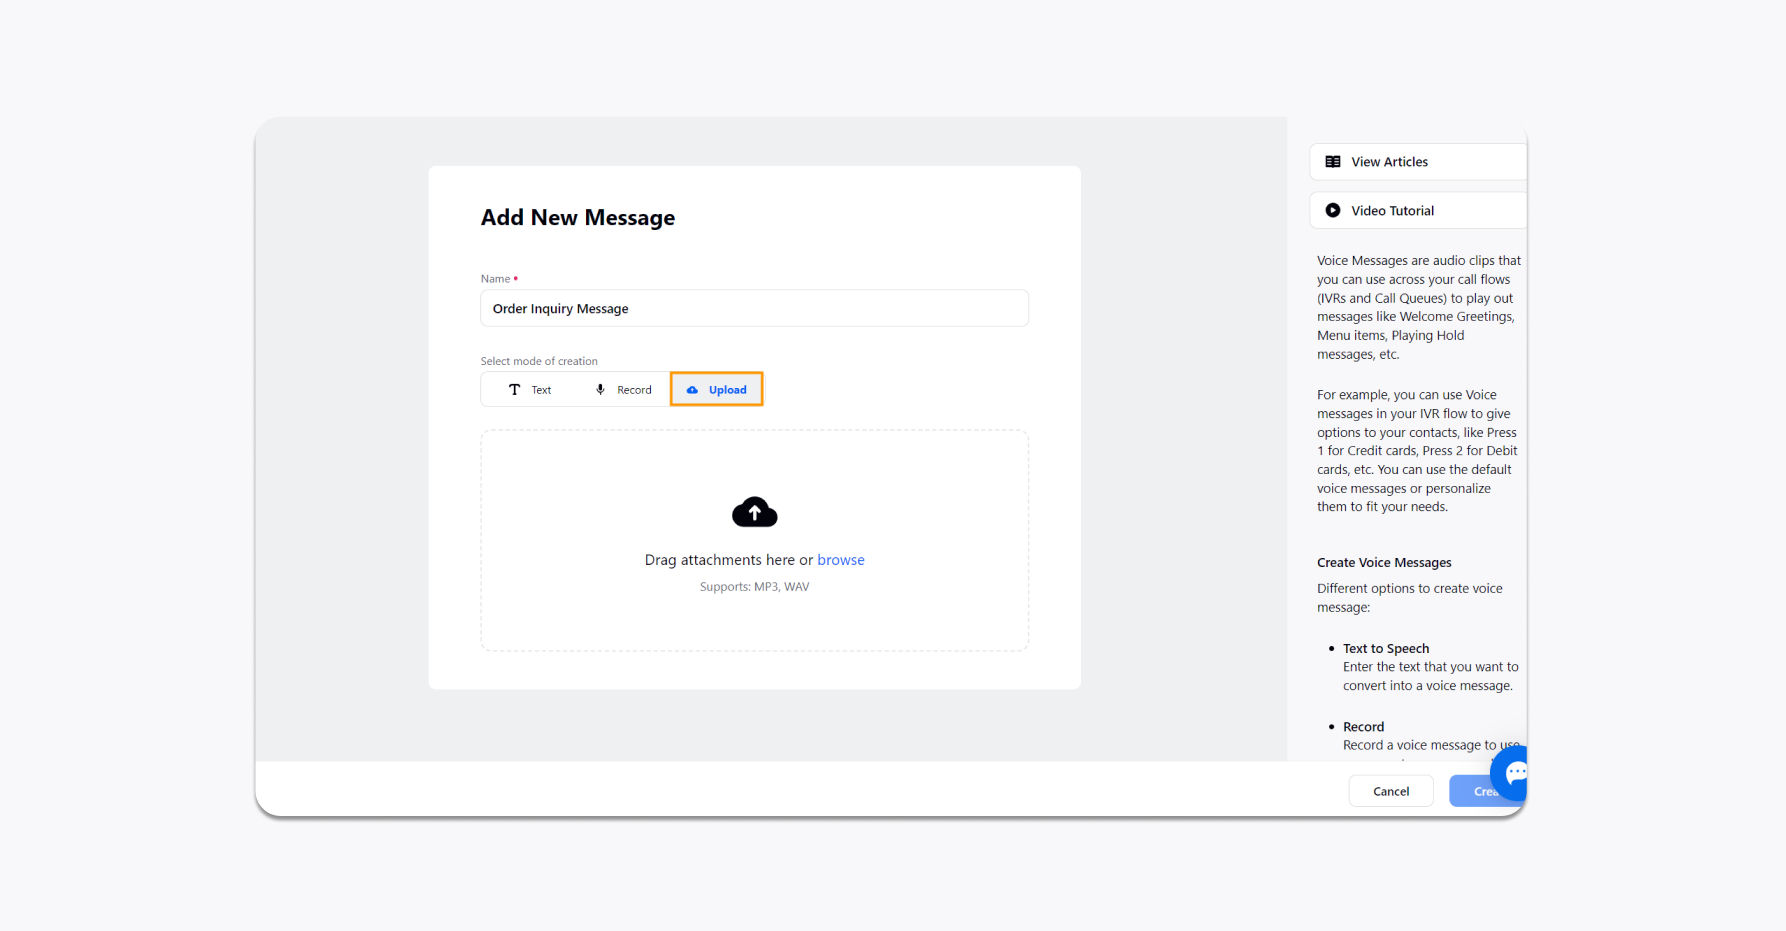
To create new Voice messages from Upload
Select the Upload tab under the Select mode of creation section.
Click Browse and locate the file on your system/computer and click Upload. You can only use MP3 and WAV file formats to upload a message.
Once uploaded, ensure that the message is correct by previewing it using the Play icon.
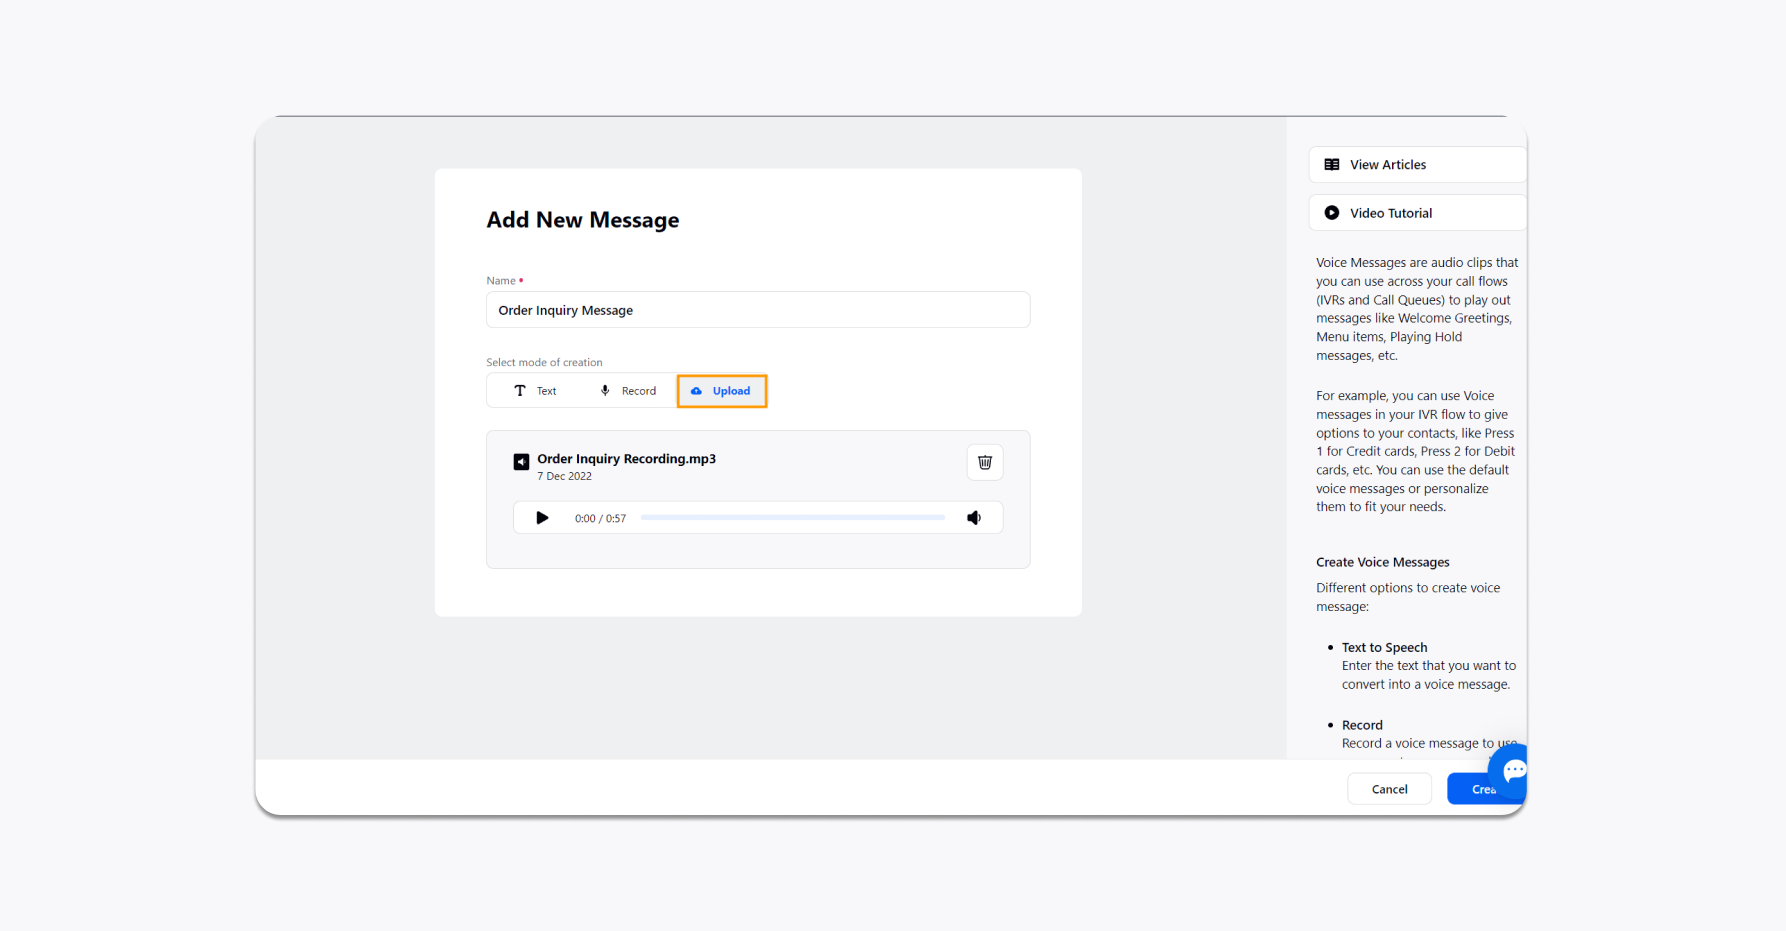
Click on Save, and you are ready to use your message now.
Default Voice Messages
You can use the existing default voice message templates that can be used out of the box to get your contact center running:
Message Name — Description
To edit existing Voice messages
Log into Sprinklr Advanced. Click the Settings icon on the left Navigation Bar. On the Settings window, select Voice Messages under Voice Workflows.
Hover over the Options icon alongside the desired Voice message and click Edit to make the changes.
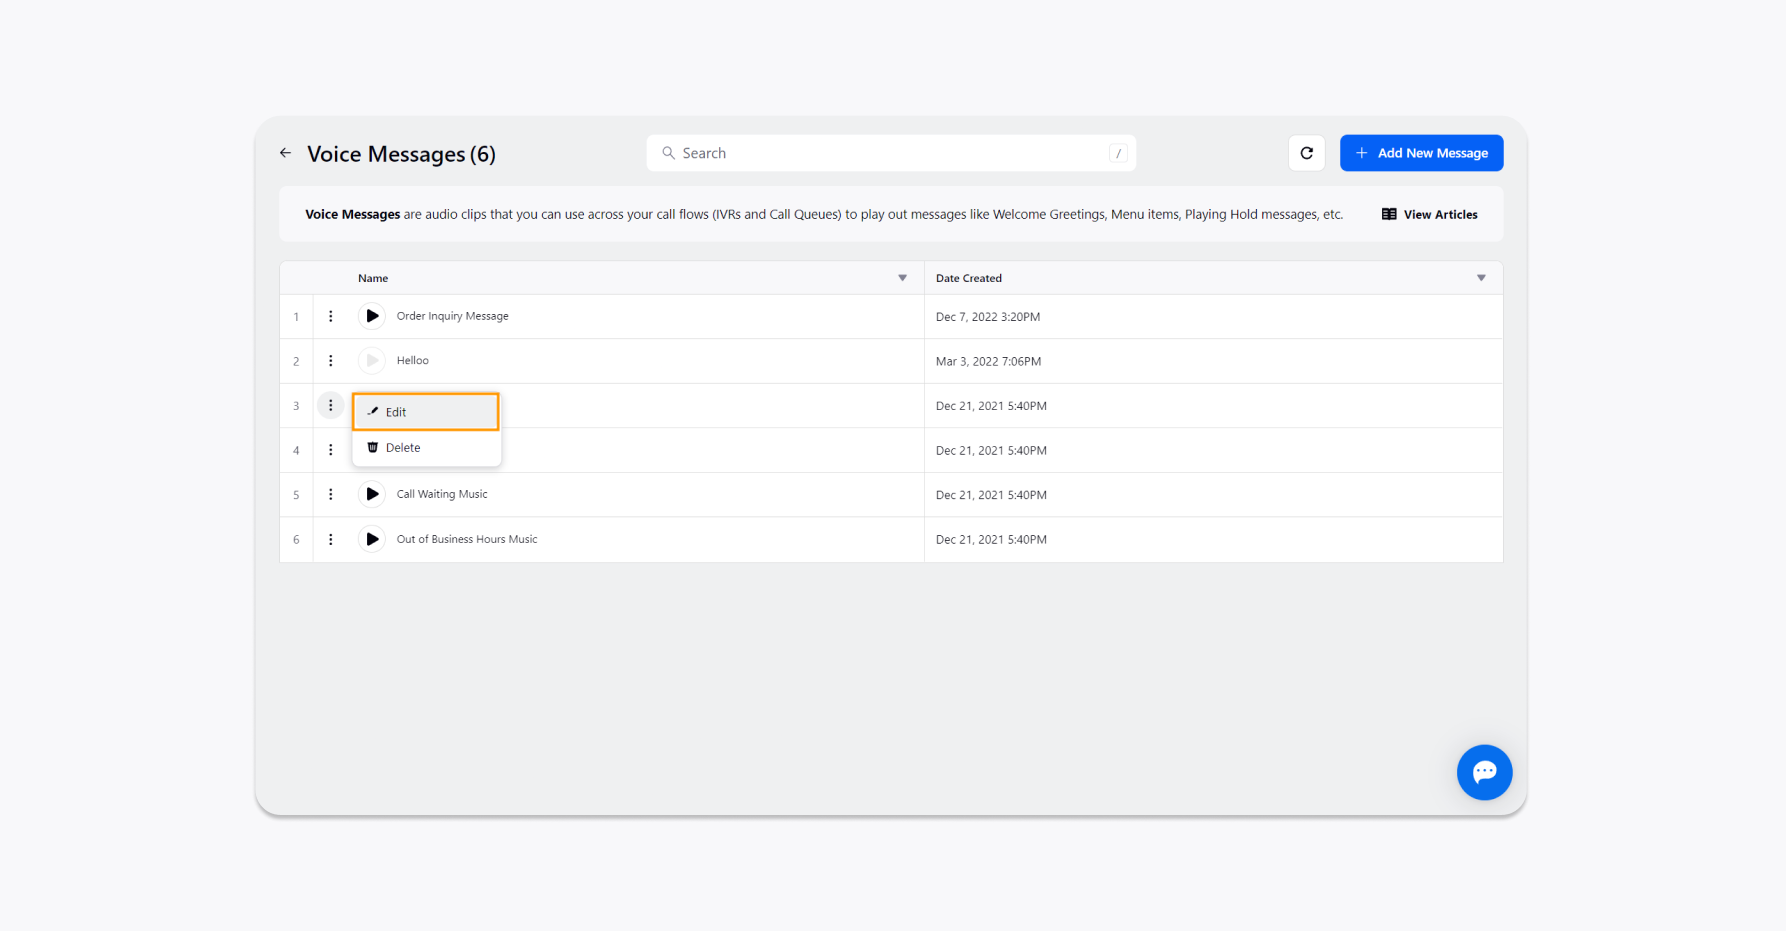
To delete existing Voice messages
Log into Sprinklr Advanced. Click the Settings icon on the left Navigation Bar. On the Settings window, select Voice Messages under Voice Workflows.
Hover over the Options icon alongside the desired Voice Message and click Delete.
On the Delete pop-up window, click Delete to confirm. It will permanently delete your Voice Message.